Embed Size (px)
Citation preview
Contents
Overview.....................................................................................................4
Configuring the application from the printer home screen...........................5Accessing the admin home page...............................................................................................................5
Configuring the reset frequency................................................................................................................5
Customizing the application notifications.................................................................................................5
Customizing the application settings........................................................................................................5
Configuring User Accounts........................................................................................................................6Managing individual users ..................................................................................................................................6Managing multiple users ....................................................................................................................................7
Configuring account defaults....................................................................................................................8
Running reports.........................................................................................................................................9
Configuring the application from the Embedded Web Server.....................10Accessing application configuration settings using the Embedded Web Server.....................................10
Customizing the display icon...................................................................................................................10
Restricting administrative access (LDAP)................................................................................................11
Restricting B&W or color usage (LDAP)...................................................................................................11
Exporting and importing settings and data.............................................................................................12Exporting and importing global settings ...........................................................................................................12Importing a configuration file ...........................................................................................................................12Exporting usage data ........................................................................................................................................13
Troubleshooting.........................................................................................14No usage information has been stored for a user...................................................................................14
User already exists or duplicate user ID..................................................................................................14
Error when importing a .csv file..............................................................................................................14
User is unable to copy.............................................................................................................................14
User is unable to print.............................................................................................................................14
User is unable to scan.............................................................................................................................15
User is unable to send faxes....................................................................................................................15
User not receiving quota‑related e‑mail messages.................................................................................15
Administrator not receiving quota‑related e‑mail messages..................................................................16
“User quota account not found. Please contact the system administrator” error message..................16
“Unable to display quota information because Device Quotas is not running” error message..............16
Contents 2
Appendix....................................................................................................18Exporting and importing configuration files............................................................................................18
Notices.......................................................................................................20Edition notice..........................................................................................................................................20
Index..........................................................................................................22
Contents 3
OverviewUsing Device Quotas in conjunction with user authentication, administrators can:
• Restrict color usage
• Permit black and white usage
• Define quotas and overage allowances
• Display quota‑related alerts on the printer touch screen
• Trigger automatic e‑mail notices as the user nears quota
• Enforce quotas or simply track usage
• Reset usage on a weekly, biweekly, monthly, quarterly, or yearly basis
Upon loading the application to the device, the application is automatically configured for use with Internal Accountsand is ready to use. The default configuration includes an administrator account (“admin”), protects color copy andcolor print, protects any eSF applications that are included with the device, and restricts non‑authenticated print jobs.By default, the application is set to notify users of a pre‑set quota (“inform”) but will not prevent usage once quota isreached. To modify the default configuration, access the admin account from the printer home screen.
You also have the option to configure the application for use with LDAP authentication. To use LDAP authentication,you must first set Authentication Mode to LDAP through the admin home screen or the application’s configure screenin the Embedded Web Server. From the Embedded Web Server, you must create an LDAP security template, apply thesecurity template to the appropriate controls and functions, and designate one or more users as administrators. Formore information on configuring LDAP authentication, see the Embedded Web Server Administrator’s Guide onhttp://support.lexmark.com. Once LDAP authentication has been configured, most administrator tasks can becompleted from the printer home screen.
Before using the application, Job Accounting must be enabled in the printer driver. For more information, see the driverhelp. If your printer driver does not support Job Accounting, download the Universal Printer Driver fromhttp://support.lexmark.com.
This guide is intended for use by service providers and administrators responsible for the implementation andmanagement of this software in their network environment. It provides instructions for configuring the application andrelated printer settings. For information on setting up the printer and installing it on the network, as well as how touse standard printer features such as Copy, Fax, and basic printing capabilities, see the Software and DocumentationCD or User's Guide that came with the printer.
Overview 4
Configuring the application from the printer homescreen
Accessing the admin home page1 From the printer home screen, touch Device Quotas.
2 Enter admin.
3 Touch Done.
Configuring the reset frequencySet the reset frequency to determine when and how often the users’ usage counter should be reset to zero.
1 From the admin home screen, touch Reset Frequency.
2 Adjust the settings as needed, and then touch Apply.
Customizing the application notifications1 From the admin home screen, touch Messaging.
2 From “Display warning when”, touch the arrows to select when you want users to begin receiving notifications.
3 If you select “Quota is near”, touch the arrows next to “Quota is near when” to specify the percentage of pagesremaining that signals nearing quota.
4 Touch Quota near message, Quota reached message, and/or Quota exceeded message to enter a custom messagefor the notification e‑mail.
5 Touch Apply.
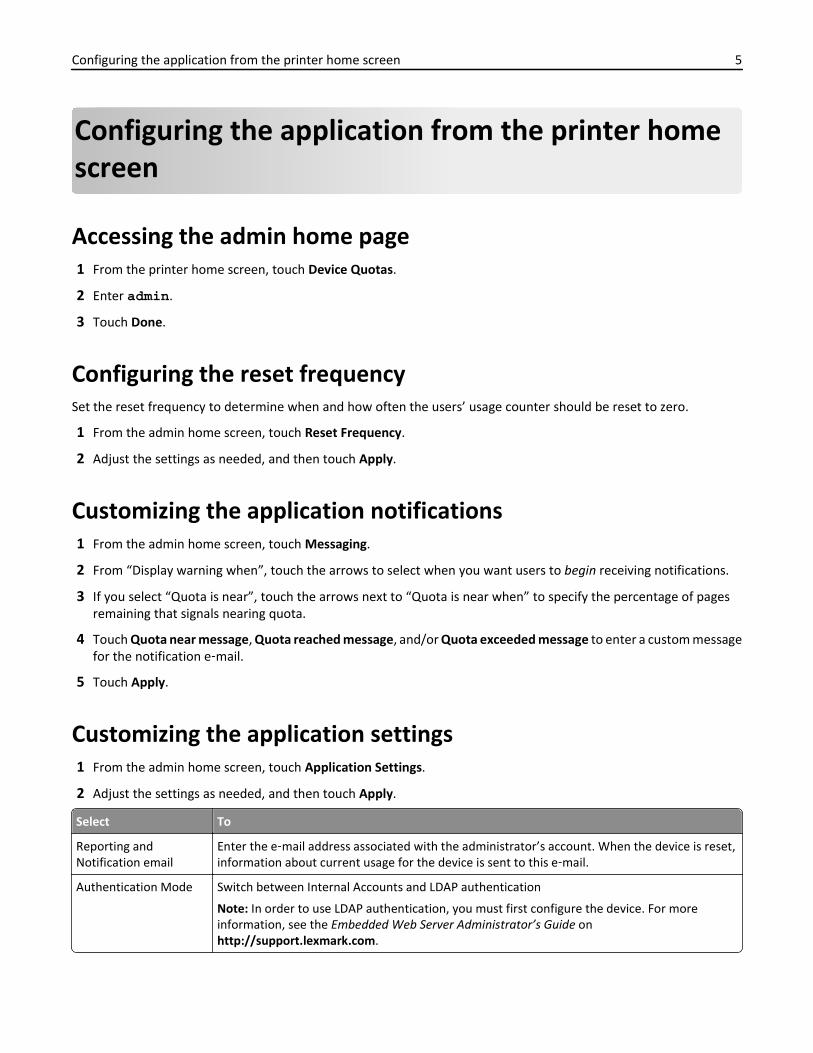
Customizing the application settings1 From the admin home screen, touch Application Settings.
2 Adjust the settings as needed, and then touch Apply.
Select To
Reporting andNotification email
Enter the e‑mail address associated with the administrator’s account. When the device is reset,information about current usage for the device is sent to this e‑mail.
Authentication Mode Switch between Internal Accounts and LDAP authentication
Note: In order to use LDAP authentication, you must first configure the device. For moreinformation, see the Embedded Web Server Administrator’s Guide onhttp://support.lexmark.com.
Configuring the application from the printer home screen 5
Select To
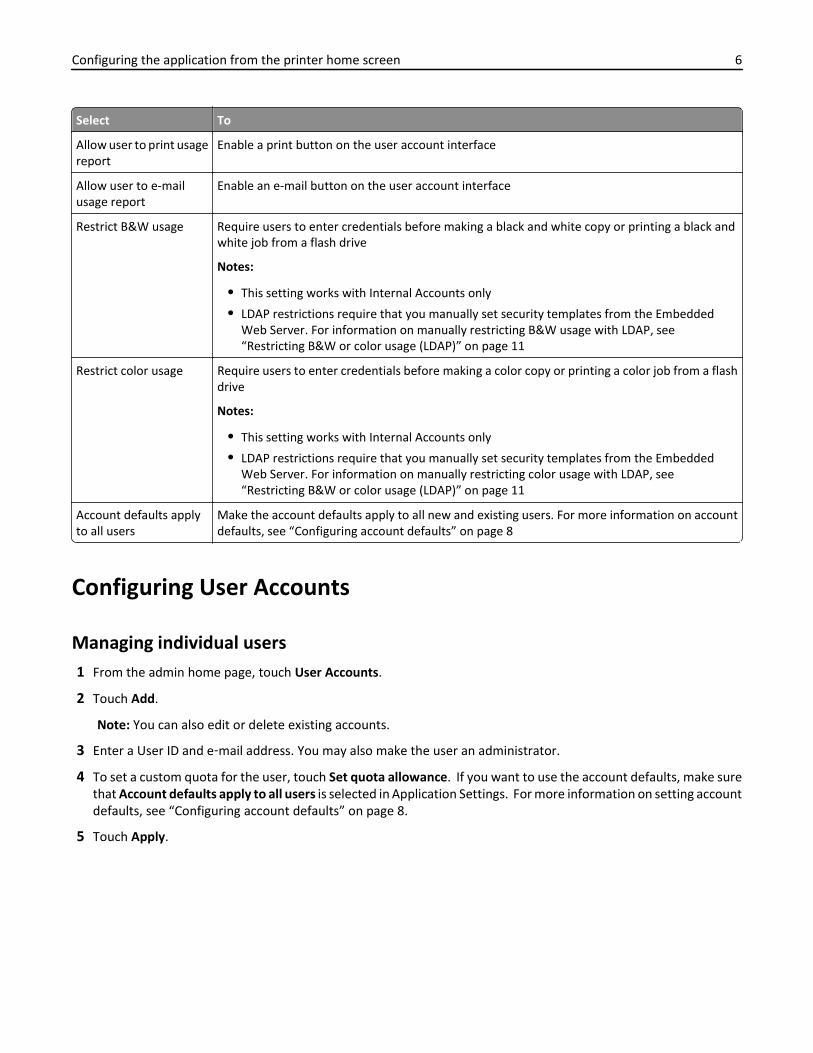
Allow user to print usagereport
Enable a print button on the user account interface
Allow user to e-mailusage report
Enable an e-mail button on the user account interface
Restrict B&W usage Require users to enter credentials before making a black and white copy or printing a black andwhite job from a flash drive
Notes:
• This setting works with Internal Accounts only
• LDAP restrictions require that you manually set security templates from the EmbeddedWeb Server. For information on manually restricting B&W usage with LDAP, see“Restricting B&W or color usage (LDAP)” on page 11
Restrict color usage Require users to enter credentials before making a color copy or printing a color job from a flashdrive
Notes:
• This setting works with Internal Accounts only
• LDAP restrictions require that you manually set security templates from the EmbeddedWeb Server. For information on manually restricting color usage with LDAP, see“Restricting B&W or color usage (LDAP)” on page 11
Account defaults applyto all users
Make the account defaults apply to all new and existing users. For more information on accountdefaults, see “Configuring account defaults” on page 8
Configuring User Accounts
Managing individual users1 From the admin home page, touch User Accounts.
2 Touch Add.
Note: You can also edit or delete existing accounts.
3 Enter a User ID and e‑mail address. You may also make the user an administrator.
4 To set a custom quota for the user, touch Set quota allowance. If you want to use the account defaults, make surethat Account defaults apply to all users is selected in Application Settings. For more information on setting accountdefaults, see “Configuring account defaults” on page 8.
5 Touch Apply.
Configuring the application from the printer home screen 6
Managing multiple usersTo make it easier to manage quotas for multiple users or to copy users to another device, the application allows youto import and export a Comma‑Separated Values (CSV) file containing user settings. A User Settings template containingthe appropriate headings can be downloaded from the application interface on the device.
Notes:
• Importing a User Settings file will overwrite changes made to user settings through the Embedded Web Server.To preserve changes made through the Embedded Web Server, export the User Settings file to your computerand then modify that file.
• If a User Settings file is copied to more than one device, each device will maintain a separate running total forindividual users. Quotas are not shared across devices.
• If you are managing multiple devices, you can copy the same User Settings file to each device, or customize thefile for each device.
• A User Settings file created on a multifunction device can be imported to a single function device. Singlefunction printers will ignore settings for functions not supported by the device.
• A User Settings file created on a single function printer can be imported to a multifunction device, however,additional configuration will be required to enact quotas for other functions supported by the device.
• A User Settings file from an earlier version of the application may not be compatible with the current version ofthe application. You may need to modify the User Settings file to match the user file template for the currentversion.
Downloading a user file template from the device
1 From the Embedded Web Server, click Applications > Device Quotas.
2 Under User Settings file, click Download, and then follow the prompts to save the template to your computer asa .csv file.
Filling in the user template
1 After downloading the user template from a device running the application, open the file using an applicationcapable of reading and editing .csv files.
2 Fill in the fields as needed to create a profile for each user. The header rows indicate the setting being configuredin each column, and correspond to the user settings found in the Embedded Web Server interface for the application.To use the default setting for a field, leave that field blank in the template.
Note: User ID and password are case sensitive.
3 When finished adding users, be sure to save your changes in .csv format.
Configuring the application from the printer home screen 7
Importing a users file
After you have downloaded and filled in or updated the template, you can import the file to one or more devices runningthe application.
Note: Importing a user file overwrites the existing user file.
1 From the Embedded Web Server, click Applications > Device Quotas.
2 Under User Settings file, click Import, and then follow the prompts to locate the .csv file you want to use. Afteruploading, the printer will report the number of valid user entries found.
Note: Depending on the number of entries, it may take a minute or two for the file to upload. Do not turn offyour printer during this time.
Exporting a users file
You can export a previously uploaded user file to make changes, or to copy the file to other devices running theapplication.
1 From the Embedded Web Server, click Applications > Device Quotas.
2 Under User Settings file, click Export, and then follow the prompts to save the user file to your computer as a .csvfile.
Adding, editing, or deleting users in an existing user file
1 Begin by saving the most current working version of the user file. From the Embedded Web Server, clickApplications >Device Quotas.
2 Under User Settings file, click Export , and then follow the prompts to save the user file to your computer as a .csvfile.
3 Edit the user file as needed to add, remove, or change users, and then save the file (be sure to maintain .csv format).
Note: Deleting a user will also delete any usage data that has been stored for that user once the modified UserSettings file is loaded to the printer. For information about saving usage data before deleting a user, see“Exporting usage data” on page 13.
4 From the Embedded Web Server, click Applications >Device Quotas.
5 Under User Settings file, click Import, and then follow the prompts to locate the .csv file you want to use. Afteruploading, the printer will report the number of valid user entries found.
Note: Depending on the number of entries, it may take a minute or two for the file to upload. Do not turn offyour printer during this time.
Configuring account defaultsIf you want to apply the account defaults globally, make sure that Account defaults apply to all users is selected inApplication Settings.
1 From the admin home screen, touch Account Defaults.
2 For each printer function, select the following:
• Enforcement—Choose to notify users when quotas are reached (Inform), disable the function when quotas arereached (Enforce), or ignore quotas for the function (None).
• Larger paper sizes count x 2—Count tabloid (11x17) or larger paper as two pages.
Configuring the application from the printer home screen 8
• Quota—Select the maximum number of pages a user can, should, or is expected to print during the specifiedperiod.
• Overage Allowed—Specify by how many pages, if any, a user can exceed quota.
3 If needed, touch the down arrow to access additional B&W or color settings.
4 Touch Apply.
Running reports1 From the admin home screen, touch Reports.
2 Select the type of report you want to run:
• Current period usage–Usage for the device during the current period, as specified in the Reset Frequencysettings
• Previous period usage–Usage for the device during the previous period, as specified in the Reset Frequencysettings
• Lifetime usage–Usage for the device since the application was installed
• Individual User Reports–Specify one or more users
3 Touch E‑mail or Print.
Configuring the application from the printer home screen 9

Configuring the application from the EmbeddedWeb ServerAlthough the application can be entirely configured from the Embedded Web Server, we recommend that primaryconfiguration be done through the admin home screen. The following chapter is limited to those tasks that can onlybe done through the Embedded Web Server.
Accessing application configuration settings using theEmbedded Web Server1 Obtain the printer IP address:
• From the printer home screen
• From the TCP/IP section in the Network/Ports menu
• By printing a network setup page or menu settings page, and then finding the TCP/IP section
Note: An IP address appears as four sets of numbers separated by periods, such as 123.123.123.123.
2 Open a Web browser, and then type the printer IP address in the address field.
The Embedded Web Server appears.
3 From the navigation menu on the left, click Settings or Configuration, and then do one of the following:
• Click Apps > Apps Management.
• Click Device Solutions > Solutions (eSF).
• Click Embedded Solutions.
4 From the list of installed applications, click the application you want to configure, and then click Configure.
Customizing the display icon1 Access the application configuration settings from the Embedded Web Server.
2 From the Configure, Profile, or Profiles page, add or edit a profile, and then change the settings if necessary:
• Button Text or Text—Type up to 20 characters that will appear above the profile button on the printer homescreen. This field is optional.
• Button Icon or Icon—Browse to a new image file that represents the profile on the printer home screen. Thisfield is optional.
• Button Icon when pressed or Icon when pressed—Browse to a new image file that will be displayed while theprofile icon is being pressed. This field is optional.
Notes:
– For printers running the Embedded Solutions Framework (eSF) version 3.0 or later, the image should bea PNG file with a transparent background, and should measure 192 x 302 pixels. It should not exceed11KB in size.
– For printers running eSF version 2.0, the image should be a GIF, PNG, or JPEG file, and should measure120 x 75 pixels.
Configuring the application from the Embedded Web Server 10
– For printers running eSF version 1.2, the image should be a GIF file and should measure 120 x 75 pixels.
– If you are unsure about which version of eSF your printer is running, then see “Checking which version ofthe Embedded Solutions Framework is installed on a printer” on page 18.
3 Save or discard your changes.
Restricting administrative access (LDAP)Upon loading the application to the device, the following access controls are set to use the default templateES_Admins_Template. This restricts administrative access to a limited group of administrators.
Note: To use LDAP configuration, you must first configure the device and set Authentication Mode to LDAP. Formore information, see the Embedded Web Server Administrator’s Guide on http://support.lexmark.com.
1 From the Embedded Web Server, click Settings or Configuration.
2 Click Security.
Note: If prompted for a user ID, enter admin.
3 Click Security Setup.
4 Under Advanced Security Settings, click Access Controls.
5 Set the following fields to LDAP, as needed:
6 If necessary, expand Administrative Menus.
• Security Menu at the Device - Protect access to the Security menu from the printer control panel.
• Security Menu Remotely - Protect access to the Security menu from the Embedded Web Server.
7 If necessary, expand Management.
• Solutions Configuration or eSF Configuration - Control access to the configuration of any installed solutions.
8 Click Submit.
Note: If LDAP is not a choice, make sure the LDAP security template has been properly configured. For moreinformation, see the Embedded Web Server Administrator’s Guide on http://support.lexmark.com.
Restricting B&W or color usage (LDAP)If you are using Internal Accounts, you can restrict black and white or color usage from the admin home screen. If youare using LDAP authentication, you must manually set security templates from the Embedded Web Server.
Note: To use LDAP configuration, you must first configure the device and set Authentication Mode to LDAP. Formore information, see the Embedded Web Server Administrator’s Guide on http://support.lexmark.com.
1 From the Embedded Web Server, click Settings or Configuration.
2 Click Security.
Note: If prompted for a user ID, enter admin.
3 Click Security Setup.
4 Under Advanced Security Settings, click Access Controls.
5 If necessary, expand Function Access.
Configuring the application from the Embedded Web Server 11
6 Set the following fields to LDAP, as needed:
• Flash Drive Print - Require users to enter credentials before printing a black and white job from a flash drive
• Flash Drive Color Print - Require users to enter credentials before printing a color job from a flash drive
• Copy Function - Require users to enter credentials before making a black and white copy
• Copy Color Function - Require users to enter credentials before making a color copy
7 Click Submit.
Note: If LDAP is not a choice, make sure the LDAP security template has been properly configured. For moreinformation, see the Embedded Web Server Administrator’s Guide on http://support.lexmark.com.
Exporting and importing settings and data
Exporting and importing global settingsThe global settings file contains default quota settings that are applied to all users who do not have a custom profile,as well as messages to be displayed to users, and the administrator e‑mail address.
Note: Settings for Device Quotas can only be imported and exported using the Applications interface as described inthis section. Do not attempt to use the Import and Export buttons found at the bottom of the Global Settings page.
Exporting global settings
You can use the exported .csv file to copy settings to other printers running Device Quotas, or make changes to the fileand then load it back to the original device.
1 From the Embedded Web Server, click Applications > Device Quotas.
2 Under Global Settings file, click Export, and then follow the prompts to save the settings file to your computer in .csvformat.
Importing global settings
You can use Import to copy global settings to one or more devices running Device Quotas.
1 From the Embedded Web Server, click Applications > Device Quotas.
2 Under Global Settings file, click Import, and then follow the prompts to locate and upload a previously‑stored .csvsettings file.
Importing a configuration fileAdministrators can upload a configuration file that will configure the security settings for multiple access controls. Thisfile uses the following XML format:
<FunctionAccessControls>
<FunctionAccessControl>esf.<bundle name>.<FAC Id></FunctionAccessControl>
Configuring the application from the Embedded Web Server 12

</FunctionAccessControls>
1 From the Embedded Web Server, click Settings or Configuration, and then do one of the following:
• Click Apps > Apps Management.
• Click Device Solutions > Solutions (eSF).
• Click Embedded Solutions.
2 Click Device Quotas, and then click Configure.
3 Scroll to locate FAC Configuration File, and then click Choose File to locate the configuration file.
4 Click Apply to save the settings.
Exporting usage dataNote: Be sure to export usage data before deleting users; previously stored usage data is not saved when a user isdeleted.
1 From the Embedded Web Server, click Applications > Device Quotas.
2 Under Usage Data, click Export next to the type of data you want to export:
• Current usage data —Data that has been collected since the last reset. Resets can be performed using theEmbedded Web Server. .
• Archived usage data (most recent interval)—Data that was collected during the interval prior to the last reset.For example, if resets are performed monthly and the last reset occurred on the first day of March, archivedusage data would be available for the month of February.
• Archived usage data (total)—The total of all archived usage data that has been collected since the applicationwas installed. Total archived usage data only includes data from previous completed intervals and does notinclude any current data collected since the last reset.
3 Follow the prompts to save the file to your computer in .csv format.
Configuring the application from the Embedded Web Server 13
Troubleshooting
No usage information has been stored for a userIf no usage information has been stored for a particular user, check the following:
• Verify the user has not been deleted from the application. A list of user accounts can be found under User Accountsin the admin home screen.
Note: User ID and password are case‑sensitive.
User already exists or duplicate user IDWhen configuring users, each User ID must be unique.
• If the administrator uploads a .csv file containing duplicate user IDs, the application accepts the first instance only,and a message appears listing the duplicate user IDs and the rows in which they can be found.
• If an administrator enters user IDs individually, a message may appear telling the administrator that the user alreadyexists. This feature is not available for all devices. We recommend verifying that each user ID is unique. Duplicateuser IDs may cause unpredictable results.
To edit or delete existing user IDs, see “Configuring User Accounts” on page 6.
Error when importing a .csv fileIf an error occurs when importing a .csv file, the error message specifies the user ID and row where the error occurred.Open the .csv file, and then troubleshoot the problem at the indicated location.
User is unable to copyIf an individual user is unable to use the Copy functions of the device:
• Verify that the user is supplying correct credentials.
• Verify that the user has quota available for Copy functions.
• Verify that the user is set up to access the device using an internal account or LDAP.
Note: The user ID and password used to authenticate to the device are case‑sensitive.
User is unable to printIf an individual user is unable to print to the device:
• Verify that the user is supplying correct credentials.
Note: The user ID and password used to authenticate to the device are case‑sensitive. The print driver must beconfigured to pass credentials with the correct capitalization.
• If the user accesses the device through certain embedded applications or applications that print via FTP or Port9100, make sure Restrict non‑authenticated printing is deselected under Application Settings in the administratorhome screen.
Troubleshooting 14
• Verify that the user has quota available for Print functions.
• Verify that the user is set up to access the device using an internal account or LDAP.
Note: If a user exceeds print quota and submits another print job, that job will be cancelled. The cancelled job maybe listed in the print queue with a status of “Sent to printer” for up to five minutes before it times out and isremoved from the queue. Other users with available quota will not be prevented from printing in the meantime.
If all users are unable to use the Print functions of the device:
• Verify that the correct print driver is installed and properly configured. This should be the default PostScript driverthat shipped with the device or the Universal Printer Driver.
• Verify that Job Accounting has been enabled in the printer driver. For more information, see the driver help. If yourprinter driver does not support Job Accounting, download the Universal Printer Driver fromhttp://support.lexmark.com.
User is unable to scanIf an individual user is unable to scan:
• Verify that the user is supplying correct credentials.
• Verify that the user is set up to access the device using an internal account or LDAP.
Note: The user ID and password used to authenticate to the device are case‑sensitive.
User is unable to send faxesIf an individual user is unable to send faxes:
• Verify that the user is supplying correct credentials.
• Verify that the user is set up to access the device using an internal account or LDAP.
Note: The user ID and password used to authenticate to the device are case‑sensitive.
If all users are unable to send faxes:
• Verify that the fax module is attached and correctly configured. For information about attaching and setting up faxfunctions, see the User's Guide that came with the printer.
User not receiving quota‑related e‑mail messagesIf an individual user is not receiving e‑mail messages from the application:
• Verify that the correct e‑mail address has been specified for the user.
• If global quota settings have been applied to the user, verify that the “enforcement” settings are set to eitherEnforce, or Inform.
• If custom quota settings have been applied to the user, verify that the “enforcement” settings are set to eitherEnforce, or Inform.
• Verify that e‑mail messages are not being blocked by a spam filter.
Troubleshooting 15
Administrator not receiving quota‑related e‑mail messagesIf administrator e‑mail messages are not being received from the application:
• Verify that the correct e‑mail address has been specified in Notification and E‑mail address under Account Settings.For more information, see “Managing individual users” on page 6.
• Verify that e‑mail messages are not being blocked by a spam filter.
“User quota account not found. Please contact the systemadministrator” error messageThis error message occurs after a user has initiated a device function such as Copy or Fax and has entered a correctUser ID and password, but has not been added to the application. To correct this problem, add the user to theapplication. For information about adding users, see “Configuring User Accounts” on page 6.
“Unable to display quota information because Device Quotas isnot running” error messageThis error message occurs when a user attempts to access the application, and the application either has not beeninstalled on the device, has not been properly licensed, or is not in a Running state. To correct this problem, try one ormore of the following:
Verify that the application is installed on the device
1 From the Embedded Web Server, click Settings or Configuration, and then do one of the following:
• Click Apps > Apps Management.
• Click Device Solutions > Solutions (eSF).
• Click Embedded Solutions.
2 Verify that the application appears in the Installed Solutions list.
• If the application does not appear in the Installed Solutions list, contact your Lexmark representative forinformation about obtaining the application.
• If the application is installed, verify that it is in a Running state. If the application is not running, proceed to“Starting the application.”
• If the application is installed and running, proceed to “Verifying the application license”.
Starting the application
1 From the Embedded Web Server, click Settings or Configuration, and then do one of the following:
• Click Apps > Apps Management.
• Click Device Solutions > Solutions (eSF).
• Click Embedded Solutions.
2 If the application is in a Stopped state, select the check box next to the application name, and then click Start.
Troubleshooting 16
Verifying the application license
1 From the Embedded Web Server, click Settings or Configuration, and then do one of the following:
• Click Apps > Apps Management.
• Click Device Solutions > Solutions (eSF).
• Click Embedded Solutions.
2 Click License. If the Status is “Unlicensed”, contact your Lexmark representative for information about obtaining alicense.
Troubleshooting 17

Appendix
Checking which version of the Embedded Solutions Frameworkis installed on a printer1 Type the printer IP address or hostname in the address field of your Web browser.
2 From the Embedded Web Server, click Reports > Device Settings.
3 Scroll down until you see Embedded Solutions (usually found near the bottom).
4 Under Embedded Solutions, the value next to Framework = signifies the installed version.
Licensing applicationsApplications require a valid electronic license to run on select printers.
For more information on purchasing a license for an application, or for any other licensing information, contact yourLexmark representative.
Exporting and importing configuration filesAfter configuring an application, you can export your current settings into a file that can then be imported and used toconfigure that application on one or more additional printers.
Exporting and importing a configuration using the Embedded Web ServerYou can export configuration settings into a text file, and then import it to apply the settings to other printers.
1 From the Embedded Web Server, click Settings or Configuration, and then do one of the following:
• Click Apps > Apps Management.
• Click Device Solutions > Solutions (eSF).
• Click Embedded Solutions.
2 From the list of installed applications, click the name of the application you want to configure.
3 Click Configure, and then do one of the following:
• To export a configuration to a file, click Export, and then follow the instructions on the computer screen to savethe configuration file.
Note: If a JVM Out of Memory error occurs, then repeat the export process until the configuration fileis saved.
• To import a configuration from a file, click Import, and then browse to the saved configuration file that wasexported from a previously configured printer.
Notes:
– Before importing the configuration file, you can choose to preview it first.
Appendix 18
– If a timeout occurs and a blank screen appears, then refresh the Web browser, and then click Apply.
Appendix 19
Notices
Edition notice
November 2012
The following paragraph does not apply to any country where such provisions are inconsistent with local law:LEXMARK INTERNATIONAL, INC., PROVIDES THIS PUBLICATION “AS IS” WITHOUT WARRANTY OF ANY KIND, EITHEREXPRESS OR IMPLIED, INCLUDING, BUT NOT LIMITED TO, THE IMPLIED WARRANTIES OF MERCHANTABILITY OR FITNESSFOR A PARTICULAR PURPOSE. Some states do not allow disclaimer of express or implied warranties in certaintransactions; therefore, this statement may not apply to you.
This publication could include technical inaccuracies or typographical errors. Changes are periodically made to theinformation herein; these changes will be incorporated in later editions. Improvements or changes in the products orthe programs described may be made at any time.
References in this publication to products, programs, or services do not imply that the manufacturer intends to makethese available in all countries in which it operates. Any reference to a product, program, or service is not intended tostate or imply that only that product, program, or service may be used. Any functionally equivalent product, program,or service that does not infringe any existing intellectual property right may be used instead. Evaluation and verificationof operation in conjunction with other products, programs, or services, except those expressly designated by themanufacturer, are the user’s responsibility.
For Lexmark technical support, visit http://support.lexmark.com.
For information on supplies and downloads, visit www.lexmark.com.
If you don't have access to the Internet, you can contact Lexmark by mail:
Lexmark International, Inc.Bldg 004-2/CSC740 New Circle Road NWLexington, KY 40550USA
© 2012 Lexmark International, Inc.
All rights reserved.
Trademarks
Lexmark and Lexmark with diamond design are trademarks of Lexmark International, Inc., registered in the UnitedStates and/or other countries.
Mac and the Mac logo are trademarks of Apple Inc., registered in the U.S. and other countries.
All other trademarks are the property of their respective owners.
GOVERNMENT END USERS
The Software Program and any related documentation are "Commercial Items," as that term is defined in 48 C.F.R.2.101, "Computer Software" and "Commercial Computer Software Documentation," as such terms are used in 48 C.F.R.12.212 or 48 C.F.R. 227.7202, as applicable. Consistent with 48 C.F.R. 12.212 or 48 C.F.R. 227.7202-1 through 227.7207-4,
Notices 20
as applicable, the Commercial Computer Software and Commercial Software Documentation are licensed to the U.S.Government end users (a) only as Commercial Items and (b) with only those rights as are granted to all other end userspursuant to the terms and conditions herein.
Notices 21

IndexAaccessing application configurationsettings
using the Embedded WebServer 10
adding users from the admin home screen 6using the CSV file 7
admin home page accessing 5
application configuration settings accessing 10
applications licensing 18
archived usage data exporting 13
Cconfiguration file
security settings 12setting access controls 12XML format 12
configuring account defaults 8account settings 5administrator e‑mail address 5overage allowance 8reset frequency 5
copying global settings 12CSV file
for managing users 7customizing the display icon 10
Ddeleting users
from the admin home screen 6using the CSV file 7
display icon customizing 10
Eediting users
from the admin home screen 6using the CSV file 7
Embedded Solutions Framework checking version number 18
Embedded Web Server accessing application
configuration settings 10error messages
Unable to display quotainformation because DeviceQuotas not installed. 16
User quota account not found. 16exporting
archived usage data 13summary usage data 13usage data 13
exporting a configuration using the Embedded Web
Server 18exporting a configuration using theEmbedded Web Server 18e‑mail notifications
customizing 5
Gglobal settings
exporting 12importing 12transferring to other devices 12
Iimporting
configuration file 12importing a configuration
using the Embedded WebServer 18
importing a configuration using theEmbedded Web Server 18
LLexmark Embedded SolutionsFramework
checking version number 18licensing applications 18logging in 5
Mmanaging users 7messaging 5
Nnotices 20
Qquota enforcement
enforcing 8informing 8
Rreports
e‑mailing 9printing 9
reset frequency configuring 5
restricting administrative access(LDAP) 11restricting B&W usage (LDAP) 11restricting color usage (LDAP) 11
Ssummary usage data
exporting 13
Ttransferring global settings to otherdevices 12troubleshooting
administrator not receivinge‑mails 16
Device Quotas not installed errormessage 16
duplicate user ID 14error when importing a .csv
file 14no usage information stored for a
user 14user already exists 14user quota account not found 16users not receiving e‑mails 15users unable to copy 14users unable to print 14users unable to scan 15users unable to send faxes 15
Index 22
Uusage data
exporting 13usage reports
allowing user to e‑mail 5allowing user to print 5
user quota account not found error message 16
users adding from the admin home
screen 6adding using the CSV file 7deleting from the admin home
screen 6deleting using the CSV file 7editing from the admin home
screen 6editing using the CSV file 7using a CSV file to manage 7
Index 23