Embed Size (px)
Citation preview

Technical Report Documentation Page 1. Report No.FHWA/TX-09/0-5629-1
2. Government Accession No. 3. Recipient's Catalog No.
4. Title and SubtitleDEVELOPMENT OF A TRAFFIC SIGNAL OPERATIONSHANDBOOK
5. Report DateSeptember 2008Published: August 2009Published: August 2009 6. Performing Organization Code
7. Author(s)James Bonneson, Michael Pratt, and Karl Zimmerman
8. Performing Organization Report No.Report 0-5629-1
9. Performing Organization Name and AddressTexas Transportation InstituteThe Texas A&M University SystemCollege Station, Texas 77843-3135
10. Work Unit No. (TRAIS)
11. Contract or Grant No.Project 0-5629
12. Sponsoring Agency Name and AddressTexas Department of TransportationResearch and Technology Implementation OfficeP.O. Box 5080Austin, Texas 78763-5080
13. Type of Report and Period CoveredTechnical Report:September 2006-August 200814. Sponsoring Agency Code
15. Supplementary NotesProject performed in cooperation with the Texas Department of Transportation and the Federal HighwayAdministration.Project Title: Best TxDOT Practices for Signal Timing and Detection Design at IntersectionsURL: http://tti.tamu.edu/documents/0-5629-1.pdf16. AbstractThe Texas Department of Transportation (TxDOT) operates thousands of traffic signals, both in rural areasand small cities. TxDOT’s operation of these signals has served the state well over the years. However,regional differences in signal timing and detection design practice have evolved. These differences createoperational inconsistencies and, possibly, sub-optimal performance. Good signal timing practices developedin some areas are not well documented or otherwise communicated to other areas. A comprehensive signaltiming resource guide is needed to promote uniform, effective signal operation on a statewide basis.
This document summarizes the research conducted and the conclusions reached during the development of aTraffic Signal Operations Handbook. The handbook provides guidelines for timing traffic control signals atintersections that operate in isolation or as part of a coordinated signal system. The research conductedincluded a review of the literature, a survey of TxDOT engineers, an evaluation of alterative signal controllersettings and detection designs. A spreadsheet was developed to accompany the Handbook. This spreadsheetautomates several tasks involved in the development of a signal timing plan and is intended to facilitateimplementation of the Handbook guidance.
17. Key WordsSignalized Intersections, Intersection Design,Intersection Performance, Traffic Signal Timing
18. Distribution StatementNo restrictions. This document is available to thepublic through NTIS:National Technical Information ServiceSpringfield, Virginia 22161http://www.ntis.gov
19. Security Classif.(of this report)Unclassified
20. Security Classif.(of this page)Unclassified
21. No. of Pages 92
22. Price
Form DOT F 1700.7 (8-72) Reproduction of completed page authorized


DEVELOPMENT OF A TRAFFIC SIGNAL OPERATIONS HANDBOOK
by
James Bonneson, P.E.Senior Research Engineer
Texas Transportation Institute
Michael Pratt, P.E.Assistant Research Engineer
Texas Transportation Institute
and
Karl Zimmerman, P.E.Assistant Professor of Civil Engineering
Valparaiso University, Indiana
Report 0-5629-1Project 0-5629
Project Title: Best TxDOT Practices for Signal Timing and Detection Design at Intersections
Performed in cooperation with theTexas Department of Transportation
and theFederal Highway Administration
September 2008 Published: August 2009
Published: August 2009
TEXAS TRANSPORTATION INSTITUTEThe Texas A&M University SystemCollege Station, Texas 77843-3135


v
DISCLAIMER
The contents of this report reflect the views of the authors, who are responsible for the factsand the accuracy of the data published herein. The contents do not necessarily reflect the officialview or policies of the Federal Highway Administration (FHWA) and/or the Texas Department ofTransportation (TxDOT). This report does not constitute a standard, specification, or regulation.It is not intended for construction, bidding, or permit purposes. The engineer in charge of the projectwas James Bonneson, P.E. #67178.
NOTICE
The United States Government and the State of Texas do not endorse products ormanufacturers. Trade or manufacturers’ names appear herein solely because they are consideredessential to the object of this report.

vi
ACKNOWLEDGMENTS
This research project was sponsored by the Texas Department of Transportation and theFederal Highway Administration. The research was conducted by Dr. James Bonneson, Mr. MichaelPratt, and Dr. Karl Zimmerman. Dr. Bonneson and Mr. Pratt are with the Texas TransportationInstitute. Dr. Zimmerman was with the Texas Transportation Institute at the time of his participationin the project, he is now with Valparaiso University in Indiana.
The researchers acknowledge the support and guidance provided by the Project MonitoringCommittee:
! Mr. Larry Colclasure, Program Coordinator (TxDOT);! Mr. Henry Wickes, Project Director (TxDOT);! Mr. Don Baker (TxDOT);! Mr. Adam Chodkiewicz (TxDOT);! Mr. David Danz (TxDOT);! Mr. Gordon Harkey (TxDOT); ! Mr. Derryl Skinnell (TxDOT); ! Mr. Dexter Turner (TxDOT); and! Mr. Wade Odell, Research Engineer (TxDOT, Research and Technology Implementation
Office).
The researchers also acknowledge the insight and advice provided by Mr. Kirk Barnes andMr. Nader Ayoub during the development of several report chapters and appendices.

vii
TABLE OF CONTENTS
Page
LIST OF FIGURES . . . . . . . . . . . . . . . . . . . . . . . . . . . . . . . . . . . . . . . . . . . . . . . . . . . . . . . . . viiiLIST OF TABLES . . . . . . . . . . . . . . . . . . . . . . . . . . . . . . . . . . . . . . . . . . . . . . . . . . . . . . . . . . . ixCHAPTER 1. INTRODUCTION . . . . . . . . . . . . . . . . . . . . . . . . . . . . . . . . . . . . . . . . . . . . . . 1-1
OVERVIEW . . . . . . . . . . . . . . . . . . . . . . . . . . . . . . . . . . . . . . . . . . . . . . . . . . . . . . . . . . . . 1-1OBJECTIVE . . . . . . . . . . . . . . . . . . . . . . . . . . . . . . . . . . . . . . . . . . . . . . . . . . . . . . . . . . . . 1-1RESEARCH APPROACH . . . . . . . . . . . . . . . . . . . . . . . . . . . . . . . . . . . . . . . . . . . . . . . . . 1-2
CHAPTER 2. REVIEW OF STATE AGENCY SIGNAL TIMING PRACTICES . . . . . 2-1OVERVIEW . . . . . . . . . . . . . . . . . . . . . . . . . . . . . . . . . . . . . . . . . . . . . . . . . . . . . . . . . . . . 2-1SIGNAL CONTROLLER TIMING AND PHASING . . . . . . . . . . . . . . . . . . . . . . . . . . . . . 2-2ADVANCED SIGNAL TIMING FUNCTIONS . . . . . . . . . . . . . . . . . . . . . . . . . . . . . . . . 2-11DETECTION DESIGN AND OPERATION . . . . . . . . . . . . . . . . . . . . . . . . . . . . . . . . . . 2-15REFERENCES . . . . . . . . . . . . . . . . . . . . . . . . . . . . . . . . . . . . . . . . . . . . . . . . . . . . . . . . . 2-15
CHAPTER 3. ALTERNATIVE DETECTION DESIGNS FORHIGH-SPEED APPROACHES . . . . . . . . . . . . . . . . . . . . . . . . . . . . . . . . . . . . . . . . . 3-1
OVERVIEW . . . . . . . . . . . . . . . . . . . . . . . . . . . . . . . . . . . . . . . . . . . . . . . . . . . . . . . . . . . . 3-1EXISTING DETECTION DESIGNS . . . . . . . . . . . . . . . . . . . . . . . . . . . . . . . . . . . . . . . . . 3-1EVALUATION FRAMEWORK . . . . . . . . . . . . . . . . . . . . . . . . . . . . . . . . . . . . . . . . . . . . . 3-3EVALUATION OF EXISTING DESIGNS . . . . . . . . . . . . . . . . . . . . . . . . . . . . . . . . . . . . . 3-7REFERENCES . . . . . . . . . . . . . . . . . . . . . . . . . . . . . . . . . . . . . . . . . . . . . . . . . . . . . . . . . 3-14
CHAPTER 4. EVALUATION OF SIGNAL CONTROLLER SETTINGS . . . . . . . . . . . 4-1OVERVIEW . . . . . . . . . . . . . . . . . . . . . . . . . . . . . . . . . . . . . . . . . . . . . . . . . . . . . . . . . . . . 4-1REVIEW OF PRACTICE . . . . . . . . . . . . . . . . . . . . . . . . . . . . . . . . . . . . . . . . . . . . . . . . . . 4-1EVALUATION OF ALTERNATIVE SETTINGS . . . . . . . . . . . . . . . . . . . . . . . . . . . . . . . 4-8REFERENCES . . . . . . . . . . . . . . . . . . . . . . . . . . . . . . . . . . . . . . . . . . . . . . . . . . . . . . . . . 4-11
CHAPTER 5. DEVELOPMENT OF SIGNAL COORDINATION SOFTWARE . . . . . . 5-1OVERVIEW . . . . . . . . . . . . . . . . . . . . . . . . . . . . . . . . . . . . . . . . . . . . . . . . . . . . . . . . . . . . 5-1BANDWIDTH TECHNIQUE DEVELOPMENT . . . . . . . . . . . . . . . . . . . . . . . . . . . . . . . . 5-2VALIDATION . . . . . . . . . . . . . . . . . . . . . . . . . . . . . . . . . . . . . . . . . . . . . . . . . . . . . . . . . . . 5-7REFERENCES . . . . . . . . . . . . . . . . . . . . . . . . . . . . . . . . . . . . . . . . . . . . . . . . . . . . . . . . . 5-10
APPENDIX A. USER'S MANUAL - TEXAS SIGNAL COORDINATION OPTIMIZER . . . . . . . . . . . . . . . . . . . . . . . . . . . . . . . . . . . . . . . A-1
OVERVIEW . . . . . . . . . . . . . . . . . . . . . . . . . . . . . . . . . . . . . . . . . . . . . . . . . . . . . . . . . . . A-3SOFTWARE OVERVIEW . . . . . . . . . . . . . . . . . . . . . . . . . . . . . . . . . . . . . . . . . . . . . . . . A-3ANALYSIS WORKSHEET . . . . . . . . . . . . . . . . . . . . . . . . . . . . . . . . . . . . . . . . . . . . . . . A-5SPLITS WORKSHEET . . . . . . . . . . . . . . . . . . . . . . . . . . . . . . . . . . . . . . . . . . . . . . . . . . A-15VOLUMES WORKSHEET . . . . . . . . . . . . . . . . . . . . . . . . . . . . . . . . . . . . . . . . . . . . . . . A-16LEFT-TURN MODE WORKSHEET . . . . . . . . . . . . . . . . . . . . . . . . . . . . . . . . . . . . . . . A-19PREEMPTION WORKSHEET . . . . . . . . . . . . . . . . . . . . . . . . . . . . . . . . . . . . . . . . . . . . A-21REFERENCES . . . . . . . . . . . . . . . . . . . . . . . . . . . . . . . . . . . . . . . . . . . . . . . . . . . . . . . . A-23

viii
LIST OF FIGURES
Figure Page
2-1 Demonstration of Yellow Trap with Lead-Lag Phasing . . . . . . . . . . . . . . . . . . . . . . . 2-102-2 Dallas Phasing to Eliminate Yellow Trap . . . . . . . . . . . . . . . . . . . . . . . . . . . . . . . . . . 2-113-1 Probability of Stopping or Going at Yellow Onset . . . . . . . . . . . . . . . . . . . . . . . . . . . . 3-53-2 Probability of Dilemma . . . . . . . . . . . . . . . . . . . . . . . . . . . . . . . . . . . . . . . . . . . . . . . . . 3-53-3 Indecision Zone Protection Provided by Advance Detection . . . . . . . . . . . . . . . . . . . . 3-63-4 Typical Detector Coverage Relationships . . . . . . . . . . . . . . . . . . . . . . . . . . . . . . . . . . 3-103-5 Detector Coverage as a Function of Design Speed and Detector Operation . . . . . . . . 3-103-6 Effective Passage Time Settings by Speed and Detector Operation . . . . . . . . . . . . . . 3-123-7 Delay as a Function of Passage Time and Detector Operation . . . . . . . . . . . . . . . . . . 3-133-8 Max-Out Probability as a Function of Passage Time and Detector Operation . . . . . . 3-144-1 Distribution of Maximum Green Values Used in Practice . . . . . . . . . . . . . . . . . . . . . . 4-24-2 Distribution of Minimum Green Values Used in Practice . . . . . . . . . . . . . . . . . . . . . . . 4-54-3 Variation in Delay as a Function of Maximum Green . . . . . . . . . . . . . . . . . . . . . . . . . . 4-94-4 Optimum Minimum Green Setting When Total Minor-Movement
Volume is between 100 and 200 veh/hr . . . . . . . . . . . . . . . . . . . . . . . . . . . . . . . . . . . . 4-105-1 Illustration of Bandwidth Concept . . . . . . . . . . . . . . . . . . . . . . . . . . . . . . . . . . . . . . . . . 5-35-2 Upper and Lower Bandwidth Interference . . . . . . . . . . . . . . . . . . . . . . . . . . . . . . . . . . . 5-45-3 TSCO Algorithm Validation Data . . . . . . . . . . . . . . . . . . . . . . . . . . . . . . . . . . . . . . . . 5-10A-1 TSCO Welcome Worksheet . . . . . . . . . . . . . . . . . . . . . . . . . . . . . . . . . . . . . . . . . . . . . A-4A-2 Node and Segment Labeling Scheme . . . . . . . . . . . . . . . . . . . . . . . . . . . . . . . . . . . . . A-6A-3 Node Description Data Entry Cells . . . . . . . . . . . . . . . . . . . . . . . . . . . . . . . . . . . . . . . A-6A-4 Phase-Specific Signal Timing Data . . . . . . . . . . . . . . . . . . . . . . . . . . . . . . . . . . . . . . . A-7A-5 Time-Space Diagram . . . . . . . . . . . . . . . . . . . . . . . . . . . . . . . . . . . . . . . . . . . . . . . . . . A-8A-6 Time-Space Diagram Cycle Bar Details . . . . . . . . . . . . . . . . . . . . . . . . . . . . . . . . . . . A-9A-7 Graph Adjustment Controls . . . . . . . . . . . . . . . . . . . . . . . . . . . . . . . . . . . . . . . . . . . . . A-9A-8 Example System Measures of Effectiveness . . . . . . . . . . . . . . . . . . . . . . . . . . . . . . . A-12A-9 Advisory Messages and Checks . . . . . . . . . . . . . . . . . . . . . . . . . . . . . . . . . . . . . . . . . A-12A-10 Manual Offset Adjustment Guidance . . . . . . . . . . . . . . . . . . . . . . . . . . . . . . . . . . . . A-13A-11 Splits Worksheet Data Entry Cells . . . . . . . . . . . . . . . . . . . . . . . . . . . . . . . . . . . . . . . A-15A-12 Splits Worksheet Output Data . . . . . . . . . . . . . . . . . . . . . . . . . . . . . . . . . . . . . . . . . . A-16A-13 Volumes Worksheet Data Entry Cells . . . . . . . . . . . . . . . . . . . . . . . . . . . . . . . . . . . . A-17A-14 Volumes Worksheet Calibration Factors . . . . . . . . . . . . . . . . . . . . . . . . . . . . . . . . . . A-18A-15 Volumes Worksheet Output Data . . . . . . . . . . . . . . . . . . . . . . . . . . . . . . . . . . . . . . . A-19A-16 Volumes Worksheet Turn Movement Volumes . . . . . . . . . . . . . . . . . . . . . . . . . . . . A-19A-17 Left-Turn Mode Worksheet Data Entry Cells . . . . . . . . . . . . . . . . . . . . . . . . . . . . . . A-20A-18 Left-Turn Mode Worksheet Output Data . . . . . . . . . . . . . . . . . . . . . . . . . . . . . . . . . . A-20A-19 Preemption Worksheet Data Entry and Output . . . . . . . . . . . . . . . . . . . . . . . . . . . . . A-22

ix
LIST OF TABLES
Table Page
2-1 State DOT Document Sources and Topics Reviewed . . . . . . . . . . . . . . . . . . . . . . . . . . . 2-12-2 Minimum Green Setting . . . . . . . . . . . . . . . . . . . . . . . . . . . . . . . . . . . . . . . . . . . . . . . . . . 2-32-3 Maximum Green Variables . . . . . . . . . . . . . . . . . . . . . . . . . . . . . . . . . . . . . . . . . . . . . . . 2-42-4 Maximum Green Setting . . . . . . . . . . . . . . . . . . . . . . . . . . . . . . . . . . . . . . . . . . . . . . . . . 2-42-5 Yellow Change and Red Clearance Intervals . . . . . . . . . . . . . . . . . . . . . . . . . . . . . . . . . . 2-62-6 Gap Reduction Settings . . . . . . . . . . . . . . . . . . . . . . . . . . . . . . . . . . . . . . . . . . . . . . . . . 2-123-1 Detection Layout Used in Several TxDOT Districts . . . . . . . . . . . . . . . . . . . . . . . . . . . . 3-23-2 Common Variables for Analysis Scenarios . . . . . . . . . . . . . . . . . . . . . . . . . . . . . . . . . . . 3-83-3 Alternative Variable Values for Analysis Scenarios . . . . . . . . . . . . . . . . . . . . . . . . . . . . 3-94-1 Typical Ranges of Maximum Green Settings Used by Two State DOTs . . . . . . . . . . . . 4-44-2 Typical Ranges of Minimum Green Settings Based on Driver Expectancy . . . . . . . . . . . 4-64-3 Computed Maximum Green Setting for Through Phases . . . . . . . . . . . . . . . . . . . . . . . . 4-95-1 Evaluation Criteria for Efficiency . . . . . . . . . . . . . . . . . . . . . . . . . . . . . . . . . . . . . . . . . . 5-65-2 Evaluation Criteria for Attainability . . . . . . . . . . . . . . . . . . . . . . . . . . . . . . . . . . . . . . . . . 5-75-3 Validation Test Bed Characteristics . . . . . . . . . . . . . . . . . . . . . . . . . . . . . . . . . . . . . . . . . 5-8A-1 Analysis Worksheet Input Data Requirements . . . . . . . . . . . . . . . . . . . . . . . . . . . . . . . . A-5A-2 Evaluation Criteria for Efficiency . . . . . . . . . . . . . . . . . . . . . . . . . . . . . . . . . . . . . . . . A-11A-3 Evaluation Criteria for Attainability . . . . . . . . . . . . . . . . . . . . . . . . . . . . . . . . . . . . . . . A-11A-4 Advisory Messages and Possible Solutions . . . . . . . . . . . . . . . . . . . . . . . . . . . . . . . . . A-12A-5 Volumes Worksheet Input Data Requirements . . . . . . . . . . . . . . . . . . . . . . . . . . . . . . A-16


1-1
CHAPTER 1. INTRODUCTION
OVERVIEW
The Texas Department of Transportation maintains and operates about 6000 traffic signalsin Texas. TxDOT is supported in this activity by cities with a population of 50,000 or more.Specifically, TxDOT arranges by agreement to have these cities maintain the signals on the statehighway system. Also, TxDOT sometimes arranges by agreement to have these cities maintain thesignals on the access roads of controlled-access facilities.
Differences have appeared in the design and operation of traffic signals across the state.Some of these differences are due to the variation in geography, climate, population, trafficcomposition, and driver population that exists within the state. However, other differences are dueto the limited amount of statewide guidance available on traffic signal operation.
As a result of limited statewide guidance, each district has tended to develop its ownguidelines for signal operation. The result is that variations in signal operating philosophy haveemerged among TxDOT districts. This flexibility has served Texas reasonably well over the years.However, the consequence of having different operating philosophies is a lack of uniformity amongdistricts and possible sub-optimal signal operation. As traffic volume grows on Texas highways,sub-optimal performance of traffic signals may result in increased delay and fuel consumption.
A single statewide policy for signal timing settings and detection designs may be too limitingdue to the differences in climate, terrain, and driver behavior across the state. However, a documentthat describes a range of effective settings and designs would allow traffic engineers to identify the“best” solution for his or her district’s conditions. This approach is consistent with TxDOT’s goalof ensuring uniform signal operations on a statewide basis, while giving local engineers the abilityto make small adjustments (with an allowable range) to adapt the settings, design, or both to localconditions.
OBJECTIVE
The objective of this research was to develop traffic signal operations guidance suitable forstatewide application and document it in a Traffic Signal Operations Handbook. This Handbookprovides guidance on signal timing and detection design for isolated signalized intersections andinterchanges as well as coordinated signal systems. The Handbook describes alternatives, discussesdifferences between these alternatives, and defines conditions where each alternative is mostappropriate.
The primary intent of the Handbook is to summarize current signal operating practices andidentify either the “best practice” or provide guidance where equally workable alternative practicesexist. Where appropriate, research was conducted to resolve significant differences in practice andto fill knowledge gaps. This report documents the activities undertaken to: (1) synthesize best signal

1-2
timing and design practices based on an extensive review of the literature and practitioner interviews,and (2) resolve differences in practice and fill knowledge gaps through original research.
Several elements of traffic signal design were outside the scope of this research. These topicsinclude:
! signal justification (i.e., warrants and engineering studies),! traffic control device design (e.g., signal head displays and mounting),! signal infrastructure (e.g., poles, mast arms, foundations, etc.),! plan preparation, and! signal hardware maintenance.
RESEARCH APPROACH
A two-year program of research was developed to satisfy the project’s stated objective. Theresearch approach consists of eight tasks that represent a logical sequence of review, research,evaluation, and workshop development. These tasks are identified in the following list.
1. Evaluate state-of-the-practice.2. Conduct TxDOT district interviews.3. Develop Handbook outline and research plan.4. Conduct research for Handbook.5. Develop draft Handbook.6. Solicit comments and revise draft Handbook.7. Develop introductory workshop materials.8. Prepare research report.
The research conducted in Tasks 1 through 4 and 8 is documented in this report. Thefindings from Tasks 5, 6, and 7 are reflected in the Handbook that was produced for this project.

2-1
CHAPTER 2. REVIEW OF STATE AGENCY SIGNAL TIMING PRACTICES
OVERVIEW
This chapter documents the findings from a review of the signal timing practices of severalstate departments of transportation (DOTs) in the United States. The documentation provided bythese DOTs was reviewed to identify similarities and differences in signal timing practice among thestate DOTs.
State DOT signal-related documents (e.g., traffic signal manuals, standard drawings, policies,etc.) were reviewed to identify the range of guidance that is being provided for signal timing. Thereview was also extended to detection design. Only readily available documents were referenced(e.g., documents available on the Internet). No attempt was made to be comprehensive in the reviewof documents, and only fifteen states were represented in the review. These states are listed inTable 2-1.
Table 2-1. State DOT Document Sources and Topics Reviewed.Signal-Related
DocumentSource
Topics Reviewed
Change Period Left-Turn
Phasing
MinimumGreen
MaximumGreen
FlashingOperation
Pre-emption DetectionYellow
ChangeRed
ClearArizona (1) U U U -- -- U U U
California (2) U U U -- -- -- U U
Connecticut (3) U U U -- -- U U U
Florida (4) U U U -- -- U -- U
Idaho (5) U U U U U U U U
Indiana (6) U U U U -- -- -- U
Maryland (7) -- -- -- -- -- -- U U
Minnesota (8,9) U U U U U U U U
Ohio (10) U U -- -- -- U U U
Oregon (11,12,13) -- -- U -- -- U U U
South Dakota (14) U U U -- -- U U U
Texas (15) -- -- -- -- -- U U --Utah (16,17) U U -- U U -- U U
Virginia (18) -- -- U -- -- -- -- U
Washington (19) -- -- U -- -- -- U U
Note:“--” information on topic not available.

2-2
The review of state DOT documentation revealed the availability of guidance on manydifferent areas of signal timing and detection design. However, the search was narrowed to allowfocus on key areas for which a wider range in practice was identified. These key focus areas are:
! change period (i.e., yellow change and red clearance intervals),! left-turn phasing,! minimum green,! maximum green,! flashing operation,! preemption, and! detection.
The reference numbers in column 1 of Table 2-1 identify the specific documents that werereviewed. The checkmark (U) in subsequent columns describes the topics covered in thecorresponding document. Only two documents addressed every topic and no single topic wasaddressed by every state.
The fact that a document is listed in Table 2-1 as not providing guidance on a particular topicdoes not mean that particular topic is not addressed by that state. Instead, it most likely means thatthe particular guidance on this topic is determined by local, regional, or district engineers (insteadof being specified on a statewide basis). This flexibility reflects differences in climate, topography,and driver behavior across the individual state. In some cases, the lack of statewide guidance on atopic may mean only that it is not in a publicly accessible form (e.g., internal memoranda).
Table 2-1 provides some indication of the considerable variation in the content of statedocumentation for traffic signal timing and detection design. Many of these documents includeinformation that describes how signal projects are handled, construction details or specifications,signal warranting information, or traffic engineering study procedures. This information is outsidethe scope of the review for this research.
The remainder of this chapter summarizes the findings from the review of the state DOTdocuments identified in Table 2-1. The summary is divided into three parts. The first part addressessignal controller timing and signal phasing. The second part addresses signal settings that aretypically used for special applications. The last part addresses detection design and operation.
SIGNAL CONTROLLER TIMING AND PHASING
This part of the chapter summarizes state DOT practice related to the following five topics:
! minimum green,! maximum green,! yellow change and red clearance intervals,! left-turn operational mode, and! left-turn phasing.

2-3
Minimum Green
For actuated phases, the minimum and maximum green settings are important for efficientsignal operation (20). A long minimum green can be inefficient when queues are short. In contrast,a short minimum green may cause occasional premature phase terminations due to variation in queuedischarge time.
Five DOT documents identified recommended values for the minimum green setting. Thesevalues are listed in Table 2-2 and should be regarded as the shortest allowed minimum green setting.Idaho DOT recommends a minimum green setting of 4 s to provide “snappy” operation (i.e., rapidresponse to traffic demands). On the other hand, Minnesota, South Dakota, Utah, and Indiana DOTsrecommend major-road minimum green settings on the order of 8 to 20 s. South Dakota, Utah, andIndiana DOTs also recommend a minimum green setting equal to the sum of the pedestrian reactiontime and pedestrian clearance time, if pedestrians are present.
Table 2-2. Minimum Green Setting.State DOT Applicable Phases Minimum Green Setting, s 1
Idaho All 4
Indiana Through movement 10 to 20Left-turn movement 5 to 7
Minnesota Major-road through movement, 40 mph or less 15Major-road through movement, 45 mph or more 20Minor-road through movement 10Protected-only left-turn movement 7Protected-permissive left-turn movement 5
South Dakota Major-road through movement 12Minor-road through movement 7Left-turn movement 4
Utah High-speed through movement (more than 40 mph) 20Crossing and minor arterials through movement 15Minor road movement 4 to 5Left-turn movement 4 to 5
Note:1- Values shown are the shortest minimum green setting allowed; the actual minimum green used may be longer.
Minnesota, Utah, Indiana, and South Dakota DOTs also identify recommended minimumgreen settings for minor-road and left-turn movement phases. These values are shown in Table 2-2.All four DOTs indicated that these minimum green values were based on consideration of driverexpectancy. Minnesota DOT indicates that minimum green can vary depending on whether aprotected-only or protected-permissive left-turn mode is used. This distinction may reflect theadditional turning opportunities that are allowed by the protected-permissive mode.

2-4
Maximum Green
A long maximum green setting allows time for the controller to ensure effective queueclearance and, if advance detection is used, to ensure a safe phase termination. However, anunnecessarily long maximum green setting can result in excessive delay to other movements.
Idaho, Minnesota, and Utah DOTs use the following equation for calculating the maximumgreen setting for each phase:
(1)where,Gmax = maximum green setting, s.
The adjustment factor is used to account for random variation in vehicle arrivals each cycle. The“nominal green time” and “adjustment factor” variables used in this equation vary among the DOTs.The rationale for determining the nominal green time and the recommended factor values are listedin Table 2-3.
Table 2-3. Maximum Green Variables.State DOT Nominal Green Time, s Adjustment Factor
Idaho Average queue clearance time 1.2 to 1.3Minnesota 3.0 + 2.1×(average number of vehicles in queue per cycle) 1.5Utah Minimum-delay green interval duration 1.25 to 1.50
Minnesota DOT and Utah DOT also provide typical ranges of maximum green settings.These values are listed Table 2-4. It is interesting to note that Minnesota DOT’s document statesthat the maximum green may be as large as 120 s for a major-road through movement.
Table 2-4. Maximum Green Setting.StateDOT
Volume-Density
Feature Used?
Applicable Phases MaximumGreen Setting, s
Minnesota No Left-turn movement 10 to 45Minor-road through movement 20 to 75Major-road through movement 30 to 120
Yes Minor-road through movement 30 to 75Major-road through movement and speed less than 45 mph 45 to 120Major-road through movement and speed of 45 mph or more 60 to 120
Utah not specified not specified 15 to 60

2-5
Change Period
The change period provides the time necessary to safely end one vehicle phase and beginanother. The change period consists of the yellow change interval and the red clearance interval.These two intervals are individually discussed in this section.
Yellow Change Interval
The yellow change interval provides a warning to drivers that the phase is ending and right-of-way is being transferred to another phase (21). Most states use the following equation to calculatethe yellow change interval (22):
(2)
where,y = yellow change interval duration, s;t = perception-reaction time (use 1.0 s), s;v = approach speed, mph;a = deceleration rate (use 10 ft/s2), ft/s2; andg = approach grade, uphill grade is positive (= percent grade/100), ft/ft.
The Manual on Uniform Traffic Control Devices (MUTCD) states that the yellow change intervalshould be between 3 and 6 s (21).
The Florida and Idaho DOTs recommend yellow change interval durations that are differentfrom that computed by Equation 2. These durations are shown in Table 2-5. It is noted that IdahoDOT presents both the Equation 2 and the information in Table 2-5 as methods to determine yellowintervals. The Idaho DOT’s manual states that the values in Table 2-5 are intended to “present...thesame yellow [change] interval at comparable intersections” (5).
Two DOT documents provide additional guidance about yellow change intervals.Connecticut DOT’s signal manual states that yellow change intervals should not normally be longerthan 5 s (3). This type of restriction is recognized by other agencies and reflects a concern aboutdriver disrespect for long yellow change intervals (20). Minnesota DOT uses Equation 2, but roundsthe results up to the nearest 0.5 s, as long as the result does not exceed 6 s.

2-6
Table 2-5. Yellow Change and Red Clearance Intervals.Approach
Speed, mphEquation 2 Florida DOT Idaho DOT
YellowChange, s
RedClearance, s 1
YellowChange, s
RedClearance, s
YellowChange, s
RedClearance, s 1,2
25 3.0 2.3 3.5 1.0 3.2 2.130 3.2 2.0 3.5 1.0 3.2 2.035 3.6 1.7 4.0 1.0 3.2 2.140 3.9 1.5 4.0 1.0 4.0 1.445 4.3 1.3 4.3 1.0 4.0 1.650 4.7 1.2 4.7 1.0 4.0 1.955 5.0 1.1 5.0 2.0 4.0 2.160 5.4 1.0 5.4 2.0 5.0 1.465 5.8 0.9 5.8 2.0 5.0 1.7
Notes:1- Assumes intersecting road has five lanes (60 ft pavement), 6-ft stop line setback, and a 20-ft vehicle length.2- Red clearance interval is optional at speeds below 40 mph and required at higher speeds. It should not exceed 2.0 s.
Red Clearance Interval
As with the yellow change interval, most states use the following equation to calculate thered clearance interval (22):
(3)
where, r = red clearance interval duration, s; W = width of intersection, ft; and Lv = length of vehicle (use 20 ft), ft.
The red clearance interval is recognized as an optional interval in the MUTCD (21). For thisreason, its use varies widely among the DOTs. California DOT’s manual does not require the useof a red clearance interval and gives no equation for calculating its duration. This manual indicatesthat a red clearance interval should be applied if engineering judgment indicates it is needed, and ifused, the red clearance interval should be between 0.1 s and 2 s.
Florida DOT’s recommended red clearance intervals are shown in Table 2-5. These intervalsincrease with speed, unlike the values obtained from Equation 3.
Idaho DOT does not require a red clearance interval for approach speeds below 40 mph.Where used, the red clearance interval should be between 0.5 s and 2.0 s, adjusted using engineeringjudgment. This DOT’s guidelines indicate that the red clearance interval is computed by adding thevalues from Equations 2 and 3, and then subtracting the yellow change interval. The yellow changeintervals recommended by Idaho DOT are shown in column 6 of Table 2-5. The red clearance valuescomputed in this manner are listed in the last column of Table 2-5.

2-7
Utah DOT uses a red clearance interval of 1.5 s, regardless of approach speed or crossroadwidth. In contrast, Connecticut DOT uses Equation 4 to calculate the red clearance interval.
(4)
where, tc = time for clearing vehicle to clear conflict point (use 1.0 s), s; Dc = distance from clearing vehicle’s stop line to the farthest conflict point, ft; vc = clearing vehicle speed, mph; De = distance from entering vehicle’s stop line to the conflict point associated with Dc, ft; and ve = entering vehicle’s speed, (use 15 mph), mph.
Equation 4 estimates the minimum separation time between two conflicting vehicles asmeasured at the conflict point where their paths cross in the intersection conflict area. A conflictpoint is any point where the last vehicle clearing the intersection could collide with the first vehicleor pedestrian entering the intersection. The “critical” conflict point is defined by the conflictingmovement pairs that require the longest separation time for the subject phase.
Left-Turn Operational Mode
There are three operational modes for the left-turn movements at an intersection. Theyinclude: permissive mode, protected mode, and protected-permissive mode. The DOT documentsreviewed indicated a range of guidelines being used for determining the most appropriate mode ata particular intersection. These guidelines are summarized in this section.
Protected or Protected-Permissive Mode
This subsection describes guidelines used by several state DOTs to determine when a left-turn phase is appropriate. Many of these guidelines do not make a distinction between the protectedand protected-permissive modes. The Florida DOT manual is an exception. It indicates that theprotected-permissive mode is preferred. Common considerations in the formulation of left-turnphase selection criteria are provided in the following list:
! product of left-turn and oncoming through volumes (Arizona, California, Oregon, Virginia),! left-turn volume (South Dakota, Arizona, California, Indiana),! delay to left-turn vehicles (Arizona, California, Indiana), and! crash history (Arizona, California, Idaho, Minnesota, Oregon, Indiana, Virginia).
Some state DOTs have identified additional criteria that are not provided in the previous list.For example, California DOT recommends trying other options first to avoid the use of a left-turnphase. Florida and Connecticut DOTs require left-turn phases on both road approaches, even if onlyone direction appears to be justified. In contrast, Idaho DOT’s manual states that a left-turn phaseshould only be used on the intersection approach where it is justified.
The individual states do not agree on the actual thresholds to be used for the selection criteria.For example, Virginia DOT uses a product threshold of 50,000; California DOT uses a value of
2-8
100,000; Oregon DOT uses a range from 50,000 to 300,000 depending on the lane configuration andphasing type; and Arizona DOT uses a range from 50,000 to 225,000, depending on the laneconfiguration and whether the intersection is urban or rural.
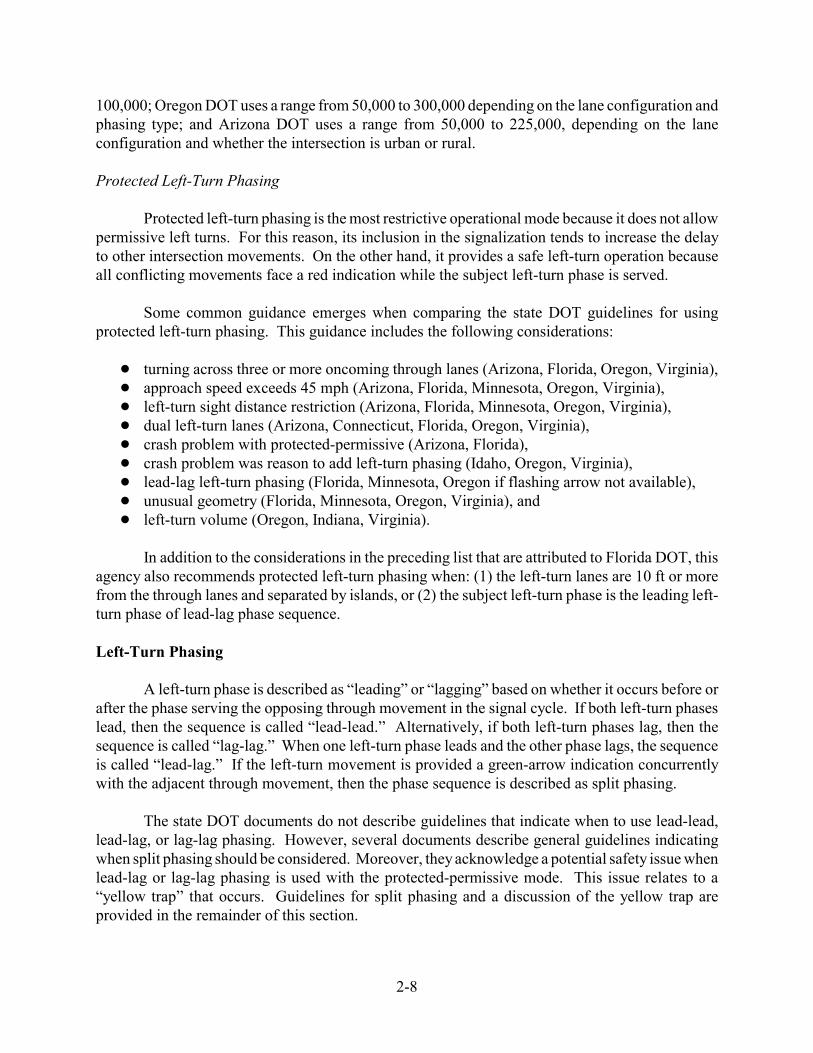
Protected Left-Turn Phasing
Protected left-turn phasing is the most restrictive operational mode because it does not allowpermissive left turns. For this reason, its inclusion in the signalization tends to increase the delayto other intersection movements. On the other hand, it provides a safe left-turn operation becauseall conflicting movements face a red indication while the subject left-turn phase is served.
Some common guidance emerges when comparing the state DOT guidelines for usingprotected left-turn phasing. This guidance includes the following considerations:
! turning across three or more oncoming through lanes (Arizona, Florida, Oregon, Virginia),! approach speed exceeds 45 mph (Arizona, Florida, Minnesota, Oregon, Virginia),! left-turn sight distance restriction (Arizona, Florida, Minnesota, Oregon, Virginia),! dual left-turn lanes (Arizona, Connecticut, Florida, Oregon, Virginia),! crash problem with protected-permissive (Arizona, Florida),! crash problem was reason to add left-turn phasing (Idaho, Oregon, Virginia),! lead-lag left-turn phasing (Florida, Minnesota, Oregon if flashing arrow not available),! unusual geometry (Florida, Minnesota, Oregon, Virginia), and! left-turn volume (Oregon, Indiana, Virginia).
In addition to the considerations in the preceding list that are attributed to Florida DOT, thisagency also recommends protected left-turn phasing when: (1) the left-turn lanes are 10 ft or morefrom the through lanes and separated by islands, or (2) the subject left-turn phase is the leading left-turn phase of lead-lag phase sequence.
Left-Turn Phasing
A left-turn phase is described as “leading” or “lagging” based on whether it occurs before orafter the phase serving the opposing through movement in the signal cycle. If both left-turn phaseslead, then the sequence is called “lead-lead.” Alternatively, if both left-turn phases lag, then thesequence is called “lag-lag.” When one left-turn phase leads and the other phase lags, the sequenceis called “lead-lag.” If the left-turn movement is provided a green-arrow indication concurrentlywith the adjacent through movement, then the phase sequence is described as split phasing.
The state DOT documents do not describe guidelines that indicate when to use lead-lead,lead-lag, or lag-lag phasing. However, several documents describe general guidelines indicatingwhen split phasing should be considered. Moreover, they acknowledge a potential safety issue whenlead-lag or lag-lag phasing is used with the protected-permissive mode. This issue relates to a“yellow trap” that occurs. Guidelines for split phasing and a discussion of the yellow trap areprovided in the remainder of this section.

2-9
Split Phasing
With split phasing, the green indications for all of the movements on a single intersectionapproach begin and end simultaneously. Some state DOTs, such as Florida and Arizona, describeguidelines for justifying split phasing. Arizona DOT’s guidelines indicate the use of split phasingwhen:
! the intersection has either offset legs or overlapping turning paths,! heavy left-turn volume and adjacent through volume,! no separate left-turn lane on approach, or! shared left-turn and through lanes.
Florida DOT’s requirements are similar to those used by Arizona DOT.
Yellow Trap
If the protected-permissive mode is used with lead-lag or lag-lag phasing, then the yellowtrap (or left-turn trap) problem may occur for one or both of the left-turn movements. This problemstems from the potential conflict between left-turn vehicles and oncoming vehicles at the end of theadjacent through phase. Of the two through movement phases serving the subject road, the trap isassociated with the first through movement phase to terminate and occurs during this phase’s yellowchange interval. The left-turn driver seeking a gap in oncoming traffic during the through phase firstsees the yellow ball indication, then incorrectly assumes that the oncoming traffic also sees a yellowindication; the driver then turns across the oncoming traffic stream without regard to the availabilityof a safe gap.
The yellow trap is illustrated in Figure 2-1. During Stage 1, the southbound and northboundleft-turn movements are operated in the permissive mode during their respective through phases.During Stage 2, the southbound left-turn and through signal heads display a yellow change interval.However, the northbound left-turn and through heads continue to display a green indication. Thiscondition can create a yellow trap for the southbound left-turn driver if he or she assumes thatnorthbound drivers are also viewing a yellow indication and preparing to stop. Following thisincorrect assumption, the southbound left-turn driver attempts to complete the left turn maneuvereven though he or she is exposed to oncoming traffic.
The state DOT manuals differ as to whether or not they specifically mention or describe theyellow trap. Nine of the 15 state DOT manuals mention the yellow trap. Six of these nine manualssuggest countermeasures. These countermeasures are summarized in the following paragraphs.
The yellow-trap countermeasure identified in the Washington State DOT manual is the useof a lead-lead phase sequence with phase recall for a crossroad through phase. This techniqueinsures that a crossroad phase always times after the subject road through phase and before its left-turn phase. However, the manual also acknowledges that this approach may unnecessarily delay themajor-road movements during periods of low crossroad volume.

2-10
Figure 2-1. Demonstration of Yellow Trap with Lead-Lag Phasing.
The yellow trap countermeasure identified in the Oregon DOT manual is based on the useof a permissive left-turn indication that is assigned to a controller overlap associated with theopposing through movement phase. The protected left-turn indications are assigned to the left-turnphase output. This operation eliminates the yellow trap by maintaining the permissive left-turnindication (as opposed to having it show a yellow indication) when the adjacent through phase ends.A flashing yellow arrow is used for the permissive left-turn indication by Oregon DOT.
The aforementioned countermeasure is also used by the City of Dallas, Texas where it isreferred to as “Dallas Phasing” (23). The only differences are that (1) the overlap is associated withboth the adjacent and opposing through movement phases, and (2) a louvered green ball indication
Yellow trap for south-bound left-turn vehicle
Southbound Indications
Northbound Indications
Stage 1
Stage 2
Stage 3
Southbound Indications
Northbound Indications
Southbound Indications
Northbound Indications
G G
G G
Y Y
G G
R R
G Gtime

2-11
is used for the permissive left-turn indication, as shown in Figure 2-2. The louvers are necessary toprevent the indication from being seen by drivers in the adjacent through lanes (21, Section 4D.08).
Figure 2-2. Dallas Phasing to Eliminate Yellow Trap.
Other state DOTs (e.g., Florida DOT and Connecticut DOT) require that the leading left-turnphase of a lead-lag phase sequence operate in the protected mode. While this countermeasureeliminates the yellow trap, it eliminates some of the efficiency gains afforded by the protected-permissive mode.
ADVANCED SIGNAL TIMING FUNCTIONS
Advanced signal timing functions address situations that are outside the normal stop-and-gooperation of a traffic signal. These functions include variable initial, gap reduction, flashingoperation and preemption. Other possible functions include time-of-day operation and coordination.However, due to considerable differences in signal timing practices between the states, only flashingoperation and preemption are addressed in this document.
Variable Initial Settings
In situations where detection is not provided at the stop line, the variable initial feature canbe used to ensure that the green interval is sufficiently long to discharge the stopped queue. Adetector located upstream of the intersection is used to count the number of vehicle actuationsduring the yellow and red indications, and then compute the green time needed (referred to as “addedinitial”) to clear the waiting queue.
At least three of the state DOT documents reviewed (i.e., Connecticut, Virginia, Minnesota)recommended the use of the variable initial settings. However, only Minnesota DOT’s manualprovides specific guidance for determining the variable initial settings.
Yellow trap eliminated
Stage 2Southbound Indications
Northbound Indications
Y
G G
G
Louvered lens

2-12
Gap Reduction Settings
The Minnesota, Utah, and Indiana DOTs use the gap reduction feature to minimize phasetermination by extension to the maximum limit (i.e., max-out). This feature is also used whenadvance detection is provided but stop line detection is not provided. Utah DOT’s manualrecommends the use of this feature whenever the associated phase passage time is greater than 3.0 s.
Controller settings associated with the gap reduction feature are: time before reduction, timeto reduce, and minimum gap. Gap reduction settings recommended by Utah DOT and MinnesotaDOT are shown in Table 2-6. Utah further recommends that the last car passage setting is off whenthe gap reduction feature is used with advance detection on high-speed approaches.
Table 2-6. Gap Reduction Settings.State DOT Setting Value
Minnesota Passage time 3.0 to 5.0 sTime before reduction one-third of maximum greenTime to reduce one-third of maximum greenMinimum gap at least 2.0 s
Utah Passage time 2.5 to 4.0 s, with 3.0 s typicalTime before reduction minimum greenTime to reduce (maximum green - minimum green)/2Minimum gap 2.0 to 3.0 s
Flashing Operation
In flashing operation, a traffic signal’s operation changes from its normal green-yellow-redcyclic pattern to a flashing single-indication pattern. Flashing operation is used to indicate amalfunction or to reduce the level of intersection control during periods of low volume. There aretwo types of flashing operation: planned and unplanned. These two types are discussed below.
Planned Flashing Operation
Planned flashing operation is called by the following names in the state DOT documents:“programmed,” “nighttime,” and “off-peak.” In each case, flashing operation is an intentional,planned event that is set to occur regularly at certain times of day. The motivation for this type ofoperation is to reduce delay and stops when traffic volume is low.
When planned flashing operation is used, 12 of the 15 state DOT documents reviewed usea “yellow-red” flash pattern, where the major-road through movement indications flash yellow andall of the minor movement indications flash red. Three state DOTs differed from this practice, theyinclude Idaho DOT, South Dakota DOT, and Oregon DOT. The Idaho and South Dakota DOTmanuals recommend that all signal indications on an approach should flash the same color (i.e., the

2-13
major-road left-turn indications should flash yellow if the adjacent through movement indicationsflash yellow). In contrast, the Oregon DOT manual uses “all-red” flash (i.e., all indications flash red)for all approaches as its standard flash mode. However, if the major-road to minor-road volume ratiois greater than 4:1, then yellow-red flash is allowed and the major-road left-turn phase indicationsmay flash red.
Each state DOT manual that discusses planned flashing operation uses somewhat differentcriteria for this operation. For example, the Connecticut DOT manual states that planned flash maybe used during hours that the signal does not meet the signal warrants. The Texas DOT manualstates that fully actuated intersections should not be placed in flash unless all other signals in the areaoperate in flash. At the other extreme, the Ohio DOT manual cites the following criteria should beconsidered before using planned flashing operation:
! No sight distance deficiencies exist on any leg of any approach.! The major-road volume is less than 200 veh/h, although flash may be allowed at higher
volumes if the major-road to minor-road volume ratio is greater than 3:1.! Do not begin flashing operation until one hour after local drinking establishments close.! Keep “some” signals in stop-and-go operation to prevent a “speedway effect.”! Monitor the crash history after implementation and revert to stop-and-go operation if:
" three or more right-angle crashes occur in one year, or" two right-angle crashes per million entering vehicles during flashing operation, if 3 to
5 right-angle crashes observed, or" 1.6 right-angle crashes per million entering vehicles during flashing operation, if 6 or
more right-angle crashes observed.
Florida DOT’s guidelines are similar to Ohio DOT’s, although less extensive. The IdahoDOT’s manual allows planned flashing operation if:
! adequate gaps exist for cross traffic,! intersection crash history does not show a tendency for right-angle collisions,! there is a high ratio of major to minor volumes,! crashes were not the reason the signal was installed,! sight distance is not a problem on any intersection approach, and! distraction and glare from flashing operation itself will not be a problem.
Generally, all state DOT documents agree that all intersections in an area that are to be placedin planned flash are to be put in flash simultaneously and that the pedestrian indications should bedark during flash.

2-14
Unplanned Flashing Operation
Unplanned flash occurs during a malfunction of the signal operating equipment. The purposeof unplanned flash is to provide safe intersection operation during periods where the signal isinoperable or functioning improperly. In most state DOT documents, unplanned flashing operationmust use “all-red” flash. The Connecticut and Minnesota DOT documents allow “yellow-red” flashduring unplanned flashing operation.
Other Uses of Flashing Operation
When starting a new traffic signal, a common practice is to use flash for a period of timeprior to beginning normal signal operations. The idea is to get drivers used to having the signal atthat particular intersection. However, the Idaho DOT signal manual states that using flashingoperation during signal start-up is “no longer preferred,” and recommends only using temporarywarning signs for two weeks after signal start-up (5).
The Minnesota DOT manual states that if an intersection is in flash, any advance warningdevices such as intersection warning signs should also flash during that time.
Preemption
Preemption is used with traffic signals to stop the current timing plan and implement analternative plan that provides extended service for another type of movement, including a non-roadway movement. Usually, safety is the prime motivation for using signal preemption. Thissection discusses the types of preemption sources that are accommodated and the operation of thetraffic signal during preemption.
Railroad Preemption
The various state DOT documents did not agree about whether the pedestrian change intervalcould be shortened by rail preemption. Most state DOTs do not allow the pedestrian change intervalto be shortened by rail preemption. The Oregon DOT manual specifically states that a pedestrianchange interval must occur prior to track clearance.
A survey of engineers in each of TxDOT’s 25 districts indicated that only about 4 percentof traffic signals statewide have railroad preemption. Of the signals with railroad preemption, about42 percent have advance preemption. Pedestrians are not present at intersections with preemptionin 20 percent of the districts. Engineers with the remaining 80 percent of districts were askedwhether they truncate the pedestrian Walk or Flashing Don’t Walk intervals. Twenty percent of thedistricts truncate just the Walk interval and 46 percent of the districts truncate both intervals. Thedistricts that truncate these intervals do so because the intersection does not have advancepreemption. These districts also use flashing operation during a railroad preempt. As soon asflashing operation begins, the pedestrian heads go dark and stay that way until the preempt ends.

2-15
Emergency Vehicle Preemption
Several state DOT documents mentioned emergency vehicle preemption, but differed onprovisions for it. The Oregon DOT manual requires the addition of emergency preemptionequipment with all new traffic signals. In contrast, the Ohio DOT is not convinced that emergencypreemption is worth the time and expense because no studies have shown that it necessarilyimproves response times or reduces emergency vehicle conflicts. Ohio DOT only providesemergency vehicle preemption by special request. Where used, emergency preemption is secondonly to railroad preemption in priority.
Transit and Light Rail Preemption
A few state DOT documents mentioned transit preemption. The Washington State DOTdoes not install transit preemption but will allow it if installed by transit agencies. In WashingtonState, light rail preemption is handled similarly to emergency vehicles rather than heavy rail. InOregon, light rail preemption may be exempt from heavy rail requirements. Oregon bus priority onlymodifies existing green times rather than changing phasing.
DETECTION DESIGN AND OPERATION
Most of the state DOT documents reviewed indicated a preference for inductive loopdetectors. The inductive loop has proven to be reliable, although installation can be inconvenientand the loops are vulnerable to damage due to pavement deterioration and shift. Only the MarylandDOT manual specifically states a preference for video detection. Most of the DOT documentsrecognize the use of video detection when loop detection is not viable.
Each state DOT’s standard detection layout is unique and reflects differences in operationalgoals, detection technology, climate, and pavement design. Most state DOTs indicate a preferencefor presence detection at the stop line. Some state DOT manuals identify standard detection designsfor high-speed intersection approaches, while others do not acknowledge the need for advancedetection. These differences in design philosophy result in detection designs that are difficult togeneralize and difficult to compare. At this time, specification of standard detection designs appearsto be a low priority among the state DOTs.
REFERENCES
1. Arizona Department of Transportation. ADOT Traffic Engineering Policies, Guidelines, andProcedures. Phoenix, Arizona, January 2000.
2. California Department of Transportation. Traffic Manual. Sacramento, California, November2002.
3. Connecticut Department of Transportation. Manual Of Traffic Control Signal Design.Hartford, Connecticut, 2001.
2-16
4. Florida Department of Transportation. Traffic Engineering Manual. Tallahassee, Florida,March 1999.
5. Idaho Transportation Department. Traffic Manual. Boise, Idaho, July 2006.
6. Indiana Department of Transportation. Design Manual. Indianapolis, Indiana, 1999.
7. Maryland State Highway Administration. Traffic Control Devices Design Manual. Annapolis,Maryland, July 2006.
8. Minnesota Department of Transportation. MnDOT Traffic Signal Timing and CoordinationManual. St. Paul, Minnesota, March 2005.
9. Minnesota Department of Transportation. MnDOT Signal Design Manual. St. Paul, Minnesota,March 2006.
10. Ohio Department of Transportation. Traffic Engineering Manual. Columbus, Ohio, October2002.
11. Oregon Department of Transportation. Traffic Signal Policy and Guidelines. Salem, Oregon,May 2006.
12. Oregon Department of Transportation. ODOT Signal Design. Salem, Oregon, 2006.
13. Oregon Department of Transportation. ODOT Traffic Signal Loop Layout Examples. Salem,Oregon, 2006.
14. South Dakota Department of Transportation. Road Design Manual. Pierre, South Dakota,2006.
15. Texas Department of Transportation. Traffic Signals Manual. Austin, Texas, December 1999.
16. Utah Department of Transportation. Guideline and Procedure Update: Timing of TrafficSignals. Salt Lake City, Utah, October 2003.
17. Utah Department of Transportation. Design of Signalized Intersections: Guideline andChecklist. Salt Lake City, Utah, March 2004.
18. Virginia Department of Transportation. Traffic Engineering Design Manual. Richmond,Virginia, 2006.
19. Washington State Department of Transportation. Design Manual. Olympia, Washington, June2005.

2-17
20. Federal Highway Administration. Signalized Intersections: Informational Guide. ReportFHWA-HRT-04-091, Washington, D.C., August 2004.
21. Federal Highway Administration. Manual on Uniform Traffic Control Devices, 2003 ed.,Washington, D.C., 2003.
22. Technical Council 4A-16. “Determining Vehicle Change Intervals: Proposed RecommendedPractice.” ITE Journal. Institute of Transportation Engineers, Washington, D.C., May 1985,pp. 61-64.
23. De Camp, G., and R.W. Denney, Jr. “Improved Protected-Permitted Left-Turn SignalDisplays–The Texas Approach.” ITE Journal. Institute of Transportation Engineers,Washington, D.C., October 1992, pp. 21-24.


3-1
CHAPTER 3. ALTERNATIVE DETECTIONDESIGNS FOR HIGH-SPEED APPROACHES
OVERVIEW
This chapter describes an evaluation of alternative detection designs used by TxDOT forhigh-speed intersection approaches. Detection for high-speed approaches typically consists ofmultiple advance detectors that are configured to extend the green indication until the approach isclear of vehicles. Research has shown that there is a length of roadway on every intersectionapproach in which drivers are collectively indecisive about whether to stop or go at the onset of theyellow indication. Advance detection is used to clear this “indecision zone” and thereby, reduce thepotential for rear-end crashes and red-light violations.
The objective of this research was to evaluate alternative high-speed detection designs usedin Texas and to identify the most effective design configurations. In this regard, the detection designfor a high-speed approach includes specification of the following factors:
! number of advance detectors,! use of a stop line detector, including:
" whether it uses a detector channel separate from that used for the advance detectors," whether it is functionally disabled after queue clearance,
! distance between each detector and the stop line, ! length of each detector,! use of presence or pulse mode detection, ! use of locking or non-locking memory,! duration of controller passage time (i.e., extension), and! use of supplemental call extension or delay for the detector channel input.
This chapter consists of three main parts. The first part of this chapter identifies the variousdetection designs used by the various TxDOT districts for high-speed approaches. The second partsummarizes the evaluation procedure. The last part describes the findings from the evaluation ofalternative designs.
EXISTING DETECTION DESIGNS
This part of the chapter summarizes the inductive-loop-based detection designs used in tenTxDOT districts for through movements on high-speed intersection approaches. It is believed thatthese designs are representative of those used by the other 15 districts. The first section describesthe detection layout of these designs. The second section describes the controller settings typicallyused with these designs. The last section summarizes the observations from this review andidentifies the issues that need to be resolved.

3-2
Detection Layout
The detection layout used by 10 TxDOT districts is identified in the top half of Table 3-1.The layout used by eight districts is listed in column 4. It has three advance detectors when thedesign speed is 55 mph or more and two advance detectors for design speeds of 45 and 50 mph.These detectors are more distant from the stop line for the higher design speeds. The stop linedetector is 40 ft long and is wired to one of two detector channels assigned to the phase that servesthe through movement. The second detector channel is assigned to the set of advance detectors. Thecontroller settings listed in this table are discussed in the next section.
Table 3-1. Detection Layout Used in Several TxDOT Districts.Category Design
SpeedDesign Element TxDOT District
8 Districts District P District KDetectionLayout
70 Distance from the stop line to the upstreamedge of the advance detector, ft
(Note: The number of distances listedindicates the number of advance detectors. All advance detectors are 6 ft in length)
600, 475, 350 ? 606, 481, 35665 540, 430, 320 ? 546, 436, 32660 475, 375, 275 320, 220, 140,
80481, 381, 281
55 415, 320, 225 421, 326, 23150 350, 220 356, 22645 330, 210 ? 296, 181
45 to 70 Stop line detector length, ft 40 not used 4045 to 70 Advance detector lead-ins wired to
separate channel from stop line detectorsYes not applicable Yes
ControllerSettings
70 Passage (extension) time, s 1.2 ? 1.0 to 1.5 1
65 1.2 ?60 1.4 1.5 to 2.0 1
55 1.250 2.045 2.0 ?
45 to 70 Detection mode Presence Presence Presence45 to 70 Detector memory Nonlocking Locking Nonlocking45 to 70 Stop line detector channel extend setting, s 0.5 s not applicable not used45 to 70 Stop line detector operation (deactivated or
continuously active) 2Deactivatedafter gap out
not applicable ?
Notes: 1 - Passage time is adjusted on an intersection-by-intersection basis within the stated range.2 - Stop line detector operation is “deactivated” if it is disconnected after its detector channel extend timer times out.
It is reconnected after the green interval terminates (see Special Detector, Operation Mode 4 in Eagle controller).? - Data were not provided by the district.
The detection layout for District K is very similar to that used by the other eight districts.In contrast, the layout used by District P is quite different from the other districts and is consistent

3-3
with a layout used by many TxDOT districts prior to about 1997 (1). It addresses design speeds inthe range of 50 to 60 mph and does not require a stop line detector.
Controller Settings
The controller settings associated with the most commonly used detection layout are listedin column 4 of Table 3-1. A unique passage time is established for each design speed and detectorlayout. The detectors operate in the presence mode with nonlocking memory. The use of separatechannels for the stop line and advance detectors allows the stop line detector to be electricallydisconnected by the controller when the detector’s extend timer times out. When this feature isenabled, it deactivates the stop line detector once the queue has been served so that the advancedetectors can efficiently search for a safe time to end the phase.
The controller settings for Districts P and K are listed in columns 5 and 6, respectively, ofTable 3-1. These designs do not include a stop line detector. For District P, the lack of a stop linedetector is offset by the use of locking memory such that a vehicle arriving during the red indicationis guaranteed to receive a green indication.
Observations
The information in Table 3-1 indicates that most districts are using the same detection layout.The layout used by District P does not appear to be widely used and is not fully specified. In fact,a before-after evaluation of the District P design and the “8 Districts” design was conducted byMiddleton et al. (1). They found that the “8 Districts” design resulted in fewer vehicles being caughtin the indecision zone and fewer vehicles running the red indication.
A comparison of the controller settings used by the “8 Districts” with those used byDistrict K indicates some difference in strategy. Specifically, there appears to be a preference forflexibility in the selection of passage time in District K. Also, District K, and many other districtsinterviewed, indicated that they do not use “deactivated” stop line detector operation.
EVALUATION FRAMEWORK
This part of the chapter describes the framework used to evaluate the operational and safetyperformance of alternative controller settings for through movement detection on high-speedintersection approaches. It identifies the recommended performance measures and the methods usedto compute these measures.
Recommended Performance Measures
The recommended operational performance measures include control delay and max-outprobability. Control delay is computed for all intersection movements and then used to computethe overall average intersection delay. Desirably, a detection design will minimize intersectiondelay. This delay can be computed using the methodology described in the Highway CapacityManual (2).
3-4
Max-out probability represents the likelihood that the green interval will extend to itsmaximum limit. When a phase is terminated in this manner, it is likely that vehicles will be on theintersection approach at the onset of yellow. These vehicles will undergo a lengthy delay waitingfor the next green indication. They are also more likely to be involved in a rear-end crash shouldthey decide to stop and the following driver decide to continue through the intersection. With regardto this latter behavior, max-out can also be considered to be a safety performance measure. Themax-out probability can be computed using the procedure described by Bonneson et al. (3).
The safety performance of each scenario can be evaluated in terms of its detection coverage.This measure is an indication of the extent to which the detection design minimizes the probabilityof one or more vehicles being in the indecision zone at the onset of the yellow indication. It iscomputed for the distribution of vehicle speeds and volumes during the design hour. The remainderof this section describes a procedure for computing detection coverage. Detection Coverage
The detection design for a high-speed intersection approach should provide efficientoperation and safe phase termination. Safe termination is achieved when an advance detectiondesign is used to monitor the indecision zone during the green indication and extend the green whenone or more vehicles are in this zone. Practical considerations dictate that such designs include onlyone, two, or three points of detection within the zone. Passage time is then used to “carry” a vehiclefrom one detector to the next until it is clear of the zone.
An effective detector design is one that provides an optimal balance between safety andoperations. For example, if a short passage time is used, it becomes easier to end the major-roadphase by gap out, resulting in a shorter average cycle length and reduced delay to minor-roadvehicles. However, a short passage time is also more likely to result in a gap out when there arevehicles in their indecision zone, with a resulting reduction in safety. Similarly, long passage timestend to increase delay and cause phase termination by max-out (which also reduces safety).
This section examines the safety trade-offs associated with alternative detection designs. Theinsights obtained are used to develop a procedure for evaluating the safety of the detection design.The examination is based on the probability of stopping at the onset of the yellow indication as afunction of a vehicle’s travel time to the intersection. Research indicates that this probabilityincreases with increasing travel time to the stop line (3). The complement of this probability is theprobability that the driver will continue through the intersection (i.e., go). The probability ofstopping and the probability of going are shown in Figure 3-1.
At a given travel time from the stop line, a “dilemma” is defined to exist if there is both anonzero probability of stopping and a nonzero probability of going. The probability of a dilemmais represented as the product of these two probabilities. This probability is shown by the curve inFigure 3-2. The area under this curve represents the “possible exposure” to a dilemma on anintersection approach that does not have advance detection. The probability of a dilemma is at itsmaximum value when the probability of stopping and the probability of going both equal 0.5.

3-5
Figure 3-1. Probability of Stopping or Going at Yellow Onset.
Figure 3-2. Probability of Dilemma.
Advance detection is used to minimize the exposure to the stop-or-go dilemma by sensingwhen a vehicle is in its indecision zone and extending the green indication until the vehicle isdownstream of this zone. Ideally, the first advance detector would be placed 7 s travel time from thestop line and the passage time setting would be sufficiently long to hold the green until the vehiclereaches the next advance detector or the stop line.
In the aforementioned idealized situation, the driver’s exposure to a dilemma is eliminatedby the detection design. However, practical considerations limit the number of advance detectorsthat can be used as well as their maximum distance from the stop line. Moreover, experience
0.0
0.2
0.4
0.6
0.8
1.0
1 2 3 4 5 6 7
Travel Time to Stop Line at Yellow Onset, s
Prob
abili
ty
Probability of StoppingProbability of Going
0.00
0.05
0.10
0.15
0.20
0.25
0.30
0.35
1 2 3 4 5 6 7
Travel Time to Stop Line at Yellow Onset, s
Prob
abili
ty o
f Dile
mm
a
Possible Exposure

3-6
(5)
indicates that full indecision zone coverage results in lengthy green extension during moderate tohigh volumes. Lengthy extension causes vehicles waiting for service in conflicting phases to incursignificant delay and often results in phase termination by max out. When a phase terminates bymax out, any indecision zone protection provided by the advance detection is lost. For these reasons,the detection design and passage time are often designed to provide indecision zone protection foronly that portion of the traffic stream associated with the greatest probability of dilemma.
Figure 3-3 illustrates the manner by which advance detection can provide indecision zoneprotection for an intersection approach. The approach has three advance detectors and a passagetime of about 1.0 s. The most distant advance detector is located at a travel time of 5.2 s. Thisparticular detection design is not a “good” design because the passage time is inadequate to carry thevehicle to the next detector before passage time expires. Thus, the yellow will be presented whilethe vehicle is in its indecision zone. All such exposures to a dilemma on this approach are illustratedby the shaded portions under the curve. In contrast, the instances where indecision zone protectionis provided are illustrated by the unshaded portions under the curve. The summation of the unshadedportions represents the “detector coverage.”
Figure 3-3. Indecision Zone Protection Provided by Advance Detection.
A useful measure of the quality of an advance detection design is the probability of indecisionzone coverage. It represents the probability that a vehicle will receive indecision zone protectionwhen traveling along the intersection approach at the onset of the yellow indication. It is computedas the ratio of detector coverage to possible exposure and is defined using the following equation:
where,Pcov|gap = probability of indecision zone coverage, given that the phase ends by gap out.
0.00
0.05
0.10
0.15
0.20
0.25
0.30
0.35
1 2 3 4 5 6 7
Travel Time to Stop Line at Yellow Onset, s
Prob
abili
ty o
f Dile
mm
a
Detector Coverage
DetectorPassage time

3-7
(6)
(7)
To accurately quantify detector coverage and possible exposure, the probability of dilemmamust be assessed for the distribution of approach speeds. This assessment can be computed for bothstatistics in a discrete manner by evaluating every possible speed in 1-mph increments. Specifically,the overall detector coverage and possible exposure used in Equation 5 are each computed as aweighted average of their individual values for each speed, where the weight used for each individualvalue equals the probability of the corresponding speed.
When the green interval is extended to its maximum limit, the phase ends arbitrarily and anyindecision zone protection provided by the detection design is lost. Thus, the probability of max-outmust be included in the evaluation of detection coverage. The following equation is used to computethe overall probability of coverage, with consideration given to the probability of phase terminationby max out.
where,Pcov = probability of indecision zone coverage;Pmax = probability of max-out; and
Pcov|max = probability of indecision zone coverage, given that the phase ends by max out (= 0.0).
As a final step, the probability of indecision zone coverage (i.e., detection coverage) isadjusted to address performance for the expected range of traffic volume. A volume-weightedaverage probability is computed for this purpose. This overall average is computed using thefollowing equation:
where,Pcov, tot = weighted average probability of indecision zone coverage; and
qi = volume for subject phase in scenario i, veh/h/lane.
The probability of indecision zone coverage can be used to assess the level of safetyassociated with alternative detection designs. A larger probability indicates greater indecision zonecoverage and theoretically fewer crashes. A value of 1.0 indicates that max-out never occurs andthe entire traffic speed distribution is provided detection coverage. A low probability indicates thatthe phase frequently ends by max-out, the advance loops are poorly located, the advance loops aretoo few in number, or the passage time is too short to allow vehicles to reach subsequent advancedetectors in time to extend the green interval.
EVALUATION OF EXISTING DESIGNS
This part of the chapter describes an evaluation of the 8 Districts detection layout, asdescribed in Table 3-1. The evaluation consisted of the application of the framework described inthe previous part, but repeated for each of several analysis scenarios. Each scenario consists of aunique combination of design speed, 85th percentile speed, traffic volume, stop line detectoroperation, and passage time. The results of the evaluation were used to define application guidelines

3-8
for the 8 Districts design. These guidelines identify a range of speeds and passage times for whicheach design will provide acceptable detection coverage.
Analysis Scenarios
All analysis scenarios were based on traffic and signalization conditions at an isolatedintersection serving two intersecting highways. The intersection operated with a simple “two-phase”phase sequence where the major-road movements are served in one phase and the minor-roadmovements are served in the second phase. Turn movements were not represented at the intersectionbecause they are not relevant to the evaluation of detection designs for through movements. Table 3-2 lists the intersection conditions that are the same for all analysis scenarios.
Table 3-2. Common Variables for Analysis Scenarios.Category Variable Values by Road Category
Major Road Minor RoadSignalization Minimum green setting, s 10 10
Maximum green setting,1 s 40, 60, 80 40Yellow change plus red clearanceinterval, s
(speeds listed are 85th percentile speed)
30 mph: 4.0 35 mph: 4.540 mph: 4.0 45 mph: 4.550 mph: 5.0 55 mph: 5.560 mph: 5.5 65 mph: 6.070 mph: 6.5 75 mph: 7.0
4.0
Passage time, s varies 1.6Phase recall Recall to Minimum noneDetection mode Presence PresenceDetector memory Nonlocking Nonlocking
Detection Layout Stop line detector length, ft 40 40Advance detector location, ft varies not used
Other Through lanes per approach 2 1Saturation flow rate, veh/h/lane 1700 1700Start up lost time, s 2.0 2.0
Note:1 - Major-road maximum green varies with major-road volume as follows: 40, 40, 60, and 80 s for volumes of 100, 200,
300, and 400 veh/h/lane, respectively.
The variables used to define the analysis scenarios are listed in Table 3-3. Each uniquecombination of variables represents one analysis scenario. A total of 2016 scenarios (= 6×7×4×2×6)were created through this process. All scenarios include a 40-ft stop line detector. Efficientoperation with this length of detector requires a minimum passage time of 1.0 s. Preliminaryanalyses indicated that the passage time providing the best operation was in the range of 1.0 to 2.0 s.
The 85th percentile speed was varied in 5 mph increments over a range of feasible values.This range was linked to the design speed of the detection layout, as indicated in Table 3-1.

3-9
Specifically, seven values of the 85th percentile speed were computed for each detection designspeed. For example, 85th percentile speeds of 35, 40, 45, 50, 55, 60, and 65 mph were evaluated forthe design speed of 50 mph. This approach allowed each design to be evaluated for a range ofspeeds. More robust designs would accommodate a wider range of speeds, such as may occur overthe course of the day, month, or year, or when the speed limit is changed.
Table 3-3. Alternative Variable Values for Analysis Scenarios.Variable Values
Detection design speed, mph 45, 50, 44, 60, 65, 7085th percentile speed, 1 mph Design speed ± 0, 5, 10, 15Major-road traffic volume, veh/h/lane 100, 200, 300, 400Minor-road traffic volume, 2 veh/h/lane 40, 80, 120, 160Stop line detector operation Continuously Active, DeactivatedPassage time, s 1.0, 1.2, 1.4, 1.6, 1.8, 2.0
Notes:1 - Seven combinations of 85th percentile speed. Combinations are computed to equal the design speed plus 0, 5, 10,
or 15 mph and design speed minus 5, 10, or 15 mph.2 - Minor-road volume is 40 percent of major-road volume for each scenario.
Detector Coverage
Concepts
The typical relationship between detector coverage and 85th percentile speed is shown inFigure 3-4. As noted previously, detector coverage is represented as the volume-weighted averageprobability of indecision zone coverage. The trend lines shown in the figure represent a detectorlayout based on a design speed of 55 mph and a stop line detector that is active. Each curverepresents a different passage time value. The largest probability of coverage is shown to occurwhen the 85th percentile traffic speed is close to the design speed. However, the decrease inprobability is relatively small when the 85th percentile speed is only slightly faster or slower than thedesign speed. A passage time of 1.0 s is shown to provide the best coverage for this detectiondesign. The coverage is lower when the passage time is slightly shorter, or longer, than 1.0 s.
The trends in Figure 3-4 are typical of those found for the other detector designs. In eachcase, there was an optimal combination of speed and passage time. Fortunately, the coverage trendline is often sufficiently flat near these optimal values that slight variations from optimal do notsignificantly degrade the coverage. This characteristic suggests that the detection designs evaluatedare robust such that they can accommodate changes in speed that may occur throughout the day,month, or year. In terms of the passage time, this characteristic allows for small adjustments to bemade in the passage time setting for the purpose of reducing delay without significantlycompromising the design’s indecision zone coverage.

3-10
0.5
0.6
0.7
0.8
0.9
1.0
40 45 50 55 60 65 70
85th Percentile Speed, mph
Prob
abili
ty o
f Ind
ecis
ion
Zone
C
over
age
1.0 s
0.8 s
2.0 s Passage Time
Detector layout based on a 55 mph design speed.Stop line detector active.
0.0
0.2
0.4
0.6
0.8
1.0
45 50 55 60 65 70
Design Speed, mph
Prob
abili
ty o
f Ind
ecis
ion
Zone
C
over
age
Stop line detector deactivated Stop line detector active
Figure 3-4. Typical Detector Coverage Relationships.
Guideline Development Process
Optimum values of speed and passage time were identified for each of the 8 District detectionlayouts using the scenarios described in the previous section. Relationships similar to those shownin Figure 3-4 were developed for each layout. The resulting detector coverage is shown in Figure 3-5as a function of design speed and stop line detector operation.
Figure 3-5. Detector Coverage as a Function of Design Speed and Detector Operation.
The trends shown in Figure 3-5 indicate that the coverage provided by each detection designis about the same, regardless of design speed. More notably, the stop line detector operation is

3-11
shown to have a significant influence on coverage. Leaving the stop line detector active during thegreen interval consistently reduces the coverage to 80 percent or less. That is, under otherwiseoptimal passage time and speed conditions, an advance detection system with an active stop linedetector is likely to provide indecision zone protection for only 70 to 80 percent of vehicles. Incontrast, the deactivated stop line detector operation will provide detector coverage to about93 percent of vehicles. These percentages shown in Figure 3-5 represent low-to-moderate volumes.They decrease by about 10 percent for high volume conditions (i.e., 600 veh/h/lane or more).
The passage time and speed combinations that provide optimum coverage for each of the8 District detection layouts were used to identify alternative passage times that provided near-optimum coverage for a reasonable range in speed. These alternative times and speed ranges formedthe basis for the application guidelines for the 8 District layouts. The following criteria were usedto were used to develop these guidelines:
! For a given design speed, the minimum 85th percentile speed equals the optimum 85th
percentile speed minus 5 mph and the maximum 85th percentile speed considered equals theoptimum speed plus 5 mph.
! The probability of indecision zone coverage for the alternative passage time (when evaluatedat its minimum and maximum 85th percentile speeds) has to be within 0.05 of the optimumcoverage probability.
Using the aforementioned criteria, a range of acceptable passage times was identified for a10-mph range centered on the optimum coverage speed. Combinations of passage times within thisrange would correspond to coverage probabilities that are within 0.05 of the optimum coverage.
Application Guidelines
The application guidelines based on detection coverage analysis are shown in Figure 3-6.Figure 3-6a applies when the stop line detector is deactivated. It is also applicable if stop linedetection is not provided. Figure 3-6b is used when the stop line detector is continuously active.Each column in Figure 3-6a or 3-6b corresponds to one detection layout for a given design speed.
Figure 3-6 can be used to select the appropriate passage time for a given detection layout. Forexample, consider an intersection with a detection layout corresponding to a 60-mph design speedand a stop line detector that is deactivated following the first gap out. Figure 3-6a indicates that aneffective passage time for this location is 1.6 to 2.0 s. The “+” symbol indicates that a passage timeof 2.0 s provides the best overall coverage. In contrast, if the stop line detector is active, thenFigure 3-6b indicates that the passage time should range from 1.0 to 1.2 s. The passage time of 1.0 sprovides the best coverage; however, values as large as 1.2 s provide acceptable coverage.
Figure 3-6 can be used to select the appropriate detection layout for a given intersectionapproach. For example, consider an intersection approach with an 85th percentile traffic speed of60 mph. The upper section of Figure 3-6a (labeled “85th Percentile Traffic Speed Range”) indicatesthat the 8 District detection layout for a 60-mph design speed will provide effective coverage. In

3-12
fact, this particular layout provides good coverage should the 85th percentile speed drop to 51 mph(or increase to 61 mph) during the day, month, or year.
“+” indicates desirable passage time.
a. Stop Line Detector Deactivated. b. Stop Line Detector Active.
Figure 3-6. Effective Passage Time Settings by Speed and Detector Operation.
45 45 50 50 55 55 60 60 65 65 70 70
404142 424344 44454647484950 505152 525354 545556 5657585960 60616263 63646566 666768 686970717273 737475767778 78798081828384
1.0 + 1.0 + 1.0 + 1.0 1.01.11.2 1.2 1.2 1.2 + 1.21.31.4 + 1.4 1.41.5 1.5 1.51.6 1.6 + 1.61.71.81.92.0
Design Speed, mph
85th
Per
cent
ile T
raffi
c S
peed
Ran
ge, m
phPa
ssag
e Ti
me
Ran
ge, s
45 45 50 50 55 55 60 60 65 65 70 70
40 40 40414243444546 46474849 4950 5051 515253545556 565758 58596061 616263 636465666768 686970717273 737475767778798081828384
1.01.11.21.31.4 1.4 1.41.5 1.5 1.51.6 + 1.6 1.6 1.6 1.61.71.8 1.8 1.8 1.8 + 1.81.92.0 + 2.0 + 2.0 2.0 + 2.0 + 2.0 2.0
Pass
age
Tim
e R
ange
, s85
th P
erce
ntile
Tra
ffic
Spe
ed R
ange
, mph
Design Speed, mph

3-13
The traffic speed ranges shown in Figure 3-6a are similar to those shown in Figure 3-6b inmost cases. However, the passage time ranges in Figure 3-6b are narrower than those in Figure 3-6a,and the passage time values are lower. These differences are a consequence of the stop line detectoroperation. When the stop line detector remains active, it continues to extend the green phase andincreases the probability of max-out. To mitigate the increase in max-out probability, it becomesnecessary to use shorter passage times. However, shorter passage times increase the probability ofindecision zone exposure when gap-out occurs. Thus, a reduction in indecision zone coverageresults when the stop line detector is allowed to remain active, as shown previously in Figure 3-5.
Control Delay and Max-Out Probability
The section examines the effect of passage time and stop line detector operation onintersection delay and the max-out probability for the major-road through movement. Intersectiondelay represents the total delay incurred for all intersecting movements divided by the total numberof vehicles served by the intersection. As such, it provides an indication of the effect of a detectiondesign on the overall intersection operation.
The effect of passage time and stop line detector operation on intersection delay is shown inFigure 3-7. In Figure 3-7a, it is shown that a 2.0 s passage time is associated with longer delay thana 1.0 s passage time. If fact, passage times shorter than 1.0 s are also associated with a longer delay.This latter trend occurs because the phase occasionally gaps out prematurely and results in previouslyqueued vehicles having to wait for another signal cycle. In general, passage times of 1.0 to 1.5 sprovide the lowest delay when a 40-ft detector is used at the stop line. These values increase if thestop line detector length is shorter than 40 ft.
a. Passage Time. b. Stop Line Detector Operation.
Figure 3-7. Delay as a Function of Passage Time and Detector Operation.
The effect of stop line detector operation is shown in Figure 3-7b. The trend lines indicatethat this operation has negligible effect on delay for a lane volume of 300 veh/h/lane or less. Using
0
2
4
6
8
10
12
14
0 100 200 300 400 500
Major-Road Volume, veh/h/lane
Inte
rsec
tion
Del
ay, s
/veh
55 mph design speed55 mph 85th % speedStop line detector active40 ft stop line detector
1.0 s passage time
2.0 s passage time
0
2
4
6
8
10
12
0 100 200 300 400 500
Major-Road Volume, veh/h/lane
Inte
rsec
tion
Del
ay, s
/veh
55 mph design speed55 mph 85th % speed2.0 s passage time40 ft stop line detector
Stop line detector active
Stop line detector deactivated

3-14
the deactivated operation will yield lower delay when the volume exceeds this level because theprobability of max out will decrease.
The effect of passage time and stop line detector operation on max-out probability is shownin Figure 3-8. As indicated by Figure 3-8a, when passage time is increased, the major-road greeninterval is extended to its maximum more frequently, especially at higher volumes. As a result,minor-road vehicles arriving at the intersection during the red indication are forced to wait longerfor service. Phase termination by max-out also has a safety consequence because it effectivelydisables the indecision zone protection provided by the advance detectors. Figure 3-8b indicates thatthe deactivated stop line detector operation significantly reduces max-out probability.
a. Passage Time. b. Stop Line Detector Operation.
Figure 3-8. Max-Out Probability as a Function of Passage Time and Detector Operation.
REFERENCES
1. Middleton, D., R. L. Nowlin, M. Shafer, A. H. Parham, and D. Jasek. Evaluation of DetectorPlacement for High-Speed Approaches to Signalized Intersections. Report No. TX-98/3977-1.Texas Transportation Institute, College Station, Texas, September 1997.
2. Highway Capacity Manual 2000. 4th ed. Transportation Research Board, Washington, D.C.,2000.
3. Bonneson, J.A., P.T. McCoy, and B.A. Moen. Traffic Detector Design and EvaluationGuidelines. Research Report No. TRP-02-31-93. University of Nebraska, Lincoln, Nebraska,April, 1994.
0.0
0.1
0.2
0.3
0.4
0.5
0 100 200 300 400 500
Major-Road Volume, veh/h/lane
Max
-Out
Pro
babi
lity
1.0 s passage time
2.0 s passage time
55 mph design speed55 mph 85th % speedStop line detector active
0.0
0.1
0.2
0.3
0.4
0.5
0 100 200 300 400 500
Major-Road Volume, veh/h/lane
Max
-Out
Pro
babi
lity
55 mph design speed55 mph 85th % speed2.0 s passage time
Stop line detector deactivated
Stop line detector active

4-1
CHAPTER 4. EVALUATION OF SIGNAL CONTROLLER SETTINGS
OVERVIEW
Interviews with TxDOT engineers and technicians were conducted to identify areas whereadditional signal timing guidance may be helpful. The findings from these interviews indicated theexistence of variation among districts in the preferred maximum and minimum green settings foractuated phases. This chapter describes the research undertaken to develop recommendedguidelines for selecting appropriate maximum and minimum green settings. The first part of thechapter summarizes a review of practice on this topic. The last part summarizes an evaluation ofalternative maximum and minimum green settings.
REVIEW OF PRACTICE
This part of the chapter summarizes a review of the literature on the topic of maximum greensetting and minimum green setting for an actuated phase. The review includes the findings fromseveral surveys of practice and the guidance provided in several engineering reference documents.The first section addresses the maximum green setting and the second section addresses theminimum green setting.
Maximum Green
This section describes the maximum green settings used in practice. The discussionaddresses the setting values used for both left-turn phases and through phases. The first subsectionpresents the findings from several surveys on this topic. The second subsection presents theguidance offered in various documents for determining the appropriate maximum green setting.
Survey of Engineers
This subsection summarizes the findings from two surveys that were conducted on topicsrelated to signal timing practice. One survey was conducted by the researchers. It focused on thepractices of TxDOT engineers. The other survey was conducted by Tarnoff and Ordonez (1). Theysurveyed more than 100 state, city, and county agencies responsible for traffic signal operations.One question in this survey inquired about the typical maximum “phase” time used in thejurisdiction, as opposed to the maximum green setting. However, the context of the discussionindicates that the responses provided to the survey refer to the maximum green setting. Nodistinction was made between values used for left-turn phases and for through phases. Thedistribution of the replies to this question is shown in Figure 4-1. It is labeled “Nationwide Survey.”
The trends in Figure 4-1 show that a wide range of maximum green settings is usednationwide. The nationwide survey indicates that most agencies (37 percent) use maximum greensettings in the range of 51 to 100 s. In contrast, only 5 percent of agencies use maximum greensettings less than 50 s. Although not explicitly stated, it is likely that the respondents reported thevalue they use for a through-movement phase (as opposed to a left-turn phase).

4-2
Figure 4-1. Distribution of Maximum Green Values Used in Practice.
Also shown in Figure 4-1 are the maximum green settings reported during the survey ofTxDOT districts. These findings are based on the responses provided by 19 of the 25 districts. Noresponse was provided to this question by six districts. The question was specific to the maximumgreen used for the typical through movement phase. Almost all districts (84 percent) use a maximumvalue of 45 s or less. The average of the reported values is 38 s with a range of 20 to 60 s.
Further examination of the TxDOT responses indicates that there was some correlationbetween the maximum green setting for through phases and road usage. The districts with the mostvehicle-miles of travel typically used maximum green settings in the range of 40 to 60 s. In contrast,those districts with the least vehicle-miles of travel typically used maximum green settings in therange of 25 to 40 s.
The TxDOT districts were also asked about the typical maximum green setting used for left-turn phases. The average maximum green setting for this case is 20 s with a range of 10 to 35 s. Acomparison of the maximum green settings reported by each district indicates that it is fairlycommon to have the maximum green for a left-turn phase equal about one-half that used for thethrough phase.
Literature Review
Maximum Green Calculation. A review of the literature indicates that guidance regardingthe maximum green setting is predominantly based on traffic volume, where the volume consideredis that of the peak period (2). The stated objective is to choose a maximum green setting that issufficiently large that the frequency of extension to the maximum green limit is minimal during theday and, if it occurs, it is limited to the peak demand periods.
0
10
20
30
40
50
60
70
80
90
0 - 50 51 - 100 101 - 150 151 - 200 No policy
Maximum Green Setting, s
Perc
enta
ge
TxDOT Survey
Nationwide Survey

4-3
Two basic approaches are followed when using traffic volume to estimate the maximumgreen setting. One approach is based on the calculation of the optimum green duration Go for theintersection based on pretimed signal operation (3, 4, 5, 6). This duration can be obtained from asoftware product (e.g., PASSER II) that finds the minimum-delay timing plan through some type ofoptimization algorithm. It can also be calculated using the critical movement analysis technique (6).With this procedure, the following equation is used to estimate the minimum-delay cycle length:
where,Co = minimum-delay cycle length, s; L = total lost time (= 4 np), s; np = largest number of phases used in a ring (consider both rings); andvc,i = critical movement volume for phase i, veh/h/lane.
The optimum green duration is computed as:
where,Go = optimum green interval duration for phase i, s; L = total lost time (= 4 np), s; andYi = change period for phase i, s.
The maximum green interval is computed using the following equation:
where,Gmax, i = maximum green setting phase i, s; and
f1 = adjustment factor.
The recommended adjustment factor typically varies from 1.25 to 1.50 (3, 4, 5, 6). Lin (4)indicates that intersection operation is not significantly affected by the value chosen for the factor,provided that it is used to establish the maximum green setting for all signal phases. However, largervalues of this factor should be used cautiously because long maximum green settings can yieldlengthy delays when a detector fails or a car stalls on the detector (2).
A second approach for determining the maximum green setting is based on the average queueservice time during the peak period (2, 7). Initially, a desired cycle length for equivalent pretimedoperation is selected. Then, the average number of arrivals per cycle n is computed. Finally, thequeue service time is computed using the following equation:
(8)
(9)
(10)
(11)

4-4
where,Gs = average queue service time for phase i, s; andni = number of arrivals per cycle for phase i, veh/cycle.
The maximum green interval is computed using the following equation:
where,Gmax, i = maximum green setting phase i, s; and
f2 = adjustment factor.
The recommended adjustment factor varies from 1.2 to 1.3 and is intended to estimate the queueservice time needed for most signal cycles. The maximum green values obtained from this approachare typically about 25 percent smaller than those obtained from Equation 10.
Typical Maximum Green Settings. Two state agencies have specified typical maximumgreen settings in their respective signal timing manuals. These settings are summarized in Table 4-1.The range of maximum green settings offered in this table for the major approach through phase isconsistent with the findings noted in Figure 4-1 for the nationwide survey. Also, the range offeredfor the left-turn phase is about one-half that use for the through phase. This trend is consistent withthe findings from the survey of TxDOT districts.
Table 4-1. Typical Ranges of Maximum Green Settings Used by Two State DOTs.Phase Condition Maximum Green Setting, s State DOT
Left-turn All 10 to 45 Minnesota (6)Through Minor approach 20 to 75
Major approach 30 to 120Left-turn or through All 15 to 60 Utah (5)
Minimum Green
This section describes the minimum green settings used in practice. The discussion addressesthe setting values used for both left-turn phases and through phases. The first subsection presentsthe findings from two surveys on this topic. The second subsection presents the guidance offeredin various documents for determining the appropriate minimum green setting.
Survey of Engineers
This subsection summarizes the findings from the two surveys described in the previoussection. In the nationwide survey, one question inquired about the typical minimum “phase” timeused in the jurisdiction, as opposed to the minimum green setting. However, the context of thediscussion indicates that the responses provided to the survey refer to the minimum green setting.
(12)

4-5
No distinction was made between values used for left-turn phases and for through phases. Thedistribution of replies to this question is shown in Figure 4-2 and labeled as “Nationwide Survey.”
Figure 4-2. Distribution of Minimum Green Values Used in Practice.
The trends in Figure 4-2 show that a wide range of minimum green settings is usednationwide. Most agencies (42 percent) use minimum green settings in the range of 3 to 5 s. Incontrast, only 9 percent of agencies use minimum green settings of 50 s or more. Although notexplicitly stated, it is likely that the respondents reported the values used for through phases (asopposed to left-turn phases).
Also shown in Figure 4-2 are the minimum green settings reported during the survey ofTxDOT districts. These findings are based on the responses provided by 22 of the 25 districts. Noresponse was provided to this question by three districts. The question was specific to the minimumgreen used for the typical major-road through movement phase. Almost all districts (82 percent) usea minimum value in the range of 6 to 10 s. The average of the reported values is 9 s with a range of5 to 20 s.
The TxDOT districts were also asked about the typical minimum green setting used forminor-road through phases and left-turn phases. The average minimum green setting for minor-roadphases is 7 s with a range of 4 to 10 s. The average minimum green setting for a left-turn phase is6 s, with a range of 4 to 10 s.
Literature Review
The review of the literature indicated that the minimum green setting for through movementsmay be based on one or more of the following considerations: driver expectancy, queue clearancetime, and pedestrian crossing time. If two or more of these considerations are applicable, then the
0
10
20
30
40
50
60
70
80
90
3 - 5 6 - 10 11 - 50 51 - 99 No policy
Minimum Green Setting, s
Perc
enta
geTxDOT Survey
Nationwide Survey

4-6
one requiring the longest minimum green value should be used to establish the minimum greensetting.
Minimum Green Based on Driver Expectancy. Research indicates that drivers expect thesignal indication to remain green for at least 3 to 5 s. Intervals that are shorter than 3 s are contraryto driver expectancy and tend to cause unsafe maneuvers (2).
One agency guideline indicates that the minimum green duration should be roughly equal tothe time required by the first queued driver to react to the onset of the green indication and to travelwell into, or through, the intersection (7). Similar guidance was reported by Tarnoff and Ordonez(1) in their survey of agency practice. Interviews with TxDOT staff indicate that the minimum greensetting may need to be increased beyond 5 s when the number of trucks is significant because thesevehicles require more time to start up and travel into the intersection.
Table 4-2 summarizes the guidance offered by several agencies related to the minimum greensetting. As shown in the table, the minimum green setting for left-turn phase ranges from 4 to 7 s.This range is consistent with that identified in the survey of TxDOT practice.
Table 4-2. Typical Ranges of Minimum Green Settings Based on Driver Expectancy.Phase Condition Approach
Speed, mphMinimum Green
Setting (Ge), sState DOT
Left-turn All any 4 South Dakota (8)4 to 5 Utah (5)
Protected-permissive 5 Minnesota (6)Protected-only 7 Minnesota (6)
Through Minor approach 7 South Dakota (8)4 to 5 Utah (5)
10 Minnesota (6)Major approach 12 South Dakota (8)
less than 45 15 Minnesota (6), Utah (5)45 or more 20 Minnesota (6), Utah (5)
Left-turnor through
Normal width intersection any 4 Idaho (7)Wide intersection 5 to 6 Idaho (7)
Table 4-2 indicates that the minimum green setting for through phases varies widely amongthe referenced agencies. The range of settings is 4 to 20 s, with shorter values used for minor-roadapproaches to the intersection and longer values used for major-road approaches. The longestminimum green of 20 s is reserved for major roads with an approach speed of 45 mph or more. Thisrange is consistent with that identified in the survey of TxDOT practice.
Minimum Green Based on Queue Clearance Time. The minimum green for queueclearance is needed when there are one or more advance detectors but no stop line detection. In this

4-7
situation, the green indication will need to be presented for sufficient time to serve all vehicles thatmay be stopped between the nearest advance detector and the stop line. The following equation canbe used for this purpose:
where,Gq, i = minimum green based on queue service time for phase i, s;
l1 = start-up lost time, s;nd = maximum number of vehicles stored between detector and stop line (= Dd /25), veh; andh = average saturation headway for a discharging queue, s/veh.
The use of Equation 13 to compute the minimum green setting is described in two agency documents(6, 8). Specifically, Minnesota DOT guidelines recommend a lost time of 3 s and an averageheadway of 2.0 s/veh (6). South Dakota DOT guidelines do not specify values for lost time andaverage headway (8). However, their recommended minimum green values can be computed usingEquation 13 with a lost time of 7.7 s and an average headway of 1.2 s/veh.
Minimum Green Based on Pedestrian Crossing Time. The minimum green setting mustsatisfy pedestrian crossing needs for those through phases that are not associated with a pedestrianpush button and for which a pedestrian demand is known to exist. Guidance offered by four agenciesand the Texas MUTCD (9) is consistent in their recommendation of the following equation forcomputing the minimum green needed to serve pedestrians (2, 5, 6, 8).
where,Gp, i = minimum green based on pedestrian crossing time for phase i, s; Prt = pedestrian perception-reaction and curb departure time, s;Dc = pedestrian crossing distance, ft;vp = pedestrian walking speed, ft/s;Y = yellow change interval, s; and
Rc = red clearance interval, s.
A pedestrian perception-reaction time of 4.0 s is recommended by all four agencies.However, one agency suggests that 7 s is appropriate for moderate pedestrian volume (i.e., 10 to20 ped/cycle) and even longer values can be used for heavy pedestrian volumes. The crossingdistance is specified by the Texas MUTCD (9) as a curb-to-curb distance, as measured along thecrosswalk. A majority of TxDOT districts do not include the yellow change and red clearanceinterval terms in Equation 14 when computing the minimum green setting.
The Texas MUTCD (9) recommends a walking speed of 4.0 ft/sec. However, the PedestrianFacilities User Guide (11) recommends a maximum walking speed of 3.5 ft/s. This guide alsosuggests that a slower walking speed should be used in areas where there is a heavy concentrationof elderly pedestrians or children.
(13)
(14)

4-8
Additional Guidance on Minimum Green. Other minimum green guidance was found inthe literature that extended beyond considerations of driver expectancy, queue clearance time, andpedestrian crossing time. Specifically, the Utah DOT document advises that the minimum greensetting should equal the average queue service time (as obtained from Equation 11) when either ofthe following two conditions exists (5):
! detection is not provided for a movement (e.g., it is served by the non-actuated phase at asemi-actuated intersection), or
! detection quality has degraded to an unreliable condition.
EVALUATION OF ALTERNATIVE SETTINGS
This part of the chapter consists of two sections. The first section describes the procedureused to evaluate alternative maximum and minimum green settings. The second section summarizesthe findings from the evaluation.
Evaluation Process
The evaluation process focused on an examination of the effect of alternative minimum andmaximum green settings on control delay. Control delay was computed using the methodologydescribed in Chapter 16 of the Highway Capacity Manual (10).
The evaluation of maximum green setting focused on the relationship between the adjustmentfactor in Equation 10 and average intersection delay. The objective was to determine the factor valuethat yielded the lowest intersection delay. The analysis considered a range of factor values and arange of major- and minor-road approach volumes. Equations 8 and 9 were used to estimate theoptimal green interval duration.
The evaluation of minimum green setting focused on the relationship between minimumgreen duration, major-road through movement volume, total minor-movement volume, andintersection delay. The objective was to determine the minimum green value that yielded the lowestintersection delay. The total minor-movement volume represents the sum of the volumes for theminor-road approaches and the left-turn movements from the major road.
Findings
Maximum Green Setting
This section describes the findings from the evaluation of alternative maximum andminimum green settings. Figure 4-3 illustrates the relationship between intersection delay and themaximum green adjustment factor. Three trend lines are shown in this figure and represent differentvolume levels, ranging from moderate to high levels. The trend in the lines indicates thatintersection delay is relatively insensitive to the adjustment factor value. This trend is consistentwith the findings reported by Lin (4). Although not shown, intersection delay was observed to

4-9
increase rapidly as the factor value decreased below 1.0. It also increased noticeably when the factorvalue increased above 1.5.
The maximum green setting for through phases based on delay considerations is listed inTable 4-3. The values listed in this table were computed using Equations 8, 9, and 10 with anadjustment factor of 1.3. The minor approach volume was assumed to equal one-half that of themajor approach. The maximum green settings for the major-major configuration with 700 veh/h/laneare quite large and illustrate the sensitivity of Equation 8 to near-capacity conditions.
Figure 4-3. Variation in Delay as a Function of Maximum Green.
Table 4-3. Computed Maximum Green Setting for Through Phases.Intersection
ConfigurationCritical Phase
Count 1Through Phase
on...Maximum Green Setting, s
by Major Approach Volume, veh/h/lane 2
300 400 500 600 700Major - Minor 2 Major approach 15 20 25 40 70
Minor approach 10 10 15 20 353 Major approach 15 20 25 35 50
Minor approach 10 10 15 20 25Major - Major 3 Both approaches 15 20 35 60 200
4 Both approaches 20 25 40 65 140Notes:1 - Critical number of phases for the intersection:
“2”: Only through phases are provided. No left-turn phases are provided.“3”: Through phases plus left-turn phases for one major road.“4”: Through phases plus left-turn phases for both major roads.
2 - The major-road approach volume used in the table represents the larger volume of the two major-road approaches.For the major-major intersection, this volume is estimated as the average of the major approach volume for bothintersecting roads.
5
10
15
20
1.0 1.1 1.2 1.3 1.4 1.5
Maximum Green Adjustment Factor (f 1 )
Inte
rsec
tion
Del
ay, s
/veh
Moderate Volume
High Volume

4-10
To illustrate the interpretation of Table 4-3, consider the intersection of two major roads. Theintersection has three critical phases. One road has a northbound approach volume of 400 veh/h/laneand a southbound approach volume of 650 veh/h/lane. The approach volume for the southboundroad equals the larger of the two approach volumes (i.e., 650 veh/h/lane). The approach volume forthe intersecting road is determined in a similar manner and found to equal 550 veh/h/lane.Footnote 2 of Table 4-3 indicates that the average of these two major approach volumes (i.e.,600 veh/h/lane) should be used in the table to estimate the maximum green setting. Based on theinformation provided, a maximum green setting of 60 s is appropriate for the through phases on eachof the intersecting roads.
Minimum Green Setting
The findings from the examination of minimum green duration are shown in Figure 4-4. Thetrend line in this figure applies when the total minor-movement volume is in the range of about 100to 200 veh/h. When this volume is below or above the stated range, the slope of the line decreases.For significant deviations from this range, the trend line is nearly flat and varies from 5 to 10 s.
Figure 4-4. Optimum Minimum Green Setting When Total Minor-MovementVolume is between 100 and 200 veh/hr.
The trend line in Figure 4-4 indicates the minimum green setting that yields the lowest totalintersection delay for a given major-road through movement volume. This delay increases for othervalues of the minimum green setting. The reason for this trend is explained in the followingparagraph.
Under actuated control, a phase is called when a vehicle travels across the assigned detector.When the minor-movement volume is light (i.e., about 150 veh/h total for all movements), calls for
0
10
20
30
40
50
0 100 200 300 400 500
Major-Road Through Movement Vol., veh/h/lane
Min
imum
Gre
en S
ettin
g, s
Total minor-movement volume 100 to 200 veh/h

4-11
the phase serving minor-road vehicles tend to arrive with an average headway of 18 to 30 s. Thesecalls arrive sufficiently far apart that they are individually served by the controller and at a time whenthe major-road approach queue has just cleared from the previous call. Higher minor-movementvolumes arrive more frequently and are served in groups, so they do not increase the delay to themajor-road movements. Lower minor-movement volumes produce longer call headways and,thereby, allow the major-road movement to retain the green for longer periods.
In summary, total minor-movement volume in the range of 100 to 200 veh/h can create ashort cycle length and inefficient operation (i.e., one minor-movement vehicle served per cycle)when the major-road through movement has a minimum green of 5 to 10 s. For this volume range,total intersection delay can be reduced by using the minimum green setting obtained from Figure 4-4for the major-road through phase.
REFERENCES
1. Tarnoff, P.J. and J. Ordonez. Signal Timing Practices and Procedures - State of the Practice.Institute of Transportation Engineers, Washington, D.C., March 2004.
2. Orcutt, F.L. The Traffic Signal Book. Prentice-Hall, New York, 1992.
3. Kell, J.H., and I.J. Fullerton. Manual of Traffic Signal Design, 2nd ed. Institute ofTransportation Engineers, Washington, D.C., 1998.
4. Lin, F.B. “Optimal Timing Settings and Detector Lengths of Presence Mode Full-ActuatedControl.” Transportation Research Record 1010. Transportation Research Board, NationalResearch Council, Washington, D.C., 1985, pp. 37-45.
5. “Guideline and Procedure Update: Timing of Traffic Signals.” Utah Department ofTransportation. Salt Lake City, Utah, October 2003 (revised April 15, 2004).
6. MnDOT Traffic Signal Timing and Coordination Manual. Minnesota Department ofTransportation, St. Paul, Minnesota, March 2005.
7. Traffic Manual. Idaho Transportation Department. Boise, Idaho, July 2006.
8. Road Design Manual. South Dakota Department of Transportation. Pierre, South Dakota,2006.
9. Texas Manual on Uniform Traffic Control Devices. Texas Department of Transportation,Austin, Texas, 2006.
10. Highway Capacity Manual 2000. 4th ed. Transportation Research Board, Washington, D.C.,2000.
11. Zegeer, C.V., C. Seiderman, P. Lagerway, M. Cynecki, M. Ronkin, and R. Schneider.Pedestrian Facilities User’s Guide - Providing Safety and Mobility. Report No.FHWA-RD-01-102. U.S. Department of Transportation, Federal Highway Administration,Washington, D.C., 2002.


5-1
CHAPTER 5. DEVELOPMENT OF SIGNAL COORDINATION SOFTWARE
OVERVIEW
A wide array of signal timing software tools, such as PASSER II, TRANSYT-7F, andSynchro, are available for the purpose of evaluating and optimizing coordinated signal timing plans.These tools are quite powerful in their ability to quantify the effect of a wide variety of factors onsignal system performance and traffic flow efficiency. Their power stems partly from the extensivedetail to which the signal system is described in the form of input data and the complexity of theirmodeling algorithm. Hence, the power comes at a price. These tools require a large amount of inputdata and they require a significant time investment to learn and apply.
Transportation agencies are continually challenged with the need to update and maintain thequality of signal timing at the intersections in their jurisdiction. Traffic demand patterns change ona seasonal and an annual basis. Signal control equipment ages and is upgraded. Detectors wear outor fail and are replaced. As a result, signal timing plans are constantly in need of refinement.Unfortunately, agency responsibilities are broad and signal timing does not get updated as often asdesired. One reason for this trend is that the development of optimal signal timing plans and theirimplementation takes a significant investment of time and resource by the agency.
In recognition of the aforementioned challenges, engineers have developed cost-effectivetechniques and rules-of-thumb to guide them in the development of effective signal timing plans.For example, engineers know that most non-coordinated signal phases operate in a fairly predictablerange of phase splits. They also know that there are one or two cycle lengths that work well for agiven arterial and associated intersection spacing. Experience tells them that a specific range ofoffsets will work for a given intersection. In many cases, this experience is sufficient to estimate aworkable cycle length, offset, and phase splits for each intersection on the arterial street.
This chapter documents the development of a simple software tool that takes advantage ofthe aforementioned experiences, techniques, and rules that engineers apply when developing signaltiming plans with limited resources. This tool can be used to develop a coordinated signal timingplan for an arterial street, where the plan is defined by the following four signal settings:
! cycle length,! phase splits,! offsets from system reference time, and! left-turn phase sequence.
This software tool is referred to herein as the Texas Signal Coordination Optimizer (TSCO).
The signal settings identified in the previous paragraph are the basic descriptors of a signaltiming plan for a given arterial street. The algorithm used in TSCO to optimize these settings isreferred to as the “bandwidth technique.” This technique does not require traffic data as a direct

5-2
input and can be used to provide a reasonable timing plan when resources are not available forextensive traffic data collection and analysis. When these resources are available, the more powerfulsoftware tools (e.g., PASSER II) should be used because they are likely to produce more efficienttiming plans.
This chapter is comprised of two parts. The first part describes the bandwidth technique.The last part describes the research conducted to validate the bandwidth technique implemented inTSCO. Guidelines for using TSCO are provided in the appendix.
BANDWIDTH TECHNIQUE DEVELOPMENT
This part of the chapter describes the research conducted to develop and validate the TSCObandwidth technique. It consists of four sections. The first section describes the TSCO input datarequirements. The second section describes the progression bandwidth and interference concept. Thethird section describes the half-integer offset optimization technique. The last section reviewsvarious performance measures used to describe the quality of a coordinated signal timing plan.
Input Data Requirements
The bandwidth technique models the arterial street as a series of segments separated bynodes. A node can represent the location of a signalized intersection, a change in traffic speed, orboth. The following data are used to describe the subject street:
! location of nodes along the street,! node type (i.e., signalized intersection or speed change),! segment speed,! system cycle length,! phase split (in percentage of system cycle length) for the coordinated street phases,! change period,! phase sequence for the coordinated street left-turn phases, and! offset to coordinated phase 2 (optional).
Offset data are optional. The bandwidth technique can be used to evaluate a set of input offsets orsearch to find the optimal set of offsets.
Progression Bandwidth and Interference
This bandwidth technique is illustrated in Figure 5-1 for a street with four coordinatedsignals. On this example street there are four signalized intersections spaced evenly at a distance L.The dashed horizontal line associated with each intersection indicates the signal indication for eachof two through movement phases (i.e., phase 2 and phase 6) that time concurrently. The solidportion of each line represents a red signal indication. The space between red indications showswhen a green indication is displayed to the two through phases. Three signal cycles are shown. Thesignal at each intersection has a green interval equal to one-half the system cycle length C.

5-3
Figure 5-1. Illustration of Bandwidth Concept.
Progression bands are drawn for both through movement phases. Each band is defined bytwo parallel lines that have a slope equal to the progression speed v. The first line represents thetrajectory of the first vehicle in the platoon as it travels down the street. The second line representsthe last vehicle in the platoon. A vehicle will be able to pass through all four intersections withoutbeing stopped, if it travels within the band. Bandwidth is defined as the time duration of each band,as measured horizontally between the two trajectory lines.
The coordinated signal system shown in Figure 5-1 represents an idealized scenario wherethe green interval at each intersection is fully used for progressed movement. This type ofprogression is called “alternate ideal” progression because of the offset at adjacent intersectionsalternates between 0 and C/2 s (1). Whenever the odd-numbered intersections display a greenindication for the coordinated movement, the even-numbered intersections are displaying a redindication, and vice versa. The following relationship between intersection spacing L, cycle lengthC, and progression speed v holds when alternate ideal progression is available for a signal system.
where,C = cycle length, s; L = segment length, ft; andv = progression speed, mph.
Alternate ideal progression is not available for many coordinated signal systems because theydo not have intersections uniformly spaced at a distance L. Signal timing plans for non-uniform
Time, s
Distance, ft
Intersection 4Offset = C/2
Intersection 3Offset = 0
Intersection 2Offset = C/2
v1
Bandwidth for Phase 2 (B 2)
L
L
L
C
Intersection 1Offset = 0
C C
Bandwidth for Phase 6 (B 6)
green red
(15)

5-4
signal spacing will be less efficient than those based on uniform spacing. In general, one or moreof the intersections will be located such that it will tend to reduce, or interfere with, the band. Thistype of interference is illustrated in Figure 5-2 for intersections 2 and 3. Specifically, intersection2 produces lower interference, clipping the leading edge of the band, while intersection 3 producesupper interference, clipping the trailing edge of the band.
Figure 5-2. Upper and Lower Bandwidth Interference.
Lower interference at each intersection is computed by the following equation:
where,IL,i = lower interference at intersection i, s; θi = offset at intersection i, s;θc = offset at the critical intersection, s; and
Ti,c = travel time between intersection i and the critical intersection, s.
The offset at intersection i is defined as the time difference between the start of green at thisintersection and the system reference time zero. The critical intersection is defined as theintersection with the shortest green interval. This green interval will always constrain the bandwidthand, for this reason, is referred to as the critical green interval. In general, a critical green intervalexists for each travel direction in a two-way progression timing plan. If the offsets at the non-criticalintersections are chosen such that no interference is produced, the bandwidth will be equal to theduration of the critical green interval.
Time, s
Distance, ft
Intersection 3
Intersection 2
Bandwidth
Intersection 1
Lower interference
Upper interference
(16)

5-5
Upper interference at each intersection is computed by the following equation:
where,IU,i = upper interference at intersection i, s; Gi = green duration at intersection i, s; andGc = green duration at the critical intersection, s.
Equations 16 and 17 can produce negative values. A negative value indicates that theintersection has slack green time (i.e., green time that cannot be used for progression). For example,if Ti,c is equal to the difference in offsets between the two intersections (θi - θc), intersection i willproduce 0 s of lower interference and Gc !Gi s of upper interference. The resulting negative quantityGc !Gi represents unused green time at intersection i after the progressed platoon has passed. Slacktime can be desirable if it occurs at the beginning of the green interval (i.e., negative lowerinterference) because it allows initial queues to clear before the progressed platoon arrives.
Half-Integer Offset Optimization
The offset optimization algorithm in TSCO is based on the concept of half-integer offsetselection and bandwidth maximization (2). These concepts are briefly described in the followingparagraphs.
Early signal coordination optimization methods were based on graphical representations ofthe half-integer concept (3, 4). This concept is based on the assumption that the optimal, two-wayprogression offset between two intersections is obtained when each intersection has an offset equalto one-half the duration of its green or red interval. The decision to reference the green or the redinterval at a given intersection is based on consideration of both options and the selection of thatoption yielding the least interference.
Little (2) demonstrated that, in systems with optimally spaced signals, selecting half-integeroffsets at every intersection will yield the maximum attainable bandwidth. Based on this principle,he developed an algorithm that optimized coordination by comparing the bandwidths obtained fromall combinations of offset type at the system’s intersections. This method can be extended to anysignal system, even if the signals are not optimally spaced.
A variation of Little’s algorithm has been used by several researchers to maximize bandwidthindirectly by using half-integer offsets to minimize interference (5, 6, 7, 8, 9). Using this variation,it is necessary to adjust the offsets of only the non-critical intersections, thus limiting the number ofoffset combinations that need to be evaluated. In contrast, Little’s algorithm requires the explicitevaluation of all offset combinations. This variation is also used in TSCO.
(17)

5-6
Measures of Effectiveness
Several measures of effectiveness are used to describe the quality of a coordinated timingplan. These measures include total bandwidth, efficiency, and attainability. Total bandwidth isdefined as follows:
where,B = total bandwidth, s;
B2 = phase 2 bandwidth, s; andB6 = phase 6 bandwidth, s.
The goal when developing a coordinated signal timing plan is to maximize total bandwidth,while leaving sufficient time in the cycle to serve the non-coordinated phases. Chaudhary et al.suggest that an effective signal timing plan should provide a total bandwidth of at least 15 s (10).
It is often possible to increase bandwidth by increasing the cycle length and through phasegreen intervals proportionally. However, excessively large cycle lengths often cause increased delayto traffic served by non-coordinated phases and may not yield offsetting improvements in bandwidth.For this reason, efficiency is a more appropriate measure of progression quality than bandwidth.Efficiency considers both bandwidth and cycle length. Specifically, it represents the portion of thecycle that is available for progression. It is defined as follows:
where,E = signal system efficiency, percent.
Efficiency increases when a larger portion of the cycle is being used for progression. Thecriteria provided in the PASSER II documentation for the interpretation of efficiency are reproducedin Table 5-1 (11).
Table 5-1. Evaluation Criteria for Efficiency.Efficiency, percent Progression Quality
0 to 12 Poor13 to 24 Fair25 to 36 Good
37 to 100 Great
The efficiency computed using Equation 19 is described as system efficiency because itconsiders the total bandwidth for both coordinated phases. The efficiency for just coordinatedphase 2 (or phase 6) can be computed by dividing the phase 2 (or 6) bandwidth by the cycle lengthand multiplying by 100.
(18)
(19)

5-7
Attainability describes the portion of the critical green intervals that is available forprogression. It is calculated as follows:
where,A = signal system attainability, percent;
G2 = critical phase 2 green interval duration, s; andG6 = critical phase 6 green interval duration, s.
Attainability describes whether the coordinated phases’ green intervals are used effectivelyfor progression. A low attainability suggests that a large interference is occurring at one or moreintersections and that adjusting the offsets or left-turn phase sequence may be beneficial. Anattainability of 100 percent suggests that bandwidth is limited only by the length of the critical greenintervals and that all of the non-critical intersections are timed and located such that they do notinterfere with the progressed movement. The criteria provided in the PASSER II documentation forthe interpretation of attainability are reproduced in Table 5-2 (11).
Table 5-2. Evaluation Criteria for Attainability.Attainability, percent Evaluation
0 to 69 Major changes needed70 to 99 Fine-tuning needed
99 to 100 Increase minimum green interval duration
The attainability computed using Equation 20 is described as system attainability because itconsiders the bandwidth for both coordinated phases. The attainability for coordinated phase 2 (orphase 6) can also be computed by dividing the phase 2 (or phase 6) bandwidth by the critical phase2 (or phase 6) green interval length and multiplying by 100.
The system efficiency and attainability measures provided by TSCO are weighted based ona user-specified weight factor. In particular, the efficiency for each coordinated phase is used tocompute a weighted average system efficiency, where the weight for phase 2 is specified by theanalyst. A similar approach is used to compute a weighted average system attainability. If thespecified weight is equal for both phases, then the computed efficiency and attainability are equalto the values obtained from Equations 19 and 20. If there is a preference for more of the bandwidthto be assigned to one phase, then the weight factor should be selected accordingly. In this manner,the timing plan with the largest efficiency and attainability will favor the preferred phase.
VALIDATION
This part of the chapter describes activities undertaken to evaluate the accuracy of the TSCOimplementation of the bandwidth technique and its associated optimization algorithm. One objectiveof these activities was to verify that the worksheet calculations could correctly compute the
(20)

5-8
bandwidth for typical streets and timing plans. The second objective was to verify that the TSCOoptimization algorithm could compute the optimal timing plan.
Method
The validation process was based on a separate evaluation of three arterial street test beds.The characteristics of each test bed were based on those of an actual city street. They are generallydescribed as:
! Intersection spacing is uneven and does not correspond with optimal spacing.! Progression speed changes along the street.! Left-turn phase sequence varies among the intersections in a single test bed, including
lead-lead, lag-lag, lead-lag, lag-lead, and split phasing.
Five system cycle lengths were simulated for each of the three test beds to yield 15 differentevaluation scenarios. Descriptions of the three test beds and scenarios are provided in Table 5-3.
Table 5-3. Validation Test Bed Characteristics.TestBed
Numberof Signals
Speed,mph
Cycle Length (C), s 1 Critical G/C, % Left-Turn Phase Sequences 2
Low High Phase 2 Phase 61 5 40 60 80 30 33 Lead-lead, lag-lead, lead-lag, split2 6 35 80 160 43 43 Lead-lead, lag-lag, lead-lag, lag-lead
45 80 160 43 433 6 45 80 100 30 30 Lead-lead, lag-lead, lead-lag
Notes:1 - Five cycle lengths were used for each street, in even increments between the low and high cycle lengths.2 - One phase sequence was chosen for each intersection. This column provides a list of all sequences used on the street.
The evaluation involved three steps. First, each scenario was coded into the PASSER IIsimulation model. PASSER II was chosen for this evaluation because it optimizes signal timingusing the same bandwidth technique as used in TSCO. The goal was to compare timing plans thatwere developed using PASSER II with those developed using TSCO (after removing any sensitivityto the influence of traffic volume). Thus, a nominal volume of ten vehicles per hour was coded forall intersection movements in PASSER II. The optimization algorithm of PASSER II was thenexercised to obtain optimal coordination timing plans for the fifteen scenarios. The offsets andefficiencies for each timing plan were recorded.
During the second step, each scenario was coded into TSCO using the offsets generated byPASSER II. The resulting TSCO-calculated efficiencies were then compared to those obtaineddirectly from PASSER II. The purpose of this step was to determine whether TSCO could producethe same measures of effectiveness as PASSER II.

5-9
When PASSER II calculates bandwidth, it allows the entire phase split (green, yellow, andred clearance) for phases 2 and 6 to be used, instead of just the green interval. To obtain a validcomparison between the two software tools, the PASSER II bandwidths were used to calculateefficiency as follows:
where,B2' = phase 2 bandwidth from PASSER II, s;B6' = phase 6 bandwidth from PASSER II, s;
Y = yellow change interval for phases 2 and 6, s; andRc = red clearance interval for phases 2 and 6, s.
To facilitate this calculation, the same yellow and red clearance values were used for allsignal phases. PASSER II reports bandwidths B2' and B6' rounded down to the nearest second. Thus,the PASSER II bandwidths were adjusted upward by 0.5 s to remove rounding bias before they wereused in Equation 21.
During the third step, the TSCO optimization algorithm was exercised to obtain a new setof optimal offsets for each scenario. The efficiencies associated with the TSCO optimized timingplans were compared to those obtained in step two (which were based on PASSER II offsets). Thepurpose of this comparison was to determine whether TSCO could identify the same optimal timingplans as PASSER II when given the same input conditions.
Results
Figure 5-3a shows the findings from the second evaluation step. Specifically, it comparesthe efficiencies obtained from PASSER II (in the first evaluation step) with those calculated fromTSCO using the PASSER II offsets. Figure 5-3b shows the findings from the third evaluation step.It compares the efficiency based on the PASSER II solution with that obtained from TSCO. Thelines shown in these figures represent the “y = x” line. Data points falling on this line represent caseswhen the compared efficiencies were equal.
In Figure 5-3a, the compared efficiency values are shown to be within 1 percent of eachother. This value indicates that PASSER II and TSCO compute the same value of efficiency whenthey are given the same signal system and timing plan. In Figure 5-3b, the results are within0.1 percent of each other, indicating that PASSER II and TSCO are equally effective at obtainingoptimal timing plans for the 15 scenarios.
Best-fit trend lines are not shown in Figure 5-3. However, linear regression statistics werecalculated, and neither of the associated regression relationships were significantly different fromthe “y = x” line. The subtle differences shown in Figure 5-3 indicate that PASSER II can identifyslightly more efficient timing plans than TSCO under some conditions. This trend is likely aconsequence of PASSER II’s ability to generate offsets with a 0.1-s precision, while TSCO generatesoffsets to a 1-s precision.
(21)

5-10
a. Worksheet Calculation Evaluation. b. Optimization Algorithm Evaluation.
Figure 5-3. TSCO Algorithm Validation Data.
REFERENCES
1. Roess, R.P., W.R. McShane, and E.S. Prassas. Traffic Engineering: Second Edition. PrenticeHall, Upper Saddle River, New Jersey, 1998.
2. Little, J. D., B. V. Martin, and J. T. Morgan. “Synchronizing Traffic Signals for MaximalBandwidth.” Highway Research Record 118. Highway Research Board, National ResearchCouncil, Washington, D.C., 1966, pp. 21-47.
3. Bowers, D.A. “Progressive Timing for Traffic Signals.” Proceedings. Institute ofTransportation Engineers, New Haven, Connecticut, 1947, pp. 93-100.
4. Henry, R. D. Signal Timing on a Shoestring. FHWA-HOP-05-034. Federal HighwayAdministration, U. S. Department of Transportation, Washington, D.C., 2005.
5. Bleyl, R. L. “A Practical Computer Program for Designing Traffic-Signal-System TimingPlans.” Highway Research Record 211. Highway Research Board, National Research Council,Washington, D.C., 1967, pp. 19-33.
6. Messer, C. J., R. N. Whitson, C. L. Dudek, and E. J. Romano. “A Variable-SequenceMultiphase Progression Optimization Program.” Highway Research Record 445. HighwayResearch Board, National Research Council, Washington, D.C., 1973, pp. 24-33.
7. Mao, A. C. M., C. J. Messer, and R. O. Rogness. “Evaluation of Signal Timing Variables byUsing a Signal Timing Optimization Program.” Transportation Research Record 881.Transportation Research Board, National Research Council, Washington, D.C., 1982, pp. 48-52.
0%
5%
10%
15%
20%
25%
30%
0% 10% 20% 30% 40%
TSCO Efficiency
PA
SSE
R II
Effi
cien
cy 11
0%
5%
10%
15%
20%
25%
30%
0% 10% 20% 30% 40%
TSCO Efficiency
PAS
SER
II E
ffici
ency 1
1

5-11
8. Baass, K. G. “Another Look at Bandwidth Maximization.” Transportation ResearchRecord 905. Transportation Research Board, National Research Council, Washington, D.C.,1983, pp. 38-47.
9. Baass, K. G., and B. Allard. “Description of a Combined Approach for Arterial SignalCoordination Considering Bandwidth and Delays.” Transportation Research Record 957.Transportation Research Board, National Research Council, Washington, D.C., 1984, pp. 32-46.
10. Chaudhary, N.A., V.G. Kovvali, and S. M. Mahabubul Alam. Guidelines for Selecting SignalTiming Software. Report No. FHWA/TX-03/0-4020-P2. Texas Transportation Institute,College Station, Texas, 2002.
11. Chang, E. C. P., and C. J. Messer. Arterial Signal Timing Optimization Using PASSER II-90.Program User’s Manual. Report No. FHWA/TX-90/467-2F. Texas Transportation Institute,College Station, Texas, 1991.


A-1
APPENDIX A
USER’S MANUAL -TEXAS SIGNAL COORDINATION OPTIMIZER


A-3
APPENDIX A. USER’S MANUAL -TEXAS SIGNAL COORDINATION OPTIMIZER
OVERVIEW
This manual describes a software tool that can assist the practitioner in the development ofa coordinated signal timing plan. This Microsoft Excel®-based software tool is called the TexasSignal Coordination Optimizer (TSCO). It can be used to evaluate and optimize the following basicsettings that comprise a coordinated timing plan:
! cycle length,! phase splits,! offsets from system reference time, and! left-turn phase sequence.
TSCO does not require extensive traffic data such as volumes and saturation flow rates, sothe tool is most appropriate for cases when current traffic data are not available. When these dataare available, more powerful software tools (e.g., PASSER II, TRANSYT-7F, and Synchro) shouldbe considered because they are likely to produce more effective timing plans.
This manual is comprised of six parts. The first part provides an overview of the TSCOsoftware. The second through sixth parts provide guidelines for using each of the five worksheetsin TSCO.
SOFTWARE OVERVIEW
Worksheet Description
The TSCO software contains the following six worksheets:
! Welcome,! Analysis,! Splits,! Volumes,! Left-Turn Mode, and! Preemption.
The Welcome worksheet is shown in Figure A-1. It contains an overview of the software’sappearance, brief instructions, and citations to documentation to which the analyst should refer fora detailed description of the software’s calculation methods and output. The tabs at the bottom ofthe Welcome worksheet are used to select each of the five remaining worksheets.

A-4
Figure A-1. TSCO Welcome Worksheet.
Worksheet Appearance and Control
A color coding scheme is used in the worksheets to indicate the purpose of each cell and todirect the analyst toward cells that need to be manipulated.
Blue cells contain input data that describe the intersection being analyzed. These cells willbe manipulated most often for typical worksheet applications. Additionally, some types of input dataor preferences are entered using drop-down menus, check boxes, or spin buttons instead of blue cells.The analyst may manipulate these controls as appropriate to describe the analysis conditions.
Yellow cells contain calibration factors that can be adjusted based on local conditions.Changes to these cells should be based on field data collected within the agency’s jurisdiction.
Green cells contain default values for certain parameters. These values should be reasonablefor most applications, but may be changed to reflect local conditions or practices, based on local fielddata or agency policy.
Purple cells contain key output data. White cells contain intermediate calculations orguidance (e.g., advisory messages) for the analyst.

A-5
Only values in blue, yellow, or green cells can be changed. A couple of the worksheets alsocontain a button or two in the upper left corner of the worksheet. This button must be clicked toinvoke the calculation routines when input data are changed.
ANALYSIS WORKSHEET
This part of the appendix provides a detailed description of the Analysis worksheet. Thisworksheet can be used to evaluate or optimize a coordinated signal timing plan for a signalizedarterial street. The description in this part identifies the input data requirements, output datapresentation and interpretation, procedures for optimization, and various controls for refining theanalysis.
Input Data Requirements
The Analysis worksheet models the street as a series of nodes separated by segments. Up toten nodes (separated by nine street segments) can be modeled. A node can represent the location ofa signalized intersection, a change in traffic speed, or both. The required input data are listed inTable A-1. If the node represents a mid-block speed change (i.e., no signal is present), only the datathat are underlined in this table need to be entered.
Table A-1. Analysis Worksheet Input Data Requirements.Data Category Item 1 Scope
Node and segmentdescription
Distance coordinate, ft Each nodeSignal presence Each node
Progression speed, mph Each segmentSignal timing System cycle length, s Entire street
Phase split, percent of system cycle Each signal (major-street phases)Change period (yellow + red clearance), s Each signal (major-street phases)
Left-turn phase sequence Each signal (major-street phases)Offset, s Each signal (major-street phases)
Note:1 - Data required to describe a mid-block speed change are indicated by underline.
Node and Segment Description Data
The labeling scheme for nodes and segments is shown in Figure A-2. The nodes arenumbered 1 through 10 and the segments are labeled A through I. A description (e.g., cross streetname) of each node may be entered if desired. Check boxes are provided to indicate the presenceof a signal at a specific node. A distance coordinate x for each node must be entered. It representsthe distance between the subject intersection and the first intersection, as represented by theintersection with the lowest node number. TSCO calculates segment length from the distancecoordinates. If fewer than ten nodes are needed, the distance coordinate cells for unused nodesshould be left blank.

A-6
Figure A-2. Node and Segment Labeling Scheme.
The “node description” data entry cells are shown in Figure A-3. Example data are shownin the figure. The entered data describe Main Street, an example street with five signalizedintersections. The third signal (Spring Road) is located 2260 ft from the first signal (5th Avenue).
Figure A-3. Node Description Data Entry Cells.
The analyst must provide a progression speed for each segment. This speed represents theaverage running speed of platooned vehicles as they progress through the coordinated signals. Itshould be representative of both travel directions along the segment. Note that this speed may differfrom the posted speed limit. The progression speed for a segment is entered in the same column asthe upstream node that bounds this segment. For example, the progression speed for segment A isentered in the same column as is the data for node 1.
Signal Timing Data
The analyst must provide a system cycle length. This value is input in the upper-right cornerof the Analysis worksheet.
The phase-specific signal timing data entry cells are shown in Figure A-4. For eachsignalized intersection, the analyst must enter phase splits (i.e., the sum of the green, yellow, and redclearance intervals) and change period (i.e., the sum of the yellow and red clearance intervals) forthe major-street phases. The left-turn movement phases are numbered 1 and 5. The throughmovement phases are numbered 2 and 6. To facilitate the evaluation of different cycle lengths, phasesplits are entered as percentage of cycle length.
TSCO displays the green interval duration that is calculated from the entered phase split andchange period data. The analyst can review these interval durations for accuracy. For example, thephase 2 green interval at the second signal (i.e., College Road) in Figure A-4 is shown to be 32 s.
1 2 3 4 5 6 7 8 9 10
A B C D E F G H Ix

A-7
Figure A-4. Phase-Specific Signal Timing Data.
The analyst must also indicate the phase sequence for the major-street movements. Usingthe drop-down menus provided, the analyst can indicate whether the left-turn phase leads or lags theopposing through phase.
To code split phasing, the analyst must choose “lead” for the left-turn phase that occurs firstand “lag” for the left-turn phase that occurs second. The phase split and change period values mustbe equal for phases 2 and 5, and also for phases 1 and 6. In the example data shown in Figure A-4,the third signal (i.e., Spring Road) has been coded with split phasing, with phases 1 and 6 leading.
If a protected left-turn phase is omitted, enter blank values for the omitted phase split and thechange period (i.e., delete any numerical values in the blue cells for the omitted phase).
The analyst may also enter an offset for each signalized intersection. The reference time foroffset is defined as the start of the phase 2 green interval. It is recommended that the start of phase 2green at intersection 1 be used as the system reference time (i.e., use an offset of 0 s forintersection 1); however, TSCO does not require adherence to this recommendation. In the exampledata shown in Figure A-4, the fifth signal (i.e., Del Mar Street) has an offset of 7 s, indicating thatthe phase 2 green interval starts 7 s later at the fifth signal than at the first signal.
If signal timing data are entered for a node but the signal presence check box is leftunchecked, the signal timing data for the node will not be used in any of the worksheet calculations.Using this feature, the effect of adding a signal to a coordinated signal system can be evaluated.Initially, the signal timing data and node coordinate for the location of the proposed new signal areinput along with similar data for the existing intersections. The signal presence box is left uncheckedfor the new signal. The signal system is evaluated and the performance measures noted. Then, thebox is checked and the system is re-evaluated. A comparison of the performance measures from thetwo evaluations indicates the impact of the proposed signal.

A-8
Output Data
Time-Space Diagram
TSCO produces a time-space diagram for the subject street. The time-space diagram isarranged with distance on the x-axis and time on the y-axis. An example time-space diagram fromTSCO is shown in Figure A-5. Two multicolored vertical lines are used to portray the signalizationat each intersection. These lines are referred to hereafter as “cycle bars.” For each pair of cycle bars,the bar on the left corresponds to phases 2 and 5. The bar on the right corresponds to phases 1 and6.
Figure A-5. Time-Space Diagram.
A more detailed examination of cycle bars at one intersection is provided in Figure A-6. Thecycle bars for each intersection use green to represent the phase 2 and 6 green intervals, blue torepresent the phase 1 and 5 green intervals, and red to represent all other time in the cycle. Withineach cycle bar, ring 1 (including phases 1 and 2) is shown on the left, and ring 2 (including phases 5and 6) is shown on the right.

A-9
Figure A-6. Time-Space Diagram Cycle Bar Details.
Figure A-5 also shows the progression bands for both travel directions along the street. Thephase 2 band is colored purple. It slopes upward from left to right. The phase 6 band is coloredblue-green. It slopes downward from left to right. The vertical distance between the two parallellines that form a progression band is defined as the bandwidth. Bandwidth is measured in units oftime (e.g., seconds).
By inspecting the time-space diagram, the analyst can verify that the signal timing settingshave been entered correctly and determine at a glance whether good progression would beaccommodated by the timing plan. The analyst may also choose to try different left-turn phasesequences based on the location of the green intervals with respect to the progression bands.
Controls are provided so the analyst can adjust the appearance of the time-space diagram.These controls are shown in Figure A-7.
Figure A-7. Graph Adjustment Controls.
The horizontal spacing between the cycle bars can be changed. Having a small amount ofspace between the bars is helpful, but the amount of space needed changes proportionally if the scale
2
1
4 8
6
5

A-10
of the x-axis is changed. This adjustment is made using the horizontal spin button in the “Cycles”box.
The vertical position of the green intervals can be adjusted. This adjustment may be neededif an exceptionally small cycle length is used and green intervals cannot be seen at the top or bottomof the diagram. This adjustment is made using the vertical spin button in the “Cycles” box.
The position of each progression band can be adjusted vertically. Depending on the chosenoffsets and cycle length, the progression bands may occasionally plot in cycles above or below thedisplayed 250-s range, or portions of the bands near the left and right sides of the diagram may beobscured from view. These adjustments are made using the spin buttons in the “Phase 2” and“Phase 6” boxes.
The cycle bars and progression bands for phases 2 and 6 may be deactivated if desired.Depending on the visual complexity of the signal system, it may be helpful to view the phase 2 and6 bands separately. These adjustments are made using the check boxes in the “Phase 2” and“Phase 6” boxes.
The y-axis and x-axis parameters (i.e., minimum, maximum, and scale) of the time-spacediagram are automatically adjusted for best viewing. This adjustment is made each time the nodecoordinates are changed.
By default, the worksheet is set to give equal weight to phases 2 and 6 when evaluatingcoordination timing plans. If desired, the analyst may specify more or less weight for phase 2,relative to phase 6. The desired weight relationship can be entered in the “Phase 2 Weight” drop-down box just below the Graph Adjustment Controls in the lower right corner of the worksheet.
The “Phase 2 Weight” setting is useful for cases when traffic volumes are higher in onedirection than the other. When an unequal weight is used for phases 2 and 6, the calculated systemefficiency and attainability are based on a weighted average of the bandwidth for the two coordinatedphases.
Measures of Effectiveness
TSCO provides measures of effectiveness for the coordinated signal system as well as for thetwo coordinated phases separately. These measures include total bandwidth, efficiency, andattainability. Equations for their calculation are described in Chapter 5.
The concept of bandwidth, as defined by a progression band, was previously described inreference to Figure A-5. Each travel direction along a street has a bandwidth. The sum of these twobandwidths equals the total bandwidth for the signal system. In general, a wider progression banddenotes a better timing plan relative to the quality of traffic flow along the street. Bandwidth usuallyincreases with cycle length.

A-11
Efficiency is another measure of system performance. It represents the portion of the systemcycle length that is used for progression. Efficiency usually increases with cycle length; however,it may also decrease if a smaller portion of the cycle is being used for progression. The criteriaprovided in the PASSER II documentation for the interpretation of efficiency are reproduced inTable A-2 (1).
Table A-2. Evaluation Criteria for Efficiency.Efficiency, percent Progression Quality
0 to 12 Poor13 to 24 Fair25 to 36 Good
37 to 100 Great
Efficiency is typically evaluated for the signal system using the total bandwidth. However,it can also be computed for each coordinated phase. In this situation, Table A-2 would be used toseparately evaluate each travel direction.
Attainability describes the portion of the critical green interval that is available forprogression. It describes whether the green interval is used effectively for progression. The criteriaprovided in the PASSER II for the interpretation of attainability are reproduced in Table A-3 (1).
Table A-3. Evaluation Criteria for Attainability.Attainability, percent Evaluation
0 to 69 Major changes needed70 to 99 Fine-tuning needed
99 to 100 Increase minimum green interval duration
A low attainability (say, less than 70 percent) indicates that a large interference is occurringat one or more intersections, and that adjusting the offsets or left-turn phase sequence may bebeneficial. An attainability of 100 percent suggests that bandwidth is limited only by the length ofthe critical green intervals, and that all of the non-critical intersections are timed and located suchthat they do not interfere with the progressed movement.
The aforementioned measures of effectiveness are reported in the lower right corner of theAnalysis worksheet. Performance measures for an example street system are shown in Figure A-8.System attainability is shown to be 98.6 percent which indicates that some fine-tuning may beneeded. System efficiency is shown to be 25 percent which indicates that the progression is of goodquality. These system measures reflect any directional weighting that may have been specified bythe analyst. The phase measures of effectiveness shown in the bottom of Figure A-8 do not includethe effect of any weighting factors.

A-12
Figure A-8. Example System Measures of Effectiveness.
Advisory Messages and Checks
The Advisory Message and Check section of the worksheet is shown in Figure A-9.Advisory messages are generated when the analyst omits phase split data for phases 2 or 6 orprogression speed for a segment. They are also generated when the phase splits for phases 1 and 2do not equal those for phases 5 and 6. In Figure A-9, intersection 1 (i.e., 5th Avenue) is noted asmissing numeric data, and intersection 4 (i.e., Forest Drive) is noted as having a barrier conflict. Alist of the advisory messages and possible solutions is provided in Table A-4.
Figure A-9. Advisory Messages and Checks.
Table A-4. Advisory Messages and Possible Solutions.Advisory Messages Possible Solutions
Numeric data missing above. ! Enter a phase split for phase 2 or phase 6.! Enter a change period for phase 2 or phase 6.! Enter a progression speed for the segment.
Splits 1+ 2 should equal splits 5+6. Adjust the phase splits for phases 1, 2, 5, and 6. Thesum of the phase splits for phases 1 and 2 must equalthat for phases 5 and 6.

A-13
Automatic Optimization Settings
The analyst can specify the offset precision, which is the increment by which the offsets areadjusted when the optimization algorithm is exercised. Acceptable values include 1, 2, 3, 4, or 5 s.A value of 1 s is recommended. A higher value will yield a less precise solution but reducecomputation time by limiting the number of offset values tested. Similarly, the analyst can specifythe cycle length precision, which is the increment by which the system cycle length is adjusted whenthe optimization algorithm is exercised. Any integer value between 1 and 20 s is acceptable. Avalue of 5 s is recommended. The analyst can also indicate (by un-checking the appropriate boxes)if one or more of the intersections’ offsets should not be changed. These settings are entered nearthe bottom of the Analysis worksheet.
The system cycle length is entered in the upper right corner of the Analysis worksheet. Tospecify the range of desired cycle lengths for optimization, enter the minimum desired cycle lengthin the cell for “system cycle length.” Just below this cell, enter the maximum cycle length. If cyclelength optimization is not desired, then enter the same value in both cells.
Optimization Procedures
TSCO provides calculations to assist with the development of an effective timing plan. Theanalyst can manually adjust the offsets to obtain a desired timing plan, perhaps by starting with atiming plan that has already been implemented in the field. Alternatively, the analyst may let TSCOoptimize offsets and cycle lengths automatically.
Manual Adjustment Method
If the goal is to evaluate or improve an existing timing plan, the analyst can choose to adjustthe timing plan manually to determine whether a greater bandwidth could be attained. To assist withmanual offset adjustment, TSCO provides guidance indicating which intersections tend to cause themost bandwidth loss for each coordinated phase. This guidance is in the form of an indication toincrease or decrease the offset at a particular intersection to improve the bandwidth. This guidanceis shown in the bottom portion of Figure A-10. Such adjustments could also be made based oninterpretation of the time-space diagram; however, visual inspection of the diagram may not besufficient to determine which intersections cause the most bandwidth loss.
Figure A-10. Manual Offset Adjustment Guidance.

A-14
For the example street, 100 percent attainability has been achieved for phase 2, so noguidance is provided in Figure A-10 for offset adjustments to increase phase 2 bandwidth. A smallamount of interference (0.5 s) occurs for phase 6. It could be reduced by decreasing the first signal’soffset or increasing the third signal’s offset.
Automatic Optimization Method
Three types of signal timing optimization can be performed with TSCO, they are:
1. Starting with a candidate timing plan (i.e., phase splits, left-turn phase sequences, cyclelength, and offsets), determine whether minor offset adjustments increase the bandwidth.
2. Starting with phase splits, left-turn phase sequences, and cycle length, identify the optimaloffsets.
3. Starting with phase splits and left-turn phase sequences, identify the optimal offsets and cyclelength.
For a Type 1 optimization, the analyst will likely start with an existing timing plan from thefield and try to improve its effectiveness, perhaps in response to an anticipated change to the streetor its signals. Such changes might include adding a signal, implementing a left-turn phase, orchanging the left-turn phase sequence at one or more signals. To conduct a Type 1 optimization,enter the input data, including offsets, and click the “Tweak” button. The optimization algorithmwill search for a better timing plan using the input plan as a starting point.
For a Type 2 optimization, the analyst may desire to search for improvements to an existingtiming plan. Alternatively, the analyst may want to develop a new timing plan for an existing street.A Type 2 optimization is more thorough than a Type 1 optimization because it generates and testsa larger set of candidate timing plans. To conduct a Type 2 optimization, enter all input data andclick the “Search” button. The analyst may begin with a set of candidate offsets or leave the offsetentry cells blank. The optimization algorithm will identify and evaluate a large number of feasibleoffset values.
For a Type 3 optimization, the analyst may desire to evaluate different cycle lengths for thestreet. Alternatively, the analyst may want to develop a new timing plan for an existing street forwhich a system cycle length has not been chosen. To conduct a Type 3 optimization, enter all inputdata and click the “Search” button. The analyst may begin with a set of candidate offsets or leavethe offset entry cells blank, but must specify a cycle length range. The optimization algorithm willidentify and evaluate a large number of feasible offset values. This process is repeated for all cyclelengths within the specified range.
For all types of optimization, the algorithm will update the worksheet to show the timing planthat yields the greatest efficiency while providing bandwidth for both coordinated phases. If no suchtiming plan is identified, it will leave the worksheet unchanged.
While the optimization algorithm runs, it periodically updates the screen and provides theanalyst with status information to indicate its progress. This information is shown on the left side

A-15
of Figure A-9. It is also repeated just to the left of the Graph Adjustment Controls. During a Type 3optimization, the “% Complete” indicator resets to “0” at the start of each new cycle length that isbeing evaluated.
SPLITS WORKSHEET
The Splits worksheet is used to calculate effective phase splits for coordinated signaloperation. The methodology was developed by Bonneson and Fontaine (2). This part of theappendix provides a brief description of the worksheet. The description includes input datarequirements and output data presentation and interpretation. More discussion about this worksheetis provided in the Traffic Signal Operations Handbook (3).
Input Data Requirements
The Splits worksheet requires the following input data:
! cycle length,! left-turn operational mode (i.e., permissive or protected left-turn phase),! change period (i.e., yellow change plus red clearance intervals),! minimum green setting,! turn movement volume, and! approach lane allocations to left-turn and through movements.
The input cells for this worksheet are shown in Figure A-11. Drop-down menus are providedso the analyst can specify the left-turn operational mode and phasing. All other data are entered asvalues in the appropriate cell.
Figure A-11. Splits Worksheet Data Entry Cells.
Location: Analysis Period: Cycle Length (C), s: 100 Eastbound & Westbound Phasing: Northbound & Southbound Phasing:Phase 2:
Approach:LT, 5 TH+RT, 2 LT, 1 TH+RT, 6 LT, 3 TH+RT, 8 LT, 7 TH+RT, 4
Volume (vi), veh/h [i = 1,2,3,…8] 105 502 201 806 93 408 57 104Lanes (ni) 1 2 1 2 0 2 0 1
5 5 5 5 5 58 10 8 10 16 16
Movement, No.: 1
Yellow + red clearance (Yi), s Minimum green (Gm, i), s
Phase Split Calculation WorksheetGeneral Information
Volume and Lane Geometry InputEastbound Westbound Northbound
Change Period and Minimum Green
Main St. & Peachtree Drive 7:00 to 9:00 am
Southbound
LT Phase & TH Phase LT & TH in same phaseEB

A-16
Output Data
Once all of the data have been entered, the computed phase splits are automatically calculatedand shown in the bottom portion of the worksheet. Figure A-12 shows the output section of theworksheet based on the data shown in Figure A-11. The computed phase splits are provided in unitsof “seconds” and “percent of cycle.” The latter units are more useful when using the Analysisworksheet.
Figure A-12. Splits Worksheet Output Data.
VOLUMES WORKSHEET
The Volumes worksheet calculates approximate turn movement volumes for an intersection.It is useful when actual turn movement counts are not available. The methodology was developedby Van Zuylen (4). This part of the appendix provides a description of the worksheet. Thedescription includes input data requirements, output data presentation, and output data interpretation.
Input Data Requirements
The Volumes worksheet calculates turn movement volumes based on user-provided trafficand roadway characteristics. The required input data are listed in Table A-5. Also listed in this tableare the recommended calibration factors. Analysts may wish to adjust these factors based on localtraffic patterns to improve the accuracy of the estimated volumes.
Table A-5. Volumes Worksheet Input Data Requirements.Data Category Item Scope
Roadway description Functional classification Both intersecting roadsIntersection configuration All movements
Traffic description Approach with peak demand Both intersecting roadsAverage annual daily traffic (AADT), veh/d Both intersecting roads
Calibration factors Traffic distribution by time period By time of dayPeak period directional distribution By time of day
Left-turn percentage By functional classificationRight-turn percentage By functional classification
Approach:LT, 5 TH+RT, 2 LT, 1 TH+RT, 6 LT, 3 TH+RT, 8 LT, 7 TH+RT, 4
SouthboundEastbound Westbound NorthboundMovement, No.: 1
Computed Phase Splits 2 2 2 2 1 1 1 1Phase split (Ti), s {see note 6}Phase split, % [= 100 Ti/C] 13 61 18 66 0 21 0 21Checks: . . . .
. . .. . . .
13 1861 66 0 21 0 21

A-17
The calculations in the Volumes worksheet are implemented in computer code that isactivated each time the “Calculate Movement Volumes” button is clicked. Thus, if any changes aremade to the input data, the analyst must click this button to ensure that the changes are reflected inthe estimated turn movement volumes. This button is located near the upper-left corner of theworksheet.
Roadway Description Data
The input cells for the roadway and traffic description data are shown in Figure A-13.Drop-down menus are provided so the analyst can specify the functional classification for eachintersecting road. Drop-down menus are also provided to specify the approach direction thatexperiences peak demand. The analyst must provide the AADT for each roadway.
Figure A-13. Volumes Worksheet Data Entry Cells.
Check boxes are provided so the analyst can indicate which movements (i.e., left turn,through, and right turn) are accommodated on each approach. These check boxes are shown in thebottom row of Figure A-13. All check boxes are checked by default. This condition correspondsto a conventional four-leg intersection that accommodates all movements. A diagram is providedin the worksheet to illustrate the correct check box configuration for the specification of a “T” (i.e.,three leg) intersection.
Calibration Factors
The input cells for the calibration factors are shown in Figure A-14. The default values forthe calibration factors are based on previous research (5, 6) and will yield reasonable turn movementvolumes for most intersections. The analyst may adjust these values to more accurately reflect localtraffic patterns. Adjustments should be based on actual traffic counts taken at intersections in theagency’s jurisdiction.

A-18
Figure A-14. Volumes Worksheet Calibration Factors.
Output Data
Volume Analysis
The Volumes worksheet provides an estimate of the volume for each movement at theintersection. One estimate is provided for each of the following five time periods:
! morning peak period,! mid-morning period,! noon peak period,! mid-afternoon period, and! evening peak period.
The volume analysis cells are shown in Figure A-15. Each purple row corresponds to one timeperiod, and each column corresponds to one movement (i.e., a left-turn movement or a combinedthrough-and-right-turn movement) at the intersection. Volume distribution factors and approach turnmovement volumes are also provided.
Note the Advisory Messages box at the bottom of Figure A-15. The calculations in theVolumes worksheet are iterative in nature such that the calculation algorithm must be re-run everytime a change is made to the input data. If any input data are changed, a message reminding theanalyst to click the “Calculate Movement Volumes” button will appear in the Advisory Messagesbox. If the button is not clicked, the output data will not reflect the changes to the input data.
Turn Movement Volumes
The Volumes worksheet also provides the turn movement volumes (in veh/hr) for the left-turn, through, and right-turn volumes. The box containing these data is shown in Figure A-16.

A-19
Figure A-15. Volumes Worksheet Output Data.
Figure A-16. Volumes Worksheet Turn Movement Volumes.
LEFT-TURN MODE WORKSHEET
The Left-Turn Mode worksheet is used to determine the most appropriate left-turn mode foreach intersection approach. The methodology was developed by Bonneson and Fontaine (2). Thispart of the appendix provides a brief description of the worksheet. The description includes inputdata requirements and output data presentation. More discussion about the rules and criteria usedin this worksheet is provided in the Traffic Signal Operations Handbook (3).

A-20
Input Data Requirements
The Left-Turn Mode worksheet requires the following input data:
! cycle length,! turn movement volume,! approach lane allocations to left-turn and through movements, ! crash history (i.e., left-turn related crash counts),! approach speed, and! adequacy of sight-distance for the left-turning driver.
The input cells for this worksheet are shown in Figure A-17. Spin buttons are provided sothe analyst can specify the time period corresponding to the crash counts. Drop-down lists are alsoprovided to indicate whether sight distance is adequate. All other data are entered as values in theappropriate cell.
Figure A-17. Left-Turn Mode Worksheet Data Entry Cells.
Output Data
Once all of the data have been entered, the suggested left-turn model is determined. asuggested left-turn mode is automatically determined and shown in the middle of the worksheet.Figure A-18 shows the output section of the worksheet based on the data shown in Figure A-17.
Figure A-18. Left-Turn Mode Worksheet Output Data.
Location: Analysis Period: Cycle Length (C), s: 100Phase 2:
Approach:LT, 5 TH+RT, 2 LT, 1 TH+RT, 6 LT, 3 TH+RT, 8 LT, 7 TH+RT, 4
Volume, veh/h 105 502 201 806 93 408 57 104Lanes 1 2 1 2 0 2 0 1
Left-turn related crashesTime period for crashes, years:
45 45 45 45Minimum sight distance (SDc), ft: 360 360 360 360
1
Is sight distance for the left-turn driver adequate?
Left-Turn Operational Mode Calculation WorksheetGeneral Information
Volume and Lane Geometry InputEastbound
7:00 to 9:00 am
Northbound Southbound
Main St. & Peachtree Drive
Movement, No.: 1
Approach speed, mph
Westbound
Speed and Sight Distance1 1
Crash History4 3 2
EB
Yes Yes Yes Yes
Analysis Results
Suggested left-turn mode: Protected-Permissive Protected-Permissive Permissive Permissive

A-21
PREEMPTION WORKSHEET
The Preemption worksheet is used to calculate time requirements for traffic signalpreemption at highway-rail grade crossings. The methodology was developed by Engelbrecht et al.(7). This part of the appendix provides a brief description of the worksheet. The descriptionincludes input data requirements and output data presentation. More discussion about this worksheetis provided in the Traffic Signal Operations Handbook (3). A detailed discussion and guidelines forusing this worksheet are provided by Engelbrecht et al. (7).
Input Data Requirements
The Preemption worksheet requires the following input data:
! controller response time to preempt,! yellow change interval of worst-case conflicting vehicle phase,! red clearance interval of worst-case conflicting vehicle phase, ! pedestrian clearance time during right-of-way transfer,! yellow change interval of worst-case pedestrian phase,! red clearance interval of worst-case pedestrian phase, ! clear storage distance between stop line and railroad tracks,! minimum track clearance distance,! clearance time (from railroad),! advance preemption time (if used), and! distance from center of gate support post to nearest side of the design vehicle.
The input cells for this worksheet are shown in Figure A-19. Drop-down lists are providedto indicate the design vehicle, approach grade, and warning time variability. All other data areentered as values in the appropriate cell.
Output Data
Once all of the data have been entered, the preemption settings are automatically determinedand shown on the right side of the worksheet. Figure A-19 also shows the output sections of theworksheet. The following values are calculated by the worksheet:
! right-of-way transfer time,! queue clearance time,! maximum preemption time, ! additional warning time required from railroad,! track clearance green interval, and! advance preemption time required to avoid design vehicle-gate interaction.

A-22
Figure A-19. Preemption Worksheet Data Entry and Output.
General InformationCity: Date:County: Completed by:District: District Approval:
Parallel Street Name:Crossing Street Name:
North Note: Cells with green shading represent typical Arrow values or recommended default values.
Railroad: Railroad Contact:Crossing DOT#: Phone:Section 1: Right-of-Way Transfer Time CalculationPreempt Verification and Response Time1. Preempt delay time (seconds) 0.0 Usually 0.0 s2. Controller response time to preempt (seconds); get from manufacturer 0.2 Controller type:
3. Preempt verification and response time (seconds) 0.2Worst-Case Conflicting Vehicle Time4. Worst-case conflicting vehicle phase number 45. Minimum green time during right-of-way transfer (seconds) 2.0 2.0 s or more recommended6. Other green time during right-of-way transfer (seconds) 0.0 Usually 0.0 s7. Yellow change time (seconds) 4.08. Red clearance time (seconds) 1.09. Worst-case conflicting vehicle time (seconds) 7.0Worst-Case Conflicting Pedestrian Time10. Worst-case conflicting pedestrian phase number 411. Minimum walk time during right-of-way transfer (seconds) 2.0 2.0 s or more recommended12. Pedestrian clearance time during right-of-way transfer (seconds) 11.0 o.k.13. Vehicle yellow change time (seconds) 4.0 Same as for normal operations.14. Vehicle red clearance time (seconds) 1.0 Same as for normal operations.15. Worst-case conflicting pedestrian time (seconds) 18.0Worst-Case Conflicting Vehicle or Pedestrian Time16. Worst-case conflicting vehicle or pedestrian time (seconds) 18.017. Right-of-way transfer time (seconds) 18Section 2: Queue Clearance Time Calculation
18. Clear storage distance, CSD (feet) 2519. Minimum track clearance distance, MTCD (feet) 2020. Design vehicle length, DVL (feet) 4021. Queue start-up distance, L (feet) 4522. Time required for design vehicle to start moving (seconds) 4.323. Design vehicle clearance distance, DVCD (feet) 6024. Time for design vehicle to accelerate through the DVCD (seconds) 7.025. Queue clearance time (seconds) 11.3Section 3: Maximum Preemption Time Calculation26. Right-of-way transfer time (seconds) 18.227. Queue clearance time (seconds) 11.328. Desired minimum separation time (seconds) 4.0 4.0 s recommended29. Maximum preemption time (seconds) 33.5Section 4: Sufficient Warning Time Check30. Required minimum time, MT (seconds); per regulations 20.0 20.0 s required by TMUTCD31. Clearance time, CT (seconds); get from railroad 0.0 AREMA requirement: 0.0 s32. Minimum warning time, MWT (seconds) 20.0 Excludes buffer time (BT)33. Advance preemption time, APT, if provided (seconds); get from railroad 22.034. Warning time provided by the railroad (seconds) 42.035. Additional warning time required from railroad (seconds) 0
GUIDE FOR DETERMINING TIME REQUIREMENTS FORTRAFFIC SIGNAL PREEMPTION AT HIGHWAY-RAIL GRADE CROSSINGS 1
11/10/2008
Large School Bus
Design Vehicle:
Approach Grade, %:
3% uphill
Warning Time Variability:Low

A-23
REFERENCES
1. Chang, E.C P., and C.J. Messer. Arterial Signal Timing Optimization Using PASSER II-90.Program User’s Manual. Report No. FHWA/TX-90/467-2F. Texas Transportation Institute,College Station, Texas, 1991.
2. Bonneson, J., and M. Fontaine. NCHRP Report 457: Evaluating Intersection Improvements:An Engineering Study Guide. Transportation Research Board, National Research Council,Washington, D.C., 2001.
3. Bonneson, J., S. Sunkari, and M. Pratt. Traffic Signal Operations Handbook. Report No.FHWA/TX-09/0-5629-P1. Texas Transportation Institute, College Station, Texas, March 2009.
4. Van Zuylen, H.J. “The Estimation of Turning Flows on a Junction.” Traffic Engineering andControl, Vol. 20, No. 11, Nov. 1979, pp. 539-541.
5. Hauer, E., E. Pagitsas, and B.T. Shin. “Estimation of Turning Flows from Automatic Counts.”Transportation Research Record 795. Transportation Research Board, National ResearchCouncil, Washington, D.C., 1981, pp. 1-7.
6. Orcutt, F.L. The Traffic Signal Book. Prentice Hall, Englewood Cliffs, New Jersey, 1993.
7. Engelbrecht, R.J., K.N. Balke, S.R. Sunkari, and S.P. Venglar. Engineering Solutions toImproving Operations and Safety at Signalized Intersections near Railroad Grade Crossingswith Active Devices. Report No. FHWA/TX-06/0-4265-1. Texas Transportation Institute,College Station, Texas, September 2005.