Embed Size (px)
DESCRIPTION
C++ programming
Citation preview

Annotation
At first glance, it may seem like I’m reinventing the wheel; Windows already comes with a verycomplex, very functional GUI. Unfortunately, while the Windows GUI is great for office apps, quitefrequently, it’s not suited for many games. Games tend to want a more precise control over the GUIthan Windows can provide (for example, games may want to use alpha-blending to implementpartially transparent windows - easy if you’ve written your own GUI, but next to impossible using theWindows GUI).
This article will walk you though how to create a GUI using C++ and DirectX. The series isdivided into several parts, each dealing with a specific aspect of GUI programming:
Part I: The Basics, and the MousePart II: WindowsPart III: ControlsPart IV: Resource Editors and Other MadnessNOTE: This document was originally four separate articles on www.gamedev.net. I’ve
concatenated all four into one for the XGDC, but they remain otherwise unchanged. - Mason
Mason McCuskeyPart I: The Basics, and the Mouse
Start with the basics - The Rendering LoopThe Mouse
Part II: Windows
The DesignThe PlanThe ImplementationWindow Management CodeCoordinate SystemsWindow Drawing CodeWindow MessagesWrapping It Up
Part III: Implementing Controls
GUI Controls We’ll NeedBreaking It Down: Complex Controls As Combinations of Simple OnesThe Static Controls
Pushbutton ControlsCarets and The Textbox Control
Progress BarsSliders and Scrollbars
The Listbox Control

Part IV: Resource Editors and Other Madness
Saving WindowsLoading WindowsResource EditorsSubclassingSpeeding up GUI RenderingConclusion

Mason McCuskey Developing a GUI in C++ and DirectX
Part I: The Basics, and the Mouse Before I get started, I want to throw out a disclaimer: I’m going to outline the approach I used
when I created the GUI system for my upcoming title, Quaternion. Treat this text as one solution to avery intricate problem, nothing more. I’m not saying that this way of making a GUI is the fastest oreasiest way; I’m simply outlining a solution that worked for me. Also, this text is not complete. Likeone of those Bob-Vila TV episodes, it skips over the easy stuff and concentrates on the interesting.There is no attached source file; there are code snippets in the text, and that’s it. In that code, I’vestripped out a lot of layers of indirection that aren’t relevant to what I’m trying to show (i.e. thewrappers that you’d probably have for your DirectX functions, non-relevant initialization andcleanup code, etc). Also, beware of bugs - I’ve done lots of bug checking, but I’m only human. If youfind a bug, please let me know about it by emailing [email protected].
I’m making several assumptions about your knowledge. I’m assuming you know the basics ofhow event-driven programming works (message queues, etc), and I’m assuming you have a stronggrasp of PDL (the commenting language - if you don’t know what this is, read Code Complete, bySteve McConnell), and C++. I used C++ to implement my GUI system, because I’m a card-carryingmember of the C++ fan club, and because the OOP of C++ work great for implementing window andcontrol types. Shameless plug for the C++ language: Note the power of OOP in this solution, and askyourself if you could do the same thing as easily in C.
Let’s start by defining our scope. It’s important to realize up front that we’re not remakingWindows 95, we’re just trying to get a simple GUI up for a game, so we don’t have to implementevery single control and GUI construct. We only need a few parts for this simple GUI: a mousepointer, a generic window, and some dialog controls to place within that window. We’re also goingto need a resource editor, a program that will allow us to design dialogs by graphically droppingcontrols at various places.
Start with the basics - The Rendering Loop
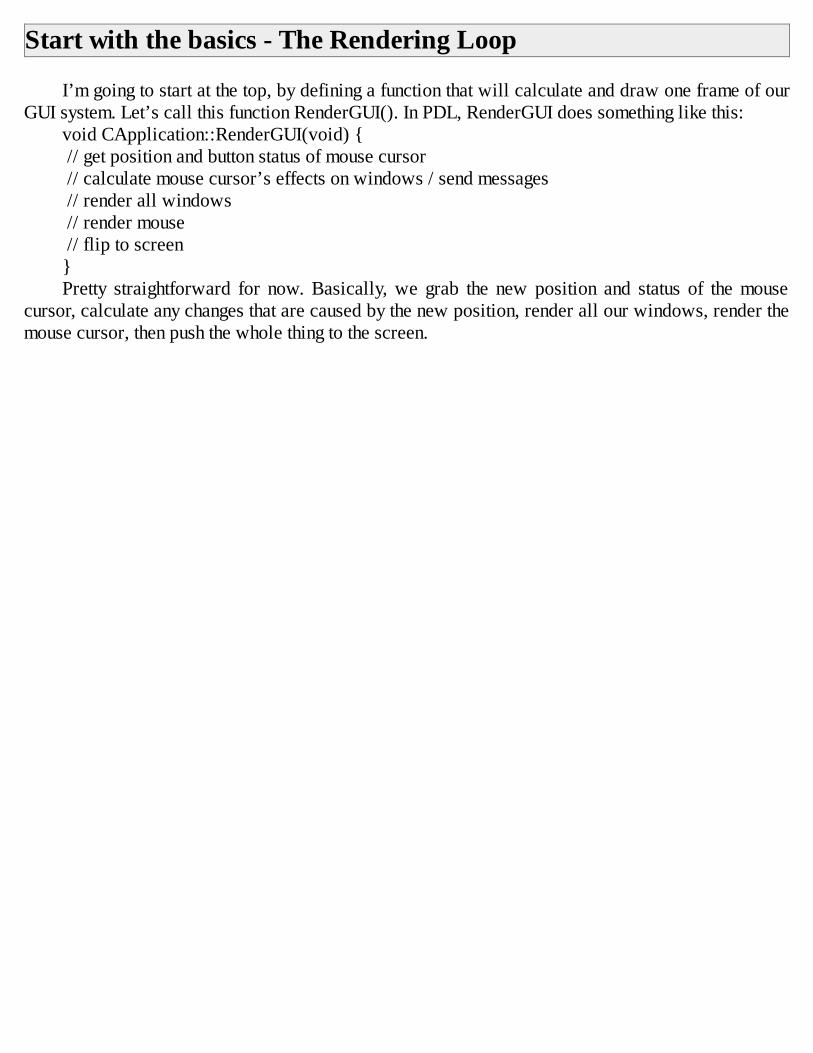
I’m going to start at the top, by defining a function that will calculate and draw one frame of ourGUI system. Let’s call this function RenderGUI(). In PDL, RenderGUI does something like this:
void CApplication::RenderGUI(void) { // get position and button status of mouse cursor // calculate mouse cursor’s effects on windows / send messages // render all windows // render mouse // flip to screen}Pretty straightforward for now. Basically, we grab the new position and status of the mouse
cursor, calculate any changes that are caused by the new position, render all our windows, render themouse cursor, then push the whole thing to the screen.

The Mouse
Now that we’ve got a main function, we’re going to create a mouse class. This mouse class willinitialize the rodent, and will be responsible for querying its position and storing the results. Here’sthe definition:
class CMouse {public: CMouse(); // boring ~CMouse(); // boring
int Init(LPDIRECTINPUT di); // we’ll talk about this later int Refresh(void); // we’ll talk about this later
int GetButton(int index) { if (index ‹ 0 || index › NUMMOUSEBUTTONS) return(0); return(m_button[index]);}
CPoint GetPosition(void) { return(m_position); } enum { NUMMOUSEBUTTONS = 3 }; // three button mouse
private: LPDIRECTINPUTDEVICE m_mousedev; char m_button[NUMMOUSEBUTTONS]; // state of buttons CPoint m_position; // actual screen position};Pretty straightforward class definition. We’ve got two data pieces, m_button and m_position,
abstracted by two functions, GetButton and GetPosition(). Then we’ve got Init and Refresh functions,which initialize the mouse and Refresh its button and position information. The m_mousedev is aninterface to our mouse device; we get this interface during Init(), and use it in Refresh tocommunicate with DirectInput.
So… before we go any further with CMouse, let’s look at the code to initialize DirectInput.Note that this code doesn’t belong in our CMouse::Init() routine; the DirectInput pointer is used bythe entire game, not just the mouse, so the code that inits DirectInput should go in your main initfunction - the same time you init DirectDraw, DirectSound, etc. A DirectInput interface pointer isdifferent than a DirectInput device pointer; you use DirectInput pointers to get DirectInputDevicepointers.
Here’s the code to initialize the master DirectInput interface pointer:LPDIRECTINPUT di = NULL;hr = DirectInputCreate(hinst, DIRECTINPUT_VERSION, &di, NULL);if (FAILED(hr)) { // error processing}That will put a valid DirectInput interface pointer into di. (Don’t forget to Release() it when
your game ends!)
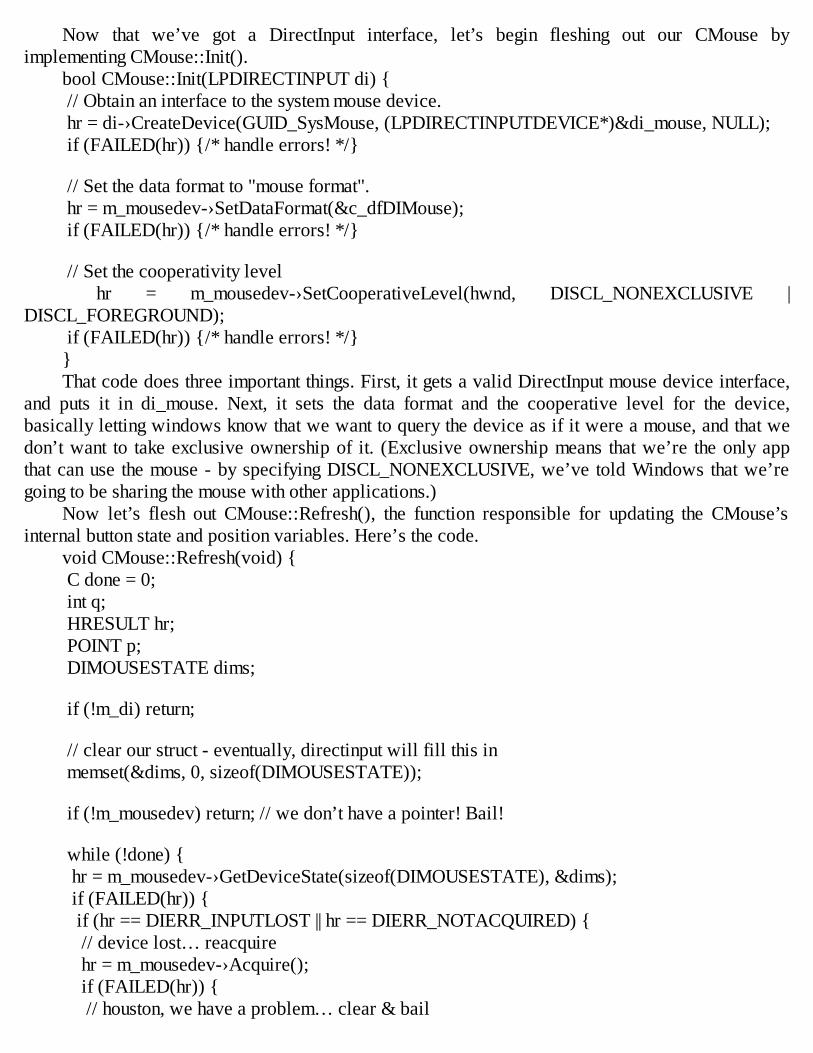
Now that we’ve got a DirectInput interface, let’s begin fleshing out our CMouse byimplementing CMouse::Init().
bool CMouse::Init(LPDIRECTINPUT di) { // Obtain an interface to the system mouse device. hr = di-›CreateDevice(GUID_SysMouse, (LPDIRECTINPUTDEVICE*)&di_mouse, NULL); if (FAILED(hr)) {/* handle errors! */}
// Set the data format to "mouse format". hr = m_mousedev-›SetDataFormat(&c_dfDIMouse); if (FAILED(hr)) {/* handle errors! */}
// Set the cooperativity level hr = m_mousedev-›SetCooperativeLevel(hwnd, DISCL_NONEXCLUSIVE |
DISCL_FOREGROUND); if (FAILED(hr)) {/* handle errors! */}}That code does three important things. First, it gets a valid DirectInput mouse device interface,
and puts it in di_mouse. Next, it sets the data format and the cooperative level for the device,basically letting windows know that we want to query the device as if it were a mouse, and that wedon’t want to take exclusive ownership of it. (Exclusive ownership means that we’re the only appthat can use the mouse - by specifying DISCL_NONEXCLUSIVE, we’ve told Windows that we’regoing to be sharing the mouse with other applications.)
Now let’s flesh out CMouse::Refresh(), the function responsible for updating the CMouse’sinternal button state and position variables. Here’s the code.
void CMouse::Refresh(void) { C done = 0; int q; HRESULT hr; POINT p; DIMOUSESTATE dims;
if (!m_di) return;
// clear our struct - eventually, directinput will fill this in memset(&dims, 0, sizeof(DIMOUSESTATE));
if (!m_mousedev) return; // we don’t have a pointer! Bail!
while (!done) { hr = m_mousedev-›GetDeviceState(sizeof(DIMOUSESTATE), &dims); if (FAILED(hr)) { if (hr == DIERR_INPUTLOST || hr == DIERR_NOTACQUIRED) { // device lost… reacquire hr = m_mousedev-›Acquire(); if (FAILED(hr)) { // houston, we have a problem… clear & bail
clear(); done=1; } } else { // it’s some other error - clear and bail! m_mousedev.clear(); done = 1; } } else // read mouse successfully! { done = 1; } } //while !done
m_position.z += dims.lZ;
if (m_vga-›isfullscreen()) { // we're in fullscreen, so this is easy… just copy the coords m_position.x += dims.lX; m_position.y += dims.lY; } else { // we're in window mode, so this is not-so-easy… // grab the relative mouse position GetCursorPos(&p); ScreenToClient((HWND)m_vga-›gethwnd(), &p);
if (p.x ‹ 0 || p.y ‹ 0) { // the cursor is out of our window! "hide" it! m_mousedev.setposition(KJM_AXES_X, m_vga-›getscreendims().getwidth()); m_mousedev.setposition(KJM_AXES_Y, m_vga-›getscreendims().getheight()); } else { m_mousedev.setposition(KJM_AXES_X, p.x); m_mousedev.setposition(KJM_AXES_Y, p.y); } } m_mousedev.constrainpos(KJM_AXES_X, 0, m_vga-›getscreendims().getwidth()); m_mousedev.constrainpos(KJM_AXES_Y, 0, m_vga-›getscreendims().getheight());
for (q=0; q ‹ KJM_NUMMOUSEBUTTONS; q++) { m_mousedev.setbutton(q, (dims.rgbButtons[q] & 0x80)); }}

Part II: Windows We’ll be using C++ heavily here. If you’re rusty on pure virtual functions, dynamic_cast’ing,
etc., grab a C++ book and brush up before continuing.
The Design
Before we dive into code, it’s important to make a blueprint of what we’re aiming for.In the finished GUI of our game, we’ll use a tree to keep track of every window displayed on the
screen. The window tree is a simple n-node tree. At the root of the tree is the Windows Desktop (or,if you’re in X, the “root window” - now you know why they call it that). The children of the Desktopwindow are (usually) main windows; their children are dialog boxes, and the dialog boxes’ childrenare the individual dialog controls (buttons, textboxes, etc). An important distinction - the appearanceof a window is NOT determined by its place in the tree. For example, many games place buttonsdirectly on their desktop windows, as well as in dialogs.
And yes, buttons are windows too. This is a very important frame of mind. A button is just awindow with a funny appearance. In fact, all of the GUI controls are simply windows with differentappearances. This is where the power of C++ comes in. If we create a generic window class, andgive it a few virtual functions, we can then easily create our different controls by overriding the basewindow class’s behavior. This use of polymorphism is extremely elegant; so elegant, in fact, thatmany C++ books use it as an example. (I’ll talk more about this in Part III.)
That’s our basic design, now, let’s work through an implementation strategy…
The Plan
I took the following steps when I implemented my GUI:1) First I coded some basic window management code. This chunk of code is responsible for
the window tree, adding / deleting windows (i.e., new’ing and deleting window pointers), showing /hiding them, moving them to the top of the Z-Order, etc. I stubbed out the window drawing procedureby simply drawing rectangles where my windows should be, then drawing a number in the top-leftcorner of them to indicate their z-order.
Understand up front that your life will become tremendously easier if you buy or make a good,solid, template class for arrays of pointers. The STL (Standard Template Library) that ships withmost versions of C++ has several good template-able pointer array classes, but if you want to makeyour own, do it formally - test it thoroughly and completely before you start implementing yourwindow manager. The last things you need right now are subtle memory leaks or null pointerreferences caused by a shoddy array class.
2) Once I had basic window management functions, I spent some time thinking about mycoordinate systems. Coded up some ClientToScreen() functions, and some other misc. stuff.
3) Next, I tackled the window drawing code. I derived a “fancy window” class, and showed ithow to draw itself using a set of nine sprites - four sprites for the corners, four sprites for the edges,and one sprite for the background (see diagram) ‹‹DIAGRAM››.
Using nine window sprites, it’s possible to create windows that sport a unique, artisticappearance, and yet are still dynamically re-sizeable (ala StarDock’s WindowBlinds). The downsideto this is that you’ll need a fairly smart drawing library, one that can handle tiling sprites, stretchingthem, and centering them, as well as a very complex window creation program (something the artistscan use to construct their windows), to really make this method work well. And, of course, you’ll payin window drawing speed, too.
4) Once the drawing code for the generic window was complete, I started implementing thecontrols. Coding controls is straightforward, but again, requires very thorough testing. I started withthe simple controls: statics, icons, etc., and worked my way up from there, as explained earlier.
5) Finally, after all of my controls were complete, I coded up a simple Resource Editor, aprogram that allows someone to graphically place controls and layout dialog boxes. The resourceeditor took me a good month to do, but I highly suggest doing it (instead of just using text files toposition stuff) - it’s much easier to create dialog boxes graphically, and it was a good exercise:during development I uncovered several bugs in my controls’ code, things that would have provenvery difficult to catch in the actual game.
I toyed, for a very long time, with the idea of creating a program that would convert anMSVC++ resource (.RC) file into a custom resource file useable by my GUI. In the end, I decidedsuch a program would be more trouble than what it would be worth. The whole reason I was writinga GUI was to get away from the confines of Windows, and to truly do that, I needed my own editor,tied to my own resource file format and my own way of doing things. I decided to implement aWYSIWYG Resource Editor in MFC from the ground up. My needs, my decision; your needs may bedifferent. If anyone out there tries to write a converter, I’d love to hear about it.
So… let’s start with step one: basic window management functions.
The Implementation
Here we go. Here’s a good start for our base-class window definition:class gui_window {public: gui_window(); // boring virtual ~gui_window(); // boring virtual void init(void); // boring gui_window *getparent(void) { return(m_pParent); }
///////////// // section I: window management controls /////////////
int addwindow(gui_window *w); int removewindow(gui_window *w);
void show(void) { m_bIsShown = true; } void hide(void) { m_bIsShown = false; } bool isshown(void) { return(m_bIsShown); } void bringtotop(void); bool isactive(void);
///////////// // Section II: coordinates /////////////
void setpos(coord x1, coord y1); // boring void setsize(coord width, coord height); // boring
void screentoclient(coord& x, coord& y);
int virtxtopixels(coord virtx); // convert GUI units to actual pixels int virtytopixels(coord virty); // ditto
virtual gui_window *findchildatcoord(coord x, coord y, int flags = 0);
///////////// // Section III: Drawing Code /////////////
// renders this window + all children recursively int renderall(coord x, coord y, int drawme = 1);
gui_wincolor& getcurrentcolorset(void) { return(isactive() ? m_activecolors :
m_inactivecolors); }

///////////// // Messaging stuff to be discussed in later Parts /////////////
int calcall(void);
virtual int wm_paint(coord x, coord y); virtual int wm_rendermouse(coord x, coord y); virtual int wm_lbuttondown(coord x, coord y); virtual int wm_lbuttonup(coord x, coord y); virtual int wm_ldrag(coord x, coord y); virtual int wm_lclick(coord x, coord y); virtual int wm_keydown(int key); virtual int wm_command(gui_window *win, int cmd, int param) { return(0); }; virtual int wm_cansize(coord x, coord y); virtual int wm_size(coord x, coord y, int cansize); virtual int wm_sizechanged(void) { return(0); } virtual int wm_update(int msdelta) { return(0); }
protected:
virtual void copy(gui_window& r); // deep copies one window to another
gui_window *m_pParent; uti_pointerarray m_subwins; uti_rectangle m_position;
// active and inactive colorsets gui_wincolor m_activecolor; gui_wincolor m_inactivecolor;
// window caption uti_string m_caption;};First of all, notice the virtual destructor on the window class. This may not seem like it’s
needed just yet, but we’ll eventually be deriving controls from this class, so it’s important that it havea virtual destructor.
As you peruse the functions we’ll be talking about, keep in mind that recursion is everywhere.For example, our game will be drawing the entire GUI system by making a call to the renderall()method of the root window, which will in turn call the renderall() methods of its subwindows, whichwill call renderall() for their subwindows, and so on. Most of the functions follow this recursivepattern.
The whole GUI system will be contained within one global static variable - the root window.
To be on the safe side, I encapsulated this variable within a global GetDesktop() function.
Also, notice that the class definition is rife with virtual keywords. This is where C++’spolymorphism is working for us. Need to change how certain types of windows (or controls - say,buttons) deal with a “left mouse button has just been pushed down” event? Simple, derive a classfrom the base window and override its wm_lbuttondown() method. The system will automaticallycall the derived class’s method where appropriate; behold the power of C++.
Now that we’ve got the header, let’s start filling in some functions, starting with the WindowManagement code…
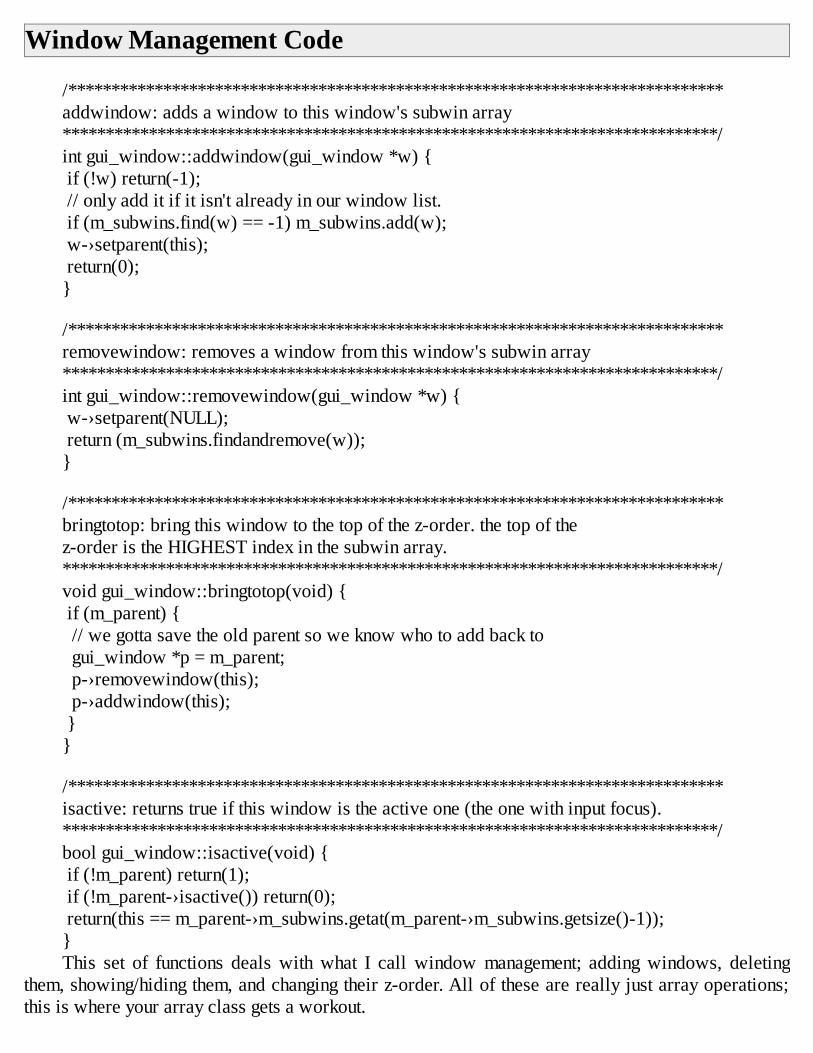
Window Management Code
/****************************************************************************addwindow: adds a window to this window's subwin array****************************************************************************/int gui_window::addwindow(gui_window *w) { if (!w) return(-1); // only add it if it isn't already in our window list. if (m_subwins.find(w) == -1) m_subwins.add(w); w-›setparent(this); return(0);}
/****************************************************************************removewindow: removes a window from this window's subwin array****************************************************************************/int gui_window::removewindow(gui_window *w) { w-›setparent(NULL); return (m_subwins.findandremove(w));}
/****************************************************************************bringtotop: bring this window to the top of the z-order. the top of thez-order is the HIGHEST index in the subwin array.****************************************************************************/void gui_window::bringtotop(void) { if (m_parent) { // we gotta save the old parent so we know who to add back to gui_window *p = m_parent; p-›removewindow(this); p-›addwindow(this); }}
/****************************************************************************isactive: returns true if this window is the active one (the one with input focus).****************************************************************************/bool gui_window::isactive(void) { if (!m_parent) return(1); if (!m_parent-›isactive()) return(0); return(this == m_parent-›m_subwins.getat(m_parent-›m_subwins.getsize()-1));}This set of functions deals with what I call window management; adding windows, deleting
them, showing/hiding them, and changing their z-order. All of these are really just array operations;this is where your array class gets a workout.
The only thing interesting in the add / remove window functions is the question, “who isresponsible for the window pointer?” This is always a good question to ask yourself in C++.Addwindow and removewindow both take pointers to a window class. This means that to create anew window, your code news it, then passes the pointer to the parent (desktop) window throughaddwindow(). So who’s responsible for deleting the pointer you newed?
My answer was “the GUI doesn’t own the window pointers; the game itself is responsible foradding them.” This is consistent with the C++ rule of thumb that says “those who new things alsodelete them.”
The alternative to the method I chose was to say “the parent window is responsible for thepointers of all his child windows.” That would mean that to prevent memory leaks, each windowmust, in it’s (virtual) destructor (remember, there’s derived classes), loop through its m_subwindowsarray and delete all of the windows contained within it.
If you decide to implement a GUI-owns-pointer system, be aware of an important trade-off - allof your windows must be dynamically allocated (newed). A quick way to crash a system like that isto pass in the address of a variable on the stack, i.e. say something like “addwindow(&mywindow)”,where mywindow is declared as a local variable on the stack. Things will work until mywindowgoes out of scope, or until the destructor for the parent window is called, whereupon it’ll try to deletethat address and all hell will break loose. The lesson is “be extra careful with pointers.”
That’s the main reason behind why I decided that my GUI would not own the window pointer. Ifyou’re passing a lot of complex window classes into and out of your GUI (say, for example, you’repopulating a tabbed property sheet), you might prefer a system where the GUI doesn’t keep track ofthe pointers, and where remove simply means “the pointer is now in my control; remove it from yourarray, but don’t delete it.” This would also allow you to (carefully) use addresses of local variableson the stack, provided you made sure that you removewindow()’ed them before they went out ofscope.
Moving on… Showing and hiding windows is accompished through a boolean variable.Showwindow() and hidewindow() simply set or clear this variable; the window drawing andmessage processing functions check this “is window shown” flag before they do anything. Pretty easystuff.
Z-ordering was also fairly easy. For those unfamiliar with the term, z-ordering refers to the“stacking” of windows on top of each other. At first thought, you may decide to implement z-orderingsimilar to how DirectDraw does it for overlays - you might decide to give each window an integerthat describes its absolute z-order position, their place on the z axis - say, maybe, 0 is the top of thescreen, and negative -1000 is furthest back. I thought a bit about implementing this type of z-ordering,but decided against it - absolute z-order positions don’t concern me; I care more about relative z-order positions. That is, I don’t really need to know “how far back” one window is from another; Isimply need to know whether a given window is behind another, or in front of it.
So, I decided to implement z-order like this: The window with the highest index in the array,m_subwins, would be the window “on top.” The window at [size-1] would be directly under it,followed by [size-2], etc. The window at position [0] would be on the very bottom. In this way,processing z-ordering became very easy. Also, killing two birds with one stone, I deemed that thetopmost window would always be the active window, or more technically, the window with inputfocus. Although this restricted my GUI from making “always on top” windows (for example:Windows NT’s task manager is always on top of all other windows, regardless of who has the inputfocus), I felt it was worth it to keep the code as simple as possible.
Also, I paid a small price for using array indices as z-orders was the array shuffle that occurswhen I tell a given window to move to the top of the z-order. Say I tell window #2 to move to the topof a 50 window list; I’ve got to shift 48 windows down a slot to accommodate window #2’s newposition at the end. The good news is that moving a window to top of the z-order isn’t really a time-critical function, and even if it were, there’s dozens of good, quick ways to juggle array items likethis - linked lists spring to mind.
Check out the cheap trick I used in the bringtotop() function. Since I know that the windowdoesn’t own the pointers, I can just clobber the window and then immediate re-add him, effectivelyrepositioning him at the top of the array. I did this solely because my pointer class, uti_pointerarray,already had code that would delete an element and slide all higher elements backwards one slot.
So that’s window management. Now, onto the joy of coordinate systems…
Coordinate Systems
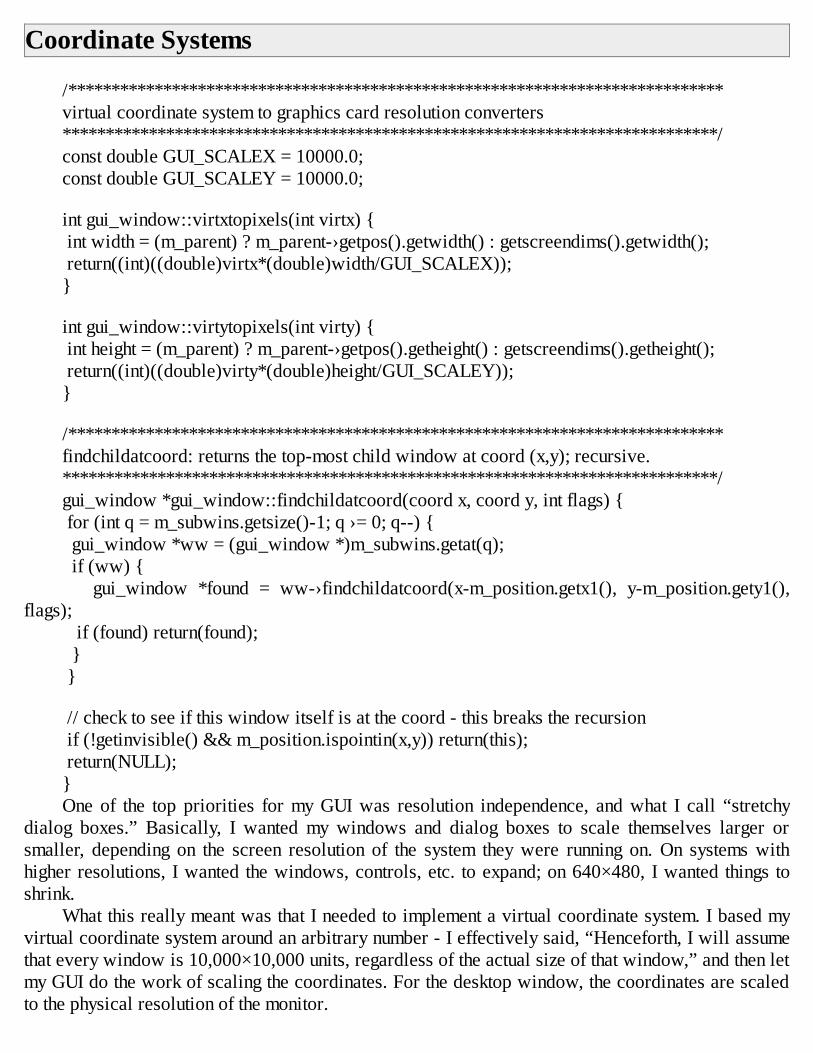
/****************************************************************************virtual coordinate system to graphics card resolution converters****************************************************************************/const double GUI_SCALEX = 10000.0;const double GUI_SCALEY = 10000.0;
int gui_window::virtxtopixels(int virtx) { int width = (m_parent) ? m_parent-›getpos().getwidth() : getscreendims().getwidth(); return((int)((double)virtx*(double)width/GUI_SCALEX));}
int gui_window::virtytopixels(int virty) { int height = (m_parent) ? m_parent-›getpos().getheight() : getscreendims().getheight(); return((int)((double)virty*(double)height/GUI_SCALEY));}
/****************************************************************************findchildatcoord: returns the top-most child window at coord (x,y); recursive.****************************************************************************/gui_window *gui_window::findchildatcoord(coord x, coord y, int flags) { for (int q = m_subwins.getsize()-1; q ›= 0; q--) { gui_window *ww = (gui_window *)m_subwins.getat(q); if (ww) { gui_window *found = ww-›findchildatcoord(x-m_position.getx1(), y-m_position.gety1(),
flags); if (found) return(found); } }
// check to see if this window itself is at the coord - this breaks the recursion if (!getinvisible() && m_position.ispointin(x,y)) return(this); return(NULL);}One of the top priorities for my GUI was resolution independence, and what I call “stretchy
dialog boxes.” Basically, I wanted my windows and dialog boxes to scale themselves larger orsmaller, depending on the screen resolution of the system they were running on. On systems withhigher resolutions, I wanted the windows, controls, etc. to expand; on 640×480, I wanted things toshrink.
What this really meant was that I needed to implement a virtual coordinate system. I based myvirtual coordinate system around an arbitrary number - I effectively said, “Henceforth, I will assumethat every window is 10,000×10,000 units, regardless of the actual size of that window,” and then letmy GUI do the work of scaling the coordinates. For the desktop window, the coordinates are scaledto the physical resolution of the monitor.
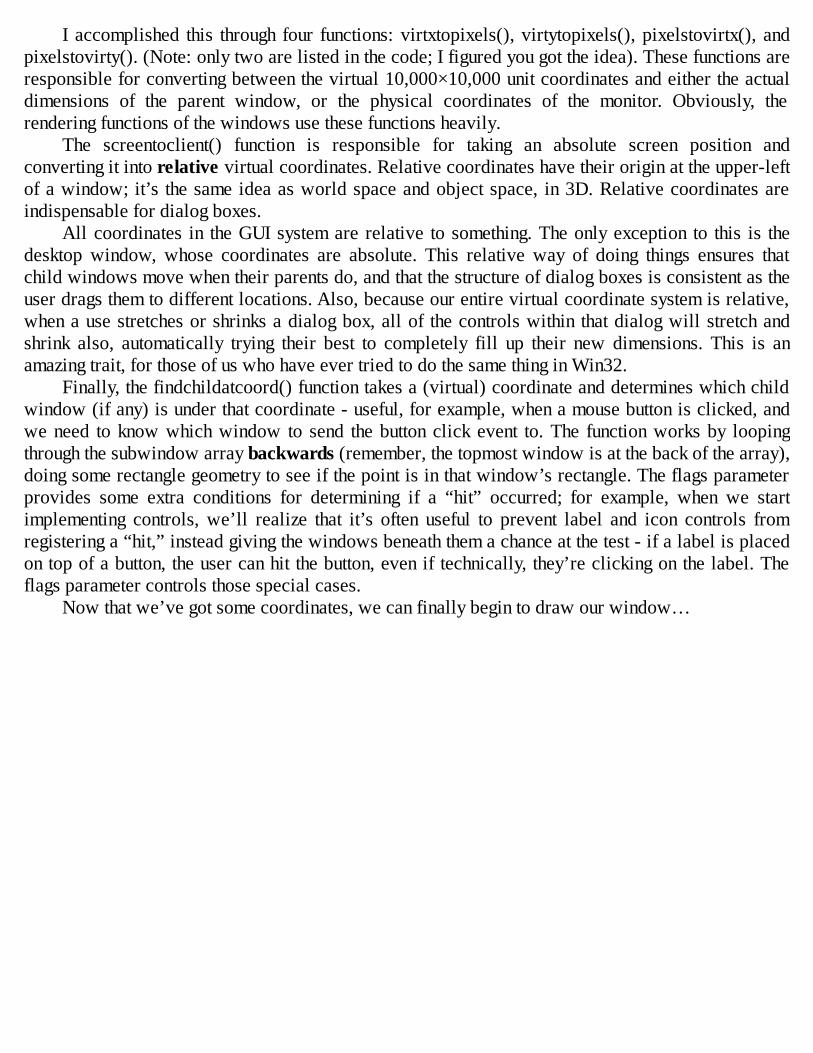
I accomplished this through four functions: virtxtopixels(), virtytopixels(), pixelstovirtx(), andpixelstovirty(). (Note: only two are listed in the code; I figured you got the idea). These functions areresponsible for converting between the virtual 10,000×10,000 unit coordinates and either the actualdimensions of the parent window, or the physical coordinates of the monitor. Obviously, therendering functions of the windows use these functions heavily.
The screentoclient() function is responsible for taking an absolute screen position andconverting it into relative virtual coordinates. Relative coordinates have their origin at the upper-leftof a window; it’s the same idea as world space and object space, in 3D. Relative coordinates areindispensable for dialog boxes.
All coordinates in the GUI system are relative to something. The only exception to this is thedesktop window, whose coordinates are absolute. This relative way of doing things ensures thatchild windows move when their parents do, and that the structure of dialog boxes is consistent as theuser drags them to different locations. Also, because our entire virtual coordinate system is relative,when a use stretches or shrinks a dialog box, all of the controls within that dialog will stretch andshrink also, automatically trying their best to completely fill up their new dimensions. This is anamazing trait, for those of us who have ever tried to do the same thing in Win32.
Finally, the findchildatcoord() function takes a (virtual) coordinate and determines which childwindow (if any) is under that coordinate - useful, for example, when a mouse button is clicked, andwe need to know which window to send the button click event to. The function works by loopingthrough the subwindow array backwards (remember, the topmost window is at the back of the array),doing some rectangle geometry to see if the point is in that window’s rectangle. The flags parameterprovides some extra conditions for determining if a “hit” occurred; for example, when we startimplementing controls, we’ll realize that it’s often useful to prevent label and icon controls fromregistering a “hit,” instead giving the windows beneath them a chance at the test - if a label is placedon top of a button, the user can hit the button, even if technically, they’re clicking on the label. Theflags parameter controls those special cases.
Now that we’ve got some coordinates, we can finally begin to draw our window…
Window Drawing Code
Recursion is a double-edged sword. It makes the window drawing code very easy to follow, butit also ends up touching pixels twice, which can be a significant performance hit (say, for example,you have a stack of fifty windows, all the same size and at the same screen position - the code willrun through the drawing loop fifty times, and touch the same set of pixels fifty times). This is anotorious problem. There are certainly hidden-surface elimination algorithms one could apply to thissituation - in fact, this is an area I need to spend some time with on my own code - Quaternion’s GUIis most active during the non-game screens (title, closing, etc.), places where it’s perfectly OK forthe GUI to be a hog, because there isn’t anything else going on.
But, I am tinkering with it; I’m currently trying to employ the DirectDrawClipper object in mydrawing routines. So far, the initial code looks pretty promising. Here’s the way it will work: Thedesktop window “clears” the clipper object. Each window then draws is subwindows backwards,top one first, bottom one last. After each window is drawn, it adds its screen rectangle to the Clipper,effectively “excluding” that area from the windows below it (yes, this assumes all windows are100% opaque). This helps to ensure that at the very least, each pixel will be touched only once;granted, the code is still churning through all of the calculations and calls required for GUI rendering,(and the clipper’s probably got its hands full, too), but at least the code isn’t actually drawingredundant pixels. Whether the clipper object operates fast enough to make this worthwhile remains tobe seen.
I’m tossing around several other ideas, too - perhaps using the built-in z-buffer on the 3Dgraphics card, or implementing some sort of dirty rectangle setup. If you’ve got any ideas, let meknow; or, try them yourself and let me know what you found.
Most of the bulk of the window drawing code I cut out, because it’s very specific to my situation(it calls my custom sprite classes). Suffice it to say that once you know the exact screen dimensionsof where you’re going to draw a window, the actual drawing code is straightforward (and fun) toimplement. Fundamentally, my drawing code takes a set of nine sprites - four for the corners, four forthe edges, one for the background - and uses those sprites to draw the window.
The color sets deserve a small explanation. I decided that each window would have two uniquecolor sets; one set for when that window is active, one set for when it’s not. Before the drawing codegets started, it makes a call to getappropriatecolorset(), which returns the correct color set for thewindow’s activation status. Having separate colors for active and inactive windows is a basicprinciple of GUI design; it was also fairly easy to implement.
Now our windows draw, so it’s time to start looking at messaging…
Window Messages
This section is the core of GUI implementation. Window messages are the events that get sent toa window when the user performs certain actions - clicking the mouse, moving it, hitting a key, etc.Some messages (like wm_keydown) are sent to the active window, some (wm_mousemove) are sentto the window the mouse is over, and some (wm_update) are always sent to the desktop, regardless.
Microsoft Windows has a message queue. My GUI does not - when calcall() figures out that itneeds to send a message to a window, it stops right there and “sends” it - it calls the appropriatewm_xxxx() virtual function for that window. I’ve found that this method is just fine for simple GUIs.Unless you have a really good reason, don’t bother with implementing a full-blown message queue,storing things into it, and having separate threads pick up the messages and dispatch them. For mostgame GUIs, it isn’t worth it.
As much as I’d like to, I can’t go into very much detail about calcall(), the function that polls allthe input devices and sends out the messages. It does many things, and implements many behaviorsthat are specific to my GUI. For example, you might want your GUI to behave like X-Windows,where the window the mouse is over is always the active window. Or, you might want to make theactive window system modal (meaning nothing else can happen until the user gets rid of it), likeseveral Mac-based programs do. You might want the ability to move windows by clicking anywherein them, instead of just in their title bar, like WinAmp. The implementation of calcall() will varywildly depending on which behaviors you decide to incorporate into your GUI.
I’ll give you a hint, though - the calcall() function is not stateless, in fact, your calcall() functionwill probably end up being a rather complex state machine. The perfect example of this is draggingand dropping things. In order to properly calculate the difference between a normal “mouse buttonreleased” event, and a similar but completely different “whatever the user was dragging has just beendropped” event, calcall() must maintain a state. If you’re rusty on finite state machines, save yourselfa lot of headaches and brush up on them before you tackle calcall()’s implementation.
The wm_xxx() functions included in the window header file were the ones I felt represented theminimum set of messages a GUI would need to calculate and dispatch. Your needs may differ, andthere’s no reason why you have to stick to the Microsoft Windows set of messages; if a custommessage would be perfect for you, now’s the time to implement it.
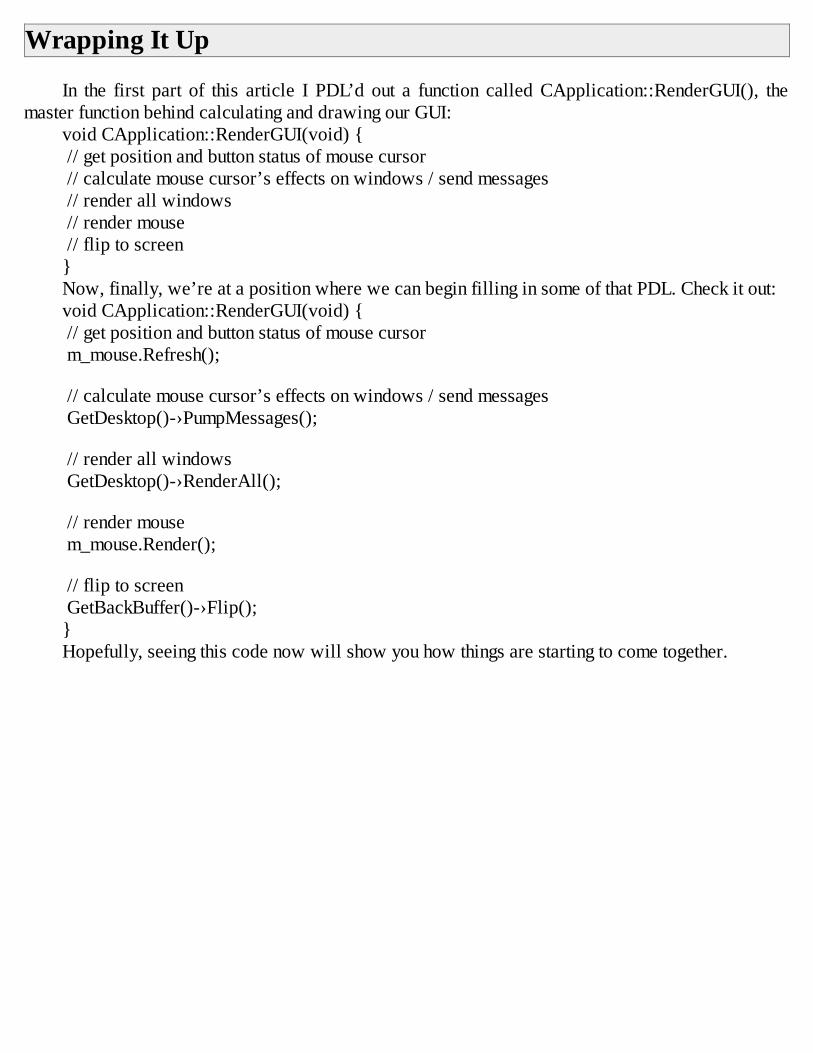
Wrapping It Up
In the first part of this article I PDL’d out a function called CApplication::RenderGUI(), themaster function behind calculating and drawing our GUI:
void CApplication::RenderGUI(void) { // get position and button status of mouse cursor // calculate mouse cursor’s effects on windows / send messages // render all windows // render mouse // flip to screen}Now, finally, we’re at a position where we can begin filling in some of that PDL. Check it out:void CApplication::RenderGUI(void) { // get position and button status of mouse cursor m_mouse.Refresh();
// calculate mouse cursor’s effects on windows / send messages GetDesktop()-›PumpMessages();
// render all windows GetDesktop()-›RenderAll();
// render mouse m_mouse.Render();
// flip to screen GetBackBuffer()-›Flip();}Hopefully, seeing this code now will show you how things are starting to come together.
Part III: Implementing Controls This section doesn’t have as much code as the others - this is mainly because we programmers
are fairly picky when it comes to the appearance of our GUI. We like to code things up so that ourbuttons, our textboxes, and our GUI appear unique, and fit our own aesthetic tastes. Consequently,everyone’s control code will be slightly (or maybe drastically different), and it wouldn’t make senseto include my particular drawing code. Besides, writing code to draw all the GUI elements is fun, infact, in my opinion, it’s the most fun you can have implementing a GUI. Go wild.
That being said, let’s start by determining which GUI controls we need.
GUI Controls We’ll Need
I didn’t want to spend a lot of time implementing controls for my game GUI; I wanted to stickwith the smallest set of controls that I could. So, I came up with a list of controls that I consider theminimum set for game GUIs…
· Static Text, Icon, and Group Boxes - vital. These controls label and group the other controls ina dialog box. The static control is crucial; the frame control we could probably live without, but it’sfairly simple, and in some cases can go a long way towards making a dialog box easy to navigate, soI’m including it. Icon controls should be simple, but should be able to animate, providing coolbackground animations in our dialogs and menus (ala Theif: The Dark Project).
· Buttons and Checkboxes - vital. Weird button types (flat buttons, pushbutton-style radiobuttons) we can do without, but most games can’t live without a basic button and checkbox.
· List control - important. I’ve found list controls, especially multi-column list controls,indispensable when creating game GUIs. They’re used everywhere. You’re going to want a veryintelligent, heavyweight list control, as good or better than the Windows List Control. For me, the listcontrol was the most difficult control to implement.
· Sliders and scrollbars - Important. Famous for controlling sound and music volume. The badnews is that we’ll probably need horizontal and vertical flavors of these guys; the good news is thatthey’re so similar you can implement them very easily.
· Textboxes - Vital. You have to be able to enter your mega-3l33t, super-kewl player handlesomewhere, right?
· Progress Bars - Essential for displaying hit points, “I’m almost done loading!”, etc.Noticeably absent from this list are the spin button controls (which aren’t crucial, and irritate
me to no end anyway), radio buttons (we can get by with a single selection listbox instead), and thedrop-down combo box (again, we can just use a list box), and tree control. By making the listboxcontrol smart enough to indent certain items, we can incorporate the functionality of the tree control
Tab controls aren’t included simply because my game doesn’t have enough of a GUI to warrantthem, though your needs may differ.
Even with all the omissions, the “minimum” list might seem daunting at first, but we cansimplify it quite a bit…
Breaking It Down: Complex Controls As Combinations of SimpleOnes
The list becomes much more manageable when we realize that the more complex controls arejust clever combinations of other, more simple controls. For example, a scrollbar is basically justtwo buttons and a slider control. A checkbox is a static control and two buttons (one “off” button, andone “on” button). A plain old button could be implemented using three static icon controls (justshow/hide the appropriate ones to get the button to “press”), so that you can reuse your drawing code.If you were really strapped for time, you could even implement a progress bar as a slider that’smoved by the computer, though I prefer having a separate control for this.
There are, however, disadvantages to this - namely, your GUI controls are going to take up moresystem resources than they really need. Think about it - each control is a window. Let’s say you’vegone with the reuse philosophy, and have created a button control that’s really just three differentstatics. That’s three windows per button. Now, you build a scrollbar control, using two buttoncontrols. That’s six windows per scrollbar control. Build a List control using horizontal and verticalscrollbars, and you’re sitting at twelve windows per list. It adds up quickly.
So it’s really just another example of the classic tradeoff between “how fast can I develop it”and “how little resources can I get it to use?” If you need a very high performance, no-waste GUI,implement each control from the ground up. If you would instead a quick implementation, and don’tmind the performance hit, you might choose to implement your controls so that the only control thatwould actually draw to the screen would be the static, and all other controls would be made up ofcombinations of statics.
When building my GUI, I tried to create a good balance between these two extremes.Now, let’s dive into the actual implementation of each control, starting with everyone’s favorite,
the static label.
The Static Controls
There are three kinds of static controls we’ll be looking at: static text controls, static iconcontrols, and frame controls. All three of these controls are very easy, because they take no messages- all they do is draw themselves at certain positions.
Static text controls are by far the easiest control you’ll ever implement - just draw yourwindow’s caption at the upper-left of your window, and you’re done. If you’re especially through,you might want to add code to justify your text a certain way - for example, to center your text in yourclient rect, you might employ the classic centering algorithm - take the width of your window,subtract the width of the text you’re going to draw, and divide by two, telling you how many pixels“in” (that is, how many pixels right from the left window edge) to start drawing.
Static icon controls are a little tougher. Actually, the term “static icon control” is a bit of amisnomer, given that we want our icon controls to be able to animate. Even so, implementation ofthese icon controls isn’t tough, provided you’ve got a solid sprite library to handle all the details ofimplementing animation: checking the millisecond delta between this frame and the one that’s on thescreen now, using this delta to determine how many frames your sprites should advance by, etc.
Icon controls only become painful to implement if you’re not redrawing your entire GUI systemevery frame. In this case, you’ve somehow got to deal with clipping the icon control, so that eventhough it’s being drawn every frame, it doesn’t accidentally overwrite pixels belonging to a windowthat’s sitting on top of it (but wasn’t changed, so therefore wasn’t drawn). I didn’t implement this -my GUI gets redrawn every frame - but if you’re faced with this problem, you might want to trysetting up a clip list for each icon, using it to draw the icon, and re-evaluating it when any window ismoved, closed, or opened. This may or may not be a viable solution - I just dreamt it up whilewriting this - but it seems to be at least a good jumping off point.
Frame controls are also pretty straightforward. I implemented my frame control by drawing aborder around m_position, then drawing the window caption at about position (5,5), in clientcoordinates (that is, about five pixels right and five pixels down from the upper-left of the framecontrol), but you may decide you want something a little fancier.
The one complex thing you might want to do for your static controls is to change the behavior ofthe findwindow function slightly so that it “skips” all windows that are static controls. That way, if astatic text control is sitting on top of a pushbutton, the user will be able to push the button “through”the static control.
Speaking of, let’s now take a look at how to implement that button.
Pushbutton Controls
Pushbuttons are only slightly more difficult than static controls. Your pushbutton control needsto keep track of whether it’s “pressed” (pushed down) or “unpressed.” It does this by implementingtwo virtual functions, wm_mousedown() and wm_mouseup(), which your main calcall() functionneeds to call when appropriate.
Basically, in wm_mousedown(), you set a boolean variable, which I call the “depressed flag,”to true, and in wm_mouseup(), you set it back to false. Then, in your drawing code, if the depressedflag is set, you draw the button “pressed,” otherwise, you draw it “unpressed.”
Next, add an additional condition - say, “only draw the button depressed if the depressed flag is
set, AND, the mouse cursor is within my client coordinates, otherwise, set the depressed flag back tofalse.” This will give you buttons that “pop out” if you move your mouse cursor off of them, and isvery important for accurately determining when a button is clicked.
In normal GUIs, when a button is clicked, it fires off an event to its parent window, which thendoes whatever the button represents - i.e., clicking the close button will close the window, clickingthe save button will save the file, whatever. My GUI considers a button clicked if and only if, insidewm_mouseup(), the depressed flag is set. The only way the depressed flag can still be set insidemouseup() is if the user both pressed and released the mouse button while the pointer was inside thebutton. This allows users to “bail out” at the last minute by holding the button down and dragging themouse pointer somewhere outside of the button to cancel the button click, just like in any other GUIsystem.
That’s pushbuttons. Now, let’s take a peek at text boxes.
Carets and The Textbox Control
I chose to implement a very simple textbox control. It just captures keys, and does no scrolling -but you might want something more complex, say, a control that accurately handles the home, end,insert, and delete keys, or maybe even one with support for cutting, copying, and pasting, via thewindows clipboard.
But before we can have a textbox, we need a caret. In case you’re not familiar with theterminology, a caret is another word for a cursor - that’s right, that little blinking vertical bar. Caretstell the user where the text they type is going to go.
For the purposes of my GUI, I’ve made things simple - I’ve ordained that the active window isthe window that has the caret, period. This is how most GUIs behave, and seems to be the bestsolution. Also, my GUI, like Windows, considers the “caption” of the textbox to be the text that’sactually in the box.
So how do you implement the caret? Well, I decided that since it’s a given that the caret alwaysgoing to be drawn inside the active window, and that the caret will only appear if the active windowis a textbox, it makes sense to consider the caret part of the textbox and implement it inside thetextbox’s draw function. This makes it really easy to implement - simply use an integer to representan index into the character array of the window caption, and your textbox has all the information itneeds to properly draw the caret.
Which means, basically, that if you’re a textbox, all you have to do to render yourself is draw aborder around your client area, draw your window caption inside this border, and then, if you’re theactive window, draw your caret at the correct position. In my GUI, the maximum length of a stringinside a textbox is governed by the size of the textbox window, meaning that I don’t have to deal withscrolling the text within the box. You, however, might want to some way for the user to scroll throughthe contents of a textbox, allowing them to enter a very long string in a very small box.
By far the most difficult thing about a textbox is the keyboard processing that comes with it.Once we have a key, it’s easy to create a wm_keypressed() virtual function, and call it, and it’s easyto implement the textbox handler for wm_keypressed() so that it processes the key, and either tacks itonto the end of the window caption, or processes special keys (backspace, etc. - this is where yourheavyweight string class pays for itself), and moves the caret.
The hard part is getting the key in the first place. Windows provides no less than threecompletely different ways to query the keyboard - the WM_KEYDOWN event, the

GetKeyboardState() and GetAsyncKeyState() functions, and of course, DirectInput. I used theDirectInput method, simply because I already had done most of the heavy-lifting associated withDirectInput back when I implemented the mouse cursor, and because getting the keyboard statethrough DirectInput seemed to me the cleanest and most elegant solution.
To use DirectInput’s keyboard functionality, the first thing you need to do is set up a keyboarddevice. This is incredibly similar to how we set up the DirectInput mouse device way back in Part Iof this article. Basically, the only difference here is that instead of telling DirectInput to treat our newdevice as a mouse, we’re telling it to treat it as a keyboard (duh). If you’ve gone through DirectInputfor the mouse, doing the same stuff again for the keyboard should be easy.
Once we’ve got our keyboard device we can query it.To actual determine if a key was “hit” requires slightly more work. Basically, to determine
which keys are pressed, you need two snapshots of all 101 key states - you need a snapshot from thelast frame, and a snapshot from this frame. The keys that are down in this frame but not down lastframe are the keys that have been “pressed,” and they’re the keys you should send outwm_keypressed() “messages” for.
Now, onto progress bars…
Progress Bars
Progess bars are just about as easy as static controls to implement, since they only take a fewmessages.
Basically, you need to do two things with a progress bar - you need to tell it a min/max range,and you need to tell it to “step” some number of units. For example, say I wanted to put up a“Loading…” progress bar, because I had to load 100 different game resources. I would create aprogress bar with a range of 0 to 100. I would initally set the progress bar to zero, then, whenever Iloaded a game resource, I would “step” the progress bar by one unit. Whenever the progress bar wasstepped, it would redraw itself, showing graphically how far along it was by displaying a bar whoselength was proportionate to its client area.
Progress bars are very similar to scroll bars; in fact, it might make sense to implement yourprogess bars in terms of your scroll bars. I made my progress bar separate from my scroll barssimply because I wanted the two to have drastically different appearances - your needs may bedifferent.
Sliders and Scrollbars
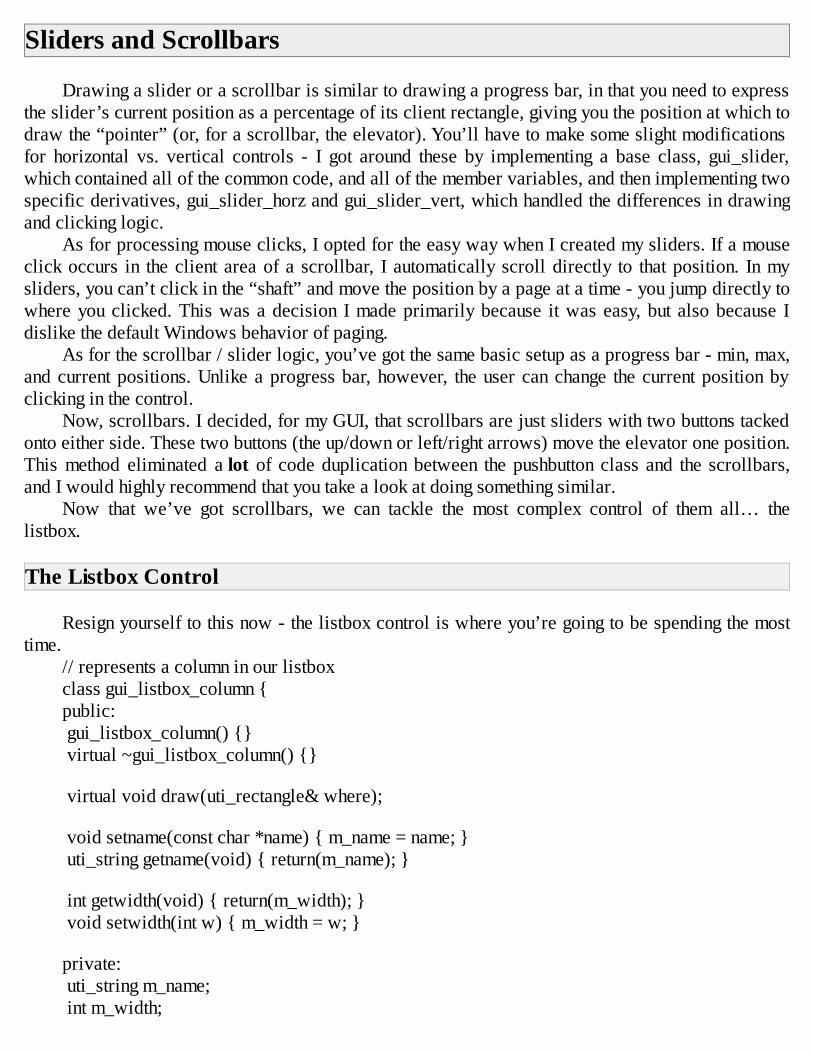
Drawing a slider or a scrollbar is similar to drawing a progress bar, in that you need to expressthe slider’s current position as a percentage of its client rectangle, giving you the position at which todraw the “pointer” (or, for a scrollbar, the elevator). You’ll have to make some slight modificationsfor horizontal vs. vertical controls - I got around these by implementing a base class, gui_slider,which contained all of the common code, and all of the member variables, and then implementing twospecific derivatives, gui_slider_horz and gui_slider_vert, which handled the differences in drawingand clicking logic.
As for processing mouse clicks, I opted for the easy way when I created my sliders. If a mouseclick occurs in the client area of a scrollbar, I automatically scroll directly to that position. In mysliders, you can’t click in the “shaft” and move the position by a page at a time - you jump directly towhere you clicked. This was a decision I made primarily because it was easy, but also because Idislike the default Windows behavior of paging.
As for the scrollbar / slider logic, you’ve got the same basic setup as a progress bar - min, max,and current positions. Unlike a progress bar, however, the user can change the current position byclicking in the control.
Now, scrollbars. I decided, for my GUI, that scrollbars are just sliders with two buttons tackedonto either side. These two buttons (the up/down or left/right arrows) move the elevator one position.This method eliminated a lot of code duplication between the pushbutton class and the scrollbars,and I would highly recommend that you take a look at doing something similar.
Now that we’ve got scrollbars, we can tackle the most complex control of them all… thelistbox.
The Listbox Control
Resign yourself to this now - the listbox control is where you’re going to be spending the mosttime.
// represents a column in our listboxclass gui_listbox_column {public: gui_listbox_column() {} virtual ~gui_listbox_column() {}
virtual void draw(uti_rectangle& where);
void setname(const char *name) { m_name = name; } uti_string getname(void) { return(m_name); }
int getwidth(void) { return(m_width); } void setwidth(int w) { m_width = w; }
private: uti_string m_name; int m_width;
};
// an item in our listboxclass gui_listbox_item {public: gui_listbox_item() { m_isselected = 0; m_indent = 0; } virtual ~gui_listbox_item() {}
virtual drawitem(int colnum, uti_rectangle& where);
void clearallcolumns(void); // boring void setindent(int i) { m_indent = i; } int getindent(void) { return(m_indent); }
void settext(int colnum, const char *text); // boring uti_string gettext(int colnum = 0); // boring
void setitemdata(UL itemdata) { m_itemdata = itemdata; } UL getitemdata(void) { return(m_itemdata); }
void setselected(int s = 1) { m_isselected = s; } int getselected(void) { return(m_isselected); }
private: int m_isselected; int m_indent; // # of pixels to indent this item UL m_itemdata; uti_pointerarray m_coltext;};
// the listbox itselfclass gui_fancylistbox: public gui_window {public: gui_fancylistbox() { m_multiselect = 0; } virtual ~gui_fancylistbox() { clear(); }
int getselected(int iter = 0);
virtual int wm_command(gui_window *win, int cmd, int param); virtual int wm_paint(coord x, coord y); virtual int wm_lbuttondown(coord x, coord y);
gui_fancyscrollbar_horz& gethscroll(void) { return(m_hscroll); } gui_fancyscrollbar_vert& getvscroll(void) { return(m_vscroll); }
virtual int wm_sizechanged(void); // the window's size has changed somehow

gui_listbox_item *getitemat(int index); // boring gui_listbox_item *additem(const char *text); // boring int delitem(int index); // boring int delallitems(void); // boring gui_listbox_column *getcolumn(int index); // boring int addcolumn(const char *name, int width); // boring gui_listbox_column *getcolumnat(int index); // boring int delcolumn(int index); // boring int delallcolumns(void); // boring
int clear(void); // delete columns & items
int getnumitems(void); int getnumcols(void);
void deselectall(void); void selectitem(int item); void selecttoggleitem(int item);
void deselitem(int item);
private: int m_numdispobjsy; int m_vertgutterwidth; // # of pixels between items vertically
gui_fancyscrollbar_horz m_hscroll; gui_fancyscrollbar_vert m_vscroll;
bool m_multiselect; // is this multi-selectable? uti_pointerarray m_items; // array of gui_listbox_items uti_pointerarray m_columns; // array of gui_listbox_columns};The listbox is by far the most complex control you’ll make… but that’s only because it’s the
most versatile. A good listbox control, capable of multiple columns, indenting, and multi-selectionwill prove practically indispensable in your game’s GUI. Stop and think for a moment about all theplaces that listboxes are used in the average game, and you’ll quickly see my point.
I tackled my listbox control by splitting it up into two separate controls: a multi-column “report-style” list control, and an icon list control, which creates a view similar to what you’d see whenselecting “large icons” in an explorer window.
The icon list control was fairly easy to do. It kept track of a list of static icons (again, note thecode reuse), all the same size. I divided the listbox width by the width of the icons, which gave methe number of columns available. (If it turned out that my listbox was smaller than the largest icon, Iassume I have only one column, and let the gui system take care of clipping the icons so that theydon’t overrun my client area). Once I had the number of columns, I calculated how many rows I’dneed by dividing the total number of icons by the number of columns. This told me how to setup myincluded scrollbar (again - complex controls as combinations of simple ones).
Note that these values will have to be recalculated whenever the control is resized. For thisreason, I set up a wm_sizechanged() message that calcall() would call whenever the client area of awindow was modified.
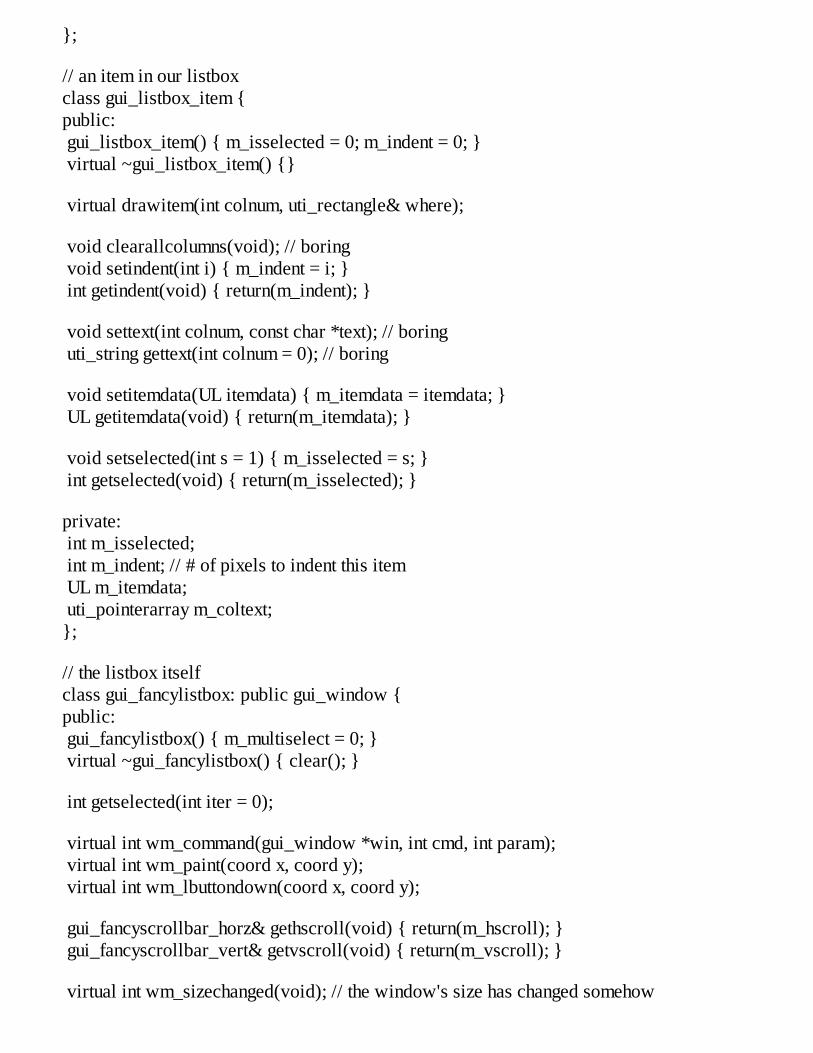
The report-style list control was a little more complex. I first created two helper classes,gui_listbox_column and gui_listbox_item, which contained all of the information about a given itemand column in the list.
gui_listbox_column is the simpler of the two classes. The main listbox class keeps, as a membervariable, a dynamic array of gui_listbox_columns, which represent the columns in the listbox rightnow. gui_listbox_column contains all of the information needed for a column in our list box,including the name of the column, the alignment of the column, whether it’s shown or hidden, its size,etc.
The main listbox class also keeps a dynamic array of gui_listbox_items. The gui_listbox_itemclass contains everything related to a particular row (or item) in our report-style listbox. By far themost important data member of this class is the array of strings, representing the data for eachcolumn. I also decided to let each item store an additional 32-bits of data with it, via the m_itemdatamember. This technique is similar to how Windows allows you to store 32-bits of data by callingSetItemData() and GetItemData() for your listbox items. This feature is important because it allowsclients of the listbox to store a pointer with each item - usually a pointer to the specific classassociated with the item, so that it’s readily available later.
As for drawing the columns and items… I decided that I’d like to have absolute control overhow each individual item/column in the listbox was drawn. Towards this end, I decided to have thelistbox draw its items and columns by repeatedly calling two virtual functions,gui_listbox_item::draw() and gui_listbox_column::draw(). Each function took one parameter - arectangle understood to be the location on the screen where the column or item was supposed to bedrawn. The default implementations of these draw() functions just spit out the text associated withthat particular column and subitem in that rectangle; however, I could now easily derive and overridedraw() for items or columns that required a unique appearance. This technique has seemed to workfor me so far, though I don’t claim that it’s the best or “right” way to do it.
Drawing the items required a little more work than the columns, however. Items had to bedrawn with or without a highlight, depending on whether they were selected or not. Not a big deal,but important to remember.
Then there’s the issue of scrollbars. My report-view listbox contained two members,m_horzscrollbar and m_vertscrollbar, both GUI scrollbars. Whenever the size of the listbox waschanged (wm_sizechanged()), it took a peek at the width and height of the data it had, and eitherdisplayed or hid the scrollbars as appropriate.
It’s been a whirlwind tour, but hopefully you have a general idea of what lies ahead of you inyour quest to create controls for your GUI. The only thing I want to reiterate is “style is fun.” Don’tbe afraid to take a few liberties as you create your GUI - implement the stuff you’ve always wishedfor, and the stuff that makes the most sense in your game. This is especially important if the game yourmaking relies heavily on the functionality of your GUI - like, say, you’re making a RTS game.
But also remember that in creating your controls, your doing the same balancing act as with therest of your game - you’re weighing features against development time. Give your players as easy andintuitive GUI as possible, but also, don’t spend all your time making 50 different controls. You wantto strike a balance between functionality, the good thing, and complexity, the bad thing.

Part IV: Resource Editors and Other Madness This section will address a whole bunch of miscellaneous issues and ideas to polish off your
game GUI.
Saving Windows
Window serialization (or, saving and loading windows) may or may not be crucial for yourproject. If your game GUI is minimal, you might be able to get by with just hard-coding the windowsinto your game. But if your GUI’s more complex than that, you’re going to want code that will save awindow (and all its children) to a file, and then load it back up again. For starters, having windowserialization code allows you to change your game’s GUI without recompiling, and is a boon ifyou’re working with more than one person. So, let’s spend a little time talking about how Iimplemented saving windows.
My plan of attack was easy - start at the main dialog window, and recursively go through all ofits child windows, saving each one to disk. If I were programming in C, the first thing I would havesaid to myself would have been “OK, so if I have to save these windows, I need a byte for eachwindow that tells me what type of window it is, so I can load it back up correctly. 1 is a button, 2 is alistbox, 3 is an icon, etc.”
This kind of problem is specifically what C++’s RTTI (Run Time Type Identification)addresses. RTTI provides two things, a type_info class and a typeid() function, which togetherallowed me to query an object for it’s class name - “gui_window”, “gui_button”, etc. Instead offiddling with enums and IDs, I simply call typid() for each window I’m going to save, and “writedown” the class name of the window.
I saw two minor disadvantages to using RTTI’s object identification functions to help savewindows. First of all, the RTTI IDs are strings, not integers, which means they’ll take up more spaceon disk (store them Pascal style, that is, the first 4 bytes describe the length of the string, followed bythe string data itself). Second, if you change the name of one of your window classes, you’ll breakany window files that you’ve previously saved. For these reasons, you might opt out of using RTTI inthis manner - after all, just because a technology is there doesn’t mean you have to use it. However, Ifound RTTI to be a lifesaver in my code.
For more information on RTTI and these two functions, search for them in your online help.Also, if you decide to use RTTI with Visual C++, make sure you turn it on in your project settings,C/C++ tab, C++ language option.
Loading Windows
Loading windows is more difficult than saving them, primarily because you have to new eachwindow, load it up, and then remember to delete it when it’s no longer needed.
This function is recursive, and looks like this in PDL:void gui_window::load(int filehandle) { // read window properties (colorsets, etc.) // read total number of children for this window // for each child… // read window ID from disk // new a gui_window derivative based on that ID // tell the newly created window to load itself (recurse) // next child}In other words, you’d load windows from disk exactly as you would expect. First, you take care
of the base window: read in its properties. Then, read in the total number of children of the basewindow. For each child, read an ID byte, new up a window based on that ID, and then tell that newwindow to load itself (recurse down into it). Once all of your children are loaded, you’re done.
Of course, it’s also very important that your file structure mirrors this same layout. Make sureyour save code saves things in the same order that you’re loading them.

Resource Editors
To really make your game GUI shine, you’re going to need a resource editor. Certainly youdon’t need one as slick and functional as Developer Studio’s, but you at least need a basicapplication that will let you add, edit, delete, and arrange things, and will save you the trouble ofcalculating out virtual coordinate positions for all of the controls in your dialogs.
Writing a full-featured, WYSIWYG resource editor is beyond the scope of this article, but I cangive you a few miscellaneous tips for if you do decide to attempt such a beast:
· Share your code. Specifically, make the resource editor share the same rendering code asyour actual game. This way, you get WYSIWYG support, and you save yourself the trouble of havingto implement two sets of GUI code. I guarantee you, it’s easier to tweak your DirectX code so that itrenders to a GDI surface instead of to a double-buffered system than it is to re-implement an entirelynew drawing core. Remember also that it’s quite likely your GUI system will change over time - youdon’t want to constantly have to change code in two different places.
· Don’t try to emulate DevStudio’s look and feel. In other words, don’t waste time trying tofigure out how to mimic the various features of the DevStudio GUI (like, say, tabbed property sheetsand preview windows). Don’t feel bad if your Resource Editor is ugly in comparison; yes, it’s truethat the productivity of a team is directly proportional to how useful its tools are, but at the sametime, it’s very unlikely that anyone outside your team will be using your Resource Editor, and you’renot using it to create a full-fledged GUI app; you’re just making a few dialogs. You don’t needcontext sensitive help. You don’t need context menus, unless in your opinion they ease a particularlytedious operation. It’s OK if your resource editor isn’t polished, just so long as it gets the job done.
· Emphasize data integrity over speed. The Resource Editor is a data wrangler, not a high-performance app, and there’s nothing more annoying than when a dialog you’ve spent an hourdesigning goes down the tubes because of a program crash. When writing your GUI, preserving datashould be your highest goal - implement autosaves, undo buffers, etc, and go easy on the optimization.
Subclassing
Those of you who are familiar with the way Win32 does its windowing probably already knowwhat the term “subclass” means. For those of you who don’t - when you “subclass” a window, youeffectively “derive” a new window type, and then wedge your new window type into places wherethe old window used to be.
Let me explain that a little better. Say we need a Super Listbox. We’ve got a normal listboxclass, but it just doesn’t cut it for some reason; our game demands the Super Listbox. So we derive anew “super listbox” class from our regular listbox class. So far so good.
But how do we place the Super Listbox in our game’s dialog? Since the Super Listbox isspecific to our application, it wouldn’t make sense for us to add functionality to our resource editorto support it. But, at the same time, how do we tell our GUI system that for this one particularinstance (our game), we’d like all listboxes to really be Super Listboxes? That’s what subclassing isall about - it’s not an exact, technical definition, but it will suffice for now.
The approach I’m about to illustrate is what I call “subclassing at load time.” To understand it,let’s start with the basic loading code I described in the last section. We’ve got a load function,which recursively news, loads, and then adds windows. Specifically, we’ve got something that lookslike this, in PDL:
// read total number of children for this window// for each child… // read window ID from disk // new a gui_window derivative based on that ID //…// next childTo implement subclassing, I’ve told my window loading routine to “give the application a
chance to create a window of this type,” like so:// read total number of children for this window// for each child… // read window ID from disk // give application a chance to create a window of this type // if the application didn’t create a window, then new a gui_window derivative based on the ID // else, use the application’s created window //…// next childSpecifically, I give the application this chance by way of a function pointer. If the application
needs to subclass a window, it fills in the function pointer with the address of its own function. Whenthe windows are loading, they call this application function, passing in the ID of the window theywant to create. If the application wants to subclass a window from this ID, it news up the appropriateobject and returns the new pointer back to the window. If the app doesn’t want to do anything specialfor this ID, it returns NULL, and the window function senses this and news up the appropriate defaultobject. This method allows the app to “pre-filter” the incoming window ID bytes, and to override thedefault behavior for certain window types. Perfect!
Using a method like this gave me a huge amount of freedom when it came to creating customcontrols. I went back and added code to my resource editor that would let me change the IDs thatwere saved for each window. Then, when I needed a custom control in the app, I just used my
resource editor to change the ID byte that was saved for that window. Saved on disk would be the ID,along with the dimensions and all the other base-class properties for the custom control!
Real quickly - there’s another way to do this same thing, and that is to mirror the approach theSTL has used when it needs to create things. The STL uses special “allocator” classes, which aresort of like “factories,” in the sense that clients tell them what they want created, and they create it.You could use this same approach for creating windows.
It’d work something like this. Create a class and call it gui_window_allocator or something.Implement one virtual function, say CreateWindowOfType(…), which would take in a given windowID and spit back out a brand new pointer to that window. Now you’ve got a very simple allocatorclass, which your window loading code will use by default to new up windows as they are needed.
Now, when your application wants to override the “new” behavior for the windows, you simplyderive a new, application-specific gui_window_allocator class, and tell your window loading codeto use this allocator instead of the default one. This method is similar to providing a function pointer,only with a bit more C++ thrown into the mix.
Speeding up GUI Rendering
Here’s another miscellaneous tidbit for you that will help you if you’re trying to speed up yourGUI drawing.
The key concept here, just like with optimizing any other drawing routine, is simply “don’t drawwhat you don’t need to.” By default, the GUI spends a lot of its time drawing stuff that hasn’tchanged. You can, however, optimize this a little, by telling the GUI to only draw windows that are“dirty.” The windows set their dirty flag whenever their appearance needs to change, and they clearthe dirty flag once they’re drawn.
There’s one catch - since our GUI controls might be transparent, when a control is marked asdirty, its parent window must also be marked as dirty. That way, when it draws itself, the backgroundis still intact, since the parent window has also just redrawn.
Conclusion
I’d like this article to be as useful as possible, so now that you’ve read it, if there’s anythingyou’d like me to expand on, or anything that I’ve missed, please email me and let me know about it.
Also, check out my web site and my current project, Quaternion, at http://www.spin-studios.com.
And, if you get a chance, drop by http://www.gamedev.net.But most importantly… have fun developing your game!Mason McCuskey is the leader of Spin Studios, a game development team working to break
into the industry by creating a great game, Quaternion, and getting it published. He looks forwardto your suggestions and comments, and can be reached via his web site at http://www.spin-studios.com, or by email at [email protected].