Embed Size (px)
Citation preview
Developed for Metropolitan Nashville Pawn Shops.
Funded by Edward Byrne Grant #95-DG401through the State of Tennessee in Cooperation with the
Metropolitan Nashville Police Department.
©1998Tim BuchananDave Tempero
Stan Wilson
Distribution to Federal, State, local Police Departments and the pawn shops they serve is free-of-charge. Nameddevelopers above may distribute (no cost) PCPawn client and server software and may charge for installation &
customization. Any other use (graphics, tradenames, source code, screen layouts) is strictly prohibited.

Contents
I. Overview of PCPawnII. Installation and SetupIII. Form instructionsIV. Troubleshooting and Contacts
Overview of PCPawn
PCPawn is an inventory tracking system developed specifically for pawn shops. It provides for the pawn, loan, sale,and reporting of all types of merchandise. Each “Pawned” (loan or purchase) item is entered on a ticket, by serial number andNCIC code, when it enters the store and the maturity date and status are computed. All customer information is also enteredon the ticket. If the customer has been entered previously then their information can be called up and put on the ticketautomatically. The ticket can then be printed and given to the customer for their records. The sale of merchandise is recordedin much the same way as the pawning of merchandise with the broker being able to select available items from inventory.Broker information is also recorded for general business purposes. Daily “Pawn” (loan or purchase) transactions are reportedover a modem directly to the local police department from the Administrator screen. Various customizable settings (i.e. daysto hold, tax rate, and mark-up ) are available in the setup screen. The Reports screen allows for printing various inventoryreports using customizable parameters (date ranges and item status).
PCPawn is designed to transmit legally required information to your locsl police agency. Some agencies andjurisdictions require more information than others and PCPawn can accomodate most requirements. Police Departmentsrequire identification and addresses but may not REQUIRE estimated item value, for example, and any data can be excluded inthe send portion of this application. This program is designed only to send information necessary to meet legal requirements inthe jurisdiction it is used. This application was developed for the “Mom and Pop” shop or the national chain. This applicationis distributed free-of-charge ( though integrators may charge to localize (customize) it for that area of the country). Any policedepartment may distribute and use this application free of charge. The Metro Nashville Police Department does not providetechnical support EXCEPT in Nashville-Davidson County. The Metro Nashville Police Department chose to use grant funds toprovide support and installation to shops in and surrounding Nashville - Davidson County, Tennessee. In addition, thedevelopers, Tim Buchanan, Stan Wilson and Dave Tempero may distribute PCPawn.
All of the information is captured through a Microsoft Visual Basic application and stored in a Microsoft Accessdatabase. The database can also be accessed for custom reporting by brokers if they have Access 2.0 or later and areexperienced in the building of queries and reports.
The minimum system requirements for running PCPawn is a 486DX 66Mhz with 8 Mb RAM, VGA monitor at800x600 with 256 colors, 9600 baud modem, running under Windows for Workgroups 3.11. The recommended system wouldbe a Pentium 100Mhz (or faster) with 16 Mb RAM, 28.8 baud modem, running under Windows 95.

Installation and Setup
*Note: Before starting the setup process please be sure you are on the network ( if present) and all hardware isworking correctly. Make sure you have an active modem and phone line (free support and installation in DavidsonCounty).
Install and Setup of ODBC (Other Database Connectivity Layer)
PCPawn uses ODBC to send transaction updates to the local police department’s SQL Server over a modem line.ODBC requires that drivers (software) be added to some systems and that Data Sources (configuration settings) be added, sothat different types of databases can communicate with each other. Depending on what type of system you currently have andwhat types of software you have already installed, you may or may not have to install from the ODBC diskette.
Determining if you need to run the ODBC Setup disk on a Windows for Workgroups PC
Start Windows for Workgroups In Program Manager, double-click on the Main group.
In Main, double-click on Control Panel.If you do not see ODBC listed, then follow directions for #1 and #2 below.In Control Panel, double-click ODBC to open the Data Sources window.Click on the Drivers… button to see a list of installed drivers.If you see SQL Server listed, then click Close and follow the directions for #2 below.If you do not see SQL Server listed, then follow directions for #1 and #2 below.
1. Insert ODBC diskette in drive A:In Program Manager, select Run from the Menu and type A:\setup.exeChoose SQL Server drivers and click OK.ODBC setup will copy the SQL files to your hard drive and then it will start the Data Sources setup window.
2. Click the Add button and then click the SQL Server and click OK.Fill in the boxes so the information is the same as shown below.
After entering the data click the OK button.Then click Close in the Data Sources window.You should then get the Setup Succeeded message if you ran Step #1Click OK to finish setup.
Install and Setup of PCPawn
Start Windows and insert Disk #1 into drive A.In Program Manager, select Run from the Menu and type A:\setup.exeContinue following the instructions on the screen for the rest of the diskettes.
The setup will create a program group and a program icon for running the program. The first time that PCPawn is runthe following messages will appear:
Message : Creating ini fileReason : This is creating your settings file in your system directory.Action to Take: Click OK to continue.
Message: “ ” Isn’t a valid pathReason: The program cannot find the database initially.Action to Take: Follow instructions for the System Setup Form.

Message: You must restart for changes to take effect.Reason: Any changes on the Setup form take effect after restarting PCPawn.Action to Take: Click OK and then Click Exit on main Pawn form.
First Things to Do:
After Setup and Installation there are a couple of things that need to be done.1. Read the rest of the manual.2. Follow the instructions for the System Setup Form.3. Follow the instructions for the Broker Form.
Form Instructions
How it all works together, shortcuts, moving along…
All of the forms (also called screens and windows) in PCPawn were designed to be easy to use. However, “easy” forone person may be “bothersome” to another and even “confusing” to someone else. Fortunately, experience, patience, andpractice will soon make most operations second nature.
All of the forms in PCPawn are started from the main Pawn screen by clicking the appropriate menu item. There arekeyboard “shortcuts” for most screens and buttons. To use these shortcuts, you simply hold down the “Alt” key and press theunderlined letter in the item or button you wish to activate. For example: in the main Pawn window you would hold down“Alt” and press P ( usually written as Alt+P) to start the Pawn Ticket form or use Alt+R for the Reports. To navigate thevarious fields on a form you may either use the tab key or click directly on the field . The ESC key also functions as an exit onall forms except the Main Pawn Form. The ESC key does not cancel or erase information that you may have entered already.
On various forms that have entry boxes that you double-click to activate, you can also tab to them and then pressRETURN/ENTER to activate them from the keyboard. To activate buttons on various forms you can tab to them and thenpress the SPACE bar to activate them. On drop-down entry boxes (shown below) you can click the arrow to see the availablechoices or tab to them and use the up/down arrow keys or start typing you entry and then choose from the selections that matchwhat you’ve typed.
a drop-down box
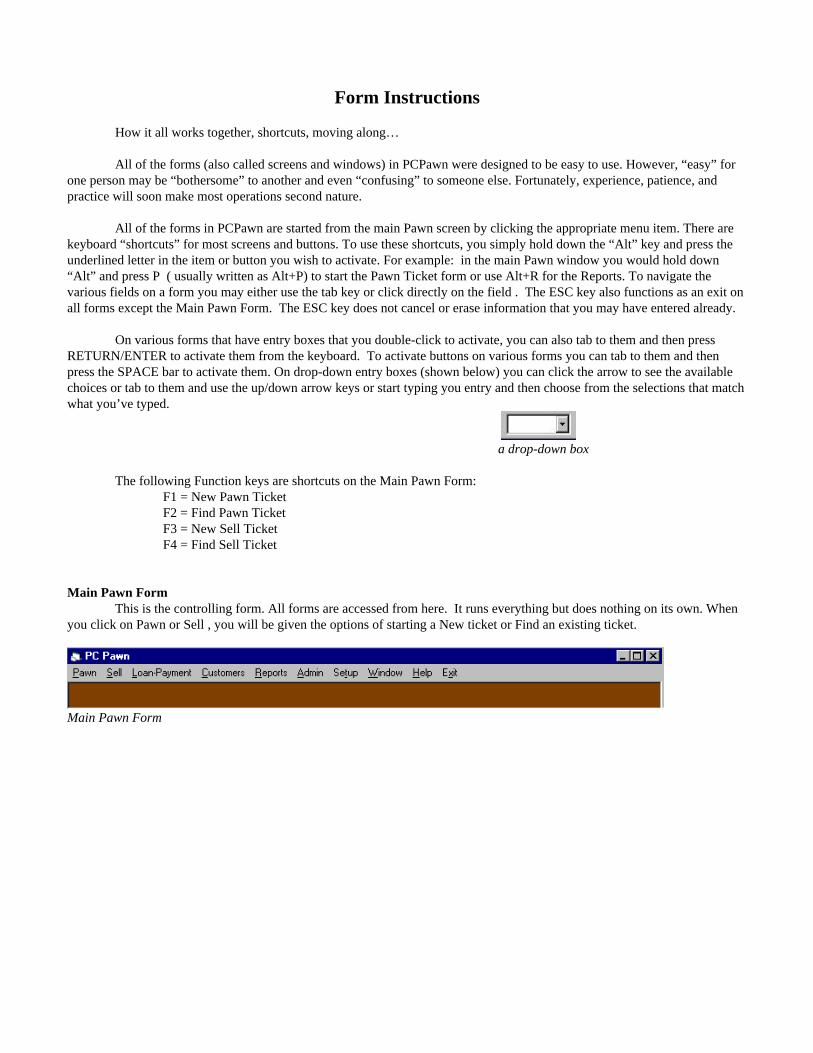
The following Function keys are shortcuts on the Main Pawn Form:F1 = New Pawn TicketF2 = Find Pawn TicketF3 = New Sell TicketF4 = Find Sell Ticket
Main Pawn FormThis is the controlling form. All forms are accessed from here. It runs everything but does nothing on its own. When
you click on Pawn or Sell , you will be given the options of starting a New ticket or Find an existing ticket.
Main Pawn Form

System Setup Form showing Store Information tab.
System Setup FormClick Setup in the main Pawn window.Click Store Information tab.Enter Store Information as requested.

System Setup Form showing Program Setup tab.
Click Program Setup tab.Enter the directory path and name of the database in database location or browse for it by clicking the box with thethree dots.Enter the directory where PCPawn was installed in other file location or browse for it by clicking the box with thethree dots.
The Com Port and Communications settings are for information purposes only in this version.

System Setup Form showing Admin Setup tab.
If you wish tickets to be numbered automatically make sure AutoNumber is checked. If AutoNumber is checked,you need to enter the starting Pawn Ticket and Sell Ticket numbers (maximum ticket number is 8 digits).Enter the number of days to hold items that are on Pawn/Loan.Enter the number of days to hold item that are purchased outright.Enter the standard markup to use on sell of merchandise. ( Actual sale price can be changed on ticket to any amount.)Enter the sales tax rate to use on sale of merchandise.Enter the monthly interest rate on loans.Enter the monthly handling fee. This fee can be a flat rate or a percentage up to 1/5 (20%) of loan value. PCPawn
treats any entry less than 1 as a percentage rate (i.e. .2 = 20% per month).

System Setup Form showing Label Setup tab.
Click Label Setup Tab.Choose the Label Printer from the list of available printers.Enter the Label Size, Starting positions, and/or scale positions.(Note: Due to the numerous types of labels and printers available you may need to try various settings to get the bestlooking labels.)
Enter the Special Label Price code that you wish to see on the labels based on the cost of the item.This code will allow you to determine your actual cost of an item by reading the label. You can use any printablecharacter but do not use the same character to represent two or more numbers.For example : the label code BCF-AA is equal to 125.00 using the code shown below.
Click OK when finished entering all information.Click OK when told you need to restart.Click Exit and restart PCPawn to use new settings.

Pawn Ticket FormUse this to enter pawns/loan and outright purchases of merchandise from customers. Fill in all the information
requested by the form. Most of this information is required to be recorded by state or local law. Below are listed any specialinformation or options for the fields. If you have not filled in all the required information a Ticket Error message box (shownwith the Gun and Jewelry Detail Forms) will appear that informs you of any missing field and give you the option of losing theinformation you’ve entered or returning to the ticket to fix the fields.
Fields: Ticket # can be set to AutoNumber on the Setup Form or entered manually.
You can double-click on the field to search for a specific Ticket that been entered previously.
Status is a drop-down list of possible ticket statusesHold : Items on ticket are currently on hold either due to date or special circumstances.Sell : Items are available for sale.Police : Items are held at the request of the police.Delete : Items and Ticket are to be deleted.
Note: Status and Maturity date are both based on the number of days to hold an item and the current date. It is alsobased on the Ticket Type as pawn/loans are typically held longer than purchases. Status is also related to the SpecialDate and Special Hold fields. These fields are used to record any special reason to hold the ticket and who requestedit, whether it was requested by an officer on the pawn detail or a special request from the customer themselves.
Last Name can be double-clicked on new tickets to add an existing customer on the new ticket.
NCIC is the required category field. Double-click on this field to bring up the NCIC Form.
Serial # should be entered if at all possible. It may be left blank for some items (i.e. screwdrivers, sockets) but it isvery useful in being able to track and value your inventory.
Owner ID# is any engraving or identifying tag that was applied by a previous owner. This is also useful in identifyinginventory cost and profit.

Buttons:The “<” and “ >” are used to move either forward or back in the tickets. The New button will give you a new blankticket and the Find button will start the Ticket Search form. The Print Ticket button will open a preview of the printedticket that you can send to the printer by clicking the printer button. The “+” button will add a new line to the itemlist if you need more lines ( use the scroll bars to look at all item lines).
Pawn Ticket Form

Search FormsTo use the Search Forms, enter whatever information you wish to find and then click the Search button. If you find the
item you were searching for you can click on it then click on the button that will use this information or you may double-clickthe field. If you wish to use the keyboard you can use the tab key and the up/down arrows to choose the items in the list andthen use Alt + letter to activate the button or press Enter to activate the default action. Searches may show multiple listings ofthe same items if they have more that one Ticket, ID Number, or other information stored in the database.
Ticket Search Form
Customer Search Form

NCIC Code Form
The NCIC code form is used to find the appropriate NCIC Code for an item. To use it, first click the NCIC Type forthe item and then click on the best fitting description for the item. You can then click the “Use on Ticket” button to copy theNCIC code to the current line item on the current Pawn Ticket. You can also double-click on the best description to copy it tothe Pawn Ticket. NCIC Code is useful when categorizing inventory, especially items that do not have a Serial # on them ( i.e.sockets, hammers, screwdrivers). If an NCIC Code cannot be found for an item , use the code for items not listed (usually endsin ZZZZZZ) for the closest NCIC Type. Please contact your representative for assistance if you have a large number of itemsthat aren’t listed in the Codes.
NCIC Code Form

Loan Payment Form
The Loan Payment Form is used to record customers payments. It also shows their payment history, and categorizedtotals of their payments. If you enter the full amount that they wish to pay into the $Total field, the program will divide thepayment into the categories in the following order:
1. $Handling2. $Interest3. $Principle
Alternatively, you may enter the amounts by hand to apply the charges as you deem appropriate.The Loan Payment History shows detail information about previous payments the customer has made. If you find it
necessary to change a past entry, double-clicking on it will move the payment data onto the Loan Payment line , where youcan make changes. Before exiting this form or making changes to the History entries, please click on the Save button to recordthe current payment data. (Note: By not saving the data automatically, as on other forms, this allows you to split the paymentinto the various fields.)
The most useful fields used in computing the outstanding balance is the Pay Date. By changing the pay date, you cansee the balances for any date in the past or in the future. The loan balances will be recalculated if you change any of the fieldsrelated to computing the balance. The ReCalculate button also uses the payment history to recompute the current loan balancesand make the appropriate corrections to the history information . If the default Handling Fee or Interest Rate has changed sincethe loan was issued the loan will use the rates that were in effect at the time of the payment and the outstanding balances willbe computed using the current rates. The Print button will print a complete history of the current loan. To Delete a payment,double-click on it (to bring it to the payment boxes) and then click on the Delete button. The Clear button will erase anyinformation you may have typed into the payment boxes (but not saved yet) and reset the pay date as the current date. When aloan has been paid up the “Make Loan Payment” bar will say “Loan has been paid in full” as shown below.
Special Note: The balances are computed as of the pay date and include any payments made on the pay date , allpayments go into effect immediately and the balances due will be reset to reflect the payment. For example: If someone paysthe Total Due, the principle, interest, and handling amounts will be set to zero even though there was principle, interest, andhandling included in the final payment.
Loan Payment Form

Jewelry Detail Form Gun Detail Form Ticket Error Message
Gun and Jewelry Detail FormsThe Gun or Jewelry Detail Forms will load anytime that the NCIC Code for an item on the ticket is a Gun or Jewelry.
These types of items require that more detailed information be recorded for their Pawn/Loan or purchase. If you wish to seethese detail forms on an existing ticket, you can click on the Description field of the line on the Ticket that describes these typeitems.

Sell Ticket FormThe Sell Ticket is used to record information on sales of merchandise and works very similar to the Pawn Ticket. The
following is a description of some of the fields and information on the Sell Ticket.The Items for Sale listing shows some of the items that are available for sale. An item will be in the list if is not on
“Hold” of some sort and it has a unique Serial # . If you double-click on the item that you wish to sell, it’s information will becopied into the correct fields. Items that are not on the list may still be sold by manually entering the necessary information.The search field and search button may be used to help locate specific items in the database.
The NCIC Code works the same as on the Pawn Ticket.The Price shown on the Sell Ticket, if entered automatically from the list, already includes the markup from the
System Setup Form. The Price can be changed by entering it from the keyboard. The Total Price include Tax if the Taxablebox is checked. The Tax Rate is also entered from the System Setup Form.
Sell Ticket Form

Customers FormThe Customer Form is used for examining and editing the data pertaining a specific customer. You can see the various
types of information about a customer by clicking on the appropriate tab. To find a specific customer you can scroll through thelisting or enter the first few characters of their last name in the search for box and then click search. To edit a customersinformation you can double-click on their name in the customer listing box. This will put their information into the customerdata section. You may also walk through each customer by using the < and > buttons. The New button will start a clear formfor entering a new customers information.
Note: After changing any existing data or adding a new customer, be sure to save your changes before changingcustomers or exiting the customer form.
Customers Form

Reports Form
The Reports Form allows you to print various listings and reports for different date ranges and by item status. Toinclude all items on listing with date fields, use a very early date for the start date and a future date for ending date. (i.e. StartDate = 01/01/1980 and End Date = 12/31/2000). The Print button for each report actually shows you a preview of the report.To print it use the printer button on the preview.
Reports Form

Admin Form Broker Information FormAdmin Form and Broker Information
The Admin Form has several functions. It is used to update ticket statuses, enter Broker information, repair thedatabase, compact and backup database, and to send daily transactions to the local police department.
Update Ticket Status. This button checks all of the tickets in the database to see if there are any that have Maturedand changes their Status to sell, if applicable. When you click on this button, a message box will appear asking if all tickets areclosed. If you are the only PC using PCPawn then you need to make sure you do not have any tickets open before answeringyes. If your database is on a network then you need to be sure that all other users of PCPawn have all if their Tickets closedalso before proceeding. When finished, the update will display a box telling how many tickets had a status change. You canprint a listing of these by using the Reports Form to print the listing where Status = Sell and the Maturity Date is the currentdate.
Broker Data. This will open the Broker Information form where you record general employee information. Anyemployee that will be working on PCPawn will need to be entered as a Broker to allow them to enter their Broker ID onTickets. When the Date Fired field is filled in, the broker will not be available in the Pawn and Sale ticket and a terminationmessage will show on their Broker Information.
Repair Database. This will repair any structural damage to the database caused by system crashes, or power loss. If thedata is severely damaged, some data loss may occur.
Compact Database. This will create a backup copy of the database on your hard drive and compact the database byremoving empty records and space. This will NOT renumber or rearrange data.
Sync. Sync is short for synchronization. This button starts the transaction reporting to the local police department overyour modem. Depending on your system and modem, the exact process for the Sync varies. Sync basically sends intransactions to the local police department that haven’t been sent previously.

Note: You should always have a backup of your computers. They’re just machines and they do break.
Troubleshooting and Contacts
If you are having problems with connecting and synchronization, please check with your police representative toinsure they are not having modem or server problems.
Contact the Metro Nashville Police Department if you can’t find the answer to your question in this manual.
Contact Numbers:
Local Police Department Phone # ____________________________________________
Officer Name ____________________________________________
Developed by Sector3, Incin cooperation with theMetro Nashville Police Departmenthttp://[email protected](615) 862-7376