Embed Size (px)
Citation preview
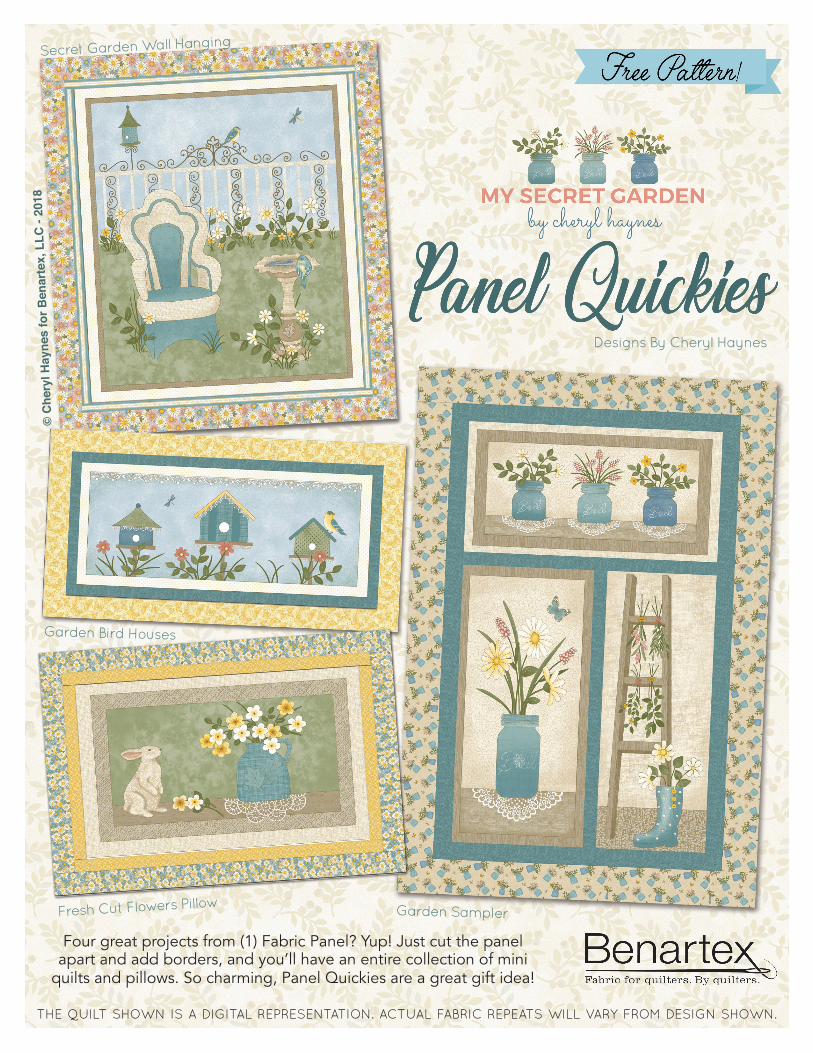
THE QUILT SHOWN IS A DIGITAL REPRESENTATION. ACTUAL FABRIC REPEATS WILL VARY FROM DESIGN SHOWN.
Designs By Cheryl Haynes
© C
hery
l Hay
nes
for B
enar
tex,
LLC
- 20
18
Four great projects from (1) Fabric Panel? Yup! Just cut the panel apart and add borders, and you’ll have an entire collection of mini
quilts and pillows. So charming, Panel Quickies are a great gift idea!
Garden Sampler
Secret Garden Wall Hanging
Fresh Cut Flowers Pillow
Garden Bird Houses
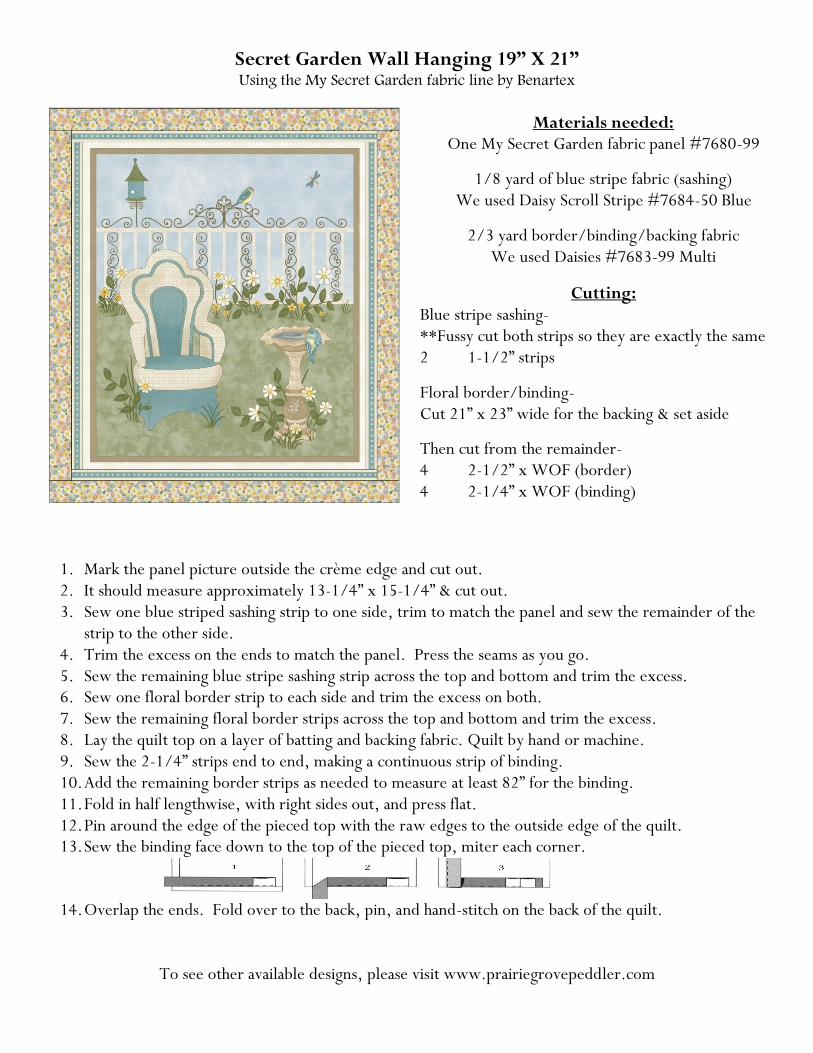
Secret Garden Wall Hanging 19” X 21” Using the My Secret Garden fabric line by Benartex
1. Mark the panel picture outside the crème edge and cut out. 2. It should measure approximately 13-1/4” x 15-1/4” & cut out. 3. Sew one blue striped sashing strip to one side, trim to match the panel and sew the remainder of the
strip to the other side. 4. Trim the excess on the ends to match the panel. Press the seams as you go. 5. Sew the remaining blue stripe sashing strip across the top and bottom and trim the excess. 6. Sew one floral border strip to each side and trim the excess on both. 7. Sew the remaining floral border strips across the top and bottom and trim the excess. 8. Lay the quilt top on a layer of batting and backing fabric. Quilt by hand or machine. 9. Sew the 2-1/4” strips end to end, making a continuous strip of binding. 10. Add the remaining border strips as needed to measure at least 82” for the binding. 11. Fold in half lengthwise, with right sides out, and press flat. 12. Pin around the edge of the pieced top with the raw edges to the outside edge of the quilt. 13. Sew the binding face down to the top of the pieced top, miter each corner.
14. Overlap the ends. Fold over to the back, pin, and hand-stitch on the back of the quilt.
To see other available designs, please visit www.prairiegrovepeddler.com
Materials needed: One My Secret Garden fabric panel #7680-99
1/8 yard of blue stripe fabric (sashing) We used Daisy Scroll Stripe #7684-50 Blue
2/3 yard border/binding/backing fabric We used Daisies #7683-99 Multi
Cutting: Blue stripe sashing- **Fussy cut both strips so they are exactly the same 2 1-1/2” strips
Floral border/binding- Cut 21” x 23” wide for the backing & set aside
Then cut from the remainder- 4 2-1/2” x WOF (border) 4 2-1/4” x WOF (binding)
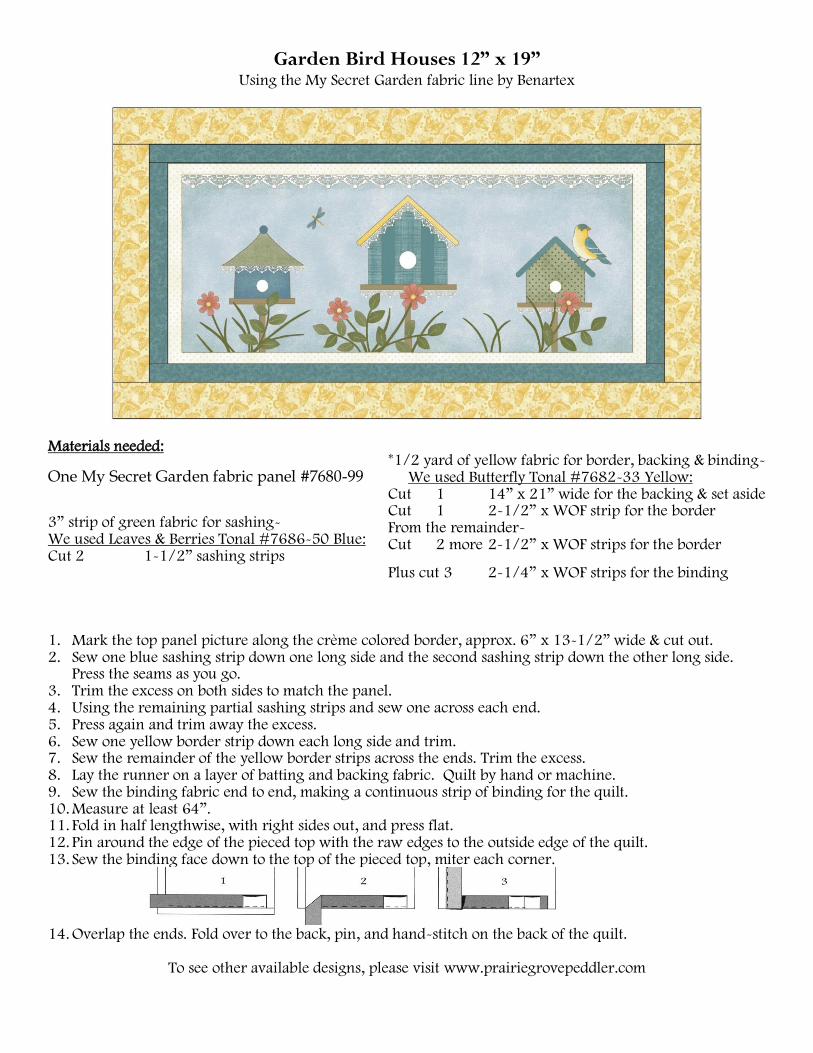
Garden Bird Houses 12” x 19” Using the My Secret Garden fabric line by Benartex
Materials needed:
One My Secret Garden fabric panel #7680-99
3” strip of green fabric for sashing- We used Leaves & Berries Tonal #7686-50 Blue: Cut 2 1-1/2” sashing strips 1. Mark the top panel picture along the crème colored border, approx. 6” x 13-1/2” wide & cut out. 2. Sew one blue sashing strip down one long side and the second sashing strip down the other long side.
Press the seams as you go. 3. Trim the excess on both sides to match the panel. 4. Using the remaining partial sashing strips and sew one across each end. 5. Press again and trim away the excess. 6. Sew one yellow border strip down each long side and trim. 7. Sew the remainder of the yellow border strips across the ends. Trim the excess. 8. Lay the runner on a layer of batting and backing fabric. Quilt by hand or machine. 9. Sew the binding fabric end to end, making a continuous strip of binding for the quilt. 10. Measure at least 64”. 11. Fold in half lengthwise, with right sides out, and press flat. 12. Pin around the edge of the pieced top with the raw edges to the outside edge of the quilt. 13. Sew the binding face down to the top of the pieced top, miter each corner.
14. Overlap the ends. Fold over to the back, pin, and hand-stitch on the back of the quilt.
To see other available designs, please visit www.prairiegrovepeddler.com
*1/2 yard of yellow fabric for border, backing & binding- We used Butterfly Tonal #7682-33 Yellow: Cut 1 14” x 21” wide for the backing & set aside Cut 1 2-1/2” x WOF strip for the border From the remainder- Cut 2 more 2-1/2” x WOF strips for the border
Plus cut 3 2-1/4” x WOF strips for the binding For the binding
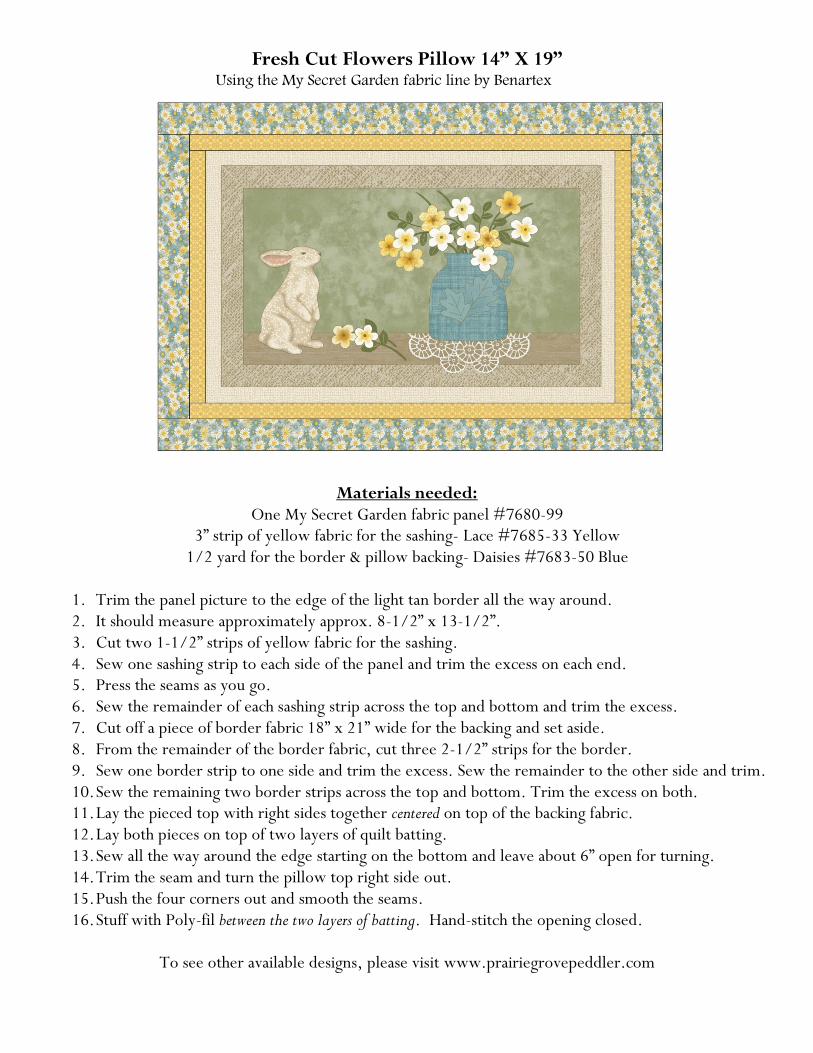
Fresh Cut Flowers Pillow 14” X 19” Using the My Secret Garden fabric line by Benartex
Materials needed: One My Secret Garden fabric panel #7680-99
3” strip of yellow fabric for the sashing- Lace #7685-33 Yellow 1/2 yard for the border & pillow backing- Daisies #7683-50 Blue
1. Trim the panel picture to the edge of the light tan border all the way around. 2. It should measure approximately approx. 8-1/2” x 13-1/2”. 3. Cut two 1-1/2” strips of yellow fabric for the sashing. 4. Sew one sashing strip to each side of the panel and trim the excess on each end. 5. Press the seams as you go. 6. Sew the remainder of each sashing strip across the top and bottom and trim the excess. 7. Cut off a piece of border fabric 18” x 21” wide for the backing and set aside. 8. From the remainder of the border fabric, cut three 2-1/2” strips for the border. 9. Sew one border strip to one side and trim the excess. Sew the remainder to the other side and trim. 10. Sew the remaining two border strips across the top and bottom. Trim the excess on both. 11. Lay the pieced top with right sides together centered on top of the backing fabric. 12. Lay both pieces on top of two layers of quilt batting. 13. Sew all the way around the edge starting on the bottom and leave about 6” open for turning. 14. Trim the seam and turn the pillow top right side out. 15. Push the four corners out and smooth the seams. 16. Stuff with Poly-fil between the two layers of batting. Hand-stitch the opening closed.
To see other available designs, please visit www.prairiegrovepeddler.com
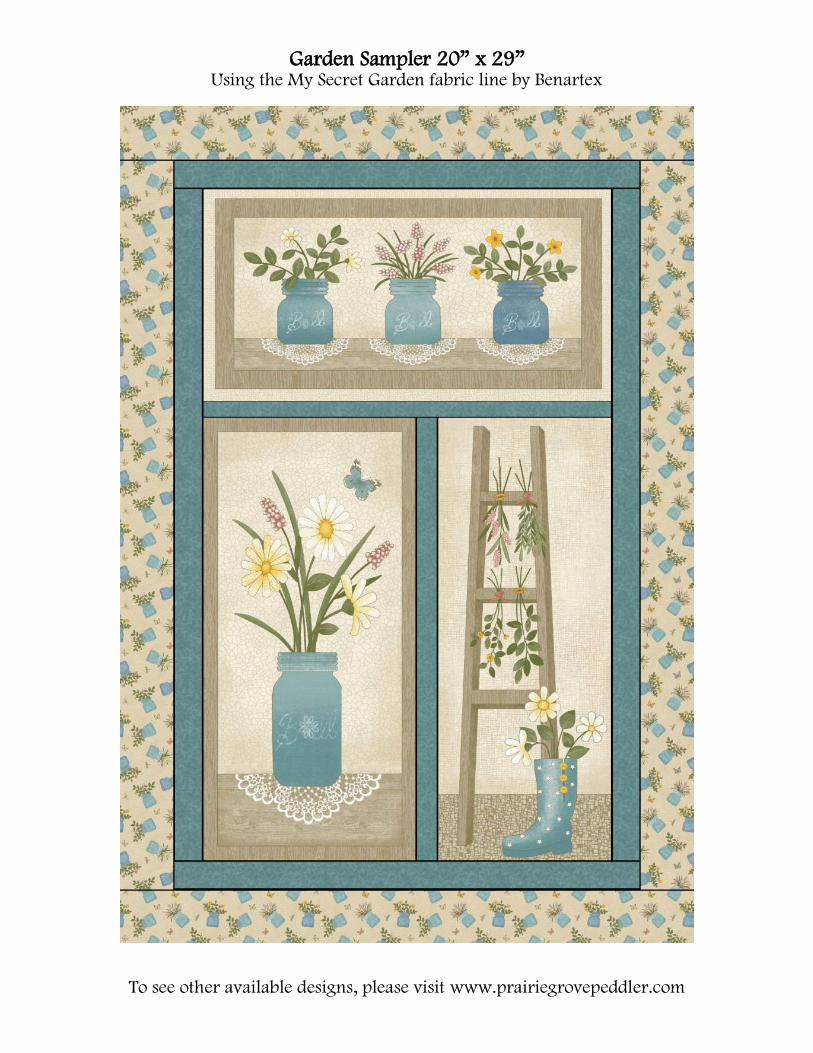
Garden Sampler 20” x 29” Using the My Secret Garden fabric line by Benartex
To see other available designs, please visit www.prairiegrovepeddler.com
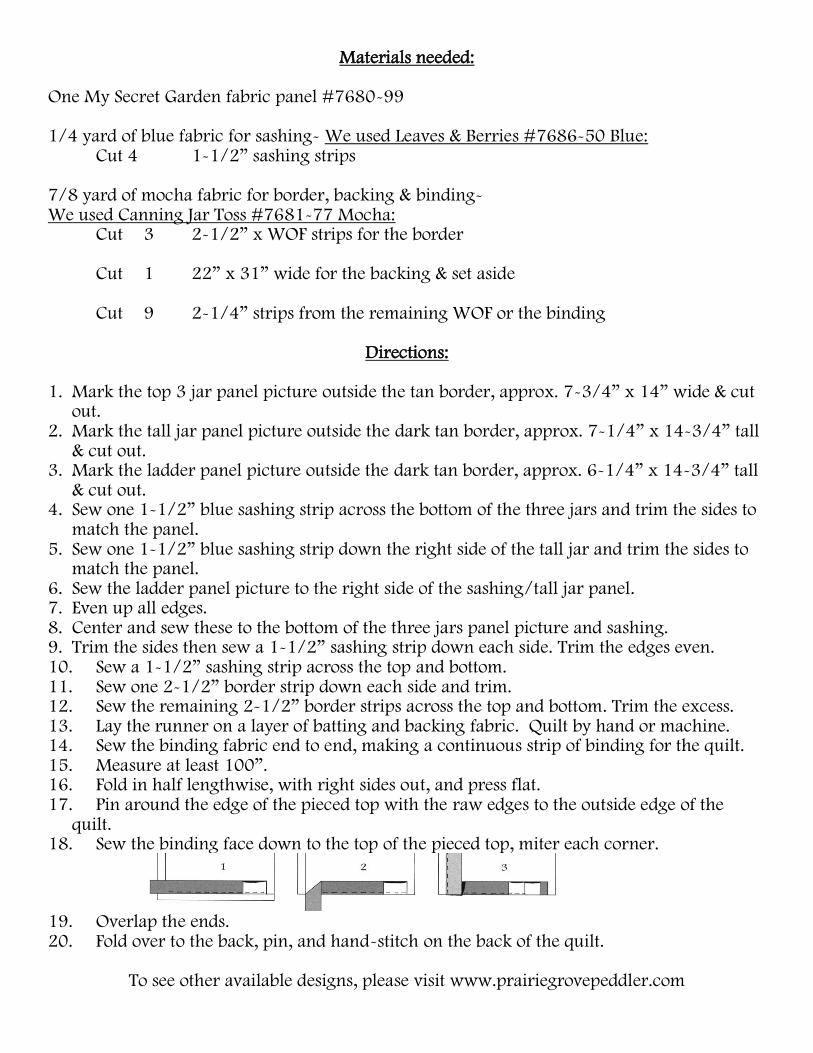
Materials needed: One My Secret Garden fabric panel #7680-99 1/4 yard of blue fabric for sashing- We used Leaves & Berries #7686-50 Blue:
Cut 4 1-1/2” sashing strips
7/8 yard of mocha fabric for border, backing & binding- We used Canning Jar Toss #7681-77 Mocha:
Cut 3 2-1/2” x WOF strips for the border Cut 1 22” x 31” wide for the backing & set aside
Cut 9 2-1/4” strips from the remaining WOF or the binding
Directions:
1. Mark the top 3 jar panel picture outside the tan border, approx. 7-3/4” x 14” wide & cut
out. 2. Mark the tall jar panel picture outside the dark tan border, approx. 7-1/4” x 14-3/4” tall
& cut out. 3. Mark the ladder panel picture outside the dark tan border, approx. 6-1/4” x 14-3/4” tall
& cut out. 4. Sew one 1-1/2” blue sashing strip across the bottom of the three jars and trim the sides to
match the panel. 5. Sew one 1-1/2” blue sashing strip down the right side of the tall jar and trim the sides to
match the panel. 6. Sew the ladder panel picture to the right side of the sashing/tall jar panel. 7. Even up all edges. 8. Center and sew these to the bottom of the three jars panel picture and sashing. 9. Trim the sides then sew a 1-1/2” sashing strip down each side. Trim the edges even. 10. Sew a 1-1/2” sashing strip across the top and bottom. 11. Sew one 2-1/2” border strip down each side and trim. 12. Sew the remaining 2-1/2” border strips across the top and bottom. Trim the excess. 13. Lay the runner on a layer of batting and backing fabric. Quilt by hand or machine. 14. Sew the binding fabric end to end, making a continuous strip of binding for the quilt. 15. Measure at least 100”. 16. Fold in half lengthwise, with right sides out, and press flat. 17. Pin around the edge of the pieced top with the raw edges to the outside edge of the
quilt. 18. Sew the binding face down to the top of the pieced top, miter each corner.
19. Overlap the ends. 20. Fold over to the back, pin, and hand-stitch on the back of the quilt.
To see other available designs, please visit www.prairiegrovepeddler.com