Embed Size (px)
Citation preview
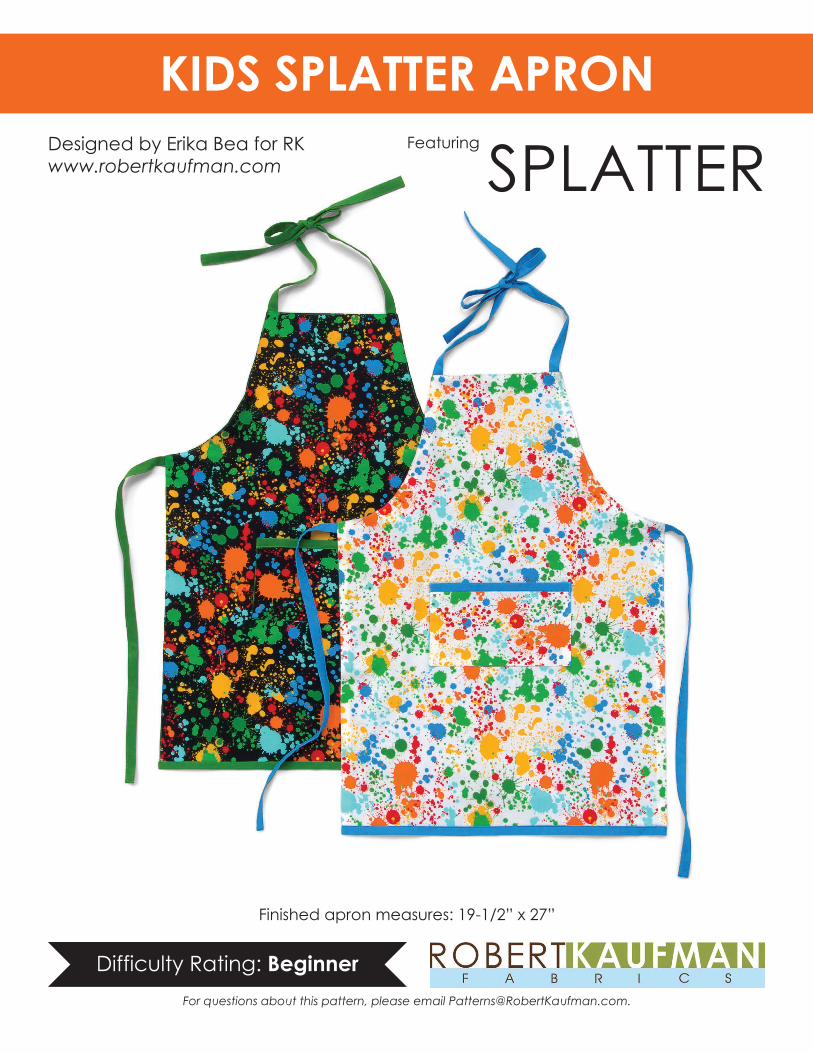
Difficulty Rating: Beginner
Just KissesDesigned by Erika Bea for RKwww.robertkaufman.com
Featuring
KIDS SPLATTER APRON
For questions about this pattern, please email [email protected].
Finished apron measures: 19-1/2” x 27”
SPLATTER
page 2
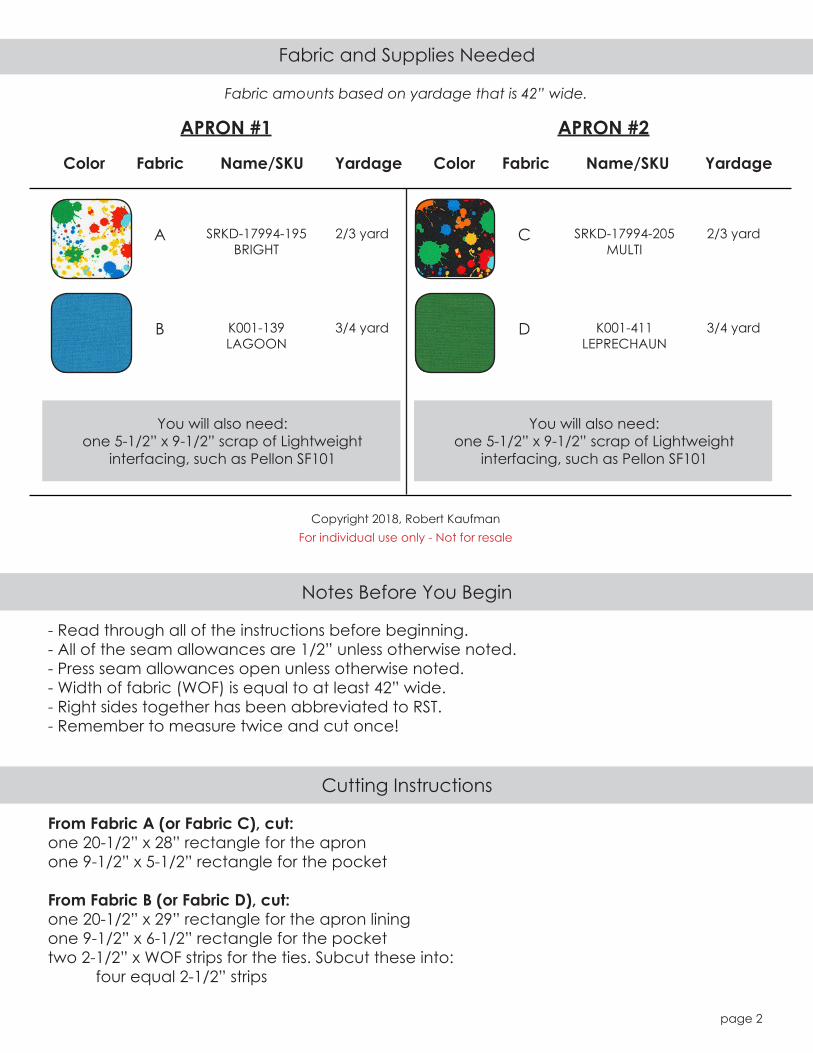
Fabric and Supplies Needed
Color Fabric Name/SKU Yardage
APRON #1
SRKD-17994-205 MULTI
K001-411 LEPRECHAUN
SRKD-17994-195 BRIGHT
K001-139 LAGOON
Color Fabric Name/SKU Yardage
APRON #2
Fabric amounts based on yardage that is 42” wide.
A
B
C
D
2/3 yard
3/4 yard
2/3 yard
3/4 yard
Copyright 2018, Robert KaufmanFor individual use only - Not for resale
You will also need:one 5-1/2” x 9-1/2” scrap of Lightweight
interfacing, such as Pellon SF101
You will also need:one 5-1/2” x 9-1/2” scrap of Lightweight
interfacing, such as Pellon SF101
- Read through all of the instructions before beginning.- All of the seam allowances are 1/2” unless otherwise noted.- Press seam allowances open unless otherwise noted. - Width of fabric (WOF) is equal to at least 42” wide.- Right sides together has been abbreviated to RST.- Remember to measure twice and cut once!
From Fabric A (or Fabric C), cut:one 20-1/2” x 28” rectangle for the apronone 9-1/2” x 5-1/2” rectangle for the pocket
From Fabric B (or Fabric D), cut:one 20-1/2” x 29” rectangle for the apron liningone 9-1/2” x 6-1/2” rectangle for the pockettwo 2-1/2” x WOF strips for the ties. Subcut these into: four equal 2-1/2” strips
Notes Before You Begin
Cutting Instructions
page 3
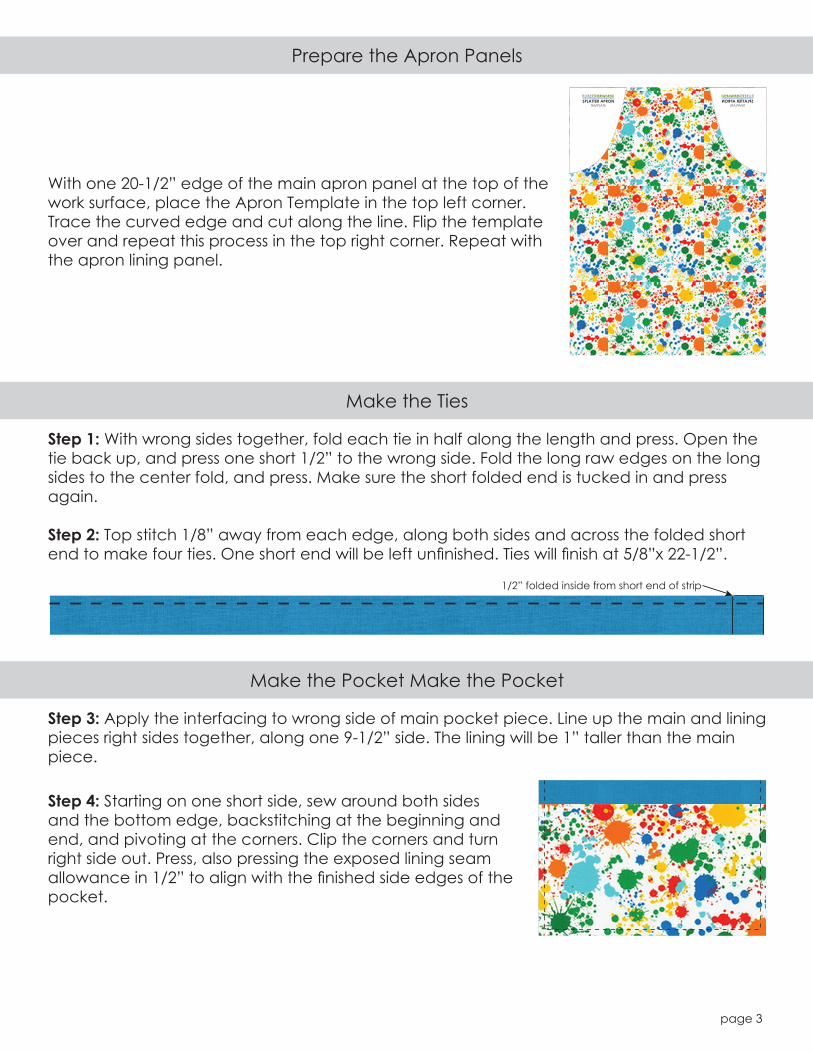
With one 20-1/2” edge of the main apron panel at the top of the work surface, place the Apron Template in the top left corner. Trace the curved edge and cut along the line. Flip the template over and repeat this process in the top right corner. Repeat with the apron lining panel.
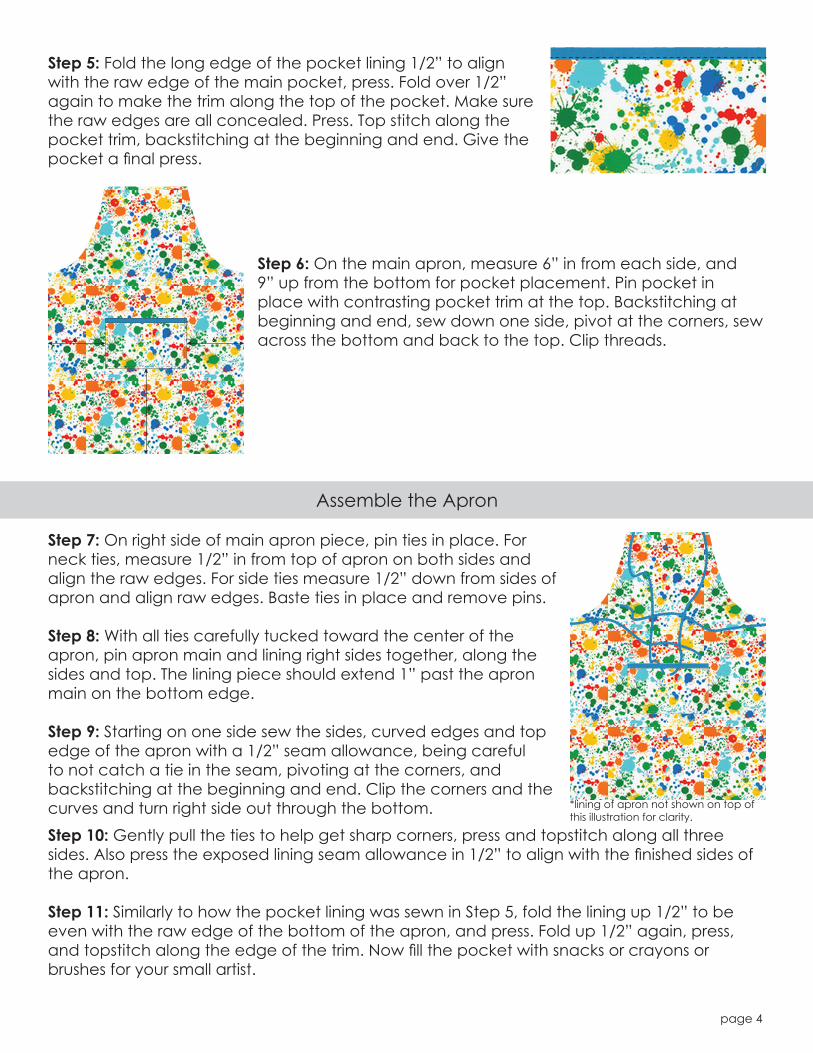
Step 3: Apply the interfacing to wrong side of main pocket piece. Line up the main and lining pieces right sides together, along one 9-1/2” side. The lining will be 1” taller than the main piece.
Step 1: With wrong sides together, fold each tie in half along the length and press. Open the tie back up, and press one short 1/2” to the wrong side. Fold the long raw edges on the long sides to the center fold, and press. Make sure the short folded end is tucked in and press again.
Step 2: Top stitch 1/8” away from each edge, along both sides and across the folded short end to make four ties. One short end will be left unfinished. Ties will finish at 5/8”x 22-1/2”.
Prepare the Apron Panels
Make the Pocket Make the Pocket
Make the Ties
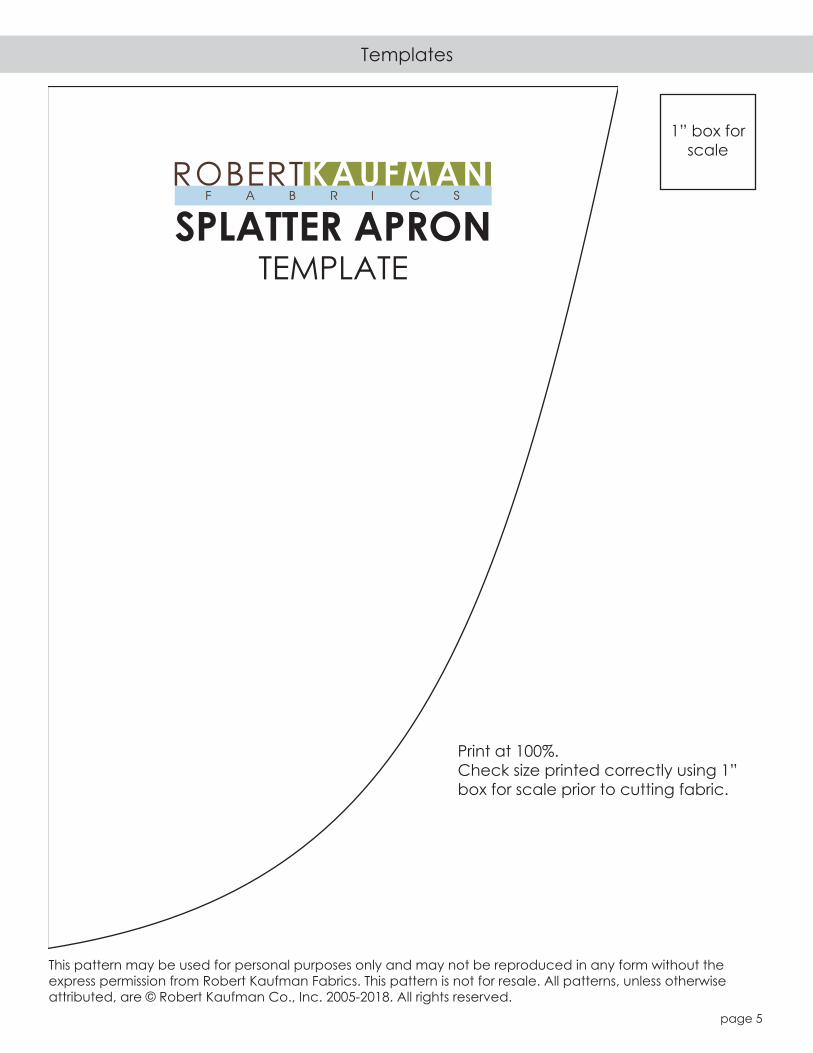
SPLATTER APRONTEMPLATE
SPLATTER APRONTEMPLATE
Step 4: Starting on one short side, sew around both sides and the bottom edge, backstitching at the beginning and end, and pivoting at the corners. Clip the corners and turn right side out. Press, also pressing the exposed lining seam allowance in 1/2” to align with the finished side edges of the pocket.
1/2” folded inside from short end of strip
page 4
Step 5: Fold the long edge of the pocket lining 1/2” to align with the raw edge of the main pocket, press. Fold over 1/2” again to make the trim along the top of the pocket. Make sure the raw edges are all concealed. Press. Top stitch along the pocket trim, backstitching at the beginning and end. Give the pocket a final press.
Step 6: On the main apron, measure 6” in from each side, and 9” up from the bottom for pocket placement. Pin pocket in place with contrasting pocket trim at the top. Backstitching at beginning and end, sew down one side, pivot at the corners, sew across the bottom and back to the top. Clip threads.
9”
6”6”
Step 7: On right side of main apron piece, pin ties in place. For neck ties, measure 1/2” in from top of apron on both sides and align the raw edges. For side ties measure 1/2” down from sides of apron and align raw edges. Baste ties in place and remove pins.
Step 8: With all ties carefully tucked toward the center of the apron, pin apron main and lining right sides together, along the sides and top. The lining piece should extend 1” past the apron main on the bottom edge.
Step 9: Starting on one side sew the sides, curved edges and top edge of the apron with a 1/2” seam allowance, being careful to not catch a tie in the seam, pivoting at the corners, and backstitching at the beginning and end. Clip the corners and the curves and turn right side out through the bottom.
Assemble the Apron
Step 10: Gently pull the ties to help get sharp corners, press and topstitch along all three sides. Also press the exposed lining seam allowance in 1/2” to align with the finished sides of the apron.
Step 11: Similarly to how the pocket lining was sewn in Step 5, fold the lining up 1/2” to be even with the raw edge of the bottom of the apron, and press. Fold up 1/2” again, press, and topstitch along the edge of the trim. Now fill the pocket with snacks or crayons or brushes for your small artist.
*lining of apron not shown on top of this illustration for clarity.
page 5
Templates
Print at 100%. Check size printed correctly using 1” box for scale prior to cutting fabric.
This pattern may be used for personal purposes only and may not be reproduced in any form without the express permission from Robert Kaufman Fabrics. This pattern is not for resale. All patterns, unless otherwise attributed, are © Robert Kaufman Co., Inc. 2005-2018. All rights reserved.
1” box for scale
SPLATTER APRONTEMPLATE


![BACK COVER OUTSIDE COVER FOLD-IN PANEL FOLD-IN PANEL FOLD-IN PANEL · 2018-12-13 · fold-in panel. fold-in panel fold-in panel. front edge “b” back cover] outside cover] additional](https://img.pdfslide.us/doc/110x75/5f02d1057e708231d4062796/back-cover-outside-cover-fold-in-panel-fold-in-panel-fold-in-panel-2018-12-13.jpg)