Embed Size (px)
Citation preview
DEN BUILDING
Wild and safe play spaces programme, Bradford- Liz Melling
What’s in this issue?
The benefits of den building: How den building is an essential part of a child’s development!
Risk: The balance between exposure to risk and preventing harm.
Moving the Indoors Outside: Some ideas that you can use when den building in your setting using everyday objects.
Woodland Dens and Shelters: Examples of shelters. A guide on how to construct a tarpaulin shelter.
Den building festival & Final word.
Upcoming events: A list of events courses and conferences for forest schools and challenging outdoor play.
Thanks to our contributors.
Next Newsletter: Using knives with children, Legal considerations, tips and ideas.
How to order and buy: Getting all that you need on one purchase order.
One-stop -shop for challenging outdoor play, Forest Schools equipment and resources
By providi ng a rich and challenging environment, children are free to explore and to think creatively which helps to build self e steem and self confidence. At Muddyfaces we provide an inspiring range of equipme nt that supports you in encouraging children to be outdoors, to be innovati ve and more resourceful .

The benefits of den building Being outdoors offers many stimulating play opportunities The materials available outdoors such as soil and leaves, sticks and stones are ideal for children to manipulate and experiment with. There are interesting and unusual places to hide, climb and balance. A whole range of elements to encourage imaginative, challenging and creative play. This newsletter concentrates on den building in both your setting and also venturing out into a woodland. Den building allows children to interact with natural elements. They learn to manage and work as a team when occupied in den building. Learning to work together can be difficult at any age but den building can be a way of learning to cooperate as during this process they are often open to other children’s suggestions and learn from their mistakes. Free from adult control and constraints, a den is where a child can determine their own rules. It is a safe place, where the child is in charge and not adults. Having a sense of control and the ability to make decisions on their own helps a child gain in confidence and become more independent.
2nd Nature Play scheme, Sheffield - Catherine Nuttgens
Risk - Outdoor environments cannot be controlled in the same way as indoor
environments .
Control over an environment will not necessarily result in an increase in safety. As practitioners we aim to expose our groups to risk but control that risk preventing serious harm. Faced with low level danger, children learn very quickly how to take risks and understand the result of their actions. Learning to adjust to change and uncertainty is an essential part of growing up. Children who do not experience these things do not build up an understanding of how to calculate risk and are more likely to put themselves in danger. Den building naturally has an element of risk that children can explore and experiment with.
At Muddy faces we are expanding our range of den bu ilding materials. Please keep an eye on the den building r esources in the
Outdoor play section over the next couple of months . Any suggestions to improve our range are always gratefu lly received.
www.muddyfaces.co.uk
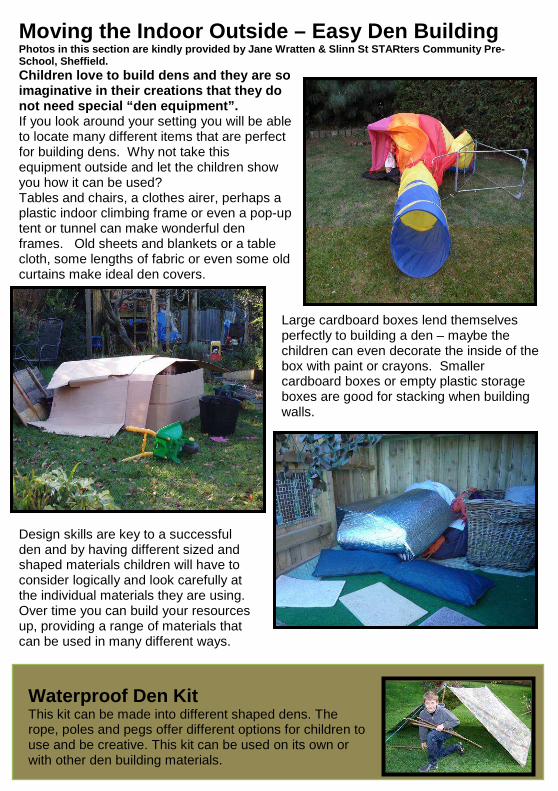
Moving the Indoor Outside – Easy Den Building Photos in this section are kindly provided by Jane Wratten & Slinn St STARters Community Pre-School, Sheffield. Children love to build dens and they are so imaginative in their creations that they do not need special “den equipment”. If you look around your setting you will be able to locate many different items that are perfect for building dens. Why not take this equipment outside and let the children show you how it can be used? Tables and chairs, a clothes airer, perhaps a plastic indoor climbing frame or even a pop-up tent or tunnel can make wonderful den frames. Old sheets and blankets or a table cloth, some lengths of fabric or even some old curtains make ideal den covers.
Large cardboard boxes lend themselves perfectly to building a den – maybe the children can even decorate the inside of the box with paint or crayons. Smaller cardboard boxes or empty plastic storage boxes are good for stacking when building walls.
Design skills are key to a successful den and by having different sized and shaped materials children will have to consider logically and look carefully at the individual materials they are using. Over time you can build your resources up, providing a range of materials that can be used in many different ways.
Waterproof Den Kit This kit can be made into different shaped dens. The rope, poles and pegs offer different options for children to use and be creative. This kit can be used on its own or with other den building materials.

A large container like this basket, placed on its side immediately becomes a readymade den waiting to be customised by its occupants. A large sheet or blanket draped over the top gives a sense of enclosure and when inside the occupants can pretend the world outside is a very different one.
Why not find a wooden pallet or an old fence panel check for nails and any other hazards, supply resources to ensure it can be secured safely, and let the group or child do the rest?
Tipi’s made from old broom handles, clothes poles or long sticks can provide an excellent frame. Provide some rope, string or wool for securing the top and materials for round the outside. An old sheet could be painted on.
Organza throws Add a magic sparkle to your den building resources. Beat those stubborn pegs with our rubber Mallet

Wild den building, Eden Project, Cornwall -Philip Waters
Duchy College Forest School, Cornwall-Tracey Maciver
Wild and safe play spaces programme, Bradford- Liz Melling
Woodland Dens and Shelters. There are so many woodland dens it would be impossible to show them all. Below are some examples of centrally supported shelters which we hope may give you some ideas to get your den building off the ground and hopefully keep it off.
This den has been created from a horizontal beam tied between two trees with the vertical support coming from two diagonal poles tied to the beam. Sticks are laid diagonally from the floor to the horizontal beam, creating a triangular shelter. Natural materials have been woven between the poles. A woven fence blocks off one side making a smaller entrance and a more enclosed and protected space inside.
A leaning central beam from the support point to the floor. This picture shows a support point, constructed from two strong sticks tied or balanced together, and the central beam creating an elongated tripod. Then sticks have been laid from the ground onto the central beam. This creates a shelter that is higher at one end, going down to the ground at the other end.
Simple but effective - an interesting old tree has been used as a central support and logs have been leant up against it creating a circular foot print. Many other shaped shelters can be made, such as benders and stand alone shelters. Most shelters can be constructed using just the resources you can find in the woods. Braiding bark for lashing, bending supple branches or saplings and twisting together, etc.
It can be handy to have some natural sisal rope and string for lashing and some tools to cut sticks to length. Large ball of sisal cord, Lightweight 19” Loppers.
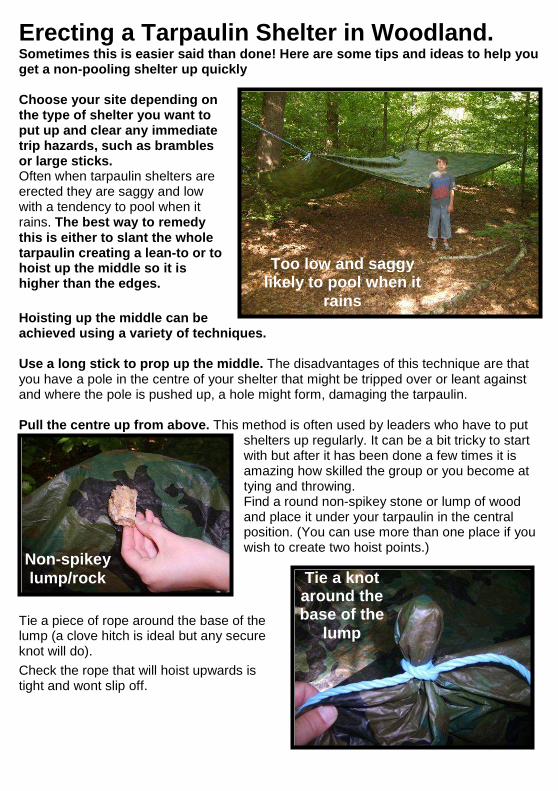
Erecting a Tarpaulin Shelter in Woodland. Sometimes this is easier said than done! Here are s ome tips and ideas to help you get a non-pooling shelter up quickly Choose your site depending on the type of shelter you want to put up and clear any immediate trip hazards, such as brambles or large sticks. Often when tarpaulin shelters are erected they are saggy and low with a tendency to pool when it rains. The best way to remedy this is either to slant the whole tarpaulin creating a lean-to or to hoist up the middle so it is higher than the edges. Hoisting up the middle can be achieved using a variety of techniques.
Use a long stick to prop up the middle. The disadvantages of this technique are that you have a pole in the centre of your shelter that might be tripped over or leant against and where the pole is pushed up, a hole might form, damaging the tarpaulin. Pull the centre up from above. This method is often used by leaders who have to put
shelters up regularly. It can be a bit tricky to start with but after it has been done a few times it is amazing how skilled the group or you become at tying and throwing. Find a round non-spikey stone or lump of wood and place it under your tarpaulin in the central position. (You can use more than one place if you wish to create two hoist points.)
Tie a piece of rope around the base of the lump (a clove hitch is ideal but any secure knot will do).
Check the rope that will hoist upwards is tight and wont slip off.
Too low and saggy likely to pool when it
rains
Non-spikey lump/rock Tie a knot
around the base of the
lump
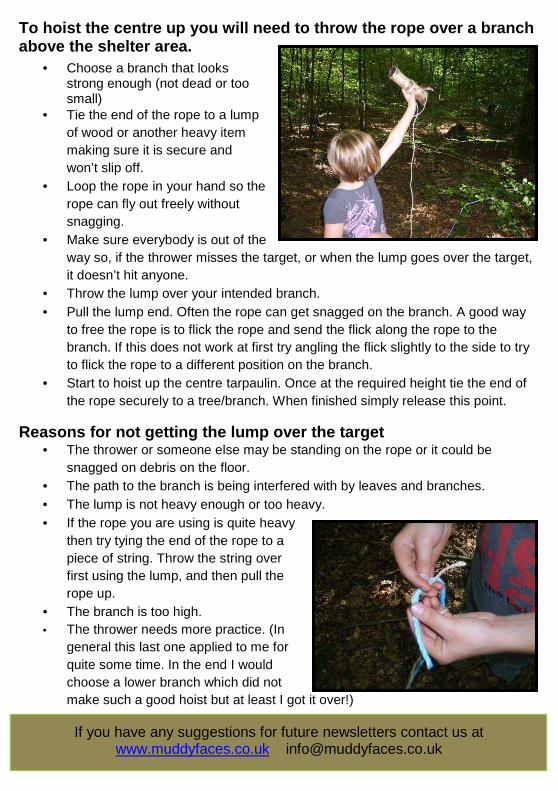
To hoist the centre up you will need to throw the r ope over a branch above the shelter area.
• Choose a branch that looks strong enough (not dead or too small)
• Tie the end of the rope to a lump of wood or another heavy item making sure it is secure and won’t slip off.
• Loop the rope in your hand so the rope can fly out freely without snagging.
• Make sure everybody is out of the way so, if the thrower misses the target, or when the lump goes over the target, it doesn’t hit anyone.
• Throw the lump over your intended branch. • Pull the lump end. Often the rope can get snagged on the branch. A good way
to free the rope is to flick the rope and send the flick along the rope to the branch. If this does not work at first try angling the flick slightly to the side to try to flick the rope to a different position on the branch.
• Start to hoist up the centre tarpaulin. Once at the required height tie the end of the rope securely to a tree/branch. When finished simply release this point.
Reasons for not getting the lump over the target • The thrower or someone else may be standing on the rope or it could be
snagged on debris on the floor. • The path to the branch is being interfered with by leaves and branches. • The lump is not heavy enough or too heavy. • If the rope you are using is quite heavy
then try tying the end of the rope to a piece of string. Throw the string over first using the lump, and then pull the rope up.
• The branch is too high. • The thrower needs more practice. (In
general this last one applied to me for quite some time. In the end I would choose a lower branch which did not make such a good hoist but at least I got it over!)
If you have any suggestions for future newsletters contact us at www.muddyfaces.co.uk [email protected]

Tying off the edges.
Once the centre has been pulled up, tie out the edges ideally to trees or peg to the ground ensuring all angles create a down ward flow for rain.
It can be helpful to use bright rope for shelter guys so that they can be easily seen. Alternatively, tie pieces of cloth to any ropes that might cause a trip or head-height hazard. (This blue poly rope is easy to see and comparatively easy to untie. Remember to tie or heat seal the ends to stop it fraying.) Bungees are useful to have in your kit to take the strain off the tarpaulin and lessens the likelihood of tearing if the wind picks up. Avoid bungees with sharp metal points. If you need to peg out a rope find a sturdy stick and angle it into the ground. Over time the group could make some wooden pegs.
A tarpaulin shelter that creates a large protected area with plenty of head room that will n ot pool with water
A couple of woodland shelter web links to take a lo ok at: Watch a video about a lean to and a one-man bender at http://www.woodlands.co.uk/blog/practical-guides/building-shelters A picture of a bender can be found at http://www.wildwise.co.uk/gallery2/pages/Woodland%20shelter.htm
Strong Stick being used as a peg
These tarpaulin shelter building ideas have been brought to you by Ben, James and Matt

Final Word. Hectic lives, timetabled after-school activities and homework,mean there is little time for relaxation in a modern child’s life. For those children whose lives are chaotic and perhaps even dysfunctional, a den is a haven away from the pressures of everyday life providing a level of emotional security. With less free time, children have less time to socialise with their peers. Dens provide a social meeting place where friends can gather and hatch great plans. A den is a place where a child can reinforce his or her sense of self. Maybe we as adults could take note and create our own den to offer a protective space with time away from our hectic day-to-day lives. What a great place for contemplation and relaxation.
www.muddyfaces.co.uk contact [email protected]
Development - On completion the den becomes a magical place where children’s imaginations can come alive and interaction through imaginary play presents many rich development opportunities. Emotional, physical, social also language development which is not something you may directly associate with den building. The task provides opportunities for plenty of talking during the planning and building process. Written and drawn plans may be used before any construction is developed. The children will convey their ideas through talking and description. During building, instructions will be given and language used to problem solve. Dens can become mini youth centres where social development, language, problem solving, maths and physical development are all just happening naturally without the need of a formal a curriculum.
Why not have a den building festival to conclude your theme
maybe inviting friends and relatives? These pictures are of the den building festival at the
Eden Project Cornwall. http://www.edenproject.com/

Notes

Notes
How to order and buy You can purchase your goods in different ways: Option 1 - payment online by card Option 2 - payment by purchase order and invoice (organisations only) Option 3 - payment by cheque You can place any type of order through our website at www.muddyfaces.co.uk choose the different things you want and when you get to the checkout: choose the correct payment method (see above)) If you are choosing to pay by purchase order and want us to put a purchase number on your paperwork please write this number in the comments box. For those not wishing to place orders online, all the usual methods are available: Telephone 0114 2219617, Fax 0114 2811455 By Post to Muddyfaces Ltd, 40 Olivet Road, Sheffield S8 8QS DO NOT FORGET OUR ONE STOP SHOP FACILITY We know how precious time is – therefore we will try and source any item you require for Forest Schools or outdoor play even if it is not available on our website. We will do all the searching around so you don’t need to!
We would like to say a big Thank You to everybody who has contributed pictures, ideas and information to help us make this newsletter as useful and interesting as possible. We received so much info (most of which we could not fit in this newsletter) that we are putting a Den Building pamphlet together with more ideas and detail in it. If you have anything to contribute please let us know. [email protected]
If you would like to contribute to our next newsletter or have any events you wish to bring to our readers attention please contact us. Our next newsletter will be out in the spring and will focus on using knives with groups.
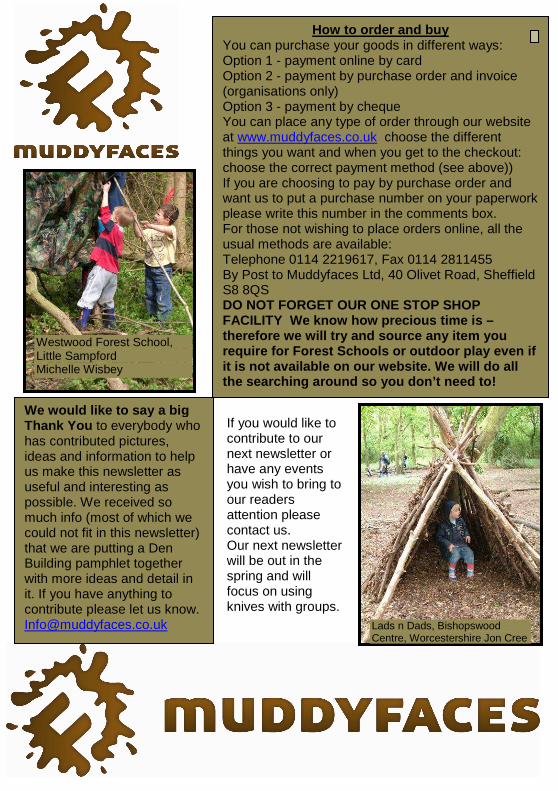
Westwood Forest School, Little Sampford Michelle Wisbey
Lads n Dads, Bishopswood Centre, Worcestershire Jon Cree