Embed Size (px)
Citation preview
Demo Mode and Set up Instructions
Kobo Mini and GloSeptember, 2012
Kobo Mini and Glo
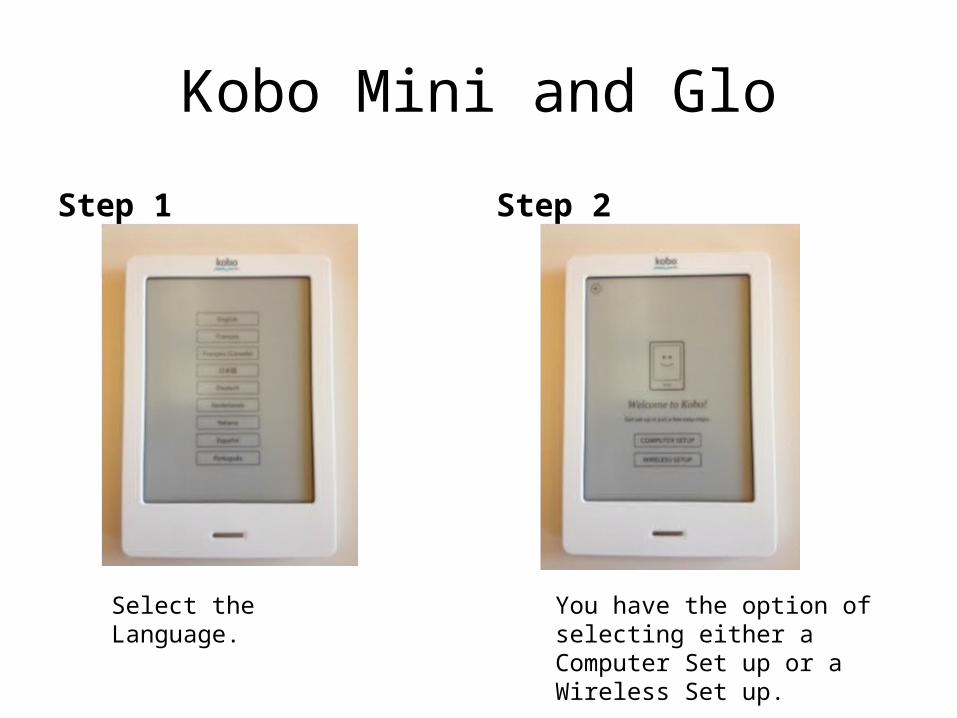
Step 1 Step 2
Select the Language. You have the option of selecting either a Computer Set up or a Wireless Set up.

Kobo Mini and Glo
Step 3 Step 4
If you choose Connect to a Computer, the screen will prompt you to do so with USB cable
If you choose Wireless Set Up, the first screen will ask you to confirm the time
Kobo Mini and Glo – Wireless Set up
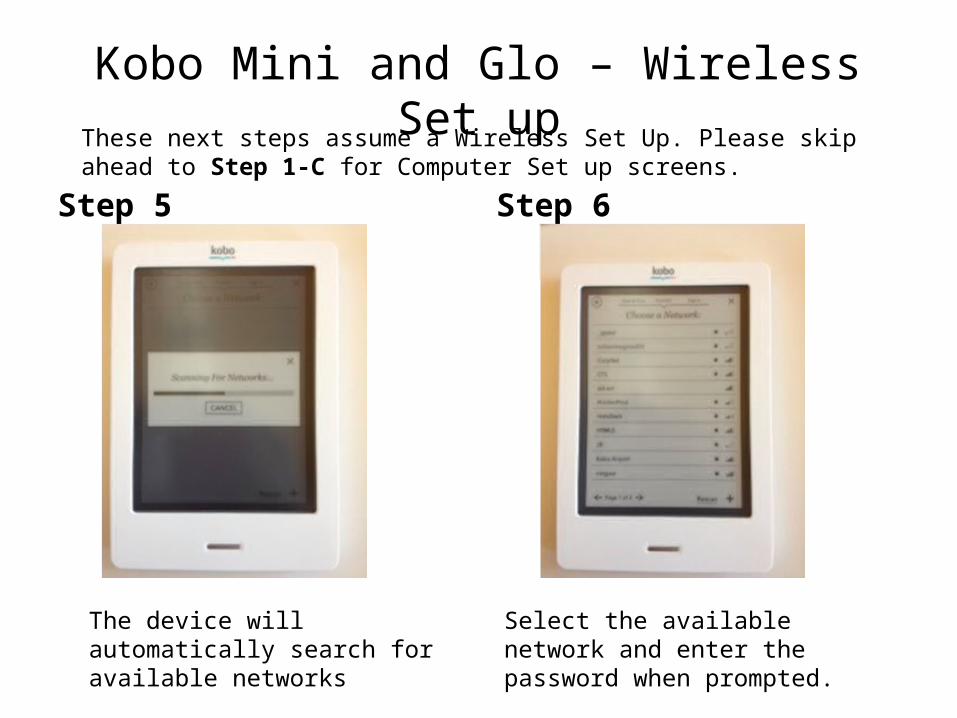
Step 5 Step 6
These next steps assume a Wireless Set Up. Please skip ahead to Step 1-C for Computer Set up screens.
The device will automatically search for available networks
Select the available network and enter the password when prompted.
Kobo Mini and Glo
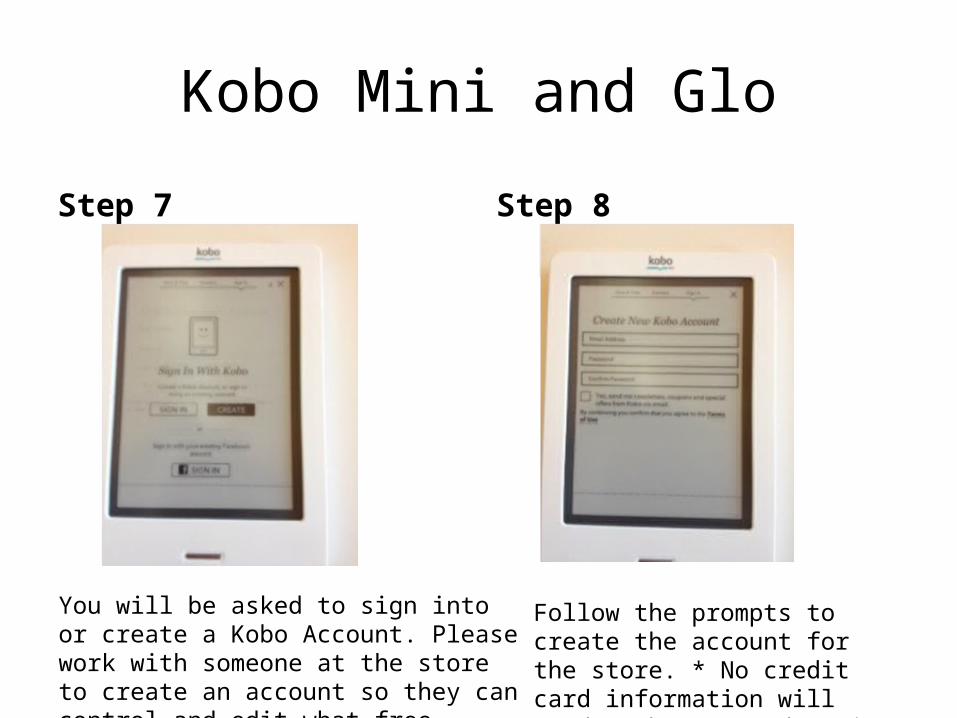
Step 7 Step 8
You will be asked to sign into or create a Kobo Account. Please work with someone at the store to create an account so they can control and edit what free previews show up.
Follow the prompts to create the account for the store. * No credit card information will need to be entered so it is safe *
Kobo Mini and Glo
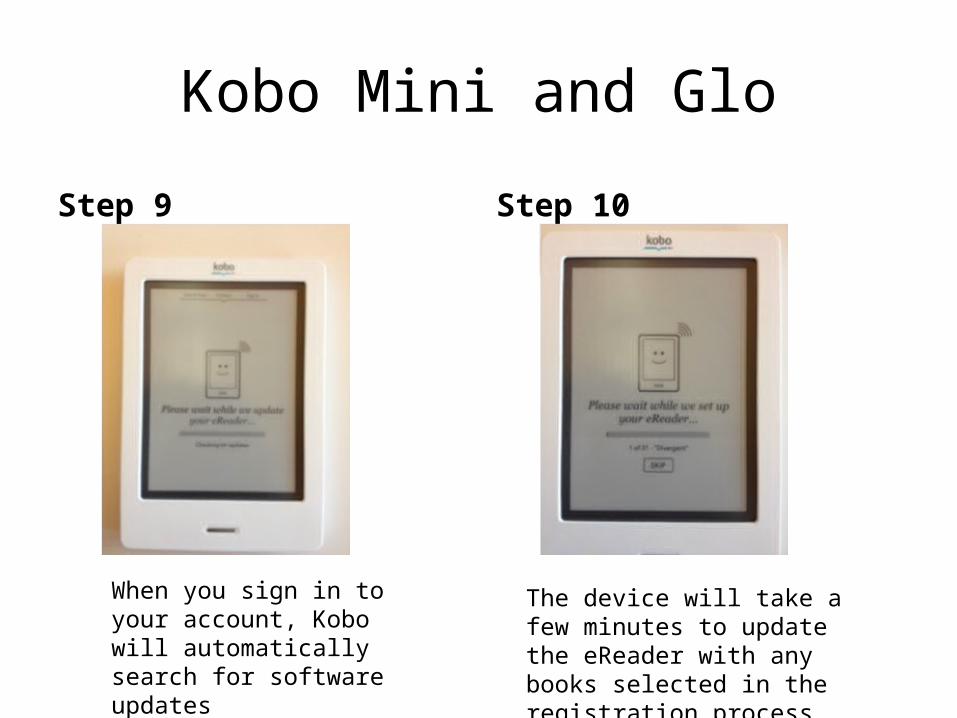
Step 9 Step 10
When you sign in to your account, Kobo will automatically search for software updates
The device will take a few minutes to update the eReader with any books selected in the registration process

Kobo Mini and Glo
Step 11 Step 12
The device will provide documentation about what updates have been included in the most recent software. To skip through – click on the X in the top right corner
This screen will prompt you to connect to Facebook for Reading Life. You can Skip this step.
Kobo Mini and Glo
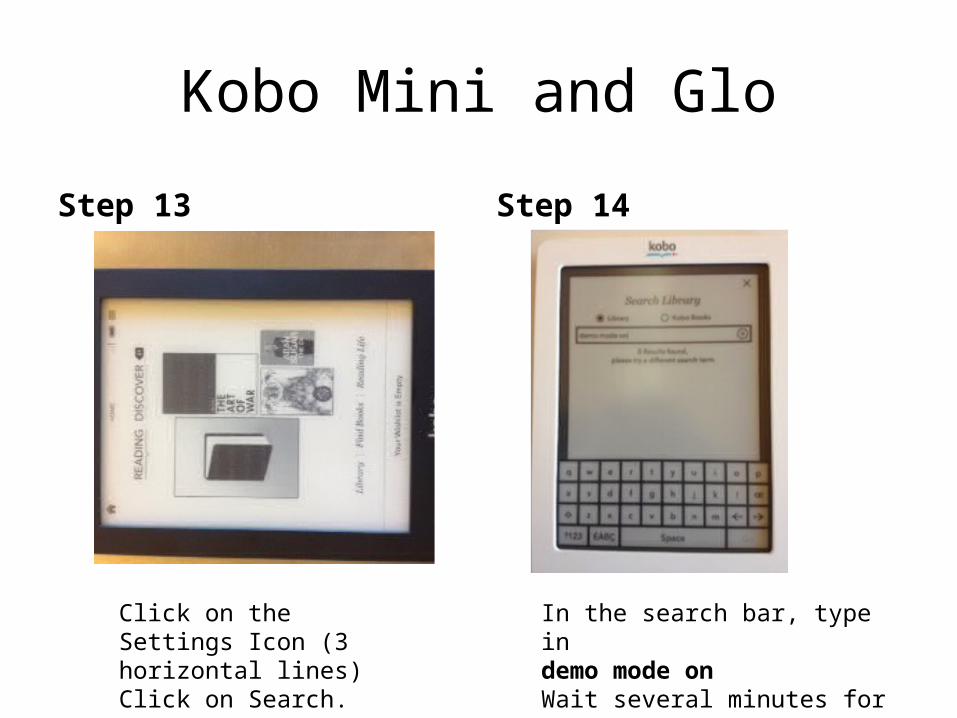
Step 13 Step 14
Click on the Settings Icon (3 horizontal lines)Click on Search.
In the search bar, type in demo mode onWait several minutes for the demo loop to begin automatically
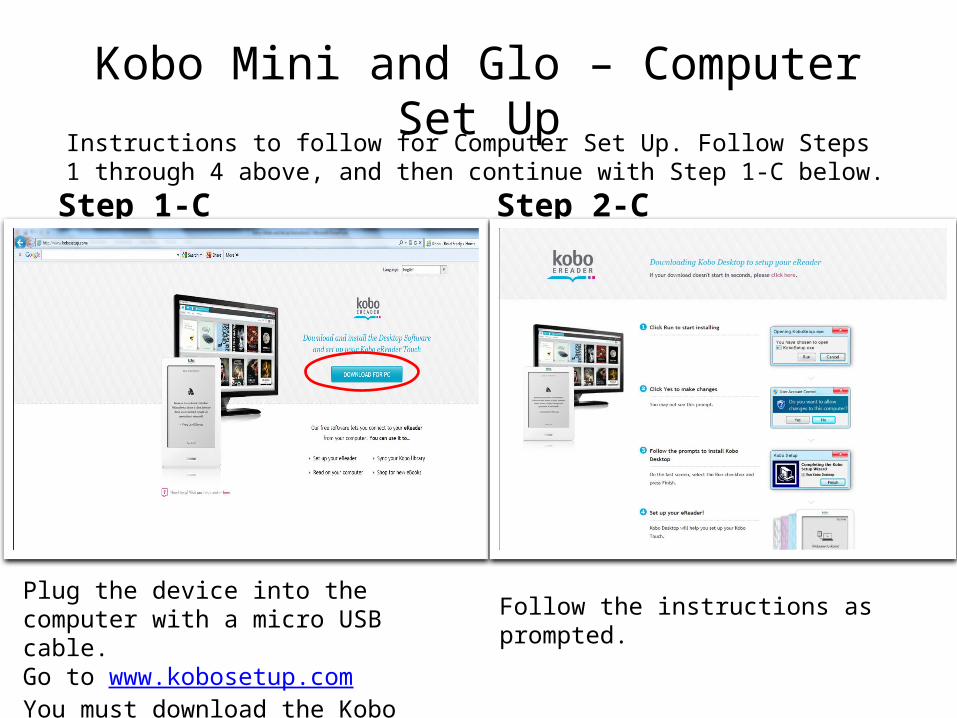
Kobo Mini and Glo – Computer Set Up
Step 1-C Step 2-C
Instructions to follow for Computer Set Up. Follow Steps 1 through 4 above, and then continue with Step 1-C below.
Plug the device into the computer with a micro USB cable.Go to www.kobosetup.comYou must download the Kobo desktop app.
Follow the instructions as prompted.
Kobo Mini and Glo
Step 3-C Step 4-C
Kobo Mini and Glo
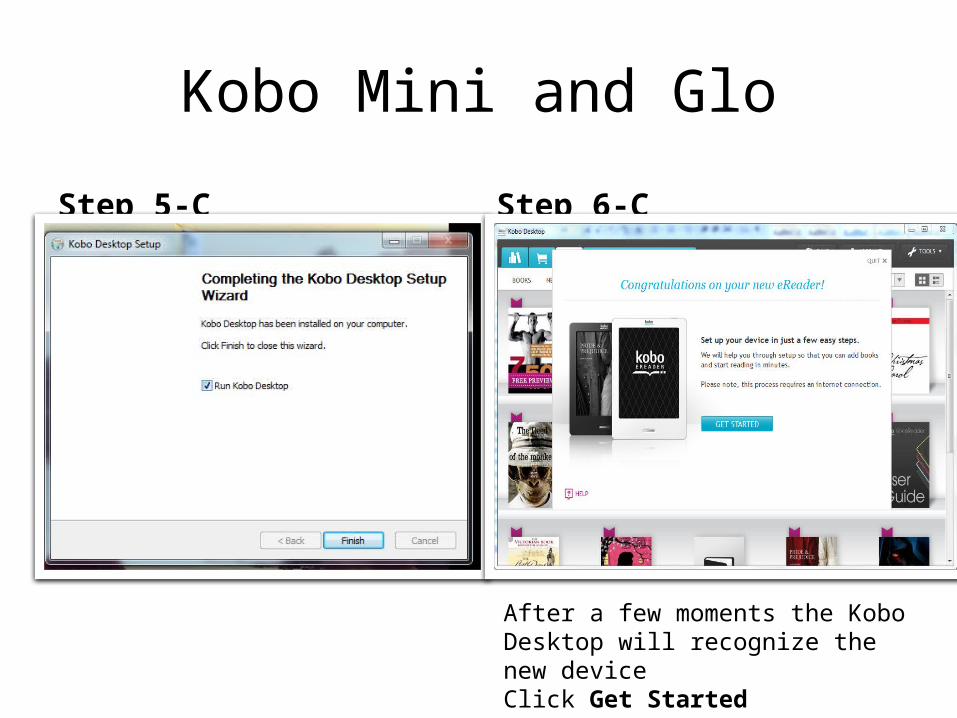
Step 5-C Step 6-C
After a few moments the Kobo Desktop will recognize the new device Click Get Started
Kobo Mini and Glo
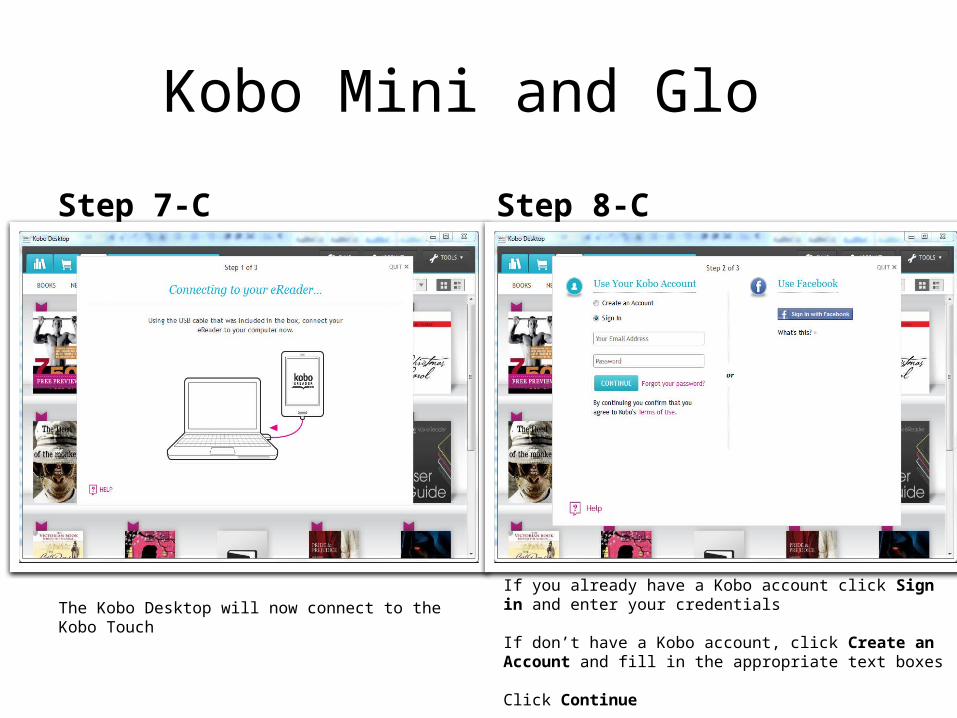
Step 7-C Step 8-C
The Kobo Desktop will now connect to the Kobo TouchIf you already have a Kobo account click Sign in and enter your credentials If don’t have a Kobo account, click Create an Account and fill in the appropriate text boxes Click Continue
Kobo Mini and Glo
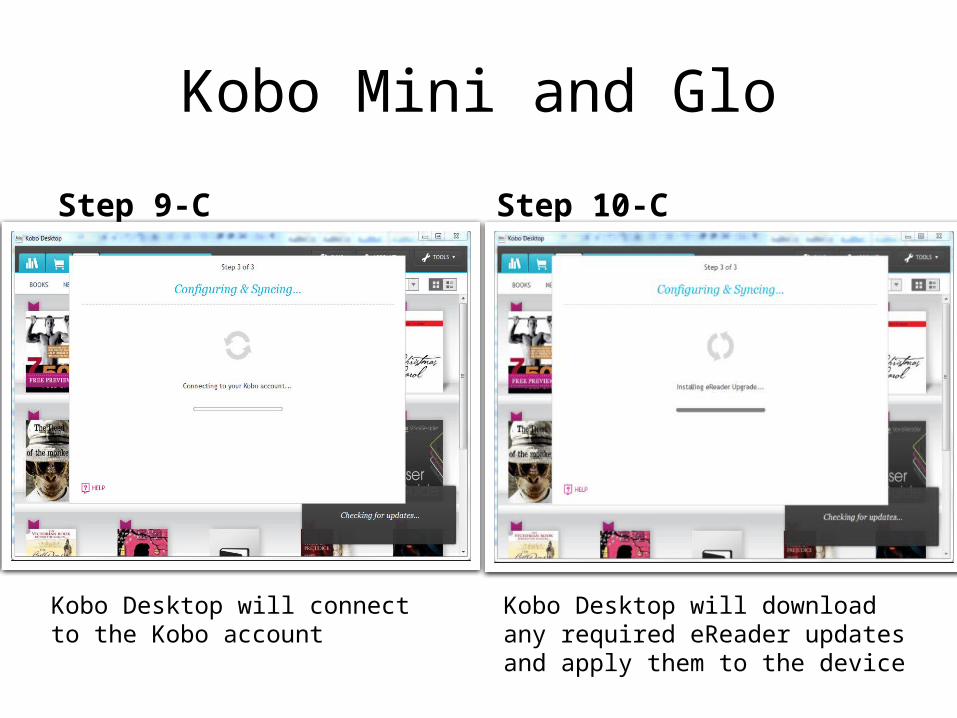
Step 9-C Step 10-C
Kobo Desktop will connect to the Kobo account
Kobo Desktop will download any required eReader updates and apply them to the device

Kobo Mini and Glo
Step 11-C Step 12-C
Kobo Desktop will then update the Library on the Touch device – this is called synchronization or syncing
Once the updates and synchronization are completed, the activation has been a successClick Continue
Kobo Mini and Glo
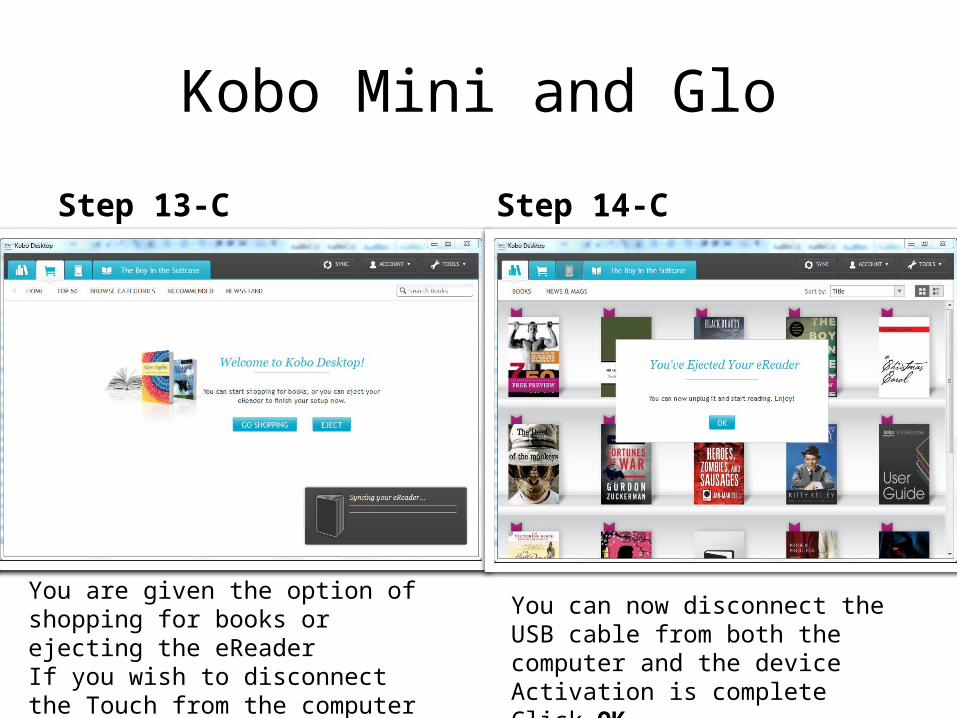
Step 13-C Step 14-C
You are given the option of shopping for books or ejecting the eReaderIf you wish to disconnect the Touch from the computer click Eject
You can now disconnect the USB cable from both the computer and the deviceActivation is completeClick OK
Kobo Mini and Glo
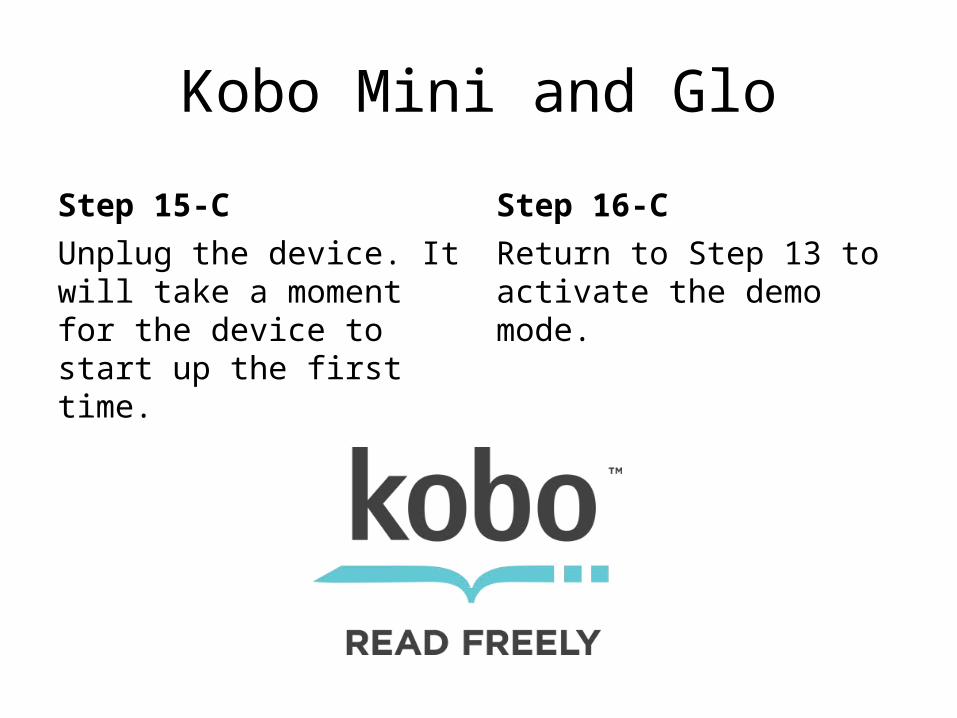
Step 15-CUnplug the device. It will take a moment for the device to start up the first time.
Step 16-CReturn to Step 13 to activate the demo mode.