Embed Size (px)
Citation preview

Dell OptiPlex GX260 Power CapacitorReplacement
This guide will show how to de-solder and replace a power capacitor on the Dell OptiPlex GX260motherboard.
Written By: Kevin Schapansky
Dell OptiPlex GX260 Power Capacitor Replacement
© iFixit — CC BY-NC-SA www.iFixit.com Page 1 of 9

TOOLS:Phillips #2 Screwdriver (1)
Soldering Station (1)
Solder (1)
Desoldering Braid (1)
Dell OptiPlex GX260 Power Capacitor Replacement
© iFixit — CC BY-NC-SA www.iFixit.com Page 2 of 9
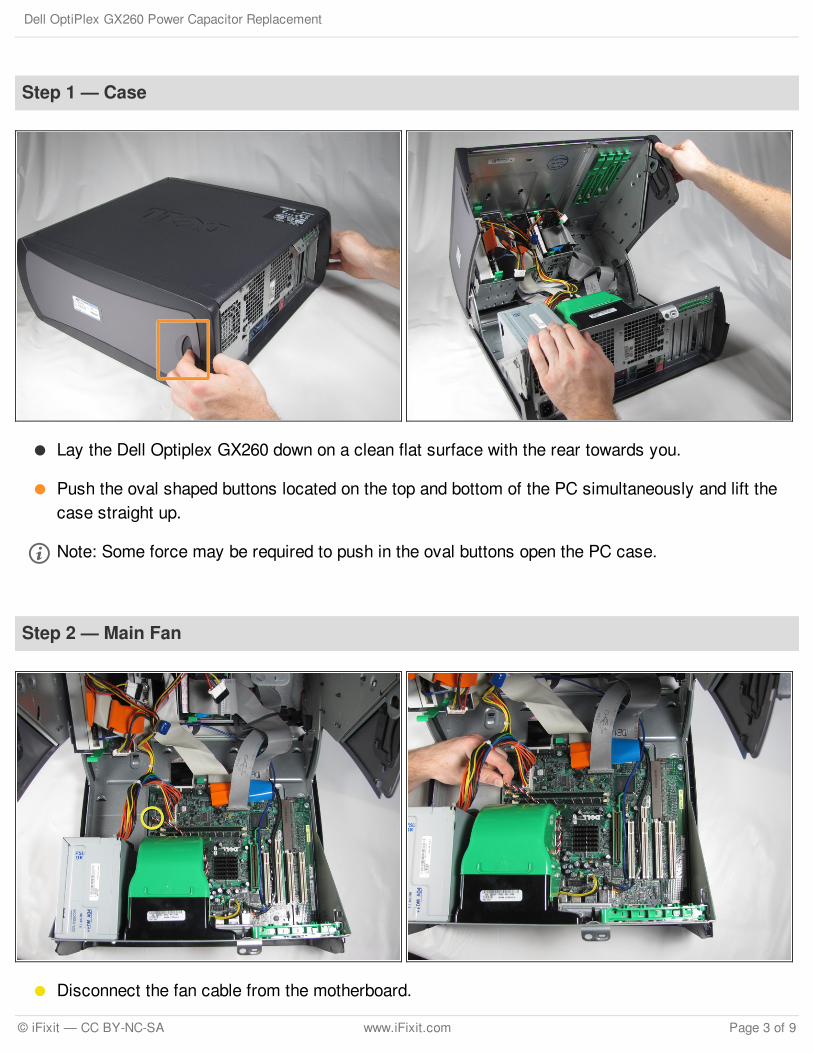
Step 1 — Case
Lay the Dell Optiplex GX260 down on a clean flat surface with the rear towards you.
Push the oval shaped buttons located on the top and bottom of the PC simultaneously and lift thecase straight up.
Note: Some force may be required to push in the oval buttons open the PC case.
Step 2 — Main Fan
Disconnect the fan cable from the motherboard.
Dell OptiPlex GX260 Power Capacitor Replacement
© iFixit — CC BY-NC-SA www.iFixit.com Page 3 of 9
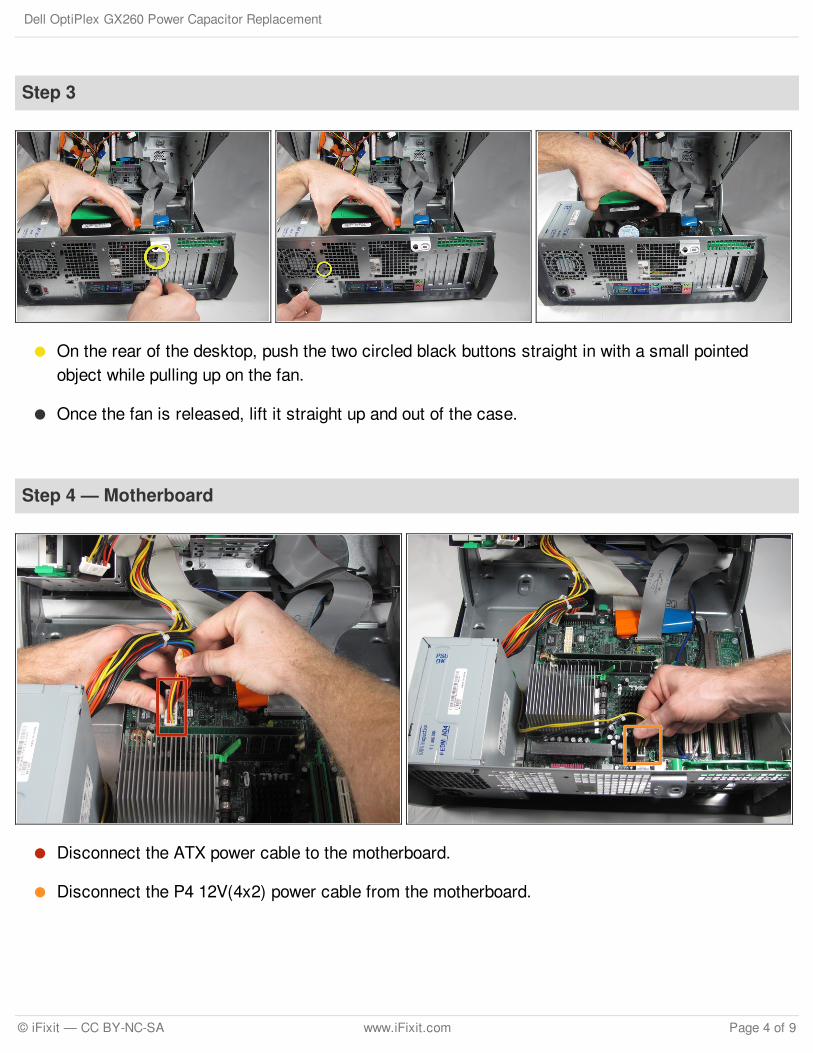
Step 3
On the rear of the desktop, push the two circled black buttons straight in with a small pointedobject while pulling up on the fan.
Once the fan is released, lift it straight up and out of the case.
Step 4 — Motherboard
Disconnect the ATX power cable to the motherboard.
Disconnect the P4 12V(4x2) power cable from the motherboard.
Dell OptiPlex GX260 Power Capacitor Replacement
© iFixit — CC BY-NC-SA www.iFixit.com Page 4 of 9

Step 5
Disconnect the front panel ribbon cable by gently pulling it straight up.
Disconnect the hard drive ribbon cable by gently pulling the blue tab away from the motherboard.
Disconnect the optical drive ribbon cable by gently pulling the orange tab away from themotherboard.
Step 6
Disconnect the floppy drive drive ribbon cable by gently pulling the black tab away from themotherboard.
Disconnect the optical drive audio cable connector from the motherboard.
Disconnect the audio input/output cable from the motherboard.
Dell OptiPlex GX260 Power Capacitor Replacement
© iFixit — CC BY-NC-SA www.iFixit.com Page 5 of 9
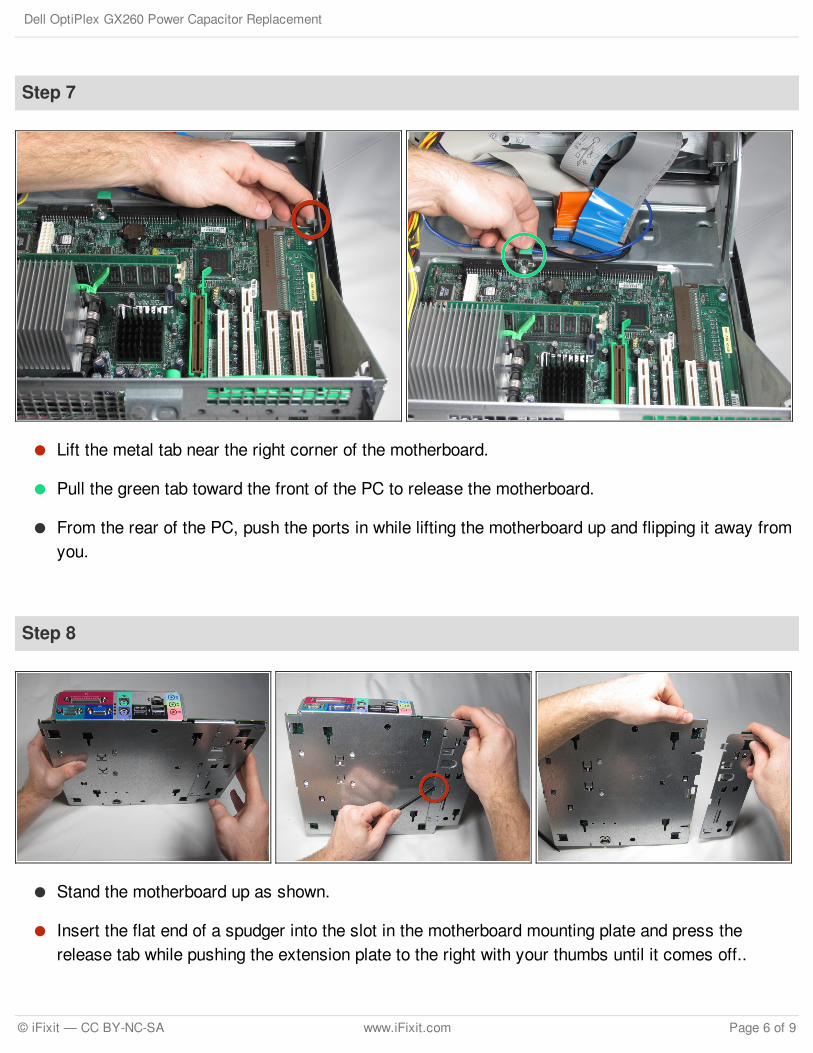
Step 7
Lift the metal tab near the right corner of the motherboard.
Pull the green tab toward the front of the PC to release the motherboard.
From the rear of the PC, push the ports in while lifting the motherboard up and flipping it away fromyou.
Step 8
Stand the motherboard up as shown.
Insert the flat end of a spudger into the slot in the motherboard mounting plate and press therelease tab while pushing the extension plate to the right with your thumbs until it comes off..
Dell OptiPlex GX260 Power Capacitor Replacement
© iFixit — CC BY-NC-SA www.iFixit.com Page 6 of 9

Step 9
Remove the screw at the rear of the motherboard.
Grasp the heat sink with your left hand and the I/O port panel with your right hand and pull toseparate motherboard from the metal base.
If you are replacing the motherboard refer to the great iFixit guide for removing the CPU.
Step 10 — Power Capacitor
With the motherboard out of the tray, let your soldering gear warm up and get a desoldering braid.
Since this isn't a Optiplex GX260 motherboard, I have removed the heatsink to get rid of anyconfusion.
Dell OptiPlex GX260 Power Capacitor Replacement
© iFixit — CC BY-NC-SA www.iFixit.com Page 7 of 9

To reassemble your device, follow these instructions in reverse order.
Step 11
Take note of which way the positivelead marker on the capacitor isfacing before removing it. You willneed to know for the next step.
Desoldering can damagemotherboards, so first practice on aboard you don't need. Use a 40-50Wsoldering iron with a chisel tip and0.080" wide desoldering braid. Alsohelpful are rosin flux and 60/40tin/lead solder, in case all the solderdoesn't come out. Wiggle desolderedleads to verify they're free, andnever pull on any that aren't.
Step 12
Install the new capacitor in the holesleft by the old one, then solder it intoplace.
Caution: Ensure that the newcapacitor is inserted with thepositive lead mark facing the samedirection as the old capacitor. If thedirection is switched, the newcapacitor will fail.
Dell OptiPlex GX260 Power Capacitor Replacement
© iFixit — CC BY-NC-SA www.iFixit.com Page 8 of 9

This document was last generated on 2017-06-20 04:15:16 PM.
Dell OptiPlex GX260 Power Capacitor Replacement
© iFixit — CC BY-NC-SA www.iFixit.com Page 9 of 9


![· Author: WPezzaglia [ GX260-4MLLP11 ] Created Date: 3/26/2007 6:19:56 PM](https://img.pdfslide.us/doc/110x75/602ca53e9be68538ce3f37cc/-author-wpezzaglia-gx260-4mllp11-created-date-3262007-61956-pm.jpg)