Embed Size (px)
Citation preview
Decoupage Tile Coasters
Although we’ve been using the stock art for all sorts of things up ‘til now, from stenciling to
wall stickers, the simplest use of art is just to
stick it on things. I know, what a novel concept.
The easiest way of doing this would be collage, but often printing and using regular paper gives art a cheap, first-grade project kind of feel. The most elegant use of image placement, I think,
is found in the use of decoupage. Decoupage is basically a fancy word for collage, but often the paper used is of much thinner, lighter variety so
that when it is layered the layers blend more smoothly into each other. This decoupage
paper can be found in craft stores. The problem is the kind of decoupage paper you can buy is boringly predictable, and if you don’t want to
use pretty flowers or teddies, you’re sort of out
of luck...
I’m going to show you a way of making your own decoupage paper, so you can collage everything from skulls to cute animals if you want to. All it involves is learning how to print on tissue paper. For this project I thought I’d make a cute set of tile coasters, as they provide an excellent but simple surface for our first decoupage project. To make your new coasters, you’ll need some tissue paper, some letter size cardstock so it
can fit through your printer, a bit of spray fixative, a few 4” x 4” tiles from your local
hardware store, some decoupage paste, (I’m using Mod Podge) some varnish, a small brush, enough felt to cover the bottom of your coasters,
and some craft glue. I didn’t forget to take a photo with the craft glue, it’s just invisible... so
there.
To begin, we’re going to print out our new decoupage paper. Choose some of your favorite
art from the stock art section to print out. I picked some of our endangered critters for a
coaster set, and set them all up on one sheet
to print.
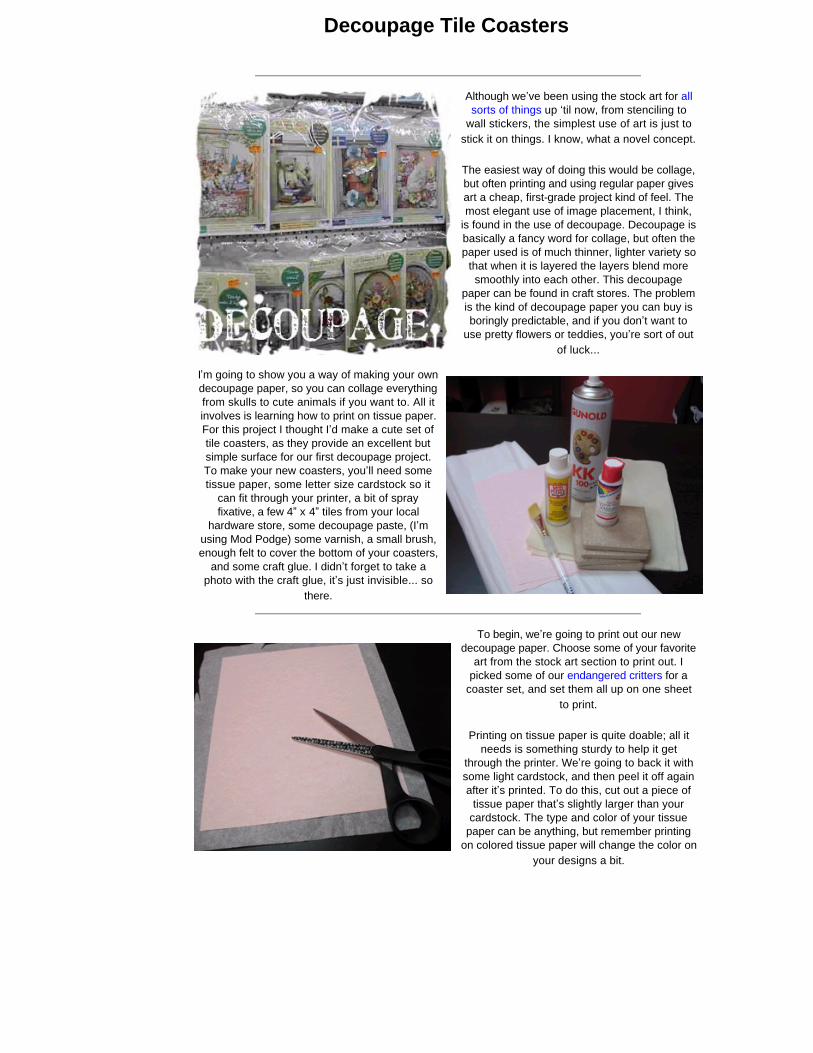
Printing on tissue paper is quite doable; all it needs is something sturdy to help it get
through the printer. We’re going to back it with some light cardstock, and then peel it off again after it’s printed. To do this, cut out a piece of
tissue paper that’s slightly larger than your cardstock. The type and color of your tissue
paper can be anything, but remember printing on colored tissue paper will change the color on
your designs a bit.
To get our tissue paper to stick ever so lightly, spray one side of your cardstock with a light layer of spray adhesive. Then, to remove some excess stickiness, place another piece of cardstock over the sticky side, press down firmly, and lift it up again. Do this three or four times, until all that's left on your cardstock is a
very lightly sticky surface.
Smooth your tissue paper lightly over the sticky side, taking care to smooth it especially around the edges, where it’s most lightly to get
caught on the printer. Once it’s stuck down, use a scissors to trim the excess tissue away so it’s the same size as your cardstock, and
should go through your printer easily.
Load your new paper into your printer and print off some of your favorite designs. I’d
recommend using the 300 dpi version of the
files to get a nice, crisp print.
As a note, this works with both inkjet and laser jet printers, but since laserjet printers often use heat you’ll find your tissue paper is a bit more
stubborn about coming off.
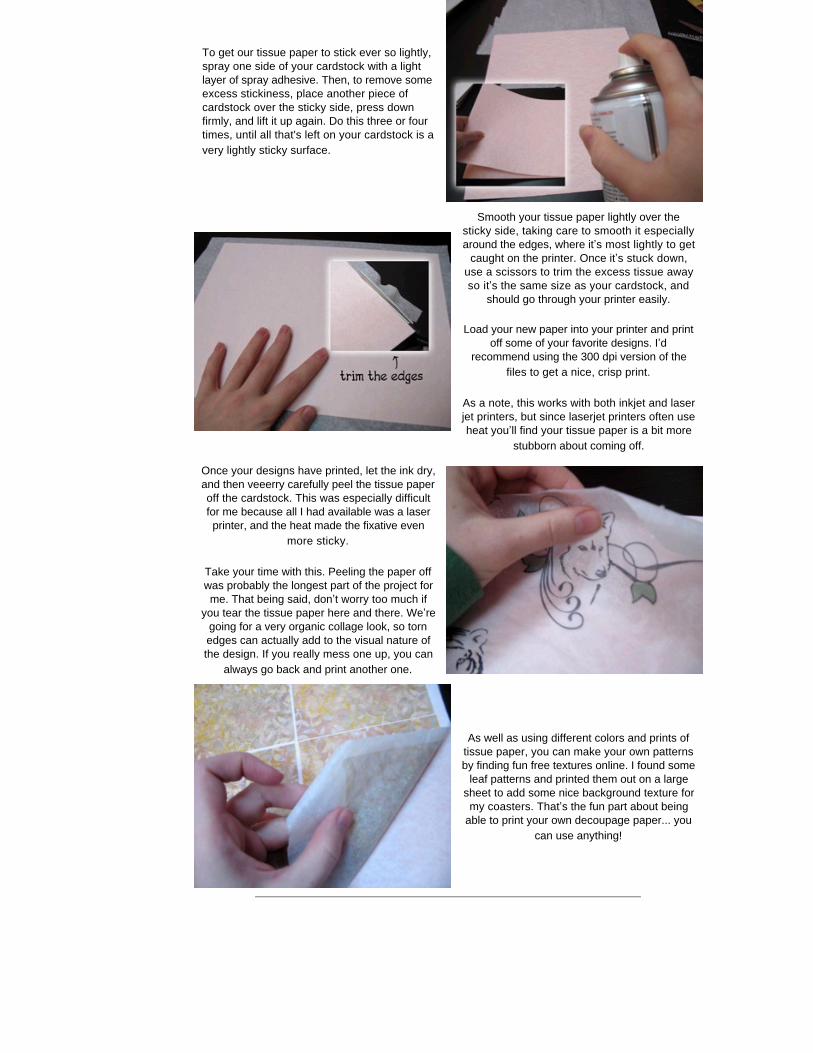
Once your designs have printed, let the ink dry, and then veeerry carefully peel the tissue paper off the cardstock. This was especially difficult for me because all I had available was a laser printer, and the heat made the fixative even
more sticky.
Take your time with this. Peeling the paper off was probably the longest part of the project for me. That being said, don’t worry too much if
you tear the tissue paper here and there. We’re going for a very organic collage look, so torn edges can actually add to the visual nature of the design. If you really mess one up, you can
always go back and print another one.
As well as using different colors and prints of tissue paper, you can make your own patterns by finding fun free textures online. I found some
leaf patterns and printed them out on a large sheet to add some nice background texture for my coasters. That’s the fun part about being
able to print your own decoupage paper... you
can use anything!
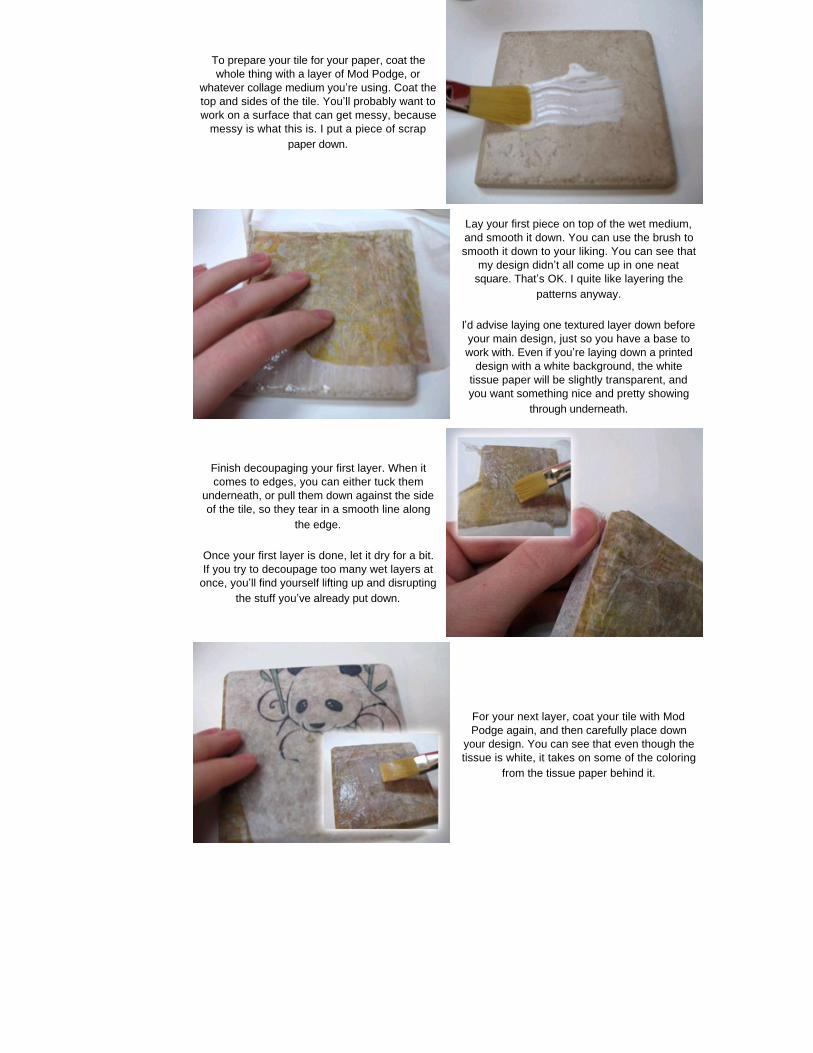
To prepare your tile for your paper, coat the whole thing with a layer of Mod Podge, or
whatever collage medium you’re using. Coat the top and sides of the tile. You’ll probably want to work on a surface that can get messy, because
messy is what this is. I put a piece of scrap
paper down.
Lay your first piece on top of the wet medium, and smooth it down. You can use the brush to smooth it down to your liking. You can see that
my design didn’t all come up in one neat square. That’s OK. I quite like layering the
patterns anyway.
I’d advise laying one textured layer down before your main design, just so you have a base to work with. Even if you’re laying down a printed
design with a white background, the white tissue paper will be slightly transparent, and you want something nice and pretty showing
through underneath.
Finish decoupaging your first layer. When it comes to edges, you can either tuck them
underneath, or pull them down against the side of the tile, so they tear in a smooth line along
the edge.
Once your first layer is done, let it dry for a bit. If you try to decoupage too many wet layers at
once, you’ll find yourself lifting up and disrupting
the stuff you’ve already put down.
For your next layer, coat your tile with Mod Podge again, and then carefully place down
your design. You can see that even though the tissue is white, it takes on some of the coloring
from the tissue paper behind it.
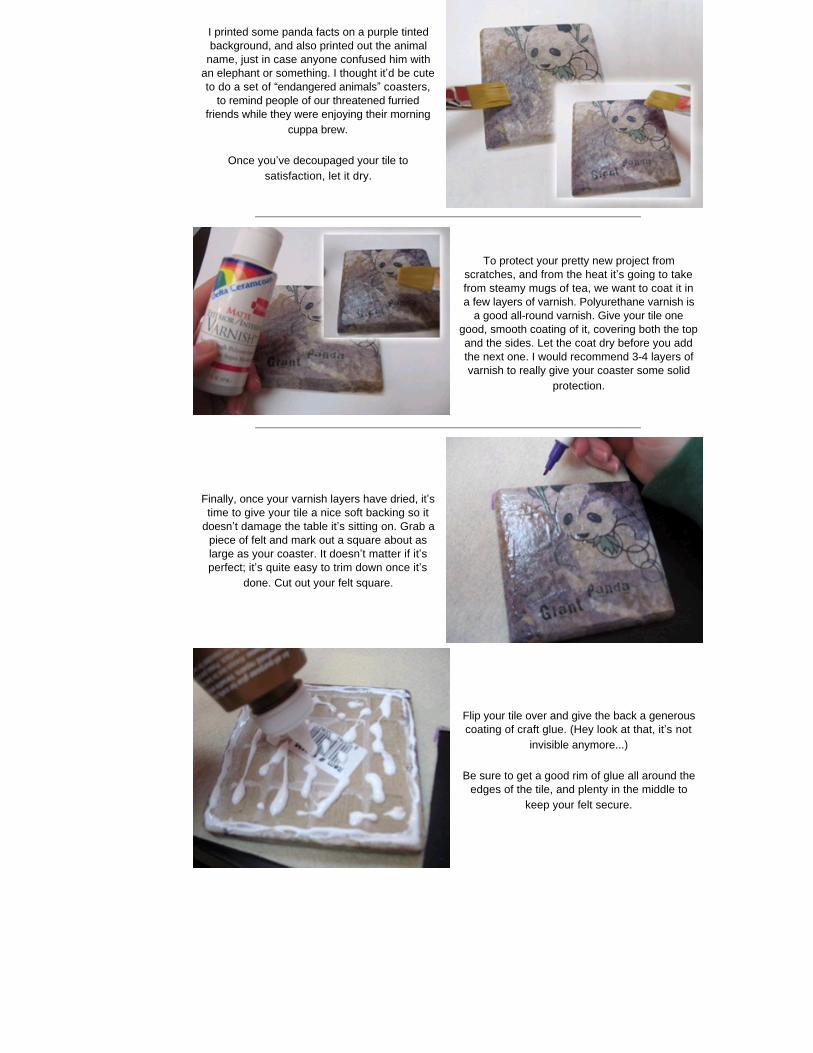
I printed some panda facts on a purple tinted background, and also printed out the animal
name, just in case anyone confused him with an elephant or something. I thought it’d be cute to do a set of “endangered animals” coasters,
to remind people of our threatened furried friends while they were enjoying their morning
cuppa brew.
Once you’ve decoupaged your tile to
satisfaction, let it dry.
To protect your pretty new project from scratches, and from the heat it’s going to take from steamy mugs of tea, we want to coat it in a few layers of varnish. Polyurethane varnish is
a good all-round varnish. Give your tile one good, smooth coating of it, covering both the top and the sides. Let the coat dry before you add the next one. I would recommend 3-4 layers of varnish to really give your coaster some solid
protection.
Finally, once your varnish layers have dried, it’s time to give your tile a nice soft backing so it
doesn’t damage the table it’s sitting on. Grab a piece of felt and mark out a square about as large as your coaster. It doesn’t matter if it’s perfect; it’s quite easy to trim down once it’s
done. Cut out your felt square.
Flip your tile over and give the back a generous coating of craft glue. (Hey look at that, it’s not
invisible anymore...)
Be sure to get a good rim of glue all around the edges of the tile, and plenty in the middle to
keep your felt secure.
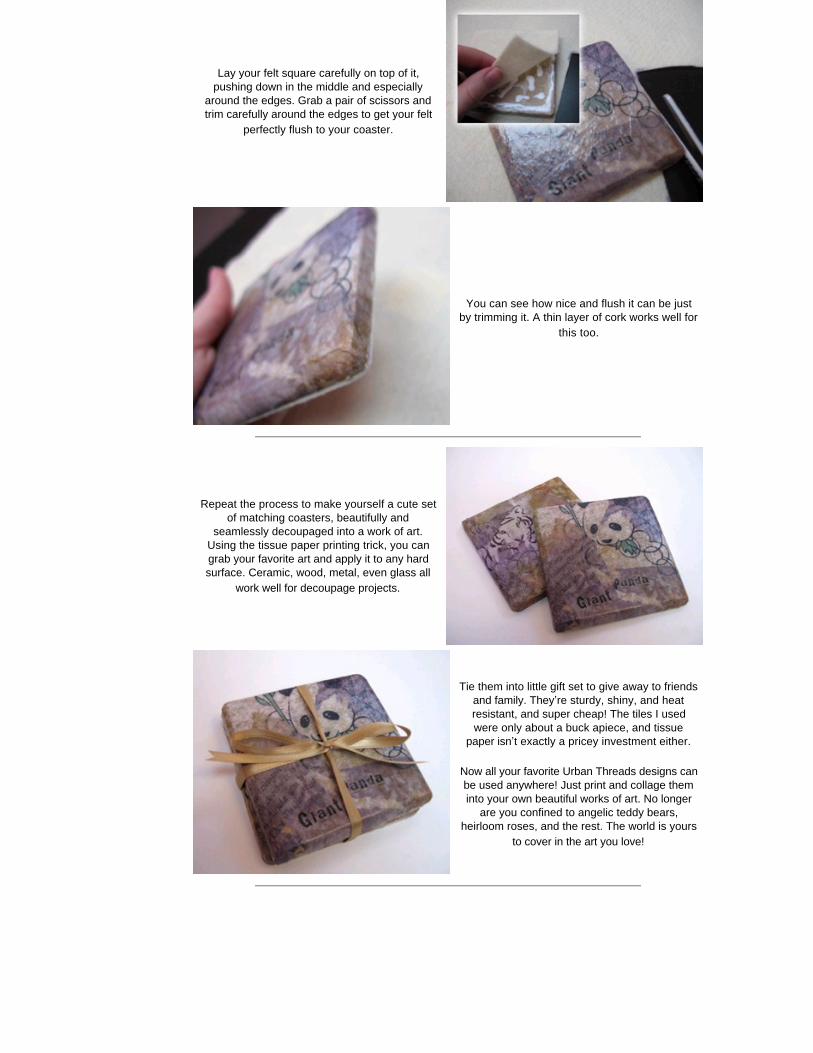
Lay your felt square carefully on top of it, pushing down in the middle and especially
around the edges. Grab a pair of scissors and trim carefully around the edges to get your felt
perfectly flush to your coaster.
You can see how nice and flush it can be just by trimming it. A thin layer of cork works well for
this too.
Repeat the process to make yourself a cute set of matching coasters, beautifully and
seamlessly decoupaged into a work of art. Using the tissue paper printing trick, you can grab your favorite art and apply it to any hard surface. Ceramic, wood, metal, even glass all
work well for decoupage projects.
Tie them into little gift set to give away to friends and family. They’re sturdy, shiny, and heat resistant, and super cheap! The tiles I used were only about a buck apiece, and tissue
paper isn’t exactly a pricey investment either.
Now all your favorite Urban Threads designs can be used anywhere! Just print and collage them into your own beautiful works of art. No longer
are you confined to angelic teddy bears, heirloom roses, and the rest. The world is yours
to cover in the art you love!