Embed Size (px)
Citation preview

1
Dear Friend,
Spring is in the air, but don’t relax yet! Now winter’s over I’m sure you’ll have a
million things to do, and it’s hard to keep track.
From rotating food and water stockpiles, to visiting the shooting range, to
keeping up on the farm. You’ll also have to spruce up the damage your home
(defenses) took during winter. After all, it only takes one hole to sink a ship…
That’s what this guide is for, giving you all the info you’ll need to know about
home maintenance, plumbing, electrics etc. Everything you’d find on your 2016
spring to do list is right here, featuring plain English solutions and answers to all
your spring problems.
P.S.: Remember that sharing is caring, so share this info with your friends that
might benefit from this experience!
.

2
Table of Contents
DISCLAIMER ................................................................................................................................... 4
Your House Checklist .................................................................................................................... 6
Roof ................................................................................................................................................................................. 6
Know the Early Signs of a Roof Leak .............................................................................................................. 9
Exterior Walls................................................................................................................................................................ 9
Foundation Check and Repair if Needed ....................................................................................................... 10
Windows ..................................................................................................................................................................... 10
Interior Maintenance of Your Home ......................................................................................... 11
General Spring Cleaning ....................................................................................................................................... 11
Air Conditioning Repairs and Servicing ...................................................................................................... 12
Attics ........................................................................................................................................................................ 12
Basements .............................................................................................................................................................. 13
Plumbing ................................................................................................................................................................ 13
Electrical Check and Repair if Needed ........................................................................................................ 13
Spring Maintenance Tips for Your Yard .......................................................................................................... 14
Lawns ....................................................................................................................................................................... 14
Pruning and Trimming all Trees and Shrubs ............................................................................................ 14
Remove All Unwanted Vines........................................................................................................................... 15
The Following Techniques Are Generally Effective at Controlling Weedy Vines ........................ 16
Prepare Garden Beds ......................................................................................................................................... 18

3
Repair Old Fences and Other Outdoor Structures ...................................................................................... 19
Fixing the Posts .................................................................................................................................................... 19
Fixing the Rails ..................................................................................................................................................... 20
Fixing the Slats ..................................................................................................................................................... 20
Decks and Patios ................................................................................................................................................. 21
Outdoor Furniture ............................................................................................................................................... 21
Grills ......................................................................................................................................................................... 21
Spring Preparations for Your Farm ........................................................................................... 23
Grooming and Coat Care ................................................................................................................................. 23
Shear the Sheep .................................................................................................................................................. 24
Get Birthing Barns or Areas Ready ............................................................................................................... 24
Re-Shoe the Horses ........................................................................................................................................... 25
Spring Clean and Repair ................................................................................................................................... 25
Replenish Medical Kits and Supplies ........................................................................................................... 26
Other Survivopedia Articles to Make Use Of This Spring......................................................................... 27
Other Resources ....................................................................................................................................................... 27

4
DISCLAIMER
THE INFORMATION CONTAINED IN “THE PREPPER GUIDE TO QUICK SPRING FIXES” IS MEANT TO
SERVE AS A COMPREHENSIVE COLLECTION OF STRATEGIES THAT ARE ONLY RECOMMENDATIONS BY
THE AUTHORS, AND READING THIS EBOOK DOES NOT GUARANTEE THAT ONE’S RESULTS WILL EXACTLY
MIRROR OUR OWN RESULTS.
THE AUTHOR OF “THE PREPPER GUIDE TO QUICK SPRING FIXES” HAS MADE ALL REASONABLE
EFFORTS TO PROVIDE CURRENT AND ACCURATE INFORMATION FOR THE READERS OF THIS COURSE.
THE AUTHOR WILL NOT BE HELD LIABLE FOR ANY UNINTENTIONAL ERRORS OR OMISSIONS THAT MAY
BE FOUND.
THE MATERIAL IN “THE PREPPER GUIDE TO QUICK SPRING FIXES” MAY INCLUDE INFORMATION,
PRODUCTS, OR SERVICES BY THIRD PARTIES. THIRD PARTY MATERIALS COMPRISE OF THE PRODUCTS
AND OPINIONS EXPRESSED BY THEIR OWNERS. AS SUCH, THE AUTHORS OF THIS GUIDE DO NOT
ASSUME RESPONSIBILITY OR LIABILITY FOR ANY THIRD PARTY MATERIAL OR OPINIONS.THE
PUBLICATION OF SUCH THIRD PARTY MATERIALS DOES NOT CONSTITUTE THE AUTHORS’ GUARANTEE
OF ANY INFORMATION, INSTRUCTION, OPINION, PRODUCTS OR SERVICE CONTAINED WITHIN THE
THIRD PARTY MATERIAL.
WHETHER BECAUSE OF THE GENERAL EVOLUTION OF THE INTERNET, OR THE UNFORESEEN CHANGES
IN COMPANY POLICY AND EDITORIAL SUBMISSION GUIDELINES, WHAT IS STATED AS FACT AT THE TIME
OF THIS WRITING, MAY BECOME OUTDATED OR SIMPLY INAPPLICABLE AT A LATER DATE. THIS MAY
APPLY TO THE “THE PREPPER GUIDE TO QUICK SPRING FIXES” AS WELL AS THE VARIOUS SIMILAR
COMPANIES THAT WEHAVE REFERENCED IN THIS EBOOK, AND OUR SEVERAL COMPLEMENTARY
GUIDES. GREAT EFFORT HAS BEEN EXERTED TO SAFEGUARD THE ACCURACY OF THIS WRITING.
OPINIONS REGARDING SIMILAR WEBSITE PLATFORMS HAVE BEEN FORMULATED AS A RESULT OF BOTH
PERSONAL EXPERIENCE, AS WELL AS THE WELL DOCUMENTED EXPERIENCES OF OTHERS.
NO PART OF THIS PUBLICATION SHALL BE REPRODUCED OR SOLD BY ANY ELECTRONIC, MECHANICAL
OR OTHER MEANS WITHOUT THE WRITTEN PERMISSION OF THE AUTHORS. ANY AND ALL REQUESTS
FOR SUCH PERMISSION SHOULD BE SENT BY TO [email protected].
COPYRIGHT 2016 SURVIVOPEDIA™, “THE PREPPER GUIDE TO QUICK SPRING FIXES”

5
How to Fix Up Your Homestead in the Early Spring
Now that winter is mostly gone and spring is getting underway, it is time to check over your
house and see what repairs must be done.
Winter is tough on roofs and chimneys, and it can also take its toll on windows, walls,
foundations, gutters, decks, and anything else that is exposed to the elements. Your farm also
needs some good care these days.
If you do not take care of problems that developed over the winter now, they may get worse
over the summer, and then leave you with an even worse situation when the weather gets cold
again.

6
Your House Checklist
Roof
It is very important in the spring to inspect your roof in order to find and stop moisture damage
that can lead to expensive repairs if left unattended. If you have a problem with climbing or
heights, you can do a thorough inspection on the ground using a pair of binoculars.
If heights do not bother you, do your own roof inspection by climbing onto the roof. Remember
this can be dangerous and sometimes deadly. To reduce your risks, wait for a sunny day with no
wind and be sure to set up the ladder according to the manufacturer's specifications.
While you are up on the roof, clean the gutters and remove any debris found on the roof.

7
While examining the roof, look for the following:
Cracked caulk or rust spots on flashing.
Shingles that are buckling, curling, or blistering.
Cracked and worn rubber boots around vent pipes.
Missing or damaged chimney cap.
Inspect the chimney for crumbling mortar and missing bricks.
Masses of moss and lichens, which could signal the roof is decaying underneath. Black
algae stains are just cosmetic.
If you find piles of colored grit from the asphalt roof tiles in your gutters, this is a very
bad sign. Those sand like granules cover the surface of the roof shingles and shield them
from the sun's damaging ultraviolet rays. This is a sign that your roof is nearing the end
of its life cycle.
Check for damaged gutters.
Check for sagging roof lines.
Here are some easy fixes to repair the above-listed roof problems:
Any loose, damage, or missing shingles should be replaced immediately.
Check for popped up nails that need to be hammered back in place.
If you are comfortable working on a roof, then it is not too difficult to replace shingles
and caulk flashing yourself. The average cost for a bundle of shingles is about $24, while
roof caulking costs about $6 a tube. For a non-professional roofer, it will take at least a
half a day to make a few shingle repairs.
Metal or vinyl flashing around chimney skylights, and attic vents that have separated
need to be resealed with caulk. The flashing and vent boots that are beginning to rust or
deteriorate should be replaced.

8
Moss removal begins in the fall. Use and apply a moss killer intended for roofs. Do not
use a moss killer that is designed for lawn use, as this moss killer contains iron which will
stain your roof.
In the spring, use a broom to remove any remaining dead moss. Spread the Moss killer
along the ridge of the roof and any remaining green patches. The average cost for
treating 3,000 square feet of roof is about $20 with a moss killing treatment. Allow about
3 hours’ time to sweep the roof, clean the gutters and apply the moss killer.
Replace leaking or broken gutters.
If the roof line is sagging, you will probably need to replace the plywood under the
shingles.

9
Know the Early Signs of a Roof Leak
A yearly roof check is very important, but roof problems can occur at any time. Early signs of
roof problems include following:
Dark areas on the ceilings.
Peeling paint on the underside of a roof overhang.
Damp spots along fireplaces.
Water stains on pipe venting the water heater or furnace.
If you find worrisome signs, especially if the roof is over 15 years old, or there has been a storm
with heavy wind or hail, get a professional assessment of your roof.
If you must replace the roof, get at least two to three bids on the project that state in writing
what will be done, how much it will cost, how long it will take to complete the job, and that the
contractor cleans up and removes all waste materials. The contract must also state that the
company is bonded.
Before signing anything, request proof of liability insurance, and workman's compensation
coverage for everyone working on this project. Unfortunately, if the business is not bonded and
does not have the proper insurances, you may become liable if any injuries occur.
You should also check out the companies through the BBB and request contact with other
individuals that had work done by these companies.
Exterior Walls
Whether you have wood siding, stucco, or brick, look for trouble spots, especially under eaves
and near gutter downspouts. Water stains normally indicate that your gutters are not adequate
for containing roof runoff.

10
If you have wood siding, check for openings, damaged areas, or knots that have popped out.
These conditions make way for carpenter ants, woodpeckers, and any other critters that may
make a nest or burrow through.
Foundation Check and Repair if Needed
When inspecting the exterior of your home, be sure to examine the foundation from top to
bottom for masonry cracks.
Routine caulking by homeowners won't do the job. To fix the problem, hire a foundation
specialist who can employ a two-part epoxy injection system that will bond all cracks chemically.
Windows
Any leakage around windows will let warm summer air in and let cooled indoor air escape. To fix
this problem, be sure to check all caulking and weather stripping you have in place to see if it
has remained intact. If not, re-caulk and replace the weather stripping to form a tight seal.
Remember a tight seal is the first line of defense against air and water leakage.
If you notice condensation inside the glass on a double or triple glazed window during the
winter months, there is a good chance that the weather seal has been compromised. Either the
glass or the window will need to be replaced.
Spring clean your windows inside and out with a dedicated window cleaner solution and a soft
cloth or a squeegee. Never use abrasive cleaners or a high-pressure spray washer as both can
scratch the glass, crack the caulking around each window unit, or damage mesh screen.
If your window screens were on all winter, remove them and clean them with a mild detergent
and then lay them on a dry surface to air dry before putting them back on.

11
Interior Maintenance of Your Home
General Spring Cleaning
Spring is a good time to clean areas of the house that are often neglected. Vacuum or dust chair
rails, window casings, wall-mounted cabinets, and ceiling fans. Wash or dry clean fabric
draperies and use a damp cloth to clean wood and vinyl blinds.
Vacuum upholstered furniture and mattresses. Consider renting a carpet cleaner to clean all rugs
and carpeting throughout the house. Remember anything you can do to remove settled dust,
mites, and allergens will make your home cleaner and healthier.

12
If you detect grease residue in your kitchen consider washing cabinets, backsplashes, and walls
with warm water and a mild detergent. If you have a kitchen vent system and it is a little greasy
this is the time to clean all filters and the hood to remove any grease residue.
In the bathroom, soap residue and fluctuations in heat and humidity combined to create a
perfect breeding ground for mold and mildew. While you're cleaning the tile, look for areas of
worn or missing grout. If the grout is missing or loose this may lead to more serious water
damage if not repaired.
Find more tips on spring cleaning on our article 31 Spring Cleaning Hacks Any Homesteader
Should Know.
Air Conditioning Repairs and Servicing
As the temperatures begin to rise it is time to check your heat pump or your outside AC unit
and get them ready for the cooling season. A good PM service will help these AC systems run
better and be more effect.
If you have window units, change the filter, check hose connections for leaks, and make sure
that the units drain correctly. Also vacuum any dust that has settled on the unit connections.
With time this dust can impact on the AC units effectiveness. If you suspected problems with
any AC unit last summer, now is the time to call a professional to check the unit.
Attics
Search for signs that indicate insects and other critters have colonized and are living in your attic
space. Also search aggressively for mold which also takes the form of gray or black blotches that
look like staining.
If you see signs of mold and mildew, take steps now to make sure insulation and ventilation
areas are set up properly to prevent further mold growth. This is very important to catch in the
spring because the mold and mildew will only grow faster as temperatures go up.

13
Basements
Higher than normal humidity, inadequate ventilation, and the need for a dehumidifier can
encourage insects, mold, and other problems.
Check the base of poured concrete walls to see if there are any cracks. These cracks will start
from the bottom up, not the top down. If there is water penetration it will also show up at the
bottom of those cracks. Examine any exposed framing with a flashlight. If you see even a quarter
of an inch or so of insect tunneling on the wood, call a pest control company immediately.
Plumbing
Spring is a good time to check for leaky faucets, clogged drains, and sweaty pipes.
Check under the kitchen and bathroom sinks to make sure the connections on pipes and
hoses are properly sealed.
Look for any wetness around the dishwasher that could signal an existing or potential
problem.
In the laundry room, check washer machine hoses for cracks, bulges, or dampness.
The same is true for hot water heaters which may show signs of corrosion and leaks.
Electrical Check and Repair if Needed
Check all electrical circuits for their proper operational voltage. Check to see that all breakers are
functioning correctly and safely. If not, replace the breaker or breakers that are working below
rated limits.
Check to see that all wiring to lights, wall outlets, and heavy appliances are working correctly. If
not replace the wiring in the affected area. Don't forget to check over emergency generators
and any alternative energy systems.
Make sure that all batteries are working properly, that you have fuel on hand, and that the
power capture systems are also working and in good order.

14
Spring Maintenance Tips for Your Yard
Lawns
Rake the lawn to remove any branches, debris, and leaves that you might have missed in the fall.
If they are left behind, there's a good chance they can suffocate the grass beneath. During the
long winter soil compaction, along with chemical changes can alter the soil's PH. This may have
left your lawn vulnerable to weed growth and other issues.
Even if you can't see the weeds yet, they are more than likely waiting for optimum conditions to
propagate. If you want to prevent them from germinating, consider an organic herbicide. It is
best to avoid using fertilizer in the spring.
Make sure outdoor water systems consisting of pipes, faucets, and in-ground sprinkler systems
are in good working order. If you have any leaking pipes, replace them. Turn on the in ground
sprinkler system after they have thawed out from the winter cold in order to test for leaking
pipes.
This is also a good time to make sure that sprinkler heads pop up to water the grass. If you have
any leaking pipes, or sprinkler heads that do not pop up, replace them with new ones.
Take stock of your garden tools and lawn maintenance equipment including lawn mowers,
trimmers, garden cultivators, and garden hoses. All lawn maintenance equipment should be
given preventive maintenance and tested to be sure all these pieces of equipment are running
correctly and safely. If you find problems, replace or repair as needed.
Pruning and Trimming all Trees and Shrubs
Proper pruning of trees and shrubs helps maintain safety and promote better growth.
Check our previous free report to see how to prune and trim trees in the spring. If you missed it,
check our free reports page to get it.

15
Still, here are some basic guidelines for pruning and trimming:
Deciduous trees and shrubs are best pruned in late winter or early spring, usually just
before they break dormancy.
Once the threat of frost is gone the plants are less likely to suffer cold damage at the
point where you have made your cuts.
Deciduous plants are still bare so this is an especially good time to spot broken and
awkwardly growing branches that need to be removed.
For flowering trees and shrubs, make sure you know whether the flowers are produced
on old or new growth before you start pruning.
If early spring flowers come on last year's wood, you will lose many flowers by pruning
before plants break their dormancy. For these trees, it is best to wait until flowering has
finished before pruning.
Remove All Unwanted Vines
Woody and weedy vines are perhaps the most difficult weeds to control in your landscape. The
following are a few species that can grow quickly and overrun your lawns or other parts of your
home landscape: cats claws, red vine, bush killer vine, bindweed, and Virginia Creeper just to
name a few.
Since they are among the fastest-growing plants, they can quickly create major problems and
rapidly recover from control efforts. Vines can also swiftly spread into new areas by growing into
the tops of trees or buildings.
In a very short time, they can also kill shrubs and lower growing plants by engulfing them and
keeping them from getting any sunlight. When trying to control weed vines, you must be
prepared for a fight.
Once you begin the control efforts, you must continue and act frequently for as long as it takes
to gain control and eradicate the vines.
16
The Following Techniques Are Generally Effective at Controlling Weedy Vines
Physical Control
The first method is hand pulling and digging out the vines by hand. This is best done when the
soil is moist and soft. For this system to work, it is very important to dig down below the ground
to remove as many roots, bulbs, tubers, or rhizomes as possible. Doing this regularly is also a
great way to deal with occasional seedlings and lighter infestations.
Physical control may also include cutting down and removing vines from buildings or fences to
clean up the situation. You must remember that cutting them down to ground level is only the
first step. This must be followed by digging out the roots and below-ground parts.
Physical control is not easy and you must have the strength and stamina to handle what is
required. If you are not physically able to do the work, hire a crew to do the initial and hardest
work of clearing out the vines. Then follow up to keep them under control.
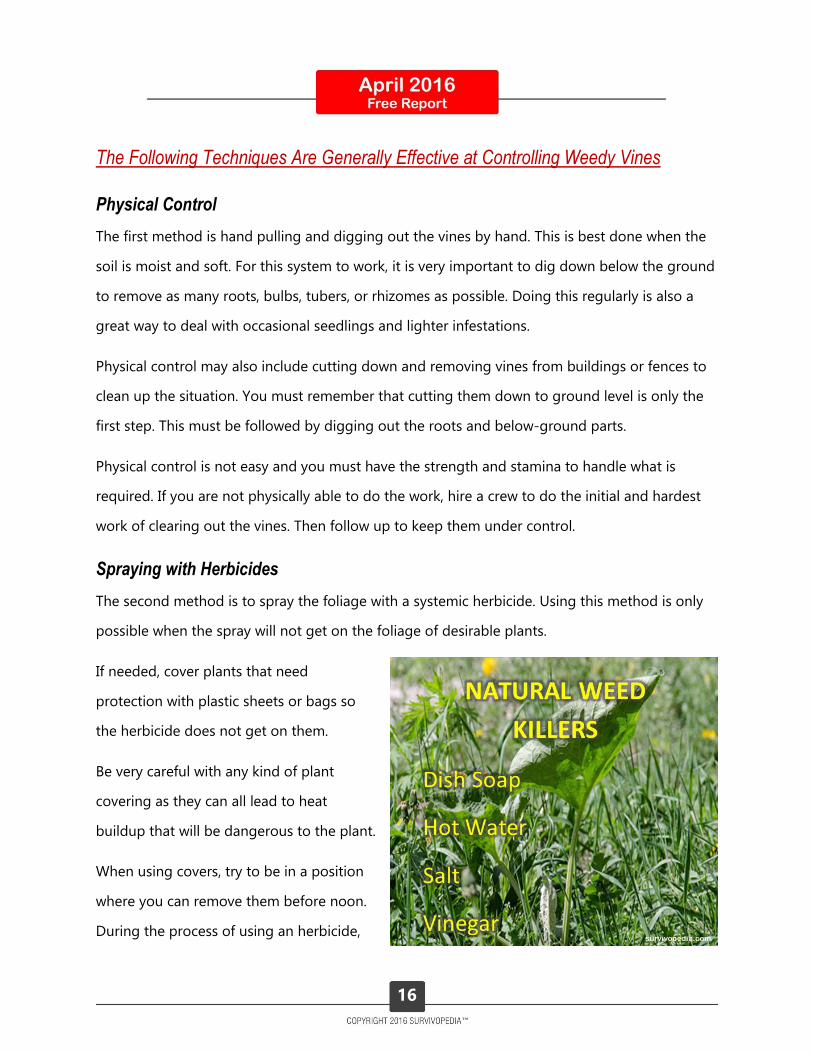
Spraying with Herbicides
The second method is to spray the foliage with a systemic herbicide. Using this method is only
possible when the spray will not get on the foliage of desirable plants.
If needed, cover plants that need
protection with plastic sheets or bags so
the herbicide does not get on them.
Be very careful with any kind of plant
covering as they can all lead to heat
buildup that will be dangerous to the plant.
When using covers, try to be in a position
where you can remove them before noon.
During the process of using an herbicide,

17
be sure to spray enough to wet the foliage of the vine thoroughly, but avoid having a run off
spilling onto the ground. You may spray the vine intact, or cut it back, then let it re-sprout and
spray the new growth.
Systemic herbicides are absorbed by the foliage. They enter to plant's circulatory system which
sends the herbicide into the vine's roots, killing them as well. The following are common
systemic herbicides that will kill and control your vine problems. They are: Roundup, Eraser,
Killzall, Brush-B-Gone, and Brush Killer. When using these herbicides, however, do not forget
that they are highly toxic and can cause serious health problems for you, your children, and your
pets.
You are far better off using physical removal methods early on in the spring rather than wait and
use these poisons. If you do decide to use an herbicide, consult with your local cooperative
extension and find out if there are any organic or natural vine killers that will work for the plants
in your area.
Treating Stems
The third method is for larger, more established vines growing on trees, buildings, fences, or
intertwined in shrubs. In these situations, spraying the vine foliage is not practical because of the
potential to injure desirable surrounding landscape plants.
Vine control in sensitive areas can best be achieved by cutting the vines a few inches above the
ground. Next, immediately treat the fresh cut stump with undiluted systemic herbicides such as
Green Light Cut Vine and Stump killer. Applying the herbicide to a fresh cut is necessary because
it prevents the stump from the re-sprouting.
Once you make the cut, the vine in the trees or shrubs will die because it has no root system.
The treated stump will die because the herbicide gets absorbed by the freshly cut surface and
sent directly to the roots. This method it's very effective especially if it is done in the fall or early
spring.
18
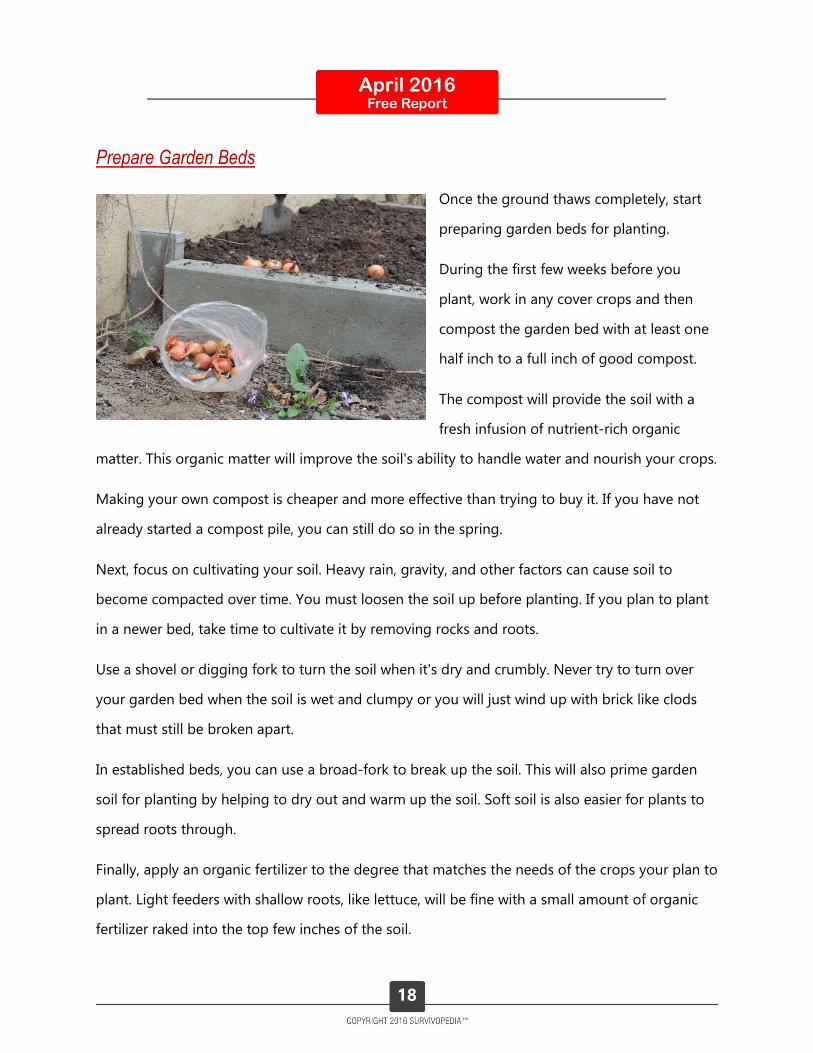
Prepare Garden Beds
Once the ground thaws completely, start
preparing garden beds for planting.
During the first few weeks before you
plant, work in any cover crops and then
compost the garden bed with at least one
half inch to a full inch of good compost.
The compost will provide the soil with a
fresh infusion of nutrient-rich organic
matter. This organic matter will improve the soil's ability to handle water and nourish your crops.
Making your own compost is cheaper and more effective than trying to buy it. If you have not
already started a compost pile, you can still do so in the spring.
Next, focus on cultivating your soil. Heavy rain, gravity, and other factors can cause soil to
become compacted over time. You must loosen the soil up before planting. If you plan to plant
in a newer bed, take time to cultivate it by removing rocks and roots.
Use a shovel or digging fork to turn the soil when it's dry and crumbly. Never try to turn over
your garden bed when the soil is wet and clumpy or you will just wind up with brick like clods
that must still be broken apart.
In established beds, you can use a broad-fork to break up the soil. This will also prime garden
soil for planting by helping to dry out and warm up the soil. Soft soil is also easier for plants to
spread roots through.
Finally, apply an organic fertilizer to the degree that matches the needs of the crops your plan to
plant. Light feeders with shallow roots, like lettuce, will be fine with a small amount of organic
fertilizer raked into the top few inches of the soil.

19
For cabbage, tomatoes, peppers and other
heavy feeders, enrich individual planting
holes with a mixture of compost and
organic fertilizers just before you set out the
seedlings.
For very heavy feeders such as sweet corn,
use a hoe to make deep trenches in the
beds, then place fertilizer in the trenches
and cover halfway.
Once this is done, put the corn seeds on top of the covered fertilizer and cover them.
Repair Old Fences and Other Outdoor Structures
Wood fences are vulnerable to rot damage from the elements. Depending on the extent of the
damage, you may be able to repair the fence instead of spending a larger amount of money on
replacing it.
If you share the fence with neighbors, talk to them before starting repairs to determine if they
will help you pay for the expenses. It is also important to check with your town or city clerk to
identify permanent fence regulations that might have been updated after you built your fence.
Fixing the Posts
Shake the fence posts to determine if any need replacing. Fence posts may move a little,
but they should be firmly planted into the ground.
Select fence materials. Pressure-treated lumber is your best first choice because it better
withstands the elements above ground and moisture in the ground itself.

20
If you must replace fence posts, dig holes for the new posts with a post hole digger. If
you are working in a difficult area, rent a power auger (they are drills specifically
designed to dig holes for fence posts).
Put two inches of gravel in the hole to help prevent your new fence post from rotting.
Place the post on top of the gravel. Use a level to ensure that it is straight. Nail wood
braces along the sides to keep it standing straight.
Mix Concrete until it is wet and chunky. Fill the post hole until the concrete is level with
the ground. Remove air bubbles by mixing the concrete with a stick.
Fixing the Rails
Stabilize a falling rail by nailing a pressure-treated 2x4 scrap of wood or a metal T brace
to the post to hold it up.
Caulk around the sides and top of the wood or T brace to prevent water damage.
Paint Wood scraps or T brace to match the color of the fence.
Buy new wood to replace the rail if you cannot salvage it. Use 2-by-4 pieces of wood for
the job. Cut the wood to the exact length necessary for the repair using a hand-held
cutting tool equipped with a 3-inch multi-purpose carbide wheel accessory.
Depending on your fence design, nail the rail from post to post or use a longer rail that
spans two posts.
Fixing the Slats
Remove the damaged slats with a crowbar.
Measure and cut the new slats to the applicable length using hand-held cutting tool
equipped with a 3-inch multipurpose carbide wheel accessory.
Nail the new boards to the top and bottom rails. The space between each board should
be equal to the boards’ width. For a privacy fence, leave about a nail's width in between
each board.

21
Decks and Patios
Start your inspection by sweeping to remove any leaves and debris accumulated in the space
between the boards. This will make it easier to spot problems and also extend the life of the
deck regardless of the materials used.
Next, search for warped, loose, or splintered boards. If the finish on your wood deck is faded or
worn, now is the time to clean, stain, and reseal it. If you have a composite deck, follow the
manufacturer's recommendations on seasonal care. The same is true for wood and composite
fences, pergolas, trellises, and other ornamental structures.
If you have a stone patio a simple hose down is all the maintenance required. If you detect moss
or staining of your patio a more serious cleaning may be necessary.
Outdoor Furniture
If you store your lawn furniture for the winter, it is now time to bring it outdoors and give it a
good rinsing or wash with a mild detergent. For metal furniture, check for signs of rust or paint
erosion.
If you must repaint the metal furniture, start off by sanding down all the rusted areas, prime the
rusted areas, and then add a few good coats of spray enamel. This will prevent the damage from
sun, rain, and humidity in the months ahead.
Grills
If your gas grill has remained idle over the winter months, check burner jets for clogs and
obstructions and replace if necessary. Be sure that all gas hoses and connections are sound and
secure.
Replace all gas hoses and connectors that are damaged or leaking. If you don't do this, there is
the risk of a gas explosion or a bad gas leak when the grill is in use. Finally, you must check and

22
inspect the propane gas tank to ensure that it does not leak and that the gas valve is working
properly. If you find leaks or faults, replace the tank and gas valve.
If you use a charcoal grill, make certain your grill is clear of ash and free of grease residue. It is a
good habit to clean your grill after every use, not just in the spring cleaning cycle. If your
charcoal grill is rusty and is in need of a touch-up paint job, do so now so that it will be ready
for this year's grilling season.
Early spring is the best time of the year to take care of a number of maintenance jobs within and
around your home. You may not be happy about all the time, hard work, and money you need
to spend on these tasks, however, it pays off in the long run when you don't have to deal with a
more expensive problem on top of all the heat that comes with summer.
Once these tasks are complete, you can look forward to enjoying the summer and thinking
about how you will advance your other prepper/survival plans.

23
Spring Preparations for Your Farm
Spring is also an extremely busy time on the farm: there are many tasks that need doing to stay
ahead of farming game, as this is the primary source of survival food for some of us. Let’s check
up the TO-DO list for spring, and see if we missed anything.
Grooming and Coat Care
As the weather gets warmer, your horses, dogs, goats, sheep, cattle and other furry livestock will
shed winter coats and grow sleeker, shorter summer coats. This can be an itchy process that you
can help by proper grooming.

24
Unfortunately, spring is also a time when biting lice and fleas become an issue for many animals.
Keep an eye out for these small-but-troublesome creatures and deal with them as needed.
Proactive care is your best option to avoid parasites as well as dry skin, summer itch, or other
skin conditions.
Shear the Sheep
Some breeds of sheep need sheared several times a year
and some only need it once. Regardless, spring is the ideal
time to do it at least once.
You’re getting rid of the long hair that kept them warm
over the winter months so that your sheep can be cool and
comfortable during the heat of summer.
It’s best to shear your ewes before they lamb for a couple
of different reasons.
First and foremost, it’s easier for the newborn lambs to
nurse if Mama is sheared. They also take up less room in
the birthing barn, and from a practical perspective, the
wool will be much cleaner.
Get Birthing Barns or Areas Ready
Excitingly, spring is a time of birth. Typically, farm animals give birth in spring so that babies
have a few months to grow and get strong enough to survive winter. It also gives Mama a few
months to recover from giving birth in a less dangerous environment.
If you’re using birthing barns or paddocks, which are a good idea if you have the room, you
need to get them clean, aired out, prepared, and stocked.

25
Get your emergency medical supplies ready and make sure that you have everything on hand to
ensure a healthy birthing process for your sheep, cows, horses, pigs, and other livestock.
Re-Shoe the Horses
Your horse should be receiving farrier care every 6-8 weeks
but if you’ve recently had barium shoes, ice caulks, snow-
rim pads, or other shoes meant to help your horse maintain
traction in the snow, you need to pull them off as soon as
threat of ice or snow is over.
If not, the extra weight and traction can cause injury to legs
and tendons that can cause lameness.
Many people let their horses go barefoot over the winter in
order to promote good hoof health and growth. If you’re
one of those people, spring is the time to shoe them if
necessary, or trim them, in order to prepare the hooves for summer work or riding. After all, no
hoof, no horse!
Spring Clean and Repair
Winter is hard on a farm: structures such as barns and outbuilding take a beating and pastures
become breeding grounds for disease. Fences, gates and roofs sag from the weight of snow or
from temperature changes. Machines need oil changes, safety checks, and maintenance, and
pastures need picked up.
Barns and chicken coops need cleaned and aired out in preparation for birthing and storing hay
and grain for the coming winter. Water and feed buckets need sterilized.
26
Just like you need to spring clean your house, you need to do the same for your farm so that
you and your animals stay safe and healthy. If there’s a nail sticking out or a section of fence
down within a 20-mile radius, rest assured that your horse will find it and injure himself on it.
Taking care of your property protects your animals and prevents costly illness and injury.
Replenish Medical Kits and Supplies
Though you should always replace supplies as you use them, spring is a great time to go
through everything that you have and take an inventory. Check expiration dates and look at
wraps for signs of dry-rot, or mold. Build a new checklist and replenish anything that’s missing
or old.
Also, if there were supplies that you ran out of or found out that you needed but didn’t have on
hand, modify your supplies list this season so that you always have what you need on hand.
***
Taking care of spring cleaning, maintenance, and animal health now will keep you ahead of the
curve and will help keep your animals safe and healthy.
Don’t forget to stop and smell the roses, though. A nice spring trail ride or a romp with yearling
goats is a great way to relieve stress and remember why you have your animals in the first place.
Live, love, laugh – it’s spring!

27
Resources
Other Survivopedia Articles to Make Use Of This Spring
Real Spring Or Just A Temporary Warm Spell?
20 Early Spring Edibles: How And When To Grow Them
10 Spring Edibles To Look For In Your Backyard
Survival Garden: DIY Cold Frames
How To Sun Map Your Garden
Top 10 Life Hacks For Your Homestead
50 Toxic Plants: The Silent Slayers at Your Farm
Other Resources
Report on Worst Toxic Weeds in the Upper Midwest