Embed Size (px)
Citation preview
DC725, DC735, DC745CORDLESS COMPACT COMBI DRILLS
a
b
c df
e
Figure 1
Figure 2
Figure 3
A B
g
h
g
h
i
c
Figure 4
c
Figure 5
c
Figure 6
1006323-02 02/08
* NOTE: NOT ALL MODELS ARE AVAILABLE IN ASIA. CHECK WITH AUTHORISED DEWALT AGENT
Technical data* DC725 DC735 DC745
Voltage VDC 18 14.4 12
Battery Type NiCd NiCd NiCd
Power output W 400 295 240
No-load speed 1st gear min -1 0–500 0–400 0–400 2nd gear min -1 0–1700 0–1450 0–1450
Impact rate 1st gear min-1 0-8500 2nd gear min -1 0–29000
Max. torque Nm 44 40 35
Chuck capacity mm 13 13 13
Maximum drilling capacity Wood mm 38 35 28 Metal mm 13 13 13 Masonry mm 13 13 13
0-6800 0-6800
0–25000 0–25000
CHARGER TYPE: DE9116-KR USED IN ALL MODELS.DEWALT reserves the right to change the content of the above tools without notice.
General Power Tool Safety Warnings WARNING! Read all safety warnings
and instructions Failure to follow the warnings and instructions may result in electric shock, fire and/or serious injury.
SAVE ALL WARNINGS AND INSTRUCTIONS FOR FUTURE REFERENCE.
1) ELECTRICAL SAFETYa) Power tool plugs must match the outlet.
Never modify the plug in any way. Do not use any adapter plugs with earthed (grounded) power tools. Unmodified plugs and matching outlets will reduce risk of electric shock.
b) Avoid body contact with earthed or grounded surfaces such as pipes, radiators, ranges and refrigerators. There is an increased risk of electric shock if your body is earthed or grounded.
c) Do not expose power tools to rain or wet conditions. Water entering a power tool will increase the risk of electric shock.
3) PERSONAL SAFETY
a) Use personal protective equipment. Always wear eye protection. Protective equipment such as dust mask, non-skid safety shoes, hard hat, or hearing protection used for appropriate conditions will reduce personal injuries.
b) Do not overreach. Keep proper footing and balance at all times.
4) POWER TOOL USE AND CAREa) Do not force the power tool. Use the
correct power tool for your application. The correct power tool will do the job better and safer at the rate for which it was designed.
b) Do not use the power tool if the switch does not turn it on and off. Any power tool that cannot be controlled with the switch is dangerous and must be repaired.
c) Disconnect the plug from the power source and/or the battery pack from the power tool before making any adjustments, changing accessories, or storing power tools. Such preventive safety measures reduce the risk of starting the power tool accidentally.
d) Use the power tool, accessories and tool bits etc., in accordance with these instructions taking into account the working conditions and the work to be performed. Use of the power tool for operations different from those intended could result in a hazardous situation.
5) BATTERY TOOL USE AND CAREa) Recharge only with the charger specified
by the manufacturer.
b) Use power tools only with specifically designated battery packs.
d) Under abusive conditions, liquid may be ejected from the battery, avoid contact. If contact accidentally occurs, flush with water. If liquid contacts eyes, additionally seek medical help. Liquid ejected from the battery may cause irritation or burns.
c) When battery pack is not in use, keep it away from other metal objects like paper clips, coins, keys, nails, screws or other small metal objects that can make a connection from one terminal to another. Shorting the battery terminals together may cause burns or a fire.
Important Safety Instructions for All Battery Chargers
WARNING: Shock hazard. Do not allow any liquid to get inside charger. Electric shock may result.
CAUTION: Burn hazard. To reduce the risk of injury, charge only DEWALT rechargeable batteries. Other types of batteries may burst causing personal injury and damage.
CAUTION: Under certain conditions, with the charger plugged in to the power supply, the exposed charging contacts inside the charger can be shorted by foreign material.
• DO NOT attempt to charge the battery pack with any chargers other than the ones in this manual. The charger and battery pack are specifically designed to work together.
• These chargers are not intended for any uses other than charging DEWALT rechargeable batteries. Any other uses may result in risk of fire, electric shock or electrocution.
• Do not expose charger to rain or snow.
• Pull by plug rather than cord when disconnecting charger.
• Do not use an extension cord unless it is absolutely necessary.
• Do not place any object on top of charger or place the charger on a soft surface that might block the ventilation slots and result in excessive internal heat.
• Do not operate charger with damaged cord or plug
• Do not operate charger if it has received a sharp blow, been dropped, or otherwise damaged in any way.
• Do not disassemble charger; take it to an authorized service center when service or repair is required.
• Disconnect the charger from the outlet before attempting any cleaning. This will reduce the risk of electric shock. Removing the battery pack will not reduce this risk.
• NEVER attempt to connect 2 chargers together.
Charging Procedure
1. Plug the charger (j) into an appropriate outlet before inserting battery pack.
2. Insert the battery pack (h) into the charger. The red (charging) light will blink continuously indicating that the charging process has started.
3. The completion of charge will be indicated by the red light remaining ON continuously. The pack is fully charged and may be used at this time or left in the charger.
Charging processRefer the table below for the state of charge of the battery pack.
State of charge
charging – – – – – –
fully charged –––––––––––
hot/cold pack delay ––– – ––– –
replace battery pack •••••••••••
problem •• •• •• ••
Automatic refreshThe automatic refresh mode will equalise or balance the individual cells in the battery pack at its peak capacity. Battery packs should be refreshed weekly or whenever the pack no longer delivers the same amount of work.
To refresh your battery pack, place the battery in the charger as usual. Leave the battery pack for at least 8 hours in the charger.
Hot/Cold Pack DelayWhen the charger detects a battery that is too hot or too cold, it automatically starts a Hot/Cold Pack Delay, suspending charging until the battery has reached an appropriate temperature. The charger
Important Safety Instructions for All Battery Packs
• Charge the battery packs only in DEWALT chargers.
• DO NOT splash or immerse in water or other liquids.
• Do not store or use the tool and battery pack in locations where the temperature may reach or exceed 40˚ C (105° F)
DANGER: Electrocution hazard. Never attempt to open the battery pack for any reason.
WARNING: Never attempt to open the battery pack for any reason. If battery pack case is cracked or damaged, do not insert into charger. Do not crush, drop or damage battery pack. Do not use a battery pack or charger that has received a sharp blow, been dropped, run over or damaged in any way (i.e., pierced with a nail, hit with a hammer, stepped on).

• Do not incinerate the battery pack even if it
is severely damaged or is completely worn out. The battery pack can explode in a fire.
• A small leakage of liquid from the battery pack cells may occur under extreme usage or temperature conditions . This does not indicate a failure.
However, if the outer seal is broken:a. and the battery liquid gets on your skin,
immediately wash with soap and water for several minutes.
b. and the battery liquid gets into your eyes, flush them with clean water for a minimum of 10 minutes and seek immediate medical attention. (Medical note: The liquid is 25-35% solution of potassium hydroxide.)
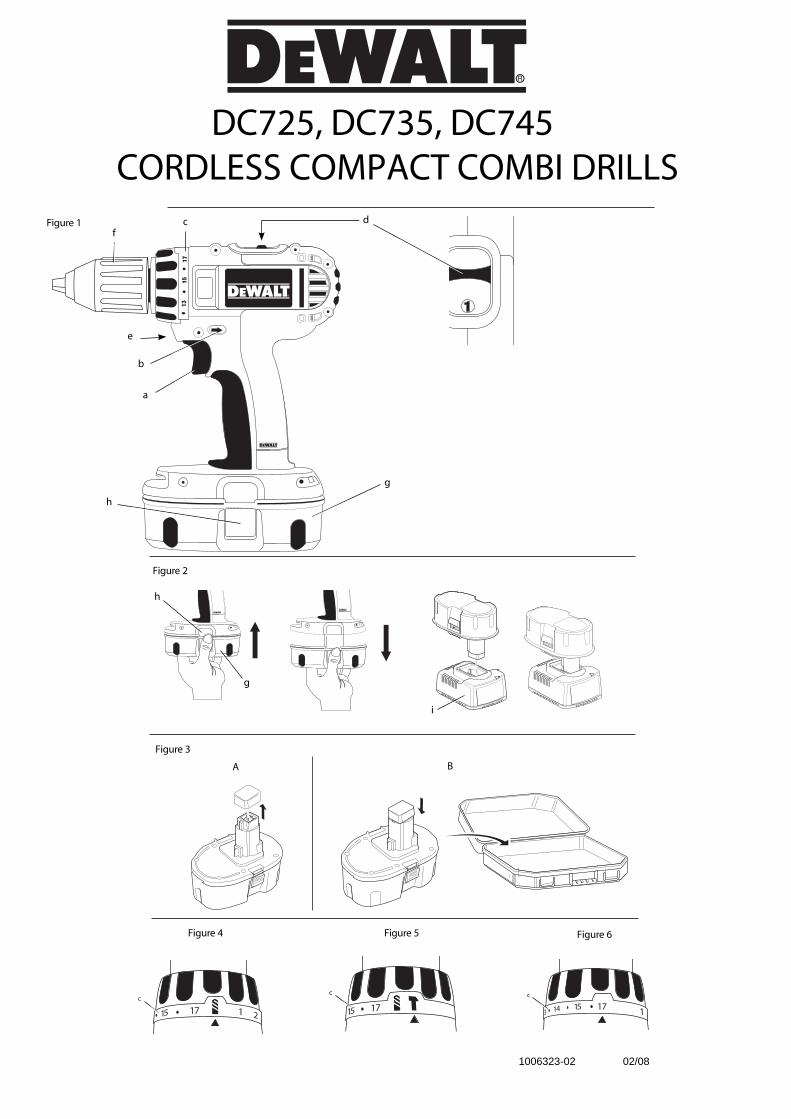
Battery Cap (fi g. 3)A protective battery cap is supplied to cover the contacts of a detached battery pack. Without the protective cap in place, loose metal objects could
short circuit the contacts, causing a fire hazard and damaging the battery pack.
1. Take off the protective battery cap before placing the battery pack in the charger or tool (Fig. 3A).
2. Place the protective cap over the contacts immediately after removing the battery pack from the charger or tool (Fig. 3B).
WARNING: Make sure the protective battery cap is in place before storing or carrying a detached battery pack.
Battery pack (fi g. 1)BATTERY TYPE
Each tool described in this manual uses different batteryplatforms within the DEWALT battery system.Users of existing 12V, 14.4V & 18V batteries can use theirpacks on the relevant tools in this manual.Performance & run time may vary slightly on pack used.
Labels on charger and battery pack
Battery charging.
Battery charged.
Battery defective.
Hot/cold pack delay.
Do not probe with conductive objects.
Do not charge damaged battery packs.
Use only with D EWALT battery packs, others may burst, causing personal injury and damage.
Do not expose to water.
Have defective cords replaced immediately.
Charge only between 4 °C and 40 °C.
Discard the battery pack with due care for the environment.
Do not incinerate the battery pack NiMH, NiCd+ and Li-Ion.
Charges NiMH and NiCd battery packs.
MAINTENANCE
Separate collection. This product must not be disposed of with normal household waste.
CHARGER CLEANING INSTRUCTIONS
WARNING: Shock hazard. Disconnect the charger from the AC outlet before cleaning. Dirt and grease may be removed from the exterior of the charger using a cloth or soft non-metallic brush. Do not use water or any cleaning solutions.
Rechargeable Battery PackThis long life battery pack must be recharged when it fails to produce sufficient power on jobs which were easily done before. At the end of its technical life, discard it with due care for our environment:
Package contentsThe package contains:
1 Drill/Hammerdrill
2 Battery packs
1 Charger
1 Kitbox (K version only)
1 Instruction manual
1 Exploded drawing
NOTE : Battery packs and chargers are not included with N-models.
• Check for damage to the tool, parts or accessories which may have occurred during transport.
• Take the time to thoroughly read and understand this manual prior to operation.
Description (fi g. 1)INTENDED USE
These drills/drivers/hammerdrills are designed for professional drilling and screwdriving applications.
a. Trigger switch
b. Forward/reverse button
c. Torque adjustment collar
d. Gear selector
e. Worklight
f. Keyless chuck
g. Battery pack
h. Battery release buttons
Inserting and removing the battery pack from the tool (fi g. 2) WARNING: To reduce the risk of
serious personal injury, turn tool off and disconnect battery pack before making any adjustments or removing/installing attachments or accessories. An accidental start-up can cause injury.
TO INSTALL BATTERY PACK INTO THE TOOL HANDLE
1. Align the base of the tool with the notch inside the tool’s handle (fig. 2).
2. Slide the battery pack firmly into the handle until you hear the lock snap into place.
TO REMOVE BATTERY PACK FROM THE TOOL
1. Press the battery release buttons (h) and firmly pull the battery pack out of the tool handle.
2. Insert battery pack into the charger as described in the charger section of this manual.
Variable Speed Switch (fi g. 1)To turn the tool on, squeeze the trigger switch (a).
To turn the tool off , release the trigger switch. Your tool is equipped with a brake. The chuck will stop as soon as the trigger switch is fully released.
NOTE: Continuous use in variable speed range is not recommended. It may damage the switch and should be avoided.
Forward/Reverse Control Button (fi g. 1)A forward/reverse control button (b) determines the direction of the tool and also serves as a lock off button.
To select forward rotation, release the trigger switch and depress the forward/reverse control button on the right side of the tool.
To select reverse, depress the forward/reverse control button on the left side of the tool.
NOTE: The first time the tool is run after changing the direction of rotation, you may hear a click on start up. This is normal and does not indicate a problem.
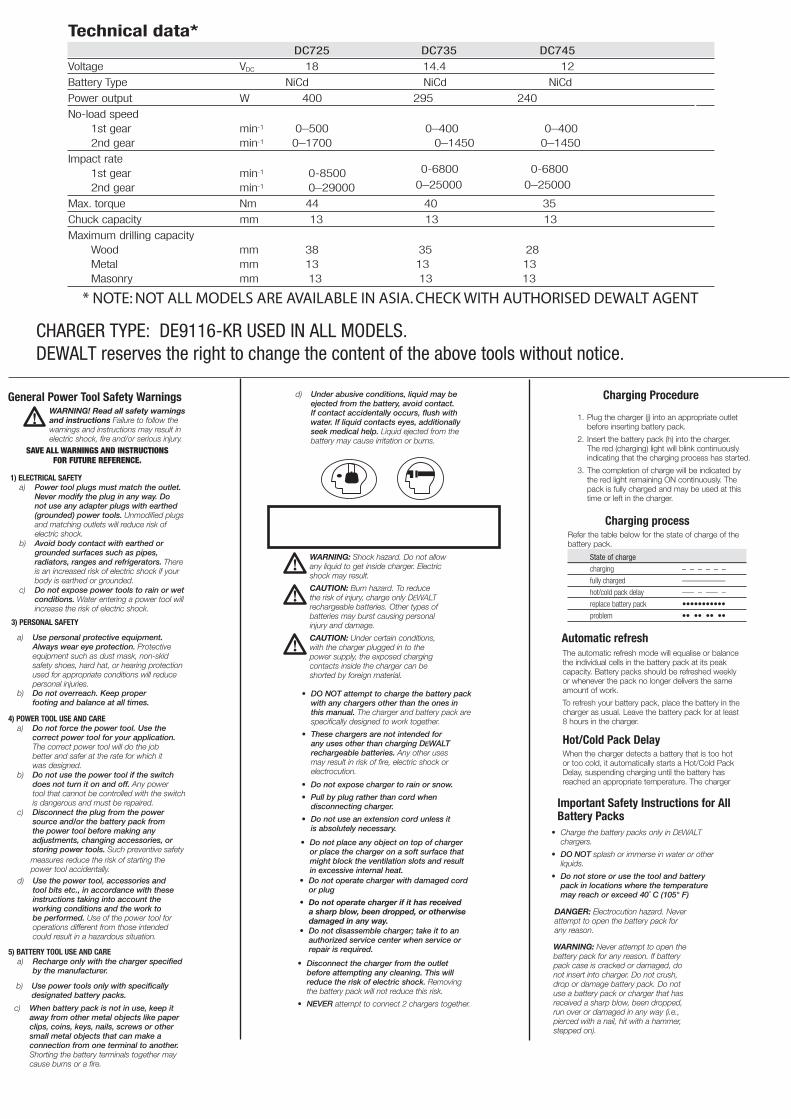
Torque Adjustment Collar (fi g. 1)Your tool has an adjustable torque screwdriver mechanism for driving and removing a wide array of fastener shapes and sizes and in some models, a hammer mechanism for drilling into masonry. Circling
the collar (c) are numbers, a drill bit symbol, and in some models, a hammer symbol. These numbers are used to set the clutch to deliver a torque range. The higher the number on the collar, the higher the torque and the larger the fastener which can be driven. To select any of the numbers, rotate until the desired number aligns with the arrow.
Dual Range Gearing (fi g. 1)To select the low speed, high torque setting, turn the tool off and permit to stop. Slide the gear selector (d) forward (towards the chuck) as shown in Figure 1.
To select the high speed, low torque setting, turn the tool off and permit to stop. Slide the gear selector back (away from chuck).
Worklight (fi g. 1)There is a worklight (e) located just above the trigger switch (a). The worklight will be activated when the trigger switch is squeezed.
Keyless Single Sleeve Chuck (fi g. 1) 1. Lock the trigger in the OFF position as
previously described.
2. Grasp the black sleeve of the chuck with one hand and use the other hand to secure the tool. Rotate the sleeve counterclockwise far enough to accept the desired accessory.
3. Insert the accessory about 19 mm into the chuck and tighten securely by rotating the chuck sleeve clockwise with one hand while holding the tool with the other. Your tool is equipped with an automatic spindle lock mechanism. This allows you to open and close the chuck with one hand.
To release the accessory, repeat step 2 above.
Hammerdrill Operation (fi g. 5) 1. Turn the collar (c) to the hammerdrill symbol.
2. Select the high speed setting by sliding the selector back (away from the chuck).
IMPORTANT: Use carbide-tipped or masonry bits only.
Screwdriver Operation (fi g. 6) 1. Select the desired speed/torque range using the
dual range gear selector to match the speed and torque of the planned operation.
2. Turn the torque adjustment collar to the desired position. Lower numbers indicate lower torque settings; higher numbers indicate higher torque settings.

DEWALT
DC725,DC735 충전 컴팩트 콤비드릴
그림1
그림2
그림3
그림4
그림5
그림6
----------------------------------------------
기술자료
DC725 DC735
전압 V DC 18 14.4
베터리타입 NiCd NiCd
출력 W 400 295
무부하회전수
1단 기어 min-1 0-500 0-400
2단 기어 min-1 0-1700 0-1450
타격
1단 기어 min-1 0-8500 0-6800
2단 기어 min-1 0-29000 0-25000
최 토크 Nm 44 40
척 mm 13 13
최 작업능력
목재 mm 38 35
철재 mm 13 13
석재 mm 13 13
충전기 유형: 모든 모델에서 사용할 수 있는 DE9116-KR
주의사항:
디월트는 제품사양을 향상시키기 위하여 별도 공지 없이 상기 공구의 내용을 변경할 수 있습니다.
----------------------------------------------
일반 전동공구 안전 수칙
경고! 모든 안전수칙과 지침을 읽으십시오. 이를 따르지 않는다면 감전이나 화재, 심각한 상해를 입을 수 있습니다.
향후 참고할 수 있도록 모든 안전수칙과 지침을 보관하십시오.

1) 전기 안전
a) 전동공구의 플러그는 콘센트와 맞아야 합니다. 어떤 방법으로든 플러그를 절 변형시키지 마십시오.
접지된 전동공구에 어댑터 플러그를 사용하지 마십시오. 플러그를 변형하지 않고 알맞은 콘센트에
사용하면 감전의 위험이 줄어들게 됩니다.
b) 파이프나 라디에이터, 전자레인지나 냉장고 등의 접지된 표면에 신체를 접촉하지 마십시오. 신체가
접지되면 감전의 위험이 커집니다.
c) 전동공구를 비가 내리거나 젖은 곳에 두지 마십시오. 전동공구에 물이 들어가면 감전의 위험이 커지게
됩니다.
2) 개인 안전
a) 개인 보호장비를 사용하십시오. 항상 보안경을 착용하십시오. 방진 마스크나 미끄럼 방지 신발, 안전모, 청력
보호구 등 보호장비를 적절하게 사용하면 상해의 위험이 줄어들 것입니다.
b) 무리하게 사용하지 마십시오. 항상 적절하게 발을 두고 균형을 유지하십시오.
3) 전동공구의 사용 및 관리
a) 전동공구에 힘을 가하지 마십시오. 사용 목적에 알맞은 전동공구를 사용하십시오. 바른 전동공구를 설계된
속도 로 사용하면 작업을 수월하고 안전하게 할 수 있을 것입니다.
b) 전원 스위치가 작동하지 않는다면 전동공구를 사용하지 마십시오. 스위치로 제어할 수 없는 전동공구는
위험하며 이는 반드시 수리해야 합니다.
d) 조정하거나 부속품을 교환하거나 전동공구를 보관하기 전에 전원 공급장치나 배터리 팩에서 플러그를
빼십시오. 이러한 예방 안전 수칙은 전동공구가 우발적으로 작동하게 되는 위험을 줄여줍니다.
e) 작업 상태와 행해야 할 작업을 고려한 본 지침에 따라 전동공구 및 부속품, 부품을 사용하십시오. 다른
용도로 전동공구를 사용하면 위험한 상황이 야기될 수 있습니다.
4) 배터리 관련 도구의 사용 및 관리
a) 제조업체가 정한 충전기로만 충전하십시오.
b) 전동공구에 맞게 특별히 고안된 배터리 팩만을 사용하십시오.
d) 무리한 상황에서, 배터리에서 액체가 나올 수 있으며 이를 만지지 않도록 하십시오. 우연히 만지게 된다면,
물로 닦아내십시오. 액체가 눈에 닿았다면, 특별히 진료를 받으십시오. 배터리에서 흘러나온 액체는
염증이나 화상을 야기할 수도 있습니다.
c) 배터리 팩을 사용하지 않을 때에는 클립이나 동전, 열쇠, 못, 나사, 한 단자에서 다른 단자로 연결할 수 있는
기타 작은 금속 물질 등을 가까이 두지 마십시오. 배터리 단자가 짧으면 화상이나 화재가 일어날 수
있습니다.
모든 배터리 충전기에 한 중요한 안전수칙
경고: 감전 위험. 충전기 내부에 액체가 들어가지 않도록 하십시오. 감전될 수 있습니다.
주의: 화상 위험. 상해 위험을 줄이기 위해, 디월트 충전용 배터리만을 충전하십시오. 다른 회사의 배터리를
충전하는 경우 상해나 손상을 야기하는 폭발이 있을 수 있습니다.
주의: 전원 공급 장치에 충전기가 꽂혀 있는 특수한 상태에서, 충전기 내부에 충전상태가 지속되면 외부물질에
의해 수명이 단축될 수 있습니다.
• 본 사용설명서에 있는 충전기 외에 다른 충전기로 본 배터리 팩을 충전하지 마십시오. 본 충전기와 배터리 팩은
함께 사용하도록 특별히 고안되었습니다.
• 본 충전기는 디월트 충전용 배터리를 충전하는 이외의 용도로는 사용하지 마십시오. 다른 용도로 사용하면
화재나 감전, 감전사 등을 야기할 수 있습니다.
• 충전기가 비나 눈을 맞지 않도록 하십시오.
• 충전기를 뺄 때, 코드로 플러그를 뽑으십시오.
• 정말 필요할 때 이외에는 연장 코드를 사용하지 마십시오.
• 충전기 위에 어떤 물건이든 두지 마십시오. 환기 슬롯을 막아서 과도한 내부열을 발생시킬 수 있는 부드러운
표면 위에 놓지 마십시오.
• 코드나 플러그가 손상된 충전기를 작동시키지 마십시오.
• 강한 충격을 받거나, 떨어뜨리거나, 그 외 어떤 방법으로든 손상이 된 경우, 충전기를 작동시키지 마십시오.
• 충전기를 해체하지 마십시오. 수리가 필요할 때에는 서비스 센터에 문의하십시오.
• 세척하시려면 그 전에 충전기를 콘센트에서 빼십시오. 감전 위험이 줄어듭니다. 배터리 팩을 빼면 감전 위험이
줄어듭니다.
• 절 로 충전기 두 개를 함께 연결하지 마십시오.
충전 절차
1. 배터리 팩을 넣기 전에 충전기(j)를 적절한 콘센트에 꼽습니다.
2. 배터리 팩(h)을 충전기에 넣습니다. 붉은 빛(충전 중)이 계속 깜빡 거리며 충전이 시작되었음이 표시됩니다.
3. 충전이 완료되면 붉은 빛이 계속 켜져 있습니다. 배터리 팩이 다 충전되면 사용하거나 충전기에서 뺄 수
있습니다.
충전 과정
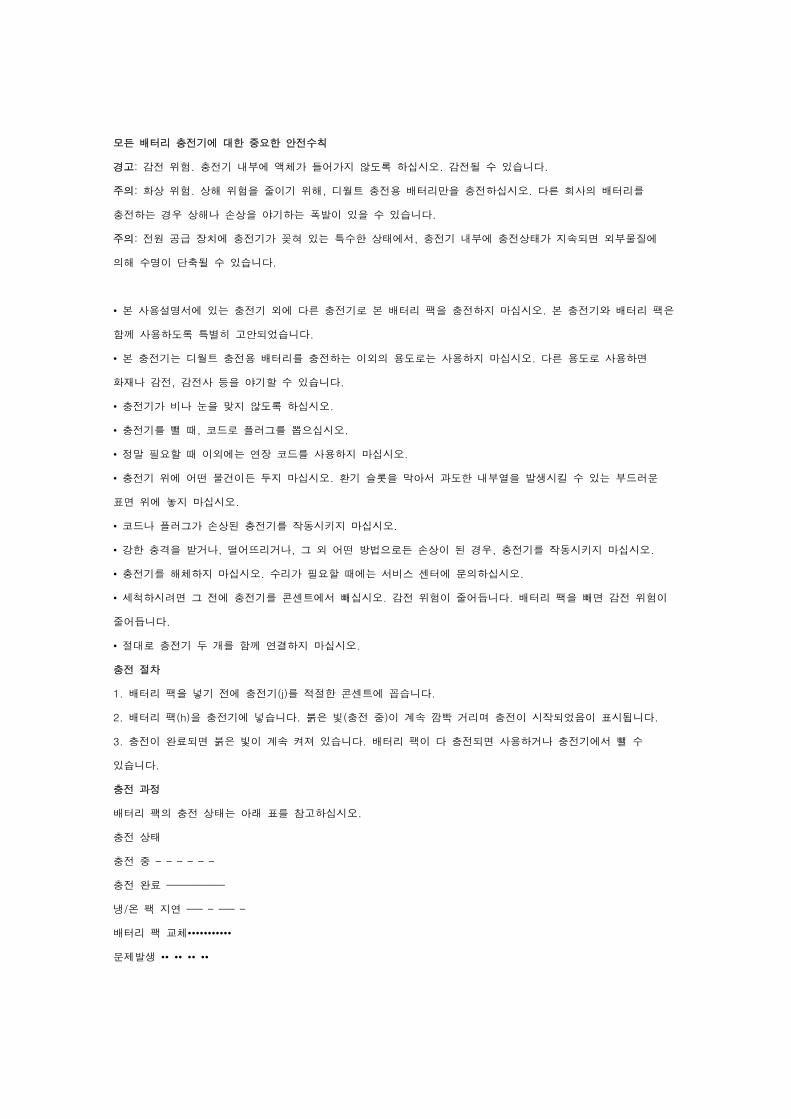
배터리 팩의 충전 상태는 아래 표를 참고하십시오.
충전 상태
충전 중 – – – – – –
충전 완료 –––––––––––
냉/온 팩 지연 ––– – ––– –
배터리 팩 교체•••••••••••
문제발생 •• •• •• ••

자동 충전
자동 충전모드는 각각의 전지가 최 충전이 되도록 똑같이 균형을 맞춰줍니다. 배터리 팩은 매주 혹은 전과 같이
작업을 수행하지 못할 때에 충전해야 합니다.
배터리 팩을 충전하려면, 보통 배터리를 충전기에 꼽습니다. 배터리 팩을 최소한 8시간 동안 충전하십시오.
냉/온 팩 지연
너무 뜨겁거나 너무 차가운 배터리를 충전기에 넣었을 때, ‘냉/온 팩 지연’이 자동으로 작동하여 배터리가 적당한
온도가 될 때까지 충전하지 않습니다.
모든 배터리 팩을 위한 중요 안전수칙
• 디월트 충전기로만 본 배터리 팩을 충전하십시오.
• 물이나 기타 액체가 튀거나 들어가지 않도록 하십시오.
• 전동공구와 배터리팩을 40˚ C (105° F) 가 넘는 곳에 보관하거나 사용하지 마십시오.
위험: 감전사 위험. 어떤 이유로든 배터리팩을 절 열려고 하지 마십시오.
경고: 어떤 이유로든 배터리팩을 절 열려고 하지 마십시오. 배터리 팩 케이스가 깨지거나 손상되었다면,
충전기에 넣지 마십시오. 배터리 팩을 뭉개거나 떨어뜨리거나 손상시키지 마십시오. 날카로운 물건이 닿거나
떨어뜨리거나, 어떤 방법으로든 손상된 (못이 박히거나 망치로 치거나, 밟는 등) 배터리 팩이나 충전기를 사용하지
마십시오.
• 배터리 팩이 심각하게 손상이 되거나 완전히 낡았다 하더라도 절 소각하지 마십시오. 배터리 팩이 폭발할 수
있습니다.
• 과도한 사용이나 특정 온도 하에서 배터리 팩 전지로부터 소량의 액체가 누출될 수 있습니다. 그러나, 외부가
깨진다면 다음과 같이 행하십시오.
a. 배터리 액체가 피부에 닿으면 즉시 비누와 물로 몇 분 동안 닦아내십시오.
b. 배터리 액체가 눈에 닿으면, 깨끗한 물로 최 10분 동안 헹구고 병원에 가십시오. (참고: 이 액체는 수산화
칼륨 25-35%용액입니다.)
배터리 캡 (그림. 3)
보호용 배터리 캡은 분리된 배터리 팩을 보호하도록 제공하고 있습니다. 보호용 캡이 없으면, 금속 물체가 닿았을
때 서킷이 줄어들어 화재나 배터리 팩이 손상될 수 있습니다.
1. 배터리 팩을 충전기나 전동공구에 넣기 전에 보호용 배터리 팩을 제거하십시오. (그림 3A)
2. 배터리 팩을 충전기나 전동공구에서 뺀 후에는 바로 보호용 캡을 접촉 부위에 씌우십시오. (그림 3B)
경고: 분리된 배터리 팩을 보관하거나 이동시키기 전에 보호용 배터리 캡이 제 로 씌워져 있는지 확인하십시오.
배터리 팩 (그림. 1)
배터리 유형
본 설명서에 기재된 각 공구는 디월트 배터리 시스템내에서 다른 배터리 기준을 적용하고 있습니다. 현재 12V,
14.4V, 18V 배터리의 유저들은 본 설명서에 있는 관련된 공구에 해당 팩을 사용할 수 있습니다. 성능과
사용시간은 사용에 따라 약간의 차이가 있을 수 있습니다.
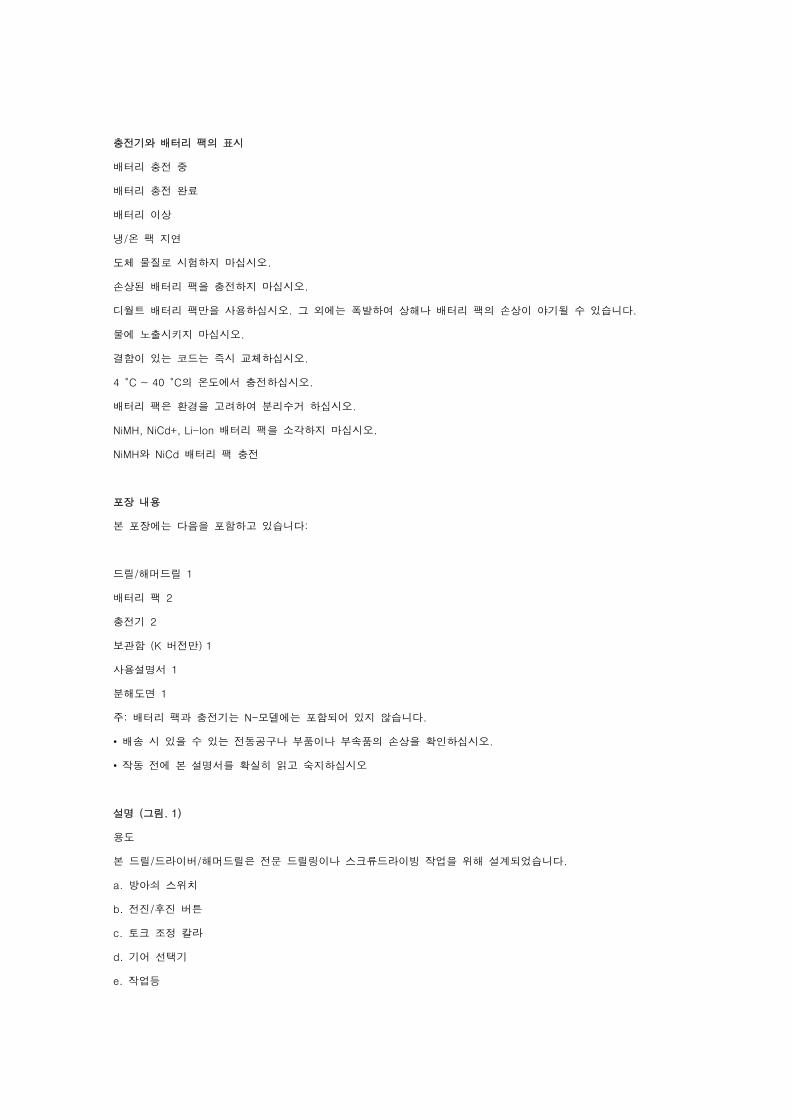
충전기와 배터리 팩의 표시
배터리 충전 중
배터리 충전 완료
배터리 이상
냉/온 팩 지연
도체 물질로 시험하지 마십시오.
손상된 배터리 팩을 충전하지 마십시오.
디월트 배터리 팩만을 사용하십시오. 그 외에는 폭발하여 상해나 배터리 팩의 손상이 야기될 수 있습니다.
물에 노출시키지 마십시오.
결함이 있는 코드는 즉시 교체하십시오.
4 °C ~ 40 °C의 온도에서 충전하십시오.
배터리 팩은 환경을 고려하여 분리수거 하십시오.
NiMH, NiCd+, Li-Ion 배터리 팩을 소각하지 마십시오.
NiMH와 NiCd 배터리 팩 충전
포장 내용
본 포장에는 다음을 포함하고 있습니다:
드릴/해머드릴 1
배터리 팩 2
충전기 2
보관함 (K 버전만) 1
사용설명서 1
분해도면 1
주: 배터리 팩과 충전기는 N-모델에는 포함되어 있지 않습니다.
• 배송 시 있을 수 있는 전동공구나 부품이나 부속품의 손상을 확인하십시오.
• 작동 전에 본 설명서를 확실히 읽고 숙지하십시오
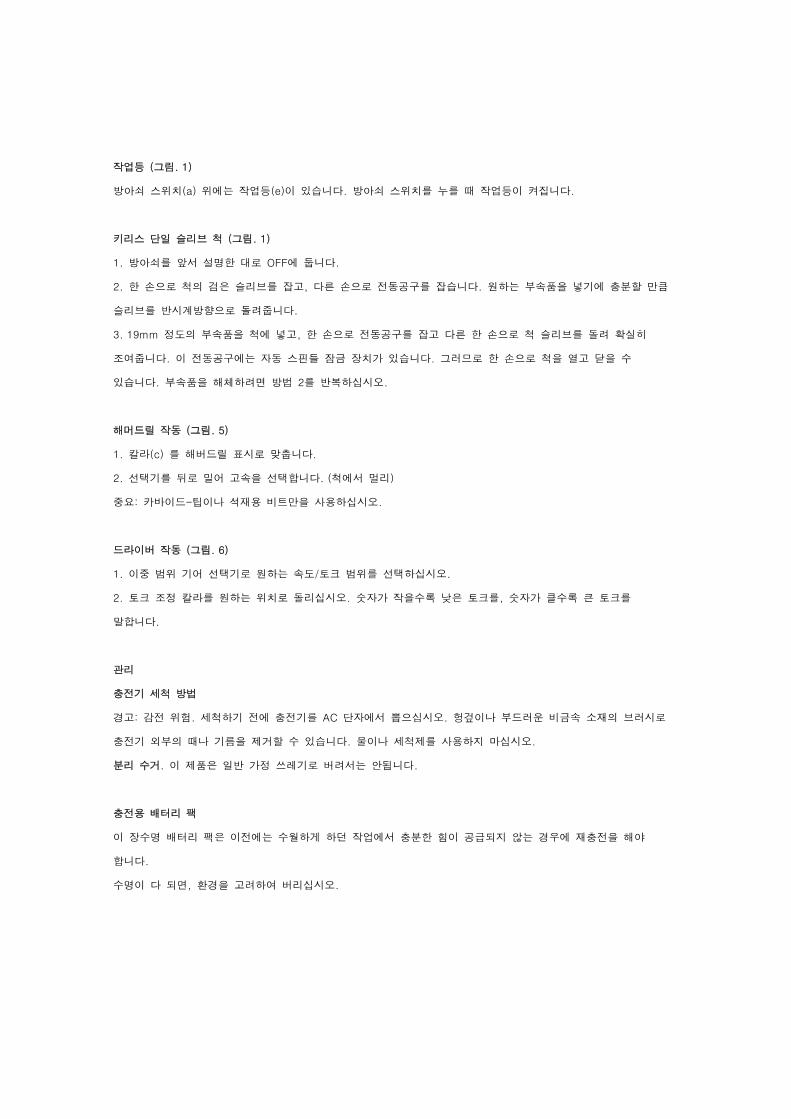
설명 (그림. 1)
용도
본 드릴/드라이버/해머드릴은 전문 드릴링이나 스크류드라이빙 작업을 위해 설계되었습니다.
a. 방아쇠 스위치
b. 전진/후진 버튼
c. 토크 조정 칼라
d. 기어 선택기
e. 작업등

f. 키리스 척
g. 배터리 팩
h. 배터리 배출 버튼
배터리 팩을 전동공구에 장착하고 분리하기 (그림. 2)
경고: 심각한 상해 위험을 줄이기 위해, 조정을 하거나, 부속품을 제거 및 설치하기 전에 전동공구의 전원을 끄고
배터리 팩을 빼십시오. 우발적인 가동은 상해를 야기할 수 있습니다.
전동공구 손잡이에 배터리 팩을 장착할 때
1. 전동공구 손잡에 내부에 있는 표시자국에 전동공구의 베이스를 중심에 맞춥니다. (그림 2)
2. 잠기는 소리가 들릴 때까지 배터리 팩을 손잡이에 확실히 밀어 넣습니다.
전동공구에서 배터리 팩을 분리할 때
1. 배터리 배출 버튼(h)을 눌러 전동공구 손잡이에서 배터리 팩을 확실히 밀어줍니다.
2. 본 설명서의 충전기 부분에서 설명한 로 배터리 팩을 충전기에 넣습니다.
가변속도 스위치 (그림. 1)
전동공구를 켜려면, 방아쇠 스위치(a)를 누릅니다. 전동공구를 끄려면 방아쇠 스위치를 놓습니다.
본 전동공구에는 브레이크가 장착되어 있습니다. 방아쇠 스위치를 완전히 놓자마자 척이 멈출 것입니다.
주: 가변 속도 범위에서 계속 사용하지 마십시오. 스위치가 손상될 수 있으니 이를 피하시기 바랍니다.
전진/후진 제어 버튼(그림. 1)
전진/후진 제어 버튼(b)은 전동공구의 방향을 결정해주며, 잠금 버튼으로도 사용됩니다.
전진 회전을 선택하려면, 전동공구의 오른쪽에 있는 전진/후진 제어 버튼을 눌러줍니다.
후진을 선택하려면, 전동공구의 왼쪽에 있는 전진/후진 제어 버튼을 눌러줍니다.
주: 회전 방향을 바꾼 뒤 전동공구를 처음으로 작동할 때, 가동 소리가 날 수 있습니다. 이는 정상이며, 제품에
문제가 있는 것은 아닙니다.
토크 조정 칼라 (그림. 1)
본 전동공구에는 조정할 수 있는 토크 스크류드라이버 메커니즘이 있어, 다양한 조임 모양이나 크기에서 나사를
조이거나 제거할 수 있으며, 일부 모델에는 해머 기능이 있어 석재를 뚫을 수 있습니다. 칼라(c)를 돌려 드릴 표시,
일부 모델에서는 해머 표시에 맞춥니다. 칼라의 숫자가 클수록 토크가 크며, 조일 수 있는 조임이 커지게 됩니다.
숫자를 선택하려면, 화살표시가 원하는 숫자에 올 때 까지 돌려줍니다.
이중 범위 기어링 (그림. 1)
저속, 큰 토크를 선택하려면, 전동공구의 전원을 끄고 멈추십시오. 기어 선택기(d)를 그림 1과 같이 앞으로
미십시오 (척을 향해).
고속, 작은 토크를 선택하려면, 전동공구의 전원을 끄고 멈추십시오. 기어선택기를 뒤로 미십시오 (척에서 멀리)
작업등 (그림. 1)
방아쇠 스위치(a) 위에는 작업등(e)이 있습니다. 방아쇠 스위치를 누를 때 작업등이 켜집니다.
키리스 단일 슬리브 척 (그림. 1)
1. 방아쇠를 앞서 설명한 로 OFF에 둡니다.
2. 한 손으로 척의 검은 슬리브를 잡고, 다른 손으로 전동공구를 잡습니다. 원하는 부속품을 넣기에 충분할 만큼
슬리브를 반시계방향으로 돌려줍니다.
3. 19mm 정도의 부속품을 척에 넣고, 한 손으로 전동공구를 잡고 다른 한 손으로 척 슬리브를 돌려 확실히
조여줍니다. 이 전동공구에는 자동 스핀들 잠금 장치가 있습니다. 그러므로 한 손으로 척을 열고 닫을 수
있습니다. 부속품을 해체하려면 방법 2를 반복하십시오.
해머드릴 작동 (그림. 5)
1. 칼라(c) 를 해버드릴 표시로 맞춥니다.
2. 선택기를 뒤로 밀어 고속을 선택합니다. (척에서 멀리)
중요: 카바이드-팁이나 석재용 비트만을 사용하십시오.
드라이버 작동 (그림. 6)
1. 이중 범위 기어 선택기로 원하는 속도/토크 범위를 선택하십시오.
2. 토크 조정 칼라를 원하는 위치로 돌리십시오. 숫자가 작을수록 낮은 토크를, 숫자가 클수록 큰 토크를
말합니다.
관리
충전기 세척 방법
경고: 감전 위험. 세척하기 전에 충전기를 AC 단자에서 뽑으십시오. 헝겊이나 부드러운 비금속 소재의 브러시로
충전기 외부의 때나 기름을 제거할 수 있습니다. 물이나 세척제를 사용하지 마십시오.
분리 수거. 이 제품은 일반 가정 쓰레기로 버려서는 안됩니다.
충전용 배터리 팩
이 장수명 배터리 팩은 이전에는 수월하게 하던 작업에서 충분한 힘이 공급되지 않는 경우에 재충전을 해야
합니다.
수명이 다 되면, 환경을 고려하여 버리십시오.