Embed Size (px)
Citation preview

Data Model Creation and Maintenance
SAP NetWeaver Gateway 2 .0 SP03

(C) SAP AG 2
Copyright © Copyright 2012 SAP AG. All rights reserved. SAP Library document classification: PUBLIC No part of this publication may be reproduced or transmitted in any form or for any purpose without the express permission of SAP AG. The information contained herein may be changed without prior notice. Some software products marketed by SAP AG and its distributors contain proprietary software components of other software vendors. Microsoft, Windows, Excel, Outlook, and PowerPoint are registered trademarks of Microsoft Corporation. IBM, DB2, DB2 Universal Database, System i, System i5, System p, System p5, System x, System z, System z10, System z9, z10, z9, iSeries, pSeries, xSeries, zSeries, eServer, z/VM, z/OS, i5/OS, S/390, OS/390, OS/400, AS/400, S/390 Parallel Enterprise Server, PowerVM, Power Architecture, POWER6+, POWER6, POWER5+, POWER5, POWER, OpenPower, PowerPC, BatchPipes, BladeCenter, System Storage, GPFS, HACMP, RETAIN, DB2 Connect, RACF, Redbooks, OS/2, Parallel Sysplex, MVS/ESA, AIX, Intelligent Miner, WebSphere, Netfinity, Tivoli and Informix are trademarks or registered trademarks of IBM Corporation. Linux is the registered trademark of Linus Torvalds in the U.S. and other countries. Adobe, the Adobe logo, Acrobat, PostScript, and Reader are either trademarks or registered trademarks of Adobe Systems Incorporated in the United States and/or other countries. Oracle is a registered trademark of Oracle Corporation. UNIX, X/Open, OSF/1, and Motif are registered trademarks of the Open Group. Citrix, ICA, Program Neighborhood, MetaFrame, WinFrame, VideoFrame, and MultiWin are trademarks or registered trademarks of Citrix Systems, Inc. HTML, XML, XHTML and W3C are trademarks or registered trademarks of W3C®, World Wide Web Consortium, Massachusetts Institute of Technology. Java is a registered trademark of Sun Microsystems, Inc. JavaScript is a registered trademark of Sun Microsystems, Inc., used under license for technology invented and implemented by Netscape. SAP, R/3, SAP NetWeaver, Duet, PartnerEdge, ByDesign, SAP BusinessObjects Explorer, StreamWork, and other SAP products and services mentioned herein as well as their respective logos are trademarks or registered trademarks of SAP AG in Germany and other countries. Business Objects and the Business Objects logo, BusinessObjects, Crystal Reports, Crystal Decisions, Web Intelligence, Xcelsius, and other Business Objects products and services mentioned herein as well as their respective logos are trademarks or registered trademarks of Business Objects Software Ltd. Business Objects is an SAP company. Sybase and Adaptive Server, iAnywhere, Sybase 365, SQL Anywhere, and other Sybase products and services mentioned herein as well as their respective logos are trademarks or registered trademarks of Sybase, Inc. Sybase is an SAP company.

(C) SAP AG 3
All other product and service names mentioned are the trademarks of their respective companies. Data contained in this document serves informational purposes only. National product specifications may vary. These materials are subject to change without notice. These materials are provided by SAP AG and its affiliated companies ("SAP Group") for informational purposes only, without representation or warranty of any kind, and SAP Group shall not be liable for errors or omissions with respect to the materials. The only warranties for SAP Group products and services are those that are set forth in the express warranty statements accompanying such products and services, if any. Nothing herein should be construed as constituting an additional warranty.

(C) SAP AG 4
Icons in Body Text
Icon Meaning
Caution
Example
Note
Recommendation
Syntax
Additional icons are used in SAP Library documentation to help you identify different types of information at a glance. For more information, see Help on Help → General Information Classes and Information Classes for Business Information Warehouse on the first page of any version of SAP Library.
Typographic Conventions
Type Style Description
Example text Words or characters quoted from the screen. These include field names, screen titles, pushbuttons labels, menu names, menu paths, and menu options.
Cross-references to other documentation. Example text Emphasized words or phrases in body text, graphic titles, and table
titles.
EXAMPLE TEXT Technical names of system objects. These include report names, program names, transaction codes, table names, and key concepts of a programming language when they are surrounded by body text, for example, SELECT and INCLUDE.
Example text Output on the screen. This includes file and directory names and their paths, messages, names of variables and parameters, source text, and names of installation, upgrade and database tools.
Example text Exact user entry. These are words or characters that you enter in the system exactly as they appear in the documentation.
<Example text> Variable user entry. Angle brackets indicate that you replace these words and characters with appropriate entries to make entries in the system.
EXAMPLE TEXT Keys on the keyboard, for example, F2 or ENTER.

(C) SAP AG 5
Table of Contents Data Model Creation and Maintenance ..................................................................................... 7
Creating a Data Model from Scratch ..................................................................................... 9
OData Channel ................................................................................................................. 10
Properties Editor ........................................................................................................... 13
Creating Data Objects .................................................................................................. 15
Creating Properties ....................................................................................................... 18
Semantic Values ....................................................................................................... 21
Creating Operations ...................................................................................................... 24
Creating Internal Relations ........................................................................................... 26
Creating Complex Types .............................................................................................. 27
Annotation Editor .......................................................................................................... 29
Annotation for Data Objects ...................................................................................... 31
Annotation for Properties .......................................................................................... 32
Annotation for Relations and Operations .................................................................. 34
Documenting a Data Model .......................................................................................... 35
Generic Channel .............................................................................................................. 36
Creating Operations ...................................................................................................... 40
Creating Relations ........................................................................................................ 42
Using the Data Model Generator Tool ................................................................................. 44
Creating a New Data Model ............................................................................................. 47
Selecting the Data Source ................................................................................................ 48
Overview of Data Sources ............................................................................................ 52
Business Object Repository ...................................................................................... 57
Constraints Using BOR Data Sources .................................................................. 58
Screen Scraping ........................................................................................................ 59
Overview of Screen Scraping Recordings ............................................................. 61
Storing Recordings in Recording Groups .............................................................. 64
Recording a Transaction, its Screens, and Fields ................................................. 66 Read-Only Data Based on Recordings ................................................ 70
Getting Search Help Data Source ......................................................................... 72
Constraints Using Screen Scraping Data Sources ............................................... 75
Remote Function Calls .............................................................................................. 76
Data Model Generator Support for Data Sources ........................................................ 78
Error Handling in the Data Model Generator ................................................................ 84
Creating the Mapping ....................................................................................................... 86
Overview of the Map Operation Dialog ......................................................................... 88
Mapping Validation Rules ............................................................................................. 92
Mapping the Query Operation ...................................................................................... 94

(C) SAP AG 6
Ranges Table ............................................................................................................ 96
Mapping the Read Operation........................................................................................ 99
Mapping the Create Operation ................................................................................... 100
Mapping Delete and Update Operations .................................................................... 102
Setting Constant Values ............................................................................................. 103
Assigning Keys to Operations ........................................................................................ 104
Setting Keys for Table Entries .................................................................................... 106
Editing a Data Model ...................................................................................................... 107
Editing the Mapping in Your Data Model .................................................................... 109
Changing the Mapping ................................................................................................ 111
Changing a Mapping Route ........................................................................................ 113
Adding and Removing Properties, and Data Objects ................................................. 114
Reassigning the Key of a Property ............................................................................. 118
Generating the PS and DS Data Models ....................................................................... 119
Manually Add Your Model to a Consumption Model ...................................................... 120
Configuring the System Alias for your Service ............................................................... 122
Guidelines for Using the Generated Service .................................................................. 124
Deriving a Data Model from an Existing Data Model ......................................................... 127
Creating a Data Model from a Generic Service Data Object (GSDO) Type ...................... 129
Editing a Data Model .......................................................................................................... 131
Changing the Language ................................................................................................. 133
Creating a Consumption Model ......................................................................................... 134
Consumption Model URL ............................................................................................... 137

(C) SAP AG 7
Data Model Creation and Maintenance Developers create content that will be available for use through SAP NetWeaver Gateway on popular devices such as the iPhone and Blackberry. You can create content in two ways:
• Use the content generator to generate content quickly and automatically without having to write any code.
• Write your own code and create content manually.
Whichever method you use, a data model is created that you can view from transaction SE80 in the ABAP Workbench. To build your service, you then create a consumption model and add data models to it.
The data model you create contains the operations you want to perform at runtime, mapped to specified data and attributes. At runtime, this data model is exposed to SAP NetWeaver Gateway services that trigger the operations that you defined at design time; returning data and fields to the end user. For example, you can create a data model that reads customers’ names, addresses, and contact details for a sales manager to have available on his or her mobile phone.
The following diagram gives an overview of the data model creation process.
Create DataModel
Writeown
code?
Create PS Data Model from scratch
Create PS Data Model from data
source
Create PS Data Model
from existingData Model
Create PS Data Model from GSDO
type
DefineProperties forData Objects,
Properties, relations,
operations, & complex types
Add Annotation?
Create UC Model and annotate it
CreateConsumption
Model
No
Yes
No
Yes
(Mandatory ifcreating fromscratch, otherwiseoptional)
Write own code(Only for ‘from scratch’ & ‘from GSDO type’ options)
Data Model Creation

(C) SAP AG 8
Prerequisites • Valid system alias to identify the remote system used as a data source.
If you are using the content generator, the system alias used when creating a data model also needs to be configured in all systems to which the data model is being transported (it can point to different physical destinations, but it must have the same name). If this is not the case, you cannot open the data model from the content generator in those systems.
• If you are using the content generator, you must configure a managed RFC connection to the system to be used to retrieve information from the data source.
More Information
If you want to use the Data Model Generator to generate a data model from an existing data source such as, BAPI, RFC, or classic dynpro screen, see Using the Data Model Generator Tool [Page 44].
If you want to write your own ABAP source code to create a data model, see Creating a Data Model from Scratch [Page 9].
When the new data model is available, you can change the data model's properties. For more information, see Properties Editor [Page 13]. If you want to add or modify a data model's annotation, see Annotation Editor [Page 29]. However, if you want to add an annotation to a data model, you must first create a UC (User Centric) data model, see Deriving a Data Model from an Existing Data Model [Page 127].
To create a data model, see Creating a Consumption Model [Page 134] and for information about checking the service, see Consumption Model URL [Page 137].
Constraints
Constraints are listed in SAP Note 1574568.

(C) SAP AG 9
Creating a Data Model from Scratch If you do not want to use the content generator to generate a data model automatically, you can create a Public Solution (PS) data model from scratch using the design time in the ABAP Workbench. You might prefer to create a data model manually, for example, if you want to write your own code or if you want to use existing ABAP Dictionary (DDIC) structures. When you create your own data model, you build the entire structure from scratch.
If you choose to create your own data model, you have the advantage that you can edit the data model's object structure and change the properties of any of its entities; whereas you can only can add or delete external relations for PS data models that the content generator has generated automatically. Use the Properties Editor [Page 13] to define and maintain entity properties. If you want to add or edit user-specific annotations, you must create a User Centric (UC) data model and then you use the Annotation Editor [Page 29] to annotate entities such as data objects, properties, relations, and operations.
For more information about creating a data model from scratch using the design time in the ABAP Workbench, select the appropriate SAP NetWeaver Gateway programming paradigm:
• OData Channel [Page 10]
• Generic Channel [Page 36]

(C) SAP AG 10
OData Channel In the OData Channel, the Application Programming Interface (API) for SAP NetWeaver Gateway is located in the backend system. In the ABAP Workbench, you can use the SE80 design time to create a data model dedicated to the OData Channel without having to provide a model provider class (MPC) on the backend. To consume the data model at runtime, however, you will still need to create a data provider class (DPC) in the backend system. The data model information is then read from the SAP NetWeaver Gateway hub system and published as an OData service. In short, you create a data model in the backend system from data stored in the backend, but you activate the service on the SAP NetWeaver Gateway hub system. For more information, see OData Channel [External].
The following constraints apply when creating data models:
• Reuse of external data models and nodes is not supported.
• There can only be one root data object for each data model.
• Output data objects of operations must always have a multiplicity of 0..n.
• The following SAP annotations are not supported:
o Sortable
o Pageable
To create a data model from scratch on the OData Channel, follow the procedure below.
Procedure 1. Start the ABAP Workbench in transaction SE80.
2. Select GW Data Model from the dropdown list.
3. Enter a name for the data model you wish to create, adhering to the following naming convention (maximum of 24 characters):
<customer name range> or <reserved customer namespace><name>
For example, ZJWTEST.
A dialog box informs you that this object does not exist and asks if you wish to create it.
4. Select Yes and the Create Data Model dialog box displays, with the data model name you entered above displaying in the Name field:

(C) SAP AG 11
(Create Data Model Dialog Box)
Ensure PS (Public Solution) is entered in the Type field.
Version (read-only) displays as 0001 (first version).
The From Scratch button and accompanying OData Channel box are checked by default.
5. Enter a name for the Root data object.
The Create Key box is not available (greyed out).
6. Select the green checkmark to continue.
7. Enter the relevant package name in the next dialog box and choose Save, or Local Object.
A message displays at the bottom of the screen confirming that the data model has been saved. A data model skeleton is created and displays in the repository browser in a tree structure, showing the root data object and an Object Structure folder beneath it, under which data objects and properties will display when created.
(Display Data Model)

(C) SAP AG 12
The Model Runtime field on the right indicates that the data model will use the OData Channel at runtime (read-only).
8. You can now add data objects, operations, properties, complex types, and relations to the data model (see More Information below).
9. You can also rename or delete properties, data objects, and operations (Rename and Delete are available from the context menu). However, you cannot delete the root data object.
When you have created the data model, you can reassign it to another package (for example, if you work on the model on local and then wish to move it to production). Right-click the data model name in the SE80 tree view, select Reassign package, and enter the new package details in the reassignment popup.
You can also copy a data model by right-clicking the data model name and selecting Copy. For more information, see Copying a Data Model in Deriving a Data Model from an Existing Data Model [Page 127].
More Information To create the data model entities, see:
Properties Editor [Page 13] to define or edit the model's properties.
Creating Data Objects [Page 15]
Creating Properties [Page 18]
Creating Operations [Page 24]
Creating Internal Relations [Page 26]
Creating Complex Types [Page 27]
Annotation Editor [Page 29] for information about adding or modifying user-specific annotations.
Documenting a Data Model [Page 35]
After you have created a data model, see:
Deriving a Data Model from an Existing Data Model [Page 127] to create a User Centric (UC) data model, required if you wish to add annotations.
Creating a Consumption Model [Page 134]
Consumption Model URL [Page 137] to check the service.
Configuration Setting for OData Channel [External]
Creating a Model on the OData Channel [External] for a cookbook showing a worked example.
As an alternative to creating your own data model and consumption model using SE80 design time, you can import an existing service description file and automatically generate implementations for data and metadata provisioning. For more information, see OData Channel Generation Tool [External]. This tool is only available on the OData Channel.

(C) SAP AG 13
Properties Editor The Properties Editor enables you to change the properties of a model and its elements. Depending on the object that is selected in the hierarchy view in the left-hand area of the screen in ABAP Workbench, the Properties Editor provides you with relevant property options specific to that particular object type.
Select the relevant object (for example, data object, property, relation, operation, complex type) for which you want to define or change existing properties in the hierarchy view in ABAP Workbench.
Defining Properties for Data Models To define the properties of your data model, ensure that your data model is selected in the hierarchy view in ABAP Workbench. After you have selected your data model, the appropriate Properties Editor view is displayed. Choose the Display<->Change button to switch to edit mode and define the properties of the model.
(Properties Editor for Data Models)
Some fields are read-only and cannot be changed. This is to ensure that any changes you make to the model do not render it incompatible. In the case of models that have been generated automatically using the content generator, you cannot edit Core Data Type and type-related fields in the Properties Editor, but you can select the Open Generator icon to navigate directly to the model in the content generator.
You can edit the following fields at model level in the Properties Editor, all other fields are read-only.
Field Description Default
Description Short description of model (maximum of 40 characters).
Default Operation
Name Name of the default query operation to be executed in this model.
After you have finished editing a data model (or its elements), choose Save to save your changes.

(C) SAP AG 14
Defining Properties for Elements in Data Models To use the Properties Editor to define the properties of other elements (for example, data objects, properties, operations, relations, complex types) contained within a data model, select the relevant object in the hierarchy view in ABAP Workbench.
For more information about defining the properties of different elements, see:
• Creating Data Objects [Page 15]
• Creating Properties [Page 18]
• Creating Operations [Page 40]
• Creating Internal Relations [Page 26]
• Creating Complex Types [Page 27]
For more information about the Annotation Editor, see Annotation Editor [Page 29]).

(C) SAP AG 15
Creating Data Objects To create data objects for your data model, proceed as follows.
Procedure 1. If you are using the OData Channel,
either right-click the root data object and choose Create Data Object , or right-click the Object Structure folder and select Create Data Object .
If you are using the Generic Channel, either right-click the root data object and choose Create Data Object Standard , or right-click the Object Structure folder and select Create Data Object
2. The Create Data Object dialog box is displayed:
(Create Data Object)
Enter the name in the Data Object field and a Relation Name (both mandatory). You must enter a Relation Name, as the data object must connect to its parent. This internal relation is automatically created.
3. The Inherit Key Fields checkbox is selected by default and means that the new data object will inherit key properties from its parent data object. Deselect this checkbox if you do not want key properties to be inherited.
4. The Create From DDIC box is not selected by default and the following DDIC Structure Name and SAP System Alias fields are read-only.
If you want to create the data model from an existing DDIC structure in the ABAP Dictionary, select the Create From DDIC checkbox and then enter the required DDIC Structure Name, for example, SFL_INFO. Search help is available for you to find a SAP System Alias, for example, LOCAL.
5. Select the green checkmark to continue.
The new data object then appears under the data model's root data object in the tree structure, and the new relation also displays, with a cardinality of 1. If you created the data model from a DDIC structure, the DDIC structure elements display as properties under the Object Structure folder, in alphabetical order.
The Properties Editor opens for you to define the new data object. There are no mandatory fields. If you created the data model from a DDIC structure, values from the DDIC structure display in the appropriate Properties Editor fields.
6. Save your entries.

(C) SAP AG 16
The following fields are available for editing in the Properties Editor; the other fields are read-only.
Field Description Default
Entity Enabled
If selected, the data object is enabled in this data model and will be reflected at runtime. If not selected, the data object is ignored at runtime. Select this checkbox if you want to enable the data object in this data model.
Selected
Semantics Controls how the data object is used.
External Name
Name of data object as represented in the external service, service document, and metadata document. For example, the data object's technical name could be 123ABC, with a more meaningful external name of Sales Order.
Subsc. Support
Select this checkbox to enable subscription at runtime to be notified of changes for this data object. If you do not select this checkbox, subscription for this data object cannot be enabled.
Not selected
Default Create
Select this checkbox to enable OData (Open Data Protocol) support for the Create operation at runtime. If you do not check this box, the Create operation is not supported at runtime.
If you select this checkbox, you must also ensure that you include a Create operation in the data model..
Not selected
Default Update
Select this checkbox to enable OData support for the Update operation at runtime. If you do not select this checkbox, the Update operation is not supported at runtime
If you select this checkbox, you must alsoy ensure that you include an Update operation in the data model..
Not selected
Default Delete
Select this checkbox to enable OData support for the Delete operation at runtime. If you do not select this checkbox, the Delete operation is not supported at runtime
If you select this checkbox, you must also ensure that you include a Delete operation in the data model..
Not selected
Media Type
Select this checkbox if the entity has a related media resource stream. This is indicated in the data service metadata by the HasStream attribute applied to an entity type that is the media link entry.
Not selected

(C) SAP AG 17
Field Description Default
Requires Filter
Select this checkbox to indicate that this entity set cannot be queried without providing a $filter expression. If you do not select this checkbox and it is accessed without a $filter expression, an error message displays that explains in human-readable form which kinds of filter expressions are required as a minimum.
This only works if at least one property in the data object has the Filterable checkbox selected in the Properties Editor (see Creating Properties) [Page 18]..
Not selected
Addressable
Select this checkbox if you want to enable the data object to be addressed directly by a URL. If the data object cannot be addressed directly via a URL, it can only be accessed by navigating step-by-step starting from the parent node.
Not selected
Freetext Support
Select this checkbox if you want the data object to support a free-text search.
Not selected
Data Object Title
Enter a name (singular) for the data object as you want it to display in the service document. This field is used in conjunction with the Collection Title field, which defines the name (plural) of the collection to which the data object belongs. For example, the Data Object Title could be Customer. and the Collection Title could be Customers.
Collection Title
Enter a name (plural) for the data object collection as you want it to display in the service document. This field is used in conjunction with the Data Object Title field, which defines a name (singular) for each data object that will appear in this data object collection. For example, the Collection Title could be Customers and the Data Object Title could be Customer.

(C) SAP AG 18
Creating Properties To create a property for your data model, proceed as described below. You can define a property as a core type, or as a complex type used in a complex type structure.
Procedure 1. Right-click a data object or the Object Structure folder and select Property from the
Create menu. The Create Property dialog box is displayed.
2. Enter a name for the property and press the green checkmark. The new property then appears under the data object in the tree structure and the Properties Editor is displayed so that you can define the new property.
3. Complete the fields in the Properties Editor as required; only Core Data Type is mandatory for core type properties. The editable fields are described in the table below.
4. Save your entries.
The following fields are available for editing in the Properties Editor; the other fields are read-only.
Field Description Default
Entity Enabled
If selected, the property is enabled in this data model and will be reflected at runtime. If not selected, the property is ignored at runtime. Select this checkbox if you want to enable the property in this data model.
Selected
Semantics
Controls how the property is used, for example, classifies a number as a telephone number or as a fax number. See Semantic Values [Page 21] for a list of possible values for this field.
External Name
Name of property as represented in the external service, service document, and metadata document. For example, the property's technical name could be PROP123, with a more meaningful external name of Sales Order Item.
Complex Type
Select this radio button if you want to use your own types in a complex type structure in the data model (instead of using a core type). You can include more than one property in a complex type structure. You first need to create the complex type structure; for more information, see Creating Complex Types [Page 27].
If you select this button, all fields under the Core Type button are disabled.
Not selected
Complex Type Name
Enter the name of the complex type structure you created (mandatory).
Core Type
Select this radio button if you want to define a core type for the property.
If you select this button, the Complex Type Name field is disabled.
Selected

(C) SAP AG 19
Field Description Default
Decimals Specifies the number of decimal places (for numeric core data types only, such as Edm.Decimal, Edm.Double). Only available for core types.
Length Maximum length of values for the property at runtime. For example, enter 30 to specify that the maximum length for the property is 30. Only available for core types.
Core Data Type
Mandatory field. Specifies the type allowed from OData that is used at runtime. Select a type from the F4 Help, for example, select Edm.String for fixed or variable length character data. Only available for core types.
Input Mask
Defines the format to be used for values and restricts allowed values by means of regular expressions, for example, [0-9\-]*. Only available for core types.
This is not enforced at runtime..
Key Select this checkbox to indicate that this is the key field of the data model. Only available for core types.
Not selected
Optional
If selected, the property will not be passed at runtime for modifying operations. If not selected, a value is expected and the property will be passed at runtime for modifying operations. Only available for core types.
Selected for key fields only
Read-only If selected, the property cannot be modified by an Update operation. If not checked, the property can be modified. Only available for core types.
Selected for key fields only
Creatable If selected, the property can be passed in the Create operation. If not checked, the property cannot be passed in the Create operation. Only available for core types.
Not selected
Filterable
If selected, the property can be included in any filter sent at runtime. If not checked, the property cannot be included in filters sent at runtime.
There must be at least one filterable property in the data object.
Only available for core types.
Not selected
Label (radio button)
Select this radio button if you want to manually enter a language-dependent label in your logon language. Selected
Label (input field)
Enter a language-dependent label in the user's logon language (if available). This is a static label.
Reference to Label
Select this button if you want to use a reference to a label (data element or field in a structure). This is a dynamic reference type that points to a ABAP Dictionary element

(C) SAP AG 20
Field Description Default from which the description will come. At runtime the system resolves the label accordingly from the reference.
Reference type
Select the required reference from the drop-down menu (Data Element or Structure)
Data Element
Reference object
If you have selected Structure in the Reference type field, copy the required structure into this field.

(C) SAP AG 21
Semantic Values The OData sap:semantics attribute controls how the property is used, for example, it classifies a number as a telephone number or as a fax number. The following table lists the possible values.
Value Meaning
tel Telephone number
tel;type=cell,work Work cellphone number, see Additional tel:type= Values below for more values
tel;type=fax Fax number, see Additional tel:type= Values below for more values
email Email address
email;type=pref Preferred email address; see Additional email:type= Values below for more values
url Web URI; see Additional url:type= Values below for more values
name Formatted text of the full name
givenname First name or given name of a person
middlename Middle name of a person
familyname Last name or family name of a person
nickname Descriptive name given instead of, or in addition to, the one marked as “name”
honorific Title of a person (Ph.D., Dr.,…)
suffix Suffix to the name of a person
note Supplemental information or a comment that is associated with the vCard
photo URI of a photo of a person
city Address: city
street Address: street
country Address: country
region Address: state or province
zip Address: postal code
pobox Address: post office box
org Organization name
org-unit Organizational unit
org-role Organizational role

(C) SAP AG 22
Value Meaning
title Job title
bday Birth date
summary Calendar: summary of a calendar component
description Calendar: description of a calendar component, detailing the summary
categories Calendar: comma-separated list of categories for a calendar component
dtstart Calendar: date and time that a calendar component starts
dtend Calendar: date and time that a calendar component ends
duration Calendar: duration as an alternative to dtend
due Calendar: date and time that a to-do is expected to be completed
completed Calendar: date and time that a to-do was actually completed
priority Calendar: relative priority for a calendar component, 0 for undefined, 1 for highest, …, 9 for lowest
class Calendar: access classification for a calendar component
status Calendar: overall status or confirmation for the calendar component
percent-complete Calendar: percent completion of a to-do, ranging from 0 to 100 (integer)
contact Calendar: contact information or alternately a reference to contact information associated with the calendar component
location Calendar: intended venue for the activity defined by a calendar component
transp Calendar: defines whether or not an event is transparent to busy time searches
fbtype Calendar: free/busy time type
wholeday Calendar: “true” or “false”, depending on whether an event is scheduled for an entire day
geo-lon Geolocation: longitude
geo-lat Geolocation: latitude
Additional tel:type= Values
You can use the following additional values with tel:type=, for example, tel:type=home to indicate a home telephone number.
Value Meaning
home Telephone number associated with a residence
msg Telephone number with voice messaging support
work Telephone number associated with a place of work

(C) SAP AG 23
Value Meaning
pref Preferred-use telephone number
voice Voice telephone number
fax Facsimile telephone number
cell Cellular telephone number
video Video conferencing telephone number
pager Paging device telephone number
bbs Bulletin board system telephone number
modem Modem-connected telephone number
car Car-phone telephone number
isdn ISDN (Integrated Service Digital Network) service telephone number
pcs Personal communication services telephone number
Additional email:type= Values
You can use the following additional values with email:type=, for example, email:type=home to indicate a home email address.
Value Meaning
home Email address associated with a residence
work Email address associated with a place of work
pref Preferred-use email address
Additional url:type= Values
You can use the following additional values with url:type=, for example, url:type=home to indicate a home URL.
Value Meaning
home URL associated with a residence
work URL associated with a place of work
org URL associated with the organization
pref Preferred-use URL
other Another URL

(C) SAP AG 24
Creating Operations To create operations for your data model (for example, Read, Query), proceed as follows.
Procedure 1. Right-click the Operations folder and select Create Operation.
The Create Operation popup displays.
2. Enter an Operation Name and select the green checkmark to continue.
The new operation appears under the Operations folder in the tree view on the left and the Properties Editor displays so that you can define the operation:
(Creating an operation)
There are no mandatory fields.
The Semantics field displays the text action and is read-only.
3. Create an input property in the Input Parameter section by selecting the Insert Row icon underneath the table and then simply type in the details in the first table row. Fill in the Name, External Name, and Type columns. Search help is available to select a type in the Core Data Type column.
To delete an input property, select it in the table and choose the Delete Row icon.
4. Select the output data object in the Output Node field in the Output Parameter section. Search help is available.
5. Save your entries.
6. If you want to change the input or the output parameters at a later time, double-click the operation, change to edit mode, and select the Insert Row or Delete Row icon underneath the table. The Insert Row icon creates a new row in the table with the text New in the Name column.
You can also change the output data object by typing in a new one or using the search help.
Rename and delete options are available from the operation context menu.

(C) SAP AG 25
The following fields are available for editing in the Properties Editor; the other fields are read-only.
Field Description Default
External Name
Name of the operation as represented in the external service, service document, and metadata document.
<operation name>
Input Parameter
Name Name of the input property for the operation. NEW (when inserting a row)
External Name
Name of the input property as represented in the external service, service document, and metadata document.
Type Type allowed from OData that is used at runtime, for example, Edm.String is for fixed or variable length character data. Only available for core types.
Output Parameter
Output Node Name of the output data object for the operation.

(C) SAP AG 26
Creating Internal Relations You can create internal relations between data objects in your data model. You can rename and delete existing internal relations from the context menu.
Procedure 1. Right-click a data object, and choose Create Create Int. Relation .
The Create Relation dialog box is displayed.
2. Enter the Name of the relation and then press the green checkmark.
The new relation then appears under the Relations from… folder under the data object in the tree view with a cardinality of 1, and the Properties Editor displays so that you can define the new relation. There are no mandatory fields.
3. Save your entries.
The following fields are available for editing in the Properties Editor; the other fields are read-only.
Field Description Default
Entity Enabled
If selected, the relation is enabled in this data model and will be reflected at runtime. If not selected, the relation is ignored at runtime. Select this checkbox if you want to enable the relation in this data model.
Selected
External Name
Name of relation as represented in the external service, service document, and metadata document.
Source Cardinality
Cardinality of the source data object. For internal (parent / child) relations, the cardinality is always 1 (one-to-one relationship). For external relations, it can also be 1:n (one-to-many relationship).
1
Target Cardinality
Cardinality of the target data object or data model. For internal (parent / child) relations, the cardinality is always 1 (one-to-one relationship). For external relations, it can also be 1:n (one-to-many relationship).
1
Title Language-dependent title in the user's logon language (if available). Enter a suitable title.

(C) SAP AG 27
Creating Complex Types Complex types consist of a list of properties with no key, and can therefore only exist as properties of a containing entity or as a temporary value. You can use complex types to group fields together without exposing them as an independent OData entity. Complex types can contain complex types, that is, they can be deep. Within a complex type the cardinality is always 1:1.
You create a complex type structure and properties within it as described below. For example, you could create a complex type structure called Fullname comprising two properties, firstname and lastname. Since a complex type is a specific type of data object that needs to be created as such, the Create Data Object dialog box is displayed.
Procedure 1. Right-click the Complex types folder and select Create Complex Type.
2. In the dialog box, enter the name of the complex type structure. Alternatively, you can copy an existing DDIC structure in the ABAP Dictionary by selecting the Create From DDIC checkbox and entering the required DDIC Structure Name and SAP System Alias:
(Create complex type)
A message displays at the bottom of the screen, confirming that the new complex type has been created. It displays in the tree view under the Complex types folder.
3. The Properties Editor opens for you to define the new complex type (see Creating Data Objects [Page 15] for details). There are no mandatory fields. If you created the model from a DDIC structure, values from the DDIC structure display in the appropriate Properties Editor fields.
4. When you have finished entering values in the Properties Editor fields, save your entries.
5. Create the complex type properties within the structure by right-clicking the complex type (Data Object) you have just created and selecting Create Property . Ensure you select the Complex Type button when defining the Properties Editor fields. See Creating Properties [Page 18] for details.

(C) SAP AG 28
When you have created and saved a complex type property, it displays under the complex type structure that you created in the tree view, with a different icon in front of its name to identify it as a complex type property:
(Complex types in tree view)
For more information about how to set a filter for a field, see http://www.odata.org/developers/protocols/uri-conventions#FilterSystemQueryOption.

(C) SAP AG 29
Annotation Editor You can make user-specific changes to a data model by adding annotations. You add and edit annotations for User Centric (UC) data models and its entities using the Annotation Editor.
You cannot, however, annotate Public Solution (PS) data models. If you want to add annotations to models of type PS, you must first create a UC data model derived from the PS data model, which you can then annotate. For more information, see Deriving a Data Model from an Existing Data Model [Page 127].
After you have browsed to the data model you want to annotate, expand the tree view in the left-hand area of the screen and select the element you want to annotate. The Annotation Editor is displayed on a separate tab in the right-hand screen area:
(Annotation Editor)
The Annotation Editor has a tree layout and you can expand and collapse its elements. The editor includes the following buttons Find, Print view, and Change layout.
The Description column shows a short description for each annotation element; an i (information) enables you to access further Help documentation for the element you are annotating (data object, property, relation, operation).
The Value column displays values that you enter (and any existing values).
To switch to edit mode and make the changes you require, press the Display<->Change button (the pen icon) at the top left of the screen. Some fields remain read-only.
Select the appropriate checkboxes in the Include Annotation column or double-click an element so that its annotation field displays at the bottom of the screen. You can enter or change a value, or select a new value from a dropdown menu:
(Adding Annotation)
If a dropdown menu exists, it contains values (for example, true and false) you can select, but if no dropdown menu is available, you can enter free text in the field. The maximum length for an annotation value is 255 characters and the structure of the annotation is also subject to validation.

(C) SAP AG 30
When you select the Include Annotation checkbox for an element, its parent folder is also automatically included (folder checkbox is selected). If mandatory elements exist, the checkboxes are selected as default and you cannot deselect them.
To delete an element's annotation, deselect its checkbox in the Include Annotation column. When you deselect a folder, this deletes all annotations for this folder's elements (all checkboxes within the folder are deselected).
To display different fields in the Annotation Editor, select a different element from the model in the tree view (data object, property, relation, operation).
After adding, modifying, or deleting values, save your changes in the data model.

(C) SAP AG 31
Annotation for Data Objects The following annotations are available for data objects.
Annotation Description Default
gp The gp (generic player) namespace represents the annotations necessary to drive the Mobile Instant Value Applications generic player.
N/A
collectionLayout
Determines the order in which the collection displays in the icon set of a mobile application. Contains the attributes to determine the display order (for example, the icons may be nested) and whether the collection displays on the first page of the icon set.
display-order
Number specifying the position of the collection on the home screen (free text entry). The lower the number, the higher the position it will occupy, for example, 0010 is tenth position and 0999 is a very low position.
The lowest existing number occupies the highest position, then the next highest number and so on. For example, if 0010 is the lowest number, it occupies the highest position and displays first on the screen.
0 (zero)
top-level
Specifies that the collection will be on the first page of the icon set and visible on the home screen. If you do not include this annotation, the collection will not display on the first page or home screen.
False
render-pretty-detail
Used in header rendering, this is an indication to the client to render a special header section for the detail screen. For example, if the detail screen displays a contact, it could render a header section to include a picture at the top left, with the name and title of the person on the right and possibly a divider underneath, before rendering the rest of the information. Exact interpretation depends on the client.
personalize-list Not used in the current implementation.
init-client-cache A value other than None means that the collection is cached according to the device settings. A value of None means that the collection is not cached according to the device settings.
None
personalize-detail Not used in the current implementation.
sap Contains SAP annotations.
icon Defines the icon for the data object in OData protocol, independent of the gp namespace (one icon for each data object). Enter the URL for your icon.
is-thing-type
Specifies whether the data object is a thing type, that is, a tangible artifact (for example, a purchase order) or a subordinate object (for example, a purchase order item). This does not affect the functionality.

(C) SAP AG 32
Annotation for Properties The following annotations are available for properties, including properties defined as complex types.
Annotation Description Default
gp The gp (generic player) namespace represents the annotations necessary to drive the Mobile Instant Value Applications generic player.
N/A
visible-in-list Determines whether the field is visible on the list view of the collection. False
group-name Groups properties together (free text entry). Properties with the same group-name will be in the same group (only used in Employee Lookup).
Null
use-in-search Searchable attributes are used for the client-side search (search in the cache). Fields with the value true are involved in the search.
False
visible-in-detail Determines whether the field is visible in the details view. False
display-order
Number specifying the position of the collection on the home screen (free text entry). The lower the number, the higher the position it will occupy, for example, 0010 is tenth position and 0999 is a very low position.
The lowest existing number occupies the highest position, then the next highest number and so on. For example, if 0010 is the lowest number, it occupies the highest position and displays first on the screen.
0 (zero)
group-label Label of the group (only used in Employee Lookup). Language-dependent free text. Null
m Microsoft namespace from OData (standard namespace). N/A
FC_ TargetPath
Name of the target element of the resulting feed to map the property. This element can be an element defined by the Atom specification or a custom element.
See FC_ TargetPath Keywords below for a list of keywords.
FC_KeepInContent
Indicates that the referenced property value should be included both in the content section of the feed and in the mapped location. Valid values are true and false. To make the resulting feed backward-compatible with earlier versions of WCF Data Services, specify a value of true to make sure that the value is included in the content section of the feed.
FC_ TargetPath Keywords
The following keywords are predefined syndication target-path values that point to specific location in an OData feed. These keywords are equivalent to the values of the SyndicationItemProperty enumeration used with the reflection provider.

(C) SAP AG 33
Keyword Description
SyndicationAuthorEmail atom:email child element of the atom:author.
SyndicationAuthorName atom:name child element of the atom:author element.
SyndicationAuthorUri atom:uri child element of the atom:author element.
SyndicationContributorEmail atom:email child element of the atom:contributor element.
SyndicationContributorName atom:name child element of the atom:contributor element.
SyndicationContributorUri atom:uri child element of the atom:contributor element.
SyndicationCustomProperty
Custom property element. When mapping to a custom element, the target must be a path expression in which nested elements are separated by a backslash (/) and attributes are specified by an ampersand (@).
When the target is a custom element name, you must also specify the FC_NsPrefix and FC_NsUri attributes.
SyndicationPublished atom:published element.
SyndicationRights atom:rights element.
SyndicationSummary atom:summary element.
SyndicationTitle atom:title element.
SyndicationUpdated atom:updated element.
(C) SAP AG 34
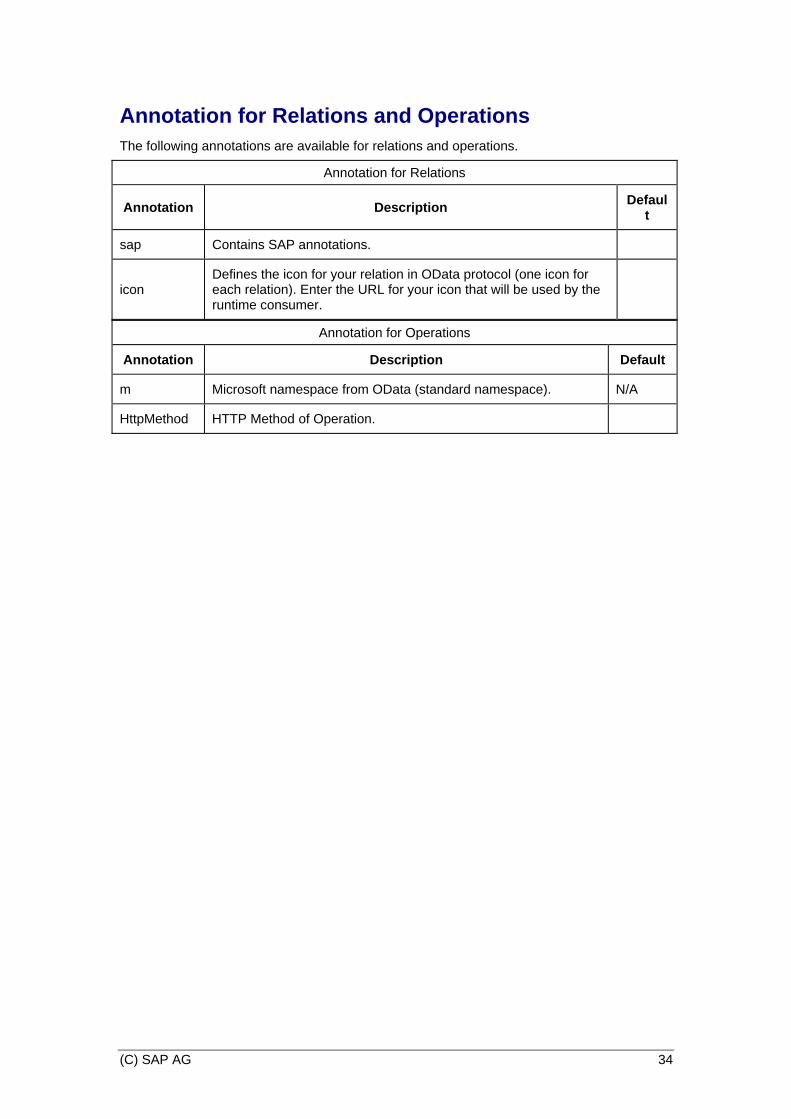
Annotation for Relations and Operations The following annotations are available for relations and operations.
Annotation for Relations
Annotation Description Default
sap Contains SAP annotations.
icon Defines the icon for your relation in OData protocol (one icon for each relation). Enter the URL for your icon that will be used by the runtime consumer.
Annotation for Operations
Annotation Description Default
m Microsoft namespace from OData (standard namespace). N/A
HttpMethod HTTP Method of Operation.

(C) SAP AG 35
Documenting a Data Model When you are creating or editing a data model or consumption model, you can access user documentation by choosing the i (Online Manual) button on the ABAP Workbench toolbar.
You can also create and maintain your own documentation linked to the following models and model elements:
• Data model
• Consumption model
• Data object
• Operation
This documentation is linked to the individual element or model, allowing you to write a tailored description for particular models, and data objects and operations within these models. The documentation is made available in your logon language from within the model or element when you press the documentation button in the SE80 ABAP Workbench toolbar (in display mode). If no documentation exists in the logon language, a message informs you of this.
A different document template is called for each model or element listed above, with standard headings applicable to the object being documented.
To create new or maintain existing documentation:
1. Switch to edit mode using the Display <-> Change button.
2. Press the relevant documentation button (for example, GW Data Model Documentation or Data Object Documentation) and the document opens for creation, or for editing if it already exists. A message asks if you want to save the model or element before the document opens.
3. Create or edit the document as required and press the Save button and then the Activate button. This links the document to the specific model or element.
4. Press the Back or Exit button to close the document.
When you delete a model or element for which you have created documentation, the documentation is also deleted.

(C) SAP AG 36
Generic Channel When you create your own data model on the Generic Channel and build the structure from scratch, certain default key fields can be generated as optional. You must, however, generate the Structure Type Container (STC) class.
To create a data model from scratch on the Generic Channel, follow the procedure below.
There should be at least one GetList (Query) and one GetDetail (Read) operation in a data model; for more information, see the OData specification at www.odata.org.
Procedure 1. Start transaction SE80.
2. Select GW Data Model from the dropdown list.
3. Enter a name for the data model you want to create, adhering to the following naming convention (maximum of 24 characters):
<customer name range> or <reserved customer namespace><name>
For example, ZJWTEST.
A dialog box informs you that this object does not exist and asks if you want to create it.
4. Select Yes and the Create Data Model dialog box is displayed, with the data model name you entered above displaying in the Name field.
Enter PS (Public Solution Model) in the Type field for the data model.
The version of your new Data Model is automatically set to 0001 in the Version field and is read-only.
The From Scratch radio button and accompanying OData Channel checkbox are selected by default.
5. Deselect the OData Channel radio button. The Create Key box becomes available:
(Create Data Model dialog box)

(C) SAP AG 37
6. Enter a name for the Root data object.
7. Select the Create Key checkbox if you want the following three key properties for the root data object to be created automatically:
Property Name Core Type Length
SCHEME_AGENCY_ID Edm.String 16
SCHEME_ID Edm.String 30
VALUE Edm.String 72
8. Select the green checkmark to continue.
9. Enter the name of the package in which you want the data model to be saved and choose Save, or Local Object.
A message displays at the bottom of the screen confirming that the data model has been saved. A model skeleton is created and displays in the repository browser in a tree structure, showing the root data object and an Object Structure folder beneath it, displaying the data objects and properties. If you selected the Create Key checkbox, the three key properties created for the root data object display underneath the Object Structure folder.
(Display Data Model)
If created, the key properties also apply by default to all data objects underneath the root; that is, the child data objects inherit the properties from the parent (root) data object unless you deselect the Inherit Key Fields checkbox when creating a data object.
The Model Runtime field on the right indicates that the data model will use the Generic Channel at runtime (read-only).
10. You can now add data objects, operations, properties, complex types, and relations to the data model (see More Information below).

(C) SAP AG 38
11. You can also rename or delete properties, data objects, and operations (Rename and Delete are available from the right-click menu). However, you cannot delete the root data object.
The Rename and Delete menu options are only available for data models created from scratch.
12. Select the Check button above the repository browser window. This checks the consistency of the data model you have created and lists any errors at the bottom of the screen so that you can correct them:
(Syntax check)
Double-click a line in the error list and the data model header opens. Select the i (information) button at the beginning of an error line to display Help information that gives an explanation of the problem and a procedure to follow to correct it.
13. After correcting any errors, double-click the data model name in the tree view and select the Generate STC Class button above the repository browser to generate the underlying STC class, which is necessary to run the model properly. If you did not create the data model in the local namespace, a customizing request displays for the STC class.
You must also use this button to regenerate the STC class after making changes to the data model to ensure you have an updated version with the changes included.
You must be in display mode when you press Generate STC Class. If you are in edit mode, changes are not included when regenerating the STC class.
After you have created the data model, you can reassign it to another package (for example, if you work on the model on local and then wish to move it to production). Right-click the data model name in the SE80 tree view, select Reassign package, and enter the new package details in the reassignment dialog box.
You can also copy a data model by right-clicking the data model name and selecting Copy. For more information, see Copying a Data Model in Deriving a Data Model from an Existing Data Model [Page 127].

(C) SAP AG 39
More Information For more information, see the following sections:
The sections listed below apply to model creation on both the Generic Channel and the OData Channel. Sections specific to the Generic Channel are identified as such.
Properties Editor [Page 13] to define or edit the data model's entities.
Creating Data Objects [Page 15]
Creating Properties [Page 18]
Creating Operations [Page 40] (specific to the Generic Channel)
Creating Relations [Page 42] (specific to the Generic Channel)
Creating Complex Types [Page 27]
Annotation Editor [Page 29] for information about adding or modifying user-specific annotations.
Documenting a Data Model [Page 35]
After you have created the data model, see:
Deriving a Data Model from an Existing Data Model [Page 127] to create a UC data model, required if you want to add annotations.
Creating a Consumption Model [Page 134]
Consumption Model URL [Page 137] to check the service.

(C) SAP AG 40
Creating Operations To create operations for your data model (for example, Read, Query), proceed as follows.
Procedure 1. Either right-click the root data object and choose Operation from the Create menu, or
right-click the Operations folder and select Create Operation.
2. The Create Operation dialog box is displayed in which you need to enter an operation name (mandatory), an Input Data Object and an Output Data Object (both optional, although if you do not enter them, syntax errors are reported after pressing the Check button). Search help is available. Fill in the fields and select the green checkmark.
3. The new operation is created and appears under the Operations folder in the tree view. The Properties Editor displays so that you can define the new operation. The Operation Type of Q (Query) is already filled in.
(Creating an operation)
There are no mandatory fields.
The operation is also available from Operation Data Objects in the tree view.
4. Save your entries.
5. If you want to change the input or the output data object, right-click the relevant data object and select Reassign Operation.
6. You can change a data object used in an operation in either the Object Structure folder or the Operations folder; any changes made are reflected in both places.

(C) SAP AG 41
The following fields are available for editing in the Properties Editor; the other fields are read-only.
Field Description Default
External Name
Name of the operation as represented in the external service, service document, and metadata document.
Operation type
Type of operation for this data model. Select one of the following options from the drop-down list:
• Q query operation
• X custom operation
• C create operation
• R read operation
• U update operation
• D delete operation
• S search operation
Sup. Freetext
Select this checkbox if you want the operation to be used to enter free text in a query, for example, to enable a free text search.
Not selected

(C) SAP AG 42
Creating Relations You can create internal relations between data objects in your data model and external relations to properties in another data model.
You can only map to the root data object of the target data model.
When you create a relation, the following validation takes place:
• For a Query operation, there must be a one to one relationship.
• For a Read operation, there must be a one to many relationship.
• If you are creating a relation between two data models generated by the content generator, you can only create a one to one association if one parameter is mapped to the target data model's key value (S_COR_ID_VALUE).
You can rename and delete existing relations from the context menu.
Procedure
Creating an External Relation
1. Right-click one of the following and choose Create External Relation :
o Data Object
o Object Structure folder
o Related GW Models folder
The Create Relation popup displays, with the Source Data Object field already filled in with the name of the Data Object from which you are creating the relation:
(Create Relation)
2. Enter a Relation Name.
3. Use the F4 Help to select the Target Data Model to which you want to link.
4. Select the green check mark to continue.
The new relation then appears under the target data model in the Related GW Data Models folder in the tree view with a cardinality of 1, and the Properties Editor displays so that you can define the new relation. There are no mandatory fields.
5. Save your entries.

(C) SAP AG 43
The following fields are available for editing in the Properties Editor; the other fields are read-only.
Field Description Default
Entity Enabled
If selected, the relation is enabled in this data model and will be reflected at runtime. If not selected, the relation is ignored at runtime. Select this checkbox if you wish to enable the relation in this data model.
Selected
External Name
Name of relation as represented in the external service, service document, and metadata document.
Source Cardinality
Cardinality of the source data object. For internal (parent / child) relations, the cardinality is always 1 (one-to-one relationship). For external relations, it can also be 1:n (one-to-many relationship).
1
Target Cardinality
Cardinality of the target data object or data model. For internal (parent / child) relations, the cardinality is always 1 (one-to-one relationship). For external relations, it can also be 1:n (one-to-many relationship).
1
Target Operation
Name of the Query operation to be called in the target data model.
Title Language-dependent title in the user's logon language (if available). Enter a suitable title.
Source Property
Specifies the source property for the external relation. Select a field from the source data object to map to the key field of the target data model (displays in the Target Property column). You can use the F4 Help to select the source property.
If the relation has a target cardinality of 1, simply map it. If the relation has a target cardinality of 1..n, enter the property from the source data object in the left column on the same line as the required target property in the right-hand column.
Target Property
Specifies the target property of the target data model for the external relation. Select the target data model's key field to which you want to map the source data object.
If the relation has a target cardinality of 1, simply map it. If the relation has a target cardinality of 1..n, select the property that you wish to return from the target data model.
Creating an Internal Relation
1. Right-click a data object, and choose Create Relation Internal .
The Create Relation dialog box displays.
2. Enter the Name of the relation and then press the green checkmark.
The new relation then appears under the Relations from… folder under the data object in the tree view with a cardinality of 1, and the Properties Editor displays so that you can define the new relation. There are no mandatory fields.
3. Save your entries. When creating an internal relation, the fields listed in the table in Creating an External Relation above are also available for editing, except for Target Operation, Source Property, and Target Property. Other fields are read-only.

(C) SAP AG 44
Using the Data Model Generator Tool The Data Model Generator tool enables you to create a Data Model from a specified data source without having to write any code. Later, you generate a service for use in SAP NetWeaver Gateway from the Data Model.
The data sources available in the Data Model Generator tool are as follows:
• Business Object Repository (BOR)
BOR contains business objects, their properties, and connecting operations as BAPIs.
For more information, see Business Object Repository [Page 57].
• Screen Scraping
Screen Scraping contains recordings of screens you wish to be exposed by the Data Model.
For more information, see Screen Scraping [Page 59].
• Remote Function Calls (RFC)
RFC contains remote function modules.
For more information, see Remote Function Calls [Page 76].
The Data Model Generator automatically generates the following:
• Meta models: PS (Public Solution) Model, DC (Data Centric) Model, and mapping.
• Runtime artifacts in the Generic Channel: structure type container, BOP (Backend Operation Proxy) and BSO (Backend Service Object) and Mapping Specialist. These are either generated or a generic is provided; this varies depending on the data source type.
OData Channel runtime artifacts use the BOP.
• Configuration entries for default configuration (Generic Channel only).
We recommend that you plan the model before using the generator tool to create it. You should know the functionality you want to provide, as well as the nodes and fields that you want the model to contain.
Having a plan helps you to properly design your model so that the Gateway service you generate, can meet your needs.
In addition, familiarize yourself Open Data (OData) protocol, as the services you create and expose through SAP NetWeaver Gateway are OData compliant.

(C) SAP AG 45
Requirements for Creating a Data Model
To use the Data Model Generator tool, make sure that you have configured a system alias defined in SAP NetWeaver Gateway.
For more information, see System Alias Configuration in the SAP NetWeaver Gateway [External].
To use Screen Scraping data sources in the Data Model Generator tool, you must have the following:
• Install the component, IW_SCS 200 (IW_SCS which is available with SAP NetWeaver 7.0 SPS18 and higher, in your backend system (SAP Business Suite system).
For more information, see Installing SAP NetWeaver Gateway Components [External].
• Configured roles, users, and authorizations for transactions and search help to determine users’ access to these objects in each SAP backend system.
For more information, see Assigning Authorization to Transaction and Search Help [External].
Important SAP Notes
Read and implement the corrections applicable to your support package in the SAP NetWeaver Gateway Release Information Note number 1560585.
You can find the SAP Notes in SAP Service Marketplace at: http://service.sap.com/notes
Overview of the Sequence of Tasks for Creating a Data Model
The procedures for creating a Data Model and generating content are the same for all data sources, and the chosen data source displays on the Data Model Generator screen.
The following is a high level overview of the sequence of tasks for creating a Data Model and generating the models:
1. From the SAP NetWeaver Gateway host, use transaction se80 to start the Gateway Data Model tool.
For more information, see Selecting the Data Source [External].
2. Map the operations, data objects, and properties from the selected data source to your Data Model.
For more information, see Creating the Mapping [Page 86].
3. Assign an attribute to a key for each operation you have mapped to the Data Model.
For more information, see Assigning Keys to Operations [Page 104].
4. Generate the PS and DC Models (generating the Data Model and associated models).
For more information, see Generating the PS and DS Models [Page 119].
5. Manually create a Consumption Model and add your Data Model to it.
For more information, see Manually Add Your Model to a Consumption Model [Page 120].

(C) SAP AG 46
6. Manually configure the system alias for the service document.
For more information, see Configuring the System Alias for your Service Document [Page 122].
Later, you can edit and modify the content of the Data Model after it has been generated. For more information, see Editing a Data Model [Page 107].
To get started and test the services you create, see SAP NetWeaver Gateway Generators Cookbook [External].

(C) SAP AG 47
Creating a New Data Model You use the Data Model Generator tool to create a Data Model from which you can generate Gateway services.
You can create a Data Model using the Data Model Generator tool in both the OData Channel and the Generic Channel.
While both the OData Channel and the Generic Channel Data Models are based on runtime components and metadata, each channel provides the runtime and metadata information differently.
OData Channel Data Models only implement interfaces that are similar to the Open Data protocol (OData).
For more information, see SAP NetWeaver Gateway Developer Guide [External].
We recommend to use the OData Channel, as it provides additional capabilities, such as, enhanced runtime performance of the generated service, and eliminates design-time limitations, for instance, mapping operations to a single model key (S_COR_ID—Value).
You can create new Generic Channel Data Models and maintain existing ones. Use the Generic Channel Data Models to generate services for Duet Enterprise, as this channel supports the SOAP bridge.
When you are creating a Data Model using the Data Model Generator, first choose your data source.
First, familiarize yourself with the data source object you want to use in your Data Model, such as, BAPIs of the specific BOR and RFC, or the screens you want to record using Screen Scraping.
The next step is to specify a name for your Data Model, and define the data source you want to use in the model.
More Information Selecting the Data Source [External]
(C) SAP AG 48
Selecting the Data Source Procedure The Data Model that you create can contain multiple operations for an SAP function, or recorded screens referred to as a data source.
To create a Data Model using one of the data sources:
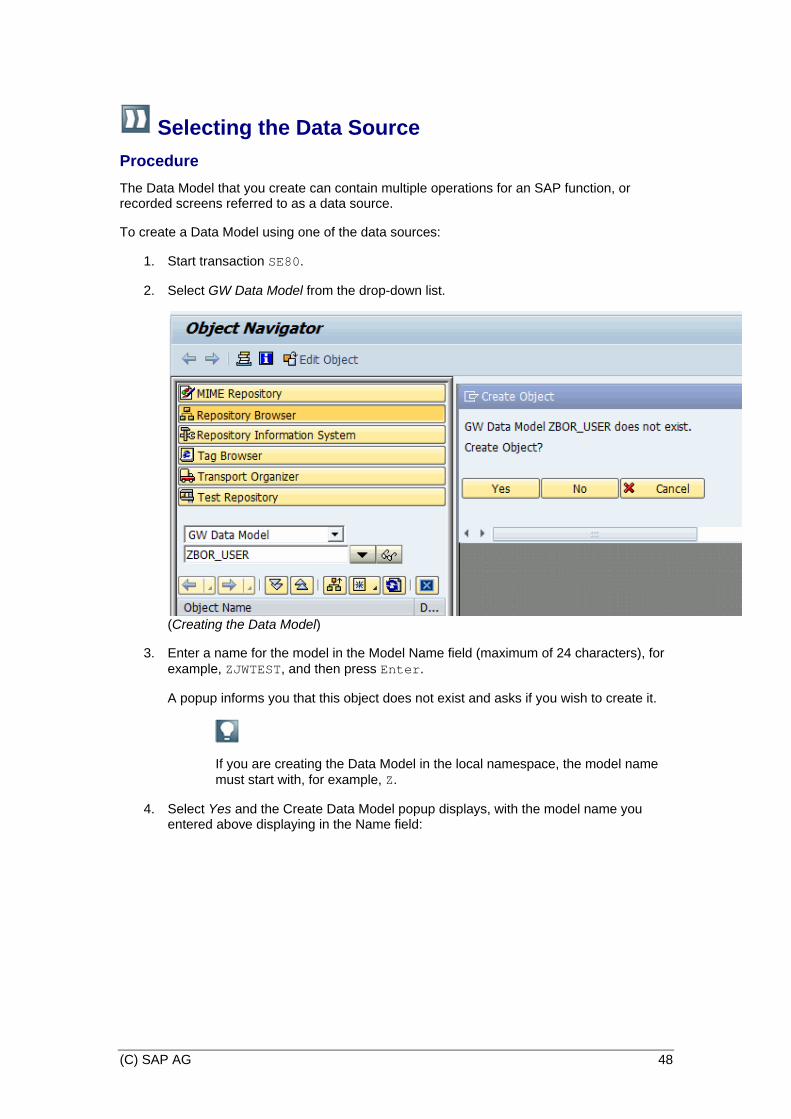
1. Start transaction SE80.
2. Select GW Data Model from the drop-down list.
(Creating the Data Model)
3. Enter a name for the model in the Model Name field (maximum of 24 characters), for example, ZJWTEST, and then press Enter.
A popup informs you that this object does not exist and asks if you wish to create it.
If you are creating the Data Model in the local namespace, the model name must start with, for example, Z.
4. Select Yes and the Create Data Model popup displays, with the model name you entered above displaying in the Name field:

(C) SAP AG 49
(Generate Model from Data Source)
5. Press F4 in the Type, and choose PS (Public Solution Model).
The Data Model automatically generates the following models:
o PS (Public Solution Model):
Maps the model to its data source through a transformation mechanism.
o UC (User Centric Model):
Translates the data exposed in the PS model into a model that can be used natively by a consumer application.
The tool does not generate the UC model.
The model types describe how objects from the SAP backend system are transformed into external objects that can be used
6. Choose Generate from Data Source Object. Version (read-only) displays as 0001 (first version).
7. Select the option, OData Channel and then select the green check mark to continue.

(C) SAP AG 50
If you remove the selection for the option, OData Channel, the model is generated in the Generic Channel.
The Create Data Model popup displays, with the model name you entered above displaying in the Name field.
(Specify the data source)
Enter the following:
o In Description, enter a suitable description for the Data Model. It can contain a maximum of 40 characters. This is a mandatory.
o In Data Source Type, select the data source for your model. The Data Source Type determines which data source appears in the left-hand section of the Data Model Generator screen.
The following are the data source types:
Business Object Repository (BOR)
Screen Scraping
Remote Function Calls (RFC)
o In System Alias, enter the System Alias for the SAP backend system to which you want to connect, for example, EX1_201.
Alternatively, press F4. The list only shows the aliases of SAP systems defined in SAP NetWeaver Gateway. Select the alias for a SAP system in which the operations you want are available.
For OData Channel Data Models, take note of the system alias you have specified. Later, you are required to manually configure the service document generated for your model with the system alias information.
8. Choose Continue. The Create Object Directory Entry popup displays.
9. Select Local Object or a package and the Save icon. The Data Model Generator screen displays with the data source information on the left-hand side.

(C) SAP AG 51
You can choose to display the entities in the data source in alphabetical order (the default) or in a hierarchical structure by using the Alphabetical or Hierarchical tabs at the top.
The Hierarchical tab is not available if Screen Scraping or RFC is your data source.
The next step is to map the operations, data, and attributes from the data source to the Data Model.
More Information Creating the Mapping [Page 86].
Overview of Data Sources [Page 52]

(C) SAP AG 52
Overview of Data Sources When you have selected the data source and created an empty Data Model, the Data Model Generator screen displays so that you can create the mapping and generate the Data Model.
At the top of the Data Model Generator screen is the name you specified for the Data Model, the menus for generating the models and switching between the Data Model Generator tool, and the Object Navigator in the ABAP Workbench.
The main screen is split into two parts; Data Source and Data Model Details.
Data Source
The left of the main screen presents the specified data source and the system alias. Find the data items such as, objects, properties, and operations you want to use from the specified data source.
(Example data source view on the left )
Business Objects Repository (BOR) Data Source
BOR data source objects come from the SAP backend system, defined in the system alias. You can view the function modules and the BAPIs available in the system, in the data source screen.
You can display the BAPIs in alphabetical order (the default) or in a hierarchical order using the Alphabetical or Hierarchical tabs at the top.
The Alphabetical tab lists business objects (BOs) in alphabetical order. Selecting the icon in front of each business object expands it.
• Key parameters
• Operations (or BAPIs)
• Parameters
Each item in the list has a different icon in front of it, similar to those in transaction BAPI.
The Hierarchical tab shows a hierarchical view of the business objects.
For more information, see Business Object Repository [Page 57].

(C) SAP AG 53
Screen Scraping Data Source
Screen Scraping data sources come from your SAP backend system. The data source screen is initially empty.
You must create recording groups in the data source screen to hold your recordings. Later, you record the transactions you want to use in your Data Model.
There are two types of objects that you can create for use in your model. These are:
• Recordings
• Search Help
For more information, see Screen Scraping [Page 59].
Remote Function Call (RFC) Data Source
Remote Function Calls (RFC) is the standard SAP interface for communication between two SAP systems, or between an SAP system and an external system, and calls a function to be executed in a remote system.
The RFC data source screen is initially empty because there are too many function modules to display.
Select the binoculars icon to restrict the RFC display to function modules you want to use in your Data Model. You can also search for a particular function module by name.
You can display the RFC function modules in alphabetical order (the default) using the Alphabetical tab at the top.
The Alphabetical tab lists the function modules in alphabetical order. Selecting the icon in front of each function module expands it to show the following:
• Parameters
• Operations (or BAPIs)
To create a Data Model using RFC as your data source, you must make sure that the function modules you choose as your data source items are supported by the Data Model Generator tool.
For more information, see Remote Function Calls [Page 76].
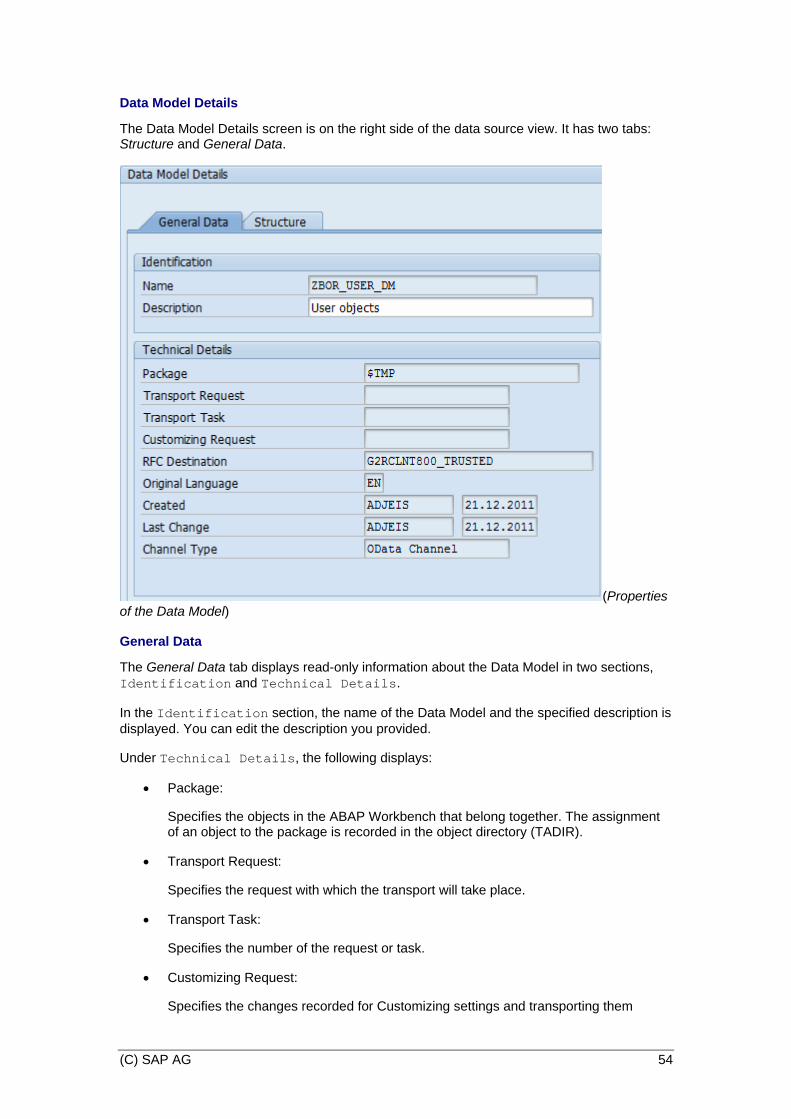
(C) SAP AG 54
Data Model Details
The Data Model Details screen is on the right side of the data source view. It has two tabs: Structure and General Data.
(Properties of the Data Model)
General Data
The General Data tab displays read-only information about the Data Model in two sections, Identification and Technical Details.
In the Identification section, the name of the Data Model and the specified description is displayed. You can edit the description you provided.
Under Technical Details, the following displays:
• Package:
Specifies the objects in the ABAP Workbench that belong together. The assignment of an object to the package is recorded in the object directory (TADIR).
• Transport Request:
Specifies the request with which the transport will take place.
• Transport Task:
Specifies the number of the request or task.
• Customizing Request:
Specifies the changes recorded for Customizing settings and transporting them

(C) SAP AG 55
• RFC Destination:
Specifies the RFC destination that points to an SAP business system. When they are assigned to SAP system aliases, that system alias points correspondingly to that business system.
• Original language:
Specifies the language in which the Data Model is created.
• Created by:
Specifies the name of the person who created the Data Model, and the date on which it was created.
• Last Change:
Specifies the date on which current changes were applied to the Data Model, and the name of the person who made the changes.
• Channel Type:
Specifies the channel type of the Data Model, either OData Channel or Generic Channel.
Structure
The Structure tab displays the following:
• Create Mapping:
Choose this button when you want to map an operation from the data source to the Data Model.
• Change Mapping:
Choose this button when you want to edit the mapped operations in the Data Model.
• Remove Mapping:
Choose when you want to remove mapped operations in the Data Model.
In addition, it shows the following: <Data_model – Operations> and Data Model.
The <Data_model – Operations> area displays information about the operations that are mapped to the methods from the data source. By default, it is empty.
The Data Model section of the screen displays a toolbar and the name of the Data Model as the root Data Object. By default, the root Data Object is empty.
Use the toolbar above the Data Objects section to do the following:
• View, expand, and collapse the Data Objects and their properties within the Data Model. When expanded, it shows the keys defined for the operations and the properties, indicated by the Key icon next to it.
• Add and remove Data Objects and Properties.
• Select and remove selection for the operations and Properties in a Data Object.

(C) SAP AG 56
• Rename a Data Object or Property.
• Display the legend for the different icons used for the content of the Data Model.
• Set and reset the keys for an operation.
You can edit and modify the Data Model until you have the structure you require, and the appropriate fields and operations are mapped.
More Information Editing the Data Model [Page 107]

(C) SAP AG 57
Business Object Repository An SAP business object is an object whose methods have been implemented as BAPIs (Business Application Programming Interfaces).
A BAPI is a remote callable ABAP function module that has been written to conform to a strict set of design constraints. These business objects are aggregated together by the SAP Business Object Repository (BOR).
You select a BAPI (the method of a business object), map selected operations and fields from the BOR to a Data Model, and the Data Model Generator then automatically generates the PS (Public Solution) and DS (Data Source) models and the mapping metadata required by SAP NetWeaver Gateway.
Some BAPIs are not supported by the Data Model Generator tool, to help you identify the BAPIs that can be used in the Data Model Generator tool, see Data Model Generator Support for Data Sources [Page 78].
Getting Started in BOR
You can quickly create a Data Model from a BAPI for use as a service in SAP NetWeaver Gateway.
The following is an overview of the sequence of tasks to perform in order to generate a Data Model based on BOR data sources:
1. Create your Data Model using BOR as the data source.
For more information, see Selecting the Data Source [Page 48].
2. Map the data entities in the selected BAPI to specific operation types in your Data Model.
For more information, see Creating the Mapping [Page 86].
3. Set keys for the mapped operations.
For more information, see Assigning Keys to Operations [Page 104].
4. Generate the Data Model.
For more information, see Generating the PS and DS Data Models [Page 119].
5. Add your generated model to a Consumption Model.
For more information, see Manually Add Your Model to a Consumption Model [Page 120].
6. Manually configure the system alias for the service document.
For more information, see Configuring the System Alias for your Service Document [Page 122].
Optionally, you can test the generated service.
To create a Data Model using the Data Model Generator tool and to test the generated Gateway service, see SAP NetWeaver Gateway Generators Cookbook [External].

(C) SAP AG 58
Constraints Using BOR Data Sources Constraints Note the following constraints, together with workarounds when using BOR data sources. Workarounds for constraints 2 and 3 are must-haves (that is, there is no OData exposure at all without them).
Workarounds for constraints 4 to 6 are required to support modifying operations.
1. There should be at least one GetList (Query) and one GetDetail (Read) operation in a Data Model; for more information, see the OData specification at www.odata.org.
2. Check for the availability of a BAPI that can be mapped to the Query operation (typically the GetList method of the corresponding BOR object).
Check for mandatory importing parameters.
Tabular parameters cannot be supported, that is, they will rule out a BAPI.
Workaround: Extend the BAPI; see Customer Enhancement of BAPIs.
3. Check for the availability of a BAPI that can be mapped to the Read operation (typically the GetDetail or GetProperties method of the corresponding BOR object).
You need to have simple importing parameters and fields of the structure, importing parameters uniquely identifying an instance of the BOR object.
4. Check for the availability of a BAPI that can be mapped to the Create operation:
In the same way as for Query (above), check that there is no mandatory table import parameter.
If there is, check if it can be supplied with empty content (that is, with no lines).
5. Check for the availability of a BAPI that can be mapped to the Update operation (typically the Change method of the corresponding BOR object):
In the same way as for Read (above), key parameters identifying the instance to be updated must be simple or structure fields.
Check if the BAPI can be used to update all fields of the BOR object or if there are multiple BAPIs for updating different parts of the BOR object.
In the latter case, a full update cannot be supported because only one BAPI can be mapped to the Update operation of the Data Model.
6. Check for the availability of a BAPI that can be mapped to the Delete operation.
In the same way as for Read (above), parameters identifying the instance to be deleted must be simple or structure fields.
More Information For more information on possible constraints see SAP note 1574568.

(C) SAP AG 59
Screen Scraping Screen Scraping captures the business logic available in ABAP Dynpro screens and exposes it as Data Model.
For more information about installing and configuring Screen Scraping, see Using the Data Model Generator Tool [Page 44].
How Screen Scraping Works
Screen Scraping uses the standard batch input recorder feature in your SAP system to record transactions, their screens and fields. The recorded data is available to you as a data source entry.
You then model the object using the data from the recorded transaction, screens and fields. Later, you can generate the model as a Data Model.
Data Model Generator creates a REST service from your Data Model which is then exposed to consumers in SAP NetWeaver Gateway, enabling them to retrieve the relevant data in the specific SAP system from which the recordings originated.
At runtime, the screens are run in the same way as they were run during the recording.
The following are some of the controls that Screen Scraping does not record:
• Self-programmed F1 - and F4 help (PROCESS ON HELP-REQUEST , PROCESS ON VALUE-REQUEST) are not recorded. The same applies to all commands in the System and Help menus.
• Error and warning dialogs are not recorded.
When errors occur during a recording, any Data Model which uses such recording may not work at runtime. For that reason, recordings in which error messages were detected are automatically discarded at runtime.
• Movements in the scroll-bar are not recorded.
Getting Started in Screen Scraping
You can quickly create a Data Model from a recording, for use as a service in SAP NetWeaver Gateway.
The following is an overview of the sequence of tasks in Screen Scraping:
1. Create your Data Model based on Screen Scraping.
For more information, see Selecting the Data Source [Page 48].
2. Create a recording group for storing and organizing your recordings.
For more information, see Storing Recordings in Recording Groups [Page 64].
3. Record the transaction, its screens and fields.
For more information, see Recording a Transaction, its Screens, and Fields [Page 66].

(C) SAP AG 60
4. Get search help data entities to enable end users to perform queries at runtime about business entities for which they have incomplete information at their disposal.
For more information, see Getting Search Help Data Source [Page 72].
5. Map the data entities in your recordings and search help to specific operation types in your Data Model.
For more information, see Creating the Mapping [Page 86].
6. Set keys for the mapped operations.
For more information, see Assigning Keys to Operations [Page 104].
7. Generate the Data Model.
For more information, see Generating the PS and DS Data Models [Page 119].
8. Create a Consumption Model and add your model to it.
For more information, see Manually Add Your Model to a Consumption Model [Page 120].
9. Manually configure the system alias for the service document.
For more information, see Configuring the System Alias for your Service Document [Page 122].
Optionally, you test he generated service.
To create a Data Model using the Data Model Generator tool and to test the generated Gateway service, see SAP NetWeaver Gateway Generators Cookbook [External].
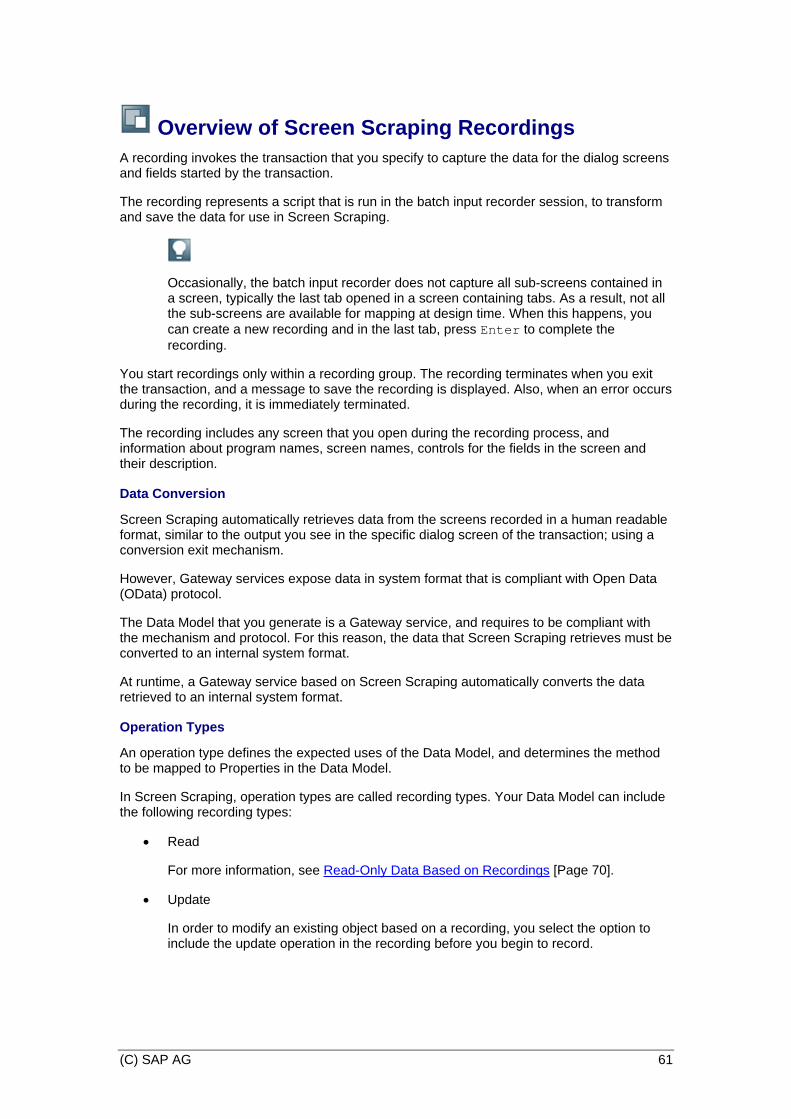
(C) SAP AG 61
Overview of Screen Scraping Recordings A recording invokes the transaction that you specify to capture the data for the dialog screens and fields started by the transaction.
The recording represents a script that is run in the batch input recorder session, to transform and save the data for use in Screen Scraping.
Occasionally, the batch input recorder does not capture all sub-screens contained in a screen, typically the last tab opened in a screen containing tabs. As a result, not all the sub-screens are available for mapping at design time. When this happens, you can create a new recording and in the last tab, press Enter to complete the recording.
You start recordings only within a recording group. The recording terminates when you exit the transaction, and a message to save the recording is displayed. Also, when an error occurs during the recording, it is immediately terminated.
The recording includes any screen that you open during the recording process, and information about program names, screen names, controls for the fields in the screen and their description.
Data Conversion
Screen Scraping automatically retrieves data from the screens recorded in a human readable format, similar to the output you see in the specific dialog screen of the transaction; using a conversion exit mechanism.
However, Gateway services expose data in system format that is compliant with Open Data (OData) protocol.
The Data Model that you generate is a Gateway service, and requires to be compliant with the mechanism and protocol. For this reason, the data that Screen Scraping retrieves must be converted to an internal system format.
At runtime, a Gateway service based on Screen Scraping automatically converts the data retrieved to an internal system format.
Operation Types
An operation type defines the expected uses of the Data Model, and determines the method to be mapped to Properties in the Data Model.
In Screen Scraping, operation types are called recording types. Your Data Model can include the following recording types:
• Read
For more information, see Read-Only Data Based on Recordings [Page 70].
• Update
In order to modify an existing object based on a recording, you select the option to include the update operation in the recording before you begin to record.

(C) SAP AG 62
Make sure that the transaction you want to record can modify data, for example, XD02.
Recordings that include the update operation are discarded if they contain tables and SAP List Viewer (ALV).
• Delete
You record a transaction for the purposes of deleting existing objects in the SAP backend system, using the delete operation.
Make sure that the transaction you record can delete data, for example, FI06.
• Create
You record a transaction for the purposes of creating a new business object in the SAP backend system, using the create operation.
Make sure that the transaction you record can create data, for example, XD01.
After recording, the recorded transaction, its screens, and fields are presented in the Screen Scraping Repository as a data source. Only the import fields in the recording are displayed together with a newly created message structure.
The message structure name is the message ID and the description is the text captured in the recording. The message variable holding the instance ID of the newly created object can be mapped to a key Property in the model.
• Query
For more information about getting search help from recordings, see Getting Search Help Data Source [Page 72].
If the recorded screen does not contain any import field, it is not displayed.
Recordings that include the Create, Delete, and Update operations are discarded if they contain tables.
Recorded fields are denoted by the following attributes to help you to identify the expected behavior of the field:
• Import
A field is denoted as an import field when it receives data to be sent to a Gateway service at runtime.
• Export
An export field only returns data from a Gateway service at runtime.
• Import and export or changing attributes
A field can have both import and export attributes, denoting it as capable of sending and returning data to the Gateway service.

(C) SAP AG 63
More Information For more information about recordings, see Recording a transaction, its screens and its fields [Page 66].

(C) SAP AG 64
Storing Recordings in Recording Groups In Screen Scraping, you organize and manage your recordings and search help entities within recording groups. A group can be empty for later use, or it can contain several recordings and search help entities.
We recommend to use meaningful names for your recording groups, such as, Vendors, Customers, or Suppliers. Such names help you to easily locate your recordings.
A recording group cannot contain another recording group.
The content of the recording group is your data source from which you choose the entities you want in your model.
To create a recording group:
1. From the Data Source: Screen Scraping Repository pane, click the icon,
(New), and select Create Recording Group. The Enter Recording Group name dialog opens.
2. Enter a name for your recording group.
We recommend that you use a "Y" or "Z" namespace prefix.
Use only alphanumeric characters. Spaces and symbols such as, &, %, $,#, @, and !, are not allowed.
3. In Description, enter some descriptive text for your group. This is optional.
4. Choose OK.
Viewing and Modifying the Values in the Properties of a Recording Group
After creating your recording group, you can view and modify the values of its properties. The following are the properties of a recording group:
• Recording Group:
Specifies the name of the selected recording group. It cannot be modified.
• Description:
Specifies the descriptive text of the selected recording group. You can edit the text.
• Created On:
Specifies the date on which the recording group was created. It cannot be modified.
• Created By:
Specifies the name of the user who created the group. It cannot be modified.

(C) SAP AG 65
To view and edit a property:
1. Select the recording group whose properties you want to view or edit.
2. Right click the selected recording group, and choose Recording Group Properties or
click the magnifying glass icon, (Recording group properties) .
Deleting a Recording Group
You can delete the recording groups in the Screen Scraping Repository pane.
You can delete a group that is empty. In the display mode, you cannot delete a group.
To delete a recording group:
1. From the Data Source: Screen Scraping Repository pane, select the recording group you want to delete.
2. Click the delete icon, (Delete)
Alternatively, right click the selected group name and choose Delete recording group. A dialog window displays.
3. Choose Yes to delete the recording group.
More Information Recording a Transaction, its Screens and Fields [Page 66].
Getting Search Help Data Source [Page 72]

(C) SAP AG 66
Recording a Transaction, its Screens, and Fields Prerequisites
• Make sure that you have information about the transaction and the fields you want to record.
• You have created or identified the recording group in which to store the recording.
Procedure To begin recording:
1. From the Data Source: Screen Scraping Repository pane, select the recording group in which you want to store your recording, choose the New icon, and select Create Recording. Alternatively, right click the recording group and choose Create Recording.
The New Recording dialog opens.
2. In Recording Name, enter a name for the recording.
Use only alphanumeric and underscore characters. Spaces and symbols such as, &, %,$,#, @, !, are not allowed.
The system has reserved characters such as, "!" for its use. When such reserved characters are detected at the beginning of a name for a recording, the specified name is discarded and you are requested to enter a new name again.
3. In Transaction Code, enter the transaction you want to record. For example, XD03.
4. In Recording Type, select the type of operation you want to use in the Data Model. The following are the operation types:
o C means Create
Specifies that, the recording is for creating new business data in the SAP system. When selected, the create operation type is set in the Data Model.
In addition, recordings based on Create enable end users to only create new business objects in the SAP system.

(C) SAP AG 67
o R means Read
Indicates that, the recording is for reading data from the transaction screens. When selected, the read operation type is set in the Data Model.
In addition, recordings based on Read enable end users to only view information coming from the SAP system.
o U means Update
Indicates that, the recording is for updating existing business objects in the SAP system.
When selected, the update operation type is set in the Data Model.
In addition, recordings based on Update enable end users to only modify existing business objects in the SAP system.
o D means Delete.
Indicates that, the recording is for deleting existing business objects from the SAP system.
When selected, the delete operation type is set in the Data Model.
In addition, recordings based on Delete enable end users to set a flag for archiving business objects in the SAP system, so that they are no longer available for use.
5. In Description, enter some descriptive text about the recording or search help.
6. Choose the check mark, to start the recording.
The recording then invokes the specified transaction and opens the corresponding dialog screen. An error message displays when the specified transaction does not exist in the specified SAP system.
7. Navigate the dialog screen and make the relevant selections to obtain the data you want in the recording.
8. Position the cursor in a field that you want to assign as the constant data object.
The value of the selected field designated as a constant data object at design-time, becomes a reference value. This reference value is the default initial proposal that cannot be changed during the runtime of your Data Model.
9. Press Enter or choose the Back icon to exit the transaction and to stop the recording, and then save the recording.
Once you complete a recording, you have a data source from which you can specify and select the entities you want in your Data Model.
(Example of a recording in a recording group)

(C) SAP AG 68
The recording is automatically created and added to the selected recording group name in the Screen Scraping Repository pane. It displays the specified recording name, the description you provided, and the transaction recorded.
Expand the recording to view the recorded screens with Screen Scraping provided names. For example, in the above image, USERLIST is the recording. When you expand a screen, you can see the recorded fields and tables with their technical names as existed in the SAP backend system. Also, you can expand the table to view the fields (columns) in the table.
Viewing and Modifying Properties of Recordings
After creating your recording, you can view and modify the values of its properties in the Screen Scraping Repository.
The following are the properties of a recording:
• Recording Name:
Specifies the name of the recording. It cannot be modified.
• Transaction Code:
Specifies the recorded transaction code. It cannot be modified.
• Recording Type:
Specifies the recording type, which can be one of the following operations: Create, Read, Update, and Delete (CRUD). It cannot be modified.
• Description:
Specifies the descriptive text. You can edit the text.
• Created On:
Specifies the date on which the recording was created. It cannot be modified.
• Created By:
Specifies the name of the user who created the recording. It cannot be modified.
• Discard Warnings:
Select to prevent warnings and information coming from the recording to be displayed at runtime. Recorded error messages cannot be discarded.
To view and edit a property:
1. Select the recording whose properties you want to view or edit.
2. Right click the selected recording, and choose Recording Properties or click the magnifying glass icon.
Deleting a Recording
You can delete a recording in the Screen Scraping Repository pane.
You cannot delete a recording that has already been mapped to a Data Model.

(C) SAP AG 69
To delete a recording:
1. From the Data Source: Screen Scraping Repository pane, select the recording you want to delete.
2. Choose the Delete icon.
Alternatively, right click the selected group name and choose Delete recording. A dialog window displays.
3. Choose Yes to delete the recording group.

(C) SAP AG 70
Read-Only Data Based on Recordings Features You can record a transaction for the purposes of displaying the data from a specific SAP backend system, using the Read operation.
Requirement
Make sure that the transaction you record is for reading data, for example, XD03.
Controls: Tables and Fields
Recordings that include the read operation can contain data about controls and fields within a screen, such as, text controls, and table controls.
When you expand the recorded screen, you can display the fields in the screen, as well as, the field names as they exist in your SAP system.
If you want the recording to read data within a table, make sure that your table has some content, and that the transaction provides functionality such as, buttons, and function keys that enable you to page through the table.
If you record an empty table control at design-time, you cannot add data to it at runtime.
If Screen Scraping does not identify table paging functionality in the recording, it provides a warning message. At runtime, it will display only the number of lines that were visible during the recording.
General Guidelines for Recording a Table Control with Content
Record paging through the table by placing the cursor on the same table entry and click twice
the page down button, (Table paging control).
To record all the entries in a table, make sure that you position the cursor on the same entry while clicking the page down button twice.
Assigning Constant Values During the Recording
In Screen Scraping, you assign one or more fields as constant data objects during the recording. You assign a field as a constant data object by selecting it or entering a value.
In addition, the value you specify during the recording, is captured and made available in the recorded value column. You can then set this value as a constant value.
The constant you assign at design-time help in the flow of the operation during the runtime of your Data Model.
Fields designated as constants contain initial recorded values. Do not set constant values for an attribute that has already been mapped to the key Property.
Using a Data Model based on the transaction, XD03, you can set and specify the constants as in the example below.

(C) SAP AG 71
When the recording begins, select the checkboxes in the initial screen for Address and Marketing. Your selection designates them as constants.
In order to have the data about the tabs, Address and Marketing available at runtime, set constant values for them in the mapping screen.
To set the constant value, select the relevant attribute in the Map Operation dialog screen, and then choose Set Constant Value. Enter the same value as displayed in the column, Recorded Value, in this case 'X' (include the single quotes), and close the Map Operation dialog screen.
More Information For more information about recordings, see Recording a transaction code, its screens and its fields [Page 66].

(C) SAP AG 72
Getting Search Help Data Source When a recorded field has search help in the SAP system, Screen Scraping enables those fields in the specific search help.
Search help allows you to provide selections using a variety of criteria, such as, obtaining customer information based on country, or tax code, or company name.
Search help is useful in that, it provides the data source for the Query operation in Screen Scraping.
Defining Search Help Entities as Data Source
You can get search help data source based on the recorded fields for which search help data existed during recording. Where a recorded field does not have search help data, you cannot get the search help data source based on that field.
To get a search help data source:
1. Open the recorded screen, and select the specific field for which you want the search help data.
2. Click the New icon, and choose Get Search Help. The Get Search Help window opens.
A message displays when the selected field does not have search help data from the SAP system.
3. In Search Help Name, press F4 to select the preset search help entity you want as a data source.
4. Click the check mark. The search help data source is created in the same recording group as the recorded field on which it is based.
The search help data source you have obtained is no longer dependent on the recorded field on which it is based.
You can map the attributes in the search help data source into the Query operation in your Data Model.
The Data Model Generator automatically proposes the selected field from which you derive the search help data source entity as the designated key.
However, if there is no match for the name of the selected field in the search help, the Data Model Generator does not propose a key and you must manually set a key for the query operation of the model.
Viewing Properties of Search Help
After creating your search help, you can view its properties. The following are the properties of a search help:
• Search Help:
Specifies the name of the search help name. It cannot be modified.
• Transaction:
Specifies the recorded transaction code. It cannot be modified.

(C) SAP AG 73
• Description:
Specifies the descriptive text. It cannot be modified.
• Added On:
Specifies the date on which the search help was added. It cannot be modified.
• Added By:
Specifies the name of the user who added the search help. It cannot be modified.
To view the properties:
1. Select the search help whose properties you want to view.
2. Right click the selected search help, and choose Search Help Properties or click the magnifying glass icon.
Deleting Search Help
You can delete a search help entity in the Screen Scraping Repository pane.
You cannot delete a search help entity that has already been mapped to a Data Model.
To delete a search help entity:
3. From the Data Source: Screen Scraping Repository pane, select the search help entity you want to delete.
4. Click the Delete icon.
Alternatively, right click the selected search help name and choose Remove from Data Source. A dialog window displays.
5. Click Yes to delete the search help entity.
Mapping the Search Help and Enabling Query Filters
After you get the search help data source, you can map it to your Data Model. Screen Scraping automatically maps the search help based on the Query operation.
To map your search help:
1. Select a search help data source from the recording group, and choose Create Mapping.
The Map Operation screen displays with the operation type automatically set to Query.
The generator provides a mapping proposal. You can change the proposal according to your needs.
In the Map Operation screen, a recorded field displays one of three icons, that designates the type of field: Input, Output, and Changing.

(C) SAP AG 74
The following table shows the icons and their designations:
(Changing)
Changing field, it is both an input (import) and an output (export) field.
Model properties which are assigned to a changing field are filterable and will contain values in the query output.
(Export)
Output (export) field, it is for runtime display purposes only.
Model properties assigned to an export field will not be filterable and will contain only values in the query result.
(Import)
Input (import) field.
Model properties which are assigned to an import field are filterable but no results are returned.
These icons help you to identify the expected runtime behavior of the field and the search help entity.
2. Choose the green check mark to map the search help.
If Screen Scraping is your data source, the maximum number of hits it retrieves at runtime is fifty. However, you can use the filter option, $top, to override the default value.
More Information For information about mapping query operation for BOR and RFC data sources, see Mapping the Query Operation [Page 94].

(C) SAP AG 75
Constraints Using Screen Scraping Data Sources Constraints In Screen Scraping, ABAP Dynpro screens are used as data sources. Note the following constraints when using Screen Scraping data sources:
1. There should be at least one Query (Search Help) and one Read operation in a Data Model.
2. The more dynamic a screen is, the less stable will be any Gateway service generated from Data Models based on such Screen Scraping data sources.
Make sure that the transaction you record behaves consistently for the possible input values. Where you are aware that a transaction recorded in Screen Scraping can behave differently at runtime, then the generated service will fail.
3. The following screen elements are not supported by Screen Scraping:
o EnjoySAP controls
All EnjoySAP controls, that is ActiveX controls such as ALV, Tree, HTML, Picture, text editor, and many more.
o ABAP lists
ABAP lists, typically generated in reports and selection pop-ups.
4. Search helps
Search helps are used by Screen Scraping as data source provider for query operations.
The search help definitions are retrieved from the ABAP Dictionary.
A constraint for this approach is that, it cannot support search helps that are provided locally in the screen (using ON VALUE REQUEST command). It only supports search helps that are defined in transaction SE11.
5. Screen-embedded Tables
Table controls can be used only with the Read operation. Currently it is not possible to Update, Create, and Delete table entries.
6. Screen Scraping uses the paging control (page down button) in order to scroll through tables and retrieve all their entries. If no page down button is provided in the screen, only the first rows which are visible in the screen can be retrieved.
More Information See also the constraints for SAP NetWeaver Gateway in the SAP Note number, 1574568

(C) SAP AG 76
Remote Function Calls Remote Function Calls (RFC) is the standard SAP interface for communication between two SAP systems, or between an SAP system and an external system, and calls a function to be executed in a remote system.
The RFC data source contains remote function modules from which you can map selected operations and fields to construct a Data Model. The Data Model Generator then automatically generates the PS (Public Solution) and DC (Data Centric) models and the mapping metadata required by SAP NetWeaver Gateway.
The RFC data source displays on the left-hand side of the Data Model Generator screen and the Data Model details display on the right-hand side:
When the Data Model Generator opens with RFC as the data source, the RFC display on the left is initially empty because there are too many function modules to display.
Select the binoculars icon to restrict the RFC display to function modules you wish to map. You can also search for a particular function module by name.
(Search for BAPIs in RFC data source)
In the popup that opens, enter a number in Maximum No. of Hits to determine the maximum number of function modules you wish to display and select the green check mark to continue.
You can also search for a particular function module by entering its name in the Function Module field. You can use the wildcard character * to aid your search, for example, you can search on *bank*. The function module(s) for which you searched then appear in the RFC section (left-hand side of the screen).
To identify the RFC modules and entities that can be used in the Data Model Generator tool, see Data Model Generator Support for Data Sources [Page 78].
Getting Started in RFC
You can quickly create a Data Model from a function module or BAPI for use as a service in SAP NetWeaver Gateway.
The following is an overview of the tasks for generating a Data Model based on RFC data sources:

(C) SAP AG 77
1. Create your Data Model using RFC as your data source.
For more information, see Selecting the Data Source [Page 48].
2. Map the data entities in the selected function module or BAPI to specific operation types in your Data Model.
For more information, see Creating the Mapping [Page 86].
3. Set keys for the mapped operations. For more information, see Assigning Keys to Operations [Page 104].
4. Generate the Data Model.
For more information, see Generating the PS and DS Data Models [Page 119].
5. Add your model to a Consumption Model.
For more information, see Manually Add Your Model to a Consumption Model [Page 120].
6. Manually configure the system alias for the service document.
For more information, see Configuring the System Alias for your Service Document [Page 122].
Optionally, check and test the generated service.
To create a Data Model using the Data Model Generator tool and to test the generated Gateway service, see SAP NetWeaver Gateway Generators Cookbook [External].

(C) SAP AG 78
Data Model Generator Support for Data Sources This section provides a set of guidelines to help you identify the SAP functions, and transactions that are supported in the data source types of the Data Model Generator tool.
Before you create a Data Model using a data source, you must make sure that the SAP functions you choose in your data source are supported by the Data Model Generator tool.
You do so to enable the Gateway service generated from your Data Model to be Open Data protocol (OData) compliant.
Although, the services created using the Data Model generator are OData compliant, they are not fully compliant.
Due to technical limitations, the following capabilities described by OData are not supported:
• You cannot map different data sources to different nodes in a model, as operations in all data source providers are defined on the model level.
• All data source providers fully support CRUD, and Query operations. However Screen Scraping does not support CUD operations on table entries. For this reason, you can only read the content of table controls but you cannot modify them.
• The operations are supported in their simple form. Mass processing using $batch and deep inserts are not supported.
• Function imports are not supported.
• Create and Query operations can be defined only in the root node.
• Support for $filter, $top, $skip, in BOR and RFC data sources depend on the availability of a corresponding MAX_HITS, or MAX_ROW parameter in the data source.
Not all the query options are supported.
General Guidelines
The following guidelines apply to all data sources:
• Each model must include a Query operation to retrieve instances of the model.
The data source must have a Query operation that can be mapped and provided in an instance of the model, for example, most BAPIs for the BOR data source have a GetList method.
The output of the Query operation must include a Property that has been set as key in the model.
• Each model must include a Read operation to retrieve details for an instance of the model.
The data source must have a Read operation which can be mapped and provided in an instance of the model, for example, most BAPIs for the BOR data source have a Get_Detail method.
The input data for the Read operation must include a Property that has been set as key in the model.
(C) SAP AG 79
BOR
The Data Model Generator supports the operations mentioned below for BOR data sources.
• Query
You base the Query operation for the Data Model on the GetList method (in most cases) of the selected BOR or RFC object.
Guidelines for input parameters
o Input parameters must be simple fields, or a structure, or ranges tables.
Mandatory tables are not allowed.
o If the input parameter of the BAPI mapped to the Data Model is a simple field, or a structure, the service generated will support filters, only the equal to (=) filtering capability.
o If the parameter has ranges, then it will support all the filtering capabilities including greater or lesser than (>, <), wild card (*), equal to (=).
Guidelines for output parameters
o The output parameter of the BAPI must be a table which contains the Property assigned as key.
o The fields in the table must be flattened using the Change Mapping Route screen and mapped directly under the Data Object root node.
o The output table must contain the input fields.
Unless the output table is set as a constant.
o Only one table can be mapped as an output table.
o Nested tables are not allowed.
• Read Operation (GET_DETAIL/GET_PROPERTIES)
You base the Read operation for the Data Model on the GET_DETAIL/GET_PROPERTIES methods (in most cases) of the selected BOR or RFC object.
Guidelines for input parameters
o Must consist of importing parameters for the Property assigned as key of the business object; additional parameters are optional as they can only be set as constant values in the mapping, or use the default values of the parameters.
o The Properties assigned as key should be consistent, at least in terms of their type, with those of the Query operation (BAPI) output table mentioned above.

(C) SAP AG 80
Guidelines for output parameters
o Must include all the fields and properties that you want to make available in the model.
Supports only one Read operation for each Data Model in the Data Model Generator tool.
• Create Operation
Use the Create operation of the selected data object for the Data Model.
Guidelines for input parameters
o Input parameters must be simple fields, or a structure.
If there is a table as an input parameter, it must be optional, since tables are not supported in this operation and cannot be mapped to the model.
o Must include all the fields and properties that you want to make available in the model.
Only one Create operation is supported in a Data Model by the Data Model Generator tool.
The Property that is assigned as key is required, and must be either an input parameter or an output parameter.
• Update Operation (CHANGE)
Use the Update operation of the selected business object (BO) for the Data Model.
Guidelines for input parameters
o The key fields should be consistent, at least in terms of their type and length, with those of the query BAPI output table mentioned above.
o Must include all the fields and properties that can be updated in the model.
Supports only one update operation in a Data Model.
Guidelines for output parameters
Business object data output parameters are not forbidden, but they cannot be mapped either.
Avoid nested tables.
• Delete Operation (DELETE or CANCEL)
Use the Delete operation of the selected object for the Data Model.
Guidelines for input parameters
Must consist of only the key; any additional parameter must be optional, unless it will get constant values or default values.

(C) SAP AG 81
Guidelines for output parameters
Business object data output parameters are not forbidden, but they cannot be mapped either.
Screen Scraping
The Data Model Generator supports the operations mentioned below for Screen Scraping data sources.
• Recording Types
Operation types are listed as recording types in Screen Scraping. For each recording, you must specify the recording type you want to apply to the data entity to be recorded.
Your Data Model can include the following recording types:
o Read
o Update
o Delete
o Create
o Query
Recordings that include the Create, Delete, and Update operations are discarded if they contain tables.
Screen Scraping displays the screens that contain only import fields for the Update, Create, and Delete operations, however, it displays all the screens and their fields regardless of the attribute of the field for the Read operation; for mapping into your Data Model.
For more information, see Overview of Screen Scraping Recordings [Page 61].
RFC
The Data Model Generator supports the operations mentioned below for RFC data sources.
• RFC (Query )
Use the Query operation to retrieve entities list.
Guidelines for input parameters
o Input parameters must be simple fields, or a structured field, or ranges tables.
Tables are not allowed.
o If the input parameter is a simple or a structured field it supports only the equal to (=) filtering capability.
o If the parameter has ranges, then it will support all the filtering capabilities, including greater or lesser than (>, <), wild card (*), equal to (=), and many more.
(C) SAP AG 82
Guidelines for output parameters
o The output parameter must be a table.
The fields in the table must be flattened and mapped to the root DATA object.
o The output table must contain the input fields.
o Only one table can be mapped as an output table.
o Nested tables are not allowed.
• RFC (Read)
Use the Read operation to read entities details.
Guidelines for input parameters
o Must consist of importing parameters for the Properties assigned as key of the business object.
Additional parameters are optional as they can only be set as constant values in the mapping, or use the default values of the parameters.
o The Properties assigned as key should be consistent, at least in terms of their type, with those of the output table of the Query operation mentioned above.
Guidelines for output parameters
o Must include all the data entities you want to make available in the model.
o Nested tables are not allowed.
Supports only one Read operation for each Data Model in the Data Model Generator tool.
o The read output parameters must also contain the query output parameters, and must be OData compliant.
o Nested tables are not allowed.
• RFC Create
Use the Create operation to create entities details.
Guidelines for input parameters
o Input parameters must be simple fields, or a structure.
If there is a table as an input parameter, it must be optional, since tables are not supported in this operation and cannot be mapped to the model.
o Must include all the required parameters to create the model.
All the required parameters should be flattened and available in the Data Object root.

(C) SAP AG 83
Only one create operation is supported in a Data Model by the Data Model Generator tool.
The Property assigned as key must be an output parameter.
• RFC Update (CHANGE)
Use the Update operation to update entities details.
Guidelines for input parameters
o Must consist of the key field, same as read. The key fields should be consistent, at least in terms of their type with those of the query RFC output table mentioned above.
o Must include all the entities that you want to make available in your Data Model.
Supports only one Update operation in a Data Model.
o Must consist of all data entities that must be updated.
o Avoid nested tables. (BAPI programming guidelines).
Guidelines for output parameters
Business object data output parameters are not forbidden, but they cannot be mapped either.
• RFC Delete (CANCEL)
Use the Delete operation to delete entities details.
Guidelines for input parameters
Must consist of only the Properties assigned as key; any additional parameter must be optional, unless it will get constant values or default values.
Guidelines for output parameters
Business object data output parameters are not forbidden, but they cannot be mapped either.

(C) SAP AG 84
Error Handling in the Data Model Generator The Data Model Generator tool has the capability to perform error handling for the runtime of the Gateway services it creates.
The following describes the error handling capabilities for the different data sources for a service.
BOR and RFC: Error Handling for Runtime of Services
BAPIs supply the RETURN structure that can be mapped, technically, to a Property in the Data Model.
Do not map this structure into the model, as the generator tool automatically handles the return messages and adds them to the application log of the Gateway host.
At runtime, the messages are collected from the RFC parameter, RETURN, and logged into the application log.
Later, the tool's error handling mechanism goes over all returned messages to find the leading message, which is the main message that was returned from the business process.
Obtaining the leading message is based on internal heuristics that attempts to discover the following:
• If the SAP backend system message log contains any message of type A (abort), or type E (error), then the message is regarded as a leading message. It is retrieved and sent to the client as an HTTP error.
• In addition, the messages of type S (success), W (warning) or I (information) are not considered as errors, however, they are added to the application log but no message is sent to the client.
To enable out-of-the-box support for error handling, verify the following from the RFC interface:
• The parameter that returns the business message is called RETURN.
• The parameter can be a structure of type BAPIRET2 , and a table of type BAPIRET2_T.
Screen Scraping: Error Handling for Runtime of Services
At design-time, you do not see any return parameter during mapping of recorded screens. However, Screen Scraping automatically captures the messages provided by the running transaction during the runtime of a service and forwards them to the client if required. There are three different uses cases defined according to the returned messages.
The following are the use cases:
• Process Executed Successfully
No messages of type Error or Abort are captured.
Other messages of type Warning, Success, or Information are written to the application log of the Gateway host.
• Administrator Oriented Messages

(C) SAP AG 85
Administrator oriented error messages of type Error or Abort as a result of unexpected behavior of the process, or of the script, such as, unexpected behavior of the transaction. will be captured.
These errors will be added to the application log of the Gateway host, and a standard error message, Processing of request failed. Contact your system administrator will be sent to the client as an HTTP server error.
• Transaction Oriented Messages.
Transaction oriented messages relate to the business of the specific transaction. These messages are actually raised by the transaction itself. For example, error about a wrong input data.
The messages of type Error or Abort will be captured. These messages will be added to the application log of the Gateway host, and the top most message will be sent to the client as an HTTP server error.

(C) SAP AG 86
Creating the Mapping Procedure You must map the data source entities such as BAPIs, function modules in RFCs, transaction recordings to your Data Model. Field labels from the data source are also mapped and appear automatically in the PS (Public Solution) Data Model that is subsequently generated.
In this section, the data source used as an example, is BOR. The differences for Screen Scraping and RFC are highlighted.
Always familiarize yourself with the documentation for the specific SAP function, BAPI, or transaction you want in your Data Model, including the following:
• Identify the parameter assigned as key. Later, you must map the key parameter to the Data Model.
• Importing parameters of the function or BAPI can be marked as constant values in order to retrieve additional information.
In addition, we recommend that, first map the Query operation into your Data Model before mapping other operations, as the generator automatically detects and proposes the Property to set as key in the Query operation.
Later, the generator automatically proposes the same Property as key for any other operations that you try to map.
To map into the Data Model, proceed as follows:
1. Find the BAPI or module in the object list of the data source screen.
If Screen Scraping is your data source, select and expand the recording group that contains the recordings you want to make available in your Data Model.
Screen Scraping does not allow you to map the recording group to your Data Model, as this can contain more than one recording.
2. Expand the BAPI or module (for example, in case of BOR, choose User) to display its signature: key parameters (for example, UserName), operations as BAPIs (for example, GetList), and parameters of these operations.
3. Select the data source attribute you wish to map and choose Create Mapping to map it to the Data Model. The Map Operation screen displays.
For example, to map the Read operation, select GetDetail from the data source and choose Create Mapping.
If Screen Scraping is your data source, select the recording or search help data you want to map to your Data Model and proceed as described above.
Some recorded screens display more fields than the number of fields presented to you during the recording, as the screen presented during recording has been customized to hide some of its fields.

(C) SAP AG 87
Map to your model, only the fields that were visible during the recording of the screen.
At design time, if you map fields that were not visible during the recording, but are available in the recorded screen, consider that, at runtime, the process will work dynamically and will not work in some cases.
For that reason, we do not recommend that you map such fields.
If you select Query (GetList), all the exporting, changing, or table parameters are mapped to the root Data Object of the Data Model.
The importing parameters get the constant value, Initial. You can only select one export table parameter per Data Model with the Query operation.
Any other import fields or range tables can be mapped to filter Properties in the Data Model. Range tables can be mapped to range Properties.
4. Select only the fields you wish to use in the Data Model (that is, the fields that will be exposed by the generated service) by selecting the checkboxes next to them.
5. Optionally, select Change Mapping Route to change the proposed mapping route or assign a constant value to a data source field.
When creating a new mapping, the mapping route column contains a mapping proposal to the Data Model. This proposal is provided according to internal heuristics that consider the operation type and the data source type.
Verify the proposed mapping and make your changes accordingly. The constant value, Initial, is used when the generator tool cannot propose a mapping for a specific field.
6. Select the green check mark at the bottom to save it, when you have finished the mapping. The Map Operation screen closes.
The Structure tab displays the mapped operation in the Data_model – Operations section, with its mapped Data Objects and Properties appearing in the Data Model node of the Data Model section.
You can continue to map more operations and build your Data Model structure.
You can only map one operation from each operation type per Data Model, that is, only one Read operation per Data Model, only one Query operation per Data Model, and so on.
The next step is to set the key for a Property in each mapped operation to the Data Model, if no key Property has been proposed.
More Information Assigning Keys to Operation [Page 104].

(C) SAP AG 88
Overview of the Map Operation Dialog You can open the Map Operation dialog screen to do the following:
• Create new mappings from the data source to the Data Model by selecting an object in your data source screen, and choosing the Create Mapping in the Structure tab.
You get an error if you choose Create Mapping without selecting any object from the data source.
• Edit the mapped operations in the Data Model by selecting Change Mapping.
If you have more than one operation mapped to the Data Model, you get an error if you choose Change Mapping without selecting any operation from the Structure tab.
The Map Operation dialog screen displays the following:
• Operation Type:
The following are the operation types:
o Query
For more information, see Mapping the Query Operation [Page 94].
o Read
For more information, see Mapping the Read Operation [Page 99].
o Create
For more information, see Mapping the Create Operation [Page 100].
o Update
For more information, see Mapping the Delete or Update Operations [Page 102].
o Delete
For more information, see Mapping the Delete or Update Operations [Page 102].
If BOR or RFC is your data source, select from Operation Type, the operation you want to map. The operation type you select displays in the Operation Type field and the screen refreshes to show the data source entities with their mapping proposals for the operation.
If Screen Scraping is your data source, the operation type is automatically selected depending on the Recording Type included in the recording.
• Expand and Collapse All:
Use if you want to display or hide all the attributes and fields for the operation. The Collapse All button at the top makes only the top level attributes of the operation visible, while the Expand All button expands all the attributes and their fields.

(C) SAP AG 89
• Change Mapping Route:
Use if you want to change the path of a Property in the Data Model, (relocating a Property from its node to the root node is referred to as flattening), or rename a Property.
For more information, see Change Mapping Route [Page 113].
• Set Constant Value:
Use to manually set constant values for input parameters of a Property.
For more information, see Setting Constants [External].
• Reset Constant Value:
Use if you want to delete the constant values for input parameters of a property.
For more information, see Setting Constants [External].
• Set Range Table:
Set a table structure as a range table to the Data Model Property.
This button is available only when you are mapping the Query operation in BOR and RFC data sources.
Ranges table are not applicable if Screen Scraping is your data source.
For more information, see Ranges Table [Page 96].
• Reset Range Table:
Use if you want a ranges table to become a generic table.
This button is available only when you are mapping the Query operation in BOR and RFC data sources.
For more information, see Ranges Table [Page 96].
• Mapped Attributes:
The Mapped Attributes section (main part of the screen) shows the data source signature: input, output, and changing parameters, and Data Objects (structures or tables) and attributes (fields) of the selected operation. Each item has an icon in front of it to indicate its type.
The following are the column headings in the Mapped Attributes section:
o Attributes:
The Attributes section (main part of the screen) shows the data source signature of the selected operation.
An attribute displays one of three icons, that signifies whether that field is an import, or an export field, or both.

(C) SAP AG 90
The following are the icons and their designations:
(Import)
An attribute is denoted as an import field type when it receives data to be sent to a Gateway service at runtime. It is also referred to as input (import) field. It is for runtime display purposes only. It cannot be used as a data source entity.
(Export)
An export attribute only returns data from a Gateway service at runtime. It is also referred to as output (export) field, which can contain data entities that can filter content at runtime.
(Changing)
An attribute can have both import and export attributes, denoting it as capable of sending and returning data to the Gateway service.
It is also referred to as changing field, it is both an input (export) and an output (import) field.
It can contain entities that can filter content at runtime.
These icons help you to identify the expected runtime behavior of the field and the operation.
o Mandatory:
The Mandatory column contains a read-only checkbox, which is selected if the attribute is mandatory in the data source. This does not mean it is mandatory in the Data Model.
o Default Value:
The Default Value column displays the default value if it has been set in the data source.
In Screen Scraping, this column is named Recorded Value and displays the value of the Property as recorded.
o Constant Value
The Constant Value column displays any constant values that have already been set for input parameters. By default, Initial is set for a constant value. No value is retrieved at runtime for attributes with the constant value Initial.
You can change these and set constant values by choosing the Set Constant Value button.
For more information, see Setting Constant Values [External].
o Description:
Description contains the descriptive text for the field from the data source.

(C) SAP AG 91
o Mapping Route
The Mapping Route column shows the proposed mapping path for the attribute, whether is directly under the root node or within a sub node. There is an icon for mapping path.
The New Property column contains a read-only checkbox, which is checked if it is new and not yet part of the Data Model structure.
When creating or changing the mapping, certain validation rules apply.
For more information, see Mapping Validation Rules [Page 92] .

(C) SAP AG 92
Mapping Validation Rules The following validation rules apply when mapping data source objects and attributes to a Data Model:
Keys Property
Make sure that, you map the key parameters from your data source to each operation in the Data Model. Failure to do so will result in warnings.
Later, you must define the Property (key parameter) as key.
General Rules
• The cardinality of the target Data Object must be the same as that of the source Data Object.
• You cannot merge fields from two different source Data Objects with cardinality 0..n into the same target Data Object.
• Property names must be unique in a node, and the node names must be unique in a model.
The generator renames additional fields with similar name and type as a Property that has already been defined as key.
• The generator will not propose to assign the key to a Property with a name that is different from the parameter set as key in the data source.
In addition, it will not assign an a key to an import parameter for Query, or an export parameter for Read, Update, and Delete.
• There is no duplicate mapping for objects of type export.
• Merging of data sources with cardinality 0..n is not possible. Parameters of a table in a data source can be mapped only to a Property in the specific related node with cardinality 0..n
• You can have more than one data source entity of type import mapped to the same Data Model attribute. Also, you can have a single data source entity of type export mapped to the Data Model.
Rules for Mapping Query Operations
• You can only map import and export parameters to the Properties in the root Data Object.
Usually, import fields are used for filtering or as constants.
• You must map all root Data Object Properties to the output structure of the Query.
• You must map one output parameter.
• If you are selecting a table, you can only select one table at a time.
• The generator tool checks that, each Data Model has a single data source entity mapped to it, with a maximum of one input and one output mapping.
(C) SAP AG 93
• If RFC or BOR is your data source, you must select one table.
You can select more than one ranges table.
Rules for Mapping the Create Operation
• You must map at least one input parameter.
• You can either map importing single attributes to Data Model Properties or you can assign constant values to them.
• You can either 'flatten out' fields of importing structures and map them to Data Model root Properties (they cannot be mapped to nested Data Objects in the Data Model) or you can assign constant values to them.
• You cannot map tables; you can only assign constant values to the table fields, but then you can only pass one line filled with these constants.
Rules for Mapping the Read, Update and Delete Operations
• The mapping proposal in the Delete operation for all the attributes is set as constant, Initial.
• For Read, you must map at least one input and one output parameter.
• For Update and Delete, you must map at least one input parameter.
Mapping Proposal Validations
When you want to create or change a mapping, the generator tool provides suggestions for mapping, referred to as mapping proposals.
The generator tool checks for the following:
• When a Property has already been mapped to an attribute from the data source and it is in the root node of an operation, the same attribute will used as the mapping proposal for each operation and type (import and export), so long as it has a similar name and type.
• When mapping an operation, the tool can detect whether a node or an attribute to be mapped already exists in another operation that has already been mapped.
If detected, the attribute is automatically renamed by adding an underscore character and a number to the end of the name. The number is added incrementally depending on the number of such instances.
For example, if the attribute Name is already mapped, it will be rename as, Name_1

(C) SAP AG 94
Mapping the Query Operation When mapping the Query operation in a Data Model, you can map import parameters and filter the output by setting ranges tables, for example, to enable searching for flights between certain date ranges.
In this section, the example for mapping the Query operation is based on the BOR data source.
Where Screen Scraping is your data source, search help is the data source provider for your Query operation.
Range tables are not applicable if Screen Scraping is your data source.
Procedure
To map the Query operation and set range tables, proceed as follows:
1. Create your Data Model. For information, see Selecting the Data Source [Page 48].
2. Select a GetList operation from the data source and choose Create Mapping. The Map Operation screen displays.
The Query method in some cases may not be called, GetList, however, most Query methods use this name.
3. Select Query from the drop-down list in the Operation Type field at the top of the screen.
Mapping routes (or constant values) are proposed and displayed in the Mapping Route (or Constant Value) column.
4. Select or remove the selections to obtain the table parameters you want and choose Set Range Table. The Map Range Table popup displays.
For more information, see Ranges Table [Page 96].
5. Choose Add. The Add Mapping Route popup displays the available Properties from the Data Model view.
6. Select a Property and choose the green check mark to continue.
The Property displays in the Mapping Route section of the Map Range Table popup. The bottom half of the popup shows any Semantic or Constant Value for each parameter of the range table.
7. Define a meaningful, valid semantic for each attribute by selecting the icon at the end of the Semantic field.
8. Select All buttons are also available for both sections of the popup. When you have finished editing the range table, choose the green check mark to continue.
The popup screen closes and the range table parameters are greyed out when you return to the mapping screen.

(C) SAP AG 95
9. Choose the green check mark on the mapping screen to save your mapping for the Query operation.
10. Generate the Data Model.
For more information, see Generating the PS and DS Models [Page 119].
To delete a mapping route, select it in the top half of the popup and choose Remove.
Limiting the Number of Items Returned in a Query
You can limit the number of items returned in a Query. Some query BAPIs and RFCs allow you to restrict the number of returned items by means of a maxrows importing parameter.
You can either set a constant value to maxrows and by default limit the returned items, or you can rely on the runtime handling of maxrows.
In both cases, if the returned items are controlled from the consumption channel (respectively with the $top parameter in OData), the runtime component tries to pass the value to the BAPI or RFC but only if there is an importing parameter with one of the following names:
• MAXROWS
• MAX_ROWS
• MAX_HITS
• MAX_LINES
• MAX_CNT
You can use $top and $skip query string attributes to page through table results.
$top can be facilitated by mapping against MAXROWS or similar parameters as listed above.
$skip can be used in your custom code implementation such as, a BADI,/iwfnd/badi_ext_bop_rfc.
If you set a constant value and the $top parameter is also defined, the number in the $top parameter takes precedence. There is no default value.
Limiting the number of items returned in a Query is not applicable if Screen Scraping is your data source.
More Information Creating the Mapping [Page 86]
Changing the Mapping [Page 111]
Getting Search Help Data Source [Page 72]

(C) SAP AG 96
Ranges Table A ranges table describes the structure of an internal table for administering complex areas, that is the type of an internal ranges table in the ABAP program.
The row type of a ranges table type has a fixed structure. The row type consists of the 4 components SIGN (sign), OPTION (comparison operator), LOW (lower limit) and HIGH (upper limit) in this order.
The Data Model Generator can recognize ranges table, if they fit the pattern the generator tries to match (that is, it contains HIGH, LOW, SIGN, and OPTION parameters having the defined types). If it recognizes them, all parameters are greyed out together with their settings.
All the table's parameters are greyed out, and their settings are only available on the Map Range Table popup (obtained by selecting the Set Range Table button). Very rarely, the table's parameters may not be greyed out, as the structure is not recognized because fields have different names.
Setting Ranges Table Parameters
Generic ranges tables contain additional parameters, typically, ones that specify for which parameter the range is valid.
If a ranges table is not automatically recognized, or if you want to set a particular table structure as a range table, proceed as follows:
1. From the Map Operation screen, select the ranges table node by choosing the arrow at the left of the table structure name, and then click Set Range Table.
The Map Range Table popup displays, split into two sections with Mapping Route at the top and details of the selected mapping route at the bottom (both sections are initially empty).
2. Choose Add and define a meaningful, valid semantic for each attribute by selecting the icon at the end of the Semantic field.
The semantic specifies how the field is handled and defines its role in the range expression.
Mandatory semantics are HIGH, LOW, SIGN, and OPTION according to the ranges table semantics.
For generic ranges tables, you can also set the semantic Parameter to specify the ranges table attribute that will be filled with the name of the BAPI or RFC parameter for which the range is valid.
If you mark a range table attribute with this semantic, it will automatically be filled with the name of the data source parameter to which the Data Model Property is mapped.
In certain cases, populating the range table attribute with this value would not be correct, therefore you can choose to specify constant value(s).
The semantic is subject to the following validation:
o Two or more parameters cannot have the same semantic. For example, two different parameters cannot both have the SIGN semantic.

(C) SAP AG 97
By default, no semantic value is specified. When no semantic value is specified, you must specify a constant value.
Place constant values in apostrophes, for example, 'Label'.
o You cannot set at the same time both the Semantic and Constant Value fields.
3. Choose the green check mark to save your changes and close the Map Range Table screen.
Choose Reset Range Table in the Map Operation screen. The selected table becomes a generic table type. All the selections are removed for the attributes.
Example Using an example based on the BOR object, MaintenanceOrderBAPI, you can map the method OrderHeadGetList to the query operation for the Data Model.
The method, OrderHeadGetList, is implemented by the BAPI BAPI_ALM_ORDERHEAD_GET_LIST, which contains an input range table ItRanges. This is a generic range table which can hold selection for various fields.
To enable the runtime Gateway service that will be generated from the Data Model, to perform various tasks, such as, support filtering using Order Enter Date, first obtain details about the method from the documentation for the specific BAPI.
According to the documentation, to support such filtering, the constant value, OPTIONS_FOR_ENTER_DATE should be assigned to the field, FIELD_NAME in the table, ItRanges.
To map the query operation so that it supports such filtering, choose the relevant BAPI, OrderHeadGetList as the data source to map to the Data Model.
1. In the Map Operation screen, select the range table, ItRanges and choose Set Range Table.
2. Select Add. A popup with the model structure displays.
3. Browse to locate and select the property, ENTER_DATE and choose OK.
The generator attempts to match the range table fields with the fields of the standard ABAP range structure, such as, Sign, Option, High, and Low. If there is a match, the semantic will be provided automatically.

(C) SAP AG 98
(Map range table)
In this example, the generator identified the range table fields, Sign and Option, and assigned the corresponding semantic, S, and O, to them respectively. For the range table fields, LOW_VALUE and HIGH_VALUE, the generator found no match, so you have to manually assign the semantic, Low and High.
4. To set the constant value, OPTIONS_FOR_ENTER_DATE, in the range table field, Field_Name, remove any semantic value assigned in the Semantic column, and manually enter the value, OPTIONS_FOR_ENTER_DATE, in the Constant Value column.
The mapping to support filtering for Order Enter Date is now complete.
5. Choose the green check mark.
You can follow the above example to enable support for various filtering capabilities.
In addition, you can use the SAP NetWeaver Gateway Generators Cookbook [External] to quickly create a Data Model and test the generated Gateway service using the Data Model Generator tool.
More Information Examples for using ranges table are available in the SAP NetWeaver Gateway Generators Cookbook [External].
Mapping the Query Operation [Page 94].
(C) SAP AG 99
Mapping the Read Operation Procedure When mapping the Read operation in a Data Model, you can map input, output, and changing parameters of the Properties.
Your must include the constant values that you require.
If Screen Scraping is your data source, get a search help (Query) entity from a recording that includes the Read operation.
More Information Creating the Mapping [Page 86].
Changing the Mapping [Page 111]
In addition, you can use the SAP NetWeaver Gateway Generators Cookbook [External] to quickly create a Data Model and test the generated Gateway service using the Data Model Generator tool.
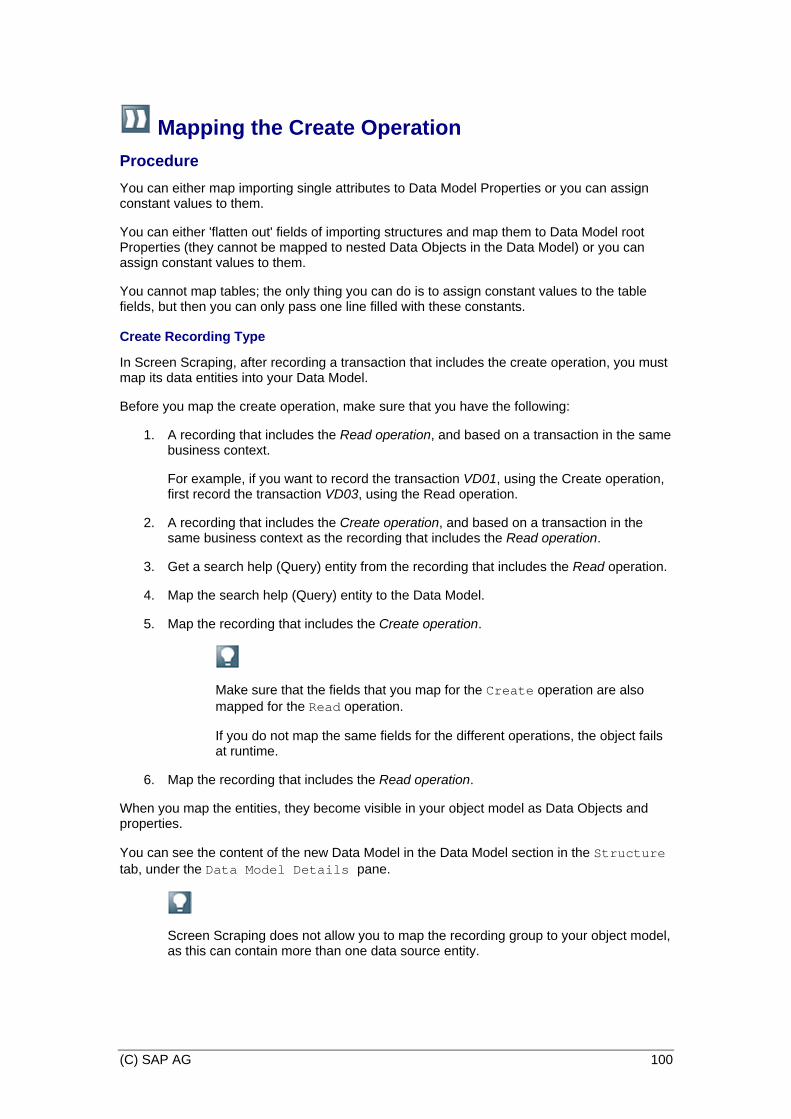
(C) SAP AG 100
Mapping the Create Operation Procedure You can either map importing single attributes to Data Model Properties or you can assign constant values to them.
You can either 'flatten out' fields of importing structures and map them to Data Model root Properties (they cannot be mapped to nested Data Objects in the Data Model) or you can assign constant values to them.
You cannot map tables; the only thing you can do is to assign constant values to the table fields, but then you can only pass one line filled with these constants.
Create Recording Type
In Screen Scraping, after recording a transaction that includes the create operation, you must map its data entities into your Data Model.
Before you map the create operation, make sure that you have the following:
1. A recording that includes the Read operation, and based on a transaction in the same business context.
For example, if you want to record the transaction VD01, using the Create operation, first record the transaction VD03, using the Read operation.
2. A recording that includes the Create operation, and based on a transaction in the same business context as the recording that includes the Read operation.
3. Get a search help (Query) entity from the recording that includes the Read operation.
4. Map the search help (Query) entity to the Data Model.
5. Map the recording that includes the Create operation.
Make sure that the fields that you map for the Create operation are also mapped for the Read operation.
If you do not map the same fields for the different operations, the object fails at runtime.
6. Map the recording that includes the Read operation.
When you map the entities, they become visible in your object model as Data Objects and properties.
You can see the content of the new Data Model in the Data Model section in the Structure tab, under the Data Model Details pane.
Screen Scraping does not allow you to map the recording group to your object model, as this can contain more than one data source entity.

(C) SAP AG 101
In addition, you can use the SAP NetWeaver Gateway Generators Cookbook [External] to quickly create a Data Model and test the generated Gateway service using the Data Model Generator tool.
For more information about mapping, see Creating the Mapping [External].
More Information Changing the Mapping [Page 111]
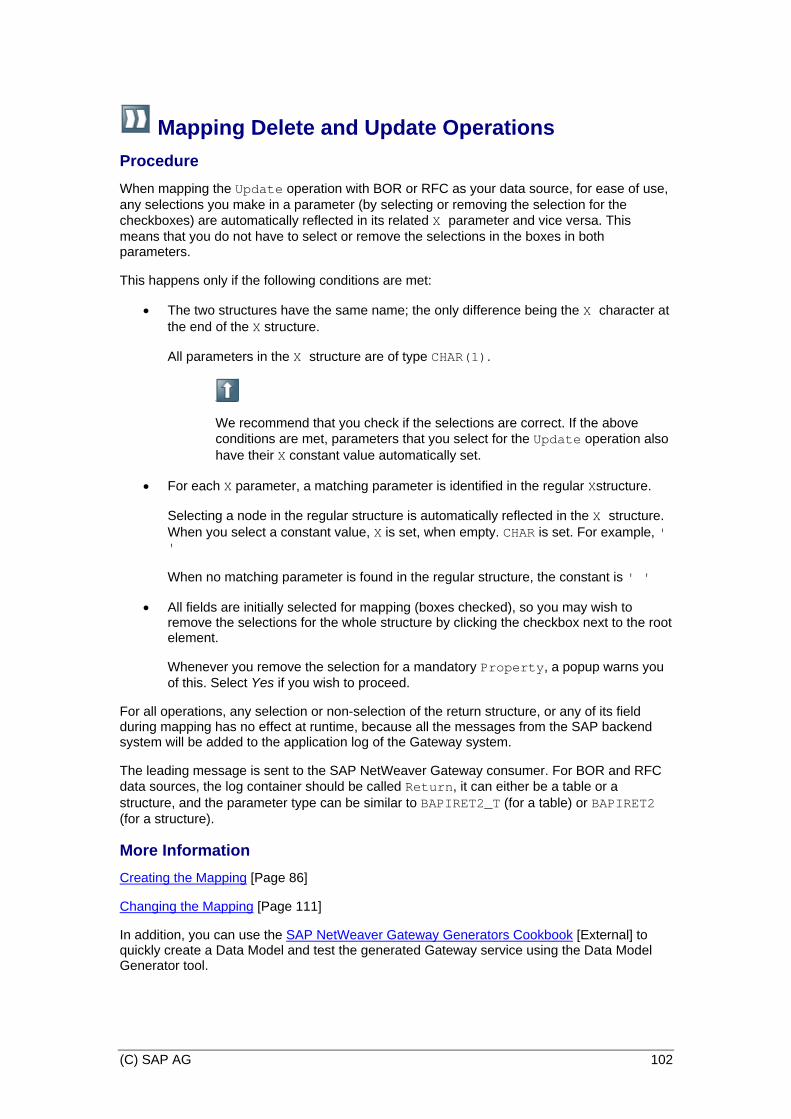
(C) SAP AG 102
Mapping Delete and Update Operations Procedure When mapping the Update operation with BOR or RFC as your data source, for ease of use, any selections you make in a parameter (by selecting or removing the selection for the checkboxes) are automatically reflected in its related X parameter and vice versa. This means that you do not have to select or remove the selections in the boxes in both parameters.
This happens only if the following conditions are met:
• The two structures have the same name; the only difference being the X character at the end of the X structure.
All parameters in the X structure are of type CHAR(1).
We recommend that you check if the selections are correct. If the above conditions are met, parameters that you select for the Update operation also have their X constant value automatically set.
• For each X parameter, a matching parameter is identified in the regular Xstructure.
Selecting a node in the regular structure is automatically reflected in the X structure. When you select a constant value, X is set, when empty. CHAR is set. For example, ' '
When no matching parameter is found in the regular structure, the constant is ' '
• All fields are initially selected for mapping (boxes checked), so you may wish to remove the selections for the whole structure by clicking the checkbox next to the root element.
Whenever you remove the selection for a mandatory Property, a popup warns you of this. Select Yes if you wish to proceed.
For all operations, any selection or non-selection of the return structure, or any of its field during mapping has no effect at runtime, because all the messages from the SAP backend system will be added to the application log of the Gateway system.
The leading message is sent to the SAP NetWeaver Gateway consumer. For BOR and RFC data sources, the log container should be called Return, it can either be a table or a structure, and the parameter type can be similar to BAPIRET2_T (for a table) or BAPIRET2 (for a structure).
More Information Creating the Mapping [Page 86]
Changing the Mapping [Page 111]
In addition, you can use the SAP NetWeaver Gateway Generators Cookbook [External] to quickly create a Data Model and test the generated Gateway service using the Data Model Generator tool.

(C) SAP AG 103
Setting Constant Values Constant Values enable you to specify which fields in the data source should be marked as constants in the mapping.
When creating or changing the mapping, you can manually set constant values for changing parameters.
Select the Property and choose Set Constant Value from the Map Operation screen. The Set Constant Value popup displays, with the Property in the Entity Name field.
Where Initial is set for the constant value, at runtime, the Data Model ignores the field, as though you did not select the field.
If BOR or RFC is your data source, you must enclose string values in apostrophes, for example,'Value'.
In case of RFC, using the data source entity BAPI_USER_GETLIST, its key parameter is USERNAME. After selecting the Properties you want to map, select the Property WITH_USERNAME and set a constant value for it by entering the character 'X'.
Do not use apostrophes for numeric values or the following ABAP statements, as these statements will be converted accordingly at runtime:
• ABAP_TRUE
• ABAP_FALSE
• SPACE
• Initial
• SY-... (for example, SY-LANGU)
You can add constants for flat structures and for only one table row. You can assign constant values to components of structures or for tables as well, but in the latter case, one table row instance will always be populated with constant values and passed to the data source.
To delete a constant value, choose Reset Constant Value in the Map Operation screen.
More Information Overview of the Map Operation Dialog [Page 88]
Creating the Mapping [Page 86]
Changing the Mapping [Page 111]
In addition, you can use the SAP NetWeaver Gateway Generators Cookbook [External] to quickly create a Data Model and test the generated Gateway service using the Data Model Generator tool.

(C) SAP AG 104
Assigning Keys to Operations Procedure You must set root node keys for the operations that you have mapped to your new Data Model.
A warning message displays when the Data Model Generator comes across a mapped operation in the model without a key.
The Data Model Generator automatically assigns a root node key to a Property in all operations of the BOR data source.
If Screen Scraping is your data source, only the Query operation is automatically assigned a root node key Property.
The following validation rules apply when setting a Property as key in a Data Model:
• The generator proposes to assign a key to the first Property, if there is more than one Property with a similar name and type.
• Where your data source is BOR, there is no proposal for assigning a key if no attribute in the data source is defined as key.
In BOR (and Screen Scraping Query operation only), we recommend that you verify if the proposed key Property for the model is the correct one, as the generator is capable of proposing the wrong key Property based on its heuristics.
• Where your data source is RFC, there is no key proposal.
• If a key Property already exists in a Data Model, the generator does not propose any key assignment.
For Generic Channel Data Models, only the S_COR_ID-VALUE is defined as the key for the Data Model, in the Map Operation screen.
You cannot edit and set keys for Generic Channel Data Models in the Structure tab screen.
You manually set and map the key Property for the Data Model in the Structure tab. You can choose any Property in each mapped operation to be a key.
When you set a Property as a key, it is automatically moved to the root node and a delegated key Property with the same name is added to all sub-nodes that already exist or will be created.
A delegated key Property enables the node to be identified at runtime.
You cannot edit a delegated key Property.

(C) SAP AG 105
To set a key to an operation in the Structure tab, proceed as follows:
1. Select Expand all in the Data Model screen to display all the Properties of Data Objects and the origin of all their Properties.
2. Select the Property you want as the key field.
3. Choose theSet/Reset Key icon above the Data Model tree view or right-click the field and choose Set Key.
The key icon displays for the Property and the mapping route displays in the format, for example, READ(USER/GetDetail)ADDITIONAL_INFO/UNIT
After setting the keys for the operations, you can either generate the Data Model directly, or edit it further.
To remove the key assigned to a Property, choose Set/Reset Key.
More Information Generating the PS and DS Data Models [Page 119]
Editing a Data Model [Page 107]

(C) SAP AG 106
Setting Keys for Table Entries Procedure You must set a key for each mapped table entry for which you want to enable access at runtime. The key must be unique for each entry.
The mapped table entries are part of the mappings in your Data Model.
You can generate a Data Model that contains table entries only when at least one of the entries has a unique key defined.
To set a key for a mapped table entry, proceed as follow:
1. Expand the table node in your Data Model in the Data Model screen.
2. Select the field you want to set as the table key.
3. Click the key icon.
At runtime, you can obtain all the data entries in a table mapped to the Data Model.
Screen Scraping: Recording a Table with Entries
If Screen Scraping is your data source, then the movement within the table is directly dependent on the same functionality in the table that was recorded. If support for movement within tables is not available in the recorded table, only the table entries available within the size of the recorded screen are displayed at runtime.
In addition, to get all the entries in a table during the recording, do the following:
• Focus the cursor in one of the fields of the table, and click the Page down icon.
• Select the same field again and click the Page down icon once more.
If you click the Page down icon only once during the recording, you will only get the entries that are visible on the screen.
More Information Assigning Keys to Operations [Page 104]

(C) SAP AG 107
Editing a Data Model You can edit an existing Data Model in the Data Model Generator tool.
You must know the name of the Data Model you want to edit. If you know part of the name of the model, you can search for it by pressing F4 in the Model Name field of the Data Model Generator screen.
Editing the Data Model
To edit an existing Data Model, proceed as follows:
1. Use transactionSE80 to open the Object Navigator screen.
2. Select GW Data Model from the drop-down list.
3. Enter the name of the model you want to edit in the Model Name field , for example, ZJWTEST_0001_PS, and then click the glasses icon.
If you want to search for the name, you can use the wild card character '*' as part of the search term.
The Find Data Model popup opens with the name you entered.
4. Click the check mark to search for all the forms of the name, for example, ZJWTEST_0001_PS.
You can edit the model and its operations, Data Objects, Properties, and mappings.
You cannot change the name of an existing Data Model as well as its data source.
5. Double click your Data Model name in the Find Data Model screen to display its content in the Repository Browser.
6. Under Object Name, double click your Data Model name at the top of the hierarchy of content, and click the Open the generator icon above, alternatively, press Ctrl+Shift+F12 to switch to the Data Model generator screen.
7. Click Display <-> Change (Ctrl+fF1), to edit your model.
Displaying the Data Model
You can display an existing Data Model in the Data Model Generator. When you choose to display the model, you cannot edit anything in the model.
To display the Data Model, open the Data Model Generator and choose Display. The Display <Data Model — Data Model name> screen displays, showing the Display Mapping button in the Structure tab.
In the menu above the data source, you can switch to the edit mode using Display <->Change or switch to the Object Navigator screen in the ABAP Workbench.
Process The following section provides an overview for editing the content of the Data Model in the Data Model Generator tool.

(C) SAP AG 108
You can only edit certain objects of a Data Model created using the Data Model Generator, in transaction SE80.
For that reason, we recommend that you edit Data Models created in the Data Model Generator using the Data Model Generator tool.
Editing the Content of the Data Model
After you have mapped the operations, properties and objects to the Data Model, you can edit and change the content of the Data Model.
You can edit the content of the Data Model in the Data Model Generator tool as follows:
• Edit the mappings in the Data Model.
For information, see Editing the Mapping in Your Data Model [Page 109].
• Add and delete the Properties, and the Data Objects in your Data Model.
For information, see Adding and Removing Properties, and Data Objects [Page 114].
• Reassign keys to operations.
For information, see Reassigning the Key of a Property [Page 118].

(C) SAP AG 109
Editing the Mapping in Your Data Model Procedure You can edit the mapping for an operation in the Structure tab of the Data Model Generator tool as follows:
• Add and remove mappings in the Data Model.
• Reassign or flatten a Property to a Data Object.
• Rename a Property.
Adding and Removing Mappings in the Data Model
To change the mapping for an operation:
1. Select the operation with the mapping you want to change in the Operations section of the Structure tab.
2. Choose Change Mapping.
The Map Operation screen displays, with the selected operation displaying in Operation Type.
The Data Objects and Properties of the selected operation display in the Mapped Attributes section (main part of the screen), showing the existing mapping.
3. Expand the Data Objects and make new selections or remove selections for the Properties you want to change.
If you remove the selections for the Properties, the mapping route and the read-only checkbox in the New Property column are no longer visible.
4. Remove the selection for the Keep Fields Without Mapping box at the bottom of the screen to ensure that fields left without mapping after the changes are removed from the Data Model’s structure in the Data Model tree view.
5. Select the green check mark at the bottom when you have finished changing the mapping. The screen closes and the changed structure displays in the Data Model tree view at the bottom of the screen.
Deleting a Mapping
You can delete the mapping for an operation in the Structure tab of the Data Model Generator tool. When you delete a mapped operation, it is removed from the Operations section of the Structure tab screen.
To delete the mapping for an operation, proceed as follows:
1. From the in the Operations section in Structure tab screen, select the operation for which you want to delete the mapping.
2. Choose Remove Mapping and a popup displays, asking you to confirm you wish to delete the mapping.
3. Select Delete All Occurrences of the Method from the Data Object box if you wish to delete all occurrences of this operation from the Data Model.

(C) SAP AG 110
4. Select Yes and the operation and its structure are removed.
Renaming and Reassigning a Property to Data Object
You can change the mapping route of a Property and also rename a Property using Change Mapping Route in the Map Operation screen.
For more information, see Changing a Mapping Route [Page 113].

(C) SAP AG 111
Changing the Mapping You can change the mapping of an operation if required.
In addition, you can view the Properties that have been proposed or set as a key in the Change Mapping Route view.
Procedure To change the mapping of an operation:
1. With the Structure tab displaying on the right-hand section of the screen, select the operation whose mapping you wish to change in the Operations section at the top.
2. Choose Change Mapping.
The Map Operation screen displays, with the selected operation displaying in the Operation Type box at the top (for example, Read).
The Data Objects and Properties of the selected operation display in the Mapped Attributes section (main part of the screen), showing the existing mapping.
(Map Operation screen)
3. Remove the selection for the Data Object whose mapping you wish to change.
The mapping route and the read-only checkbox in the New Property column are no longer visible.
4. Expand the Data Object again. All the Properties are visible and they are all deselected.
5. Select the Property that you wish to map, so that this Property and the Data Object are selected.

(C) SAP AG 112
6. Uncheck the Keep Fields Without Mapping box at the bottom of the screen to ensure that fields left without mapping after the changes are removed from the Data Model’s structure in the Data Model tree view.
7. Select the green check mark at the bottom when you have finished changing the mapping.
The screen closes and the changed structure displays in the Data Model tree view at the bottom of the screen.
More Information Overview of the Map Operation Dialog [Page 88]
Creating the Mapping [Page 86]

(C) SAP AG 113
Changing a Mapping Route You can change the mapping route of a Property and also rename a Property using the Change Mapping Route button on the Map Operation screen.
You can view the Property that has been defined or proposed as a key for an operation in the Change Mapping screen.
In addition, you can view the Property that has been defined as a delegated key.
You cannot edit a delegated key Property.
Procedure 1. With the Structure tab displaying on the right-hand section of the screen, select the
required operation in the Operations section at the top.
2. Choose Change Mapping.
The Map Operation popup screen displays, with the existing Data Object(s) and their Properties selected.
The Change Mapping Route button is also available from the Map Operation screen.
3. Select a Property and choose Change Mapping Route.
The Change Mapping Route popup displays, with the selected Property in the Property Name field at the top and the proposed mapping structure (from the Map Operation screen) underneath.
4. Select the Data Object to which you want to map the selected Property.
o To rename a Property, simply delete the existing name in the Property Name field and enter a new name.
5. Choose the green check mark at the bottom to save the new mapping route or new name and return to the Map Operation screen. The new mapping route displays in the Mapping Route column.
More Information Overview of the Map Operation Dialog [Page 88]
Changing the Mapping [Page 111]

(C) SAP AG 114
Adding and Removing Properties, and Data Objects Procedure You can edit the Properties, Data Objects, and Operations, that have already been mapped in a Data Model.
You edit these objects in the Data Model by adding, deleting or changing them in the Structure tab of the Data Model Generator tool.
If the object you want to edit is a mapped operation, then select the mapped operation you want to change in the Operations section of the Structure tab.
For information on how to edit mapped operations, see Editing the Mapping in Your Data Model [Page 109].
Editing a Property or a Data Object
If the object you want to edit is a Property or a Data Object, then proceed as follows:
1. Select Expand all in the Data Model screen of the Structure tab, to display all the Properties of Data Objects and the origin of all the Properties.
The origin shows the operation type connecting to the Property, the original name of the operation, and the root of the original mapped attribute.
2. Right click the node to which you want to add a new object, and choose Add Data Object or Add Property.
3. For a new Data Object, specify the following:
o Data Object Name
Name of the new Data Object in the Data Model.
o Cardinality
Cardinality of the Data Object.
Select the required cardinality for the new Data Object. For example, If the Data Object is a structure, the cardinality is typically 0..1. If the Data Object is a table with multiple instances, the cardinality is typically 0..n.
o Label
The label for the Data Object. This is stored in the metadata of the Data Model.
4. For a new Property, specify the following:
o Property Name
Specify a name for the new Property in the Data Model to which you can map a data source attribute.

(C) SAP AG 115
o Data Type
Specify the Entity Data Model (EDM) type. The following are the data types:
Edm.Guid
A unique identifier value. You can map it to the predefined ABAP Types: CHAR LENGTH 32. The internal representation does not contain any '-'.
Edm.Double
A floating point number with 15 digits precision. Can be mapped to the predefined ABAP Type FLOAT.
Edm.Single
A floating point number with seven digits precision. You can map it to the predefined ABAP Type: FLOAT.
The value range is between 1.18E-38 and 3.40E+38. The serialization always formats the value with 8 decimal places.
Edm.Int16
A signed 16–bit integer value. You can map it to the predefined ABAP Types: INT2, INT, and also NUM.
The value range is between -32768 and 32767. When it is mapped to NUM, leading ZEROs are removed in serialization and added in deserialization.
Edm.Int32
A signed 32–bit integer value. You can map it to the predefined ABAP Type: INT, and also NUM.
The value range is between -2147483647 to 2147483647. When it is mapped to NUM, leading ZEROs are removed in serialization and added in deserialization.
Edm.Int64
A signed 64–bit integer value. You can map it to the predefined ABAP Type: PACKED LENGTH >= 8 DECIMALS 0, and also NUM.
When it is mapped to NUM, leading ZEROs are removed in serialization and added in deserialization.
Edm.SByte
A signed 8–bit integer value. You can map it to the predefined ABAP Types: INT2, INT, and NUM is also possible The value range is between -255 and 255. When it is mapped to NUM, leading ZEROs are removed in serialization and added in deserialization.
Edm.DateTime
Date and time with values.
DateTime as Timestamp can be mapped to the predefined ABAP Type: TIME. It is ignored by deserialization. In serialization, it is 00:00:00.

(C) SAP AG 116
DateTime as Date can be mapped to the predefined ABAP Type: DATE. It is ignored by deserialization. In serialization, it is 00-00-00.
Edm.Binary
Fixed or variable length binary data. You can map it to the predefined ABAP Types: XSTRING, and HEX.
Edm.String
Fixed or variable length character data. You can map it to the predefined ABAP Types: STRING, CHAR, and NUM.
No conversion is done for Strings.
Edm.Decimal
Numeric value with fixed precision and scale. You can map it to the predefined ABAP Type: PACKED, DECFLOAT16, and DECFLOAT34.
Edm.DateTimeOf
Offset in minutes from GMT. You can map it to the predefined ABAP Type: PACKED LENGTH 8 DECIMALS 0 (timestamp is without fractional seconds), and PACKED LENGTH 11 DECIMALS 7 (timestamp with fractional seconds).
Deserialzation considers an offset like +03:30 and converts it into an UTC Timestamp. The internal representation must be an UTC Timestamp. Serialzation always uses Z as Offset.
Edm.Boolean
Represents the mathematical concepts of binary-valued logic. You can map it to the predefined ABAP Type CHAR LENGTH 1.
The XML value 'true' and '1' is mapped to the ABAP value 'X'. The XML value 'false' and '0' is mapped to the ABAP value ' '.
Edm.Time
Time of day with values raning from 0:00:00.x to 23.59.59
Edm.Byte
Unsigned 8–bit integer value. You can map it to the predefined ABAP Types: INT1, INT, and NUM is also possible.
The value range is between 0 and 255. When it is mapped to NUM, leading ZEROs are removed in serialization and added in deserialization.
o Length
Maximum characters allowed for a value of the Property. Some data types have a fixed length.
If the length you enter is not allowed for the data type, you get a warning from the system.

(C) SAP AG 117
o Decimal Places
Number of decimal places allowed for a value. Decimal places are only meaningful for the certain data types.
o Label
The label for the Data Object. This is stored in the metadata of the Data Model.
5. Choose Continue.
Deleting a Property or a Data Object
To delete a Property or a Data Object, proceed as follows:
1. Select Expand all in the Data Model screen of the Structure tab, to display all the Properties of Data Objects and the origin of all the Properties.
2. Select the Property or the Data Object you want to delete.
3. Choose the Delete Line icon above the Data Model screen.
Renaming a Property or a Data Object
To rename a Property or a Data Object:
1. Select Expand all in the Data Model screen of the Structure tab, to display all the Properties of the Data Objects and the origin of all the Properties.
2. Select the Property or the Data Object you want to rename.
3. Choose the Rename icon above the Data Model screen.
You can view your changes to the Data Objects and Properties in the Data Model screen at the bottom of the Structure tab.
More Information Editing a Data Model [Page 107]

(C) SAP AG 118
Reassigning the Key of a Property Procedure You can reassign the key that have been assigned to a Property in an operation.
You manually reset the key Property for an operation in the Data Model screen of the Structure tab. You can choose any Property in each mapped operation to be a key.
For the query operation in Screen Scraping and all operations in BOR, the Data Model Generator proposes key assignment based on the field detected as a key in the data source. You can change the proposed key assignment.
To reassign a key to a property in the Structure tab screen, proceed as follows:
1. Select Expand all in the Data Model view to display all the Properties of Data Objects and the origin of all their Properties.
2. Expand the Data Object to display its Properties, and select the Property that has been assigned as key that you want to change.
3. Choose the Reset Key icon above the Data Model tree view or right-click the field and choose Reset Key.
4. Select the field you want to assign as the key, and choose Set Key.
After resetting the keys for the operations, you must regenerate and save the Data Model.
More Information For more information about generating the model, see Generating the PS and DS Data Models [Page 119].

(C) SAP AG 119
Generating the PS and DS Data Models The Data Model Generator automatically generates the PS (Public Solution) and the DS (Data Source) models required for SAP NetWeaver Gateway.
The DS Data Model contains data source information and the PS Data Model contains Data Model information.
Mapping metadata is also generated, containing mapping information between the data source and the Data Model (between the DS and the PS Data Models respectively). The runtime artifacts generated depend on the specified channel type for the Data Model.
The Data Model Generator creates configuration entries by specifying which BOP classes belong together (there are three classes: with no suffix, with D suffix, and with Do suffix).
This does not apply if Screen Scraping is the data source, as Screen Scraping uses generic BOPs.
To generate the PS and the DS Data Models, choose Generate above the data source part of the screen (top left).
Progress messages appear at the bottom of the screen and a confirmation message displays when the models are generated, informing you that the models have been created:
To go straight to the generated PS Data Model in transaction SE80 in the ABAP Workbench, select the Object Navigator button at the top of the screen (this only displays for generated models).
If you select the Object Navigator button before generating the models, a message warns that you will lose all unsaved data. If you proceed, an empty model structure displays in SE80, as there is no generated model to display.
You can navigate between the Data Model Generator screen and transaction SE80 using the Object Navigator button and the Open generator button in transaction SE80.
When returning to the Data Model Generator screen, the Data Model opens in display mode. Select the Display<->Change button to switch to edit mode.
When the generated Data Model is to your satisfaction, the next step is to manually create a Consumption Model and then add your generated Data Model to it.
For more information, see Configuring the System Alias for your Service [Page 122].

(C) SAP AG 120
Manually Add Your Model to a Consumption Model You manually create a Consumption Model in the ABAP Workbench after you have generated your model.
Use the Object Navigator button at the top of the Data Model generator screen or use transaction SE80 in the ABAP Workbench to create the Consumption Model, and then add your Data Model to it.
To create a Consumption Model:
1. Right-click Related GW Consumption Models, and select Add Consumpt. Model under the Data Model name, for example. ZJWTEST_0001_PS, .
2. Enter a name for the Consumption Model and press Enter.
A popup displays, informing you that the Consumption Model does not exist and asking if you wish to create it.
3. Select Yes and the Create Consumption Model popup displays.
The name you entered displays as the Service Technical Name, the version is 0001 (read-only), and you must enter an external name and description (mandatory).
The OData Channel box is checked by default.
The external name must not contain any underscore characters “_”.
You cannot change the Consumption Model Description once you have created it; this field is read-only in the Property editor.
4. Select the green check mark to continue.
The Create Object Directory Entry popup displays.
5. Select Local Object or a package and the Save icon, and the Consumption Model is created.
You can add further Data Models by navigating to the Consumption Model itself, right-clicking it and selecting Add GW Data Model.
You cannot add Data Models from the Related GW Consumption Models folder. Each Consumption Model has a unique URL, which displays in the URL field so that you can view the Consumption Model in your browser.
6. Select XML or Metadata at the end of the URL field to see different views of the service.
You can also create a Consumption Model and assign it to a particular Data Model from the Data Model in the SE80 tree view.
The next step is to manually assign the system alias defined in the Data Model to the service document. For more information, see Configuring the System Alias for your Service [Page 122].

(C) SAP AG 121
More Information You can use SAP NetWeaver Gateway Generators Cookbook [External] to quickly create a Data Model and test the generated Gateway service.
(C) SAP AG 122
Configuring the System Alias for your Service Procedure After adding your Data Model to a consumption model, you must enable SAP NetWeaver Gateway to correctly identify the SAP backend system that can process OData requests from the newly created service.
We highly recommend to configure the system alias for the generated service using the procedures below whenever the service is transported to another Gateway server that has been configured with a different system alias.
You enable SAP NetWeaver Gateway to route the processing of OData request by manually assigning a system alias to the service.
Skip this section if you have Generic Channel Data Models.
The procedures in this section apply only to OData Channel Data Models.
To assign the system alias to a service:
1. Use transaction SPRO, select SAP reference IMG SAP Customizing Implementation Guide SAP NetWeaver Gateway OData Channel
Administration General Settings Assign SAP System Aliases to OData Service .
2. Choose New Entries and enter the following:
3. In the column, Service Doc. Identifier, enter the name of your Data Model and add to the end of the name, the suffix _0001.
For example, ZUSER_BOR_0001
4. In the column, SAP system alias, press F4 and select the system alias from the list displayed.
For example, EX1_800.
The system alias you choose should be the same system alias you defined while creating the Data Model.
5. Click Save to save your configuration settings.
Alternatively, use the transaction, SM30. In Table/View, enter the name /IWFND/V_MGDEAM, switch to edit mode and repeat steps two to five above.
You can see different views of the service in the consumption model using the XML and the Metadata buttons.
Assign the New System Alias to a Service after Transport (applicable to Generic Channel Data Models)
There is a direct connection between the Gateway service and the system alias that you specified.

(C) SAP AG 123
You must assign the new system alias information to a service whenever the service is transported to another Gateway server that has been configured with a different system alias.
The procedures in this section apply only to Generic Channel Data Models.
Use the procedure in the section above if you have OData Channel Data Models.
To assign the new system alias:
1. Use transaction SPRO, select SAP reference IMG SAP Customizing Implementation Guide SAP NetWeaver Gateway Generic Channel
Administration General Settings Assign SAP System Aliases to OData Service .
2. Press Ctrl +F1 to switch to the edit mode.
3. In the column, Service Doc. Identifier, locate the name of your Data Model
For example, /IWFND/ZUSER_BOR_0001
4. In the column, SAP system alias, press F4 and select the applicable system alias from the list displayed.
For example,EX2_800.
5. Click Save to save your configuration settings.
More Information Manually Add your Model to a Consumption Model [Page 120].

(C) SAP AG 124
Guidelines for Using the Generated Service These guidelines will help you to understand the expected behavior of the operations and Properties contained in the generated Gateway service.
Business Object Repository and Remote Function Calls
The following is the expected runtime processes of the operations that you include in a Gateway service based on a BOR or an RFC data source.
Query Operation in BOR and RFC at Runtime
• Perform filtering, and queries on Properties available only in the Data Model root node (the properties you have flattened at design time).
• Only Properties of type import and export are supported for filtering and in ranges table.
At design time, map only the Properties of type import in order to enable filtering capabilities at runtime. You get an error when you attempt to map Properties of type export.
Read Operation in BOR and RFC at Runtime
You can request to view or display any data regardless of the depth of the Data Object containing the data.
At design time, the level of the node for a Data Object in the hierarchy of Data Objects is not affected at runtime.
Create Operation in BOR and RFC at Runtime
• You can create new values for Properties available only under the root node of the Data Model.
At design time, all the Properties that are placed directly under the root node (flatten) during mapping, are used.
• Tables and table Properties can have new values added to them in the SAP backend system. However, only the first line of the table Properties will be filled.
At design time, map the table node and the table Properties directly under the root node, so that you can fill it at runtime.
• For BOR, at the end of the Create operation, the runtime process automatically executes BAPI TRANSACTIONAL COMMIT.
• For RFC, at the end of the Create operation, the runtime process does not execute BAPI TRANSACTIONAL COMMIT. The RFC is expected to it .
• At the end of the Create operation, the runtime process executes the Read operation after the Create operation for the Properties directly under the root node.
At runtime, the results in the client after the Create operation is a reflection of the Properties directly mapped under the root node at design time.
Update Operation in BOR and RFC at Runtime
• You execute the Update operation regardless of the depth of the Data Object containing the data to be changed.

(C) SAP AG 125
• The runtime Update flow supports the PUT method of OData.
You should provide values for all fields of the Data Object in your client request (the payload of the node should be full).
If any field is left empty, you risk updating the backend value for that field with an empty value.
• The runtime flow of the Update operation has an automatic logic to read the entire object in Gateway before performing the Update operation. This logic enables the generator to provide additional data from other Data Objects that are related to the Update operation but have not been executed in the specific process.
The additional data come from the Read operation. In such cases, the Data Object's of the Read operation and the Update operation must to be the same at design time.
Where a Data Object is mapped at design time for only the Update operation, at runtime, there is no automatic Read before Update process.
Where the Update operation is decentralized and available in more than one Data Object at design time, then the runtime automatically processes the Read operation before the Update operation.
• You can update the values in a specific line or row of a table.
• For BOR, at the end of the Create operation, the runtime process automatically executes BAPI TRANSACTIONAL COMMIT.
• For RFC, at the end of the Create operation, the runtime process does not execute BAPI TRANSACTIONAL COMMIT.
Delete Operation in RFC and BOR at Runtime
• At runtime the Delete operation can be executed only on the Properties that have been mapped directly in the root node at design time.
• The OData service payload is not relevant.
• For BOR , at the end of the Create operation, the runtime process automatically execute BAPI TRANSACTIONAL COMMIT.
• For RFC, at the end of the Create operation, the runtime process does not execute BAPI TRANSACTIONAL COMMIT.
Screen Scraping at Runtime
The following is the expected runtime processes of the operations contained in a Gateway service based on a Screen Scraping data source.
Query
• At runtime, you execute the Query operation only on Properties that have been mapped directly in the root node at design time.
• Filtering is supported only for Properties of type input.
• Runtime query results are based on the batch execution (including the search help exit) of the Search help function module in the backend system.

(C) SAP AG 126
Therefore in the backend, you can get search help results that may not be available or may be different from the results you get when using the Gateway service (OData service).
Read
• You execute the Read operation regardless of the depth of the Data Object containing the data to be changed.
• Drill down for table entities is not supported.
• Paging of the entire table is supported.
Create
• At runtime, you execute the Create operation only on Properties that have been mapped directly in the root node at design time.
• At the end of the Create operation, the runtime process executes the Read operation after tha Create operation on Properties in the root node Data Object.
The results of the Create operation presented in the client is the Properties that were mapped directly under the root node, at design time, after processing the Read operation after the Create operation.
Update
• You can execute the Update operation only on simple Data Objects with 0..1 cardinality.
• There is no logic for the Read operation before the Update operation. Since Screen Scraping is based on transactional business processes, there is the assumption that all required data is already available, so you can change the data coming from the Gateway (OData) service.
• The runtime Update flow supports the PUT method of OData.
You should provide values for all fields of the Data Object in your client request (the payload of the node should be full).
If any field is left empty, you risk replacing the backend value for that field with an empty value.
Delete
• At runtime, the Delete operation can be executed only on the Properties that have been mapped directly in the root node at design time.
• The OData service payload is not relevant.
Note that some transactions do not delete the business entity from the system, rather marks it for deletion.

(C) SAP AG 127
Deriving a Data Model from an Existing Data Model You can create a new data model that is based on an existing data model. You might want to derive a new data model from an existing data model, for example, if you want to add user-specific annotations. If you want to add annotations to a data model, you must create a User-Centric (UC) data model that is based on the existing Public Solution (PS) data model you want to annotate. This is because you cannot annotate a PS data model. You can create more than one UC data model from the same PS data model so that you can include annotations for different users.
Procedure 1. Start the ABAP Workbench in transaction SE80.
2. Select GW Data Model from the dropdown list.
3. Enter a name for the data model you want to create, adhering to the naming convention <name><version><type>, and press Enter
A message is displayed to inform you that this object does not exist and asks if you want to create it.
4. Select Yes and the Create Data Model dialog box is displayed:
(Create from Existing Data Model)
5. Enter the Type of data model you want to create, either PS (Public Solution) or UC (User Centric). Version displays as 0001 and cannot be changed.
6. In Create From, select Existing Data Model.
7. Find the existing data model on which you want to base the new data model by entering its Name, Type, and/or Version. Input help is available to help you search
8. Select the green checkmark to continue.
9. Enter the relevant package name in the next dialog box and choose Save, or Local Object as appropriate.
The data model is created and is displayed in the tree view. The original data model from which you derived the new data model is displayed under Base GW Data Model. You can

(C) SAP AG 128
now edit the new data model and its elements; see Properties Editor [Page 13] and Annotation Editor [Page 29] for more information.
If you already have a data model displaying in the ABAP Workbench tree view, (for example a PS data model from which you want to create a UC data model), a quick creation method is available. Right-click Derived GW Data Models and select Create GW Data Model. The Create Data Model dialog box is displayed with the name, type, and version of the existing data model already entered. You then enter a name and type for the new data model (read-only version of 0001) as described above. The data model is created and added to the Derived GW Data Models folder. You can navigate directly to it using the Display Object List icon in the toolbar. The new derived data model has the original data model as its base data model (displays under Base GW Data Model),to enable you to navigate back to the original data model.
If you try to delete a data model from which other data models have been derived, a message is displayed to warn you of the possible consequences of deleting the base data model.
You can also navigate to related data models and related consumption models in the tree view.
Copying a Data Model
You can copy an existing data model as follows:
1. Right-click the data model name in the tree view and select Copy from the menu. The Copy Model dialog box is displayed:
(Copy Model Dialog Box)
2. In the Target Model section, enter a name for the new data model. You cannot change the type and version; these stay the same as the base data model.
3. Select the green checkmark to continue.
4. Enter the relevant package in the next dialog box and choose Save, or Local Object as appropriate.
5. The system checks that the data model does not already exist and, if it does not, a message appears at the bottom of the screen informing you that the source data model has been successfully copied to the new data model.

(C) SAP AG 129
Creating a Data Model from a Generic Service Data Object (GSDO) Type You can create a data model from an existing Generic Service Data Object (GSDO) type. You may wish to do this, for example, if you have a working GenIL model available, together with a working implementation for it. This option enables you to reuse the GenIL structure to create a new Public Solution (PS) data model. You then have to write your own code based on the existing GenIL implementation. When the new SAP NetWeaver Gateway PS data model is created, it reflects the structure of the original GenIL model (by referencing the corresponding GSDO type) and you can change it if required. After you have created the data model using this option, you must implement ABAP code in order to make it work. New customizing is also necessary to bind the implementation to the data model.
If you are using the OData Channel, you cannot create a data model from an existing GSDO type.
Procedure 1. Start transaction SE80.
2. Select GW Data Model from the dropdown list.
3. Enter a name for the data model you want to create, adhering to the naming convention <name><version><type>, and press Enter
A dialog box informs you that this object does not exist and asks if you wish to create it.
4. Select Yes and the Create Data Model dialog box displays:
(Create Data Model from GSDO Type)
5. Select the GSDO Type button and enter the Name of the GSDO type from which you want to create the data model. Input help is available to help you search.
6. Select the green checkmark to continue.
(C) SAP AG 130
7. Add the name of the relevant package in the next dialog box and press Save, or press Local Object as appropriate.
The data model is created and displays in the tree view. You can now define the data model's elements; see Properties Editor [Page 13] for more information. If you want to add annotations, you must first create a User Centric (UC) data model (see Deriving a Data Model from an Existing Data Model [Page 127]), which you can then annotate (see Annotation Editor [Page 29] for details).

(C) SAP AG 131
Editing a Data Model You can edit a data model in the ABAP Workbench design time in transaction SE80. You might need to edit an existing data model, if you want to modify, add, or delete properties, data objects, relations, and operations, add or modify annotations, or reassign the data model to another package, for example.
You can only add or modify annotations for User Centric (UC) data models. For information about how to create a UC data model, see Deriving a Data Model from an Existing Data Model [Page 127] .
You can also delete data models in the ABAP Workbench. For more information, see Deleting a Data Model below.
Procedure
1. Start transaction SE80.
2. Select GW Data Model from the dropdown list on the left-hand side of the screen
3. Use the arrow to open the Find Data Model dialog box, where you can search by data model identifier or by data model data:
(Finding the Data Model)
When you have found the required data model, it displays in a collapsed tree structure, so that only the top (data model) level is showing.
4. Select the expand icon to the left to display the data model's elements.
5. Double-click the data model name or an element to open the relevant editor on the right-hand side of the screen, where you can modify its properties (see Properties Editor [Page 13]). For more information about creating and modifying annotations in a UC data model, see Annotation Editor [Page 29].
6. If you are editing a data model that was automatically generated, you can only edit certain elements in ABAP Workbench. However, you can navigate directly to the content generator screen and edit the data model there by pressing the Open generator button in the toolbar. The data model opens in display (read-only) mode, with only the Display Mapping button visible.
o Select the Display<->Change button to switch to edit mode, when the Create Mapping, Change Mapping, and Remove Mapping buttons become visible.
o Edit as required.

(C) SAP AG 132
If you switch from edit mode to display mode after making changes, a dialog box warns you that the changes you have made will be lost. To save the changes you have made, you must generate the data model again.
If, before generating the data model again, you use the Object Navigator to navigate back to the data model in ABAP Workbench, your changes will be lost. A dialog box is displayed to warn you of any potential data loss.
o Press the Generate button to generate the PS and DS data models. For more information, see Generating the PS and DS Data Models [Page 119].
You cannot edit a data model while it is being generated.
When you open a data model in editing mode, it is locked so that other users cannot access it.
7. Save your changes.
8. You can reassign the data model to another package by right-clicking its name in the tree view and selecting Reassign package. Enter the new package name in the reassignment dialog box.
9. If you are editing a data model that has been created from scratch on the Generic Channel, you must select the Generate STC Class button in the toolbar after making and saving changes. This regenerates the STC class to ensure you have an updated version that includes the changes you have made.
Deleting a Data Model
To delete a data model, right-click the data model name in the tree view and select Delete. A message asks you to confirm the deletion.
If you try to delete a data model from which other data models have been derived, a dialog box warns you of the possible consequences and you must confirm that you do want to delete the data model.

(C) SAP AG 133
Changing the Language If you have logged on in a different language other than the original language of a data model and you want to edit this data model, a popup displays, asking if you wish to change the language.
(Change original language)

(C) SAP AG 134
Creating a Consumption Model A consumption model represents an OData service by bundling a set of SAP NetWeaver Gateway data models for a specific consumption use case. Each data model is represented by one or more corresponding entity types or collections in the resulting service.
You create a consumption model using in the ABAP Workbench design time in transaction SE80 and subsequently add data models to it. You can also create a consumption model and assign it to a particular data model in the tree view.
The consumption model and the data models within it must be created on the same channel, that is, you cannot add a data model that was created on the OData Channel to a consumption model that was created on the Generic Channel, and vice versa.
Futhermore, you cannot include data models that were created on both channels in the same consumption model.
Procedure 1. Either:
o Start transaction SE80.
o Select GW Consumption Model from the dropdown list.
2. Or, with a data model displaying in the SE80 tree view:
o Right-click Related GW Consumption Models.
o Select Add Consumpt. Model.
3. Enter a name for the consumption model and press Enter.
A dialog box displays, informing you that the consumption model does not exist and asking if you wish to create it.
4. Select Yes and the Create Consumption Model dialog box displays:
(Create Consumption Model)
The name you entered is displayed as the Service Technical Name, the version is 0001 (read-only), and you must enter a description (mandatory).
You cannot change the consumption model Description after you have created it since this field is read-only in the Properties Editor.

(C) SAP AG 135
5. The OData Channel checkbox is selected by default. Deselect this checkbox if you want to create the consumption model on the Generic Channel. While you can choose to use the Generic Channel, you are strongly recommended to use the OData Channel.
6. Select the green checkmark to continue.
The Create Object Directory Entry dialog box displays:
(Create Object Directory Entry)
7. Select Local Object or a package and the Save icon, and the consumption model is created.
8. Right-click the consumption model in the tree and select Add GW Data Model to add one or more data models to the consumption model.
If you created the consumption model directly from data model, the consumption model is assigned to that particular data model and displays under Related GW Consumption Models in the tree view.
9. You can add further data models by navigating to the consumption model itself, right-clicking it and selecting Add GW Data Model. You cannot add data models from the Related GW Consumption Models folder.
10. Each consumption model has a unique URL, which displays in the URL field so that you can view the consumption model in your browser. Select the XML and Metadata buttons at the end of the URL field to see the different views of the service. See also Consumption Model URL [Page 137] and Checking the Service [External].
Editing a Consumption Model
You can edit an existing consumption model (add or delete data models, and edit data models within the consumption model). You can also reassign the consumption model to a different package.
To find and modify a consumption model, proceed as follows:
1. Start ABAP Workbench in transaction SE80.
2. Select GW Consumption Model from the dropdown list.
3. Use the search icon (binoculars) next to the field on the left-hand side of the screen where the name normally displays to find the consumption model you want to modify. Expand the tree view to display the models.
4. To add one or more data models to the consumption model, right-click the consumption model name and select Add GW Data Model.
5. To delete a data model from the consumption model, right-click the data model and select Delete GW Data Model.

(C) SAP AG 136
6. To reassign the consumption model to a different package, right-click the consumption model name, select Reassign package, and enter the new package details in the reassignment dialog box.
7. To edit a data model within the consumption model, double-click it. The Properties Editor and the Annotation Editor are displayed on separate tab pages and you can make changes as required.

(C) SAP AG 137
Consumption Model URL Each consumption model has a unique URL allowing you to access it from your browser and check the service.
The URL is derived from the path in the Internet Communication Framework (ICF) service tree. For more information, see Internet Communication Framework [External]. If you have defined an external alias for your area in transaction Maintain Services (SICF), the URL is derived from the external alias path. For information about external aliases, see External Aliases [External].
The URL displays in the URL field of the Properties Editor when you select the consumption model in the ABAP Workbench design time. The XML and Metadata pushbuttons at the end of the URL field enable you to access different views of the service.
The URL has the following format,
http://<host>:<port>/<ICF path>/<service>/?$format=xml
The URL reflects the namespace of the underlying consumption model. Examples are:
• Consumption model /iwcnt/abc with external name def: .../sap/opu/odata/iwcnt/def...
• Consumption model abc with external name def, that is, no namespace prefix on the consumption model: .../sap/opu/odata/sap/def...
This URL syntax allows customers to name their own consumption models as desired in their reserved namespaces, ensuring there is no conflict with SAP or partner-delivered consumption models.
To call the service, the authorization object S_SERVICE must be assigned to your user name.
For an example, see Checking the Service [External].