Embed Size (px)
Citation preview

Data Standards Manual

ii
Table of contents:
1.0 Data integrity Pg. 1 – 4
1.1 Administrative Responsibilities
1.2 Information Access
1.3 Data Stewards
1.4 Information Users
2.0 Confidential indicator/use Pg. 5 – 7
2.1 Students
- > Directory Information
2.2 Releasing Students' Confidential Information
2.3 Employees
3.0 Creating and managing records Pg. 8 – 10
3.1 Rules for Clean and Accurate Records
3.2 Multiple PIDMs Management
3.3 Offices Authorized to Create Records
4.0 Data Entry Standards Pg. 11 – 33
4.1 Identification Numbers
4.2 Name Standards
- > Person Names:
- - [ Formatting ] [ Case ] [ Initials ] [ One Name Only ]
- - [ Punctuation ] [Spaces] [ Long Names ] [ Legal Name ]
- - [ Multiple First, Middle, or Last Names ] [ Preferred
Name ]

iii
-- -- [ Prefix or Title ] [ Suffix ] [ Alternate Names ]
- > Non-Person (Vendor) Names:
- - [ Abbreviations ] [Doing Business As... ] [ Case ]
- - [ Punctuation ] [ Acronyms ] [ Numerals as Part of a
Name ]
4.3 Address Standards
- > Address Types
- > Sources of Information
- > Street Standards:
- - [ Case ] [ Punctuation ] [ Address Lines ] [ Street
Number ]
- - [ Street Name ] [ Street Designators and Postal
Abbreviations ]
- - [ Secondary Address Unit Indicators and Postal
Abbreviations ]
- - [ Compass Directions and Postal Abbreviations ]
- - [ Special Characters ] [ Business/Organization Address
Lines ]
- - [ Department or "In Care of" for Business Addresses ]
- > City Standards
- > State Standards:
- - [ Military Destinations ] [ Canadian
Provinces/Territories ]
- > County Standards
- > Zip Code Standards
- > Canadian Addresses
- > International Addresses (other than Canadian)
- > Nation Standards
- > Updating Addresses
4.4 Telephone Standards
- > Telephone Types
- > Domestic Telephone Numbers
- > North American Numbering Plan (NANP)
- > International Telephone Numbers
- > Updating Telephone Numbers
4.5 Standards for Various Shared Tables
- > College
- > Dates:
- - [ Calendar Dates ] [ Date of Birth ]

iv
- > Deceased Indicator
- > Deceased Date
- > Degrees
- > Degree Award Category Type
- > Degree Level
- > Email Addresses
- > Ethnicity
- > Gender
- > Legacy
- > Majors/Minors/Concentrations
- > Marital Status
- > Relationship
- > Religion
- > Social Security Number
- > Veteran Information
- > International Information:
- - [ Citizenship ] [ Country of Citizenship ]
- > VISA
5.0 Data policies and procedures Pg. 34
5.1 Name Change Form
5.2 Address and Telephone Number Changes
5.3 Social Security Number Change Policy
5.5 Changing Data Standards Manual
Appendix Pg. 37 - 39
A Name/ID Search Methods

1
1.0 Data Integrity
1.1 Administrative Responsibilities
These guidelines establish measures for the protection,
access, and use of The University of Tennessee at Martin (UT Martin)
administrative electronic information. The Guidelines also define the
responsibilities of all who access and manage these data. Offices may
have individual guidelines that supplement, but not supplant or
contradict, this policy statement. Data entrusted to the University by
other organizations (e.g., foundations or government agencies) are
governed by terms and conditions agreed upon with those organizations.
Specific issues not governed by such agreed terms shall be governed by
this policy.
By law, data not classified as Directory Information are confidential
and may not be released without proper authorization. Also, records
explicitly declared confidential data may not be released without proper
authorization. Users must adhere to any applicable federal and state
laws as well as University of Tennessee at Martin policies and
procedures concerning storage, retention, use, release, and destruction
of data.
Data are a vital asset owned by The University of Tennessee at Martin.
All institutional data, whether maintained in the central database or
copied into other data systems (e.g., personal computers) remains the
property of The University of Tennessee at Martin. Access to data
should not be approved for use outside a user's official University of
Tennessee at Martin responsibility. Data will be used only for
authorized tasks.
As a general principle of access, University of Tennessee at Martin
data, regardless of who collects or maintains it, will be shared among
those employees whose work can be done more effectively by
knowledge of such information. Although The University of Tennessee
at Martin must protect the security and confidentiality of data, the
procedures allowing access to data must not unduly interfere with the
efficient conduct of University business.
All administrators will ensure that, for their areas of accountability,

2
each user is trained regarding user responsibilities. As part of that
training, each user will read, understand, and agree to abide by the
stipulations in this document. The Office of Academic Records will
ensure that all new faculty, staff and student employees have the
required FERPA training.
Division/department/unit heads (or designees) will ensure a secure
office environment with regard to all University data systems.
Division/department/unit heads (or designees) will determine the data
access requirements of their staff as it pertains to their job functions
before submitting a request for access.
All procedures and data systems owned and operated by The University
of Tennessee at Martin will be constructed to ensure that:
All data is input accurately.
Accuracy and completeness of all data are maintained.
System capabilities can be re-established after loss or damage by
accident, malfunction, breach of security, or natural disaster.
Breaches of security can be controlled and promptly detected.
1.2 Information Access
Two types of access can be granted to users:
Inquiry-only access enables the user to view, analyze and
download, but not change, institutional data. Downloaded
information should be used and represented responsibly; the data
should not be altered when presented in word processing
documents, spreadsheets, etc.
Update access provides both inquiry and update capabilities.
Update capability is generally limited to the office directly
responsible for the collection and management of the data.
Update access is available to administrators and users who have
an authorized need to change institutional data in the routine
performance of their job duties.
Access for individual users must be requested by a division/department
head or designee, for each user under their supervision, following the
established procedure, using the established form(s), and providing the
required signatures.
Each user of administrative information is assigned appropriate

3
combinations of inquiry only and update access to specific parts of the
student information system. The types of access are determined by the
data stewards below.
1.3 Data Stewards
Record Type Data Steward
Student Accounts
Receivable
Business Affairs
Employees &
Affiliates
Human Resources and specific
designees
Faculty Academic Affairs
Financial Aid Financial Aid and Scholarships
Prospective
Students
Admissions, Graduate Studies,
International Programs
Student
Applications
Admissions, Graduate Studies,
International Programs
Student Housing Housing Office
Student Academic Records, Graduate
Studies, Student Health, Athletics
Non-person
(donors, vendors,
etc.)
Financial Aid and Scholarships,
Business Affairs, Alumni Affairs,
Development
On behalf of the data steward (usually an administrator of an office or
department), ITS will review the request and may deny or approve the
request. If approved, the request will be forwarded to the UT Martin
Banner security administrator for processing.
Before granting additional access to data, the data steward shall be
satisfied that protection requirements have been implemented and that a
"need to know" is clearly demonstrated. By approving end-user access
to institutional data, the data steward consents to the use of this data
within the normal business functions of administrative and academic
offices. Access to institutional data shall not be granted to persons
unless there is an established "need to know."
Data stewards are responsible for the accuracy and completeness of data
elements that they maintain. Misuse or inappropriate use by individuals
will result in revocation of access privileges.
Data stewards are also responsible for the maintenance and control of
the student information system's shared validation and rules tables at
4
UT Martin.
1.4 Information Users
University of Tennessee at Martin information is one of the University's
most valuable assets. Protecting that asset is the responsibility of all
information users.
Users should read and become familiar with the Acceptable Usage
Policy and procedures with regard to use of Information Technology
Resources.
Users are responsible for understanding their respective data elements
and how they are used. If they do not understand the meaning of a data
element, they should consult the appropriate data steward or
representative.
Users must observe requirements for confidentiality and privacy and
must comply with control procedures to protect data from unauthorized
use, disclosure, alteration, or destruction.
Users are responsible for all transactions occurring during the use of
their login and password. Users are not to loan or share login
identification or passwords with anyone. This is intended to help protect
the integrity, security, and privacy of user accounts. Please refer to the
UT Martin Security Policies and Best Practices.
It is UT Martin policy to perform background checks on the following
employees: all newly hired regular employees, term faculty, police
officers, employees in housing and the children’s center and any
employee who has access to University master keys or cash. All
employees are required to undergo FERPA training.

5
2.0 Confidential Indicator and Its Use
2.1 Students
Under the Family Educational Rights and Privacy Act of
1974 (FERPA), release of personally identifiable student education
records (other than directory information) to any party other than those
specified by FERPA is not permitted without the student's written
consent. All employees must complete the FERPA Tutorial prior to
being granted access to student data.
Note: For more information on FERPA, read the University
policy: Privacy of Education Records (Compliance with FERPA).
Further, by requesting that the Confidential Indicator be set, students
may also elect to restrict their "Directory Information". The University
of Tennessee at Martin asks that students carefully consider the
consequences of a decision to restrict directory information. With
directory information restricted, the University will:
not include the student's name, address, or phone number in the
Telephone Directory.
not include the student's email address in the electronic
directory.
refuse to release any information about the student to insurance
companies, current or future employers, all types of media, and
any non-institutional persons or organizations.
give no financial aid or personal information over the phone.
state, "We have no information on a person by that name" to any
request for information.
For these reasons, the confidential indicator is intended for individuals
who have a compelling need to have all information about them kept
private. This option should not be viewed by the student as a "do not
mail or contact" option. Students will still receive mail, email, and

6
phone calls from the University.
Students that need to have their directory information remain
confidential must file a written request with the Registrar's Office by the
end of the 14th
day of the semester.
Directory Information
At UT Martin, directory information is defined as the student's:
Name
Address
Telephone listing
Email address
Date and place of birth
Major field of study
Participation in officially recognized activities and sports
Weight and height (for members of athletic teams)
Dates of attendance
Degrees and awards received
The previous education agency or institution most
recently attended
Classification
2.2 Releasing Students' Confidential Information
Releasing directory information about anyone who has requested
confidentiality is prohibited unless it is released by the Office of
Academic Records. Anyone (other than the Office of Academic
Records) who releases any information about individuals coded as
confidential will be in violation of University policy and other federal
and state privacy laws. Any requests covered by the Sunshine Law
should be emailed to the Registrar at [email protected].
The Office of Academic Records handles all external requests for
student information, and any such requests should be forwarded to that
office.
2.3 Employees
Employee information is entered into IRIS (the official UT Human
Resources database). Employees may choose to have their information
confidential by indicating no phone, no address, or no phone/address on
the Personal Data Form that is completed at the time they are hired.
This applies on to the employee's home information. The employee's
business information (office telephone number, office number, etc.) will
still be listed in the various directories. Employee information is cross-

7
walked to the Banner system from a referential file that is sent to ITS
each evening.
Human Resources handles all requests for employee information and
any such request should be forwarded to Human Resources where the
changes are made in IRIS. All changes will be included in the nightly
referral file sent to ITS.

8
3.0 Creating and Managing Records
3.1 Rules for Clean and Accurate Records
Search first. Before users create a new record for a person or
non-person, users must conduct a complete ID and name search to make sure
that person or non-person has not already been entered in the Banner
database. Each user must conduct a thorough search to prevent entering a
duplicate record. Duplicate records create problems in multiple parts of the
system and take many hours of staff time to locate, merge data, and remove.
Refer to Appendix A for the correct search method.
Never Use During Entry:
the percent sign (%) is used as a wildcard character in Oracle SQL
queries.
the left single quote (`), also known as the grave accent. The IRS and
the Social Security Administration forbid the use of this character in
a name.
Abbreviations: If there is enough space, do not use abbreviations.
When an abbreviation is required, use the abbreviated form set out in
these Data Standards. If you cannot find a needed abbreviation in
these Standards, contact the University's Data Steward for the proper
abbreviation to use.
Follow data entry rules. Some data fields have specific data entry rules. See
that data element's specific section for its data entry rules. Except where
specifically noted, avoid abbreviations.
Punctuation: With few exceptions, do not use punctuation in the name
fields or the address fields. Hyphens, periods (e.g., St. John), and
apostrophes (right single quote marks or acute accent marks only) may be
used in the name fields when part of the legal name. However, do not use
periods after a first or middle initial. Further, you may use a slash or a
hyphen in address fields when required for clarity. (See Name

9
Standards and Address Standards for more information.)
3.2 Multiple PIDMs Management
A "multiple PIDM"--the duplication of the same person or entity in Banner
tables--is a serious problem. The PIDM (Person IDentification Master) is the
internally assigned system number that connects all the data that is
associated with a Banner ID Number. A Banner ID number record can
represent student, employee, vendor, etc.
Multiple PIDMs can occur for many reasons, including:
failure to perform a complete search
error keying in data in INB (Internet Native Banner)
error keying in data over the web (Self-Service Banner)
feeds to Banner from governmental agencies, testing agencies, any
outside sources, etc.
not entering social security number and birthdate for a person record
Purging multiple PIDM's or "containing" (isolating) multiple PIDMs that
cannot legally be purged, requires a planned and coordinated effort. This
effort must be coordinated among the functional areas which are stewards of
the Banner modules, particularly Student, Financial Aid, and Accounts
Receivable. When multiple PIDM records cannot be purged, they will be
"contained" so further use of the unusable ID will be more difficult to locate
and use.
When multiple PIDMs (via their associated external IDs) are identified, ITS
must be notified to properly handle the incorrect ID. The concerned
departments, along with ITS, will coordinate the effort to determine if there
are actual multiple records. If so, the contacts in each functional area will
coordinate the cleanup effort and begin the process that includes:
adding "-DONOTUSE" at the end of the last name field to alert users
to not make any additional data entries to the record, and deleting any
‘prior name’ records that would otherwise enable location of the
contained ID via a normal name search.
disabling the PIN of the contained ID so it cannot be accessed over
the web.
moving the data from the duplicate (in-error) record to the correct
record as required.

10
deleting all unneeded data from the contained ID (such as addresses,
email addresses, and biographical data).
ITS may then, at its discretion, entirely delete the contained PIDM, if it does
not have undeletable data associated with it (e.g. A/R transactions).
3.3 Offices Authorized to Create Records
The following departments/offices shall have the ability to create new
records as specified below and any required prerequisite records (e.g.,
General Person records).
Area of Responsibility Office
Employee – created in the
IRIS system then cross-
walked to Banner by ITS
Human Resources
Faculty – created in the
IRIS system the cross-
walked to Banner by ITS
Human Resources
Financial Aid Financial Aid and
Scholarships
Prospect / Applicant /
Student
All University Admitting
Offices (Graduate and
Undergraduate)
Non – person (e.g. donors,
venders and lenders)
Business Affairs,
Development, Financial
Aid and Scholarships
The absolute minimum data necessary to create a new entity in Banner is a
name. However, to meet University data needs and to ensure data integrity
and accurate record-keeping, the following data should also be captured
where pertinent to the type of record being created:
Address and/or telephone number
Gender
Birth date
Social security number
At various points in the building of new records (new employees, potential
donors, potential students), some of this data may not be available. NOTE:
Employee information will always include birth date, Social Security
Number, address and/ or telephone number, gender and ethnicity. If none of
the information noted above is available, data entry personnel should verify
with a supervisor whether it is appropriate to add the new entity.

11
4.0 Data Entry Standards
4.1 Identification Numbers
Perform a complete search before entering a new person or non-
person in Banner. There should be only one record for each entity. Any
entities that are in Banner more than once must go through the "multiple
PIDM" process. A search may take several minutes to perform, but
correcting a multiple PIDM may take several weeks to complete.
See Appendix A - Name/ID Search Methods for information on how to
complete a search by ID or name.
The identification number is a unique, nine-digit number given to each
person or non-person entity (e.g., an organization or business) that is
considered to be a constituent of the University.
In keeping with the spirit of the Buckley Amendment and the current trends
in privacy cases and legislation, this identification number is not to be the
person's Social Security number nor an organization's tax or employer
identification number. Social Security, tax, or employer identification
numbers should be entered in the SSN/SIN/TIN field.
When adding a person or non-person to Banner, use the system-generated ID
whose first characters will be “960 or 000.”
4.2 Name Standards
Enter names in mixed case so that when a name is printed on
correspondence, it looks contemporary and professional.
Person Names
Only one record and one identifier should exist for each person. It is
important to search the database thoroughly before adding a new person to
Banner to ensure the individual does not already exist. (See Appendix A -

12
Name/ID Search Methods.)
Formatting
Enter the first, middle, and last names exactly as the person has indicated. If
given the full middle name, enter the full middle name. Do not change a full
name to an initial. Always use normal mixed case letters for names. The
objective is to print the name on mailings, correspondence, etc., just as the
"customer" wants it to be printed. The preferred name field is used when the
person indicates they wish to be called by a name other than their given
name. Example: If James’ preferred name is Jimmy, this will be placed in
the preferred name field to personalize correspondence. Typically, the
preferred name is limited to derivatives of the first name.
Note: Enter the name as it appears on a Social Security card, court order,
marriage license, driver's license, or passport.
Case
If the person has written all uppercase letters, enter the normal mixed case
letters. If the person's name starts with a lowercase letter, enter the first letter
in lowercase (e.g., duBois). For employees, the name is entered as it appears
on the Social Security Card or court documents denoting name changes.
Initials
Do not use an initial for the first name unless the name appears as such on
accepted name documentation. In those instances in which a single character
or initial is designated as the first name and is followed by a middle name,
enter the single character or initial in the first name field with no period and
the middle name in the middle name field.
Punctuation
Enter hyphens, apostrophes, and periods (e.g., St. John Rivers) only when
they are part of the legal name. Never use the left single quote or grave
accent (`). Do not enter punctuation where there is none. Do not enter spaces
before or after hyphens in hyphenated names. In the following examples, any
could be correct:
O'Donnell, Odonnell
Dell'Acqua, DellAcqua, Dellacqua
Jones-Smith
Al-Hassan, AlHassan, al-Hassan, alHassan, al Hassan
St.Denis, St Denis, StDenis, St-Denis, SaintDenis, Saint-
Denis, Saint Denis

13
Spaces
Spacing in names is based on the legal name. Maintain the spaces indicated
by individuals (e.g., Van Canneyt, de la Cruz).
Long Names
If a name is longer than the field allows, leave off the excess characters at the
end of the name. Do not try to abbreviate in any other way.
Legal Name
The legal name field should only be populated when the separate first,
middle, or last name field is too short to store the complete name. In these
cases only, enter the complete name in this field in first-middle-last name
format. Note that this field is not used by any system processes. The data in
this field merely provides a place in the system to store the full name for
someone whose name will not fit completely in the standard name fields.
When you perform a name change for an individual whose full name is
stored in the Legal Name field, you must also update the Legal Name field.
If the new name fits in the standard fields, remove the information in the
Legal Name field.
Note: In Banner, the Legal Name field is a single, free-format field that
is not automatically updated if the person officially changes his/her name.
You cannot use the Legal Name field as the basis for database searches.
Multiple First, Middle, or Last Names
When entering names of users with multiple first, middle, and/or last names,
enter the names as identified on a Social Security card, court order, marriage
license, driver's license, or passport. For example: When entering Shi Su
Wei Liu, appropriate documentation must be used to determine the first
(Shi), middle (Su Wei), and last (Liu) names. Multiple names may be
entered into a single field. When no documentation is present which breaks
down the name as 1st, Middle, Last, enter Gwei Hung Herb Tsai as Gwei
(1st); Hung Herb (Middle) Tsai (last). The standard would be to put multiple
names in middle name field.
Preferred Name
Offices may enter data in this field when an individual uses a preferred name
which is different than his legal first name. For example, if Elizabeth Anne
Smith goes by Liz, you may enter "Liz" in the preferred name field. For
employees, IRIS lists “Known As” using last name, then the employee’s
nickname. Using the example listed above, the name is entered in IRIS as

14
Smith, Liz. ITS must separate the preferred named for the IRIS-to-Banner
crosswalk.
Prefix or Title
Do not enter prefixes or titles in any of the name fields. Enter the standard
abbreviation for the prefix or title in mixed case with no punctuation in the
prefix field. It is UT Martin’s practice to not enter a marital status unless
requested by the individual. For employees, IRIS has the selection of Mr.,
Mrs., Ms., Miss and Dr. Employees indicate their preferred title on the
Personal Data Form. If no preference is indicated, males are entered with
Mr. and females are entered with Ms.
The Prefix default for UT Martin is Mr. or Ms.
Suffix
Do not enter suffixes in any of the name fields. Enter suffixes in mixed case
with no punctuation in the suffix field.
Description Abbreviation
Esquire Esq
Fifth V
Fourth IV
Junior Jr
Second II
Senior Sr
Third III
USA (Ret) Ret
US Army USA
US Air Force USAF
US Marine Corps USMC
US Navy USN
Enter both a prefix and suffix when the person has an inherited suffix (e.g.,
Mr John Doe Jr). Both a prefix and suffix can be used for individuals who
are in the military, are retired military, or are in religious orders (e.g., Gen
Frank Smith USA (Ret)). NOTE: IRIS does not have an option for military
prefixes and suffixes.
Do not enter a suffix indicating an academic or medical degree if you have
entered a prefix. As a general rule, individuals are addressed in a non-
professional context. Therefore, the prefix and not the professional suffix
will be used. For example, do not enter a prefix of Dr and a suffix of MD;
rather, enter the prefix only (Dr James Smith, not Dr James Smith, MD.)

15
Do not enter academic degrees or professional designations as a suffix unless
specifically asked by the individual.
Alternate Names
Alternate names are other names that an individual would be known by (or
has been known by). Alternate names may include: maiden names, married
names, adopted names, etc. Alternate names may also be stored in the system
to support certain system processes such as awarding degrees, production of
transcripts, etc. Any name change must be supported by documentation such
as birth certificate, marriage license, or driver’s license. It is also
recommended that Alternate ID be used for people with multiple names. It
allows us to use the SSN and have it pull back all names. This is done under
GUIALTI (alternate ID search).
Employees may request name changes by submitting a W-4 or Personal data
Form update. Employees must submit court documentation or a marriage
license when requesting a name change. When received, employees should
also submit a Social Security card with the new name change.
The following offices may process name changes for the specified
populations. All the roles pertinent to the record must be identified. When
roles impacting other offices are present, the required documentation must be
collected and forwarded to the other offices along with notification that the
change has been made.
Population Office to Perform Name
Change
Alumni University Advancement,
Alumni Affairs
Donors
(non-student, non-
employee, non-vendor)
University Advancement,
Development
Employees Human Resources
Prospective students Admissions
Students Academic Records
Vendors
(non-student, non-
employee)
Finance, Grants &
Contracts, Procurement
Before a name change or alternate name is entered in Banner, the previous
name of the individual or vendor must be identified with a name type. Name
types are validated against table GTVNTYP:
Banner Table: Name Type Code

16
Non-Person (Vendor) Names
Vendors can be companies, organizations, or entities doing business with the
University in a professional capacity. They could include suppliers, granting
agencies, banks, institutions, government entities, or individuals. Vendors
and non-student, non-employee individuals will be entered into the non-
person name information field through the SPAIDEN form.
Only one record and one identifier should exist for each non-person/vendor.
It is important that you search the database thoroughly before adding a new
non-person to Banner to ensure that the entity or individual does not already
exist.
Always enter non-person names in the non-person name field as listed on an
invoice or other company document. Spaces are permitted between multiple
names.
Note: Periods are permissible in non-person names.
If an article (e.g., a, an, or the) is used as an adjective within the full legal
name on a non-person entry, include it when entering the name in Banner. If
a non-person name begins with the word "The" as appearing on the
company's letterhead, invoice, or bidder application, include it when entering
the name.
Examples:
ABC Trucking
Diamond Life Insurance
Smith King & Jones Inc
J F Kennedy Co
First National Bank
The Copy Store
Abbreviations
In general, do not abbreviate company names. However, only use
abbreviations when a company is more widely known by its abbreviated
name than its full name (e.g., IBM, HP) or when space limitation requires the
use of abbreviations.
Doing Business As…
If the non-person entity has a "doing business as…" (DBA) name that is
separate from its legal name, enter the DBA name in the DBA field
and not as any part of the address. For data entry purposes, the same

17
formatting rules apply to the DBA name as to the legal name.
Add alternate names on the "Alternate ID" tab.
Case
Enter all information using mixed case and standard capitalization. Never
use all uppercase or all lowercase letters, except for acronyms.
Punctuation
Do not add punctuation where there is none. Periods may be used when
required as part of the company's name. Examples:
If the organization is: Enter:
R.J. Reynolds Co. R J Reynolds Co
F. & F. Securities F & F Securities
Amazon.com Amazon.com
You may use apostrophes, but do not use spaces before or after the
apostrophe unless the apostrophe comes at the end of a word. For example:
John's Plumbing Supply
Four Wives' Club
Do not use commas between names. You may use hyphens or slashes to
separate names, but do not use spaces before or after the hyphen or slash.
Use the ampersand only when it is part of a formal name. Use "and" in all
other cases.
Acronyms
If a company is recognized by its acronym, use the acronym when entering
its record (e.g., IBM, SCT, ITT, AT&T). Do not use a space between the
letters of an acronym.
Numerals as Part of a Name
If a numeral is part of the official corporate name, enter the numeral rather
than spelling out the number (e.g., 21st Century Productions).

18
4.3 Address Standards
University-wide conventions are critical for shared data such as addresses
and the purposes for which the information is entered should be considered.
For example, units with marketing responsibility, such as Development and
Admissions, must be able to produce individualized correspondence
conforming to formal addressing rules. Units such as Financial Aid and
Accounts Payable may have less stringent formatting requirements but
should still follow the standards set forth here. These standards must balance
four considerations:
Banner system requirements
Accepted standards for formal communications
US Postal Service guidelines
International address requirements
All addresses must meet US Postal Service addressing requirements. Several
US Postal Service publications deal with addressing. The most
comprehensive and accessible publication is Postal Addressing Standards,
Publication 28. This publication is available from the US Postal Service as
well as in a portable document format (PDF) at
http://pe.usps.gov/cpim/ftp/pubs/pub28/pub28.pdf.
The guidelines expressed herein are designed to convey the minimum
standard requirements to enhance the processing and delivery of mail, reduce
instances of "undeliverable" mail, and position the University to obtain the
most advantageous postal rates.
While data may be conditioned (or reformatted) on output, it is the intention
that addresses be entered exactly as they will print on correspondence,
reports, etc. Accurate, consistent address data entry is vital. Given these
considerations, the following address data entry standards are recommended.
Address Types
Banner Table: Address Type
Sources of Information
Provide "Source" information when updating or correcting an address:
Code Description
APPL Applicant to be reviewed
AVFY Submitted via address verification
19
MAPR MA or PR address to be reviewed
POST Post office change of address notice
WEB Originated from Banner Web
Street Standards
Case
Enter all information in mixed case; never use all uppercase or all lowercase
letters.
Punctuation
The street address fields have a maximum length of 75 characters. Street
names should be spelled out in their entirety whenever possible.
Note: Street designators such as "road", "street", "boulevard", etc. may not
be abbreviated (per guidelines from the Chancellor) unless necessary due to
space restraints. See the topic, Street Designators and Postal
Abbreviations.
Because of the length restriction, do not take up space with needless
punctuation such as periods following abbreviations. Never use apostrophes
and commas. However, you may use slashes and hyphens, if necessary, for
clarity.
Address Lines
Banner provides three 75-character lines for street address; however only 30
characters will print on an envelope or label. Do not enter city, state, and zip
code data on any of these three address lines for US addresses: enter these on
the City-State-Zip line. Do not leave blank lines between street lines.
Note: Although Banner does provide three Address Lines, three-line street
addresses cause a problem when printing one inch labels since the completed
address could be five to six lines once other lines--Name, the optional "In
Care of", and City-State-Zip are added. Therefore, make every effort to enter
the address using two lines only.
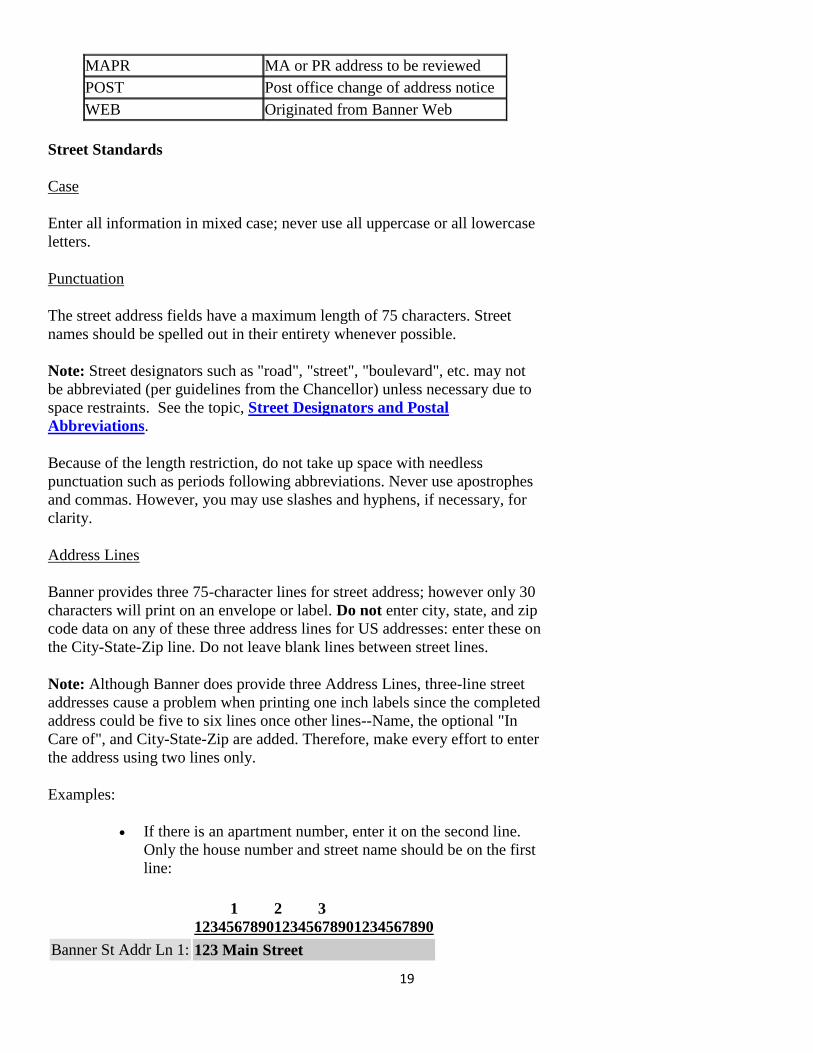
Examples:
If there is an apartment number, enter it on the second line.
Only the house number and street name should be on the first
line:
1 2 3
123456789012345678901234567890
Banner St Addr Ln 1: 123 Main Street

20
Banner St Addr Ln 2: Apt. 23
Banner St Addr Ln 3: [not used in this example]
If it is necessary to send communications to the attention of a
particular person, enter "Attn" followed by a space and then
the name on Address Line 1:
1 2 3
123456789012345678901234567890
Banner St Addr Ln 1: Attn Mary Jones
Banner St Addr Ln 2: 3535 Prien Lake Parkway
Banner St Addr Ln 3: [not used in this example]
Note: If entering both a PO Box and a street address, consider the PO Box
the mailing address (MA), and the street address as the permanent address
(PR) and enter into Banner accordingly.
Street Number
For addresses in which the street name is a number from 1-10, spell out the
number. For numbers 11 and above, use the number itself with the
appropriate suffix (i.e., the "nd" in 42nd). For example:
One First Avenue
Two 68th Street
123 Fifth Avenue
11 42nd Street
Street Name
Where the 75-character field length allows, type the street name in full. If
abbreviations are necessary, use the standard postal service abbreviation for
a street designator rather than abbreviating the street name. If you must
abbreviate the street name, make sure the end result is not confusing. For
example, do not abbreviate "Saint" as "St" in street names as this could
easily be confused with the standard abbreviation for street.
For addresses in which the street name is a number, enter the street name as
supplied by the person. Numbered streets are usually entered as a number
with the appropriate suffix, but you may spell them out if they are supplied
that way. For example, "955 73rd Street" or "100 Fifth Avenue.”
Street Designators and Postal Abbreviations
The preferred format is to spell out all address suffixes or street designators
such as Road, Street, Avenue, etc. However, Postal Service standard
abbreviations are acceptable, where the street name is too long, making it

21
necessary to abbreviate the street designator.
For a list of acceptable abbreviations, refer to:
Street Designators and Postal Abbeviations.
Secondary Address Unit Indicators and Postal Abbreviations
Second address units should always be entered on the second line of the
address field.
If you have space, spell out secondary address identifiers or unit designators.
However, if space is a problem, you may use the following abbreviations:
Description Abbreviation
Apartment Apt
Basement Bsmt
Building Bldg
Department Dept
Floor Fl
Front Frnt
Key Key
Lobby Lbby
Number No
Penthouse Ph
Pier Pier
Rear Rear
Room Rm
Side Side
Slip Slip
Space Spc
Suite Ste
Tower Twr
Trailer Trlr
Unit Unit
Upper Uppr
Compass Directions and Postal Abbreviations
Always spell out compass directions (except for a double directional such as
Southwest) unless space prohibits. If space is a problem use the standard
abbreviations in the table below. For example:
234 Jackson Street North

22
1222 SW Morris Street
An exception to the above rule is when the street name itself is East, West,
North, or South and includes a directional; the directional will be abbreviated
without periods. For example:
15 N East River Road
867 N West End Avenue
Description Abbreviation
East E
West W
North N
South S
Northeast NE
Northwest NW
Southeast SE
Southwest SW
Special Characters
If you receive an address with just a number at the end of the street, assume
this number to be an apartment number. Use the abbreviation "No" for
number when necessary (e.g., Lodge No 123).
Use hyphens and slashes when needed for clarity or for designating fractions.
Business/Organization Address Lines
Follow the guidelines for business/organization address (non-person record)
for all corporations, organizations, foundations, and vendors. The same
general rules as described in the previous sections apply to these records.
Remember, for US addresses, City-State-Zip is entered on a separate City-
State-Zip line, not in a street address line.
For example:
1 2 3
123456789012345678901234567890
Banner Bus Addr Ln 1: Skyline Towers Bldg Suite 100
Banner Bus Addr Ln 2: 365 Boylston Street
Banner Bus Addr Ln 3: [not used in this exanple]
Department or “In Care of…” for Business Addresses

23
When entering the business address for a person, type the department on
Address Line 1, the business or firm name on Address Line 2, and the
delivery data on Address Line 3. If the delivery data requires more than two
lines, omit the department data. For example:
1 2 3
123456789012345678901234567890
Banner Bus Addr Ln 1: Public Relations
Banner Bus Addr Ln 2: American Heart Association
Banner Bus Addr Ln 3: 1660 Duke Street Suite 1234
Do not enter corporate titles as part of an address. However, if "in care of" is
required, abbreviate it as "c/o" and enter it on the first street address line. Do
not use the percent sign (%) or spell out "in care of". For example:
1 2 3
123456789012345678901234567890
Banner Bus Addr Ln 1: c/o Agnes Ann Trotter
Banner Bus Addr Ln 2: American Heart Association
Banner Bus Addr Ln 3: 1660 Duke Street Suite 1234
City Standards
Always enter the city name in the city field. Enter it in mixed case; never use
all uppercase or all lowercase letters. The field has a maximum length of 20
characters.
US cities will automatically be entered in the city field when the zip code is
entered first in the zip code field. After entering the zip code, review the city
information to see that it is accurate and conforms to the preferred standards.
In some cases one zip code may be used for more than one town and the
default city must be changed. The city field can be corrected after zip code
information is entered.
The general rule is that city names will be spelled out. A standard exception
is when the city name includes "St" for Saint and "Ft" for Fort; then, always
use that format.
Compass directions in a city name are NEVER abbreviated (e.g., North
Boston, South Bend, West Memphis).
When city names must be shortened, either leave out a word (often the word
"the") or drop the necessary letters at the end of the name so it will fit the
line. For example:

24
For: Use:
Manchester-by-the-Sea Manchester-by-Sea
Rancho Santa Margarita Rancho Santa Margar
Truth or Consequences Truth or Consequence
Note: Punctuation is allowed when it is part of the city name.
State Standards
The state field is used for US and Canadian Addresses only. The Banner
State Code Table contains the two-letter standard code for: (1) US states and
US territories, (2) US military destinations, and (3) Canadian
provinces/territories:
Banner Table: State Code
Note: Use the States Codes Table and not the Nations Table for territories
such as Guam, US Virgin Islands, etc.
Military Destinations (Use the Banner State Code Table.)
Military addresses should be entered exactly as indicated. No abbreviations
are changed when entering a military address. Military destinations are
considered US addresses and have US zip codes. Enter the APO or AFO
code in the city field. For example:
Alice VanFrogulemen
HHB 6th Battalion 43rd Box 72
Air Defense Artillery CMR 417
APO AE 09602-8802
Canadian Provinces/Territories (Use the Banner State Code Table.)
County Standards
All counties will automatically be populated in the county field after the zip
code is entered in the zip code field.
Zip Code Standards
Zip codes must be entered for all US and Canadian addresses. Do not enter a
zip code for an international address.
When the five-digit zip is entered, the program automatically edits the code
against the zip code validation program and populates the correct city,
county, and state names in those fields based on the information in the
program. Once the program has validated and entered the information, city,
county, state, and zip fields may be edited as needed. (Always check the city

25
name since a zip code may cross two cities and the default city from the
validation table could be the wrong one.)
If the zip+4 information is available, enter it in the zip field. The hyphen
must be used when entering the entire nine-digit ZIP code.
Note: The validation program will not work if values are already entered in
the city or state fields. Likewise, the validation program will not work if the
nine-digit zip code is entered first. Enter the five-digit zip code to validate
the city and state fields. Then go back and add the hyphen and last four digits
to the zip code.
Canadian Addresses
Canadian street addresses and city names follow the same guidelines used
for entering US addresses.
Enter the province or territory in the state field using a two-letter code from
the Banner State Code Table.
Enter the Canadian postal code in the zip/postal code field. The format is
always a letter-number combination (e.g., B3C 4A7) with a space after the
third character.
Enter the nation code for Canada (CA) in the nation code field so that the
word CANADA is printed at the bottom of the address.
International Addresses (other than Canadian)
In general, international addresses follow most of the same guidelines used
in entering US addresses. That is, all information should be in mixed case
format; never use all uppercase or all lowercase letters. As much as possible,
use the abbreviations and formats provided in the section about street address
lines. If possible, keep the information on lines 1 and 2. Use abbreviations, if
necessary, to get the address information to fit on a single line.
Hyphens, slashes, and periods are allowed. Add a slash between information
when combining two short lines of address together in a single input line.
This is sometimes necessary with addresses for Asian countries. When
combining address lines, add the information from the lower line to the end
of the information on the upper line.
Never use the pound (#) sign anywhere in the address: substitute "No" when
needed. For example:
We receive: Correct format:
Taihei Bldg. #401
Eitai 2-1-5
Taihei Bldg 401
Eitai 2-1-5 / Koto-ku

26
Koto-ku, Tokyo 136-
8666
JAPAN
Tokyo 136-8666
JAPAN
We receive: Correct format:
ESO-Asiacom
1F Milo's Ind Bldg
2-10 Tai Yuen
Kwai Chung NT
HONG KONG
ESO Asiacom 1F Milo's Ind
Bldg
2-10 Tai Yuen / Kwai
Chung NT
HONG KONG
According to US post office guidelines, the following shows the order of
information for the international address. (Note: The line numbers used for
reference do not refer to Banner address lines, but the lines of the printed
address.)
Line 1: Name of Addressee
Line 2: Street Address or Post Office Box
Number
Line 3: City or Town name, other principal
subdivision (e.g., province, state,
county, etc.), and postal code (if
known)
Note: In some countries, the postal
code may precede the city or town
name.
Line 4: Country Name, spelled out in
English, no abbreviations, in all
uppercase.
Do not enter the international postal code in the zip code field. For example:
Ms Joyce Browning
2045 Royal Road
London WIP 6HQ
ENGLAND
Ms Joyce Browning
2045 Royal Road
06570 St Paul
FRANCE
Nation Standards
The nation code field is used only for international addresses. Always leave
this field blank when entering a US zip code (includes entries for military
27
destinations and US territories, such as Puerto Rico, Guam and the US
Virgin Islands).
According to Postal Service regulations, the name of the foreign country
must be printed alone in all caps on the last line of the address for outgoing
mail. In Banner this is accomplished by selecting the two-character alpha
code/country name from the list in the nation code field table.
Banner Table: Nation Code
Updating Addresses
When adding a subsequent address of the same type, end-date the prior
address and check its "inactive" address box. Then add the new address. Do
not change or delete a prior address unless correcting an initial entry error.
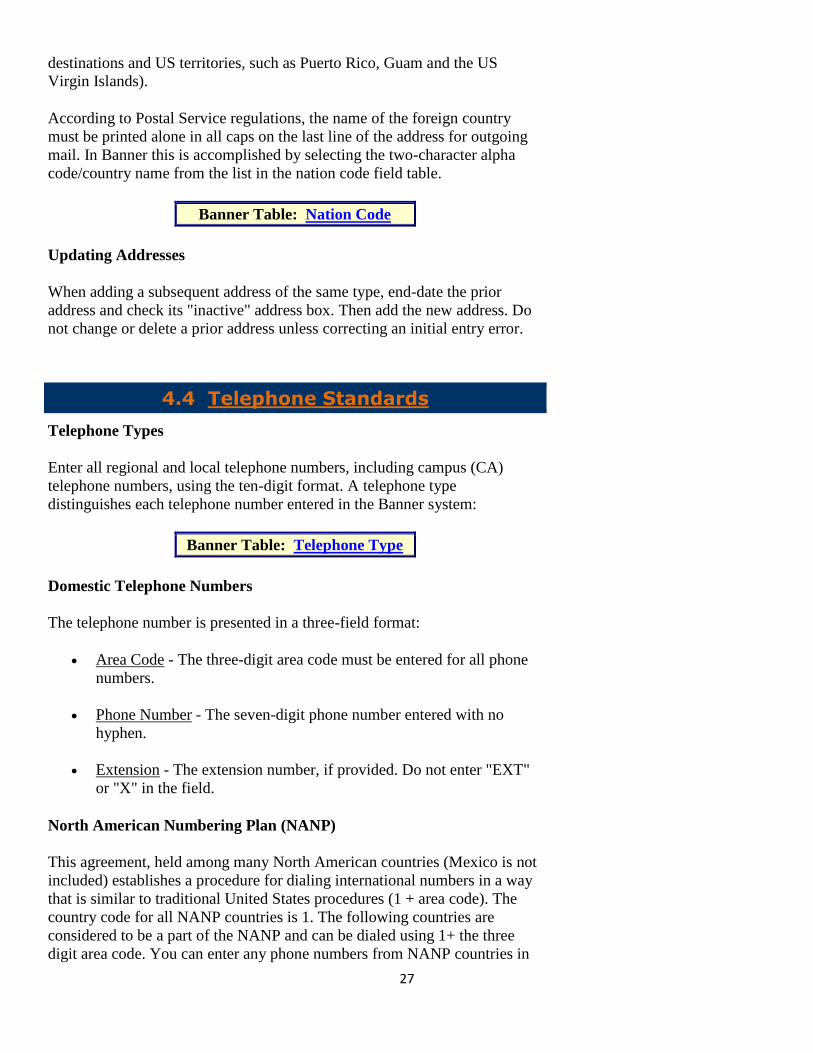
4.4 Telephone Standards
Telephone Types
Enter all regional and local telephone numbers, including campus (CA)
telephone numbers, using the ten-digit format. A telephone type
distinguishes each telephone number entered in the Banner system:
Banner Table: Telephone Type
Domestic Telephone Numbers
The telephone number is presented in a three-field format:
Area Code - The three-digit area code must be entered for all phone
numbers.
Phone Number - The seven-digit phone number entered with no
hyphen.
Extension - The extension number, if provided. Do not enter "EXT"
or "X" in the field.
North American Numbering Plan (NANP)
This agreement, held among many North American countries (Mexico is not
included) establishes a procedure for dialing international numbers in a way
that is similar to traditional United States procedures (1 + area code). The
country code for all NANP countries is 1. The following countries are
considered to be a part of the NANP and can be dialed using 1+ the three
digit area code. You can enter any phone numbers from NANP countries in

28
the domestic phone number field.
Country Area Code
Anguilla 264
Antigua 268
Bahamas 242
Barbados 246
Barbuda 268
Bermuda 441
British Virgin Islands 284
Canada Multiple
Cayman Islands 345
Dominica 767
Dominican Republic 809
Grenada 473
Guam 671
Jamaica 876
Montserrat 664
Northern Marianas Islands
(Saipan, Rota, and Tinian)
671
Puerto Rico 787
St Kitts/Nevis 869
St Lucia 758
Trinidad and Tobago 868
Turks and Caicos Islands 649
US Virgin Islands 340
When adding a subsequent telephone number of the same type, end-date the
prior telephone number and then add the new telephone number. Do not
change or delete the prior telephone number unless correcting an initial entry
error.
International Telephone Numbers
The international phone number field has a 16-character limit. Enter all three
parts of an international number (i.e., the country code, the city code without
a leading zero, and the telephone number) in the international phone number
field using no parentheses or hyphens. Do not enter the "011" standard code
for international dialing.
For example, a telephone number in Japan, consisting of country code 81,
city code 03, and telephone number of 7599311 would be entered as

29
8137599311. (Note that the leading zero for the city code was not entered.)
Updating Telephone Numbers
When adding a subsequent telephone number of the same type, end-date the
prior telephone number and then add the new telephone number. Never
change or delete the prior telephone number unless you are correcting an
initial entry error.
4.5 Standards for Various Shared Tables
College
Refer to this table for the college codes used in the Student module:
Banner Table: College Code
Dates
Calendar Dates
Enter all dates in MMDDYYYYY format:
DD = the two-digit day of the month; use a preceding zero if
the number is less than 10
MM = the two-digit month’ using a preceding zero if the
number is less than 10
YYYY = all four digits of the year
The Banner system will convert the entered dates to a DD-MM-YYYY
format. Example:
Date: Your
Entry: Banner Converts to:
April 15,
2003
15APR2003 15-Apr-2003
Date of Birth
Enter the Date of Birth in MMDDYYYY format.
For employees, Human Resources will maintain this information in IRIS. For

30
students, the undergraduate and graduate admissions offices, Financial Aid
and Scholarships, and the Office of Academic Records will maintain this
information. For Donors, the University Advancement Office will maintain
this information.
Deceased Indicator
Due to the sensitivity of this issue, prompt attention is important so future
mailings from University offices are discontinued. Deceased status must be
verified, when possible, through death certificate, obituary, or Social
Security Death Index (SSDI). (The link to a SSDI search
is: http://ssdi.rootsweb.com/)
For employees and retirees, Human Resources will enter this information in
IRIS. Updates and changes are included in the nightly referential file. For
students, the Academic Records Office will enter this information. For
applicants and recruits, the Admitting Offices will enter this information. For
Advancement constituents (who are not current students, current employees,
or retirees), University Advancement will enter this information.
Deceased Date
The same office setting the Deceased indicator should enter the date, if
known. If the date is not known, leave this field blank. The "date marker"
date should not be used since no cleanup is required for this field.
Degrees
Degrees include those awarded by UT Martin and those captured by UT
Martin for faculty, staff, donors, and students:
Banner Table: Degree Code
Note: HR has BSE as a second value for Bachelor of Science in Education.
Students and Alumni have BSE for Bachelor of Science in Engineering,
which HR also has as a value. Therefore, 246 (BSE) should be converted as
BSED.
HR has BST as Bachelor of Science in Teaching and Bachelor of Science in
Technology. Students and Alumni have BST as Bachelor of Science in
Technology. Therefore, 266 (BST) should be converted as BSTE.
Also:
200 (B ARCH) should be converted as BARC.
226 (B MUS) should be converted as BM.
228 (B M E) should be converted as BMED.
300 (M ARCH) should be converted as MARC.

31
320 (M MUS) and 322 (MM) should be converted as MMU.
326 (M M E) should be converted as MMED.
328 (M PHIL) should be converted as MPHI.
608 (PHARM D) should be converted as DP.
699 (PROF-OTH) should be converted as PR-O.
Degree Award Category Code
According to proto-type documentation, all the following are Tennessee
Board of Trustees system required and are to remain as delivered:
Code Description
11 Elementary School Program
12 Junior High School Program
13 High School Program
16 1 Year College
17 2 Year College
18 3 Year College
19 4 Year College
21 Certificate < 1 year
22 Certificate = 1 year < 2 years
23 Associate Degree
24 Certificate > or = 2 years < 4 years
25 Bachelors Degree
26 Post Secondary Certificate/Diploma > two years and
< four years
31 First-Professional Degree
32 Post-Professional Degree
41 Graduate Certificate
42 Master's Degree
43 Educational Specialist Degree
44 Doctoral Degree
45 Post-Doctoral Award
46 Post-Master's Degree
Degree Level
Per proto-type documentation, Degree Level is used in conjunction with
STVDEGC:
Banner Table: Degree Level Code
Email Addresses

32
The following guidelines apply for the use of email addresses at UT Martin.
All official UT Martin email communication to students and employees must
be sent to the individual's UT Martin email address. The Office of
Admissions may send all email correspondence to the student’s home email
address that is provided on the application.
The official UT Martin email address will be systematically entered and
updated in Banner by ITS. Valid email address types are located in:
Banner Table: Email Address Type
Ethnicity
Ethnicity must be entered for all employees and students who are US citizens
or US permanent residents in order to meet regulatory requirements. You can
find valid ethnicity codes in:
Banner Table: Ethnicity Code
In IRIS, ethnicity is either Hispanic or Latino OR Not Hispanic or Latino.
Gender
All UT Martin employees must be classified as female or male. Also, having
a valid gender code on all students facilitates record searches and analyses.
You can find valid UT Martin gender codes in:
Banner Table: Gender Code
Legacy
Legacy information is reported on the SPAPERS screen in Banner if
provided on the application:
Banner Table: Legacy Code
Majors/Minors/Concentrations
For valid codes see:
Banner Table: Majors/Minors/Concentrations
Marital Status
When needed by Financial Aid and Scholarships, these codes will be used:
33
Banner Table: Marital Status Code
Human Resources uses only Married or Single.
Relationship
The Data Standards Team determined the following values based on items in
the legacy systems.
Banner Table: Relationship Code
Religion
Religious affiliation is collected by the Office of Admissions. You can find
valid UT Martin codes in:
Banner Table: Religion Code
Social Security Number
The following populations must have a social security number on file in the
system for identification purposes, federal reporting purposes, financial aid
purposes, etc. It will not be used as a record key.
Audience SSN Field
All UT Martin employees Must have a social security number
listed.
UT Martin students who
receive Financial Aid
Must have a social security number
listed.
UT Martin students who
do not receive Financial
Aid
Note: The National Student
Clearinghouse will not process student
records with assigned or blank SSNs
for either enrollment or degree
verification purposes.
Vendors that must receive
a 1099 Form
Must have their social security
number, tax ID, or employer ID
number listed.
International Students Must have a social security number if
they plan to work or receive any type
of financial aid.
Enter the 9-digit number with no embedded dashes or spaces. Do not enter
34
"000000000" or "999999999" or any other type of place holder for records
with no social security number.
The same offices responsible for name changes will also be responsible for
social security number changes and documentation.
Veteran Information
Veteran Services, located within the Office of Financial Aid and
Scholarships, will enter and maintain all "veterans" data for students
receiving veterans’ benefits. Human Resources will also capture Veteran
data on employees.
The Veteran File Number is the principal veteran ID number for the student
and is typically the student's social security number. For spouses and
dependents, the Veteran File number may be the veteran's social security
number with an additional character at the end to indicate spouse or
dependent.
Refer to:
Banner Table: Veteran Code
International Information
Citizenship
Citizenship is required information for students and employees at The
University of Tennessee at Martin. Additional information, such as country
of citizenship and visa status, is required for any person who is not a citizen
of the United States. The following information is entered using SPAPERS:
Citizenship status Code
U.S. Citizen 1
Non U.S. Citizens 2
Resident Alien 3 (select code 2 in
SAADMA to indicate
‘Residency’.
Country of Citizenship
Using SOASUPL, select ‘Admission Nation’ from the table, then select the
‘Birth Nation’ from the table to enter the student’s country of citizenship.

35
VISA
Visa status is maintained for all non-US citizens. Visa status for students is
established and maintained throughout the career of the student by the Office
of Admissions. Visa status for non-student employees is maintained by
Human Resources.
VISA codes are validated against table STVVTYP in Banner:
Banner Table: VISA Code

36
5.0 Data Policies and Procedures
5.1 Name Change Form
A Student’s name will be changed on all their academic records once they
present the following:
A signed, written request for name change
A copy of their birth certificate, marriage license, or social security
card with new name.
University employees must also visit the Office of Human Resources, 112
Hall Moody Administration Building to make changes to their personnel
files. Changes made to academic records will not update employee files.
5.2 Address and Telephone Number Changes
Students may have their address and telephone number changed by by
submitting an address change through the “address verification hold” in
Banner. Students may also come into the Office of Academic Records,
103 Hall Moody Administration Building to complete a change of address
form.
5.3 Social Security Number Change Policy
Students must submit a copy of their official social security card showing
the correct number to the Office of Academic Records to have their social
security number changed.

37
APPENDIX A – Creating New Student Records
USE SRAQUIK
1. Click on the pull down arrow beside the ID field. Double click on Person Search (SOAIDEN) or click
F9 to bring up the search screen.
2. The % is a “wildcard”. It means “give the information requested plus everything that comes after it”.
3. Search by last name with the % sign at the end and first name using only first two letters with % sign,
then click F8.
4. Searching with only the first two letters and the % will pick up most variations. Such as Jeni instead of
Jennifer, Marianne instead of Mary Ann for example.
5. If a match is found, compare some personal identifier such as the birthday if available.
6. If not found clear the search by clicking F7 each time. Next search by last name, plus the first two
characters of the first name in the Middle Name field
7. If not found, clear the search (F7) and search by last name plus the first two characters of the Middle
Name in the First Name field.
8. If still not found, that person does not exist in Banner.
Note: There may be 2 or 3 records for the same person but as long as these correspond to the same ID number
that is okay. Ignore records with 00xxx number.
Are there are several with the same name, maybe even initial or birthday or still uncertain? Instead of
looking up each ID number individually, type in the exact name (no % sign). Then across the top of the screen
under Query header access - “Count hits”. Only the first person will be displayed, click F8 to see others and also
see addresses; arrow down and try to match an address or town if possible.
If records contain the same name or same town for example, ascertain whether or not it is the same person using
the following method: Double click on the possible match, then click Control + Page Down to display
additional data to see if the person is indeed a match. Use the tabs to see high school, grad year and birth date.
The type of data visible will depend on which screen searched from i.e. SAADSMS, SRAQUIK, etc.
If no match is found, click the black X twice to get back to the SRAQUIK screen or simply “ROLLBACK” in
SPAIDEN. Click ‘Generate ID’ on right-hand side of the screen. This opens up the GOAMTCH screen where
5.4 Changing Data Standards Manual
The Data Standards Committee will review the manual annually and make
any changes as appropriate. The ITS Banner Group Graduate Assistant is
responsible for executing these changes.
Appendix

38
most data entry can be done. The FIRST time data is entered, the Matching Source must be selected. Use the
pull down arrow and select Admissions or the source designated to your area and click okay.
Data Entry on the GOAMTCH screen.
On this screen, the final student record is being created so the address format and spelling is crucial. The TAB
key is used to move between fields.
Enter the full name in upper and lower case. Click TAB.
MA will automatically fill in for the Address type.
1. Type in street address following the Address Standards in this manual.
2. Do not manually type in the city and state instead, click TAB and city, state and county
automatically appear. If you manually type the data the county code will not be available.
3. If there is a Social Security Number (SSN), TAB to the SSN field; otherwise TAB past it. SSNs
must be entered without dashes. Make sure the SSN is entered precisely. If the SSN is illegible
do not guess, leave the field blank.
4. TAB to enter the birth date.
5. TAB to gender. If the gender is known type in F or M – the text will auto fill.
6. TAB to telephone type. The default is MA which should be used unless the student indicated it
is a cell phone – in that case use CP.
7. TAB to telephone number. The first block is area code and the cursor automatically goes to the
next block when information is entered. Enter without dashes. The last block is for an extension
number and is very rarely used. (If the prospect has more than one phone number there will be an
opportunity to enter it later).
8. TAB to the email type field. HO will be filled in automatically.
9. TAB to the email field and enter the email in the proper format.
10. Click F10 to save the data.
Clicking F10 causes the system to search to see if the data entered is already in the database. This is the
only screen where F10 is used for searching and not saving.
Now what? If no match is found: a box will popup asking if the person should be created as new? Select yes.
After a couple of seconds another box will pop up, indicating that a new record has been built and providing a
student ID number. Record this number. The person’s record where additional fields are completed will
automatically pop up..
If a match was found:
There are two types of matches that may be returned: Potential and Match.
If the Match tab is highlighted the system will display the person that perfectly matches based on
certain information that you provided. (not all data such as address is used to match). The “perfect”
match will display under the Match tab. In order to see the address, email or telephone numbers on this
perfect match, use the pull down under that area. The only reason someone would appear here is because
they were missed in the initial search.
Even though someone appears under the match screen it may not be a match because the system
can also display other really close matches under the potential match screen. Check to see the
information under the potential match screen also.

39
If there is no one that the system thinks is a perfect match, the Potential Match tab will be highlighted;
arrow down to the match. Be aware if the social security number belongs to someone else their name
will be displayed among the names that are similar.
With either tab (match or potential) highlighted, clicking on the Details button will retrieve additional
information by double clicking on any of the options there. Examples are high school, recruit record,
admissions application. This information can narrow the search considerably.
NO MATCH?
If a match was not found, click Create New. The process is the same as the Create New process above,
record the ID number and click the black X to return to the SRAQUIK screen where additional student
fields are completed.
FOUND A MATCH?
If the system found a match there are two options:
1. Select ID– does not replace any current information but will fill in any information not
previously provided, example birthday etc.
2. Update ID – replaces the current information with the data provided. Example: If the address
entered is different than what is found on the match screen, Update will use the new address.
Highlight the student record to be matched, choose Select ID or Update ID and click it once;
SRAQUIK will automatically pop up.
Click Control + Page Down. If a new record was created, this screen will be blank and the student’s data
will need to be entered. If the student record already exists, be sure to update or verify the data.