Embed Size (px)
Citation preview

DETAILED DESIGN REVIEWWEEK 15
María Camila Luna
Pablo Santizo
Zak Borden
Zach Delurey

AGENDA
Introduction Problem statement Finalized engineering and customer
requirements Proposed process design
Functional decomposition and flow diagram Components of the system Proposed bill of materials
Proposed assembly layout Ergonomics Risk management Team findings

EXPECTATIONS
Validate final design with customer and peers Future steps (Senior Design II)
And schedule for the first 3 weeks Identify areas that need improvement Obtain customer approval for the BOM
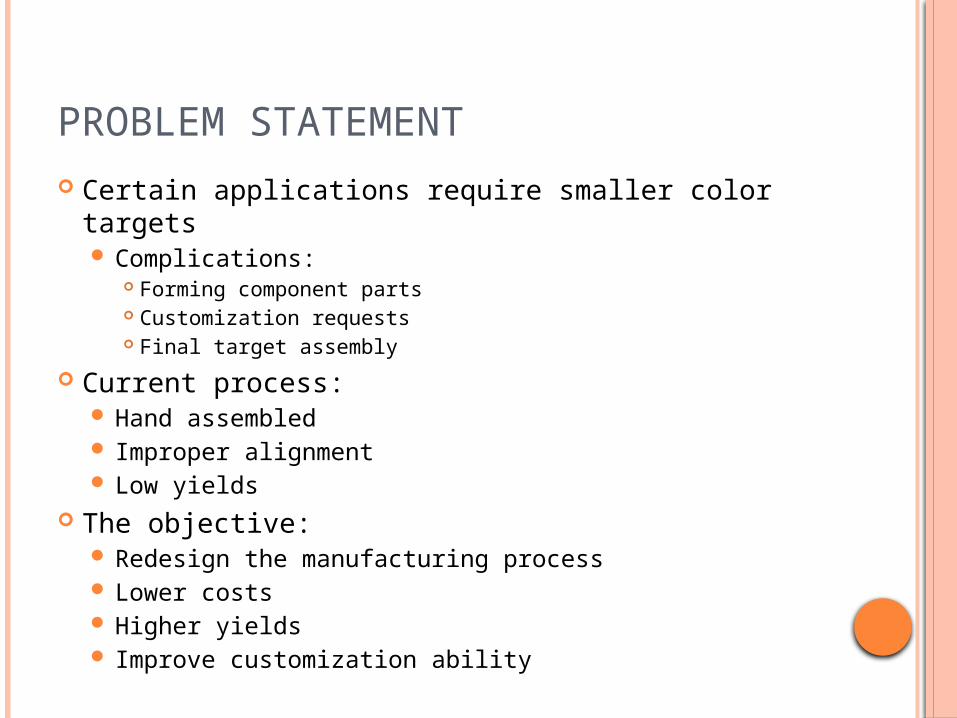
PROBLEM STATEMENT
Certain applications require smaller color targets Complications:
Forming component parts Customization requests Final target assembly
Current process: Hand assembled Improper alignment Low yields
The objective: Redesign the manufacturing process Lower costs Higher yields Improve customization ability
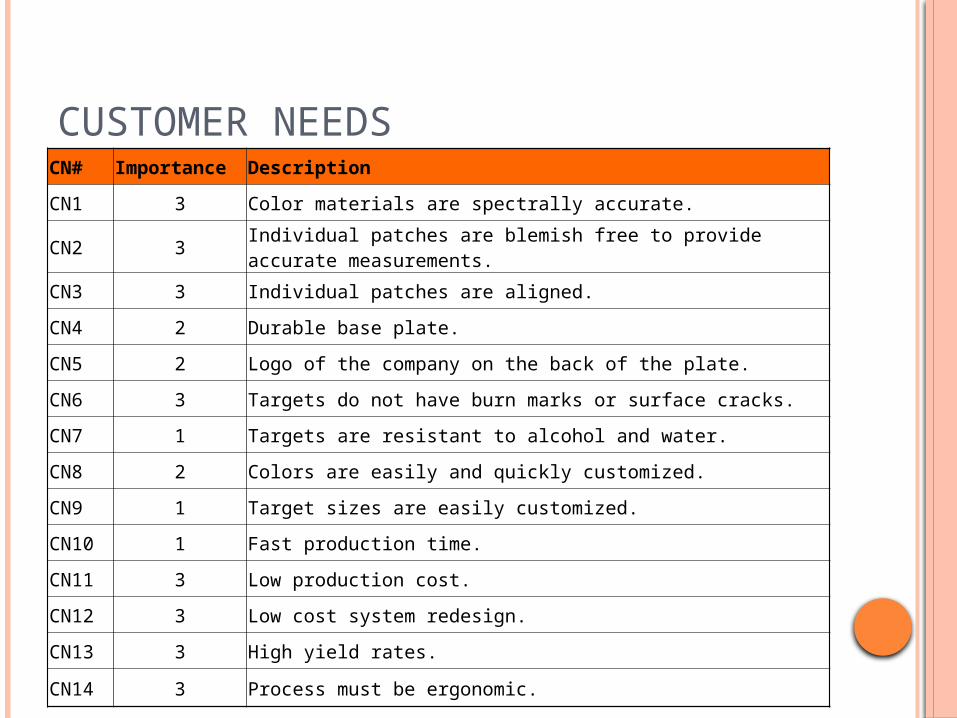
CUSTOMER NEEDSCN# Importance Description
CN1 3 Color materials are spectrally accurate.
CN2 3Individual patches are blemish free to provide accurate measurements.
CN3 3 Individual patches are aligned.
CN4 2 Durable base plate.
CN5 2 Logo of the company on the back of the plate.
CN6 3 Targets do not have burn marks or surface cracks.
CN7 1 Targets are resistant to alcohol and water.
CN8 2 Colors are easily and quickly customized.
CN9 1 Target sizes are easily customized.
CN10 1 Fast production time.
CN11 3 Low production cost.
CN12 3 Low cost system redesign.
CN13 3 High yield rates.
CN14 3 Process must be ergonomic.

ENGINEERING REQUIREMENTS Source Function
Specification (Metric)
Unit of Measure
Marginal Value
Ideal Value
Testing
S1 CN4 Base design Durability (drop test) Feet 3ft >3ft Drop test
S2 CN9 Base design Target size # of sizes 3 sizes inf. Order one of each desired size
S3 CN3 Individual patches
Positional accuracy with respect to tile size % 5% <5% Use microscope to verify accuracy
S4 CN5 Base design Logo is present Pass/Fail Pass Pass Check the logo visibility
S5 CN2/CN6/ CN7 Targets Percent damaged surface % 5 0 Use microscope to verify damage
S6 CN8 Individual patches
Number of patches that can be changed # 30 30
Test different paper in the laser cutter
S7 CN8 Individual patches
Time to change color scheme Min. 10 5 Time study
S8 CN10 System Cycle time Min. 30 <15 Time study (60 trials) different users
S9 CN11 System Production Cost Dollars 55 25 Add up the individual costs (include labor)
S10 CN12 System System Redesign Budget Dollars 1500 >1500 Add up the investment costs
S11 CN13 System Yield Rate % 90 95 Inspect final products from the time study (n=60)

PROPOSED PROCESS- FLOW DIAGRAM
Cut individual patches*
Manufacture back plates*
Place patches in bins (according
to color)
Arrange bins according to
customer order
Place individual patches and base
plate on static mat/ tilted table
Place adhesive in
pockets
Pick individual patch using vacuum pen
Place patch in correct pockets
using magnification device
Inspect for any flaws using
digital microscope
* Outsourced processes

FUNCTION DECOMPOSITIONProduce properly aligned, highly
customizable, small scale color targetsObtain color
papersChoose specific colors
(customer request)
Cut paper to desired size
Position paper on
cutter
Protect paper form
cutting process
Align patches within
tolerancesIdentify pattern
according to customer
order
Vertically and
horizontally align
patches
Check quality
Secure colors in placePrevent patches
from shifting
Protect target from
damage
Inspect final product

BACK PLATE
First iteration of prototypes: Material: Renshape® SL 7820 black
resin Quantity: 10 small, 5 large Overall length
0.495” Small target 0.850” Large target
Depth of pockets= 0.01”
Feasibility of 3D printing Pocket allows for self-aligning Pockets were not deep enough Pockets and patches size did not
match
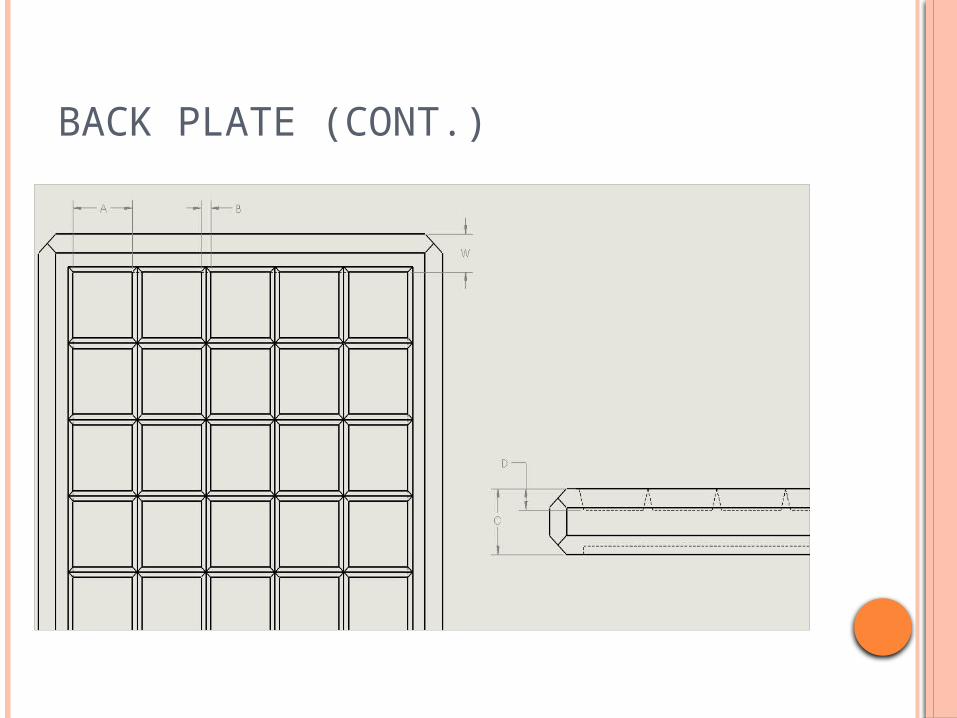
BACK PLATE (CONT.)

BACK PLATE (CONT.)
PLATE APocket width
BRib
width
CTotal
thickness
DPocket depth
WWall
thickenss
1 0.0625”
0.010” 0.0625” 0.020” 0.025”
2 (gutters) 0.0625”
0.010” 0.0938” 0.020” 0.025”
3 0.0554 0.010” 0.0625” 0.015”-.030”
0.029”
4 0.050” 0.015” 0.0625” 0.015”-.030”
0.032”
5 0.115” 0.010” 0.0625” 0.015”-.030”
0.036”
6 0.100” 0.025” 0.0625” 0.015”-.030”
0.044”
Second Iteration Prototypes:
COLOR PATCHES
Laser cutter process outsourced Test the different samples given by customer
Small variability 0.056” Small target 0.196” Large target
Customer wants to keep working with current employee
Possible back-up plan: Boston Laser Cutter

VACUUM PEN
Problems identified earlier and potential solution: Picks up more than one tile Tile flips when dropped into the pocket Learning curve
Ergonomics expert opinion: Vibration is not a problem Sound is not a problem
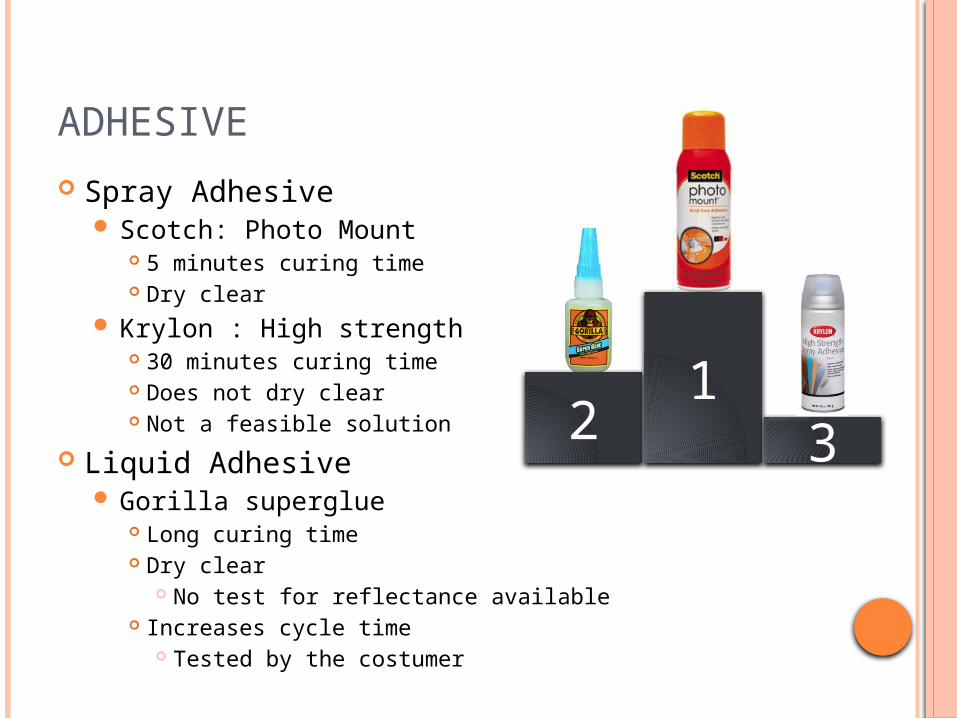
ADHESIVE
Spray Adhesive Scotch: Photo Mount
5 minutes curing time Dry clear
Krylon : High strength 30 minutes curing time Does not dry clear Not a feasible solution
Liquid Adhesive Gorilla superglue
Long curing time Dry clear
No test for reflectance available Increases cycle time
Tested by the costumer
21
3
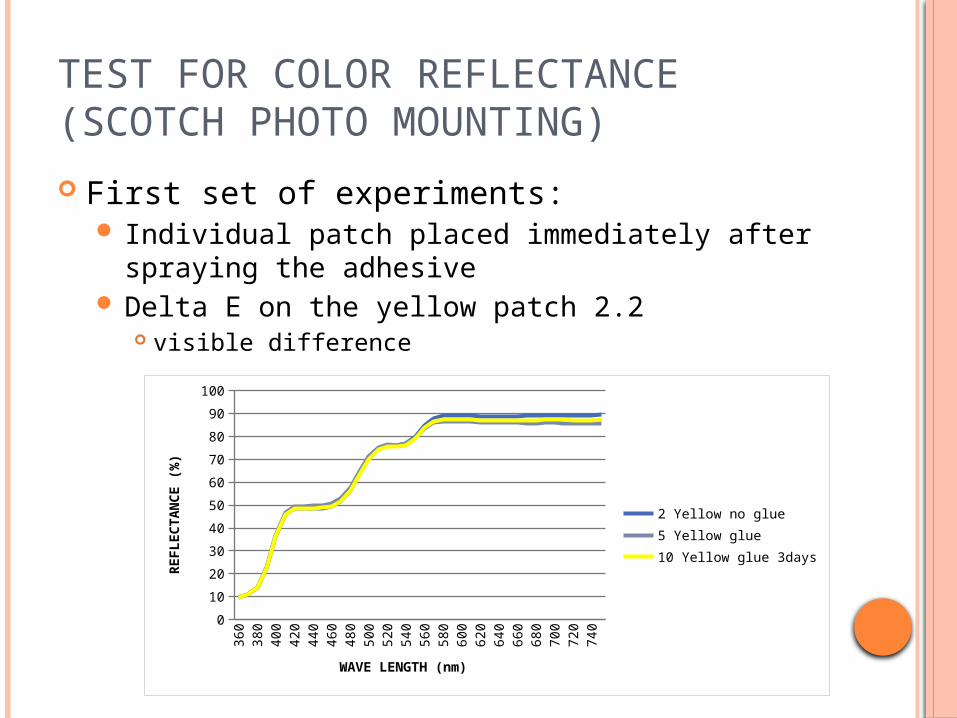
TEST FOR COLOR REFLECTANCE (SCOTCH PHOTO MOUNTING)
First set of experiments: Individual patch placed immediately after
spraying the adhesive Delta E on the yellow patch 2.2
visible difference
360
380
400
420
440
460
480
500
520
540
560
580
600
620
640
660
680
700
720
7400
10
20
30
40
50
60
70
80
90
100
2 Yellow no glue5 Yellow glue10 Yellow glue 3days
WAVE LENGTH (nm)
REFLEC
TA
NC
E (
%)

TEST FOR COLOR REFLECTANCE (SCOTCH PHOTO MOUNTING)
New application process Wait 1:30 min. after spraying the adhesive
Delta E decreased from 2.2 to 0.1 0.1 (no visible change)
360
380
400
420
440
460
480
500
520
540
560
580
600
620
640
660
680
700
720
7400
10
20
30
40
50
60
70
80
90
100
Yellow no glueYellow glue 5 min
WAVELENGTH (nm)
REFLEC
TA
NC
E (
%)

ADDITIONAL TESTING
In order to test the actual curing time a small target was sprayed The tester waited 8 minutes and then start
placing the individual patches After all the patches were placed the target was
dropped form 3ft in order to test the adhesive quality
All of the patches stayed in place

STATIC MAT & TURNING TILTED PLATE
Static Mat: Help to keep the individual patches before they
are placed in the target
Tilted Plate: Table rotates and tilts to ease the placement of
the patches Ergonomic improvement: Helps to improve the position
of the user Non-skid surface to hold the plate and reduce
the necessity of two hands handling

BINS
Keep the individual patches separated by color and sizes
Increase the organization of the layout Reduces the preparation time
2 different Bins 64 drawers 39 drawers

MAGNIFICATION DEVICE
Customer ordered a set of professional magnifying lenses Allows for people with corrective lenses Reduces the problem of going into and out of the
magnification range Reduces ergonomic problems Comfortable for the user

DIGITAL MICROSCOPE
Inspection/quality purposes Measurement software Increase quality control Reduces time
Not for alignment purposes: Difficult of use (working in one are while looking
at another)

BILL OF MATERIALSPart Name Part No. Size Price
Color patches N/A 1/8, 1/16” N/A
Back plate N/A 0.69* 0.81” , 0.44*0.38”
$10.00
Vacuum pen & accessories
V8100A 3*3*6” $499.00
Photo mount spray adhesive
B001680QHW 4.25 Ounce $13.18
Bins 10164/ HA01039001
20*16*6 ½”/19.5*15.8*6.2”
$30.14/$31.72
Tilting turntable B000674S4Q 7 ¾” $61.40
Magnification lenses
Provided by Customer
Provided by Customer
$1300
Digital microscope Provided by Customer
Provided by Customer
$1100
Static mat Provided by Customer
Provided by Customer
$850

ASSEMBLY LAYOUT
ERGONOMICS
Main problem: posture and length of the task Sound and vibration are not issues Early to make a decision
First pick a design Then consider ergonomic issues
Consider inexpensive solutions Turning table instead of whole table Inexpensive microscope/ magnification device

RISK MANAGEMENT
Link to updated risk management New Risks
Adhesive fails over time Original Sized parts make patches too small to
cut Gutters cause structural weakness

PLANS FOR SENIOR DESIGN II
Review project state Costumer and engineer requirements with
costumer Inventory of hardware and parts Review long term adhesive test Select adhesive and method Test prototypes
Varying depths and wall sizes Update customer with results Create optimized back plate Trial run process
Ergonomic or other issues

LESSONS LEARNED
Include several test variables on prototypes Previously plan for the next steps following
an experiment Keep organized notes for every meeting Adapt to changes in scope and initial
conditions Importance of risk management Continuous process

Questions?