Embed Size (px)
Citation preview
RHF2
06P_
IB_F
A_09
1012
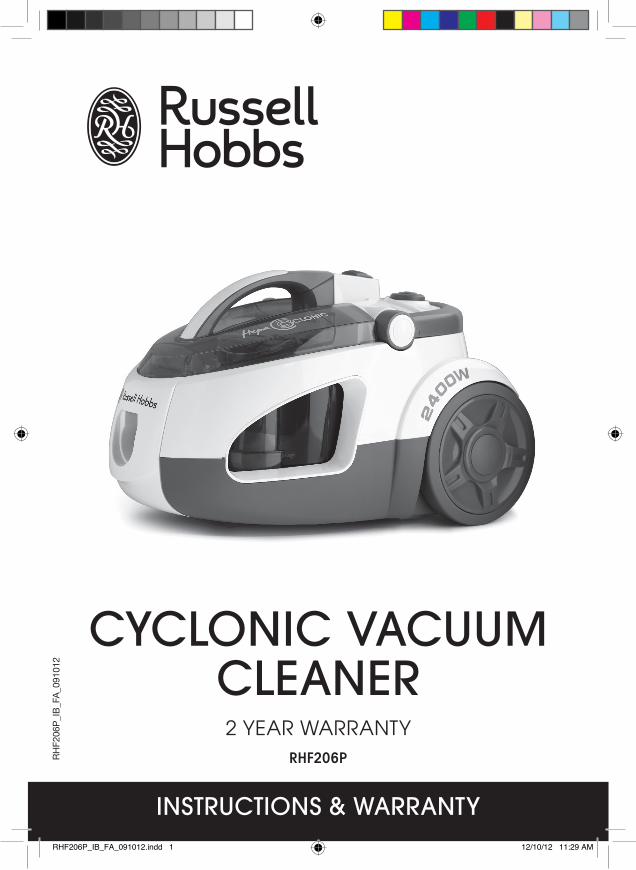
CYCLONIC VACUUM CLEANER2 YEAR WARRANTY
RHF206P
INstRUCtIONs & WARRANtYRHF206P_IB_FA_091012.indd 1 12/10/12 11:29 AM
Spectrum Brands Australia Pty LtdLocked Bag 3004 BraesideVictoria 3195 Australia
Customer Service in AustraliaTollFree: 1800 623 118Email: [email protected]: www.spectrumbrands.com.au
Spectrum Brands New Zealand LtdPO Box 9817 NewmarketAuckland 1149 New Zealand
Customer Service in New ZealandTollFree: 0800 736 776Email: [email protected]: www.spectrumbrands.co.nz
W0911
Spectrum Brands Australia Pty Ltd and Spectrum Brands New Zealand LtdWarranty Against Defects
In this warranty:Australian Consumer Law means the Australian consumer law set out in Schedule 2 to the Competition and Consumer Act 2010;
CGA means the New Zealand Consumer Guarantees Act 1993;Goods means the product or equipment which was accompanied by this warranty and purchased in Australia or New Zealand, as the case may be;Manufacturer, We or us means:
1. for Goods purchased in Australia, Spectrum Brands Australia Pty Ltd ABN, 78 007 070 573; or2. for Goods purchased in New Zealand, Spectrum Brands New Zealand Ltd, as the case may be,
contact details as set out at the end of this warranty;
Supplier means the authorised distributor or retailer of the Goods that sold you the Goods in Australia or in New Zealand; andYou means you, the original end-user purchaser of the Goods.1. Our goods come with guarantees that cannot be excluded under the Australian Consumer Law, or
the CGA. You are entitled to a replacement or refund for a major failure and compensation for any other reasonably foreseeable loss or damage. You are also entitled to have the goods repaired or replaced if the goods fail to be of acceptable quality and the failure does not amount to a major failure.
2. The bene�ts provided by this Warranty are in addition to all other rights and remedies in respect of the Goods which the consumer has under either the Australian Consumer Law or the CGA. The original purchaser of the Goods is provided with the following Warranty subject to the Warranty Conditions:
3. We warrant the Goods for all parts defective in workmanship or materials from the date of purchase (Warranty Period), for the period of:-(a) Two (2) years for Russell Hobbs products (see product packaging for details)(b) Two (2) years with �ve (5) year motor warranty for Russell Hobbs products (see product
packaging for details)(c) Limited Lifetime, Ten (10) years for Russell Hobbs cookware.(d) One (1) year for George Foreman, iRobot, Westinghouse, Black & Decker and Spectrum Brands
products.
If the Goods prove defective within the Warranty Period by reason of improper workmanship or material, we may, at our own discretion, repair or replace the Goods without charge.
Warranty Conditions
4. The Goods must be used in accordance with the manufacturer’s instructions. This Warranty does not apply should the defect in or failure of the Goods be attributable to misuse, abuse, accident or non-observance of manufacturer’s instructions on the part of the user. As far as the law permits, the manufacturer does not accept liability for any direct or consequential loss, damage or other expense caused by or arising out of any failure to use the Goods in accordance with the manufacturer’s instructions.
5. Exhaustible components (such as batteries, �lters and brushes) of the Goods are included under this Warranty only where there is a defect in workmanship or materials used.
6. The warranty granted under clause 3 is limited to repair or replacement only.
7. Any parts of the Goods replaced during repairs or any product replaced remain the property of the manufacturer. In the event of the Goods being replaced during the Warranty Period, the warranty on the replacement Goods will expire on the same date as for the Warranty Period on the original Goods which are replaced.
8. In order to claim under the warranty granted under clause 3 you must:(a) Retain this warranty with your receipt/proof of purchase; and(b) Return the Goods to us at the relevant address or to the Supplier by prepaid freight
within the Warranty Period accompanied with (i) the legible and unmodi�ed original proof of purchase, which clearly indicates the name and address of the Supplier, the date and place of purchase, the product name or other product serial number and (ii) this warranty.
9. This warranty is immediately void if:(a) Any serial number or appliance plate is removed or defaced;(b) The Goods have been serviced or otherwise repaired by a person not authorised to do so
by us or where non approved replaced parts are used.
10. The Goods are designed for domestic use only. A limited 90-day Warranty applies to any industrial or commercial use of the Goods. The Goods must be connected to the electrical voltage requirements as speci�ed in the ratings label located on the Goods.
11. This warranty does not cover the cost of claiming under the warranty or transport of the Goods to and from the Supplier or us.
12. This warranty is only valid and enforceable in Australia against Spectrum Brands Australia Pty Ltd and in New Zealand against Spectrum Brands New Zealand Ltd.
Contact us or the Supplier for further details.
Register your product online
If you live in Australia please visit: www.spectrumbrands.com.au/warrantyIf you live in New Zealand Please visit: www.spectrumbrands.co.nz/warrantyRegistration of your warranty is not compulsory, it gives us a record of your purchase AND entitles you to receive these bene�ts: Product information; Hints and tips; Recipes and news; Information on special price o�ers and promotions.
Any questions? Please contact Customer Service for advice.
RHF206P_IB_FA_091012.indd 2 12/10/12 11:29 AM

Spectrum Brands Australia Pty LtdLocked Bag 3004 BraesideVictoria 3195 Australia
Customer Service in AustraliaTollFree: 1800 623 118Email: [email protected]: www.spectrumbrands.com.au
Spectrum Brands New Zealand LtdPO Box 9817 NewmarketAuckland 1149 New Zealand
Customer Service in New ZealandTollFree: 0800 736 776Email: [email protected]: www.spectrumbrands.co.nz
W0911
Spectrum Brands Australia Pty Ltd and Spectrum Brands New Zealand LtdWarranty Against Defects
In this warranty:Australian Consumer Law means the Australian consumer law set out in Schedule 2 to the Competition and Consumer Act 2010;
CGA means the New Zealand Consumer Guarantees Act 1993;Goods means the product or equipment which was accompanied by this warranty and purchased in Australia or New Zealand, as the case may be;Manufacturer, We or us means:
1. for Goods purchased in Australia, Spectrum Brands Australia Pty Ltd ABN, 78 007 070 573; or2. for Goods purchased in New Zealand, Spectrum Brands New Zealand Ltd, as the case may be,
contact details as set out at the end of this warranty;
Supplier means the authorised distributor or retailer of the Goods that sold you the Goods in Australia or in New Zealand; andYou means you, the original end-user purchaser of the Goods.1. Our goods come with guarantees that cannot be excluded under the Australian Consumer Law, or
the CGA. You are entitled to a replacement or refund for a major failure and compensation for any other reasonably foreseeable loss or damage. You are also entitled to have the goods repaired or replaced if the goods fail to be of acceptable quality and the failure does not amount to a major failure.
2. The bene�ts provided by this Warranty are in addition to all other rights and remedies in respect of the Goods which the consumer has under either the Australian Consumer Law or the CGA. The original purchaser of the Goods is provided with the following Warranty subject to the Warranty Conditions:
3. We warrant the Goods for all parts defective in workmanship or materials from the date of purchase (Warranty Period), for the period of:-(a) Two (2) years for Russell Hobbs products (see product packaging for details)(b) Two (2) years with �ve (5) year motor warranty for Russell Hobbs products (see product
packaging for details)(c) Limited Lifetime, Ten (10) years for Russell Hobbs cookware.(d) One (1) year for George Foreman, iRobot, Westinghouse, Black & Decker and Spectrum Brands
products.
If the Goods prove defective within the Warranty Period by reason of improper workmanship or material, we may, at our own discretion, repair or replace the Goods without charge.
Warranty Conditions
4. The Goods must be used in accordance with the manufacturer’s instructions. This Warranty does not apply should the defect in or failure of the Goods be attributable to misuse, abuse, accident or non-observance of manufacturer’s instructions on the part of the user. As far as the law permits, the manufacturer does not accept liability for any direct or consequential loss, damage or other expense caused by or arising out of any failure to use the Goods in accordance with the manufacturer’s instructions.
5. Exhaustible components (such as batteries, �lters and brushes) of the Goods are included under this Warranty only where there is a defect in workmanship or materials used.
6. The warranty granted under clause 3 is limited to repair or replacement only.
7. Any parts of the Goods replaced during repairs or any product replaced remain the property of the manufacturer. In the event of the Goods being replaced during the Warranty Period, the warranty on the replacement Goods will expire on the same date as for the Warranty Period on the original Goods which are replaced.
8. In order to claim under the warranty granted under clause 3 you must:(a) Retain this warranty with your receipt/proof of purchase; and(b) Return the Goods to us at the relevant address or to the Supplier by prepaid freight
within the Warranty Period accompanied with (i) the legible and unmodi�ed original proof of purchase, which clearly indicates the name and address of the Supplier, the date and place of purchase, the product name or other product serial number and (ii) this warranty.
9. This warranty is immediately void if:(a) Any serial number or appliance plate is removed or defaced;(b) The Goods have been serviced or otherwise repaired by a person not authorised to do so
by us or where non approved replaced parts are used.
10. The Goods are designed for domestic use only. A limited 90-day Warranty applies to any industrial or commercial use of the Goods. The Goods must be connected to the electrical voltage requirements as speci�ed in the ratings label located on the Goods.
11. This warranty does not cover the cost of claiming under the warranty or transport of the Goods to and from the Supplier or us.
12. This warranty is only valid and enforceable in Australia against Spectrum Brands Australia Pty Ltd and in New Zealand against Spectrum Brands New Zealand Ltd.
Contact us or the Supplier for further details.
Register your product online
If you live in Australia please visit: www.spectrumbrands.com.au/warrantyIf you live in New Zealand Please visit: www.spectrumbrands.co.nz/warrantyRegistration of your warranty is not compulsory, it gives us a record of your purchase AND entitles you to receive these bene�ts: Product information; Hints and tips; Recipes and news; Information on special price o�ers and promotions.
Any questions? Please contact Customer Service for advice.
RHF206P_IB_FA_091012.indd 3 12/10/12 11:29 AM
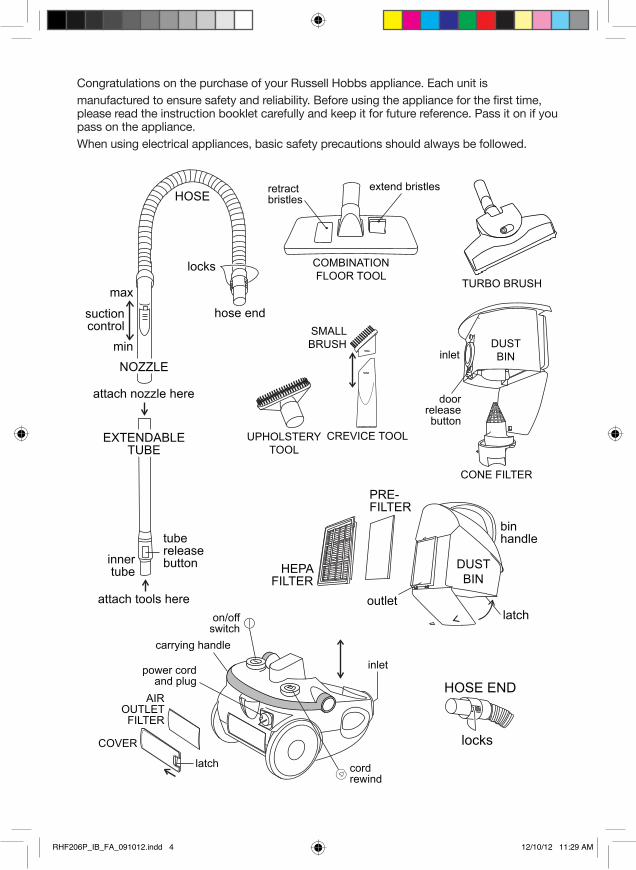
Congratulations on the purchase of your Russell Hobbs appliance. Each unit ismanufactured to ensure safety and reliability. Before using the appliance for the first time, please read the instruction booklet carefully and keep it for future reference. Pass it on if you pass on the appliance.When using electrical appliances, basic safety precautions should always be followed.
HOSE
COMBINATIONFLOOR TOOL
CREVICE TOOLUPHOLSTERYTOOL
DUSTBIN
DUSTBIN
AIROUTLETFILTER
COVER
HOSE END
HEPAFILTER
PRE-FILTER
CONE FILTER
SMALLBRUSH
NOZZLE
EXTENDABLETUBE
max
min
suctioncontrol
locks
locks
extend bristlesretractbristles
binhandle
inlet
doorreleasebutton
inlet
latchoutlet
on/offswitch
cordrewind
carrying handle
latch
power cordand plug
innertube
tubereleasebutton
attach nozzle here
hose end
attach tools here
TURBO BRUSH
RHF206P_IB_FA_091012.indd 4 12/10/12 11:29 AM
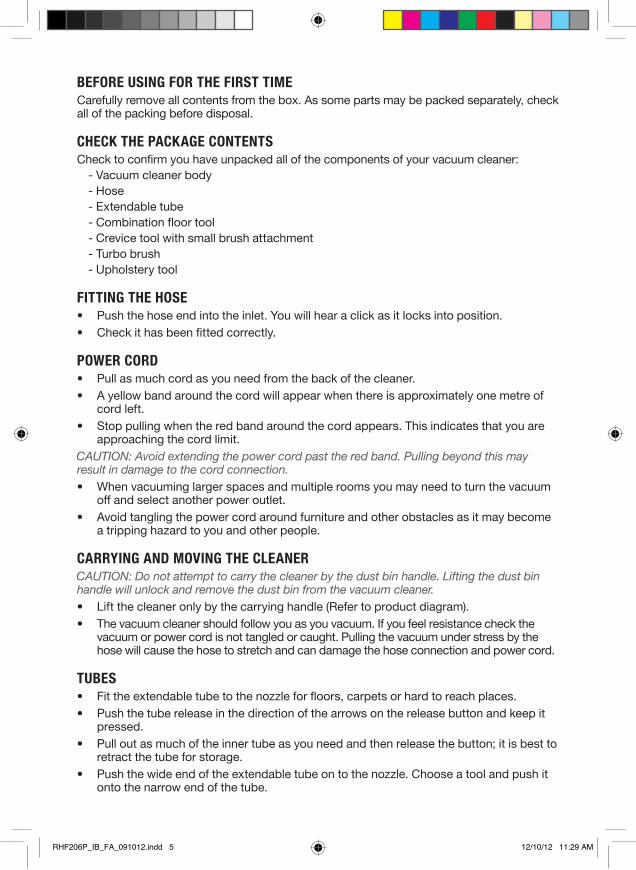
BEFORE USING FOR THE FIRST TIMECarefully remove all contents from the box. As some parts may be packed separately, check all of the packing before disposal.
CHECK THE PACKAGE CONTENTSCheck to confirm you have unpacked all of the components of your vacuum cleaner:
- Vacuum cleaner body- Hose- Extendable tube- Combination floor tool- Crevice tool with small brush attachment- Turbo brush- Upholstery tool
FITTING THE HOSE• Push the hose end into the inlet. You will hear a click as it locks into position.• Check it has been fitted correctly.
POWER CORD• Pull as much cord as you need from the back of the cleaner.• A yellow band around the cord will appear when there is approximately one metre of
cord left.• Stop pulling when the red band around the cord appears. This indicates that you are
approaching the cord limit.
• When vacuuming larger spaces and multiple rooms you may need to turn the vacuum off and select another power outlet.
• Avoid tangling the power cord around furniture and other obstacles as it may become a tripping hazard to you and other people.
CARRYING AND MOVING THE CLEANER
• Lift the cleaner only by the carrying handle (Refer to product diagram).• The vacuum cleaner should follow you as you vacuum. If you feel resistance check the
vacuum or power cord is not tangled or caught. Pulling the vacuum under stress by the hose will cause the hose to stretch and can damage the hose connection and power cord.
TUBES• Fit the extendable tube to the nozzle for floors, carpets or hard to reach places.• Push the tube release in the direction of the arrows on the release button and keep it
pressed.• Pull out as much of the inner tube as you need and then release the button; it is best to
retract the tube for storage.• Push the wide end of the extendable tube on to the nozzle. Choose a tool and push it
onto the narrow end of the tube.
RHF206P_IB_FA_091012.indd 5 12/10/12 11:29 AM
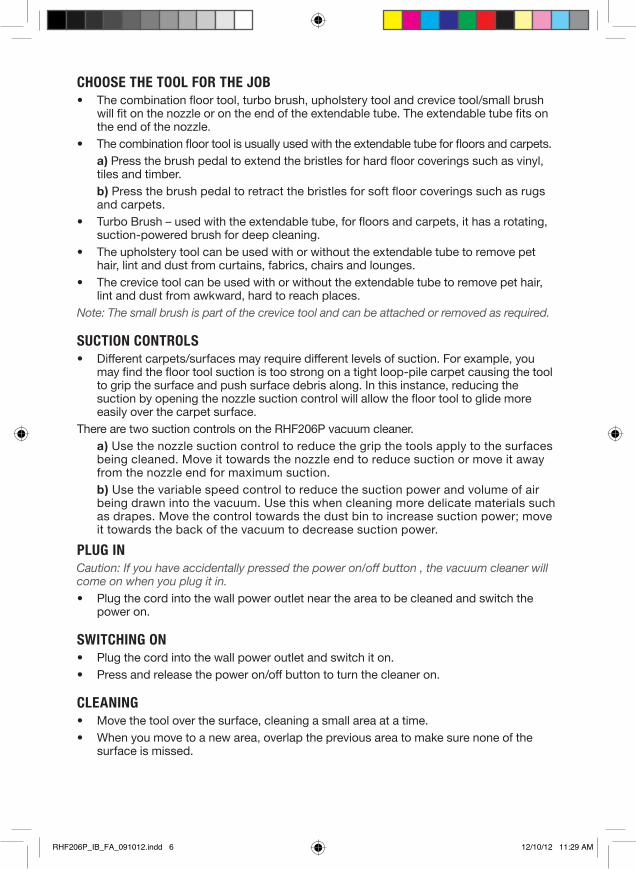
CHOOSE THE TOOL FOR THE JOB• The combination floor tool, turbo brush, upholstery tool and crevice tool/small brush
will fit on the nozzle or on the end of the extendable tube. The extendable tube fits on the end of the nozzle.
• The combination floor tool is usually used with the extendable tube for floors and carpets. a) Press the brush pedal to extend the bristles for hard floor coverings such as vinyl,
tiles and timber. b) Press the brush pedal to retract the bristles for soft floor coverings such as rugs
and carpets.• Turbo Brush – used with the extendable tube, for floors and carpets, it has a rotating,
suction-powered brush for deep cleaning.• The upholstery tool can be used with or without the extendable tube to remove pet
hair, lint and dust from curtains, fabrics, chairs and lounges.• The crevice tool can be used with or without the extendable tube to remove pet hair,
lint and dust from awkward, hard to reach places.
SUCTION CONTROLS• Different carpets/surfaces may require different levels of suction. For example, you
may find the floor tool suction is too strong on a tight loop-pile carpet causing the tool to grip the surface and push surface debris along. In this instance, reducing the suction by opening the nozzle suction control will allow the floor tool to glide more easily over the carpet surface.
There are two suction controls on the RHF206P vacuum cleaner. a) Use the nozzle suction control to reduce the grip the tools apply to the surfaces
being cleaned. Move it towards the nozzle end to reduce suction or move it away from the nozzle end for maximum suction.
b) Use the variable speed control to reduce the suction power and volume of air being drawn into the vacuum. Use this when cleaning more delicate materials such as drapes. Move the control towards the dust bin to increase suction power; move it towards the back of the vacuum to decrease suction power.
PLUG IN
• Plug the cord into the wall power outlet near the area to be cleaned and switch the power on.
SWITCHING ON• Plug the cord into the wall power outlet and switch it on.• Press and release the power on/off button to turn the cleaner on.
CLEANING• Move the tool over the surface, cleaning a small area at a time.• When you move to a new area, overlap the previous area to make sure none of the
surface is missed.
RHF206P_IB_FA_091012.indd 6 12/10/12 11:29 AM
SWITCHING OFF• If you would like to change tools or if you have finished vacuuming, press and release
the power on/off button to turn the cleaner off.
FINISHED CLEANING?• Press and release the power on/off button to turn the cleaner off.• Switch the power off and remove the plug from the wall power outlet.• Stand clear of the cord, press and hold the cord rewind button .• Keep clear of the cord, as it rewinds quite quickly and can flick up or catch on corners
and furniture. If the cord does catch on an object, release the rewind button and it will discontinue rewinding.
• If the power cord does not retract fully into the unit you may need to pull it out a little, and then press and hold the cord rewind button again. You may need to push the plug end into the storage area manually.
REMOVING AND EMPTYING THE DUST BIN• You do not have to empty the dust bin after each use; however it is best to do so. The
cleaner will work until the dust bin is full, although you may find a loss of performance as the dust bin nears capacity.
• Switch the power off, remove the plug from the wall power outlet, and leave for a minute to allow the dust settle.
• Pull the dust bin handle upwards to remove the bin from the cleaner.• Lower the dust bin into your rubbish bin so the bottom of the dust bin is below the rim.
This prevents dust dispersing into the air.• Push the dust bin door release button to allow the bottom of the dust bin to drop open
and dump the contents into the rubbish bin.• Do not tap the open dust bin on the sides of your rubbish bin as this could result in
damage to the dust bin.• If necessary, remove and clean the cone filter. Twist anti-clockwise to remove, and
clockwise to lock back into position.• Lift the bottom of the dust bin up to close it.
CLEANING THE FILTERS
WHILE EMPTYING THE DUST BIN, CHECK THE FILTERS – BLOCKED FILTERS QUICKLY REDUCE SUCTION.• Make sure the space you are using is protected with an old towel or some newspaper
as this process can be messy.
HEPA FILTER ASSEMBLY
THE HEPA FILTER ASSEMBLY CONSISTS OF THE HEPA FILTER AND PRE-FILTER.• The filter assembly is located on the back of the dust bin. Follow instructions on
“removing and emptying the dust bin” before cleaning the filters. To remove the HEPA filter assembly, unclip the top latch.
RHF206P_IB_FA_091012.indd 7 12/10/12 11:29 AM
PRE-FILTER• The Pre-filter is located on the HEPA filter casing. This can be removed from the
casing for cleaning.• The Pre-filter is responsible for stopping large particles of dirt and debris from
reaching the HEPA filter.• If the filter is covered in dust, tap it gently over some newspaper or on the rim of a
rubbish bin to dislodge the dust.• If it’s very dirty, soak it in warm soapy water for a few minutes, rinse under a
running tap, remove all traces of soap, then let it air dry – do NOT refit until it is completely dry.
HEPA FILTER• The HEPA filter is responsible for cleaning the return air and requires careful handling.• If the filter is covered in dust, tap it gently over some newspaper or on the rim of a
rubbish bin to dislodge the dust.• If it is very dirty, soak it in warm soapy water for a few minutes, rinse under a
running tap, remove all traces of soap, then let it air dry – do NOT refit until it is completely dry.
• Refit the pre-filter into the HEPA filter casing and then refit the HEPA filter assembly by locating the lugs into the corresponding holes in the dust bin and pushing the top latch into place.
AIR OUTLET FILTER• The air outlet filter is located on the back of the vacuum cleaner.• Push the release button sideways to release the grille. Remove the air outlet filter grille
by pulling away from the appliance. Once the grille is off, the filter is easily accessible.• If the filter is covered in dust, tap it gently over some newspaper or on the rim of a
rubbish bin to dislodge the dust.• If it is very dirty, soak it in warm soapy water for a few minutes, rinse under a
running tap, remove all traces of soap, then let it air dry – do NOT refit until it is completely dry.
• Fit the air outlet filter into the rear of the grille. Refit the grille by locating the lugs into the corresponding holes and push the latch into place.
CLEANING THE VACUUM CLEANER• Before cleaning, switch the power off and remove the plug from the wall power outlet.• Do not put any part of the cleaner in a dishwasher.• Do not use harsh or abrasive cleaning agents or solvents.• Wipe external surfaces with a damp cloth. A dab of washing-up liquid will remove
stubborn stains.• Wipe the tools with a damp cloth or hand wash in warm soapy water. Rinse under a
running tap to remove all traces of soap, then let air dry – do NOT refit until they are completely dry.
• Wipe the extendable tube and hose with a damp cloth. Check they are dry before refitting. Do not put them in water, you will damage them.
RHF206P_IB_FA_091012.indd 8 12/10/12 11:29 AM
• Wash the dust bin in warm soapy water with a soft cloth or sponge (remove all filters first). Rinse to remove all traces of soap, then let it air dry – do NOT refit until it’s completely dry.
BLOCKAGES• If the cleaner starts to get noisy and you start to lose suction there is probably a blockage.• Switch the cleaner off and remove the plug from the wall power outlet. • Spread some newspaper or an old towel on the floor to avoid making a mess.• If you are using one of the tools, remove and check it first.• Remove the hose and check it – leave it disconnected until you have completed the
next steps.• Remove and empty the dust bin, as outlined in “removing and emptying the bin”
and check for any blockages.• If there is a blockage, try and remove it with your hands. Do not use anything sharp.• Check all the filters.• Then reassemble.
USER REPLACEABLE ITEMS
ITEM NO.Pre-filter SPRHF202-PFHEPA Filter SPRHF202-HFOutlet Filter SPRHF202-OFFilter Pack(includes: 1x Pre-filter, 1x HEPA filter and 1x Outlet filter) RHF202-FPTo purchase, please contact customer service:
CUSTOMER SERVICE IN AUSTRALIASpectrum Brand Australia Pty LtdLocked bag 3004 BraesideVictoria 3195 AustraliaTollFree: 1800 623 118Email: [email protected]: www.russellhobbs.com.au
CUSTOMER SERVICE IN NEW ZEALANDSpectrum Brands New Zealand LtdP.O. Box 9817 NewmarketAuckland 1149 New ZealandTollFree: 0508 736 776Email: [email protected]: www.russellhobbs.co.nz
RHF206P_IB_FA_091012.indd 9 12/10/12 11:29 AM
IMPORTANT SAFEGUARDS
When using electrical appliances, basic safety precautions should always be followed, including:1. The cleaner must only be used by or under the supervision of a responsible adult. Use and store
it out of reach of children.2. This appliance is NOT a toy. Children should be supervised to ensure they do not play with
this appliance.3. This appliance is not intended for use by persons (including children) with reduced
physical, sensory or mental capabilities, or lack of experience and knowledge, unless they have been given supervision or instruction concerning use of the appliance by a person responsible for their safety.
4. Do not immerse the cleaner in any liquid and do not use it anywhere damp or wet.5. Do not use the cleaner near a gas, oil (including paraffin) or open fire. The flame may be drawn
towards the cleaner causing a fire hazard.6. To avoid personal injury, keep hair, clothing, fingers, face, etc. away from the brush/ suction inlet
of the cleaner.7. Do not use the cleaner to pick up any of the following: - do not attempt to pick up liquid – this cleaner is designed for dry substances only. - do not pick up items that may ignite spontaneously – e.g. matches, pieces of firelighter. - do not pick up anything burning or smouldering – e.g. cigarette ends, ashes or embers. - do not pick up spillage from toner cartridges – the fine carbon particles may pass through
the filter, short circuit the motor and burn it out. - do not pick up cement or plaster dust – these can combine with moisture in the air, clog
the filter, scour the bin and possibly cause the motor to overheat and burn out. - do not pick up sharp objects – they may pierce the filter and damage the motor. - do not pick up biological waste – you will eventually have to clean it off the filter and there
is a possibility of viral particles passing through the filter and entering your air supply.8. If using the cleaner outdoors (e.g. cleaning the car), connect it to a power outlet that is
protected by a safety switch.9. Do not leave the cleaner unattended when plugged in.10. To prevent damage to the power cord, avoid catching, stressing or running over the cord
while vacuuming.11. Be sure the power cord does not become a tripping hazard to yourself or others while vacuuming.12. If using the cleaner to vacuum stairs, be sure to work above the cleaner to avoid injury should
the unit fall.13. Do not use the cleaner to vacuum people, pets or animals of any sort.14. Unplug the cleaner and retract the cord when not in use.15. Do not use the cleaner for any purpose other than those described in these instructions.16. Use only the accessories supplied with the unit.17. Do not leave the cleaner sitting in sunlight. Prolonged exposure to UV rays may
damage the plastic.18. Do not use the cleaner if it is damaged or has malfunctioned in any way. Contact the customer
service department.
RHF206P_IB_FA_091012.indd 10 12/10/12 11:29 AM
19. There are no user serviceable parts other than the filters and external attachments/ accessories. If the power cord is damaged, it must be replaced by the manufacturer or similarly qualified person in order to avoid hazard.
20. For added safety, electrical appliances should be connected to a power outlet that is protected by a residual current device (RCD), also often referred to as a ‘Safety Switch’. Your switchboard may already incorporate an RCD. If unsure, call an electrician for verification and fitting if necessary.
SAVE THESE INSTRUCTIONS. THIS APPLIANCE IS FOR HOUSEHOLD USE ONLY
RHF206P_IB_FA_091012.indd 11 12/10/12 11:29 AM
www.russellhobbs.com.au
www.russellhobbs.co.nz
RUSSELL HOBBS and logo are Trade Marks of Spectrum Brands, Inc., or one of its subsidiaries.©2012 Spectrum Brands, Inc.
RHF206P_IB_FA_091012.indd 12 12/10/12 11:29 AM