Embed Size (px)
Citation preview

CYBERDECK Bonnet and HAT forRaspberry Pi 400
Created by Kattni Rembor
https://learn.adafruit.com/cyberdeck-bonnet-and-hat
Last updated on 2021-12-14 01:45:39 PM EST
©Adafruit Industries Page 1 of 16
3
8
8
9
10
11
12
13
14
14
15
16
Table of Contents
Overview
Pinouts
• I2C Connectors
• STEMMA (3-pin JST PH) Connectors
• Raspberry Pi Headers
Fixing Pin Conflicts
• Option 1 - Cut a Trace
• Option 2 - Remove the Diode
Downloads
• Files:
• Schematic and Fab Print for CYBERDECK HAT
• Schematic and Fab Print for CYBERDECK Bonnet
©Adafruit Industries Page 2 of 16

Overview
Howdy keyboard cowboys, are you surfing the information superhighway with a Pi
400? Want a cool heads-up display, or maybe you need to wire up some NeoPixel
wetware...?
Cyber-warriors, listen up here! We’ve got with some zero-day unreleased hardware
we just dumpster-dived. Now you can crack kodes, and write skripts with style, thanks
to the CYBERDECK HAT and Bonnet for Raspberry Pi 400 from Adafruit zaibatsu.
©Adafruit Industries Page 3 of 16

Well, we just fenced 12 megabytes of ram and some angled socket header from the
underground hacker club next to the chatsubo, and it's a major upgrade to our
extender board - now you can jack in any Pi bonnet or HAT into the back of your Pi
400's skull at a cool angle, perfect for augmenting your deck!
We also give you two STEMMA (JST 3-PH) connectors on GPIO #18 and #13, and twin
STEMMA QT I2C port plugs, for additional upgrades (cables sold separately (https://
adafru.it/JRA))
©Adafruit Industries Page 4 of 16

This is the same hardware Kevin Mitnick used when he popped Sidewinder! Ok,
maybe not, but it will definitely let you create a stand-alone Kali deck by plugging in
one of our many display Bonnets or HATs.
Comes completely pre-assembled and tested so you don't need to do anything but
plug it in. Works best with the Pi 400 computer.
The demo images show the Bonnet with one of our 128x32 OLED bonnets plugged in
(https://adafru.it/RfQ). Any bonnet/mini-HAT/pHAT etc should work just fine with the
Bonnet as every pin is duplicated from input to output.
©Adafruit Industries Page 5 of 16

Here are some of our favorite displays we recommend for the Bonnet:
Adafruit 2.23" Monochrome OLED Bonnet for Raspberry Pi (https://adafru.it/RfQ)
Adafruit 2.13" Monochrome E-Ink Bonnet for Raspberry Pi - THINK INK (https://
adafru.it/RfR)
Adafruit 128x64 OLED Bonnet for Raspberry Pi (https://adafru.it/RfS)
Adafruit Mini PiTFT 1.3" - 240x240 TFT Add-on for Raspberry Pi (https://adafru.it/
RfT)
Adafruit Mini PiTFT - 135x240 Color TFT Add-on for Raspberry Pi (https://
adafru.it/RfT)
Adafruit 1.3" Color TFT Bonnet for Raspberry Pi - 240x240 TFT + Joystick Add-
on (https://adafru.it/NFh)
Adafruit PiOLED - 128x32 Monochrome OLED Add-on for Raspberry Pi (https://
adafru.it/NFh)
Pimoroni Inky pHAT for Raspberry Pi - 3 Color eInk Display (https://adafru.it/RfU)
Pimoroni Inky pHAT - 3 Color eInk Display - Yellow/Black/White (https://adafru.it/
RfV)
Pimoroni Inky pHAT - eInk Display - Black/White (https://adafru.it/RfW)
•
•
•
•
•
•
•
•
•
•
©Adafruit Industries Page 6 of 16

Here are some of our favorite displays we recommend for the HAT:
Adafruit PiTFT 2.2" HAT Mini Kit - 320x240 2.2" TFT - No Touch (https://adafru.it
/RfX)
Adafruit PiTFT 2.4" HAT Mini Kit - 320x240 TFT Touchscreen (https://adafru.it/
RfY)
PiTFT Plus Assembled 320x240 2.8" TFT + Resistive Touchscreen (https://
adafru.it/eZS)
PiTFT 2.8" TFT 320x240 + Capacitive Touchscreen for Raspberry Pi (https://
adafru.it/e9Y)
Adafruit PiTFT Plus 320x240 2.8" TFT + Capacitive Touchscreen (https://
adafru.it/CFo)
Adafruit PiTFT - 320x240 2.8" TFT+Touchscreen for Raspberry Pi (https://
adafru.it/dDE)
PiTFT Plus 320x240 3.2" TFT + Resistive Touchscreen (https://adafru.it/RfZ)
PiTFT - Assembled 480x320 3.5" TFT+Touchscreen for Raspberry Pi (https://
adafru.it/e27)
PiTFT Plus 480x320 3.5" TFT+Touchscreen for Raspberry Pi (https://adafru.it/Rf-)
Pimoroni HyperPixel - 4.0" Hi-Res Display for Raspberry Pi (https://adafru.it/Rga)
Pimoroni HyperPixel - 4.0" Hi-Res Display for Raspberry Pi - Non-Touch (https://
adafru.it/Rgb)
Pimoroni Inky wHAT (ePaper/eInk/EPD) - Red/Black/White (https://adafru.it/Rgc)
Pimoroni Inky wHAT (ePaper/eInk/EPD) - Black/White (https://adafru.it/Rgd)
Pimoroni HyperPixel 4.0 Square - Touch Display for Raspberry Pi - Capacitive
Touch - PIM470 (https://adafru.it/Rge)
•
•
•
•
•
•
•
•
•
•
•
•
•
•
©Adafruit Industries Page 7 of 16

Pinouts
I2C Connectors
STEMMA QT - These are the smaller connectors on either side of the HAT and
Bonnet. You can use STEMMA QT cables (https://adafru.it/GfR) to connect up a
bunch of different sensors and breakouts (https://adafru.it/HMF) with no
soldering or breadboard needed! (Cables sold separately.)
These two connectors are connected together in parallel. You can daisy-chain
sensors and breakouts connected to them.
STEMMA QT / Qwiic JST SH 4-pin to
Premium Male Headers Cable
This 4-wire cable is a little over 150mm /
6" long and fitted with JST-SH female 4-
pin connectors on one end and premium
Dupont male headers on the other.
Compared with the...
https://www.adafruit.com/product/4209
•
•
©Adafruit Industries Page 8 of 16
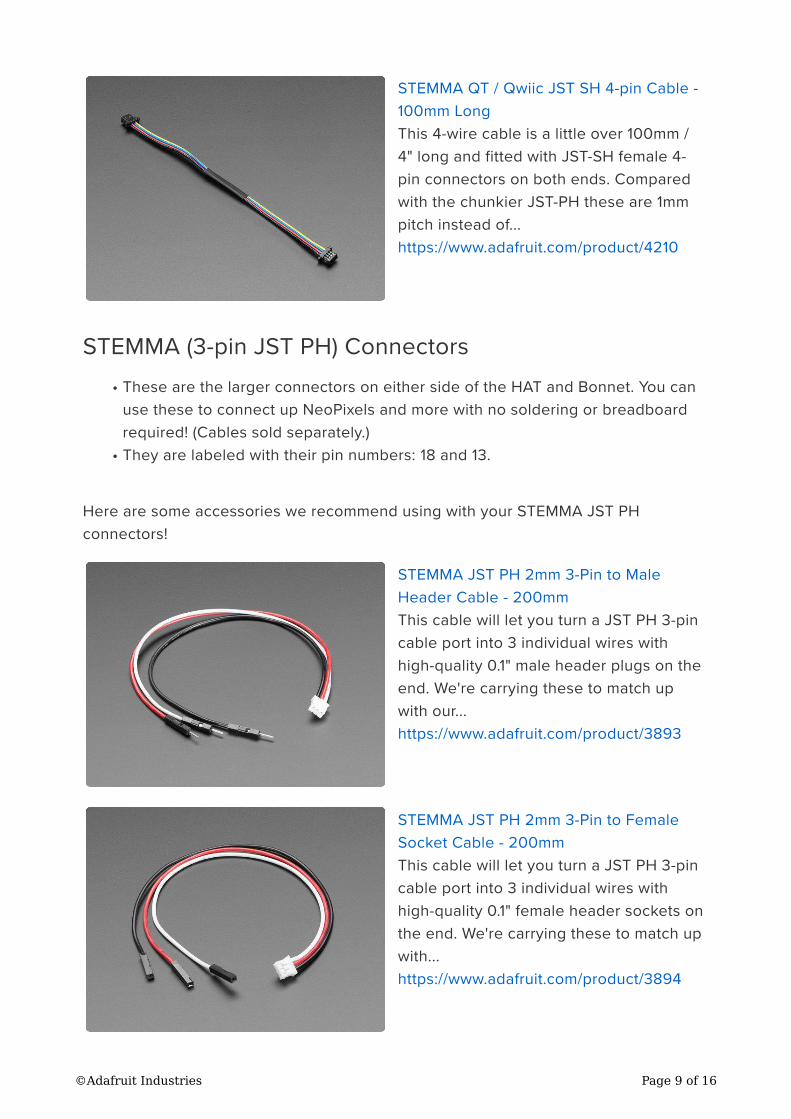
STEMMA QT / Qwiic JST SH 4-pin Cable -
100mm Long
This 4-wire cable is a little over 100mm /
4" long and fitted with JST-SH female 4-
pin connectors on both ends. Compared
with the chunkier JST-PH these are 1mm
pitch instead of...
https://www.adafruit.com/product/4210
STEMMA (3-pin JST PH) Connectors
These are the larger connectors on either side of the HAT and Bonnet. You can
use these to connect up NeoPixels and more with no soldering or breadboard
required! (Cables sold separately.)
They are labeled with their pin numbers: 18 and 13.
Here are some accessories we recommend using with your STEMMA JST PH
connectors!
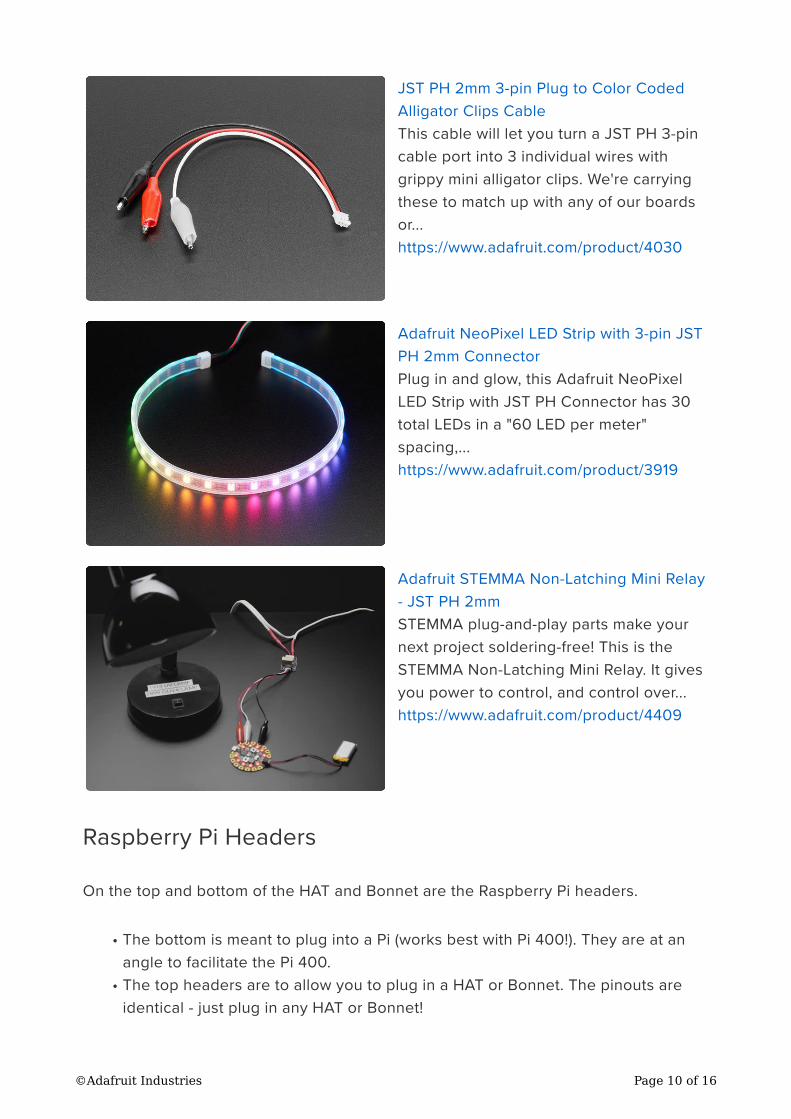
STEMMA JST PH 2mm 3-Pin to Male
Header Cable - 200mm
This cable will let you turn a JST PH 3-pin
cable port into 3 individual wires with
high-quality 0.1" male header plugs on the
end. We're carrying these to match up
with our...
https://www.adafruit.com/product/3893
STEMMA JST PH 2mm 3-Pin to Female
Socket Cable - 200mm
This cable will let you turn a JST PH 3-pin
cable port into 3 individual wires with
high-quality 0.1" female header sockets on
the end. We're carrying these to match up
with...
https://www.adafruit.com/product/3894
•
•
©Adafruit Industries Page 9 of 16
JST PH 2mm 3-pin Plug to Color Coded
Alligator Clips Cable
This cable will let you turn a JST PH 3-pin
cable port into 3 individual wires with
grippy mini alligator clips. We're carrying
these to match up with any of our boards
or...
https://www.adafruit.com/product/4030
Adafruit NeoPixel LED Strip with 3-pin JST
PH 2mm Connector
Plug in and glow, this Adafruit NeoPixel
LED Strip with JST PH Connector has 30
total LEDs in a "60 LED per meter"
spacing,...
https://www.adafruit.com/product/3919
Adafruit STEMMA Non-Latching Mini Relay
- JST PH 2mm
STEMMA plug-and-play parts make your
next project soldering-free! This is the
STEMMA Non-Latching Mini Relay. It gives
you power to control, and control over...
https://www.adafruit.com/product/4409
Raspberry Pi Headers
On the top and bottom of the HAT and Bonnet are the Raspberry Pi headers.
The bottom is meant to plug into a Pi (works best with Pi 400!). They are at an
angle to facilitate the Pi 400.
The top headers are to allow you to plug in a HAT or Bonnet. The pinouts are
identical - just plug in any HAT or Bonnet!
•
•
©Adafruit Industries Page 10 of 16

Adafruit 2.23" Monochrome OLED Bonnet
for Raspberry Pi
If you're looking for a bright, readable
OLED display for a Raspberry Pi
(most likely a
https://www.adafruit.com/product/4567
PiTFT Plus 480x320 3.5"
TFT+Touchscreen for Raspberry Pi
Is this not the cutest, little display for the
Raspberry Pi? It features a 3.5" display
with 480x320 16-bit color pixels and a
resistive touch overlay
https://www.adafruit.com/product/2441
Fixing Pin Conflicts
Both CYBERDECKs include 2 general purpose 3-pin STEMMA connectors. One is
connected to GPIO pin 18 and the other is connected to GPIO pin 13:
Each one of these has some additional protection circuitry in the form of an inline 1K
resistor and a diode. The diode is connected to ground.
©Adafruit Industries Page 11 of 16

In general, this shouldn't be an issue. However, if those same pins are used for an
attached display (or other item), then there can be potential conflicts.
One known conflict exists between the Pimoroni HyperPixel and GPIO 18. This pin
gets used as the SPI chip select for the HyperPixel. It affects both the touch (https://
adafru.it/Rga) and non-touch (https://adafru.it/Rgb) versions.
If you are having issues getting a Pimoroni HyperPixel display to work with the
CYBERDECK HAT or Bonnet, then you may need to make the following modifications.
Option 1 - Cut a Trace
This is the potentially easier option since only a sharp edged tool, like an xacto knife
is needed. However, this will permanently disable the #18 STEMMA connector.
To make this modification, carefully use a sharp edged tool like an xacto knife and
score the trace here until it is cut through:
©Adafruit Industries Page 12 of 16
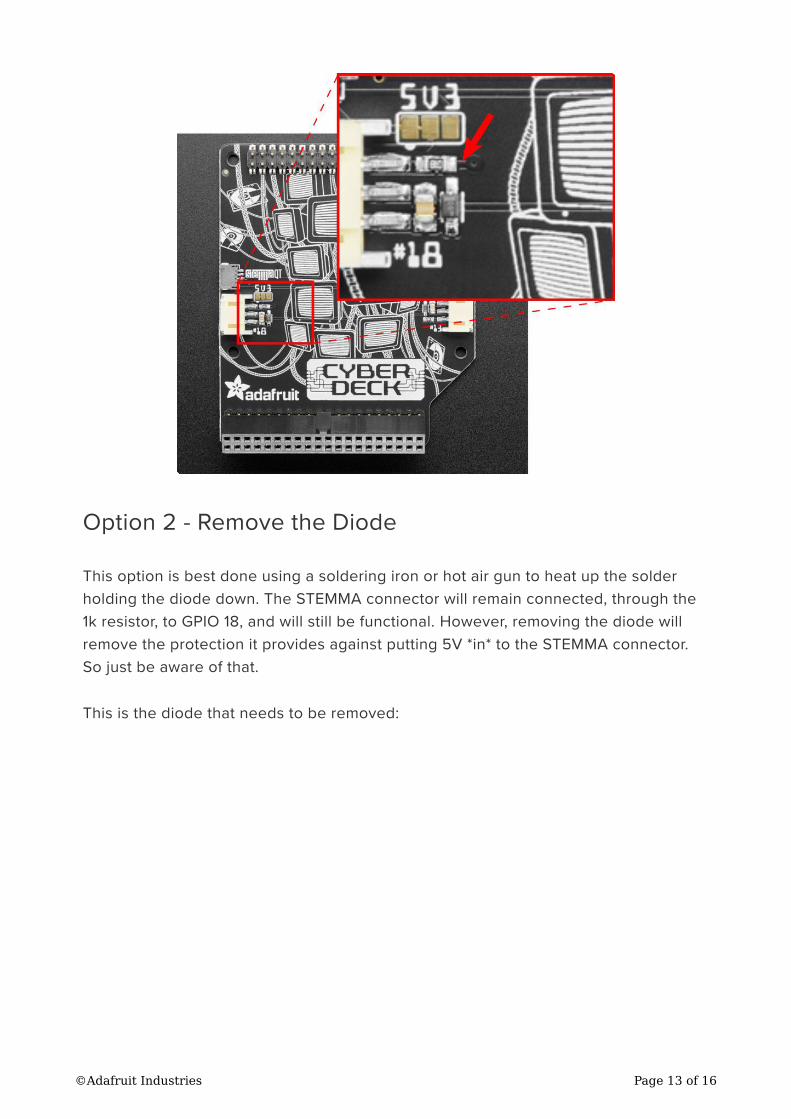
Option 2 - Remove the Diode
This option is best done using a soldering iron or hot air gun to heat up the solder
holding the diode down. The STEMMA connector will remain connected, through the
1k resistor, to GPIO 18, and will still be functional. However, removing the diode will
remove the protection it provides against putting 5V *in* to the STEMMA connector.
So just be aware of that.
This is the diode that needs to be removed:
©Adafruit Industries Page 13 of 16

Downloads
Files:
Fritzing object for HAT in Adafruit Fritzing Library (https://adafru.it/Rgf)
Fritzing object for Bonnet in Adafruit Fritzing Library (https://adafru.it/RgA)
EagleCAD PCB files on GitHub (https://adafru.it/RgB)
3D Model for HAT on GitHub (https://adafru.it/RkA)
3D Model for Bonnet on GitHub (https://adafru.it/Rsb)
•
•
•
•
•
©Adafruit Industries Page 14 of 16
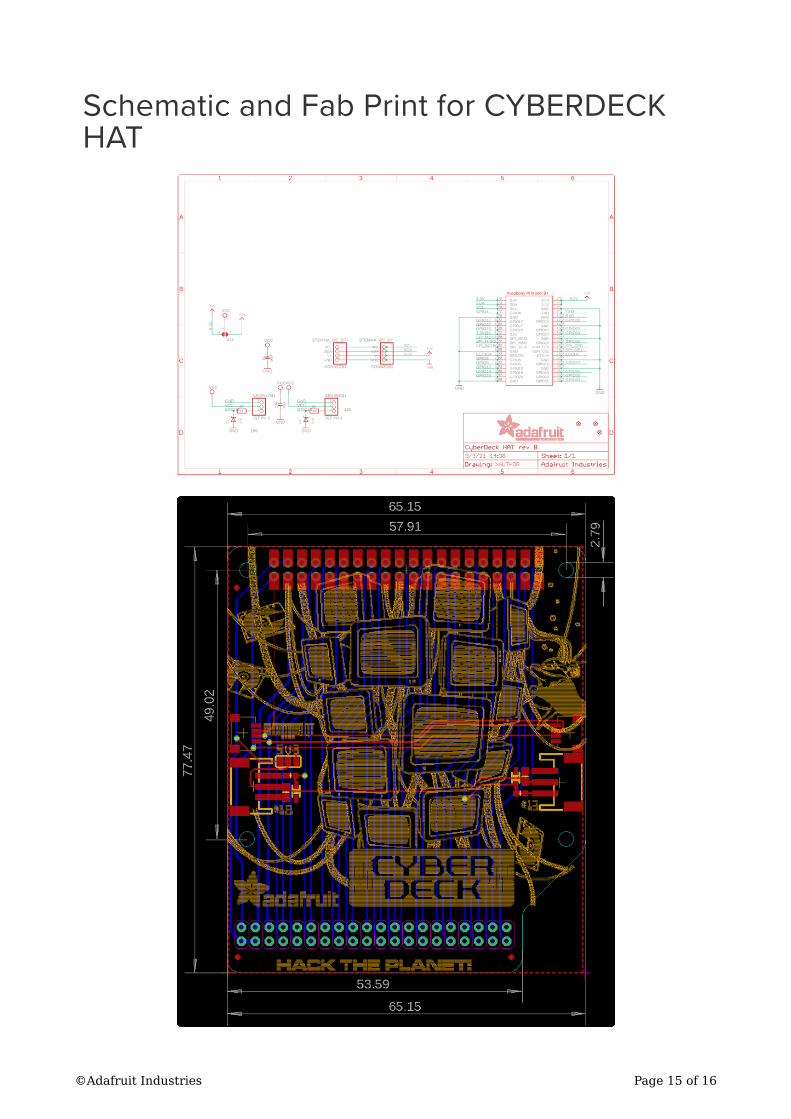
Schematic and Fab Print for CYBERDECKHAT
©Adafruit Industries Page 15 of 16
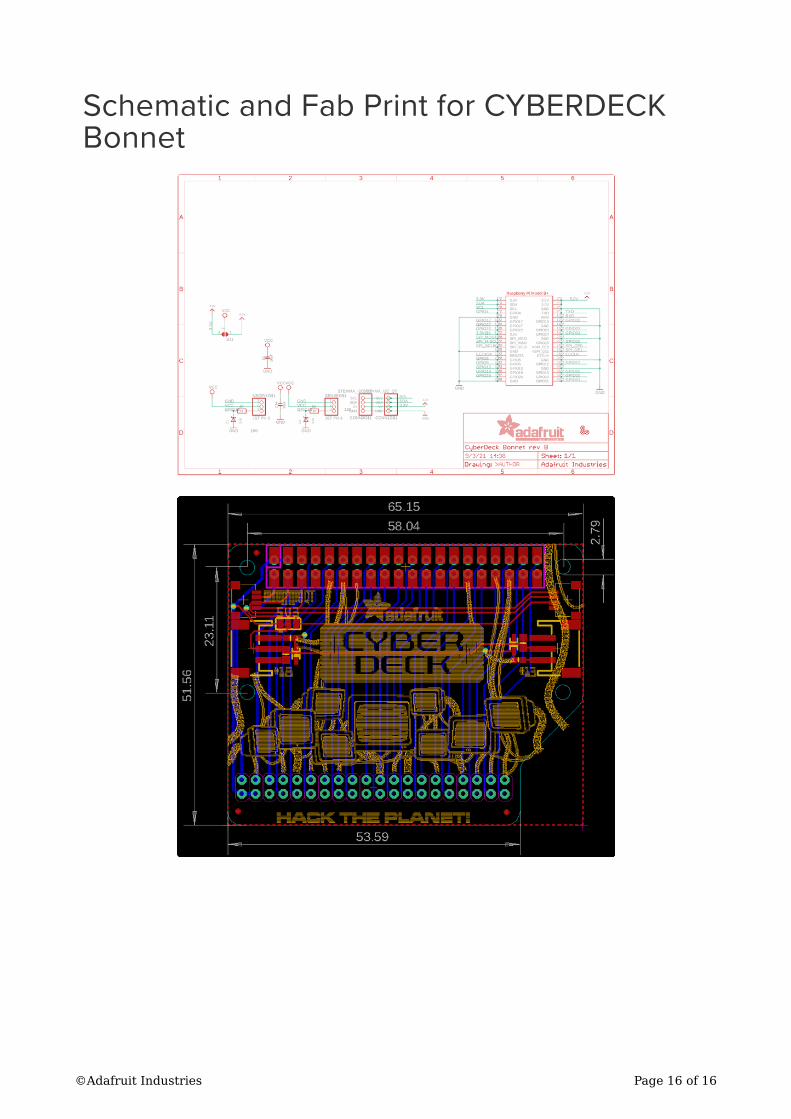
Schematic and Fab Print for CYBERDECKBonnet
©Adafruit Industries Page 16 of 16