Embed Size (px)
Citation preview
The Copernic Power for yourbusiness content.
QUICKSTARTGUIDE
Search Server
QUICK START GUIDE
1
Installation Overview
The Copernic Search Server (CSS) runs as an application on a server or any PC acting as a server. This guide provides information regarding the installation and configuration. The major tasks involved in installing the Search Server are:
• Installing & configuring the Search Server application • Installing and configuring the Copernic Enterprise Client
1
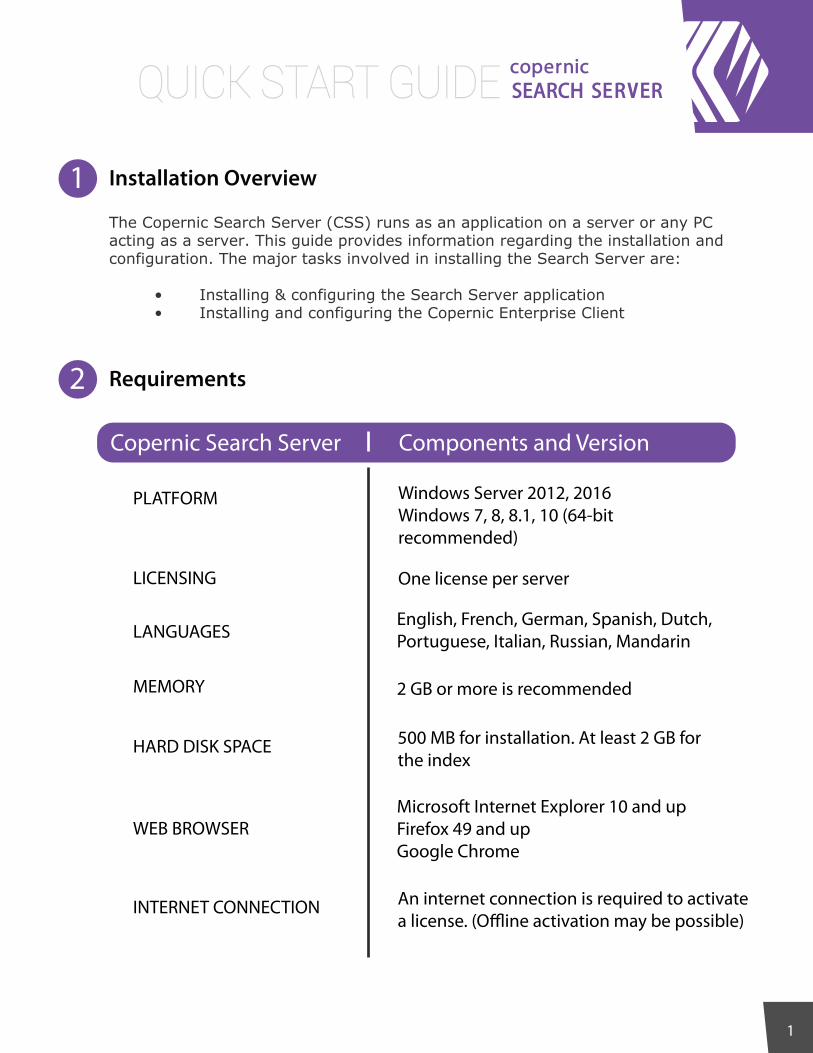
Requirements2
Copernic Search Server Components and Version
PLATFORM Windows Server 2012, 2016Windows 7, 8, 8.1, 10 (64-bit recommended)
LICENSING One license per server
LANGUAGESEnglish, French, German, Spanish, Dutch, Portuguese, Italian, Russian, Mandarin
MEMORY 2 GB or more is recommended
HARD DISK SPACE 500 MB for installation. At least 2 GB for the index
WEB BROWSERMicrosoft Internet Explorer 10 and upFirefox 49 and upGoogle Chrome
INTERNET CONNECTION An internet connection is required to activate a license. (O�ine activation may be possible)
QUICK START GUIDE
2
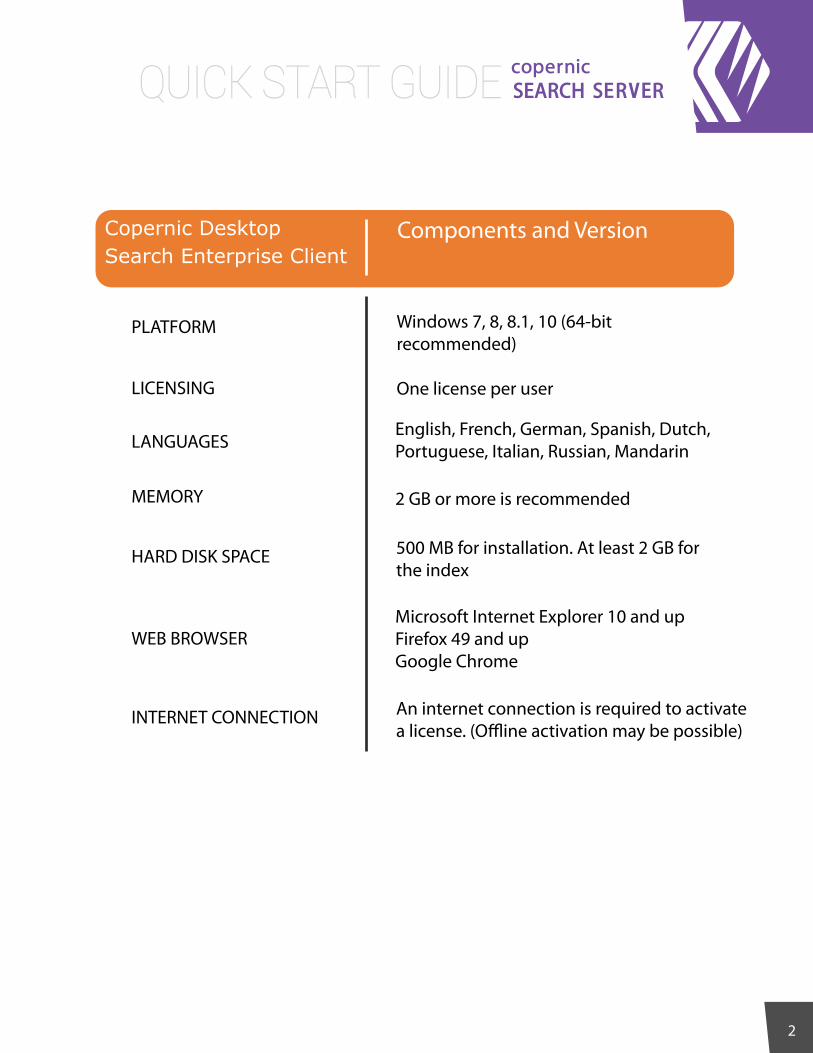
Components and Version
PLATFORM Windows 7, 8, 8.1, 10 (64-bit recommended)
LICENSING One license per user
LANGUAGESEnglish, French, German, Spanish, Dutch, Portuguese, Italian, Russian, Mandarin
MEMORY 2 GB or more is recommended
HARD DISK SPACE 500 MB for installation. At least 2 GB for the index
WEB BROWSERMicrosoft Internet Explorer 10 and upFirefox 49 and upGoogle Chrome
INTERNET CONNECTION An internet connection is required to activate a license. (O�ine activation may be possible)
Copernic Desktop Search Enterprise Client
QUICK START GUIDE
3
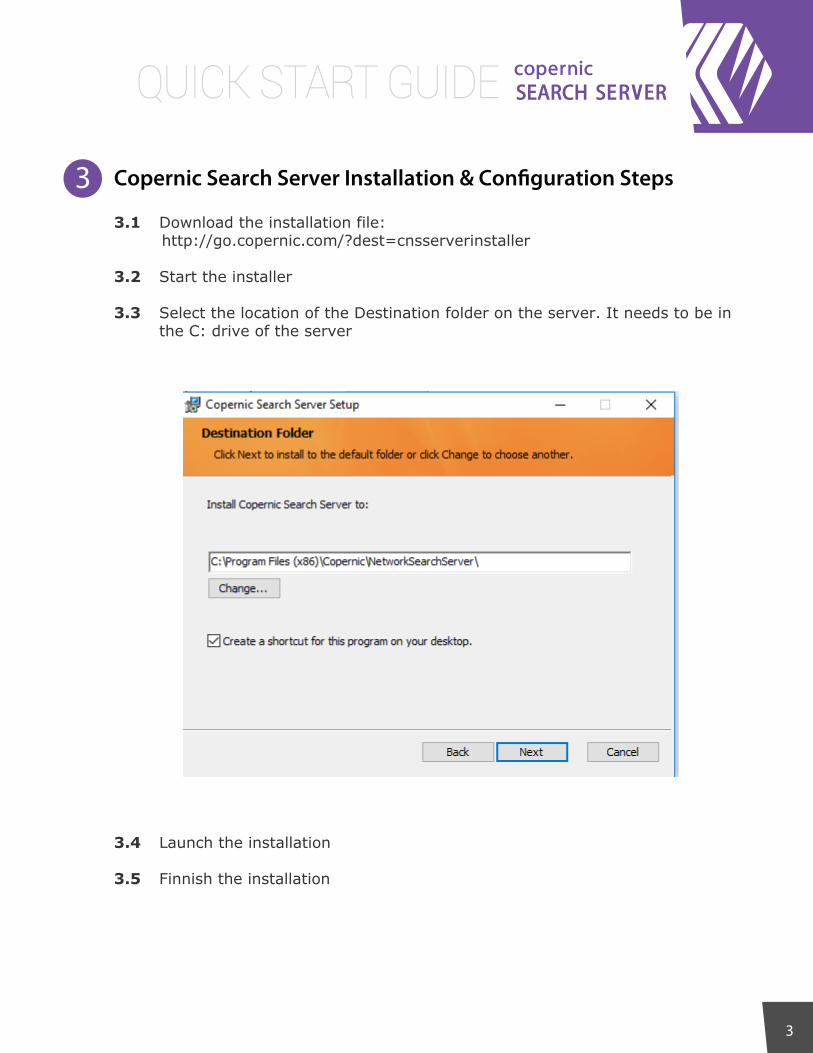
Copernic Search Server Installation & Con�guration Steps
3.1 Download the installation file: http://go.copernic.com/?dest=cnsserverinstaller
3.2 Start the installer
3.3 Select the location of the Destination folder on the server. It needs to be in the C: drive of the server
3
3.4 Launch the installation
3.5 Finnish the installation
QUICK START GUIDE
4
Launch Copernic Search Server
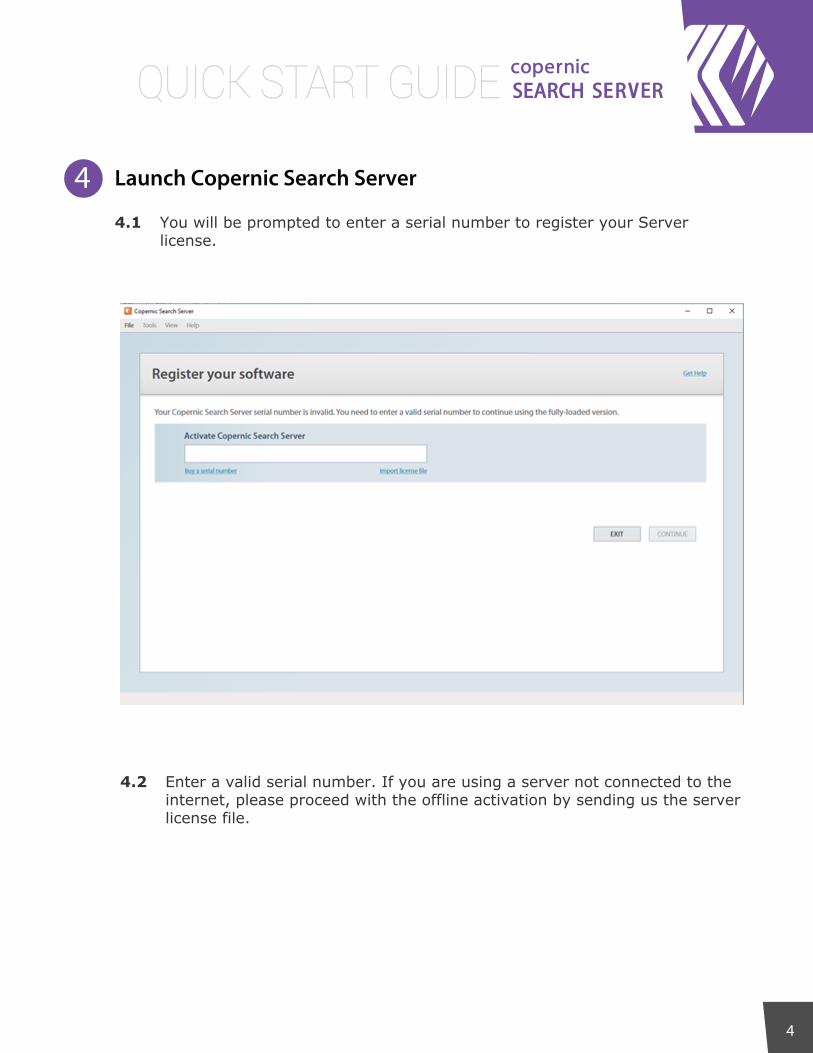
4.1 You will be prompted to enter a serial number to register your Server license.
4
4.2 Enter a valid serial number. If you are using a server not connected to the internet, please proceed with the offline activation by sending us the server license file.

QUICK START GUIDE
5
4.3 Once the registration complete, you will get to the Indexing Status window:
4.4 To configure the data to index, go to Tools – Options. • Emails & Organizer: You can add shared mailboxes or archives PST files. • Files: You can add or remove any folders on the server. In version 1, user access rights us not implemented. Every user will have access to all data on the server. • Indexing & Performance: o Schedule: You may change the Refresh interval to schedule when each category is indexed. o Daily indexing tasks: You may change the time setting of when the daily scan of all files &emails occurs. o File monitoring: You may enable file monitoring to • Advanced: o File Types: You may add or remove any file type from the supported list.
QUICK START GUIDE
6
Copernic Desktop Search Enterprise Client Installation & Con�guration Steps
To install the Copernic Enterprise Client :
5.1 Download the installation file: http://go.copernic.com/?dest=cnsclientinstaller.
5.2 If you want to deploy using GPOs, please download the msi file: http://go.copernic.com/?dest=cnsclientmsi
5.3 Start the installer
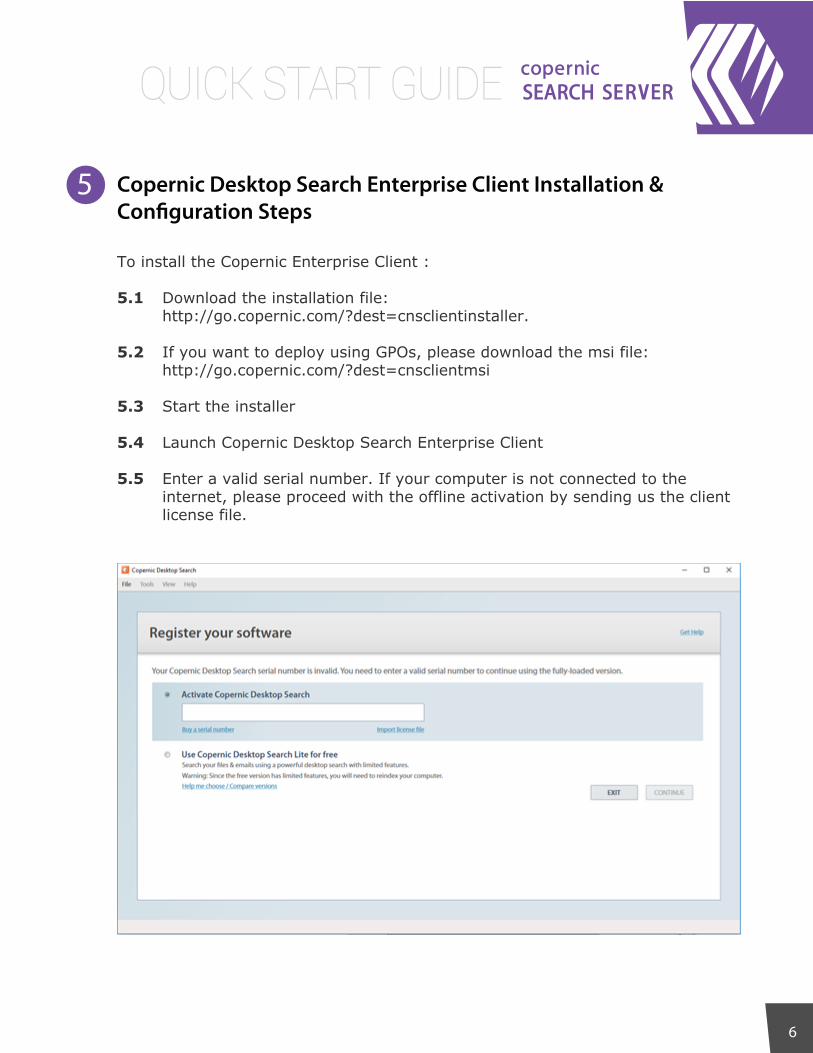
5.4 Launch Copernic Desktop Search Enterprise Client
5.5 Enter a valid serial number. If your computer is not connected to the internet, please proceed with the offline activation by sending us the client license file.
5
QUICK START GUIDE
7
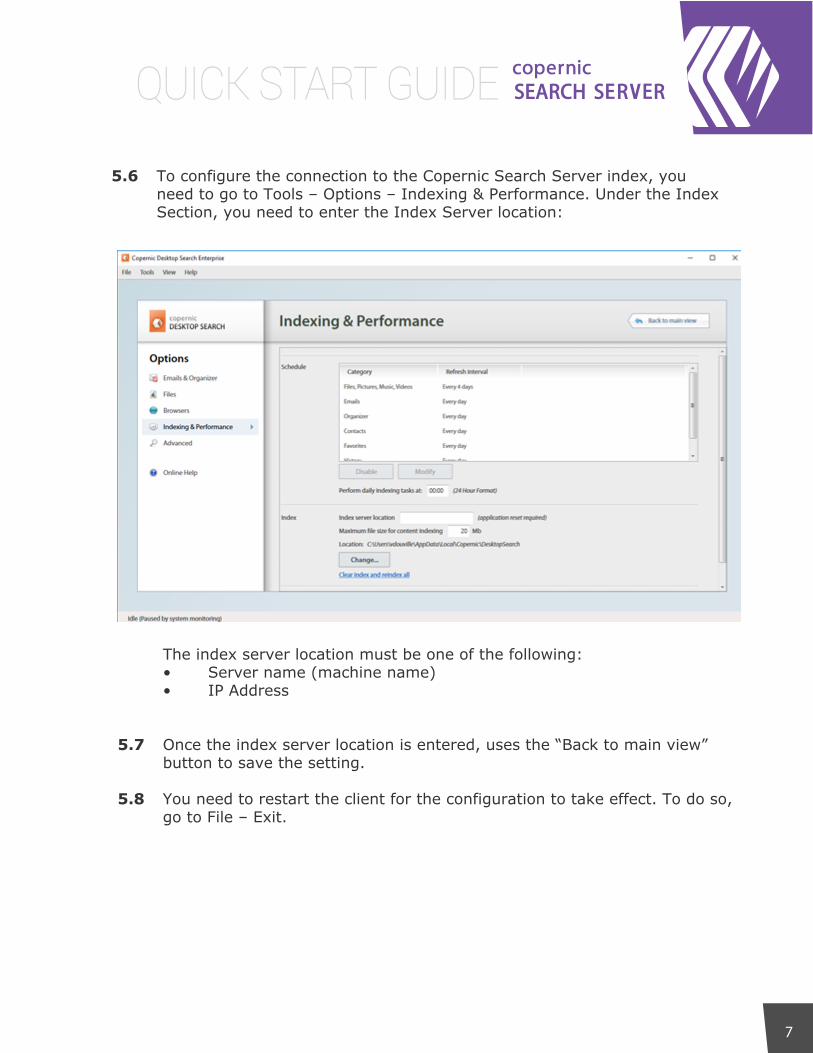
5.6 To configure the connection to the Copernic Search Server index, you need to go to Tools – Options – Indexing & Performance. Under the Index Section, you need to enter the Index Server location:
The index server location must be one of the following: • Server name (machine name) • IP Address
5.7 Once the index server location is entered, uses the “Back to main view” button to save the setting.
5.8 You need to restart the client for the configuration to take effect. To do so, go to File – Exit.
QUICK START GUIDE
8
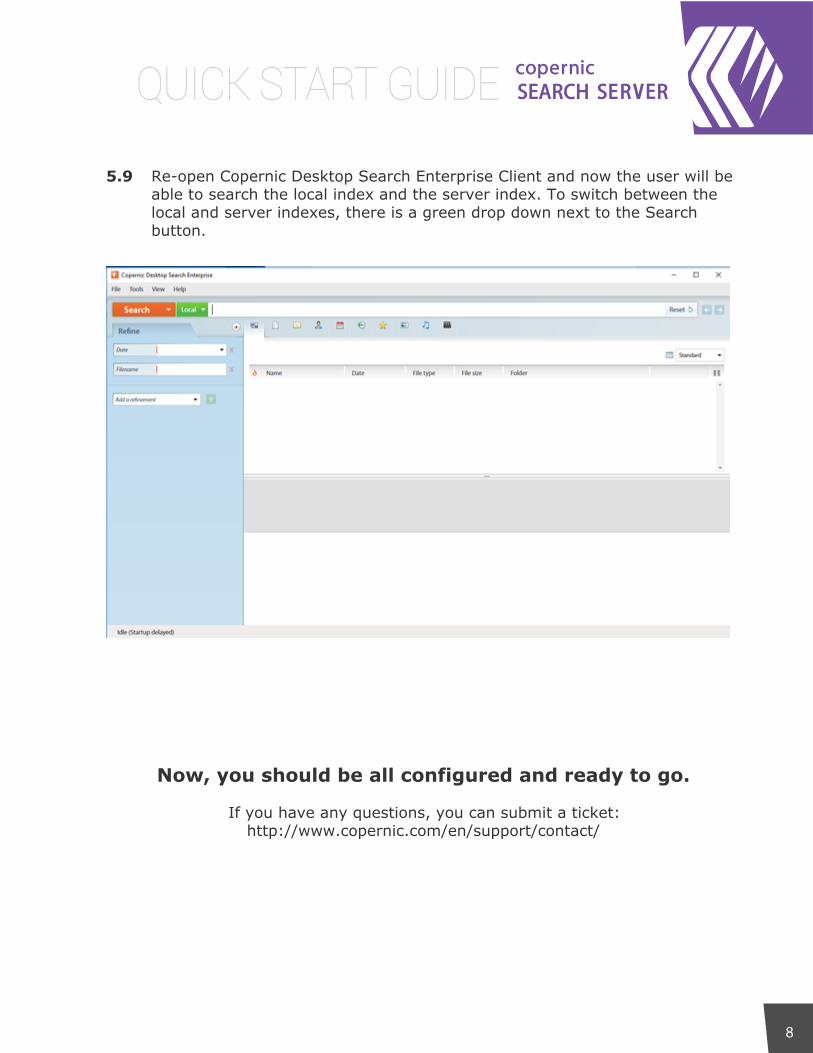
5.9 Re-open Copernic Desktop Search Enterprise Client and now the user will be able to search the local index and the server index. To switch between the local and server indexes, there is a green drop down next to the Search button.
Now, you should be all configured and ready to go. If you have any questions, you can submit a ticket:
http://www.copernic.com/en/support/contact/


![CSS & eCSStender [CSS Summit 2011]](https://img.pdfslide.us/doc/110x75/54c70c6e4a79593f288b4656/css-ecsstender-css-summit-2011.jpg)