Embed Size (px)
Citation preview
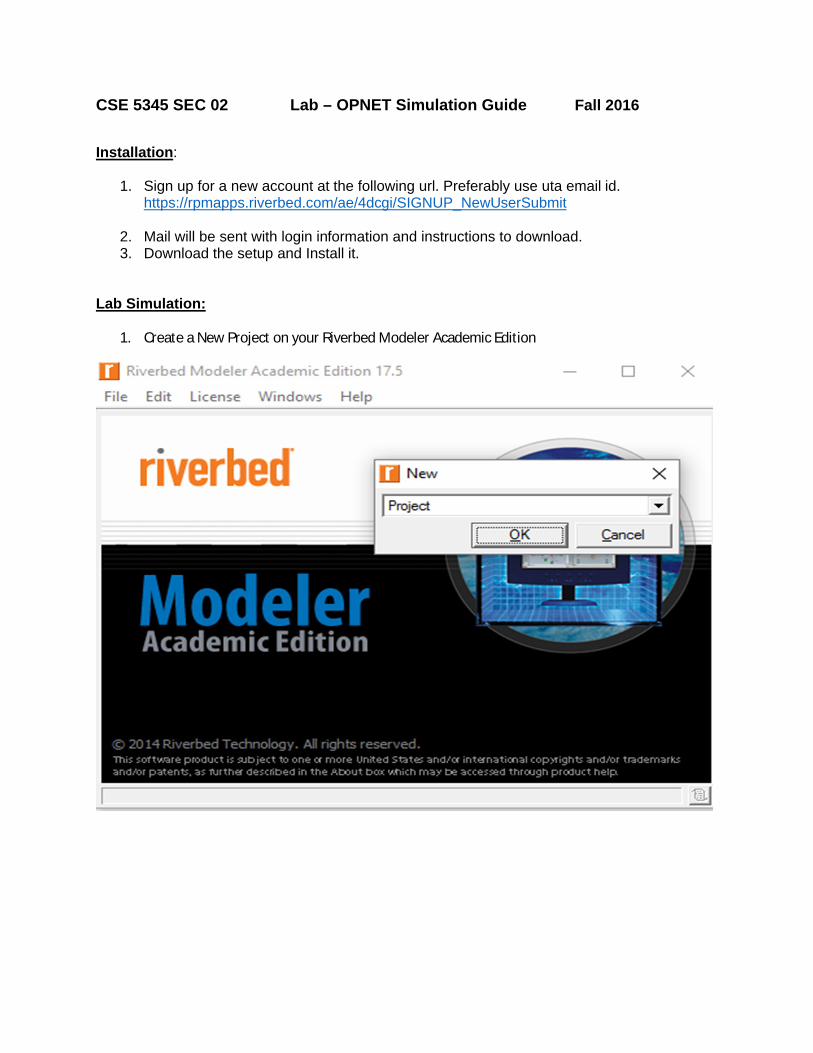
CSE 5345 SEC 02 Lab – OPNET Simulation Guide Fall 2016
Installation:
1. Sign up for a new account at the following url. Preferably use uta email id.https://rpmapps.riverbed.com/ae/4dcgi/SIGNUP_NewUserSubmit
2. Mail will be sent with login information and instructions to download.3. Download the setup and Install it.
Lab Simulation:
1. Create a New Project on your Riverbed Modeler Academic Edition
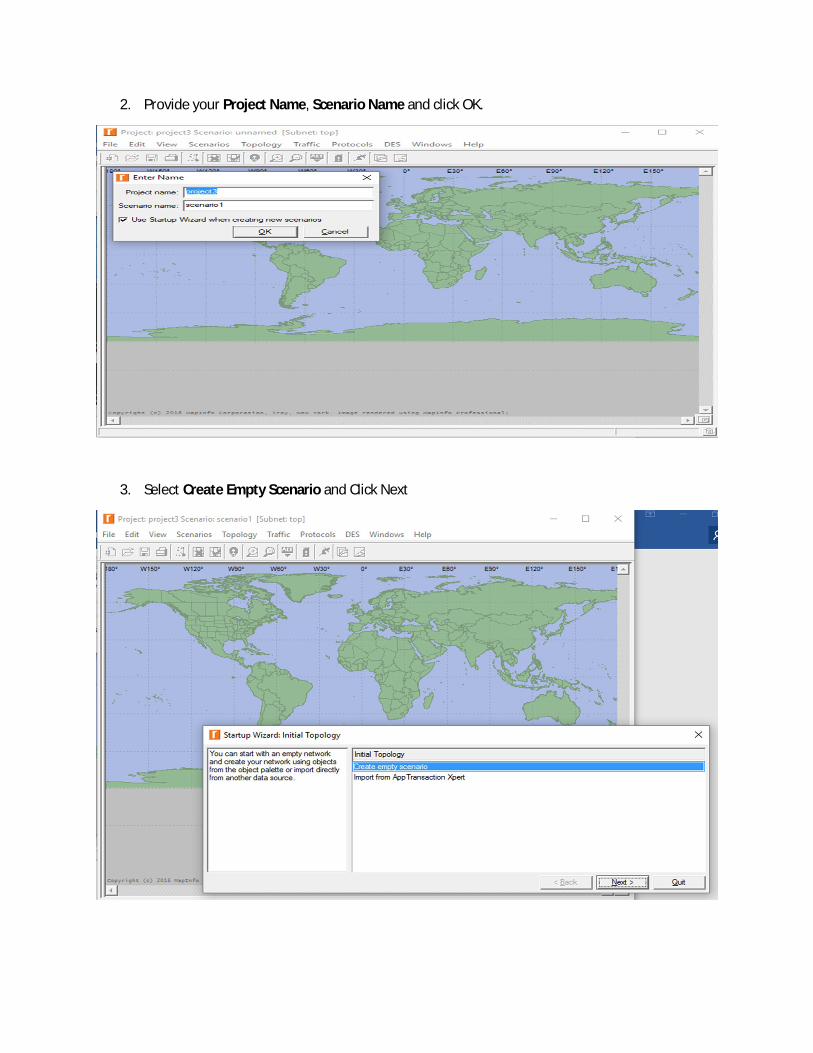
2. Provide your Project Name, Scenario Name and click OK.
3. Select Create Empty Scenario and Click Next
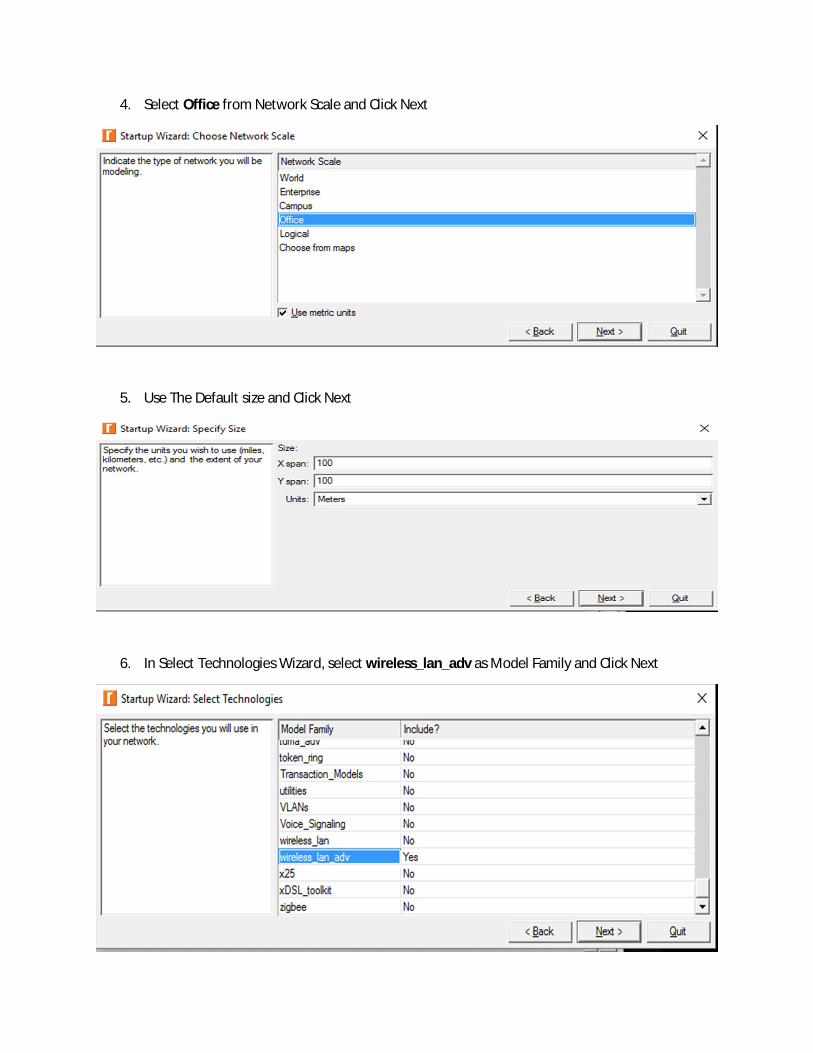
4. Select Office from Network Scale and Click Next
5. Use The Default size and Click Next
6. In Select Technologies Wizard, select wireless_lan_adv as Model Family and Click Next
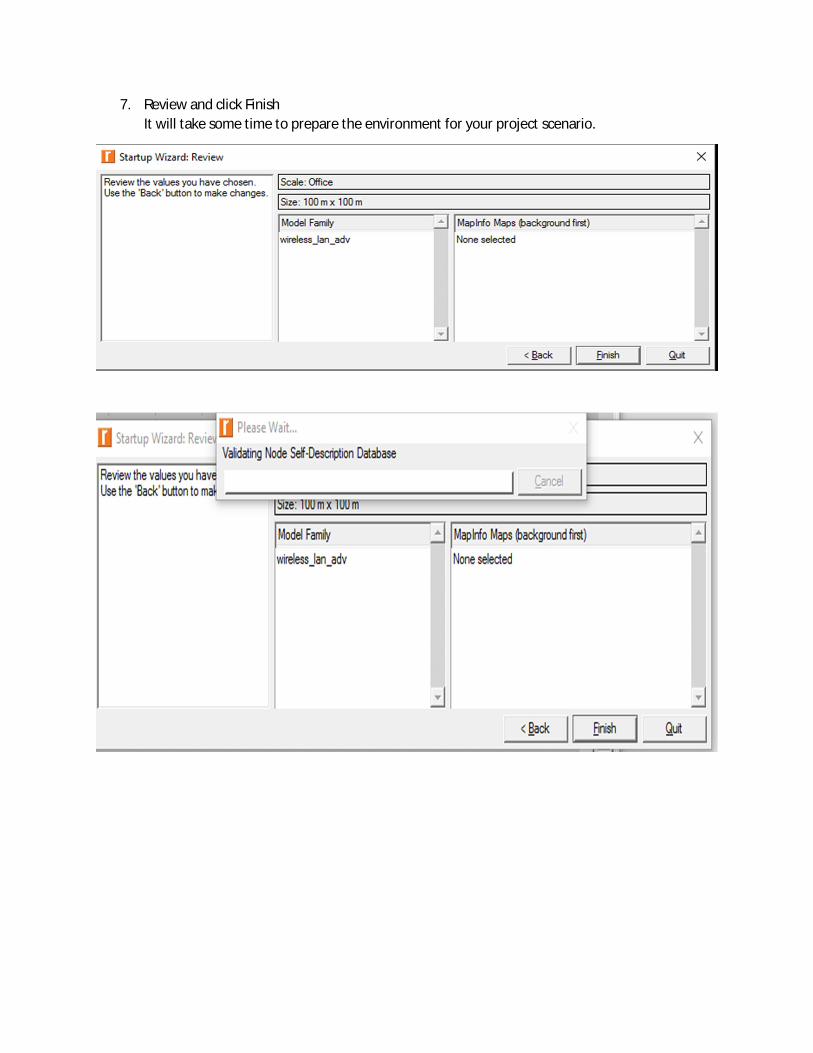
7. Review and click FinishIt will take some time to prepare the environment for your project scenario.
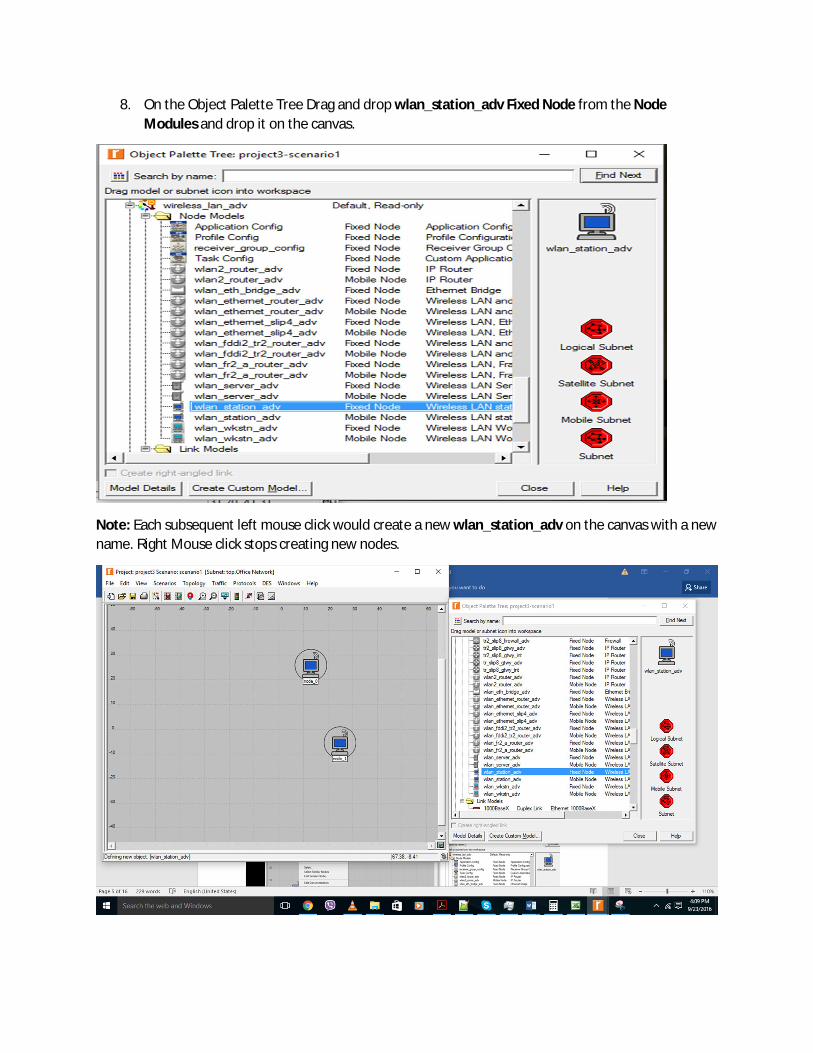
8. On the Object Palette Tree Drag and drop wlan_station_adv Fixed Node from the Node Modules and drop it on the canvas.
Note: Each subsequent left mouse click would create a new wlan_station_adv on the canvas with a new name. Right Mouse click stops creating new nodes.
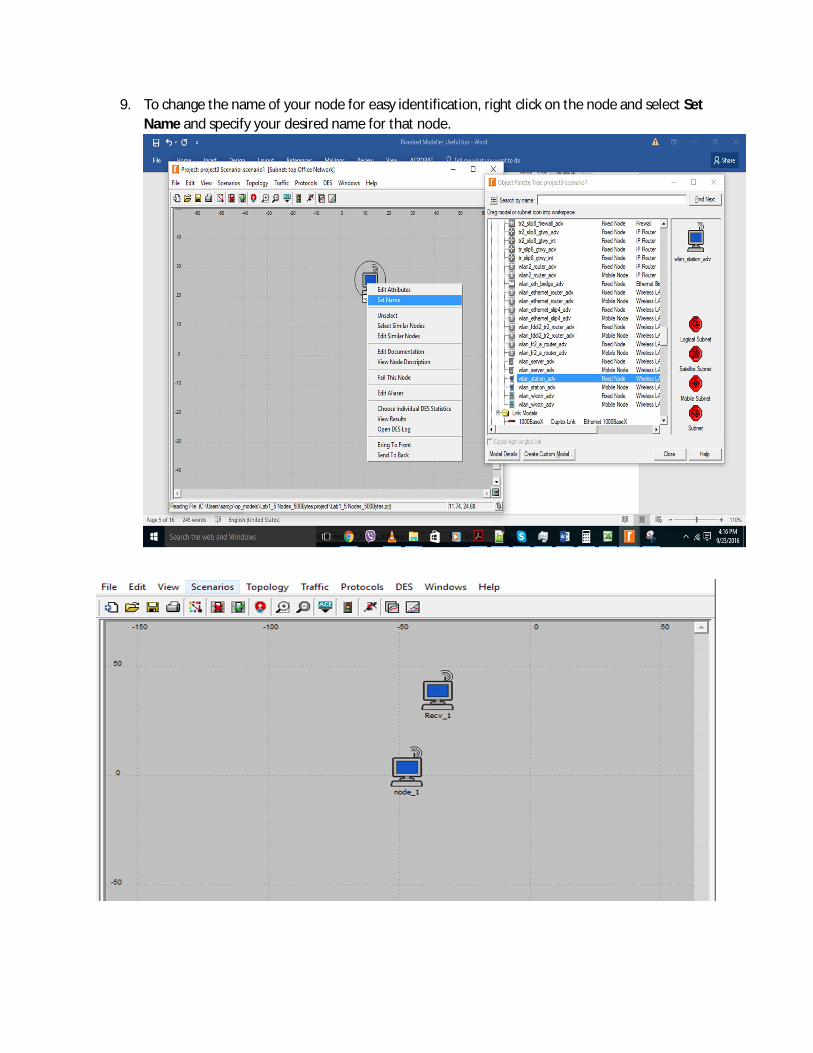
9. To change the name of your node for easy identification, right click on the node and select SetName and specify your desired name for that node.
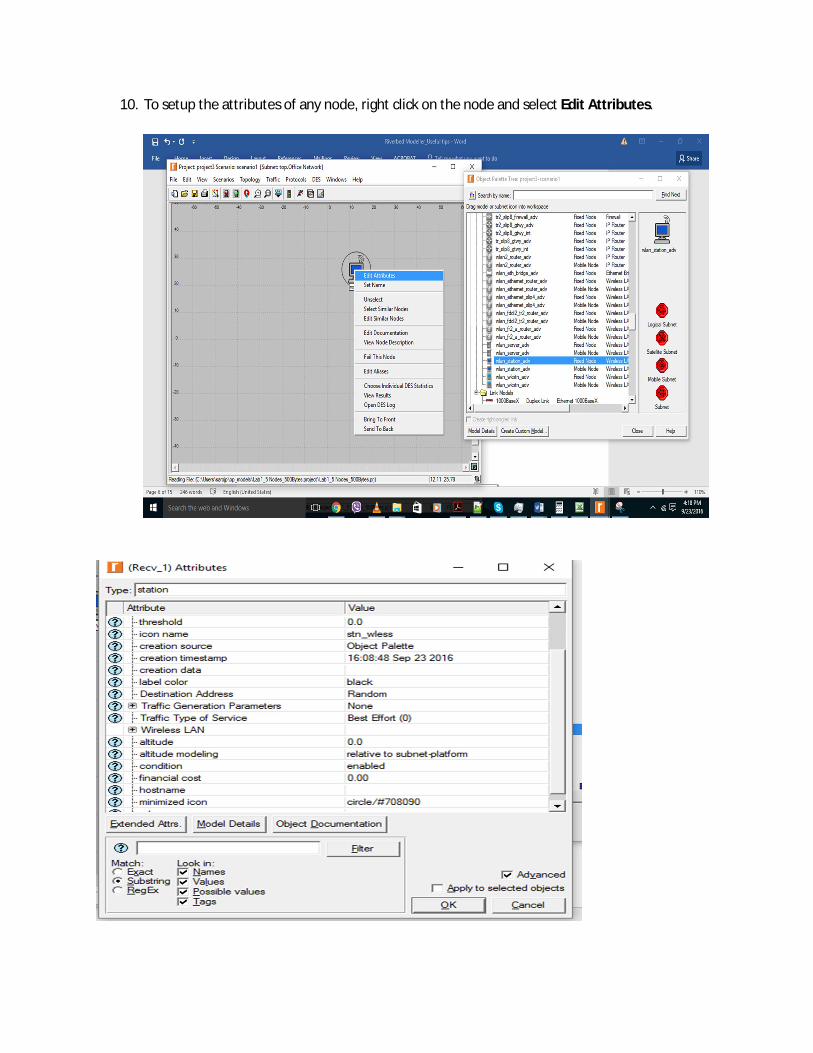
10. To setup the attributes of any node, right click on the node and select Edit Attributes.
Key Points:
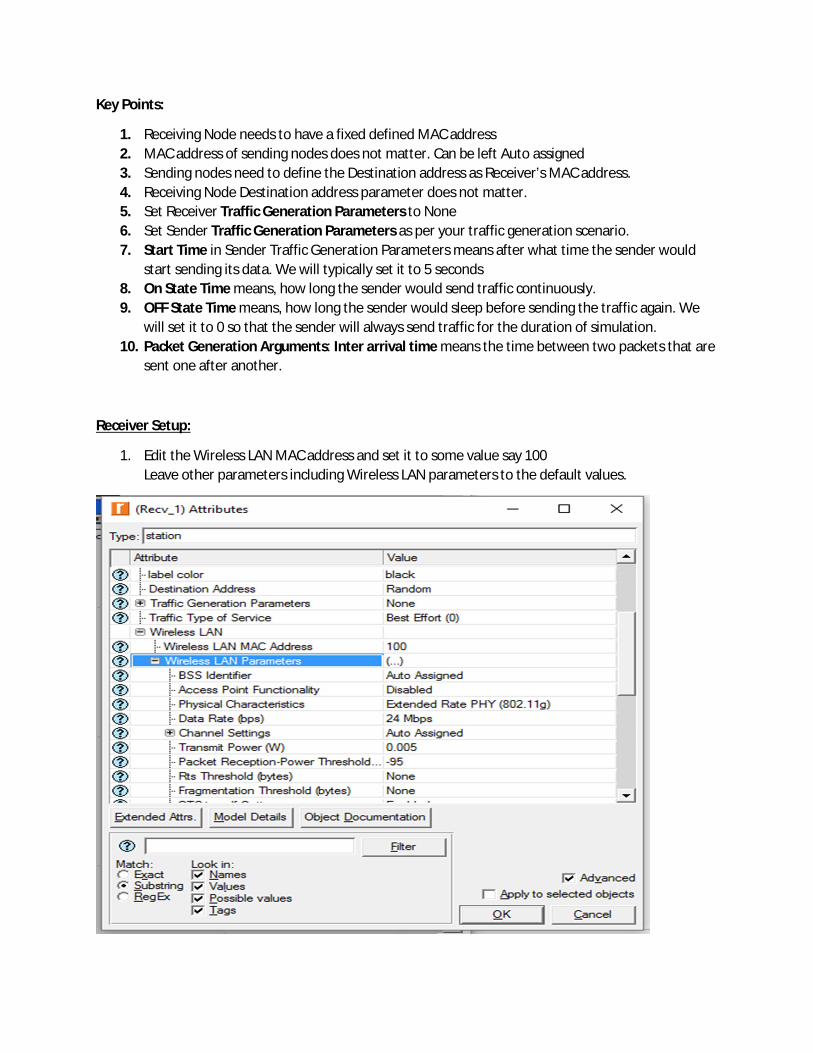
1. Receiving Node needs to have a fixed defined MAC address2. MAC address of sending nodes does not matter. Can be left Auto assigned3. Sending nodes need to define the Destination address as Receiver’s MAC address.4. Receiving Node Destination address parameter does not matter.5. Set Receiver Traffic Generation Parameters to None6. Set Sender Traffic Generation Parameters as per your traffic generation scenario.7. Start Time in Sender Traffic Generation Parameters means after what time the sender would
start sending its data. We will typically set it to 5 seconds8. On State Time means, how long the sender would send traffic continuously. 9. OFF State Time means, how long the sender would sleep before sending the traffic again. We
will set it to 0 so that the sender will always send traffic for the duration of simulation. 10. Packet Generation Arguments: Inter arrival time means the time between two packets that are
sent one after another.
Receiver Setup:
1. Edit the Wireless LAN MAC address and set it to some value say 100Leave other parameters including Wireless LAN parameters to the default values.
Sender Setup:
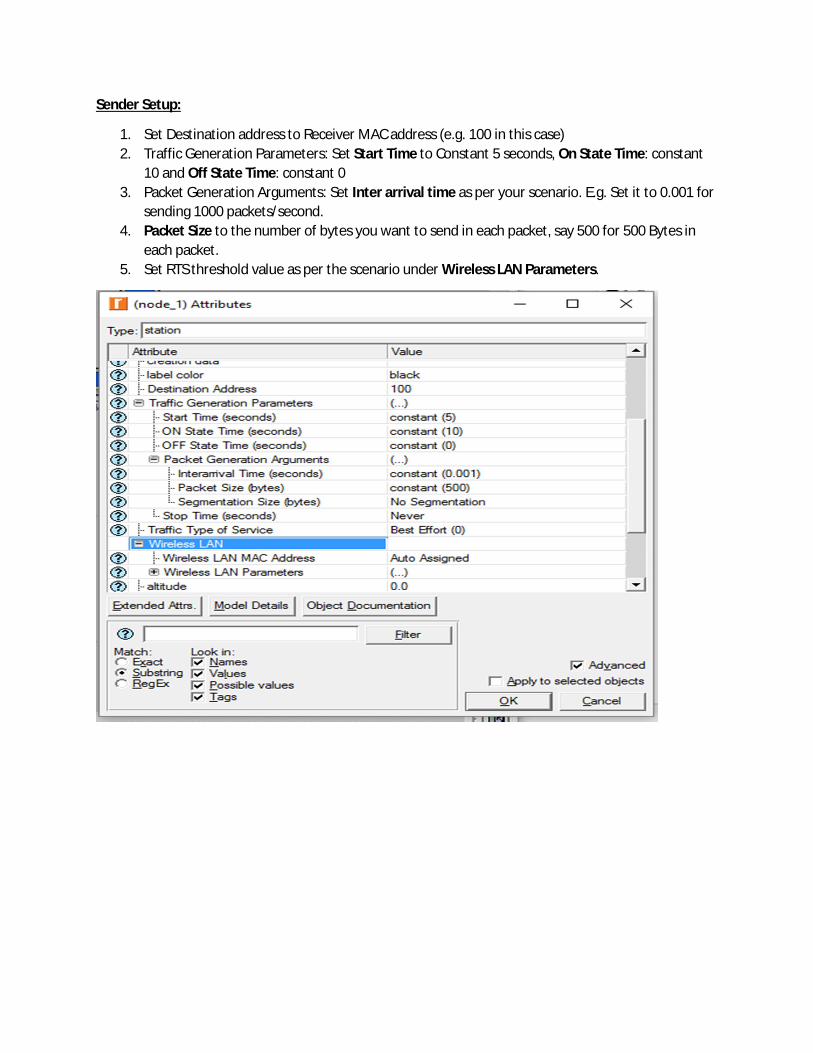
1. Set Destination address to Receiver MAC address (e.g. 100 in this case)2. Traffic Generation Parameters: Set Start Time to Constant 5 seconds, On State Time: constant
10 and Off State Time: constant 03. Packet Generation Arguments: Set Inter arrival time as per your scenario. E.g. Set it to 0.001 for
sending 1000 packets/second.4. Packet Size to the number of bytes you want to send in each packet, say 500 for 500 Bytes in
each packet. 5. Set RTS threshold value as per the scenario under Wireless LAN Parameters.

Results/Reports Settings:
1. Various Results/Reports statistics can be generated from the simulation.2. Right click on any node and select Choose Individual DES Statistics.
3. From the options select the statistics that you want to report as part of your simulation. Those reports would be available as part of the result after you have run the scenario.
Running The Scenarios:
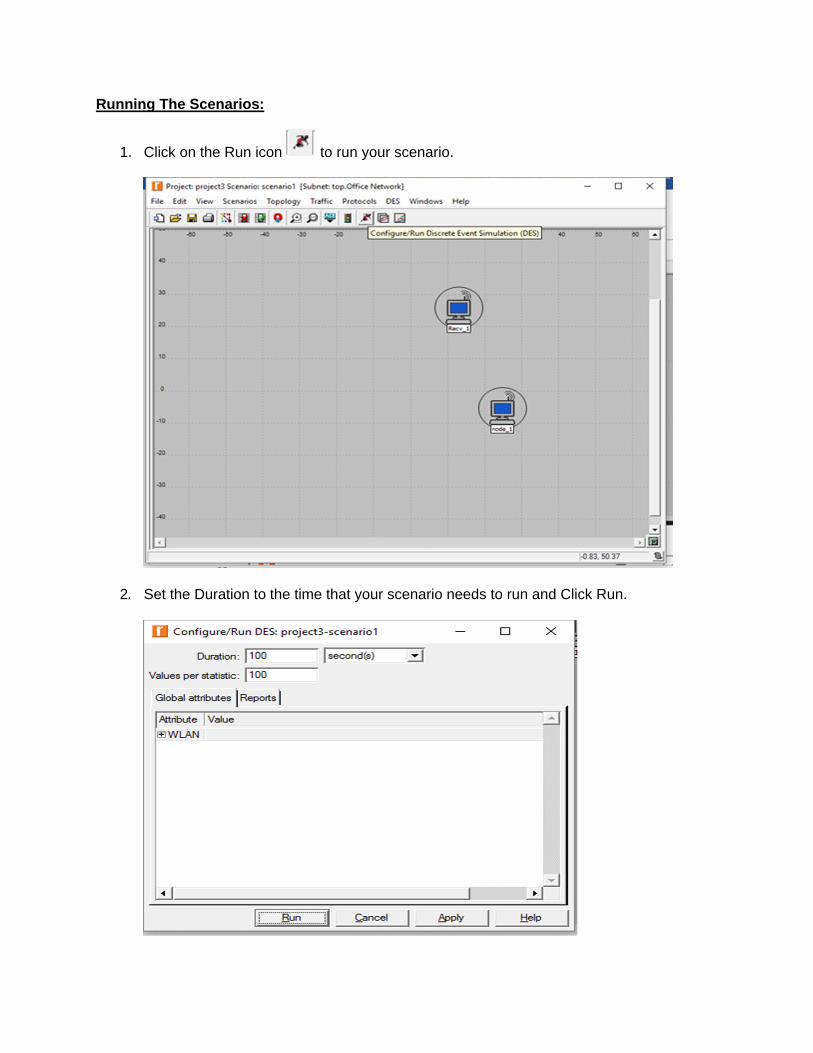
1. Click on the Run icon to run your scenario.
2. Set the Duration to the time that your scenario needs to run and Click Run.

Results:
1. To access the results of your simulation, click on the results icon besides the run icon.
Sample results from a previous run.