Embed Size (px)
Citation preview
CS3205 – HCI IN SOFTWARE DEVELOPMENT PROTOTYPING STRATEGIES
Tom Horton
* Material from: Floryan (UVa) Klemmer (UCSD, was at Stanford)
WHAT WILL WE BE TALKING ABOUT?
¢ Specific Prototyping Strategies!
¢ Low-Fidelity Strategies � Storyboarding � Video Prototypes � Paper Prototyping
BIG PICTURE!
¢ Remember that you should always use stage appropriate tools! � Fidelity vs. Time graph! (next slide)
¢ The general rule is that you should progress from low to high fidelity slowly as the design process continues.
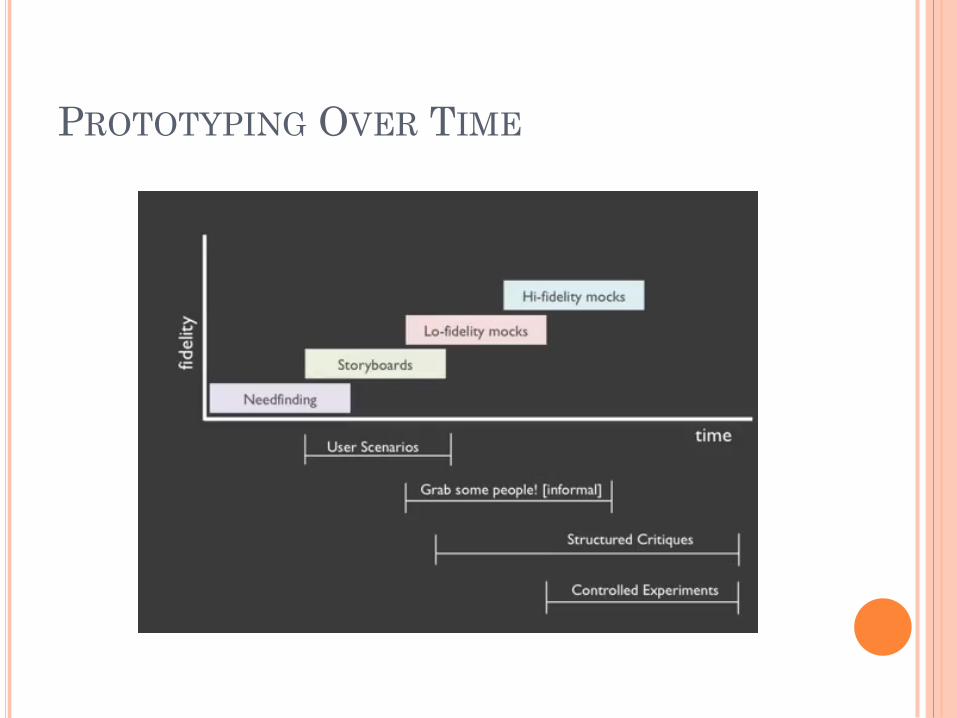
PROTOTYPING OVER TIME
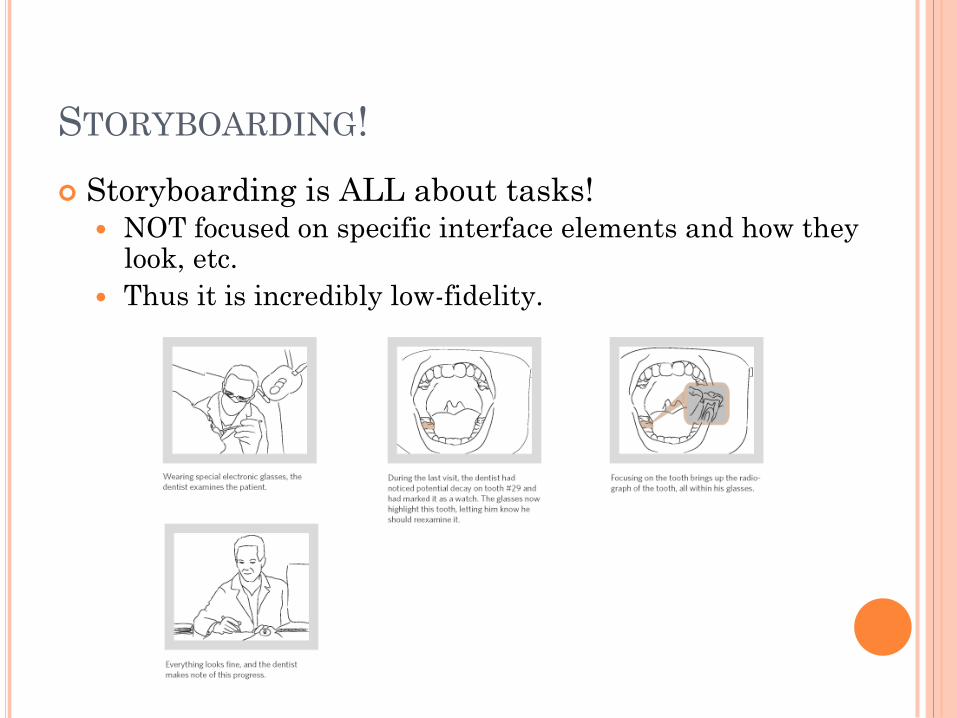
STORYBOARDING!
¢ Storyboarding is ALL about tasks! � NOT focused on specific interface elements and how they
look, etc. � Thus it is incredibly low-fidelity.
STORYBOARDING
¢ Storyboarding IS about � The tasks users want to complete. � The FLOW of the user’s interaction.
¢ Storyboarding is NOT about � Pretty pictures (in fact bad drawing helps focus on
task and not on imagery). � Showing specific interface elements.

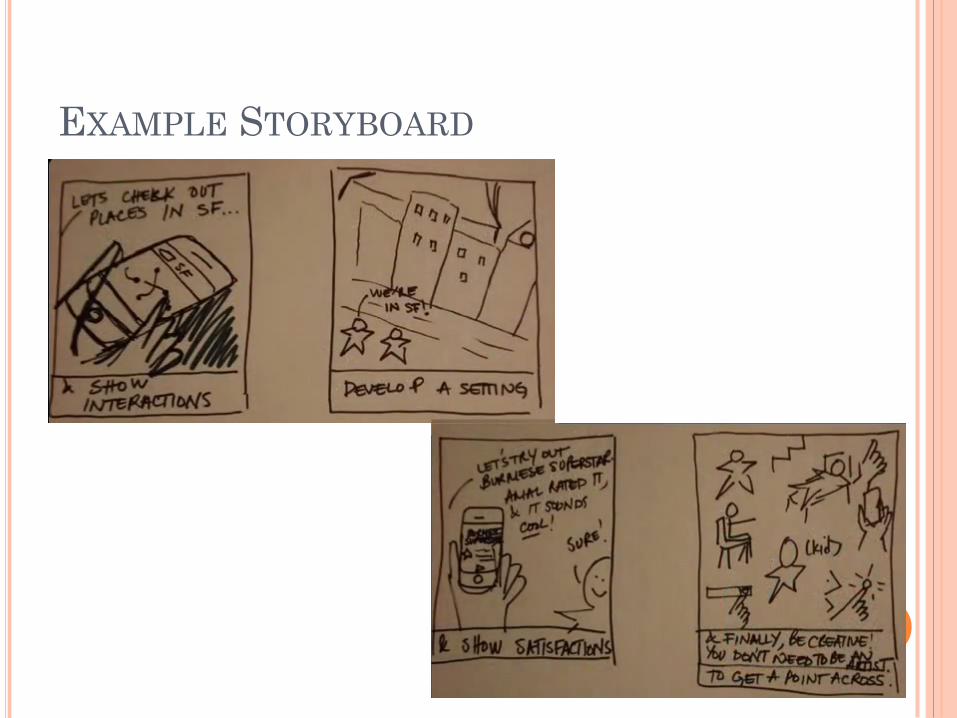
EXAMPLE STORYBOARD

STORYBOARDS SHOULD CONVEY
¢ Setting � People Involved � Environment(s) � Task being accomplished
¢ Sequence � What steps are involved? � What leads someone to use the app or system? � What task is being illustrated?

STORYBOARDS SHOULD CONVEY
¢ Satisfaction � What motivates people to use the system? � What does it enable people to accomplish? � What need does system fill?

BENEFITS OF STORYBOARDING
¢ Holistic Focus: helps emphasize how an interface accomplishes a task.
¢ Avoids commitment to a particular user interface (no buttons yet).
¢ Helps get ALL stakeholders on the same page in terms of the goal.

SOME ADVICE REGARDING STORYBOARDING
¢ DO NOT spend too much time on a storyboard. � Set a short time limit to enforce this.
¢ Focus on tasks and scenarios that are the MOST common for your users.

¢ Example from book User Interface Design and Evaluation, p. 119
¢ Shows � workflow of mail
merging � who’s involved,
responsibilities, etc.

¢ This shows high-level of view of users involved in other storyboards
From: Usability Case Studies, http://ucs.ist.psu.edu
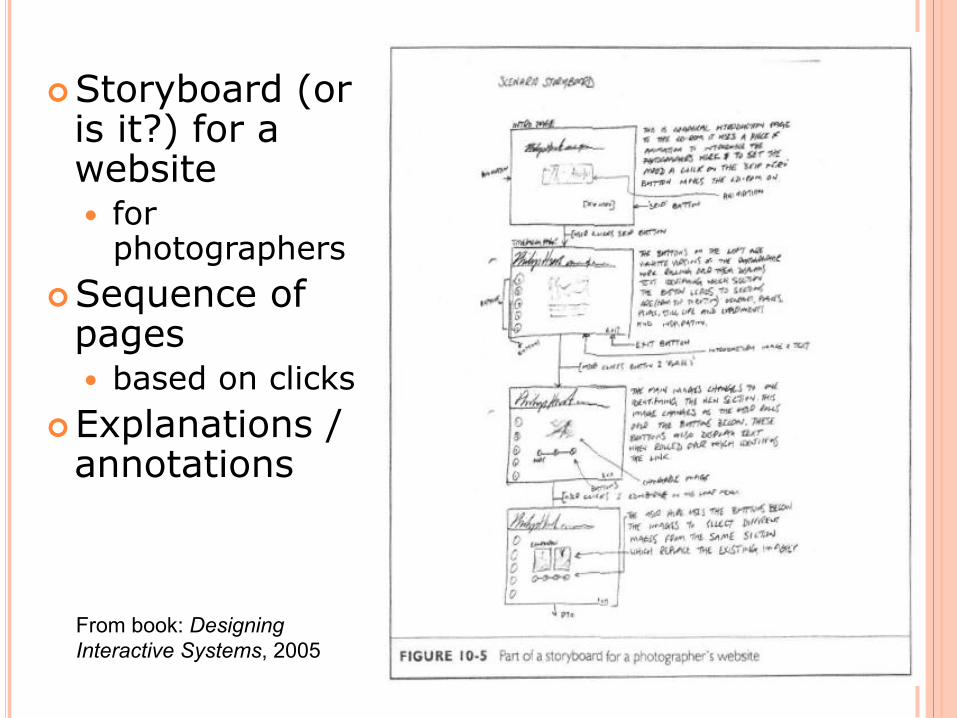
¢ Storyboard (or is it?) for a website � for
photographers ¢ Sequence of
pages � based on clicks
¢ Explanations / annotations
From book: Designing Interactive Systems, 2005

VIDEO PROTOTYPING
¢ What is video prototyping?
BENEFITS OF VIDEO PROTOTYPING
¢ Cheap and fast
¢ Great communication tools � Helps achieve common ground � Ideally, portable and self-explanatory
¢ Can serve as a ‘spec’ for developers
¢ Ties interface designs to tasks � Aligns and orients interface choices � Makes sure you have a complete interface
VIDEO PROTOTYPING
¢ Can be any level of fidelity. � Can make videos with paper prototype examples. � Fancy high fidelity videos are ok too!
¢ Usually, dependent on where you are in the design process.

WHAT DO YOU PUT IN VIDEO PROTOTYPE?
¢ The WHOLE task including motivation and success. � Establishing shots and narrative help.
¢ Draw on tasks you observe. ¢ Illustrate important tasks your system enables.
� Not in video, probably not necessary for version one of the system.
¢ Can help scope a minimum viable product. ¢ Changes what design teams argue about (in a
good way).

STEPS TO VIDEO PROTOTYPING
¢ 1) Outline / Storyboard the Video
¢ 2) Obtain Equipment. � A camera (nothing fancy required). Could be a phone
even! � People � Realistic Location
¢ 3) Focus on MESSAGE, not on production value.
¢ 4) Film it!!
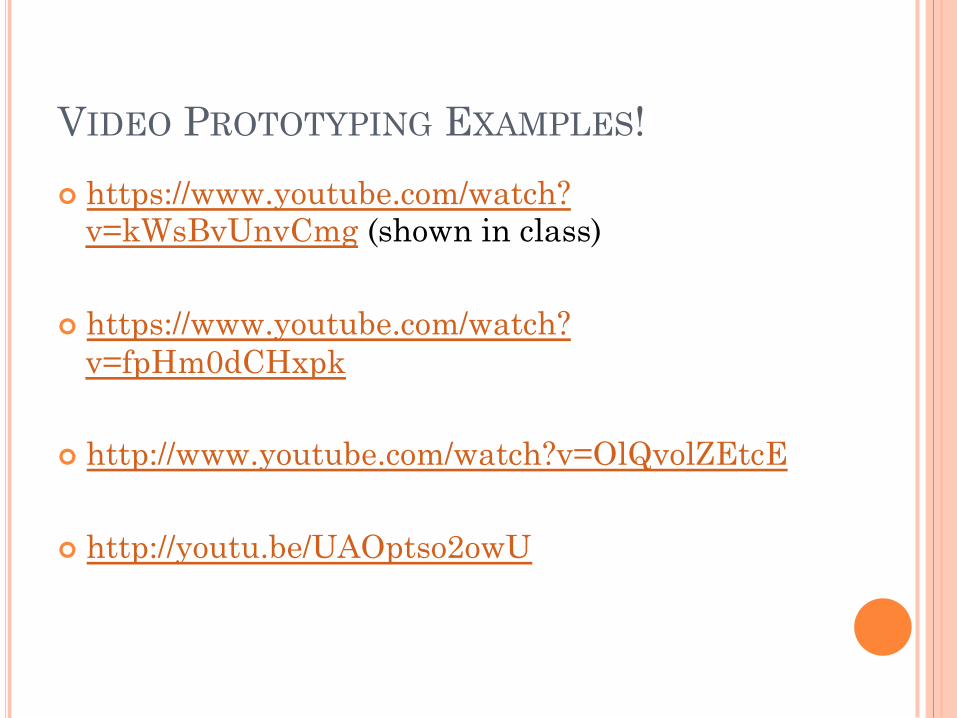
VIDEO PROTOTYPING EXAMPLES!
¢ https://www.youtube.com/watch?v=kWsBvUnvCmg (shown in class)
¢ https://www.youtube.com/watch?v=fpHm0dCHxpk
¢ http://www.youtube.com/watch?v=OlQvolZEtcE
¢ http://youtu.be/UAOptso2owU

CONSIDERATIONS
¢ Audio? Not always necessary. � You can verbally describe video in person while
showing it to someone.
¢ Interface fidelity? Paper, digital, etc. � Can even be invisible!
¢ Show both success and failure. Several use-cases always a plus.
¢ Don’t spend too much time editing.

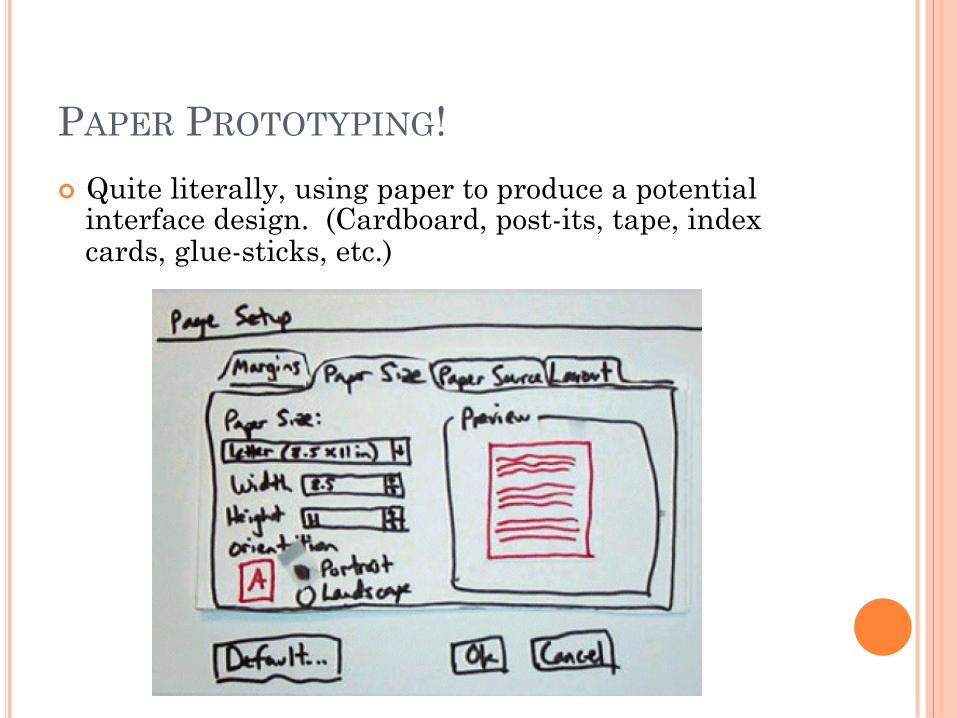
PAPER PROTOTYPING!
¢ Quite literally, using paper to produce a potential interface design. (Cardboard, post-its, tape, index cards, glue-sticks, etc.)

BENEFITS OF PAPER PROTOTYPING
¢ Very Fast! Very Cheap!
¢ Easy to change and adapt � Why not code-it, real GUIs, using a builder tool, etc.?
¢ (I.e. high-fidelity)
� Estimated to be 100 times cheaper if NO code is written. (So says Jakob Nielsen, so you know it’s true.)
� Can be used to collect important usability information!
¢ Can support interaction: an evaluation session with users � Really? But it’s just paper, scribbling and post-it notes!
USER INTERACTION WITH A PAPER PROTOTYPE
¢ Evaluation session
¢ What happens: � User walks through a task � One team member plays computer � New screens etc. are moved in and out � Team draws on paper, adds things, moves things, etc. � Someone ask questions, elicits comments � Some records feedback (video, notes)
¢ Benefits! � Not tempted to focus on fit-and-finish � Allows focus on a desired evaluation goals (e.g. flow,
conceptual model, visibility (?), etc.) � No “demo fail”. Easy to change on the fly during
evaluation session.

ADDITIONAL ADVANTAGE: COLLABORATIVE DESIGN
¢ Users (and Stakeholders) can get involved and quickly alter / update the interface.
¢ Often this leads to a better design because they can show you what they prefer! � Scaffold their efforts.
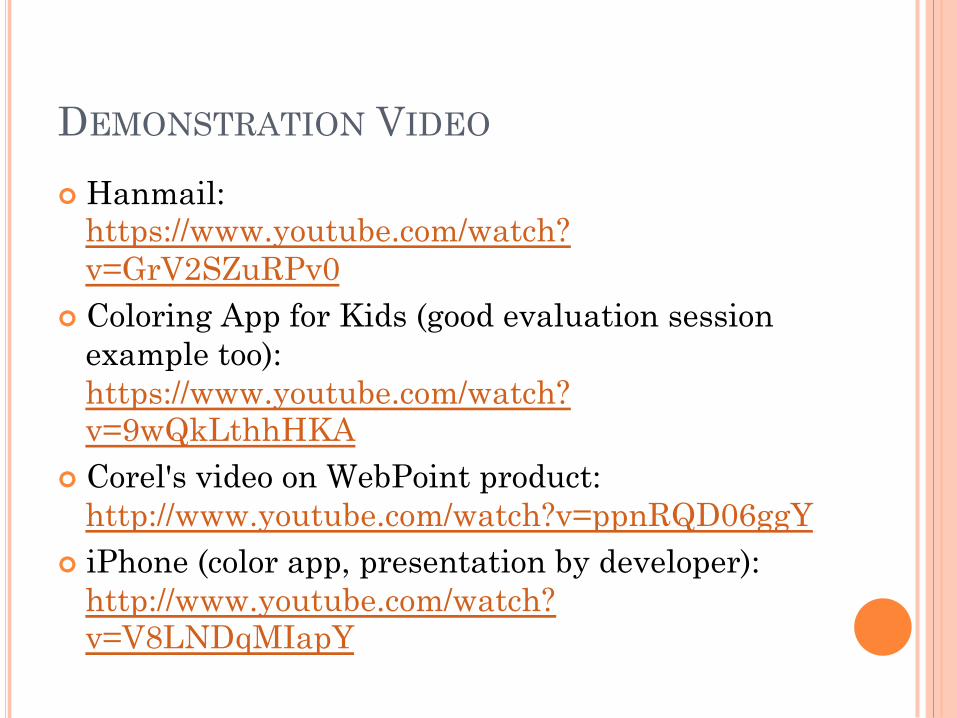
DEMONSTRATION VIDEO
¢ Hanmail: https://www.youtube.com/watch?v=GrV2SZuRPv0
¢ Coloring App for Kids (good evaluation session example too): https://www.youtube.com/watch?v=9wQkLthhHKA
¢ Corel's video on WebPoint product: http://www.youtube.com/watch?v=ppnRQD06ggY
¢ iPhone (color app, presentation by developer): http://www.youtube.com/watch?v=V8LNDqMIapY
PAPER PROTOTYPING TIPS AND TRICKS
¢ 1) Keep materials in one place! Small interface widgets tend to get lost or damaged easily.
¢ 2) Work quickly and make reusable components. � Screen grab UI widgets. Photocopy things. Use
scissors (but don’t run with them).
¢ 3) If something is difficult to simulate (progress indicators, right mouse menus, hyperlinks), have the user ask if it is available and then verbally describe the interaction. � E.g. you don’t have to construct (or code) everything
PAPER PROTOTYPING TIPS AND TRICKS
¢ 4) Backgrounds (Poster Board, etc.) can be useful to contain the prototype and provide context for the user. � E.g. a iPad or iPhone template
¢ 5) Don’t be afraid to mix and match hardware and software! Maybe a physical block of wood with paper on it!
¢ 6) When appropriate, add context by including familiar operating system elements.
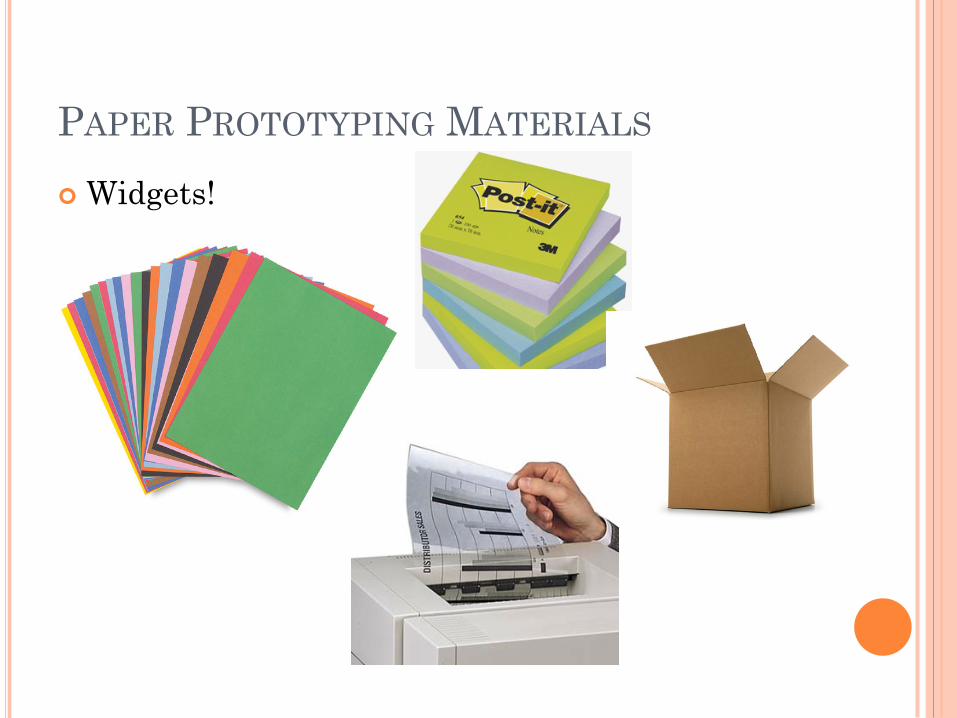
PAPER PROTOTYPING MATERIALS
¢ Widgets!
PAPER PROTOTYPING MATERIALS
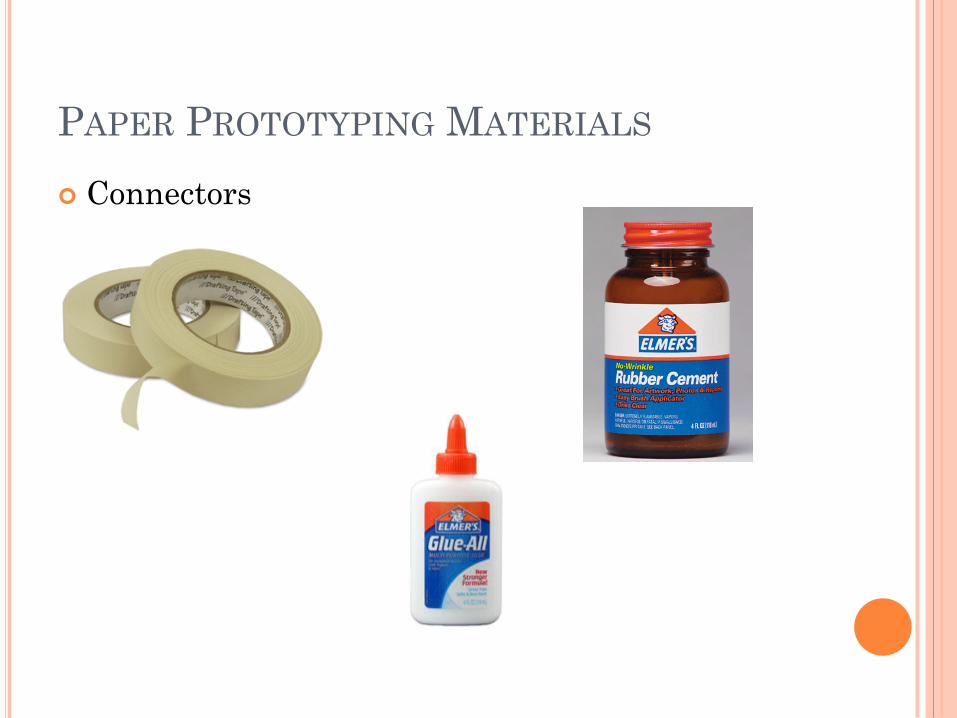
¢ Connectors
PAPER PROTOTYPING MATERIALS
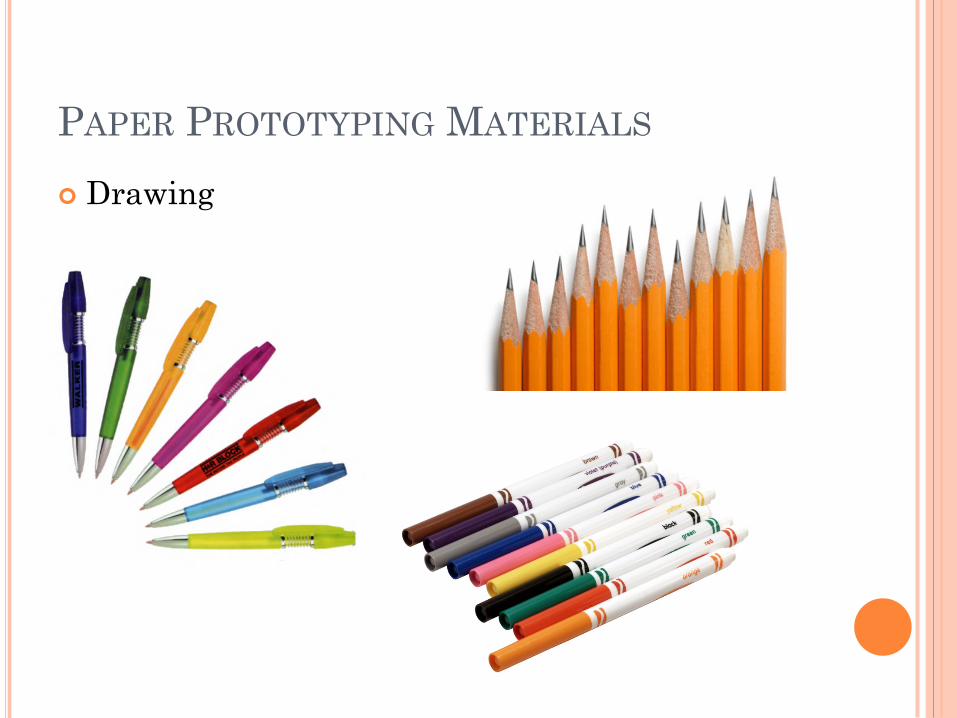
¢ Drawing

ANOTHER EXAMPLE
WIREFRAMING
WHAT’S A WIRE FRAME?
¢ A low fidelity representation of a single page or screen
¢ Goal: to meet the purpose of that screen, what UI elements are needed, and how are they organized?
¢ Should show: � All content or features needed � Relative sizes and locations of these
¢ Should NOT include: � Colors � Fonts � (Other “fit and finish” characteristics)
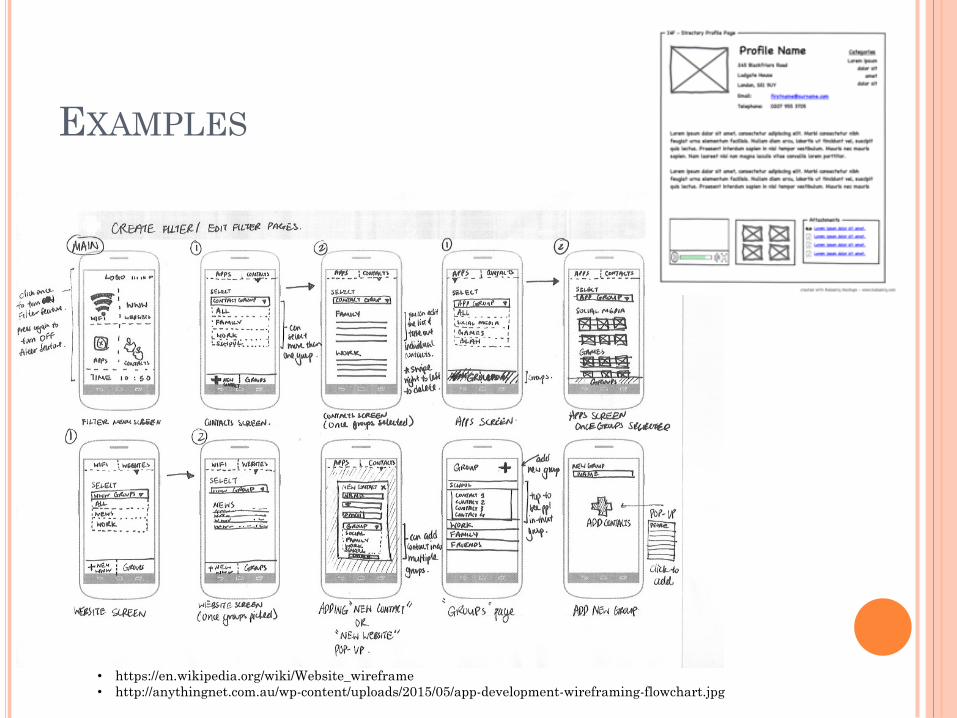
EXAMPLES
• https://en.wikipedia.org/wiki/Website_wireframe • http://anythingnet.com.au/wp-content/uploads/2015/05/app-development-wireframing-flowchart.jpg
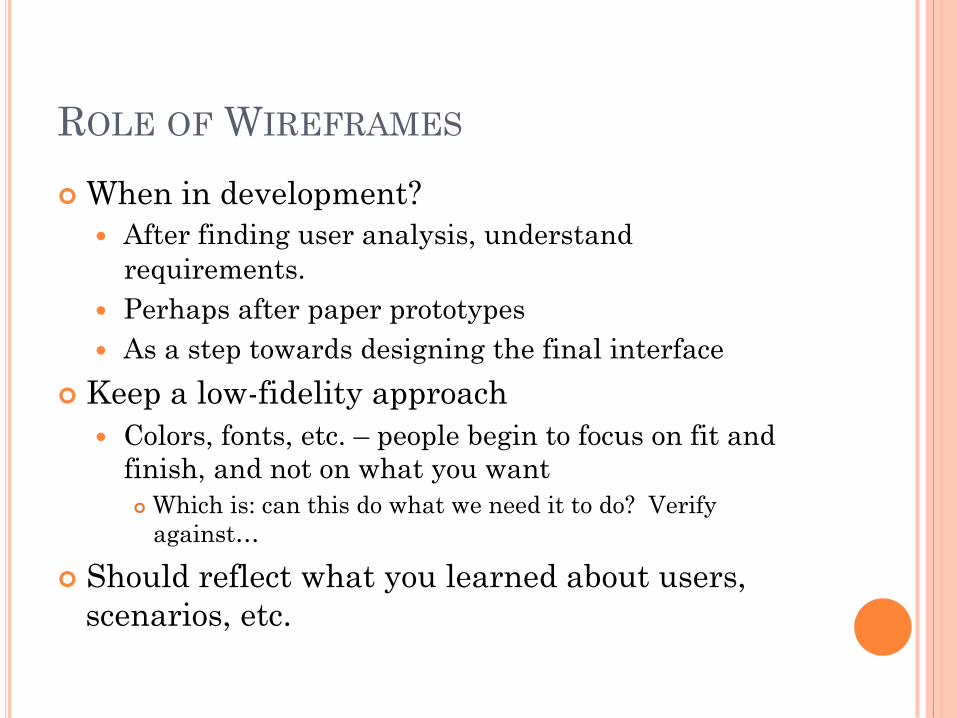
ROLE OF WIREFRAMES
¢ When in development? � After finding user analysis, understand
requirements. � Perhaps after paper prototypes � As a step towards designing the final interface
¢ Keep a low-fidelity approach � Colors, fonts, etc. – people begin to focus on fit and
finish, and not on what you want ¢ Which is: can this do what we need it to do? Verify
against…
¢ Should reflect what you learned about users, scenarios, etc.

WIREFRAMING TOOLS
¢ Many! Some are web-based, some are apps ¢ Balsamiq
� Draws things to make things look like paper (lo-fi)
¢ Other drawing tools � e.g. Microsoft Visio, OmniGraffle
¢ Others � Pencil Project (free) � Sketch � Marvel � MockFlow � FluidUI
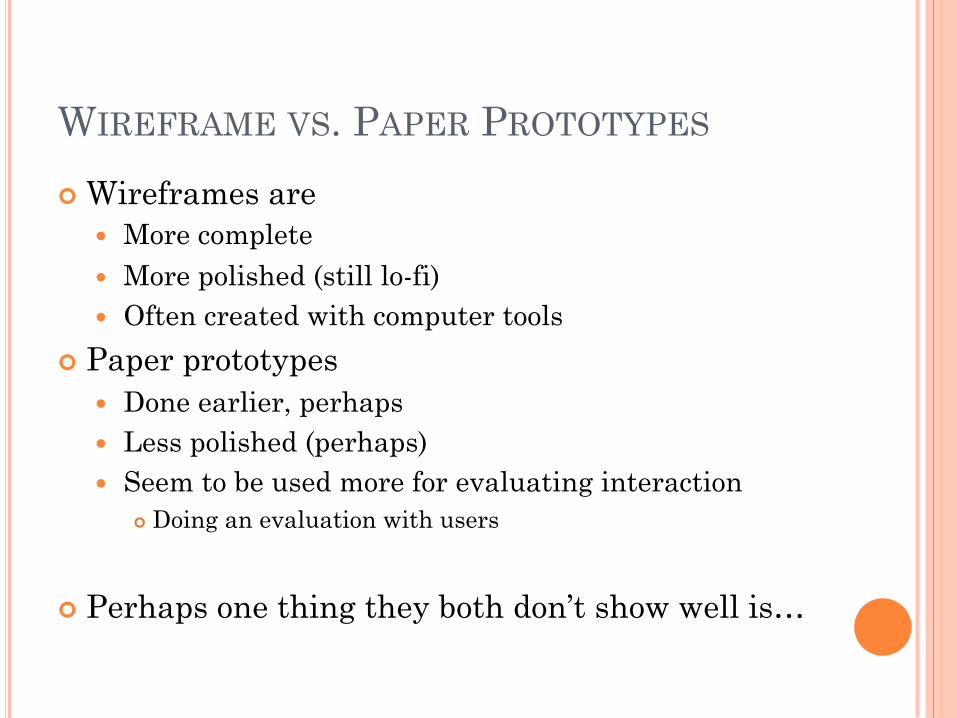
WIREFRAME VS. PAPER PROTOTYPES
¢ Wireframes are � More complete � More polished (still lo-fi) � Often created with computer tools
¢ Paper prototypes � Done earlier, perhaps � Less polished (perhaps) � Seem to be used more for evaluating interaction
¢ Doing an evaluation with users
¢ Perhaps one thing they both don’t show well is…

OVERALL UI FLOW
¢ Major UI elements are probably windows or screens (on handhelds) � What are they? How are they organized? � Do they “match” users’ mental models of how they
want to achieve tasks?
� Compare to SW architecture design ¢ Major components and their roles ¢ How they’re related ¢ Save detailed design (inside modules) for later
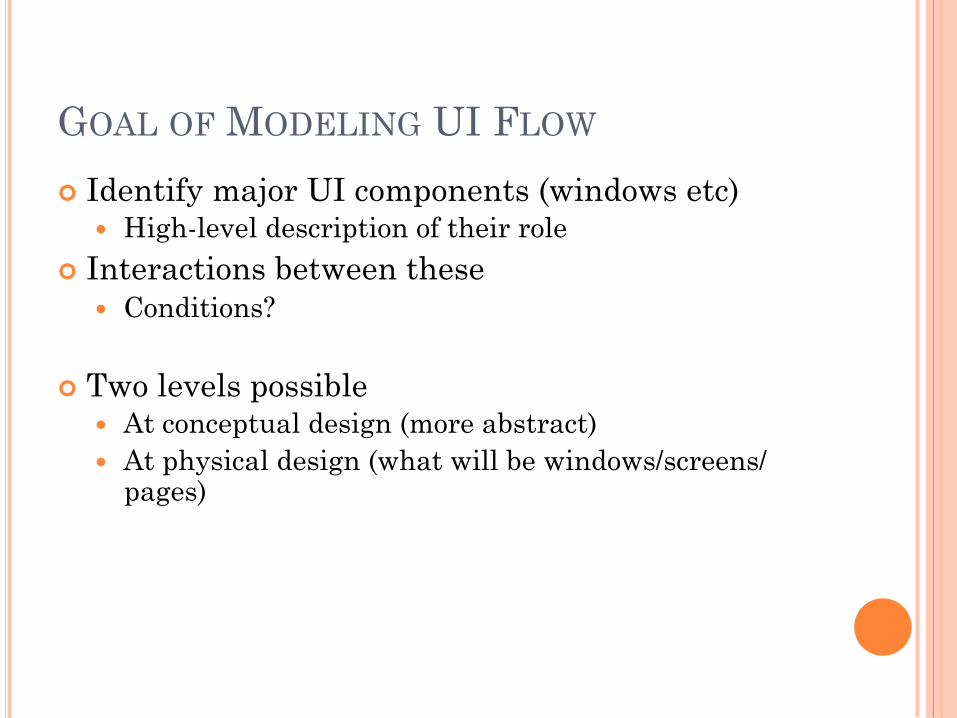
GOAL OF MODELING UI FLOW
¢ Identify major UI components (windows etc) � High-level description of their role
¢ Interactions between these � Conditions?
¢ Two levels possible � At conceptual design (more abstract) � At physical design (what will be windows/screens/
pages)

UIDE BOOK’S CONTENT DIAGRAMS ¢ Content diagram is:
� lo-fi prototype that shows organization and structure of the UI
� from the designer’s perspective (?) ¢ In physical design, can be transformed into GUI or
website or… � May not be a one-to-one match between this level of
abstraction and final physical design

CREATING A CONTENT DIAGRAM
¢ Need to know: � Primary tasks, objects, etc. for this UI � Probably want to have use-cases, scenarios, etc.
¢ Then, � Identify containers and “task objects” � Decide which tasks go into each container � Define links that show navigation flow
CONTENT DIAGRAMS: CONTAINERS
¢ Container � an abstract representation of some part of a user’s
work activity � includes functions required to do that activity
¢ Various levels within the diagram � Main container should record
¢ Vital tasks and Frequent tasks � “Lower-level” containers
CONTENT DIAGRAMS: LINKS
¢ Links � how the user will navigate in the UI between
these functional areas ¢ Single link: next container becomes primary
focus ¢ Double link: second container requires
context of first container � Example: spell checking window in a word-
processor ¢ Links may have labels to indicate conditions
on them

REPRESENTING CONTAINERS
UIDE book’s template Note: Objects are Task Objects
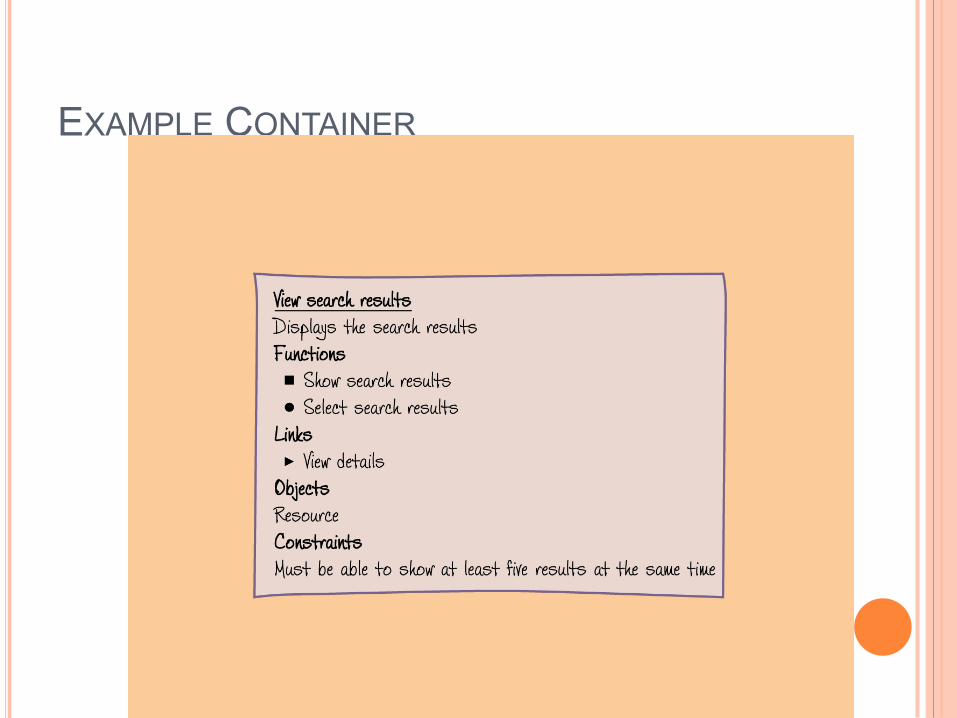
EXAMPLE CONTAINER
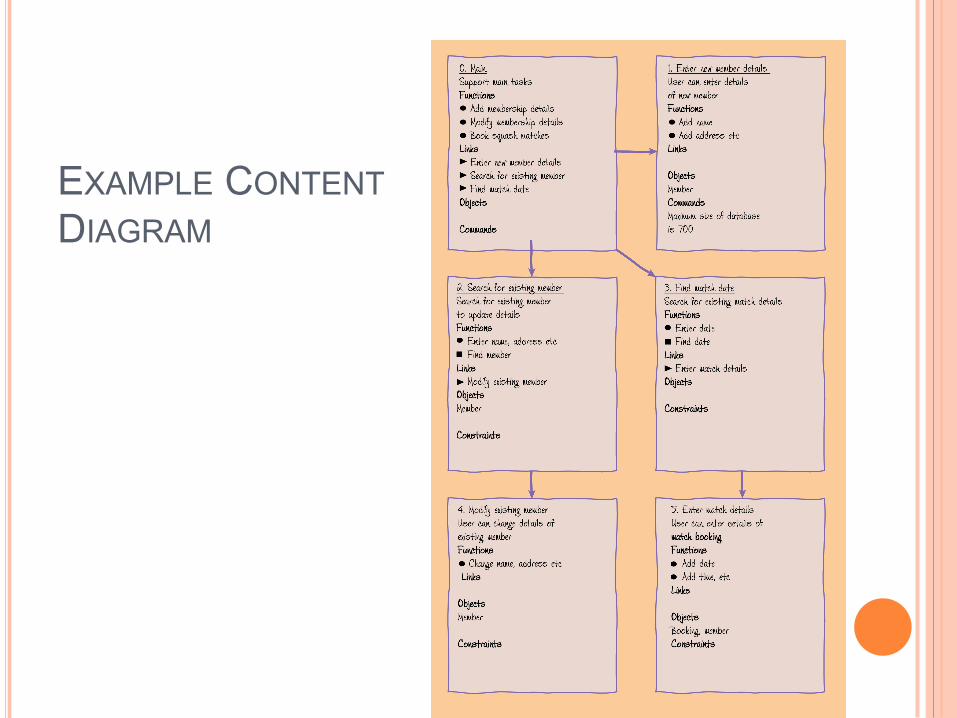
EXAMPLE CONTENT DIAGRAM
ANOTHER APPROACH: UI FLOW DIAGRAMS
¢ We can do less than this and still benefit ¢ Prototype often called a UI Flow
Diagram or Navigation Diagram in the Unified Process methodology � Post-its or boxes represent major UI elements
(e.g. Windows) � Each has a title (or short description) and
often an ID ¢ ID used to refer to a more detailed diagram (perhaps
done later)
¢ Goals: � Get high-level overview � Trace through use-cases or scenarios

EXAMPLE: UI FLOW DIAGRAM
¢ From: http://www.agilemodeling.com/artifacts/uiFlowDiagram.htm

WEB DESIGN: SITEMAPS
¢ (Note: We don’t mean an index-like web page that users look at to understand what’s on a website)
¢ A design representation for identifying the structure and high-level content of a website � What are the pages? � How are they linked?
¢ For planning and design, we need to know: � Goal or purpose of each page � What can we learn from this?
¢ Tools? Yes. Or, PostIt Notes on whiteboards
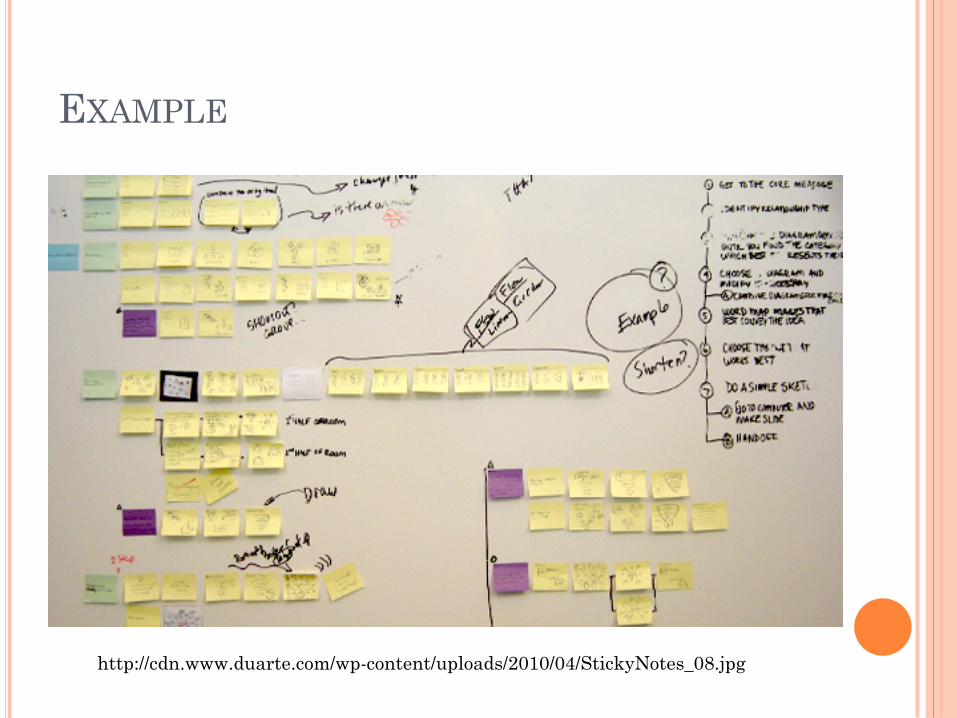
EXAMPLE
http://cdn.www.duarte.com/wp-content/uploads/2010/04/StickyNotes_08.jpg