Embed Size (px)
Citation preview
1
2
CrowPi with MineCraft Pi Edition
- Introduction - Minecraft Pi Edition
- Introduction - What you will need
- Introduction - Running Minecraft
- Introduction - Playing Multiplayer with more CrowPi’s
- Lesson 1 - Minecraft Pi edition API
- Lesson 2 - Using the Python interface
- Lesson 3 - Finding your location in the game
- Lesson 4 - Teleporting the player
- Lesson 5 - Generating blocks
- Lesson 6 - Dropping blocks as you walk
- Lesson 7 - Playing with TNT blocks
- Lesson 8 - Playing with burning Lava
- Lesson 9 - Getting player position on the LCD screen
- Lesson 10 - Teleporting player on touch press
- Lesson 11 - Building house using python code
- Lesson 12 - TNT Buzzer detector
- Lesson 13 - Generating blocks using NFC

3
IntroductionWhat is Minecraft Pi Edition?
Minecraft Pi Edition is a special edition of minecraft crafted for the Raspberry Pi.
The version is based on the “Minecraft pocket edition” with minimal features that allows theraspberry pi to run smoothly.
From the official Minecraft website:“Have you ever thought about learning to program? Where would you begin? How much would itcost? What would you need to get things moving?
The Raspberry Pi is a credit card-sized computer that’s a great starting point. It’s cheap, capable,and approachable for newbie programmers. And we’ve made a FREE version of Minecraft just forit!
It comes with a revised feature set and support for multiple programming languages.
You can start by building structures in the traditional Minecraft way, but once you’ve got to gripswith the in-game features, there’s opportunity to break open the code and use programminglanguage to manipulate things in the game world. You’ll be learning new skills through Minecraft!Wow!”
Minecraft Pi Edition combined with CrowPi is the perfect way to go if you are interested in learning codingand micro electronics using fun and simple steps!
4
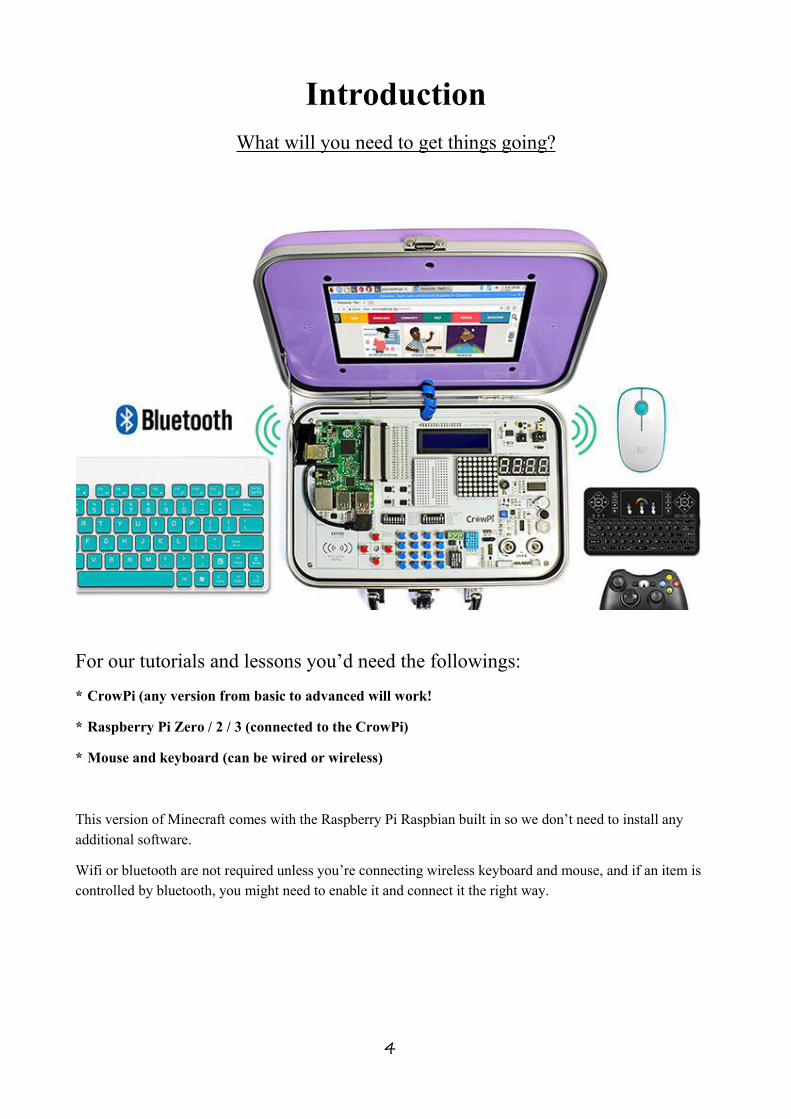
IntroductionWhat will you need to get things going?
For our tutorials and lessons you’d need the followings:
* CrowPi (any version from basic to advanced will work!
* Raspberry Pi Zero / 2 / 3 (connected to the CrowPi)
* Mouse and keyboard (can be wired or wireless)
This version of Minecraft comes with the Raspberry Pi Raspbian built in so we don’t need to install anyadditional software.
Wifi or bluetooth are not required unless you’re connecting wireless keyboard and mouse, and if an item iscontrolled by bluetooth, you might need to enable it and connect it the right way.

5
IntroductionRunning minecraft and getting things started
If you navigate to the upper menu where the “Raspberry Pi” logo is, you’ll find a navigation bar called“Games”.
Under Games, you’ll be able to see 2 options: Minecraft and Python games.
Left click on Minecraft and the game will open and should be ready to play!
Next thing will be to prepare our python interface going and we’ll be ready to go!
Note: If you’re curious, you should check python games out. It includes multiple fun games all coded inpython, it’s a great way to spend good time with your CrowPi and your friends!
6
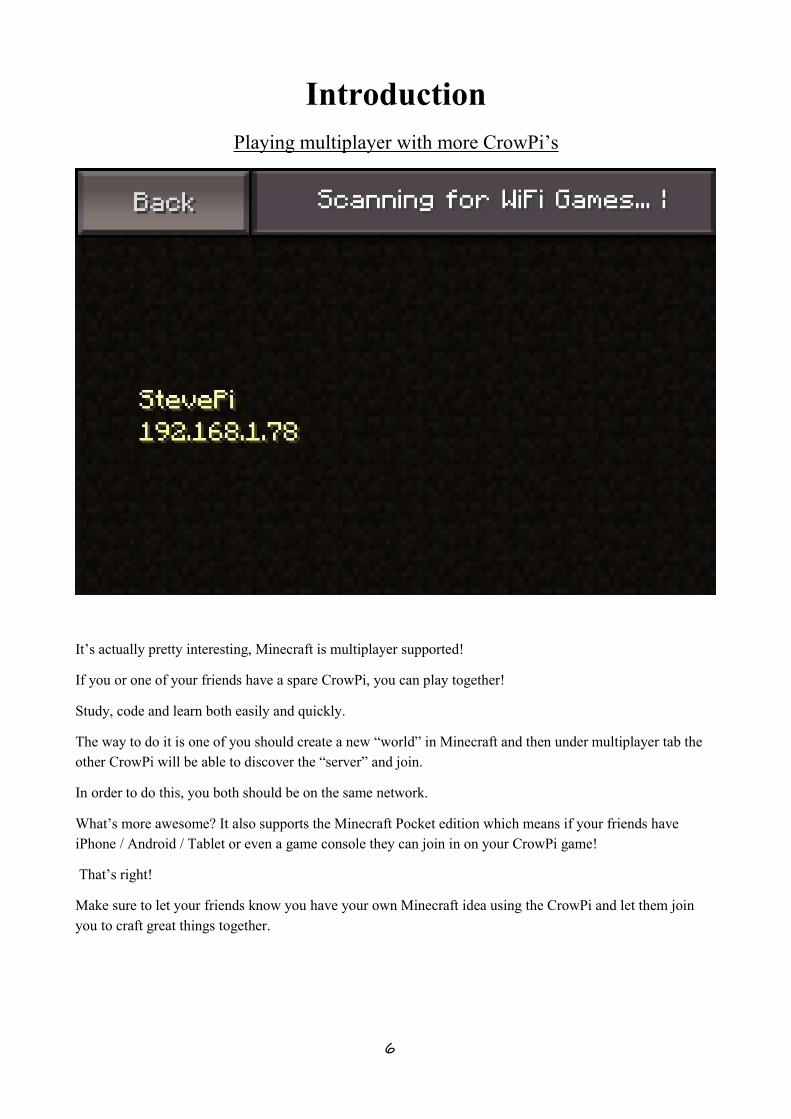
IntroductionPlaying multiplayer with more CrowPi’s
It’s actually pretty interesting, Minecraft is multiplayer supported!
If you or one of your friends have a spare CrowPi, you can play together!
Study, code and learn both easily and quickly.
The way to do it is one of you should create a new “world” in Minecraft and then under multiplayer tab theother CrowPi will be able to discover the “server” and join.
In order to do this, you both should be on the same network.
What’s more awesome? It also supports the Minecraft Pocket edition which means if your friends haveiPhone / Android / Tablet or even a game console they can join in on your CrowPi game!
That’s right!
Make sure to let your friends know you have your own Minecraft idea using the CrowPi and let them joinyou to craft great things together.
7
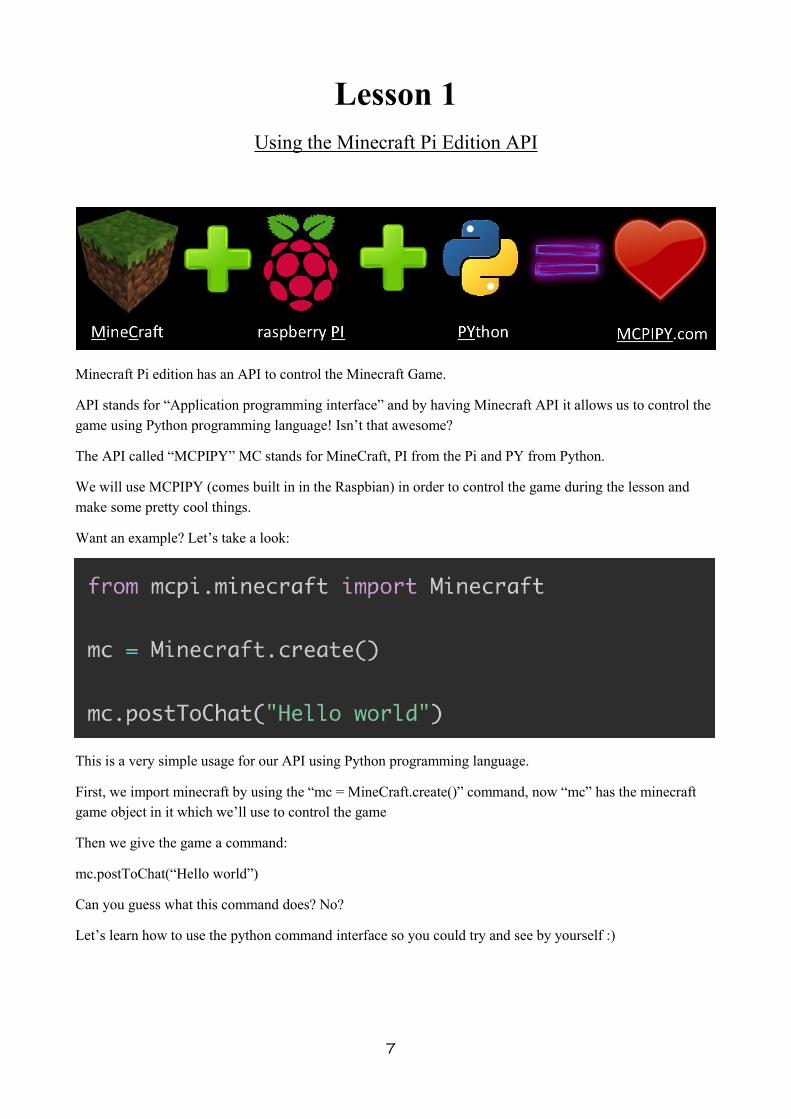
Lesson 1Using the Minecraft Pi Edition API
Minecraft Pi edition has an API to control the Minecraft Game.
API stands for “Application programming interface” and by having Minecraft API it allows us to control thegame using Python programming language! Isn’t that awesome?
The API called “MCPIPY” MC stands for MineCraft, PI from the Pi and PY from Python.
We will use MCPIPY (comes built in in the Raspbian) in order to control the game during the lesson andmake some pretty cool things.
Want an example? Let’s take a look:
This is a very simple usage for our API using Python programming language.
First, we import minecraft by using the “mc = MineCraft.create()” command, now “mc” has the minecraftgame object in it which we’ll use to control the game
Then we give the game a command:
mc.postToChat(“Hello world”)
Can you guess what this command does? No?
Let’s learn how to use the python command interface so you could try and see by yourself :)
8
Lesson 2Using the Python interface to control the game
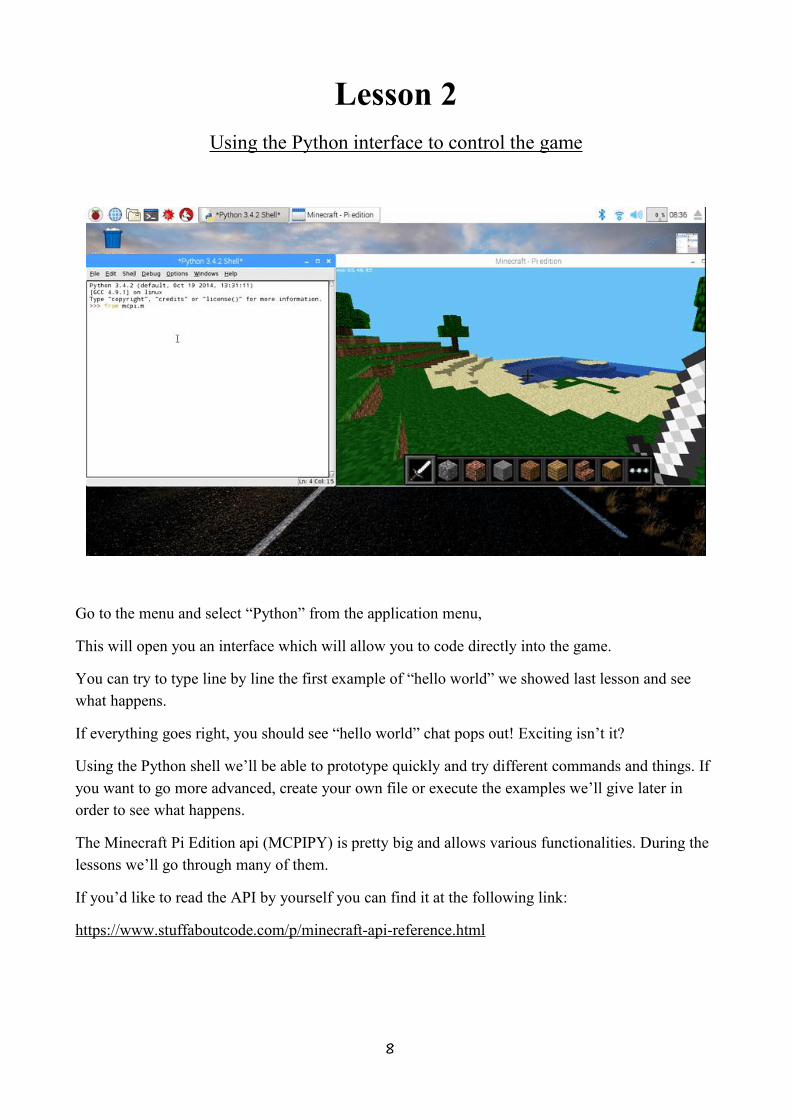
Go to the menu and select “Python” from the application menu,
This will open you an interface which will allow you to code directly into the game.
You can try to type line by line the first example of “hello world” we showed last lesson and seewhat happens.
If everything goes right, you should see “hello world” chat pops out! Exciting isn’t it?
Using the Python shell we’ll be able to prototype quickly and try different commands and things. Ifyou want to go more advanced, create your own file or execute the examples we’ll give later inorder to see what happens.
The Minecraft Pi Edition api (MCPIPY) is pretty big and allows various functionalities. During thelessons we’ll go through many of them.
If you’d like to read the API by yourself you can find it at the following link:
https://www.stuffaboutcode.com/p/minecraft-api-reference.html
9
Lesson 3Finding your location in the game
Finding your position in the game is necessary.
Later on, in the game, we’ll learn how to generate blocks and do multiple actions, in order to do
those things you need to know where to do them.
We’ll need to find our position in the game for that purpose. How we’ll do that? Let’s find out.
That’s it. Now “pos” object contains your position data which you can print or use for your own
stuff. But there is one more thing we can do …
Now we have have different coordinates separated. Now x, y, and z contain each part of yourposition coordinates. x and z are the walking directions (forward/back and left/right) and y isup/down.
10
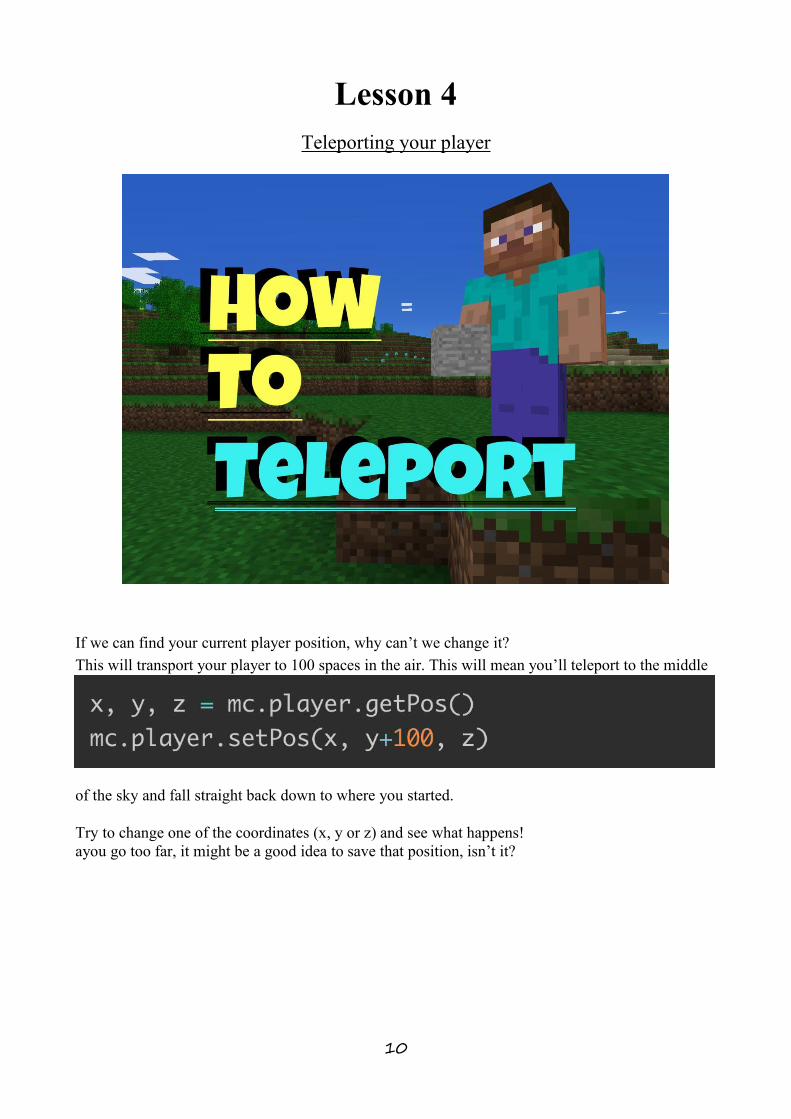
Lesson 4Teleporting your player
If we can find your current player position, why can’t we change it?This will transport your player to 100 spaces in the air. This will mean you’ll teleport to the middle
of the sky and fall straight back down to where you started.
Try to change one of the coordinates (x, y or z) and see what happens!ayou go too far, it might be a good idea to save that position, isn’t it?
11
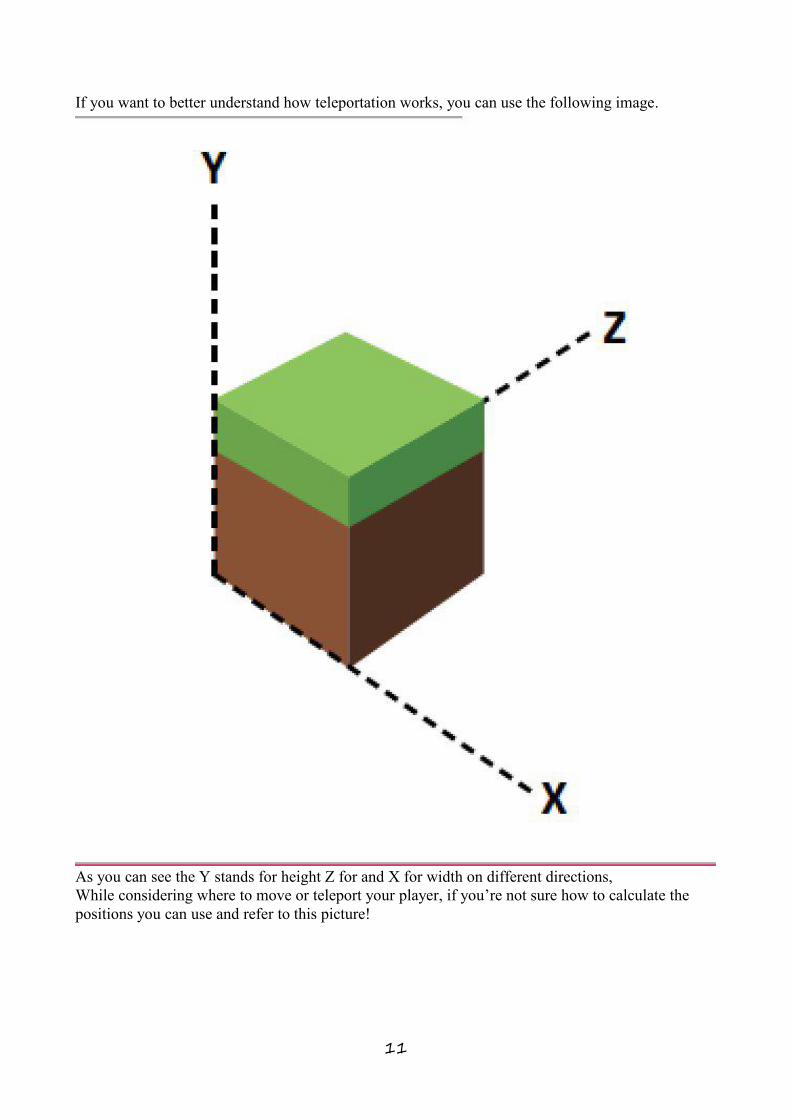
If you want to better understand how teleportation works, you can use the following image.
As you can see the Y stands for height Z for and X for width on different directions,While considering where to move or teleport your player, if you’re not sure how to calculate thepositions you can use and refer to this picture!

12
Lesson 5Generating and playing with blocks
Blocks is something we’ll use very often during our lessons, we should learn how to generate them!There's a very simple function called “setBlock()” let’s see how it works:
As you can see, first we must get our location in order to generate the block next to us so we’ll beable to find it. next, we use the setBlock() function, giving it our position and the ID of the block.
We write x+1 so we’ll be able to generate the block in front of us (+1 one block from coordinate x)You can try to change it and see what happens!
The number “1” we specified at the end is the ID of the block, ID number 1 stands for stone blockbut there are multiple block types such as:
Air: 0Stone: 1Grass: 2Dirt: 3Etc etc …
You can check the MCPIPY API in order to find all the existing blocks IDs.
13
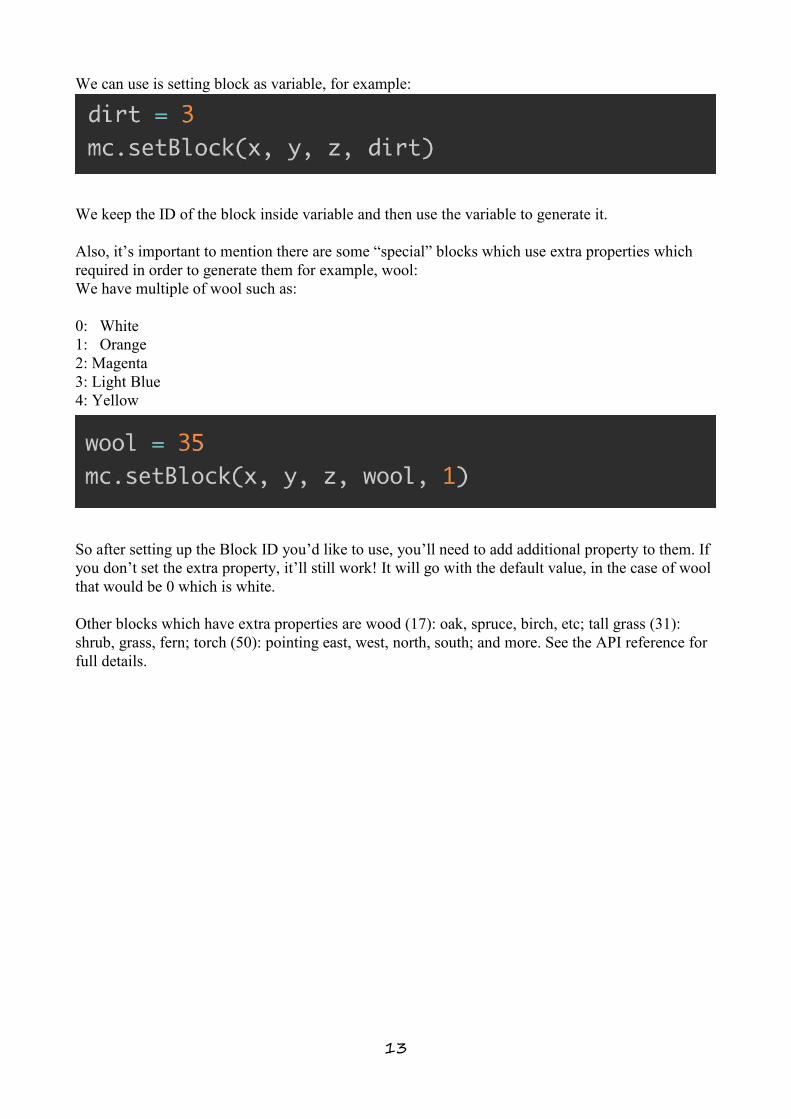
We can use is setting block as variable, for example:
We keep the ID of the block inside variable and then use the variable to generate it.
Also, it’s important to mention there are some “special” blocks which use extra properties whichrequired in order to generate them for example, wool:We have multiple of wool such as:
0: White1: Orange2: Magenta3: Light Blue4: Yellow
So after setting up the Block ID you’d like to use, you’ll need to add additional property to them. Ifyou don’t set the extra property, it’ll still work! It will go with the default value, in the case of woolthat would be 0 which is white.
Other blocks which have extra properties are wood (17): oak, spruce, birch, etc; tall grass (31):shrub, grass, fern; torch (50): pointing east, west, north, south; and more. See the API reference forfull details.
14
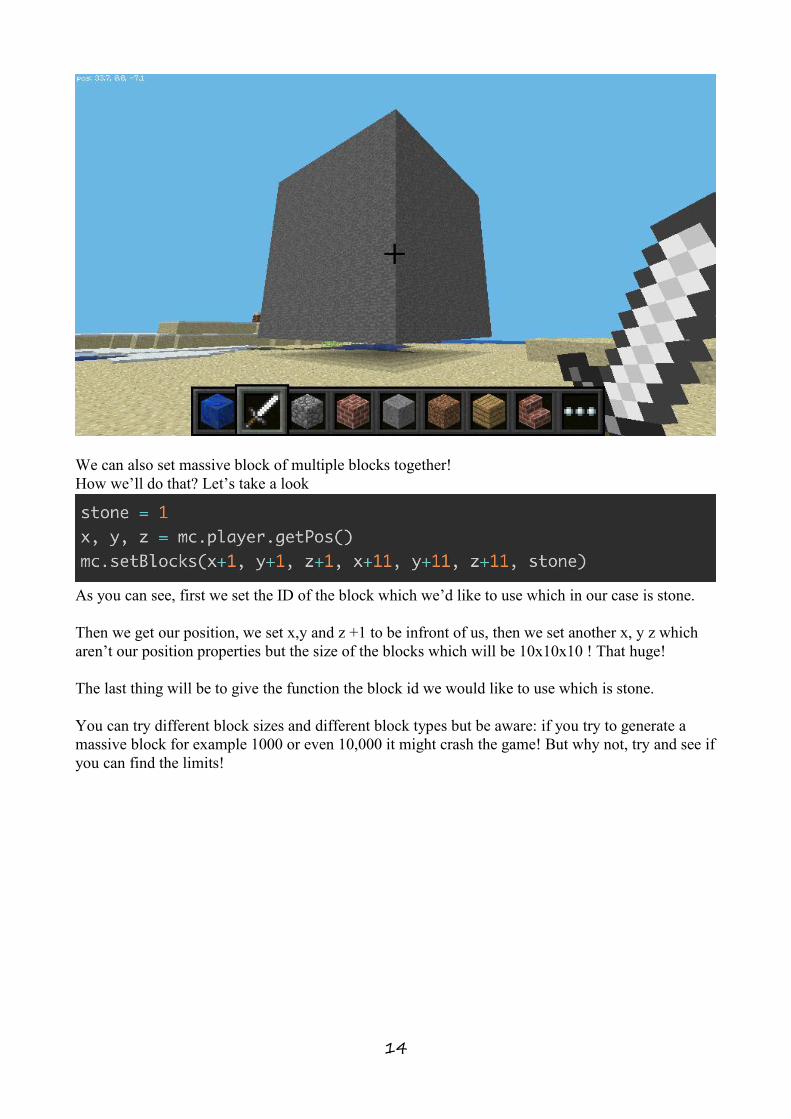
We can also set massive block of multiple blocks together!How we’ll do that? Let’s take a look
As you can see, first we set the ID of the block which we’d like to use which in our case is stone.
Then we get our position, we set x,y and z +1 to be infront of us, then we set another x, y z whicharen’t our position properties but the size of the blocks which will be 10x10x10 ! That huge!
The last thing will be to give the function the block id we would like to use which is stone.
You can try different block sizes and different block types but be aware: if you try to generate amassive block for example 1000 or even 10,000 it might crash the game! But why not, try and see ifyou can find the limits!
15
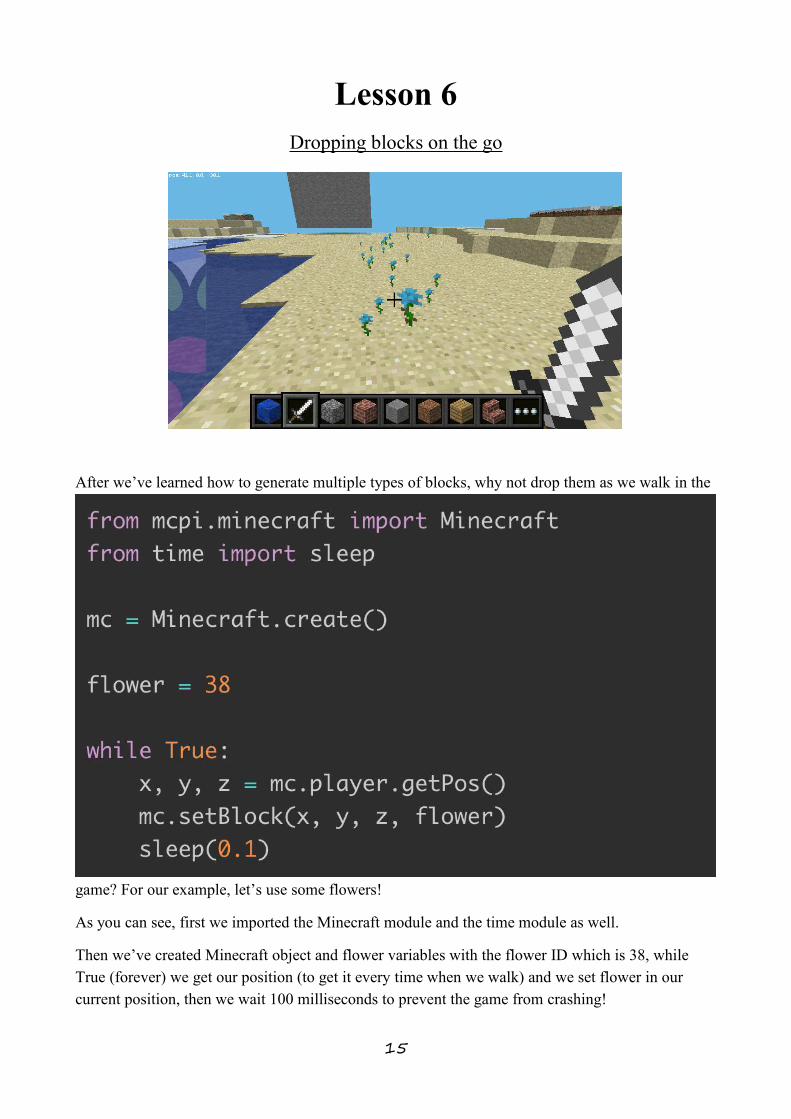
Lesson 6Dropping blocks on the go
After we’ve learned how to generate multiple types of blocks, why not drop them as we walk in the
game? For our example, let’s use some flowers!
As you can see, first we imported the Minecraft module and the time module as well.
Then we’ve created Minecraft object and flower variables with the flower ID which is 38, whileTrue (forever) we get our position (to get it every time when we walk) and we set flower in ourcurrent position, then we wait 100 milliseconds to prevent the game from crashing!
16
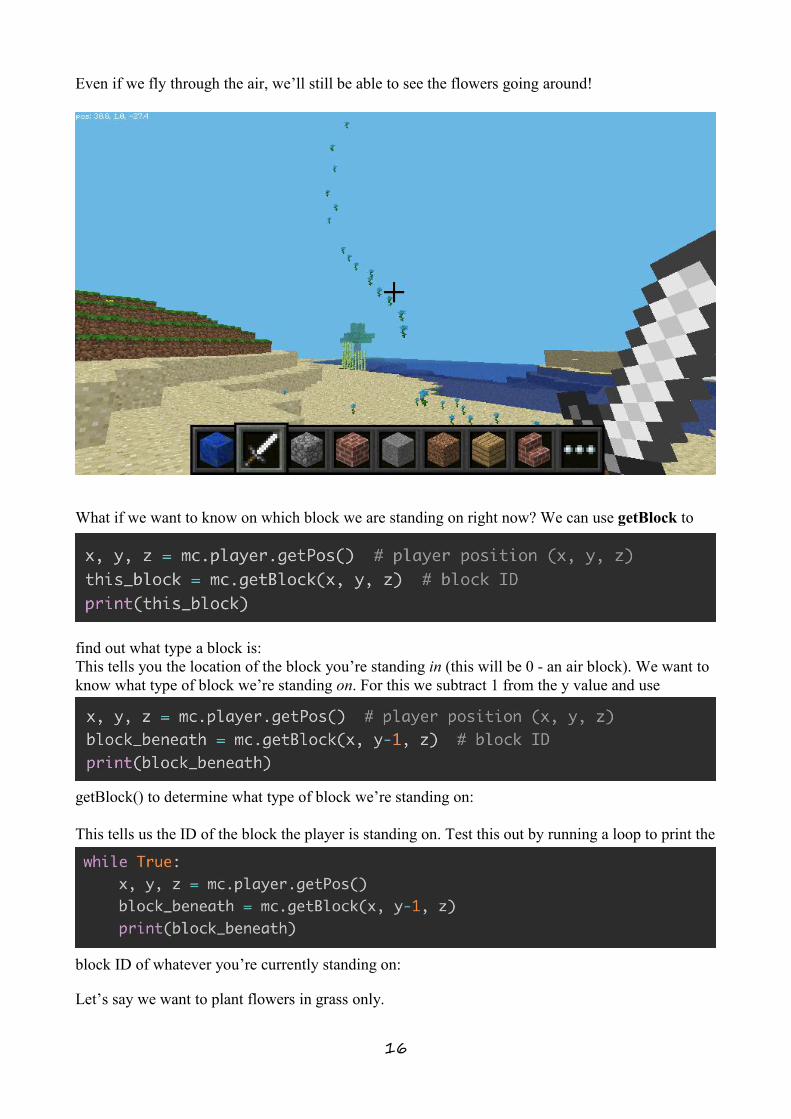
Even if we fly through the air, we’ll still be able to see the flowers going around!
What if we want to know on which block we are standing on right now? We can use getBlock to
find out what type a block is:This tells you the location of the block you’re standing in (this will be 0 - an air block). We want toknow what type of block we’re standing on. For this we subtract 1 from the y value and use
getBlock() to determine what type of block we’re standing on:
This tells us the ID of the block the player is standing on. Test this out by running a loop to print the
block ID of whatever you’re currently standing on:
Let’s say we want to plant flowers in grass only.
17
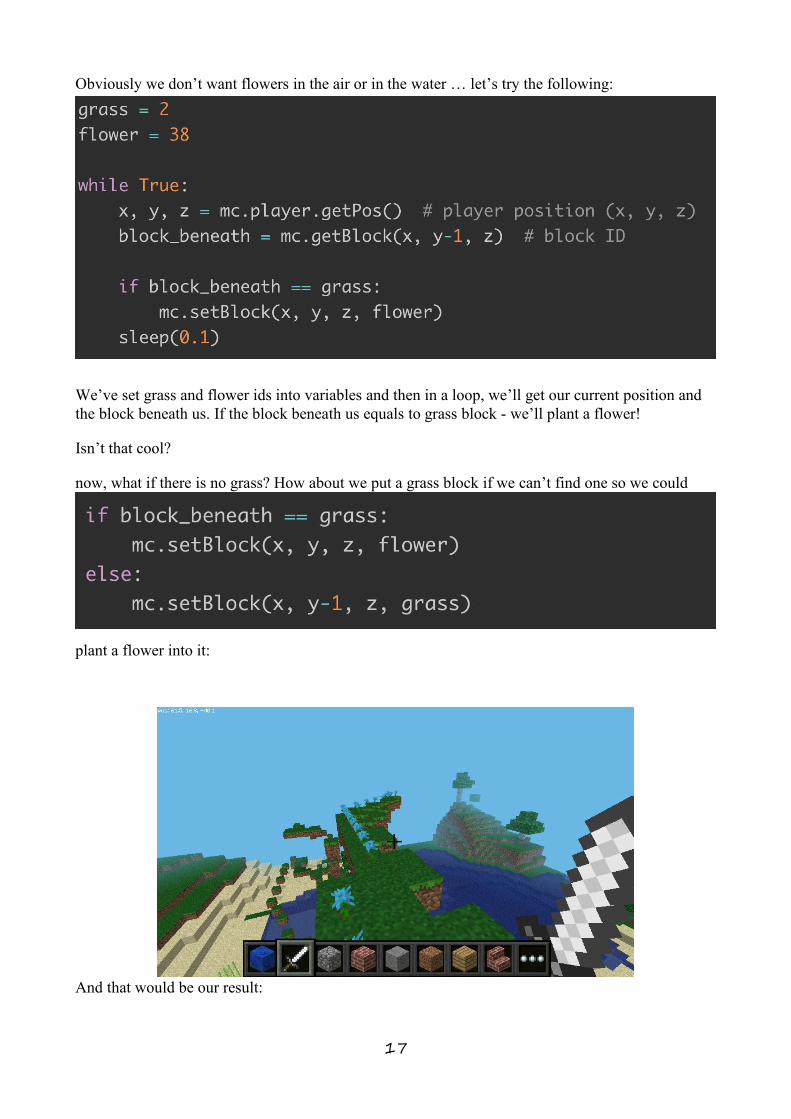
Obviously we don’t want flowers in the air or in the water … let’s try the following:
We’ve set grass and flower ids into variables and then in a loop, we’ll get our current position andthe block beneath us. If the block beneath us equals to grass block - we’ll plant a flower!
Isn’t that cool?
now, what if there is no grass? How about we put a grass block if we can’t find one so we could
plant a flower into it:
And that would be our result:
18
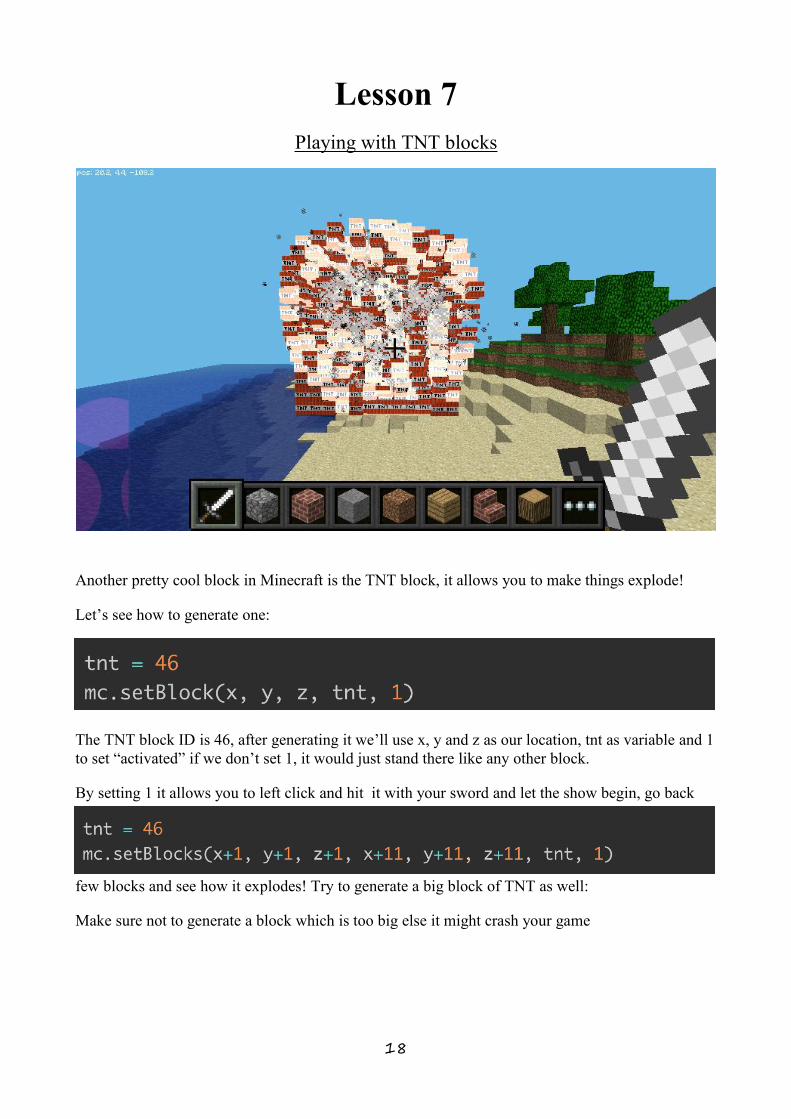
Lesson 7Playing with TNT blocks
Another pretty cool block in Minecraft is the TNT block, it allows you to make things explode!
Let’s see how to generate one:
The TNT block ID is 46, after generating it we’ll use x, y and z as our location, tnt as variable and 1to set “activated” if we don’t set 1, it would just stand there like any other block.
By setting 1 it allows you to left click and hit it with your sword and let the show begin, go back
few blocks and see how it explodes! Try to generate a big block of TNT as well:
Make sure not to generate a block which is too big else it might crash your game
19
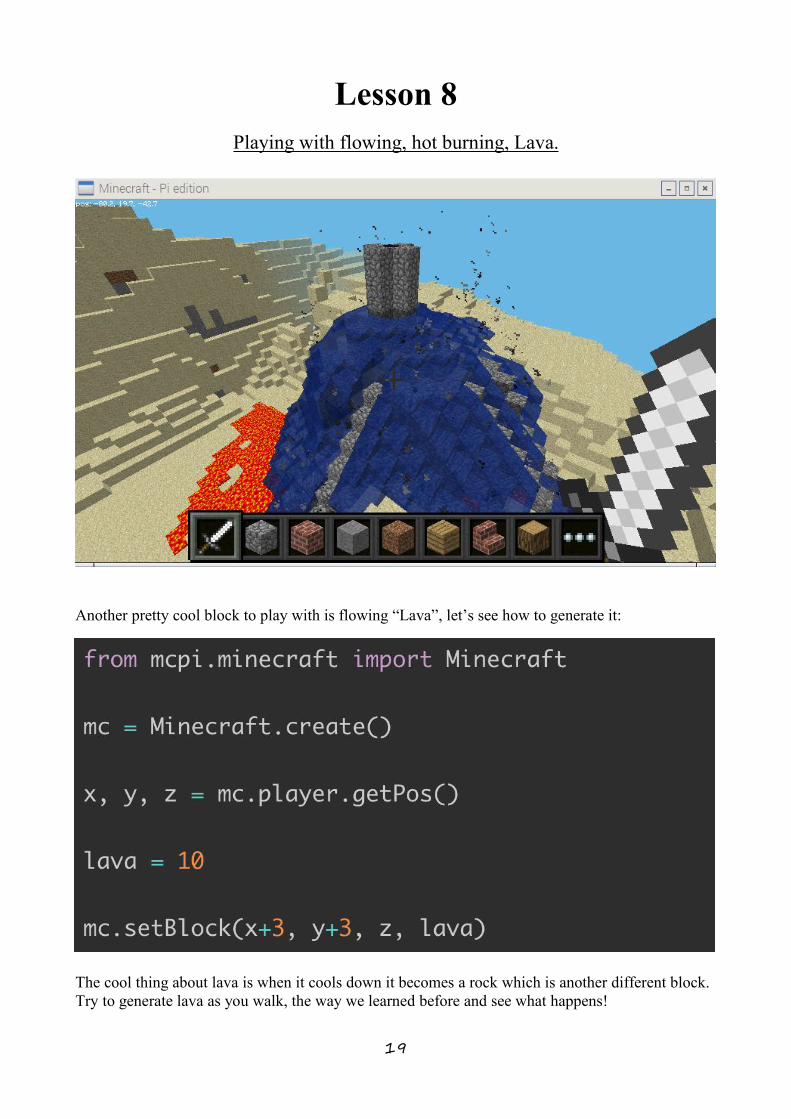
Lesson 8Playing with flowing, hot burning, Lava.
Another pretty cool block to play with is flowing “Lava”, let’s see how to generate it:
The cool thing about lava is when it cools down it becomes a rock which is another different block.Try to generate lava as you walk, the way we learned before and see what happens!
20
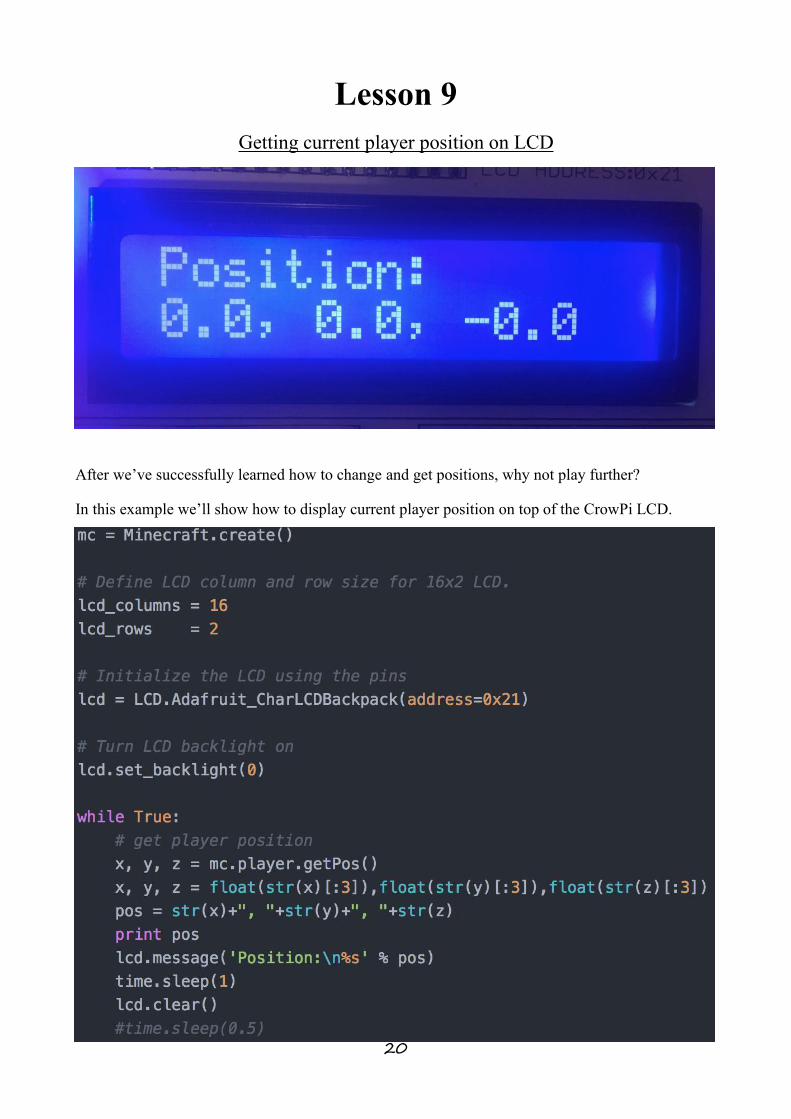
Lesson 9Getting current player position on LCD
After we’ve successfully learned how to change and get positions, why not play further?
In this example we’ll show how to display current player position on top of the CrowPi LCD.
21
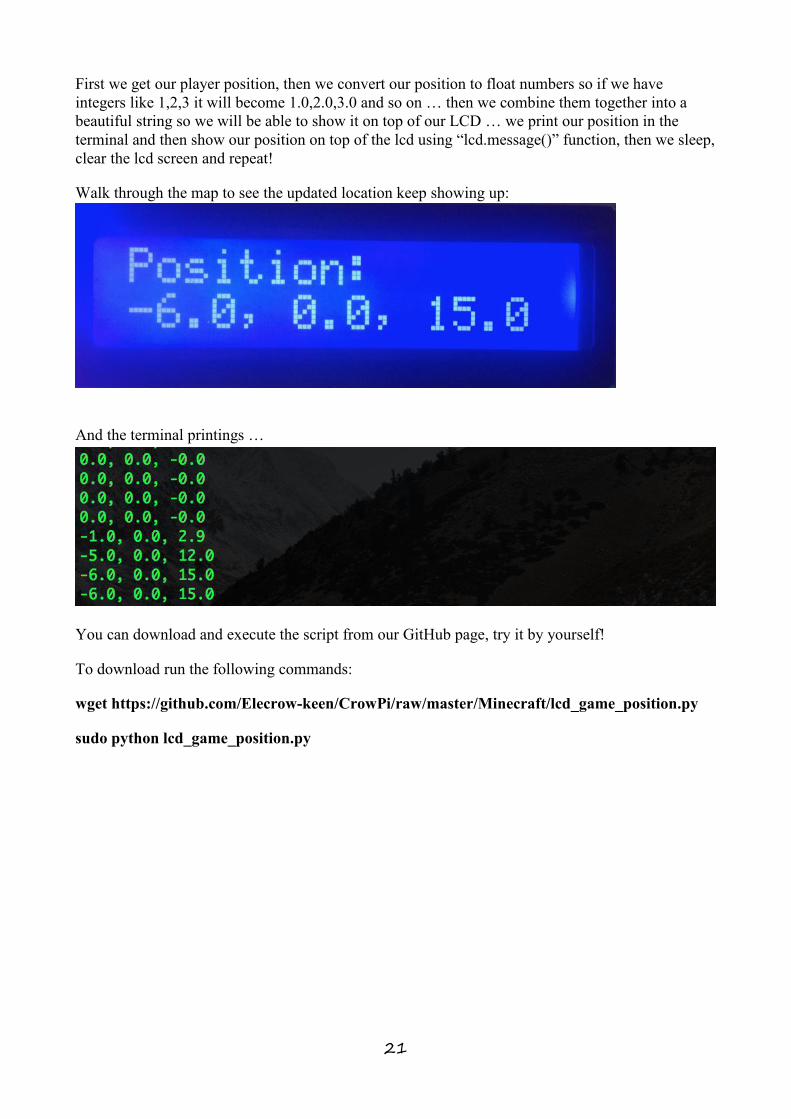
First we get our player position, then we convert our position to float numbers so if we haveintegers like 1,2,3 it will become 1.0,2.0,3.0 and so on … then we combine them together into abeautiful string so we will be able to show it on top of our LCD … we print our position in theterminal and then show our position on top of the lcd using “lcd.message()” function, then we sleep,clear the lcd screen and repeat!
Walk through the map to see the updated location keep showing up:
And the terminal printings …
You can download and execute the script from our GitHub page, try it by yourself!
To download run the following commands:
wget https://github.com/Elecrow-keen/CrowPi/raw/master/Minecraft/lcd_game_position.py
sudo python lcd_game_position.py
22
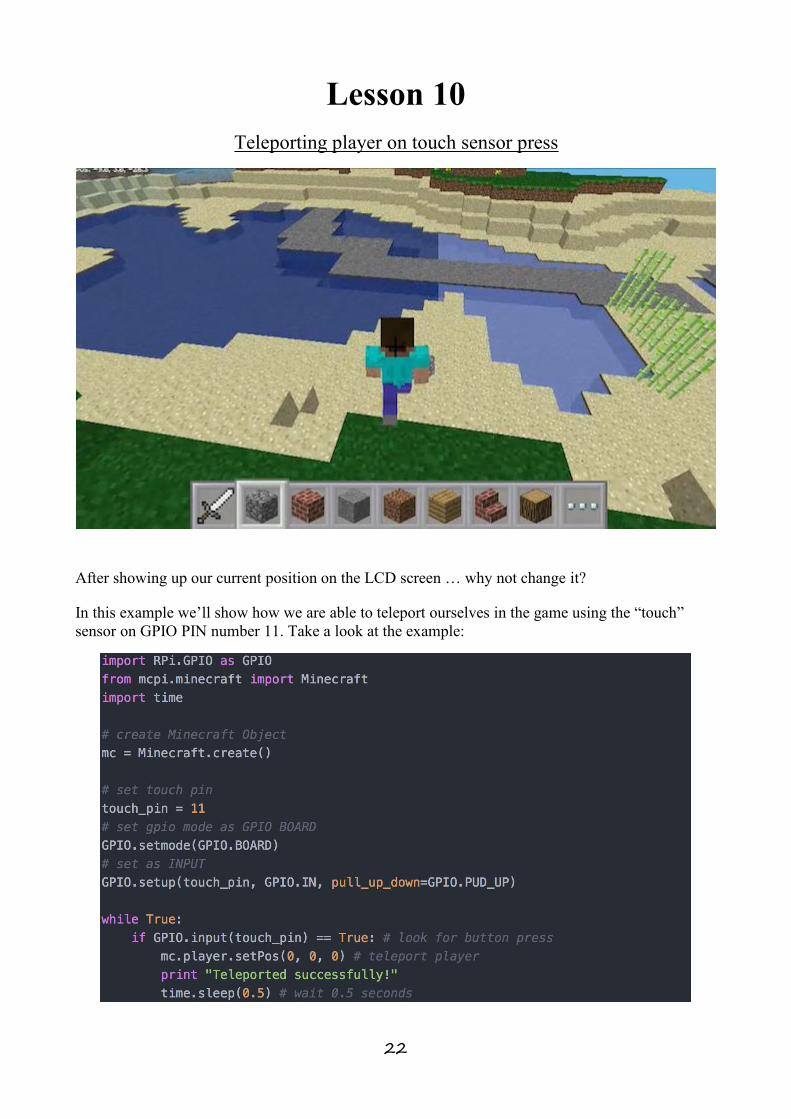
Lesson 10Teleporting player on touch sensor press
After showing up our current position on the LCD screen … why not change it?
In this example we’ll show how we are able to teleport ourselves in the game using the “touch”sensor on GPIO PIN number 11. Take a look at the example:
23
First, we set the touch PIN to GPIO 11, then we set the mode to GPIO BOARD.
We configure the touch sensor as INPUT (as we press on it), then, forever, we check if the button ispressed. If it was pressed: we teleport the player to position 0, 0, 0 by using the setPos function
We set time.sleep in order to avoid teleporting multiple times while holding our finger on the sensor.
You can change the position and see what happens!
In order to download and execute the script, you can run the following commands:
wget https://github.com/Elecrow-keen/CrowPi/raw/master/Minecraft/teleport.py
sudo python teleport.py
24
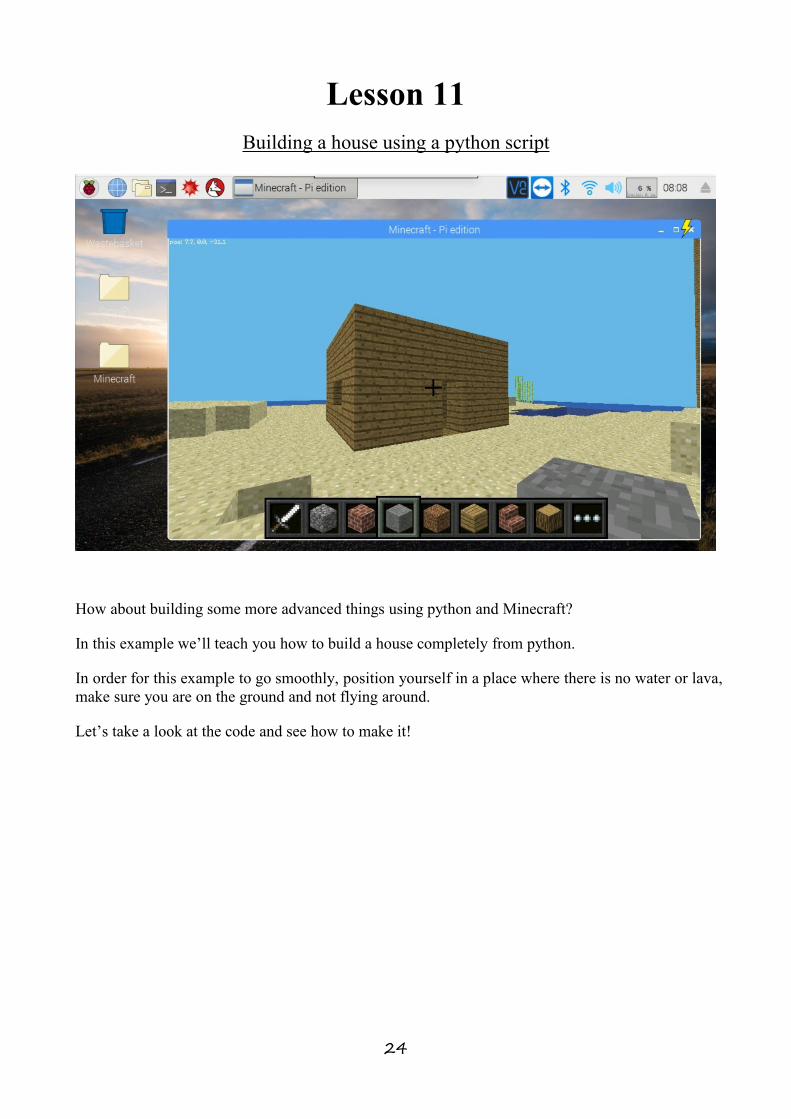
Lesson 11Building a house using a python script
How about building some more advanced things using python and Minecraft?
In this example we’ll teach you how to build a house completely from python.
In order for this example to go smoothly, position yourself in a place where there is no water or lava,make sure you are on the ground and not flying around.
Let’s take a look at the code and see how to make it!
25
At first glance the code might seem a bit complicated but hold on … let’s try to explain
The first part is to make the shell (the entire house full of wooden blocks)
The second part is to remove the inside of the house so we could enter into it …
The third one is to empty the entry so we could enter! Make it look like a door!
4,5,6 are windows on the sides of the house made of glass! That’s right, 102 ID stands for glass,check it out!
And that’s how we make a house using python …. incredible.
Try to download and execute the code by yourself and see what happens:
wget https://github.com/Elecrow-keen/CrowPi/raw/master/Minecraft/house.py
sudo python house.py
26
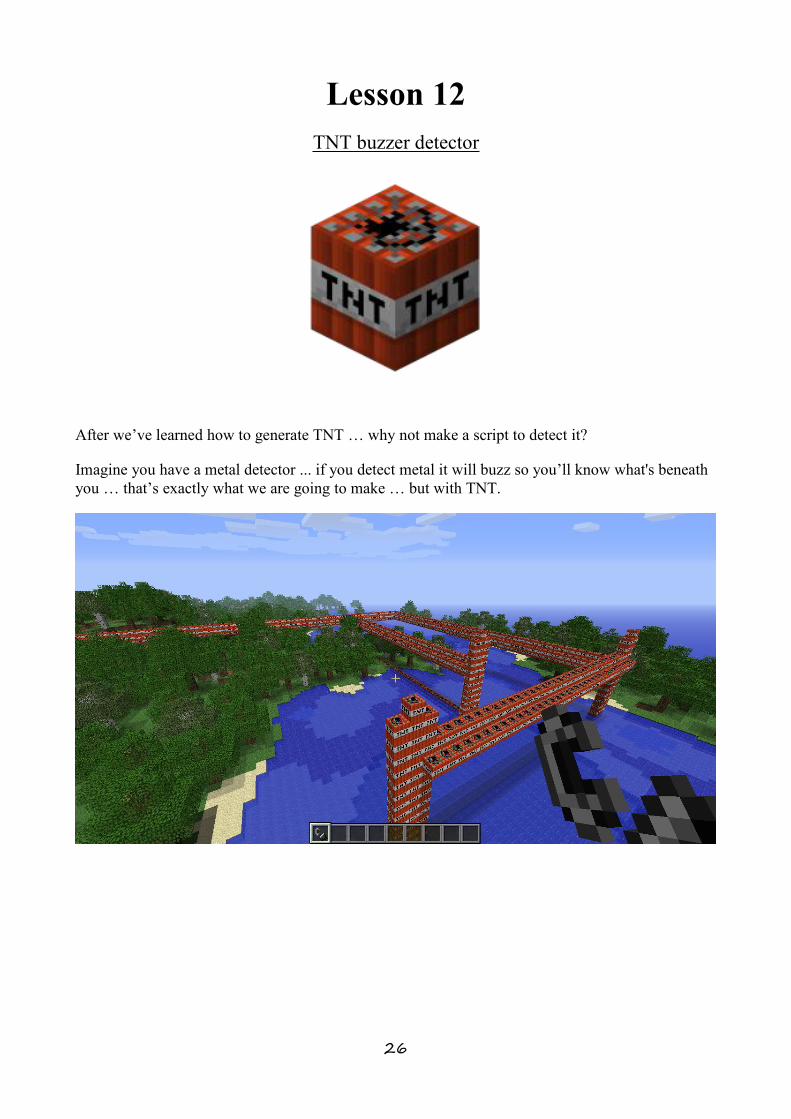
Lesson 12TNT buzzer detector
After we’ve learned how to generate TNT … why not make a script to detect it?
Imagine you have a metal detector ... if you detect metal it will buzz so you’ll know what's beneathyou … that’s exactly what we are going to make … but with TNT.
27
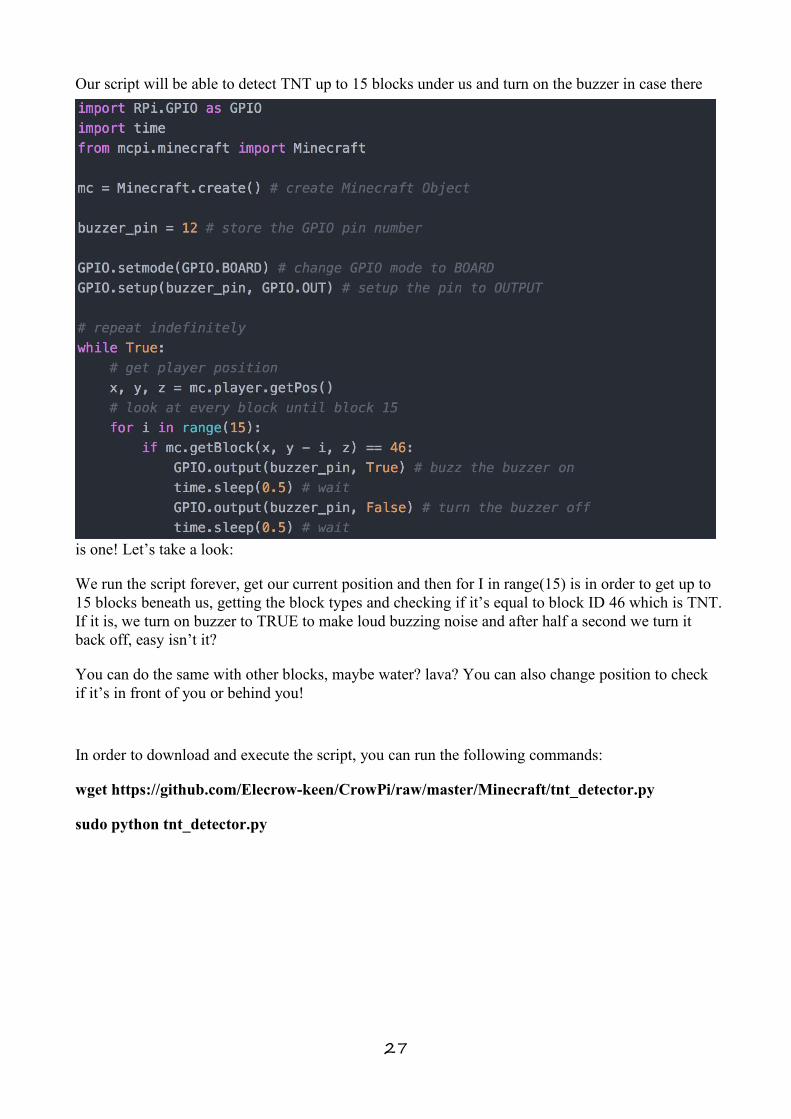
Our script will be able to detect TNT up to 15 blocks under us and turn on the buzzer in case there
is one! Let’s take a look:
We run the script forever, get our current position and then for I in range(15) is in order to get up to15 blocks beneath us, getting the block types and checking if it’s equal to block ID 46 which is TNT.If it is, we turn on buzzer to TRUE to make loud buzzing noise and after half a second we turn itback off, easy isn’t it?
You can do the same with other blocks, maybe water? lava? You can also change position to checkif it’s in front of you or behind you!
In order to download and execute the script, you can run the following commands:
wget https://github.com/Elecrow-keen/CrowPi/raw/master/Minecraft/tnt_detector.py
sudo python tnt_detector.py
28
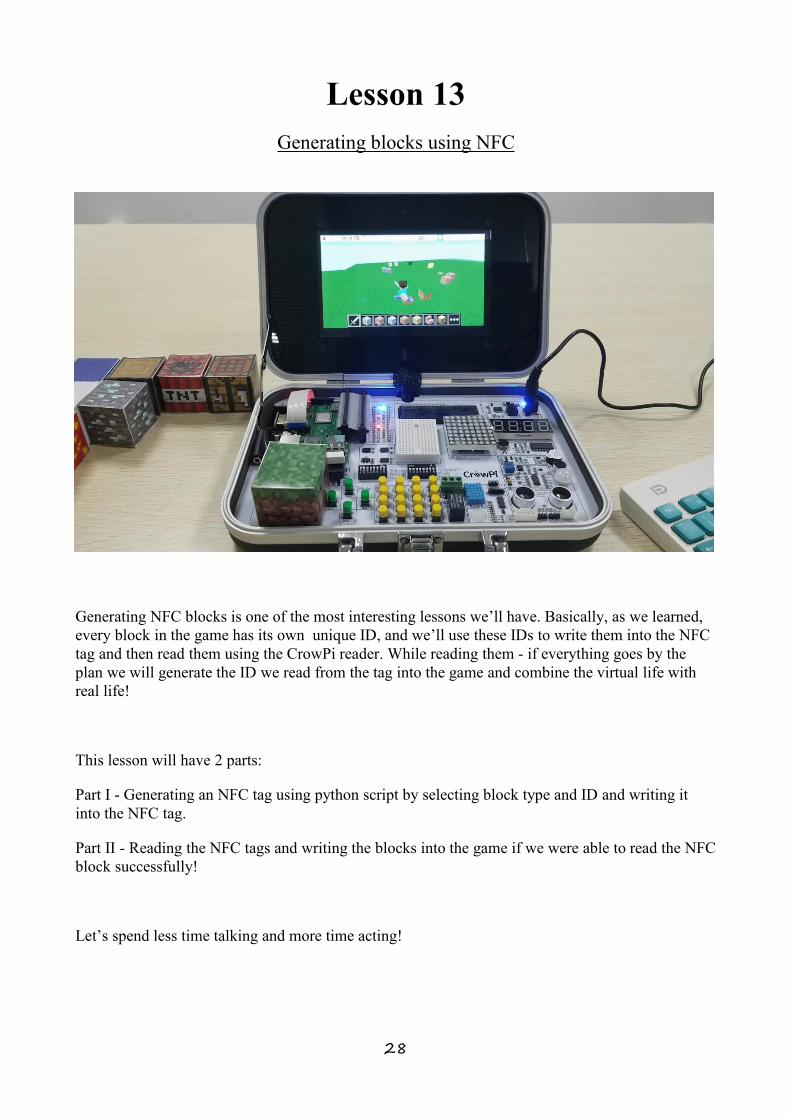
Lesson 13Generating blocks using NFC
Generating NFC blocks is one of the most interesting lessons we’ll have. Basically, as we learned,every block in the game has its own unique ID, and we’ll use these IDs to write them into the NFCtag and then read them using the CrowPi reader. While reading them - if everything goes by theplan we will generate the ID we read from the tag into the game and combine the virtual life withreal life!
This lesson will have 2 parts:
Part I - Generating an NFC tag using python script by selecting block type and ID and writing itinto the NFC tag.
Part II - Reading the NFC tags and writing the blocks into the game if we were able to read the NFCblock successfully!
Let’s spend less time talking and more time acting!
29
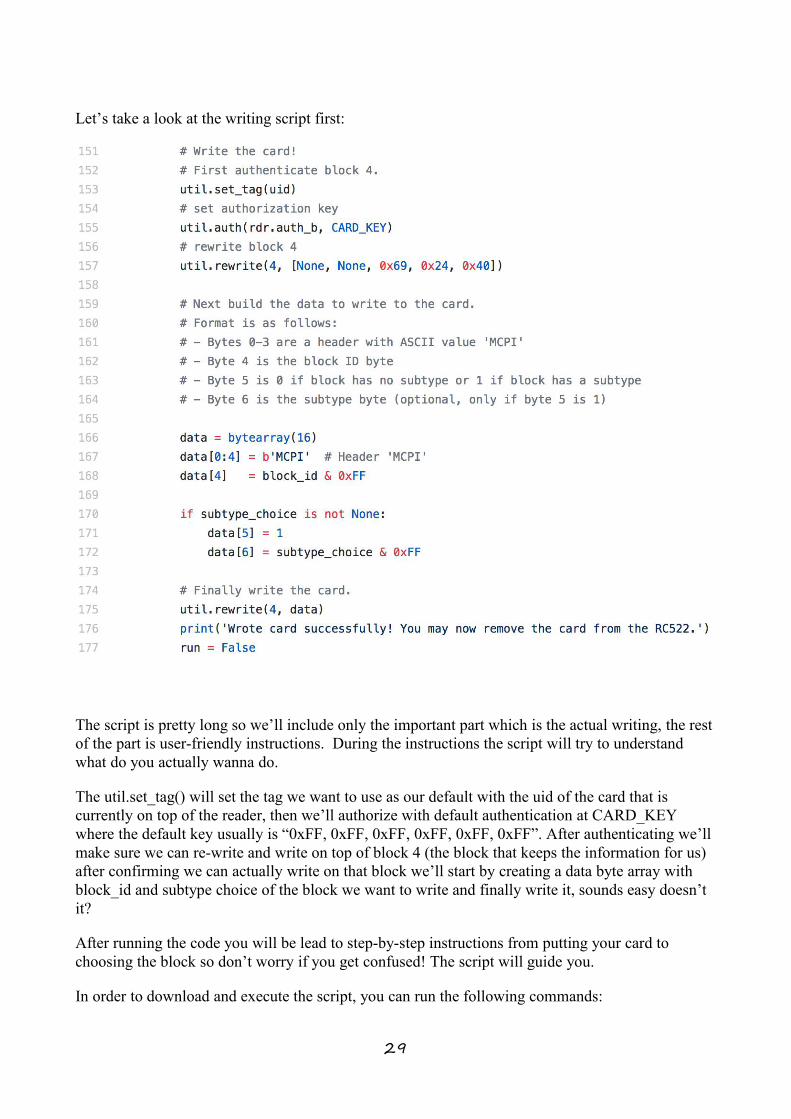
Let’s take a look at the writing script first:
The script is pretty long so we’ll include only the important part which is the actual writing, the restof the part is user-friendly instructions. During the instructions the script will try to understandwhat do you actually wanna do.
The util.set_tag() will set the tag we want to use as our default with the uid of the card that iscurrently on top of the reader, then we’ll authorize with default authentication at CARD_KEYwhere the default key usually is “0xFF, 0xFF, 0xFF, 0xFF, 0xFF, 0xFF”. After authenticating we’llmake sure we can re-write and write on top of block 4 (the block that keeps the information for us)after confirming we can actually write on that block we’ll start by creating a data byte array withblock_id and subtype choice of the block we want to write and finally write it, sounds easy doesn’tit?
After running the code you will be lead to step-by-step instructions from putting your card tochoosing the block so don’t worry if you get confused! The script will guide you.
In order to download and execute the script, you can run the following commands:
30
wget https://github.com/Elecrow-keen/CrowPi/raw/master/Minecraft/nfc_block_writer.py
sudo python nfc_block_writer.py
Now, after we put our block into the card we want, let’s read it by running another script!
Before running the script make sure your Minecraft is up and running inside your CrowPi, orelse the script won’t be able to start!
Again, let’s take a look at the most crucial part of the code:
First after recognizing the card on top of the NFC reader our script will try to parse the block typeand sub type from inside of the NFC chip.
After parsing out it will search to see if the block is a valid block and exists inside our mini-block-database. If it is we will continue creating a block using the create_block() command we learned inprevious lessons.
The interesting thing is that if you leave the block on top of the NFC it will keep creating the sameblock over and over … pretty cool! Of course, with all the lessons you’ve learned so far - you couldeasily change that and only create one block each time!
In order to download and execute the script, you can run the following commands:
wget https://github.com/Elecrow-keen/CrowPi/raw/master/Minecraft/nfc_block_read.py
sudo python nfc_block_read.py

31
Make it even better by turning the NFC cards into actual Minecraft blocks!
The website pixelpapercraft.com allows you to download and print Minecraft blocks as paper blockswhich were made by the community. We printed those and measured them and they fit justperfectly with the CrowPi NFC cards!
Turn your NFC cards into real Minecraft blocks and program the right block ID into them tocombine reality and this virtual game into one!
We can’t wait to see what you’ll do with our CrowPi and Minecraft lessons and what will you makeusing what you’ve learned during our lessons!