Embed Size (px)
Citation preview
Have you identified all the safety risks and taken steps to mitigate them? Page 1
Crosscut Saw Course Supplement Ver 11.11
John S. Glenn
Sierra NF
Dolly B. Chapman
www.sharpcrosscut.com
Estimating Weights
Estimating Heights
Cutting Large Suspended Logs
Wedges
Relieving Severe Top Bind
Torsion Bind
Split Trunks
Getting Your Saw Unstuck
Mechanical Advantage
Use of Levers
Moving Logs
Organizing a Cutting Scenario
Axes
Helpful Knots
Safety Issues
Miscellaneous Stuff
DISCLAIMER: The information that follows has probably been around for ages but a lot of it
seems to have been forgotten. We‟ve stumbled on it mainly by having to extricate ourselves
from some mess we managed to create; by word of mouth from other sawyers; purely by
accident, and even occasionally by inspiration. This supplement has not been approved by any
reliable or authoritative person so take it all with a grain of salt and use it at your own risk.
Be safe – Experiment – Have fun.
SAFETY FIRST IS A GOOD OLD SAW
Have you identified all the safety risks and taken steps to mitigate them? Page 2
ESTIMATING WEIGHTS
Number of steps to travel 100 feet: ___________________________________
CALCULATING VOLUME: 1 cubic foot = 1728 cubic inches
A) Box = Width x Height x Length = cubic inches/feet
B) Cylinder (tree) = Area of Circle (cross-section) x length = cubic inches/feet
d = diameter c = circumference
Area of a Circle = 0.8d²
= 0.08c² (can use if don‟t have a cut face to measure)
C) Sphere = 0.5d³ (sometimes helpful for estimating rock weights)
MATERIAL WEIGHTS IN POUNDS PER CUBIC FOOT
Water = 63#/cu.ft.
Wood = 60#/cu.ft. since most wood will float; allows extra safety factor – in
reality, most wood is in the 40-50 range)
Granite, solid = 168#/cu.ft.
Granite, broken = 103#/cu.ft.
Gravel with sand = 120#/cu.ft.
Soil = 90 to 100#/cu.ft.
Have you identified all the safety risks and taken steps to mitigate them? Page 3
ESTIMATING HEIGHTS
(Also useful for selecting your tent/sleeping site!)
1) Compass (based on 45 degree angle trigonometry) – must be a compass that has a second
clinometer needle – the regular North-South needle is not functional in the vertical position
Set dial so 315 degrees is at the N bearing line
Turn compass on its side
Back away from the tree and sight along the upper edge to the top of the tree
Check to be certain that clinometer arrow is at 0 degrees – could alternately put 0
degrees at the N bearing line, in which case the clinometer needle will
need to read 45 degrees – the former is easier to read
Pace off the distance to the tree and add the distance from your eyes to the ground.
2) Short Stick or Pencil
Hold the short stick or pencil vertically out in front of you
Close one eye and back away from the tree until the bottom of the pencil matches
up with the bottom of the tree and the top matches up with the top of the tree
Lay the stick on its side, still matched up with the base of the tree
Find a point at right angles to the tree, that lines up with the other end of the stick
Go to that point or have a partner go there
Pace off the distance from there, back to the tree
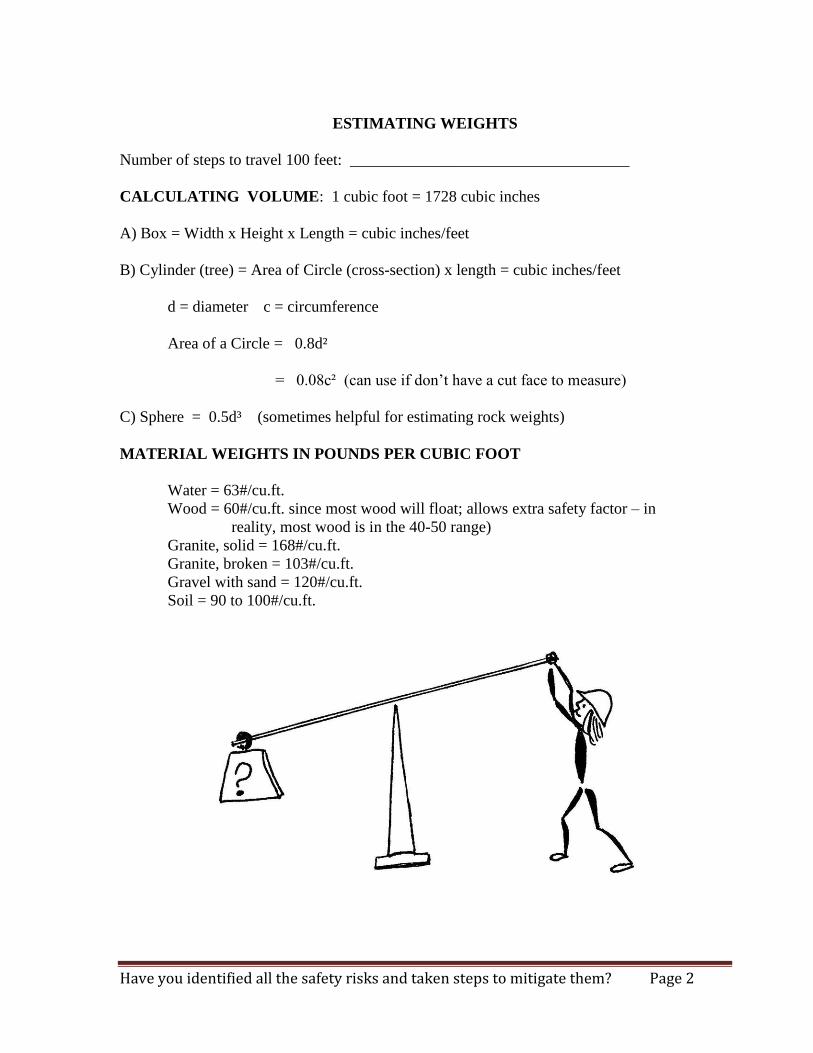
3) Long Stick (based on 45 degree angle trigonometry)
Find a stick longer than your arm
Extend arm out parallel to ground
Place one end of stick next to corner of eye
Grip stick where it passes through your hand
Flip stick up into vertical position
Since your head will be tilted back
raise hand slightly
Move forward or backward until
you sight the top of the tree
across the top of the stick
Measure distance to base of tree
and compensate for your height
and any differences in elevation
between your feet and base of
the tree

Have you identified all the safety risks and taken steps to mitigate them? Page 4
SAW LENGTH RECOMMENDATIONS
a) 2-person: twice log diameter plus 6”
b) 1-person: minimum saw length (i.e. for large trees) would be log diameter plus 6”;
Some people use felling saws effectively but bucking saws usually cut faster.
c) a saw that is too short for
double bucking may work
fine for a single bucker:
The key is to ensure that the
saw carries wood shavings
all the way out of the log
CUTTING LARGE SUSPENDED LOGS
(NOTE: We‟re talking about logs greater than three feet in diameter, and suspended more than
4 feet above ground – that means if you are on top of a 5 foot log, you are 9 feet above ground
– more than enough distance to break bones, including your neck! It is very satisfying to cut
out and drop a 12,000# section of a tree and then move it out of the trail corridor but there are
tremendous inherent dangers involved so you need to pay special attention to potential hazards
and do a thorough on-site safety analysis before you do anything else. We started out trying
things like using lag bolts for foot-steps and using climbing harnesses and tying off to other
trees to support ourselves while starting cuts. We‟ve finally built a modified springboard setup
which we are very pleased with. HOWEVER, we aren‟t recommending anything – whatever
you decide to try, just make certain you have identified all the safety risks and mitigated them
(for example, by using safety rigging and fall arrest harnesses, etc.) If you think something
isn‟t safe, it probably isn‟t and you shouldn‟t risk doing it.
Have you identified all the safety risks and taken steps to mitigate them? Page 5
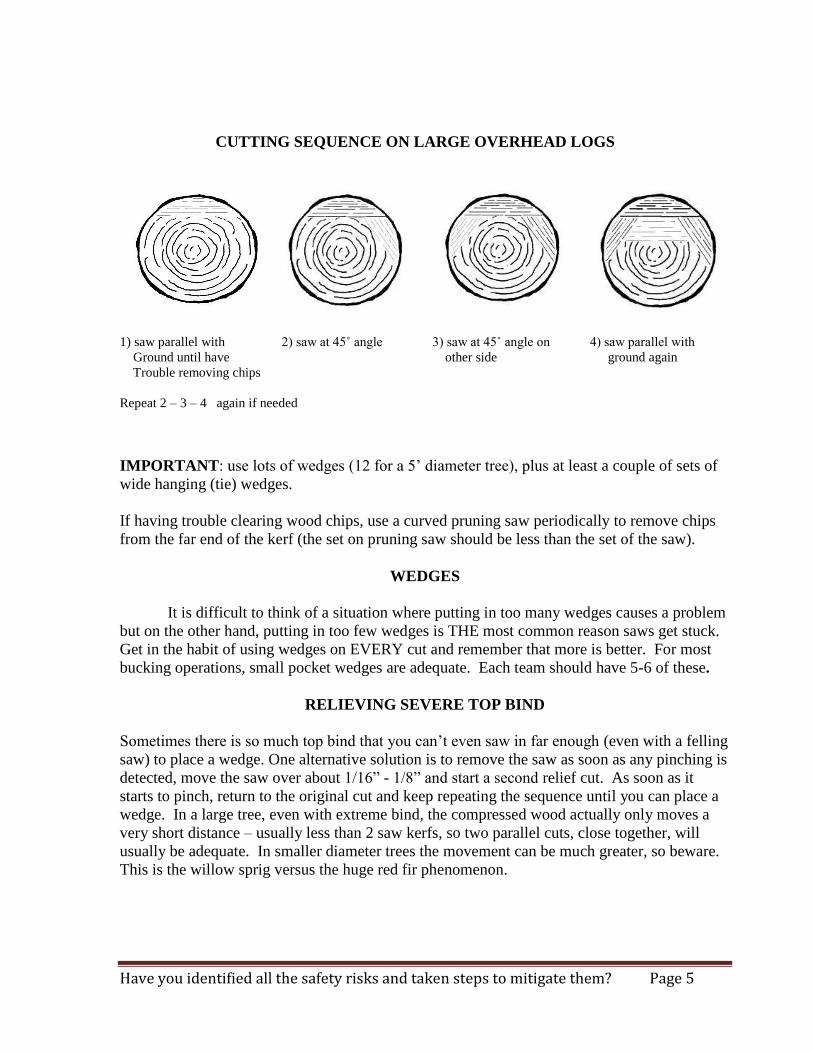
CUTTING SEQUENCE ON LARGE OVERHEAD LOGS
1) saw parallel with 2) saw at 45˚ angle 3) saw at 45˚ angle on 4) saw parallel with
Ground until have other side ground again
Trouble removing chips
Repeat 2 – 3 – 4 again if needed
IMPORTANT: use lots of wedges (12 for a 5‟ diameter tree), plus at least a couple of sets of
wide hanging (tie) wedges.
If having trouble clearing wood chips, use a curved pruning saw periodically to remove chips
from the far end of the kerf (the set on pruning saw should be less than the set of the saw).
WEDGES
It is difficult to think of a situation where putting in too many wedges causes a problem
but on the other hand, putting in too few wedges is THE most common reason saws get stuck.
Get in the habit of using wedges on EVERY cut and remember that more is better. For most
bucking operations, small pocket wedges are adequate. Each team should have 5-6 of these.
RELIEVING SEVERE TOP BIND
Sometimes there is so much top bind that you can‟t even saw in far enough (even with a felling
saw) to place a wedge. One alternative solution is to remove the saw as soon as any pinching is
detected, move the saw over about 1/16” - 1/8” and start a second relief cut. As soon as it
starts to pinch, return to the original cut and keep repeating the sequence until you can place a
wedge. In a large tree, even with extreme bind, the compressed wood actually only moves a
very short distance – usually less than 2 saw kerfs, so two parallel cuts, close together, will
usually be adequate. In smaller diameter trees the movement can be much greater, so beware.
This is the willow sprig versus the huge red fir phenomenon.

Have you identified all the safety risks and taken steps to mitigate them? Page 6
TORSIONAL BIND
Because of stresses on, or in, the tree, opposite sides of the kerf may rotate independently of
each other. This can produce a severe bind which can be very difficult to relieve. The best
way to prevent it is to sink an axe across the kerf or use hanging wedges.
SPLIT TRUNKS
An additional benefit of debarking before you saw is that you may be able to see splits in the
trunk. As you saw through these, the sections will often move and bind the saw so proceed
very slowly and carefully and use plenty of wedges. You may even want to single buck with
just the tip of the saw as you approach the split.
GETTING SAWS UNSTUCK
If you are watching the kerf, feeling the resistance on the saw and using wedges properly, you
shouldn‟t get in the position of having to unstick your saw – that sounds really good, but in
reality, if you saw enough trees Murphy will get the better of you at some point.
1) Since the teeth are the widest part of the saw (due to the set) it is counter-productive to try
and yank the saw up through the kerf – doing so tends to tweak the saw and is bad for it.
STOP, take a deep breath, and think about what you are going to do to get the saw out, intact.
2) Try using another log as a lever to raise the cut and release the bind.
3) OR put a piece of log underneath and use wedges to raise the cut – usually you can get
more lifting force with this than with a lever.

Have you identified all the safety risks and taken steps to mitigate them? Page 7
4) NEVER use an axe within striking distance of the saw – there is some magical attractive
force that will draw the axe to the saw and inflict major damage on it (and on your reputation
as a qualified sawyer).
5) The last resort is to move to another location on the log and make a second cut with a new
saw (try not to get this one stuck) or chop the log with an axe (at which point you will be
cursing yourself for not having sharpened your axe properly before the project started).
If only I had . . . . .
Place a rock or some
cribbing under the stuck saw
Chop a nice „V‟ far away from the saw
TNT

Have you identified all the safety risks and taken steps to mitigate them? Page 8
MECHANICAL ADVANTAGE (MA)
Remember that MA comes at the expense of having to pull more rope to move the load
– a 2:1 system means you‟ll have to pull 2 feet of rope to move the load 1 foot; in a 4:1 system,
you have to pull 4 feet of rope to move the load one foot – you can go through a lot of rope in a
hurry
1. If a simple system is anchored on load, likely will have an “odd” MA
2. If a simple system is anchored somewhere other than load, likely will have an “even” MA
3. If the end of the rope you‟re pulling on is pulling away from the load, it will be contributing
to the MA calculation.
4. If the end of the rope you‟re pulling on is pulling toward the load, it won‟t be contributing to
the MA calculation – it‟s just providing a change of direction
SIMPLE MA SETUPS
1. Using rope and carabiners works well for climbing and rescue but is pretty worthless once
you start applying heavy loads. The rope crosses a relatively very small diameter carabiner so
there is a tremendous loss of efficiency because of friction – this is a sorry last resort for trying
to move heavy objects.
2. Just using small Petzl pulleys instead of carabiners increases the efficiency of the system
tremendously – this would be the best small system to carry routinely.
3. Pre-made block and tackles: you can buy a 7:1 , 2,000# capacity block and tackle for around
$20.00. Upgrading the bolts, adding carabiner attachment points and a quality rope can make
the unit more serviceable. Just remember that as soon as you modify equipment, you have
released the manufacturer from any and all liability and transferred it all to guess who - so
proceed with caution and make certain you are willing to accept the accompanying risk. Most
people can generate about 125# of pulling force so three people could generate close to 2,000#
of force using this system.
4. Come-alongs are awkward to use and heavy to carry for what you get. Their best use is
probably in lifting up objects vertically such as in a high line system. If you‟re going to buy
one, buy a good one – the cheap ones are a nightmare to use and will make you angry.

Have you identified all the safety risks and taken steps to mitigate them? Page 9
USE OF LEVERS
a) NO!
This is ineffective and is a recipe for a hernia – essentially you are wasting most of your force
trying to push the bottom end of the lever through the soil toward you. You do get a little
lateral force but very little lifting force.
b) YES!
This gives you a mechanical advantage of 5:1. Most people can apply 125# - 175# of force.
As a result, you get a lot of lifting force but virtually no lateral force. Using this technique,
you can effectively “float and row” heavy rocks across the ground.

Have you identified all the safety risks and taken steps to mitigate them? Page 10
MOVING LOGS
(You have two choices: reduce friction or increase your pulling force)
1. use small logs as rollers to move log along its long axis or slides to roll log perpendicular to
its long axis (usually easier than the former) - can also help reduce friction by removing bark
2. roll up onto a fulcrum (log or rock) so can pivot in any direction; need to estimate center of
weight; to gain height, place two rocks or two other logs at right angles, under fulcrum (if only
use one, log will want to roll off)
3. construct a mechanical advantage system using rope, carabiners, and webbing; pretty
difficult to overload this type of system
4. use a pre-rigged light weight block and tackle for mechanical advantage; need to know
strength of rope
5. use a Maasdam rope puller (this is essentially a come-along that uses a rope rather than a
steel cable, so the length of pull is limited only by the length of rope you are using)
6. use a grip-hoist with pulleys and anchors to create mechanical advantage; once get to this
level, can use to move heavy rocks too
NOTE: Beware of uncontrolled moving rocks or logs – if they hit the base of a tree with
enough force, they can blow out the top of the tree and send it back toward you
Examples:
1) Using rollers / ramps:
Easy to just roll logs although you can pull lengthwise if have enough rollers

Have you identified all the safety risks and taken steps to mitigate them? Page 11
2) Balancing and rolling:
3) Pivoting:
Two people can roll extremely heavy
logs up onto a low pivot and then
easily spin the log in any direction –
the pivot only needs to be high enough
to keep the ends of the log an inch or
two off the ground when it is balanced
on the pivot.
Thus you don‟t have to keep rolling
the log down the trail –
you can turn and roll it off the side.

Have you identified all the safety risks and taken steps to mitigate them? Page 12
4) Rolling one log up and over another (make certain log won‟t roll back on top of you!)
If you need more force, anchor rope on far side, loop under and over log to be moved (like a
sling) and pull – this gives you a 2:1 mechanical advantage
5) Hooking onto logs
YES! Pull strap or rope across log, toward you
NO! Now you‟re working against yourself and are just trying to drag the log
Have you identified all the safety risks and taken steps to mitigate them? Page 13
ORGANIZING A CUTTING SCENARIO
“I knew they were inexperienced sawyers when the first thing
they did was take the sheath off the saw” Anonymous
1) LOOK UP for overhead hazards
2) CLEAN UP work area – often changes your initial impression of how to organize the work
3) SIZE UP and plan your cuts
First, walk completely around the entire length of the tree. You will often discover something
that may change your initial plan. Decide how you are going to move the cut piece AND
where you are going to place it. Not unusual to spend far more time preparing the site
(chocking, ramps, rollers) than cutting the tree. While it is tempting (as in “easy”) to put logs
parallel to the trail tread (and they do keep people on the trail), that is far outweighed by the
potential damage the channeling of water will do to the trail, especially if they are on the
downhill side of the tread. Sometimes the log will be useful to stabilize the lower side of the
tread but this is the exception rather than the rule. Plus, any logs parallel to the trail will make
movement of subsequent logs a nightmare.
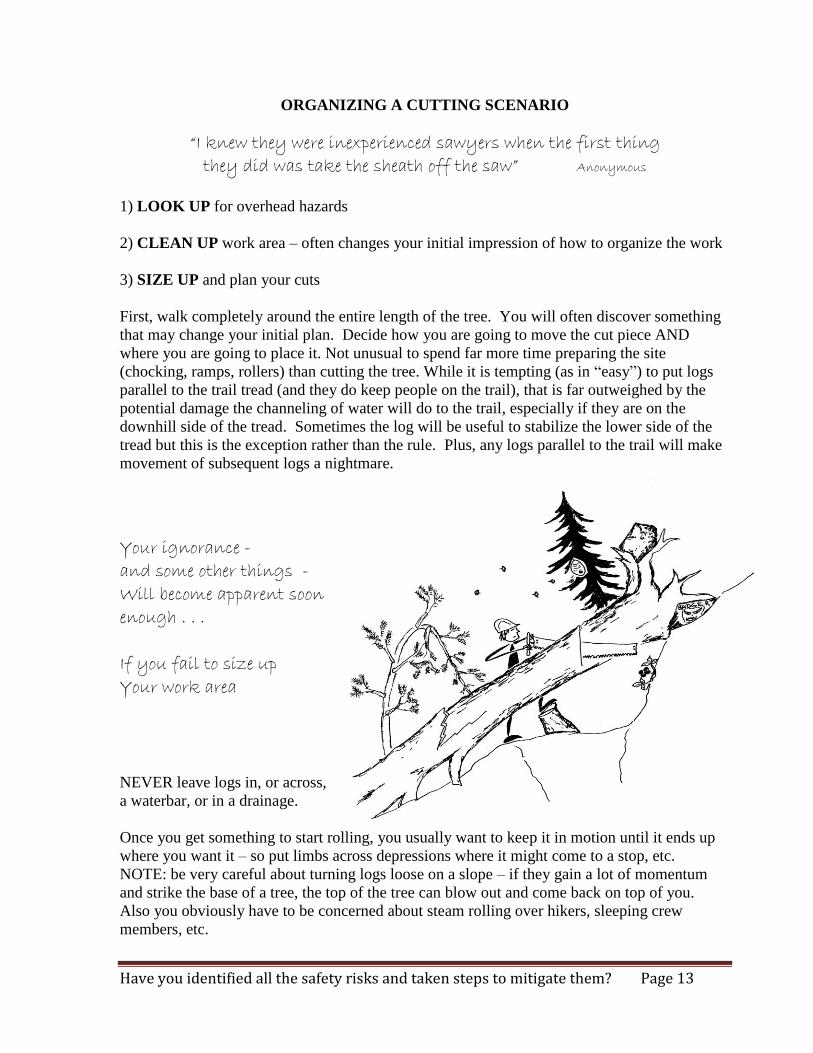
Your ignorance -
and some other things -
Will become apparent soon
enough . . .
If you fail to size up
Your work area
NEVER leave logs in, or across,
a waterbar, or in a drainage.
Once you get something to start rolling, you usually want to keep it in motion until it ends up
where you want it – so put limbs across depressions where it might come to a stop, etc.
NOTE: be very careful about turning logs loose on a slope – if they gain a lot of momentum
and strike the base of a tree, the top of the tree can blow out and come back on top of you.
Also you obviously have to be concerned about steam rolling over hikers, sleeping crew
members, etc.
Have you identified all the safety risks and taken steps to mitigate them? Page 14
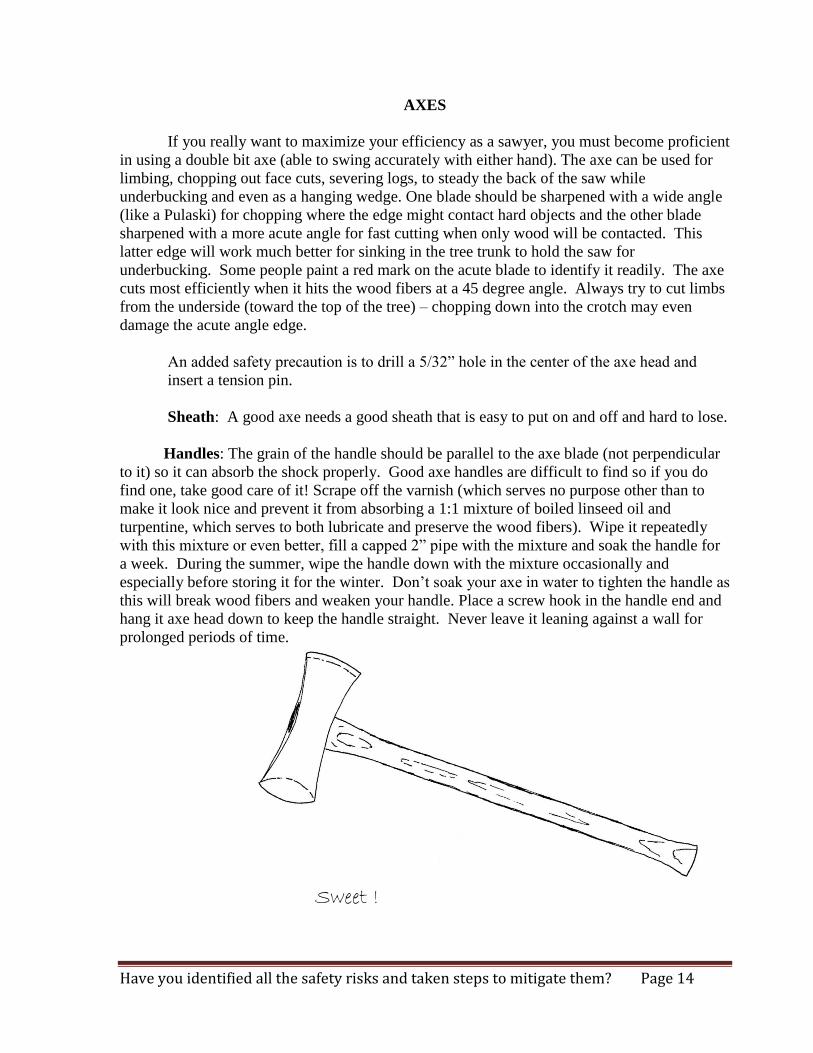
AXES
If you really want to maximize your efficiency as a sawyer, you must become proficient
in using a double bit axe (able to swing accurately with either hand). The axe can be used for
limbing, chopping out face cuts, severing logs, to steady the back of the saw while
underbucking and even as a hanging wedge. One blade should be sharpened with a wide angle
(like a Pulaski) for chopping where the edge might contact hard objects and the other blade
sharpened with a more acute angle for fast cutting when only wood will be contacted. This
latter edge will work much better for sinking in the tree trunk to hold the saw for
underbucking. Some people paint a red mark on the acute blade to identify it readily. The axe
cuts most efficiently when it hits the wood fibers at a 45 degree angle. Always try to cut limbs
from the underside (toward the top of the tree) – chopping down into the crotch may even
damage the acute angle edge.
An added safety precaution is to drill a 5/32” hole in the center of the axe head and
insert a tension pin.
Sheath: A good axe needs a good sheath that is easy to put on and off and hard to lose.
Handles: The grain of the handle should be parallel to the axe blade (not perpendicular
to it) so it can absorb the shock properly. Good axe handles are difficult to find so if you do
find one, take good care of it! Scrape off the varnish (which serves no purpose other than to
make it look nice and prevent it from absorbing a 1:1 mixture of boiled linseed oil and
turpentine, which serves to both lubricate and preserve the wood fibers). Wipe it repeatedly
with this mixture or even better, fill a capped 2” pipe with the mixture and soak the handle for
a week. During the summer, wipe the handle down with the mixture occasionally and
especially before storing it for the winter. Don‟t soak your axe in water to tighten the handle as
this will break wood fibers and weaken your handle. Place a screw hook in the handle end and
hang it axe head down to keep the handle straight. Never leave it leaning against a wall for
prolonged periods of time.
Sweet !
Have you identified all the safety risks and taken steps to mitigate them? Page 15
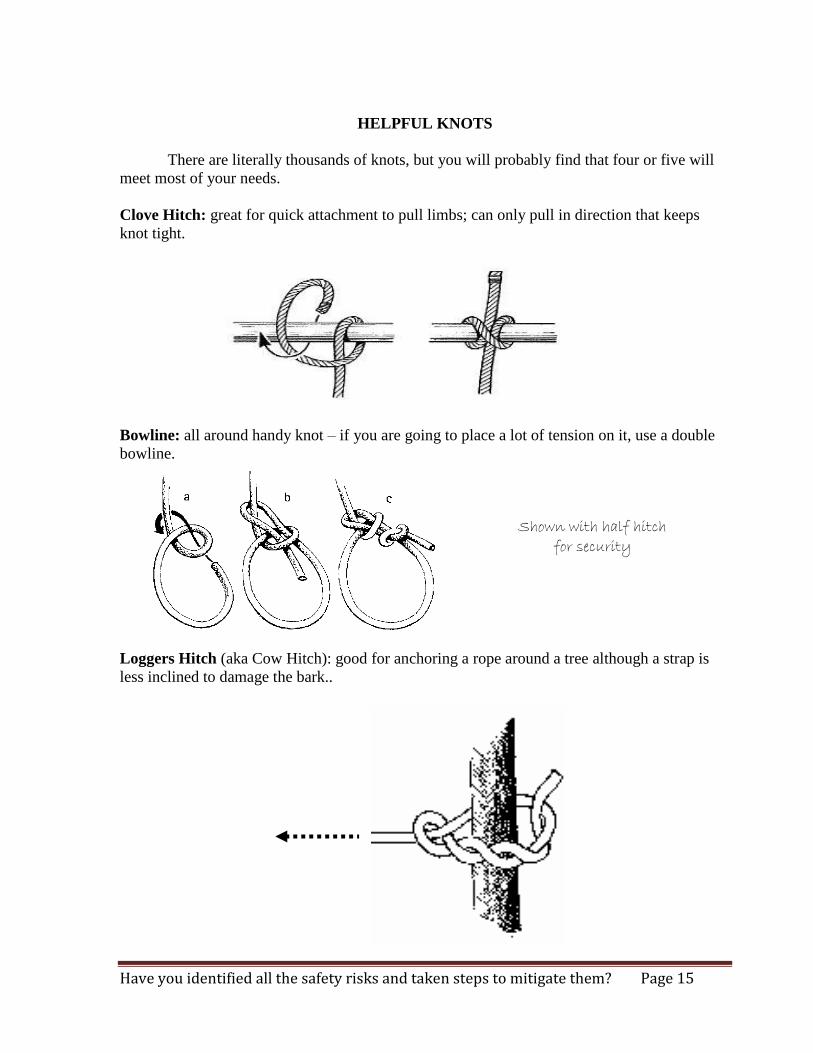
HELPFUL KNOTS
There are literally thousands of knots, but you will probably find that four or five will
meet most of your needs.
Clove Hitch: great for quick attachment to pull limbs; can only pull in direction that keeps
knot tight.
Bowline: all around handy knot – if you are going to place a lot of tension on it, use a double
bowline.
Shown with half hitch
for security
Loggers Hitch (aka Cow Hitch): good for anchoring a rope around a tree although a strap is
less inclined to damage the bark..
Have you identified all the safety risks and taken steps to mitigate them? Page 16
SAFETY ISSUES
1) Before you start pulling on things (with or without ropes), make certain you have cleared the
path you‟ll be moving along. You don‟t want to send someone to the hospital impaled on a
stick like shish-kabob (don‟t laugh – this is a common injury), or with a head injury.
2) While someone has to be boss and have final authority, EVERYONE serves equally as the
“Safety Officer” and can bring the operation to a halt until their concern is addressed and
resolved.
3) When rolling logs, caution everyone to look out for stobs that can catch in the wrist band of
gloves as the log turns – if that happens, the unfortunate person will not be able to get their
hand out of the glove quickly enough and will end up with a broken wrist or shattered elbow
(don‟t laugh – this has happened).
4) Check the handles on hand tools EVERY day – actually whenever you pick up a tool
someone else has used, you ought to do this check. Putting a tension pin in the head of an axe
or Pulaski decreases the risk of the head flying off – this also makes them easier to sharpen
with the MTDC Makita sander and sharpening jig. There are concerns about using any power
tool to sharpen an axe since it is so easy to overheat the metal and change the temper, so
beware.
MISCELLANEOUS STUFF
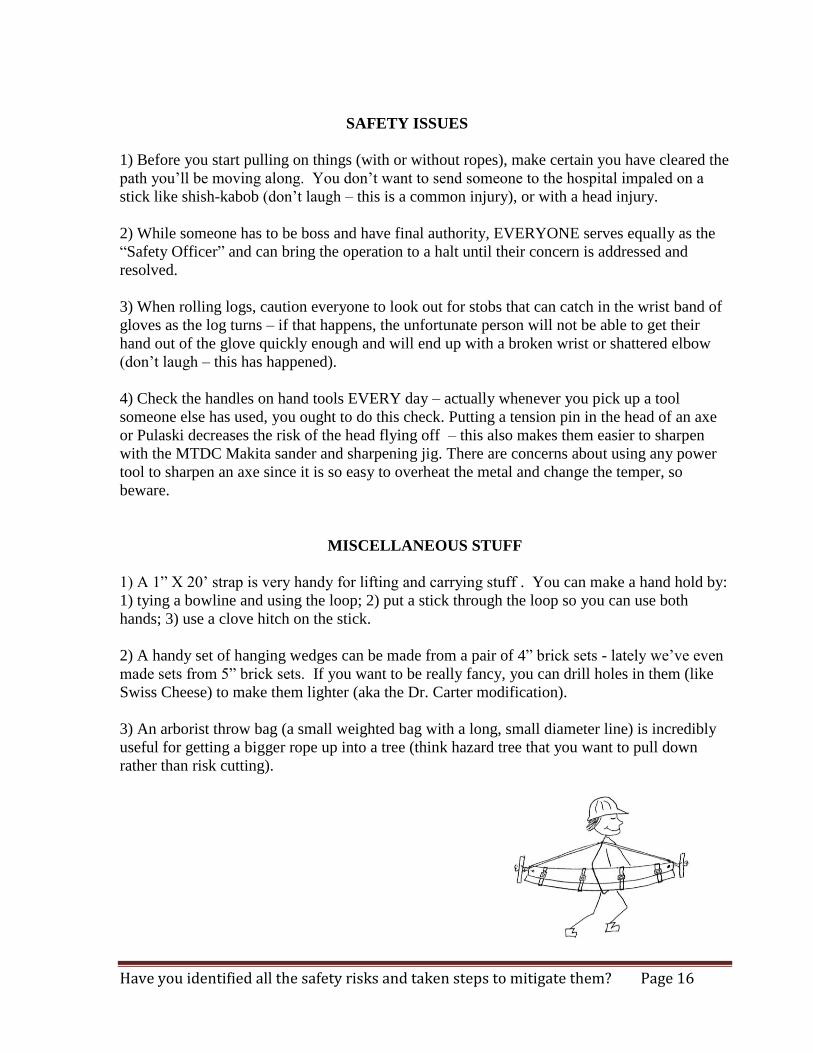
1) A 1” X 20‟ strap is very handy for lifting and carrying stuff . You can make a hand hold by:
1) tying a bowline and using the loop; 2) put a stick through the loop so you can use both
hands; 3) use a clove hitch on the stick.
2) A handy set of hanging wedges can be made from a pair of 4” brick sets - lately we‟ve even
made sets from 5” brick sets. If you want to be really fancy, you can drill holes in them (like
Swiss Cheese) to make them lighter (aka the Dr. Carter modification).
3) An arborist throw bag (a small weighted bag with a long, small diameter line) is incredibly
useful for getting a bigger rope up into a tree (think hazard tree that you want to pull down
rather than risk cutting).