Embed Size (px)
Citation preview
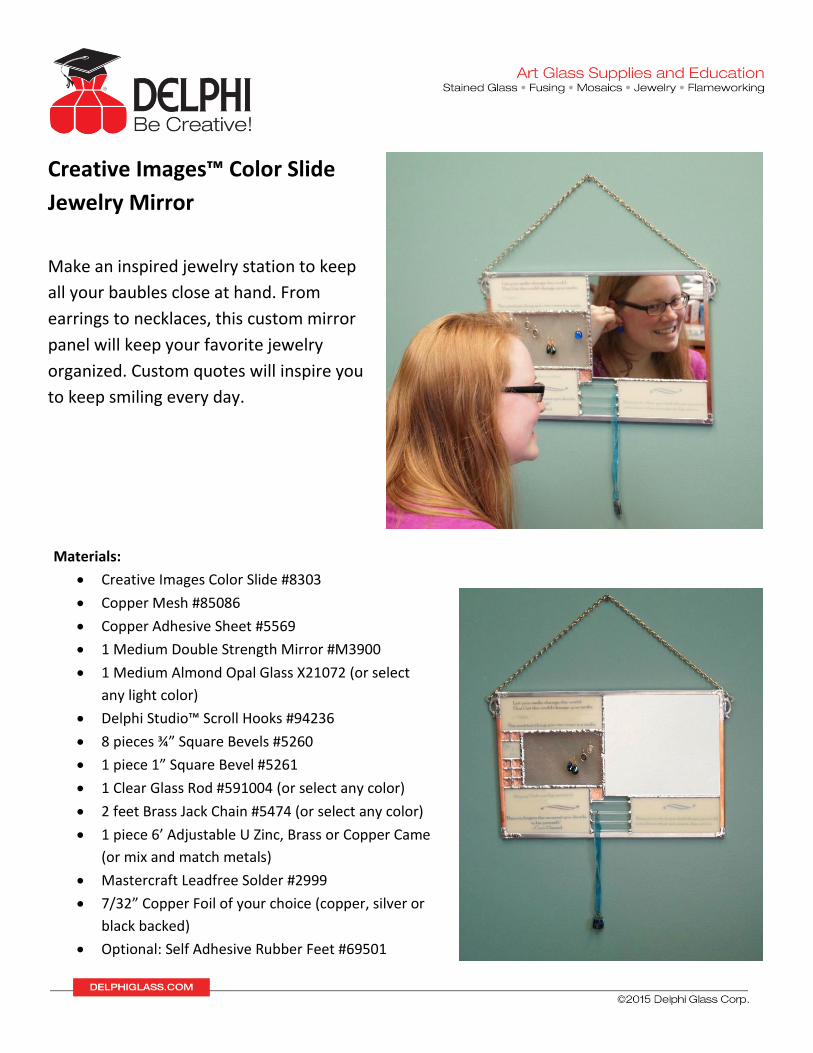
Creative Images™ Color Slide
Jewelry Mirror
Make an inspired jewelry station to keep
all your baubles close at hand. From
earrings to necklaces, this custom mirror
panel will keep your favorite jewelry
organized. Custom quotes will inspire you
to keep smiling every day.
Materials:
Creative Images Color Slide #8303
Copper Mesh #85086
Copper Adhesive Sheet #5569
1 Medium Double Strength Mirror #M3900
1 Medium Almond Opal Glass X21072 (or select
any light color)
Delphi Studio™ Scroll Hooks #94236
8 pieces ¾” Square Bevels #5260
1 piece 1” Square Bevel #5261
1 Clear Glass Rod #591004 (or select any color)
2 feet Brass Jack Chain #5474 (or select any color)
1 piece 6’ Adjustable U Zinc, Brass or Copper Came
(or mix and match metals)
Mastercraft Leadfree Solder #2999
7/32” Copper Foil of your choice (copper, silver or
black backed)
Optional: Self Adhesive Rubber Feet #69501

Instructions:
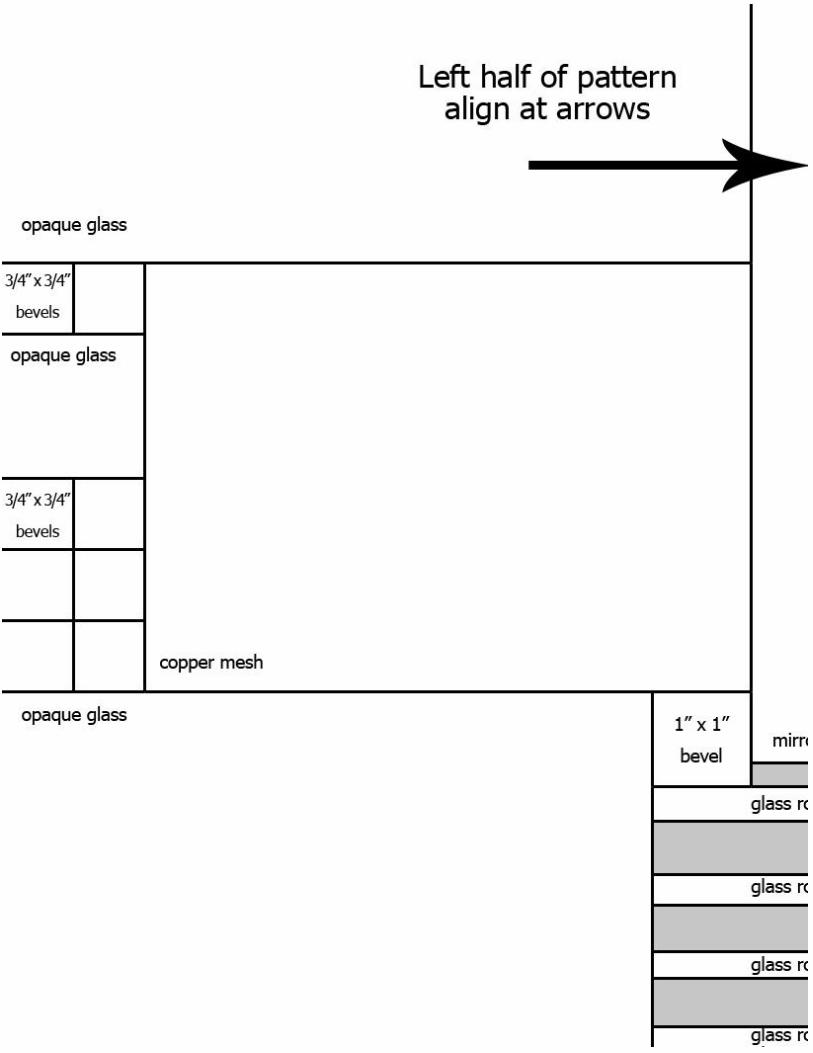
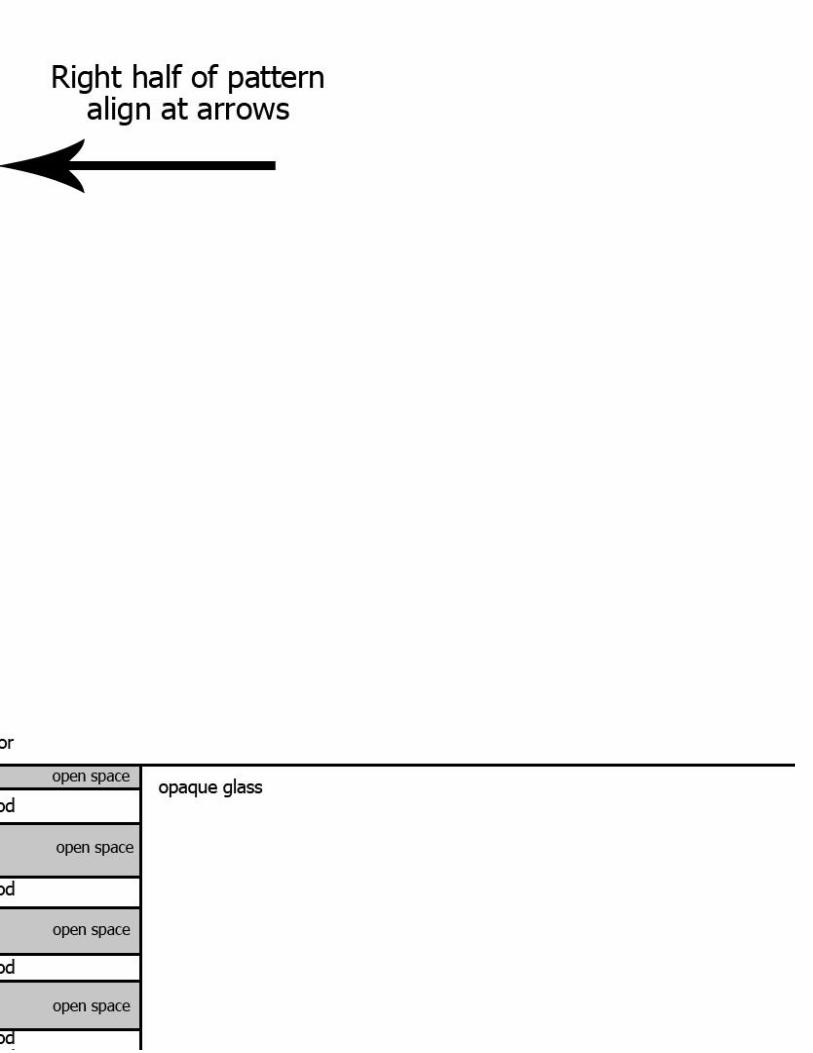
1. Print and assemble the pattern – this project is sized 11” x 17” (2
pages 8-1/2” x 11”).
2. Cut opaque glass and mirror to fit the pattern. Clean and dry your
glass.
3. Print the quotes design page on Creative Images™ Color Slide using a
color copier or color laser printer following package directions. You
can design your own custom quotes or artwork if preferred. Note:
Creative Images™ Color Slide does not work on ink jet, laser jet or
bubble jet type printers.
4. Cut apart your designs to fit onto glass.
5. Soak color slide in warm water, then slide onto glass to transfer.
Position on glass at least 3/16” away from edge of glass. Smooth out
any air bubbles and wrinkles, then blot away excess water with a soft
cloth or paper towel.
6. Allow to dry completely and bake in a pre-heated oven at 365 – 376
degrees F following package instructions to set the designs. Note:
over-heating will cause the color slide to discolor.
7. Cut sections of copper foil sheet to fit bevels and apply to flat side of
bevel squares. Delphi Tip: It is easiest to cut foil sheet larger than
bevels, peel away backing and apply to bevels. Burnish to smooth foil
in place, then use a craft knife to trim away excess.
8. Cut glass rod to fit pattern. Note: Mosaic nippers are an excellent
tool to cut glass rods quickly and easily.
9. Unfold copper mesh to reveal a single layer. Use shears to trim to fit
the pattern.
10. Foil and burnish all glass pieces and position on pattern.
11. Use masking tape to mask off color slide designs.
12. Use masking tape to mask copper mesh, leaving approximately 3/16”
border exposed all the way around. Mask from both front and back
of copper mesh. Set aside.
13. Flux and solder all glass pieces in place. Flip panel over and repeat,
soldering on reverse side.
14. Flux border of copper mesh and tin. Flip over, flux and tin reverse
side.

15. Position copper mesh on front of panel and tack solder in position.
16. Flip panel over and solder copper mesh in place from reverse.
17. Flip panel over to reveal face again, apply finish solder bead or
decorative soldering to entire project as desired.
18. Cut adjustable U came to length to fit panel. This can be done using
90 degree or 45 degree mitered corners.
19. Slide came onto edges of glass and secure with masking tape. Apply
flux and solder corners from front and back of panel.
20. Join each solder line to the adjustable U came border with solder on
the front and back of the panel.
21. Add Scroll Hooks approximately ¼” to ½” from the top edge of the
panel on the outside edges of the came border following package
directions.
22. Clean your panel with flux remover and rinse thoroughly.
23. Attach jack chain to hang your panel.
24. Optional – apply self adhesive rubber bumper feet to reverse of
panel at corners to position panel away from wall.


![[2014.10.05] Color days!Live on ustream Presentation-Slide](https://img.pdfslide.us/doc/110x75/559459c11a28ab65728b45c0/20141005-color-dayslive-on-ustream-presentation-slide.jpg)