Embed Size (px)
Citation preview
How to Create and Duplicate Courses in XpressLab
In XpressLab, tests and activities are creating within a course. Courses can be created from scratch, duplicated from an existing course, or imported from the XpressLab Library.
Creating a New CourseFollow the steps detailed below to create a new course from scratch:
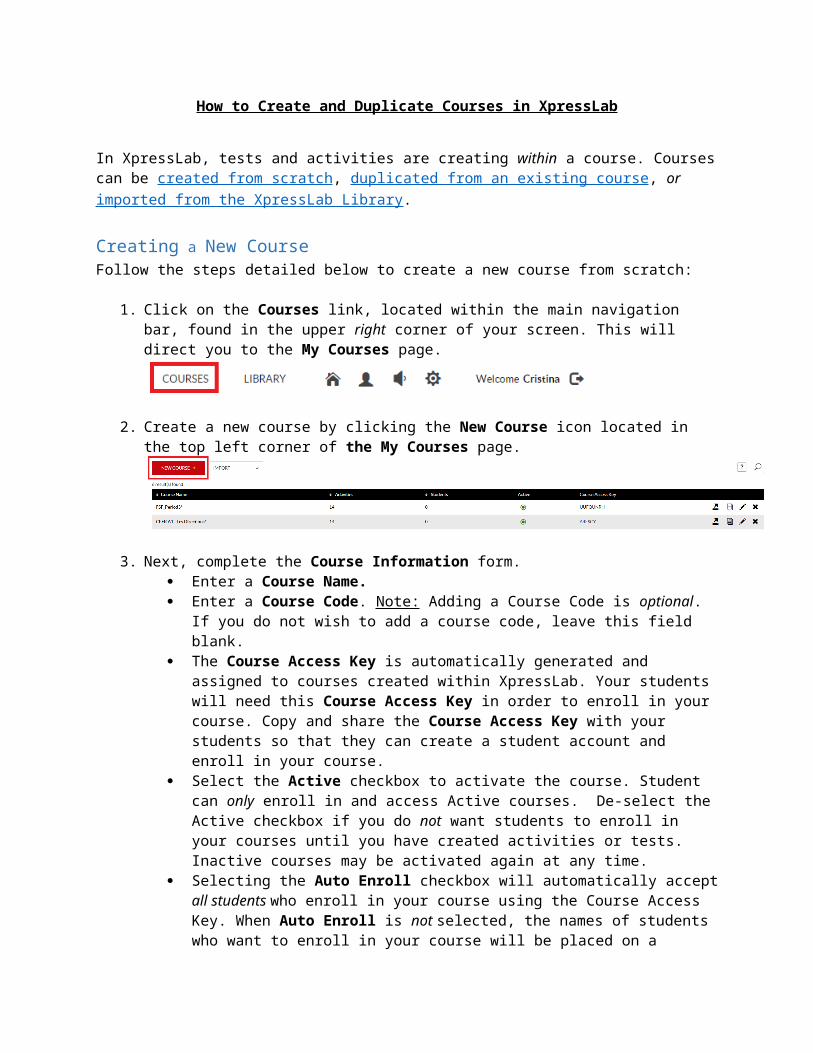
1. Click on the Courses link, located within the main navigation bar, found in the upper right corner of your screen. This will direct you to the My Courses page.
2. Create a new course by clicking the New Course icon located in the top left corner of the My Courses page.
3. Next, complete the Course Information form. Enter a Course Name. Enter a Course Code. Note: Adding a Course Code is optional. If you do not wish to add a
course code, leave this field blank. The Course Access Key is automatically generated and assigned to courses created
within XpressLab. Your students will need this Course Access Key in order to enroll in your course. Copy and share the Course Access Key with your students so that they can create a student account and enroll in your course.
Select the Active checkbox to activate the course. Student can only enroll in and access Active courses. De-select the Active checkbox if you do not want students to enroll in your courses until you have created activities or tests. Inactive courses may be activated again at any time.
Selecting the Auto Enroll checkbox will automatically accept all students who enroll in your course using the Course Access Key. When Auto Enroll is not selected, the names of students who want to enroll in your course will be placed on a waiting list pending your acceptance into the course. We recommended keeping the Auto Enroll checkbox select. You may remove students from your course in the event that they are not on your official class list.
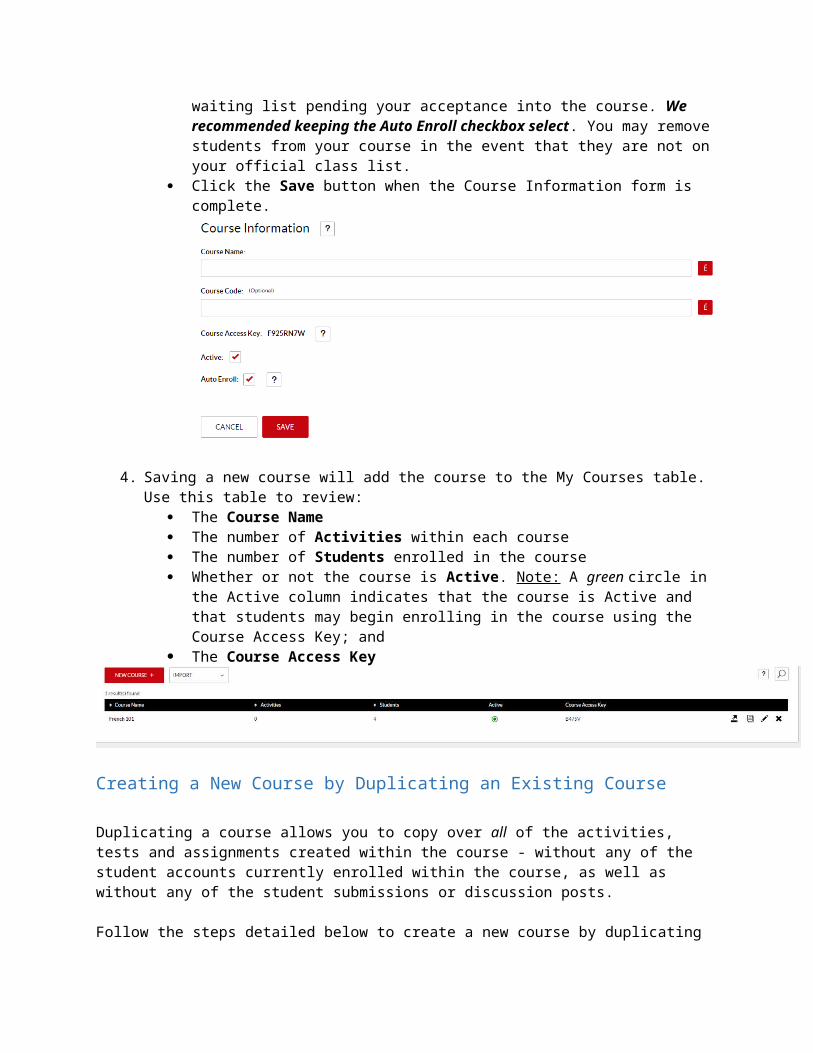
Click the Save button when the Course Information form is complete.
4. Saving a new course will add the course to the My Courses table. Use this table to review: The Course Name The number of Activities within each course The number of Students enrolled in the course Whether or not the course is Active. Note: A green circle in the Active column indicates
that the course is Active and that students may begin enrolling in the course using the Course Access Key; and
The Course Access Key
Creating a New Course by Duplicating an Existing Course
Duplicating a course allows you to copy over all of the activities, tests and assignments created within the course - without any of the student accounts currently enrolled within the course, as well as without any of the student submissions or discussion posts.
Follow the steps detailed below to create a new course by duplicating and existing course.
1. To duplicate a course, locate the course you wish to duplicate using the My Course list. Then, select
the Duplicate icon, located in the right column of the My Courses list.
2. By default, the course name is appended with the word Copy. You can edit the duplicate course name as well as add an optional course code, clicking the red Save button when you are finished.
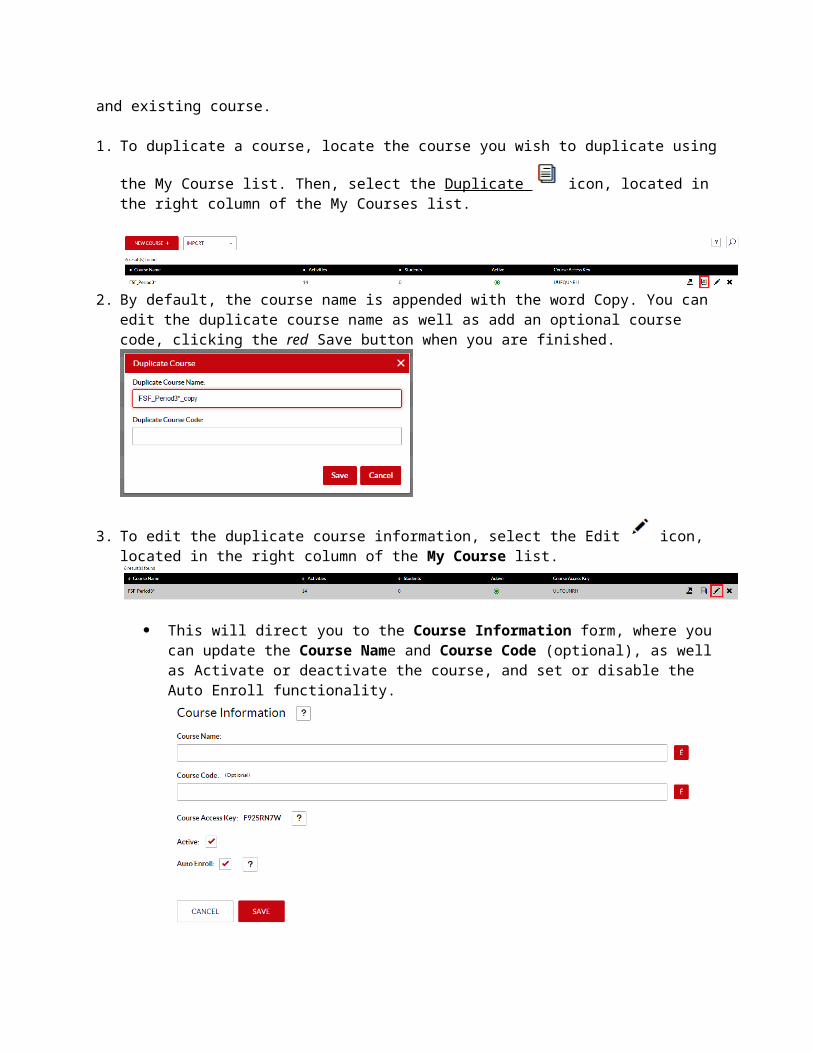
3. To edit the duplicate course information, select the Edit icon, located in the right column of the My Course list.
This will direct you to the Course Information form, where you can update the Course Name and Course Code (optional), as well as Activate or deactivate the course, and set or disable the Auto Enroll functionality.
Creating a New Course by Importing a Course from the XpressLab Library
To create a new course by importing a course from the XpressLab Library, follow the steps below:
1. Click on the Import button, located at the top of the My Courses list. Select Import from Library from the drop down list of options.
2. By default, the XpressLab Library will be filtered to display Courses. Add additional features using the filter options located along the left side of the Library (i.e. Filter by activity Type, filter by Sharing Permissions, and/or filter by Language.
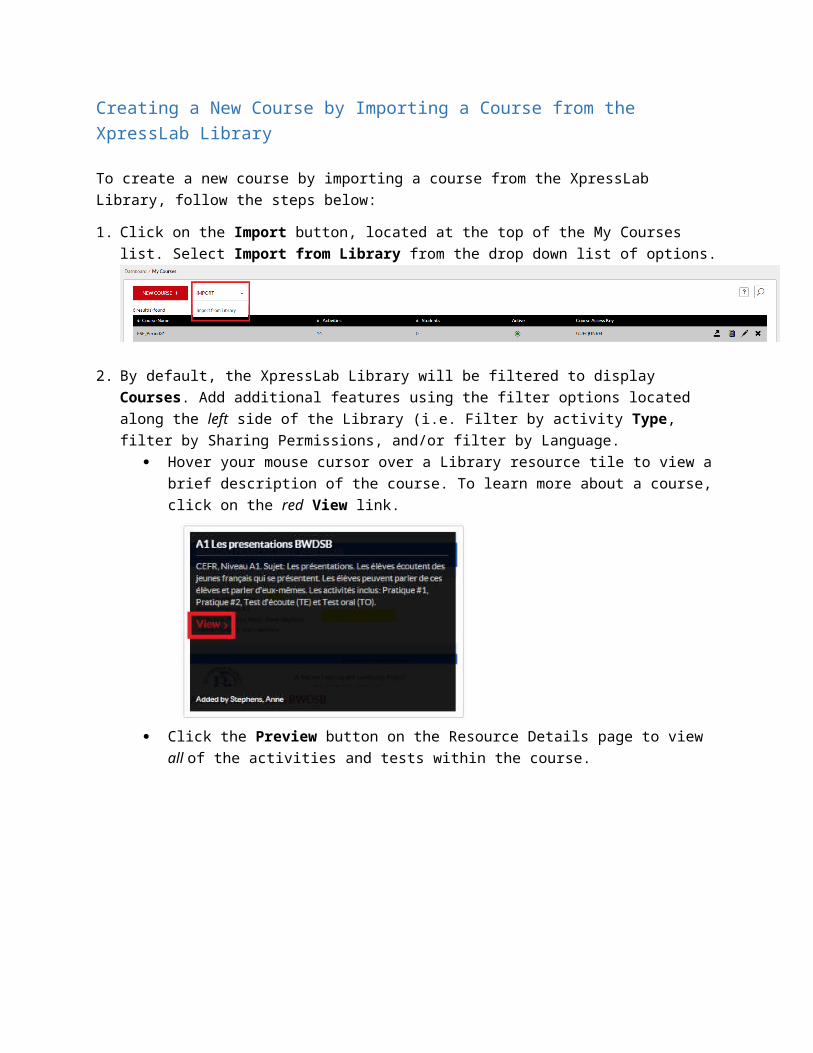
Hover your mouse cursor over a Library resource tile to view a brief description of the course. To learn more about a course, click on the red View link.
Click the Preview button on the Resource Details page to view all of the activities and tests within the course.
This will open a Full Screen preview of all activity and test tiles. Click on a tile to view the activity or test exactly as a student would see it.
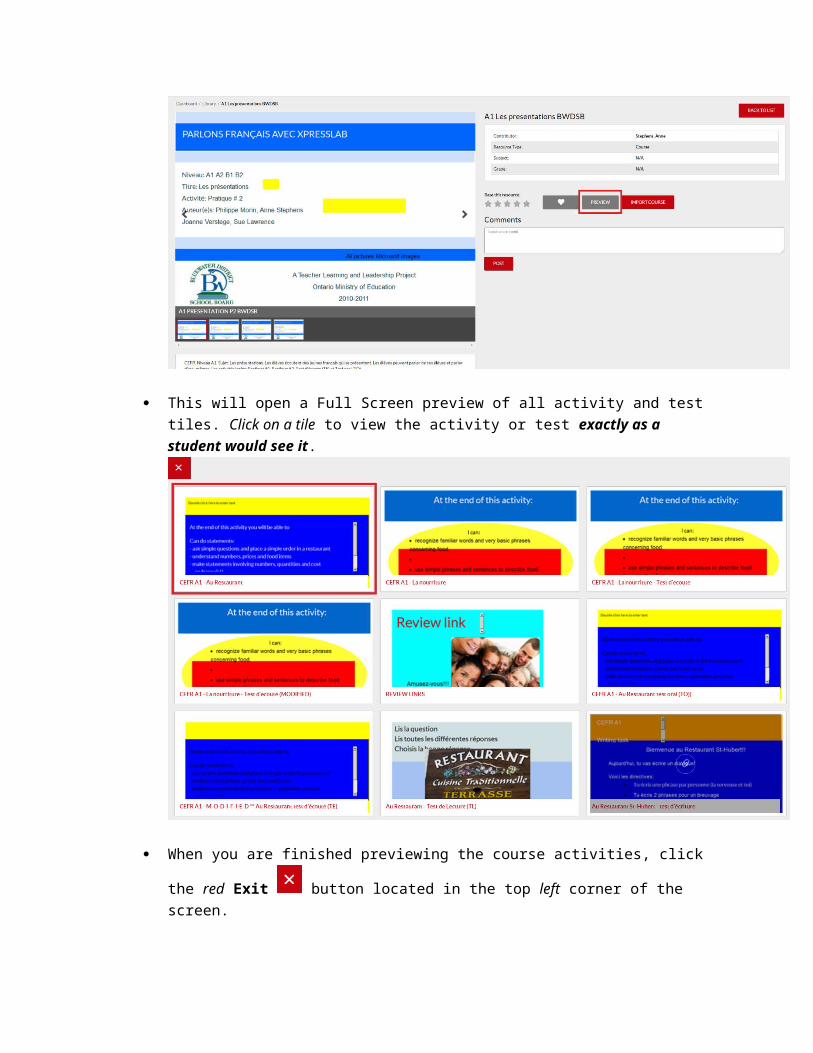
When you are finished previewing the course activities, click the red Exit button located in the top left corner of the screen.
3. When you are ready to import the course click the Import Course button, located on the Resource Details page.
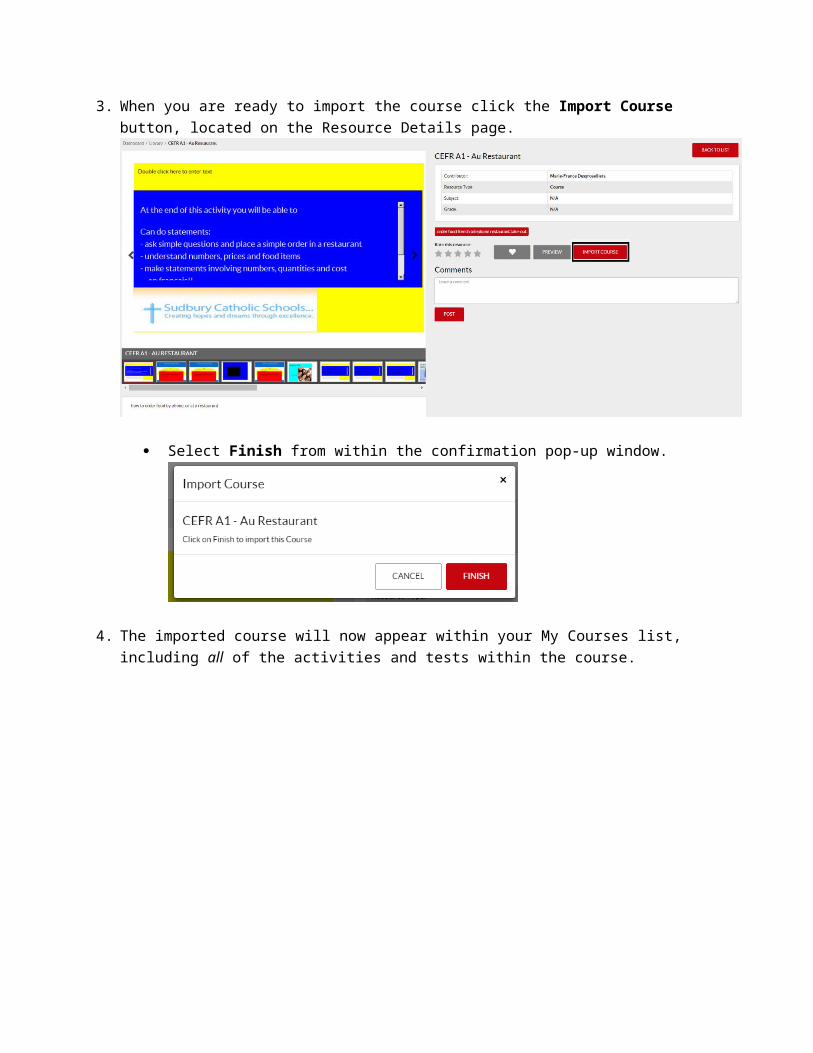
Select Finish from within the confirmation pop-up window.
4. The imported course will now appear within your My Courses list, including all of the activities and tests within the course.