Embed Size (px)
Citation preview
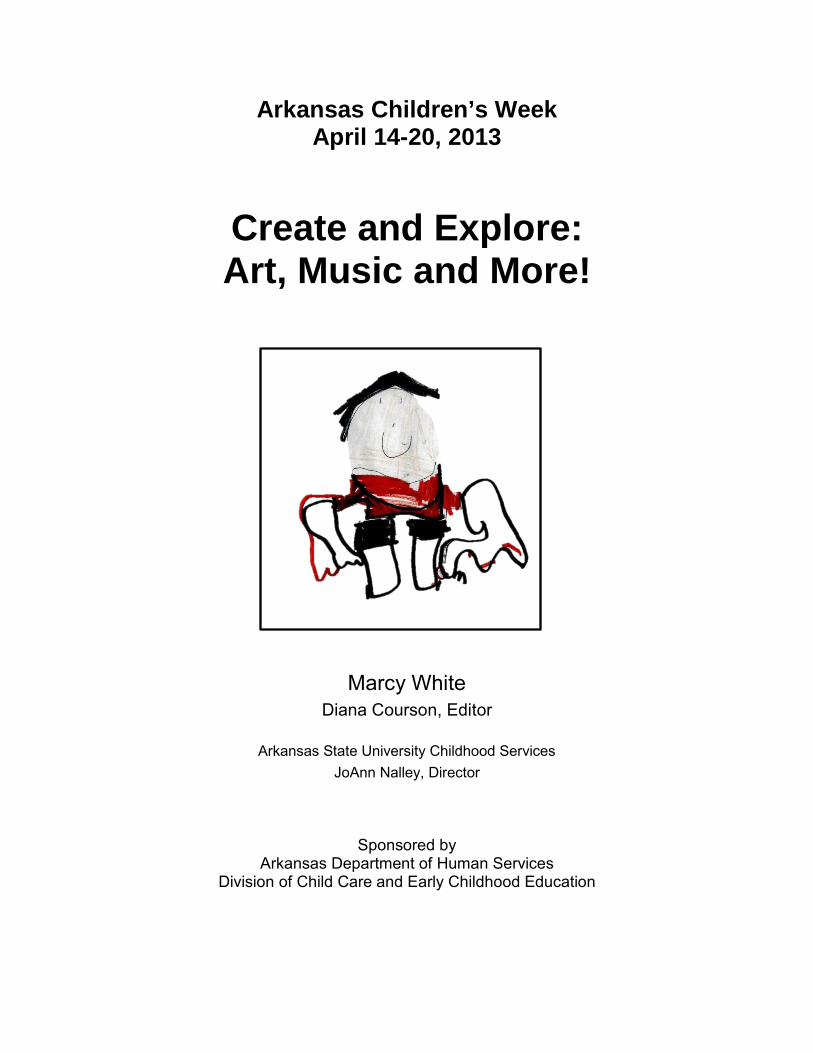
Arkansas Children’s Week April 14-20, 2013
Create and Explore: Art, Music and More!
Marcy White
Diana Courson, Editor
Arkansas State University Childhood Services
JoAnn Nalley, Director
Sponsored by Arkansas Department of Human Services
Division of Child Care and Early Childhood Education
ACW 2013
Cover art courtesy of Layton Wallace
Art on page 9 courtesy of Raylee Wallace
Thank you for the use of selected photographs in this book!
• ASU Child Development Center, Jonesboro
• First United Methodist Church Child Development Center, Magnolia
2013 Arkansas Children’s Week
Planning Committee
Marilyn Bailey Dot Brown Brinda Burr Diana Courson Jackie Dedman Woodie Sue Herlein Debbie Mays Vicki Shelby Marcy White Crystal Whittington
ACW 2013
Table of Contents
Acknowledgements 2 SECA Position Statement on Arts and Movement Education for Young Children 5 Art 9 Becoming a Front Porch Teacher 10 I’m Not Just Scribbling 18 Create with Me 19 A Year of Art 21 3 Fantastically Fun Ways to Explore Colors 23 Spatter, Spot , Drip, and Drop 27 From Trash to Treasures 29 Putting It All Together 35 Real Tools for Young Artists 36 Teacher Talk: Real Questions and Answers about Art for Infants and Toddlers 37 Teacher Talk: Real Questions and Answers about Art with School-Age Kids 43 Cameras and Kids 50 Music 53
A Word about Music 54 Music through the Day 55 Predictable Songs 58 Sing to Me 59 Setting Up a Music Discovery Center 60 Let’s Make Music 63 4 Marvelous Ways to Explore Music 64 Resources 68 Books for Children and Adults 69 Apps and Websites 71

ACW 2013 5
Arts & Movement Education for Young Children
A POSITION STATEMENT OF THE
Southern Early Childhood Association
P.O. Box 55930 - Little Rock, AR 72215-5930 1-800-305-7322
[email protected] Movement and the arts provide critical links to success in school and life. Imagine a world without architecture, music, theatre, dance and the visual arts. Most of human culture would not exist if academic ability were the whole of our intelligence. Many ideas, feelings and sensations can only be understood or expressed through arts and movement. “Poetry, music, painting, dance, and other arts are not frills to be indulged if time is left over from the real business of education; they are the business of education.” (Silberman, 1971)
SECA believes that arts and movement learning enriches, inspires, and enables profound human expression important to children’s emerging capacity for joy and
sense of well-being. The benefits of multi-arts and movement programs to society and our communities are obvious. In areas where schools are struggling to close achievement gaps, and for children who need remedial instruction, arts and movement education play critical roles in boosting learning, achievement, and over-all development. “At a time when creativity and communication skills are at a premium, the arts should be used for their rich potential to captivate and engage students in learning” (Former Secretary of Education Riley).
As children sing, dance, paint and sculpt, critical links to achievement are forged. Through multi-arts and movement activities, foundational patterns and dispositions needed for success in school and life are set up and reinforced. New experiences are integrated and anchored within the brain, enabling children to unlock mysteries of our symbol system, make sense of their world, and learn to live and work peaceably with others.
SECA recommends that we support and fully fund arts and movement programs because of the foundational importance of these programs in promoting and
enhancing all aspects of growth and development of young children. All children should be provided movement and arts experiences every day.
ACW 2013 6
In schools struggling to close achievement gaps, arts and movement programs can be a key to success. Young children who participate in the arts for at least three hours, three days a week for a year are (Catterall, 2002):
• 4 times more likely to be recognized for academic achievement,
• 3 times more likely to be elected to class office within their schools,
• 4 times more likely to participate in a math and science fair,
• 3 times more likely to win an award for school attendance,
• 4 times more likely to win an award for writing an essay or poem,
• 2 times more likely to read for pleasure, and
• 4 times more likely to perform community service. Gains in dispositions for learning are critical outcomes of participation in arts and movement programs.
SECA believes that arts and movement learning are an integral part of a balanced, quality core curriculum and recommends that arts and movement experiences be
integrated throughout the curriculum. The arts develop the basic components of creativity such as originality, elaboration, fluency, and flexible thinking. These are essential skills for success in school and in life; they enable us to solve problems, predict outcomes, and develop ideas. Evidence of transfers of learning from the arts to academic and social development is substantial.
For example:
• Reading and Language Skills: As children sing, dance, paint, enact, listen to and compose music and poetry, they internalize the rhythms and patterns of our language. Fluency, vocabulary, and phonological abilities enable children to perceive and discriminate subtleties in sounds and patterns. Children’s efforts to break the phonetic code and associate letters, words and phrases with sounds and meanings are supported. The arts also nurture comprehension, event-sequencing skills, sense-of- narrative, understanding of character motivations, and most importantly, dispositions to read.
• Writing: Spatial reasoning skills, developed through music and movement activities, improve children’s ability to plan and organize writing. Forms in music compositions coincide with literary elements such as: introductions, main ideas or themes, theme development, transition devices, and concluding statements or summaries. Symphonies, operas, even simple songs, contain many of the same elements that written verbal compositions contain: the ideas are just expressed through a different set of symbols. Practice with one symbol system reinforces skills in the other.

ACW 2013 7
• Mathematics: Music reinforces brain patterns and connections in much the same way as mathematical thinking. As children clap, sing or dance rhythmic patterns and sequences, they develop the spatial reasoning, spatial-temporal reasoning, and patterning skills that are fundamental to solving math problems and creatively engaging in scientific processes. • Sensory-Motor: Sensory-motor learning is fundamental to every aspect of development for all children, but for the kinesthetic learner, arts and movement provide the keys to learning.
• Creativity: Multi-arts and movement experiences strengthen abilities that affect every aspect of intellectual accomplishment. Without these capacities, poetry, invention, constructions, music and literature would be impossible.
• Social and Emotional Competence: The desire to pursue and sustain learning is essential to achievement. For children to be successful in school and life, they must want to learn. Skills such as engagement, disciplined and sustained attention, persistence, and risk-taking are practiced and reinforced in arts and movement programs.
In addition, children who regularly participate are absent from school less often, have fewer referrals for discipline, and report higher educational aspirations. They also show higher levels of confidence, impulse control, self-identity, problem-solving, conflict resolution skills, empathy, and social tolerance.
SECA recommends that teachers provide information to parents and policymakers concerning the foundational role that arts and movement learning play in children’s development and that we assess our arts and movement community resources to determine how to further promote and provide arts and movement opportunities for
children. When parents and business leaders are polled regarding their expectations for children’s education, they list (Catterall, 2002):
• the cultivation of integrity • cooperation • leadership abilities • social compliance • conflict resolution skills • collaboration skills • emotional health • tolerance • moral development • citizenship.
ACW 2013 8
All of these abilities are developed or enhanced through regular participation in arts and movement programs. In times of shrinking revenues or when policy makers feel pressured to focus on academic achievement, arts and movement programs are in danger of being eliminated. Early childhood teachers understand that to eliminate these programs would be counterproductive and even damaging to children, robbing them of opportunities for developing potential. All who serve and act on behalf of children must inform the public about the value of arts and movement in the lives of children.
The working professionals in our arts and movement communities can provide wonderful mentoring opportunities for young children. As children have first-hand experiences with artists and their work, an understanding of the representational nature of the arts, a sense of wonder, and the capacity for aesthetic responsiveness are fostered.
SECA believes that arts and movement opportunities for children should be developed by utilizing current research-based knowledge and best practices.
We need to ensure that our instruction in the arts and movement is based on sound research and knowledge of practices that are appropriate for young children. Children will only receive the benefits described above if the experiences we provide are informed by our own investigations and study. To teach effectively, we need a background of study in arts and movement as it should be applied in settings with young children.
See references and resources at http://www.southernearlychildhood.org/policy_position.php Position Paper Developers Carole Whitener, Tidewater Community College, Virginia
Kathi Bush, Jefferson State Community College, Alabama
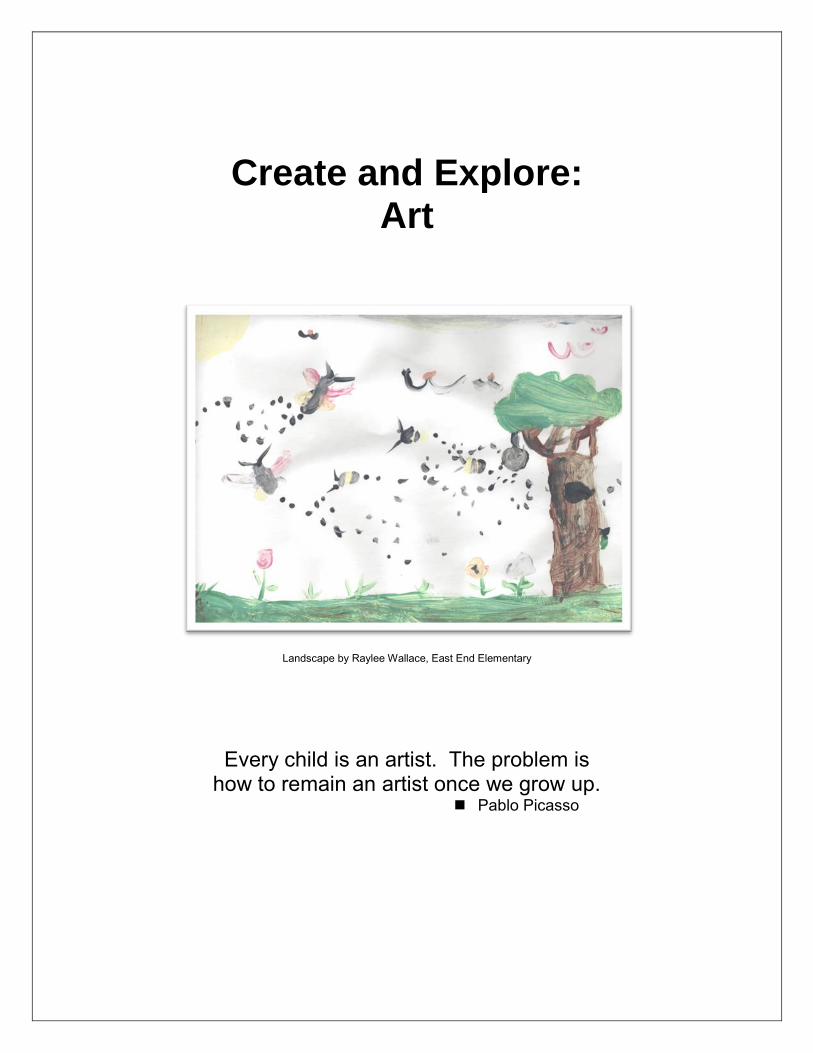
Create and Explore: Art
Landscape by Raylee Wallace, East End Elementary
Every child is an artist. The problem is how to remain an artist once we grow up.
Pablo Picasso
ACW 2013 10
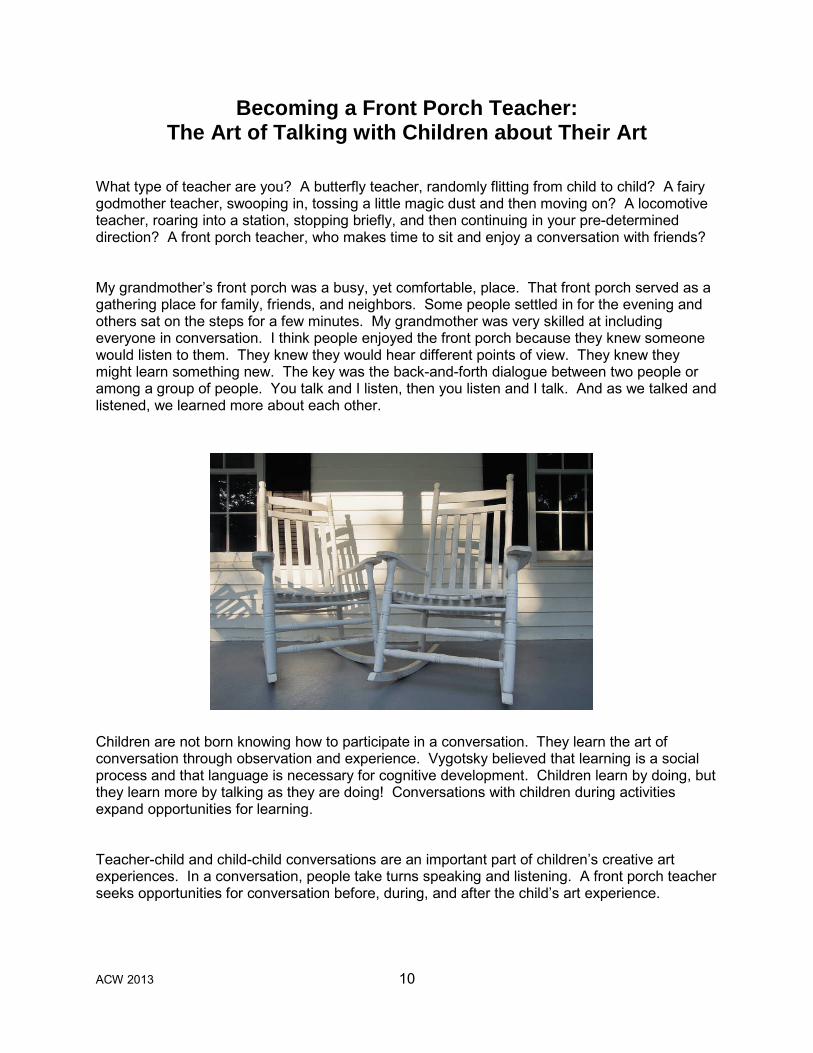
Becoming a Front Porch Teacher: The Art of Talking with Children about Their Art
What type of teacher are you? A butterfly teacher, randomly flitting from child to child? A fairy godmother teacher, swooping in, tossing a little magic dust and then moving on? A locomotive teacher, roaring into a station, stopping briefly, and then continuing in your pre-determined direction? A front porch teacher, who makes time to sit and enjoy a conversation with friends? My grandmother’s front porch was a busy, yet comfortable, place. That front porch served as a gathering place for family, friends, and neighbors. Some people settled in for the evening and others sat on the steps for a few minutes. My grandmother was very skilled at including everyone in conversation. I think people enjoyed the front porch because they knew someone would listen to them. They knew they would hear different points of view. They knew they might learn something new. The key was the back-and-forth dialogue between two people or among a group of people. You talk and I listen, then you listen and I talk. And as we talked and listened, we learned more about each other. Children are not born knowing how to participate in a conversation. They learn the art of conversation through observation and experience. Vygotsky believed that learning is a social process and that language is necessary for cognitive development. Children learn by doing, but they learn more by talking as they are doing! Conversations with children during activities expand opportunities for learning. Teacher-child and child-child conversations are an important part of children’s creative art experiences. In a conversation, people take turns speaking and listening. A front porch teacher seeks opportunities for conversation before, during, and after the child’s art experience.
ACW 2013 11
Conversation before the Art Experience Conversations about the world around them help children notice details. These conversations can inspire children to respond to what they see and to express their ideas and questions through art. The more observant children become, the richer their art will become. Conversations that seem to be unrelated to art experiences can add depth to creative expression.
Conversation can help children plan their work.
• Talk with children about the art materials that are available. o What will you need for your creation? o I see we have chalk, pencils, and crayons for drawing
• Talk with children about the subject of their work. Younger children be
exploring the crayons, paint, tape, or glue, and the media becomes the subject of their artwork. As children gain experience and knowledge, they begin to identify a subject for their art: “I’m going to paint a truck.”
o You look like you’re thinking of something you want to paint. o You said that box looks like a house.
• With experience and maturity, children will approach their art with
more intention. However, the wonder of the creative arts is the fluidity of the experience. The child who set out to paint a truck may change the subject to a house or a dinosaur or a bear during the process. Enjoy the ride, rather than trying to guide the process back to the child’s original intent.
Conversation during the Art Experience Notice actions, facial expressions, gestures, and colors/materials chosen. Comment on what you notice if the comment might extend the child’s thinking or invite him to talk about his work or this thinking.
• It’s interesting that you are standing up while you are taping the papers together, but you were sitting down while drawing and cutting.
• I see purple, then red, then purple, then red. I wonder if that’s going to be a pattern.
ACW 2013 12
Don't intrude on the process. Well-timed comments and questions can contribute to the creative and cognitive experiences. However, be careful not to offer comments when they are not needed. The key is to know your children. Know who might benefit from hearing a few words describing her actions. Know which children could benefit from conversation during the experience and which children might benefit more from conversation after the experience. Remember, all things in moderation.
• Invite children to verbalize their thoughts and to describe their actions. o I can see that you’re thinking.
• Facilitate problem solving.
o I’m interested in your ideas about how to get the blue paper to stick.
• Recognize effort and success. o You figured out how to stop the drips!
• Use questions and comments to encourage more detail in the artwork.
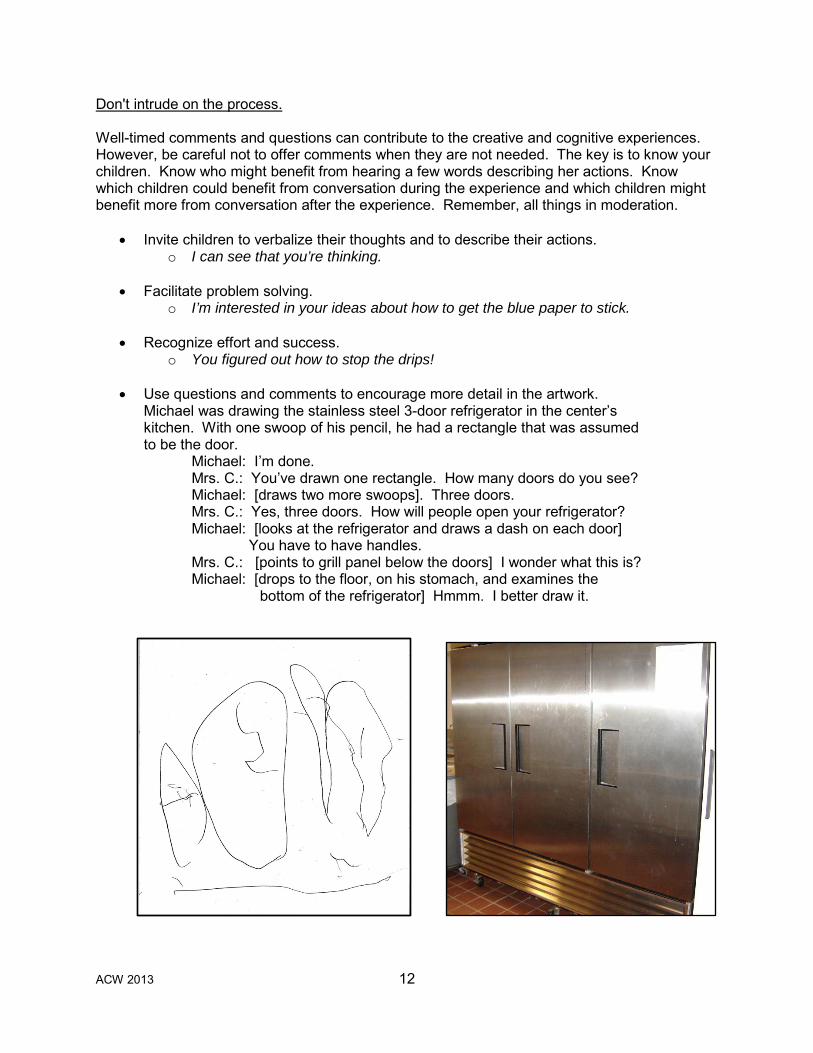
Michael was drawing the stainless steel 3-door refrigerator in the center’s kitchen. With one swoop of his pencil, he had a rectangle that was assumed to be the door.
Michael: I’m done. Mrs. C.: You’ve drawn one rectangle. How many doors do you see? Michael: [draws two more swoops]. Three doors. Mrs. C.: Yes, three doors. How will people open your refrigerator? Michael: [looks at the refrigerator and draws a dash on each door] You have to have handles. Mrs. C.: [points to grill panel below the doors] I wonder what this is? Michael: [drops to the floor, on his stomach, and examines the bottom of the refrigerator] Hmmm. I better draw it.
ACW 2013 13
Use conversation to expand vocabulary. In your comments and questions, look for opportunities to use new vocabulary words. These might be words the child may not have heard before, but can also be words the child is learning. Try to include enough context in your comment so that the child is able to connect the word and the meaning.
• That stroke shows the bristles of the paintbrush. • I see that you aligned the circles and squares in your collage. They are lined up across
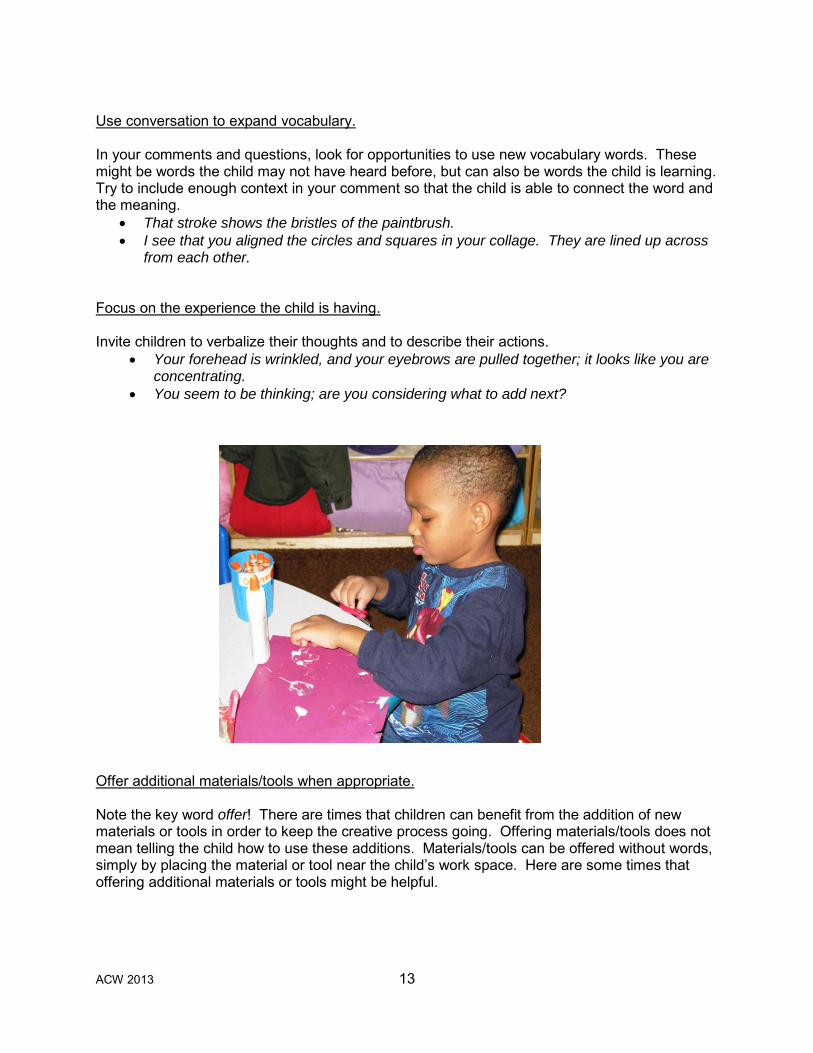
from each other. Focus on the experience the child is having. Invite children to verbalize their thoughts and to describe their actions.
• Your forehead is wrinkled, and your eyebrows are pulled together; it looks like you are concentrating.
• You seem to be thinking; are you considering what to add next? Offer additional materials/tools when appropriate. Note the key word offer! There are times that children can benefit from the addition of new materials or tools in order to keep the creative process going. Offering materials/tools does not mean telling the child how to use these additions. Materials/tools can be offered without words, simply by placing the material or tool near the child’s work space. Here are some times that offering additional materials or tools might be helpful.
ACW 2013 14
• A child is struggling with a problem during the creative process and does not seem to be finding a solution
o Here’s a stapler, if you need it. o Let me know if you need anything.
• A child appears to be stuck in the creative process, unable to move forward. This is
different from the child who needs and enjoys repetition in the experience. A child who is stuck may pause, may be ready to abandon the work, or may begin to use materials inappropriately. A comment or question can help redirect the experience toward a more satisfying outcome for the child. Note the progressive levels of the following suggestions.
o I’m wondering what you will add to your collage. o I see lots of interesting paper in the treasure basket. o I wonder which of the shapes in the treasure basket might fit into your collage. o I’m wondering what might happen if you added the red squiggle or the blue
rhombus to your collage? Conversation after the Art Experience Invite the child to recall the experience.
• How did you shape the clay into a tree? • I’m interested in how you decided to use blue paint. • I noticed your painting had drips on it while you were painting, but I don't
see those drips now. I’m curious about how it changed. Affirm the child’s effort.
• You covered the whole paper with paint; that required perseverance--you took your time and kept working until you finished.
Help the child evaluate his work.
• When you look at your picture/painting/sculpture, what do you notice? • What do you like best about your picture/paining/sculpture? Why?
Draw attention to the medium.
• I'm curious about how your work might be different if you used crayons instead of markers.
• If I wanted to create something like this, what would I need? How would I do it? [ask additional questions to help child describe the process]

ACW 2013 15
Recalling Previous Art Experiences Language is tied to memory and is part of cognitive development. Use conversation to help children recall their art experiences when looking at work that was completed a week ago, a month ago, or longer. Recalling experiences can also occur when looking at photographs of the child at work.
• What do you remember about making that sculpture? • Do you remember when Jill painted that picture? [when looking at another child’s work
or photograph]
Encourage children to think about what they learned during the experience.
• What is something you want to remember about this the next time you are painting at the easel?
• What was different about painting on the floor?
Introduce new vocabulary.
• I'm trying to decide if that blue would be called turquoise or azure.
ACW 2013 16
What not to say to children about their art? Don’t say, “What is it? What did you make? What are you painting?”
• Questions such as these imply that the child’s artwork must be something. It’s true that many creative experiences represent things, the child’s art may be an expression of emotion or may be an investigation of the materials used.
• These questions put the child on the spot and feel like a test. Children (and adults) seldom respond well in these situations.
• If the child was intended for the artwork to represent something, these questions communicate failure. The adult was not able to see what the child could see in the artwork.
Don’t say, “Tell me about your picture.” Most of us know not to look a child’s artwork and ask, “What is it?” Instead, we have learned to say, “Tell me about it.” Now we know that the child may not know what to tell us; “Tell me about your picture,” is not the best strategy. It is better to make a comment that initiates a conversation about the process or the finished work, and then wait for the child’s response.
• I see a lot of red in this corner. Wait for child's response.
• I'm interested in this line--it starts out straight, then changes to swirly, and then straight again. Wait for child's response.
• You used crayons, markers, and colored pencils. Wait for child's response.
One preschool teacher recalls an experience she had as a first grader. She had painted a picture that included a tree, a flower, and a person. Her teacher chose her picture from all the first grade pictures to be shown at the upcoming PTA meeting.
The child proudly arrived backstage on the night of the meeting. She was told to carry her picture to the middle of the stage and then tell about her picture. Panic set in. The child looked the painting, which had been completed more than a week ago. Fortunately, she was able to think fast and told the parents and teachers in the gym, “This is a picture of a boy walking through the woods.” Everyone laughed, and the child was puzzled.
Much later the child understood that the person in the painting was clearly a girl with long hair and a dress. She recalls feeling embarrassed about the incident.
ACW 2013 17
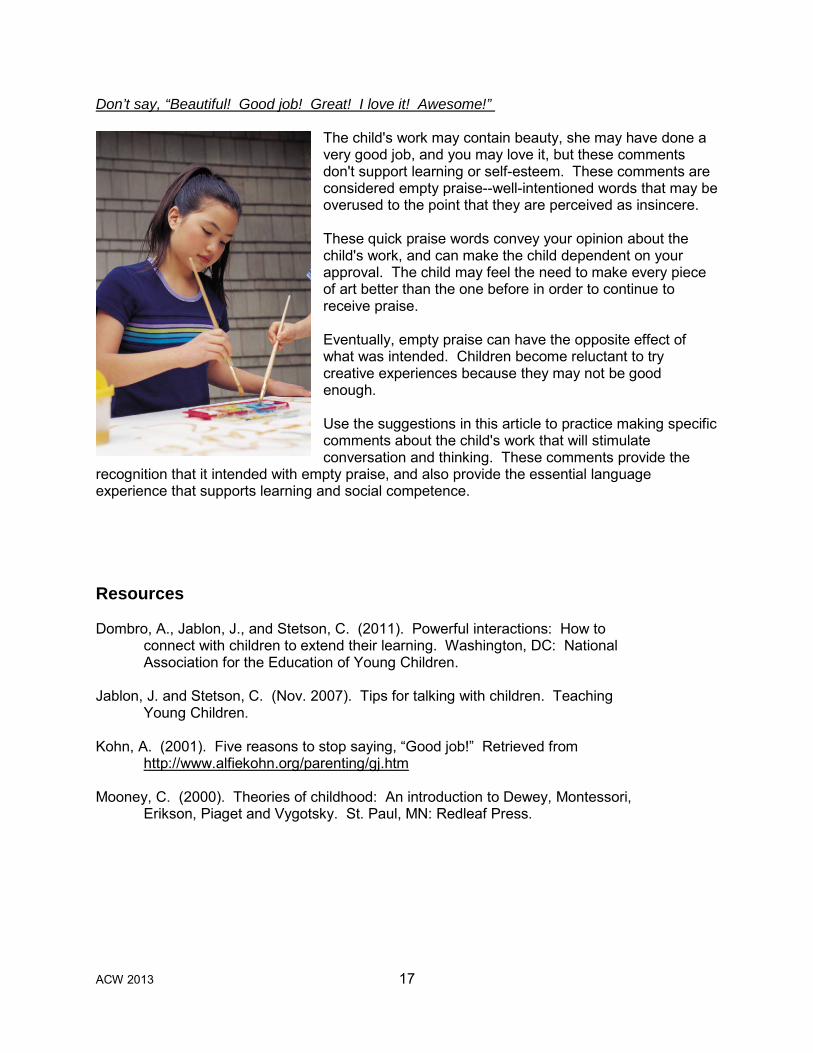
Don’t say, “Beautiful! Good job! Great! I love it! Awesome!”
The child's work may contain beauty, she may have done a very good job, and you may love it, but these comments don't support learning or self-esteem. These comments are considered empty praise--well-intentioned words that may be overused to the point that they are perceived as insincere. These quick praise words convey your opinion about the child's work, and can make the child dependent on your approval. The child may feel the need to make every piece of art better than the one before in order to continue to receive praise. Eventually, empty praise can have the opposite effect of what was intended. Children become reluctant to try creative experiences because they may not be good enough. Use the suggestions in this article to practice making specific comments about the child's work that will stimulate conversation and thinking. These comments provide the
recognition that it intended with empty praise, and also provide the essential language experience that supports learning and social competence. Resources Dombro, A., Jablon, J., and Stetson, C. (2011). Powerful interactions: How to connect with children to extend their learning. Washington, DC: National Association for the Education of Young Children. Jablon, J. and Stetson, C. (Nov. 2007). Tips for talking with children. Teaching Young Children. Kohn, A. (2001). Five reasons to stop saying, “Good job!” Retrieved from http://www.alfiekohn.org/parenting/gj.htm Mooney, C. (2000). Theories of childhood: An introduction to Dewey, Montessori, Erikson, Piaget and Vygotsky. St. Paul, MN: Redleaf Press.
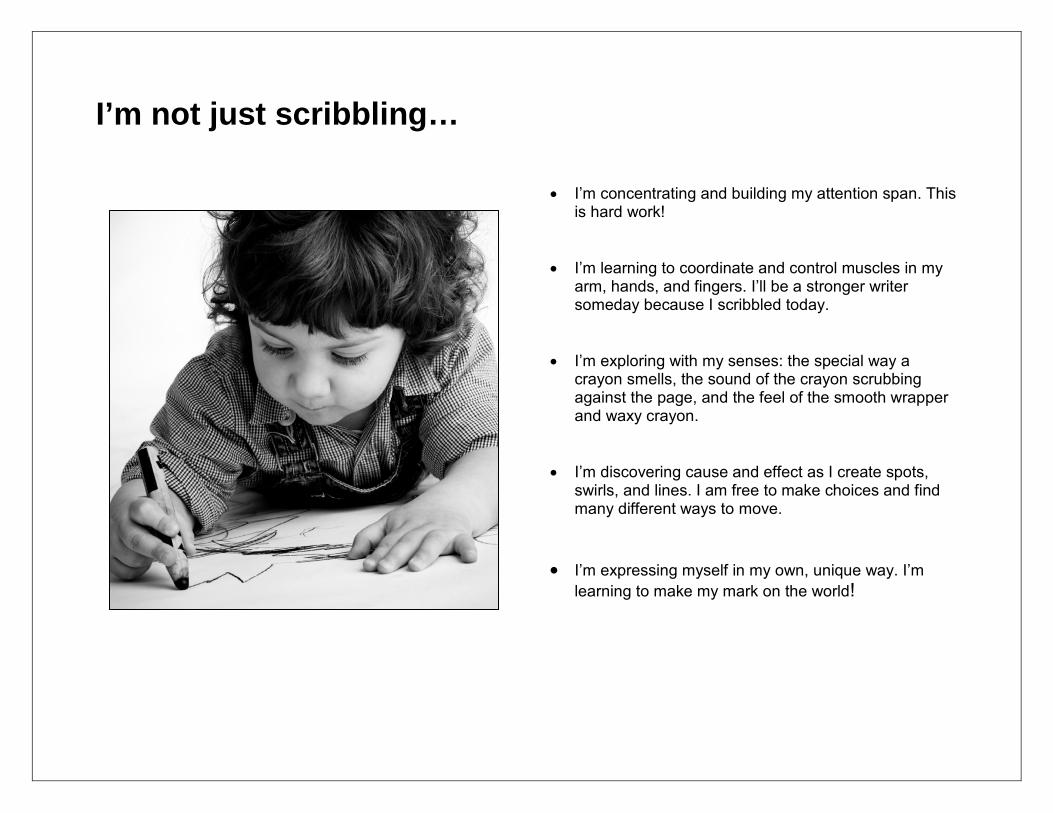
I’m not just scribbling…
• I’m concentrating and building my attention span. This is hard work!
• I’m learning to coordinate and control muscles in my arm, hands, and fingers. I’ll be a stronger writer someday because I scribbled today.
• I’m exploring with my senses: the special way a crayon smells, the sound of the crayon scrubbing against the page, and the feel of the smooth wrapper and waxy crayon.
• I’m discovering cause and effect as I create spots, swirls, and lines. I am free to make choices and find many different ways to move.
• I’m expressing myself in my own, unique way. I’m learning to make my mark on the world!
ACW 2013 19
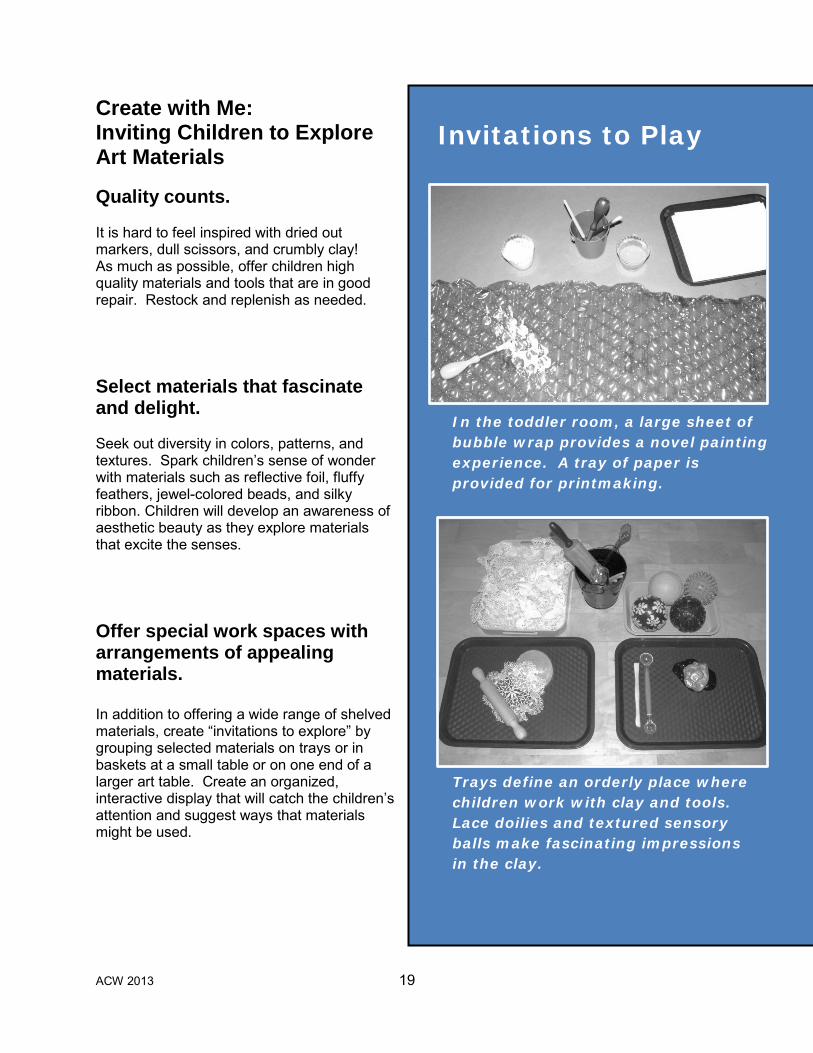
Create with Me: Inviting Children to Explore Art Materials Quality counts. It is hard to feel inspired with dried out markers, dull scissors, and crumbly clay! As much as possible, offer children high quality materials and tools that are in good repair. Restock and replenish as needed. Select materials that fascinate and delight. Seek out diversity in colors, patterns, and textures. Spark children’s sense of wonder with materials such as reflective foil, fluffy feathers, jewel-colored beads, and silky ribbon. Children will develop an awareness of aesthetic beauty as they explore materials that excite the senses. Offer special work spaces with arrangements of appealing materials. In addition to offering a wide range of shelved materials, create “invitations to explore” by grouping selected materials on trays or in baskets at a small table or on one end of a larger art table. Create an organized, interactive display that will catch the children’s attention and suggest ways that materials might be used.
Invitations to Play
In the toddler room, a large sheet of bubble wrap provides a novel painting experience. A tray of paper is provided for printmaking.
Trays define an orderly place where children work with clay and tools. Lace doilies and textured sensory balls make fascinating impressions in the clay.
ACW 2013 20
Inspire fresh interest by grouping materials creatively. Old, familiar materials captivate children’s attention again when they are paired in expected ways. Possibilities include:
• Tempera paints or liquid watercolors with “alternative” applicators, such as rollers, clean fly swatters, bottle brushes, forks, or potato mashers.
• Clay or homemade play dough with unexpected items such as golf tees, floral glass marbles, or buttons and rick rack. Children can press the materials into the dough/clay to create designs.
• Chalk with black paper
or textured materials, such as corrugated cardboard or burlap fabric.
• Paper taped to the
underside of a table so that children can lie on the floor underneath to “draw upside down”.
Trays create an organized space where children work with clay using a variety of wooden tools. Lace doilies and textured sensory balls make interesting impressions in the clay.
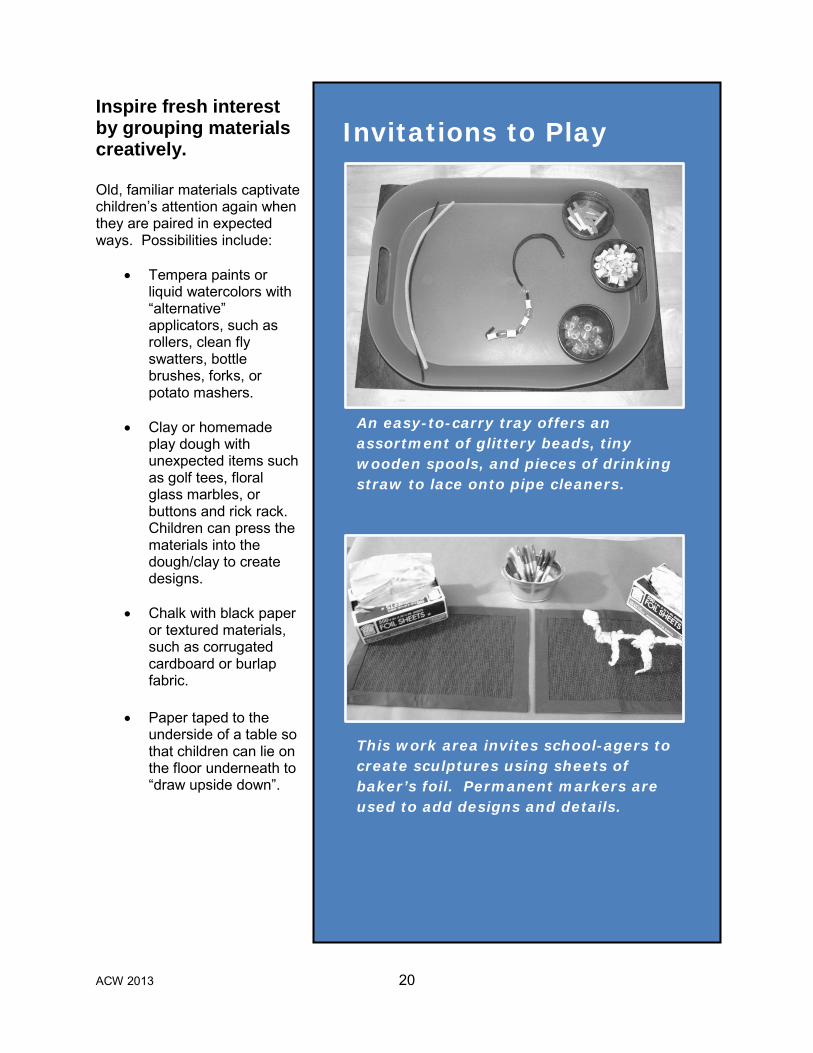
Invitations to Play
An easy-to-carry tray offers an assortment of glittery beads, tiny wooden spools, and pieces of drinking straw to lace onto pipe cleaners.
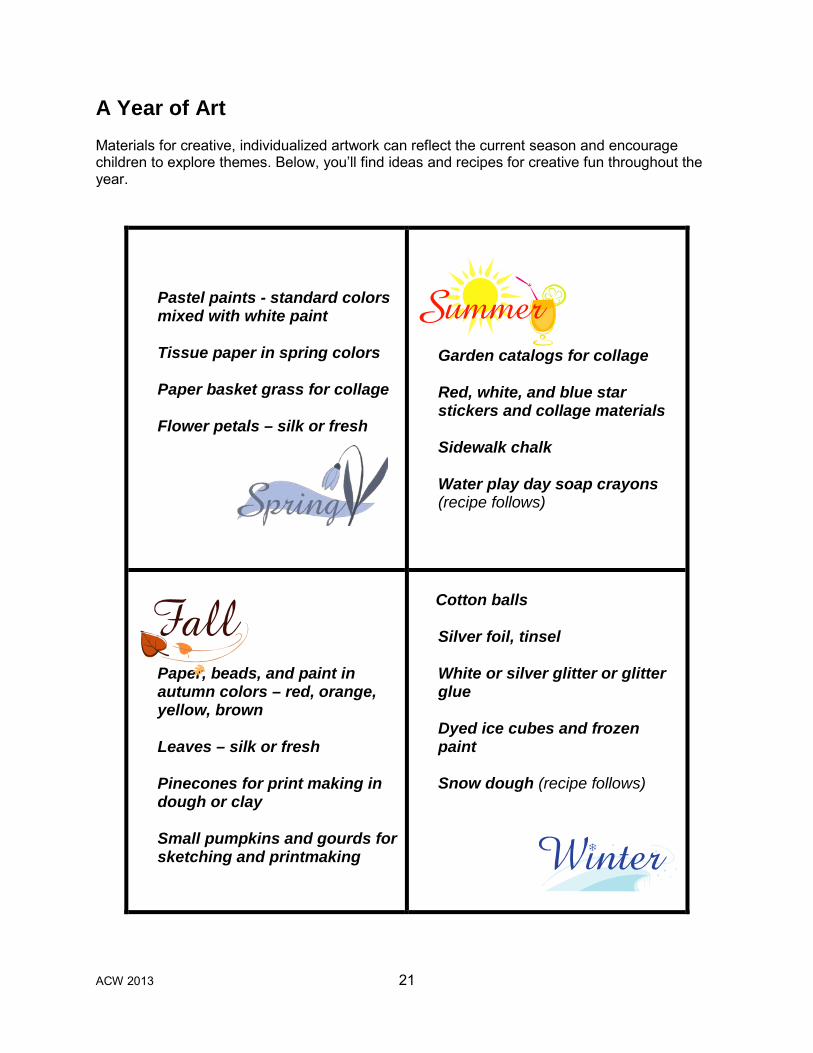
This work area invites school-agers to create sculptures using sheets of baker’s foil. Permanent markers are used to add designs and details.
ACW 2013 21
A Year of Art Materials for creative, individualized artwork can reflect the current season and encourage children to explore themes. Below, you’ll find ideas and recipes for creative fun throughout the year.
Pastel paints - standard colors mixed with white paint
Tissue paper in spring colors
Paper basket grass for collage
Flower petals – silk or fresh
Garden catalogs for collage Red, white, and blue star stickers and collage materials Sidewalk chalk Water play day soap crayons (recipe follows)
Paper, beads, and paint in autumn colors – red, orange, yellow, brown Leaves – silk or fresh Pinecones for print making in dough or clay Small pumpkins and gourds for sketching and printmaking
Cotton balls
Silver foil, tinsel White or silver glitter or glitter glue Dyed ice cubes and frozen paint Snow dough (recipe follows)
ACW 2013 22
Soap Crayons for Water Play Day Kids can use these crayons to draw on sidewalks, walls, or even themselves. Wash away with sprinklers or hose when finished playing. Ingredients:
• 1 bar Ivory soap • Warm water • Washable liquid watercolors or food coloring
Using a cheese grater or food processor, grate the bar of soap. Add the water a tablespoon at a time, stirring after each addition, until you have a thick dough. You’ll need about ¼ cup of water per cup of shredded soap. Stir in liquid watercolor paint or a few drops of food coloring to tint the soap mixture. If using food coloring, only use a little bit; if you use too much, children’s hands will be stained. Knead until dough is smooth and colors are evenly mixed. Add a little more water or grated soap if needed. Press the soap mixture into ice cube trays or use your palms to roll balls of soap into cylindrical “crayons”. Let rest overnight or until very firm. Snow Dough Sparkly, white dough may remind children of snow. It’s perfect for sculpting snowmen and making “tracks in the snow” with toy animals. Ingredients:
• 1 cup Flour • ½ cup salt • 2 tbsp oil • 2 tsp cream of tartar • 1 cup very hot water • 2 tbsp white or silver glitter
In a saucepan, combine the oil and hot water. Stir in all other ingredients. Cook over low heat until mixture is firm, about 4-5 minutes. Remove from heat and turn out onto wax paper to cool. When cool enough to handle, knead in the glitter. Store in an airtight container when not in use.
ACW 2013 23
3 Fantastically Fun Ways to Explore Colors Art and science meet as children sort, mix, and experiment with combining colors.
1. Drip-Drop Art
Get ready, get set… Protect the work area with a water-proof covering, such as a vinyl tablecloth or shower curtain, or a taped-down plastic trash bag.
Mix water and food coloring to make cups or bowls of red, yellow, and blue-tinted water. Collect a set of clean eye droppers or pipettes and a roll of plain, white paper towels. Have a permanent marker handy to write children’s names on their work, if desired.
Explore! Children use droppers to drip colored water onto a flat paper towel. The colors will spread through the absorbent towels, making large spots. Look for color mixing where spots touch one another or overlap.
Even more to explore: Geometric di dye Try folding white paper towels into tight squares or triangles. Dip a corner into a bowl of tinted water. Use fingers to gently squeeze excess water back into the bowl. Repeat until each corner has been dipped.
Place the still-folded towel aside to dry. When mostly dry, gently unfold the towel to reveal a colorful, geometric design. Can children spot the places where colors mixed?
ACW 2013 24
2. Colorful coffee filters
Get ready, get set… Protect the work area with newspaper or a water-proof covering, or provide trays for children’s work. Collect a set of large, white basket style coffee filters; washable markers; and small spray bottles filled with water. Have a permanent marker handy to write children’s names on their work, if desired.
Explore! Children use markers to create colorful designs on coffee filters. When finished, they can use spray bottles to lightly spray the entire surface of the coffee filter. Watch closely as colors run together and spread.
Even more to explore: Splitting black Did you know that many different colors are mixed together to make black ink? In this experiment, you’ll use a process called chromatography to separate the colors Use a washable black marker to draw a circle about the size of a quarter in the middle of a coffee filter. Color in the entire circle with black ink. Use a dropper or spray bottle to add a little water to the ink circle. As the water is absorbed and spreads through the coffee filter, bands of color will appear around the black ink circle. Schoolagers and older preschoolers will enjoy comparing several different brands of black markers. Does it appear that they all use the same “recipe” for black ink, or not? How can you tell?
ACW 2013 25
3. Fingerpaints on foil
Aluminum foil provides a stunning backdrop for truly hands-on color mixing in this simple project.
Get ready, get set… Tear aluminum foil into large sheets. Provide bowls and spoons for paint and paint smocks, if desired. Collect red, yellow, and blue fingerpaint or make your own:
Homemade Finger Paint
You’ll need:
1 cup cornstarch
4 tbsp sugar
4 cups cool water
½ cup clear, fragrance-free liquid dish soap
food coloring (liquid or gel)
containers with lids, such as margarine tubs or baby food jars In a saucepan, whisk together the cornstarch, sugar, and cold water. Over medium-low heat, cook and stir until thickened. Remove from heat and stir in dish soap. Let cool.
Divide paint into plastic containers and add food coloring to each container as desired. Use promptly or refrigerate until ready to use.
Science and Art Connections As children work with materials, encourage them to wonder aloud, make predictions, and notice how colors mix and materials change. Spark conversations with open-ended questions:
What have you done so far? What do you notice happening? What do you think will happen next?
Dripping paint, drying clay, and smudged chalk all provide wonderful opportunities for scientific observation!
ACW 2013 26
Explore! Children place spoonfuls of red, yellow, and/or blue paint on the foil. Use fingers and hands to mix and swirl the paint. The silver foil will shine through places where the paint is thin. Leftover paint can be stored in the refrigerator.
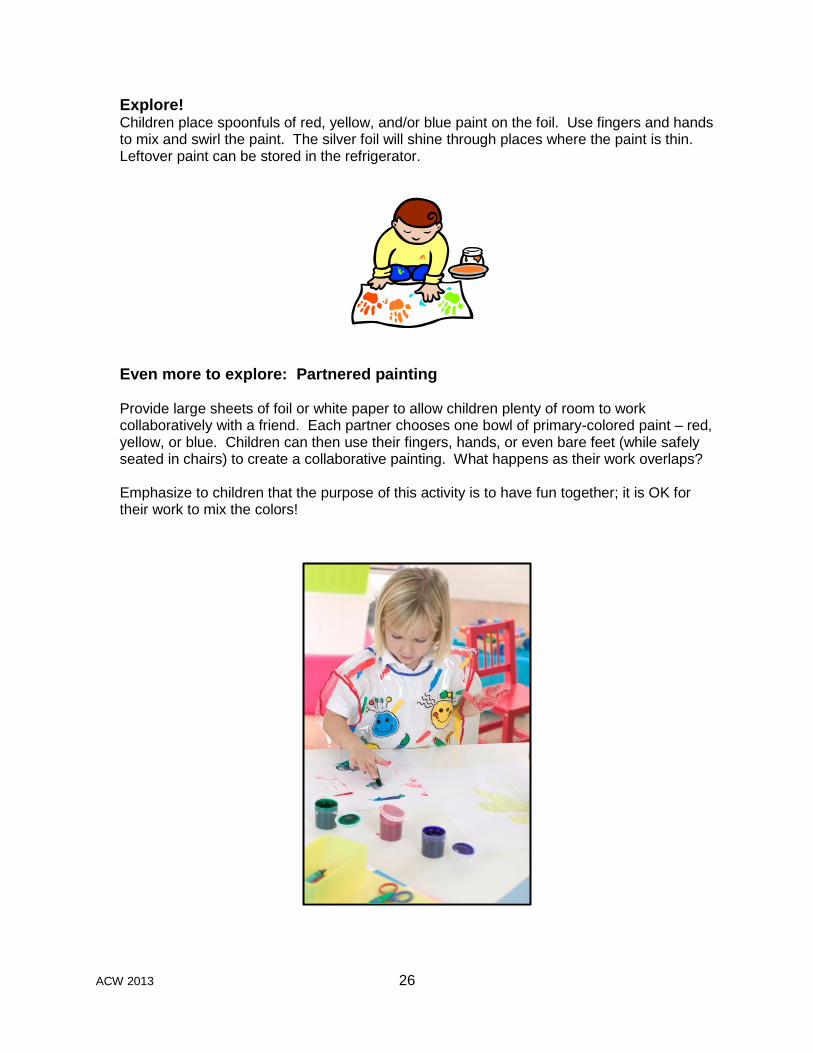
Even more to explore: Partnered painting Provide large sheets of foil or white paper to allow children plenty of room to work collaboratively with a friend. Each partner chooses one bowl of primary-colored paint – red, yellow, or blue. Children can then use their fingers, hands, or even bare feet (while safely seated in chairs) to create a collaborative painting. What happens as their work overlaps? Emphasize to children that the purpose of this activity is to have fun together; it is OK for their work to mix the colors!
ACW 2013 27
Spatter, Spot, Drip, and Drop Homemade materials for beautiful art
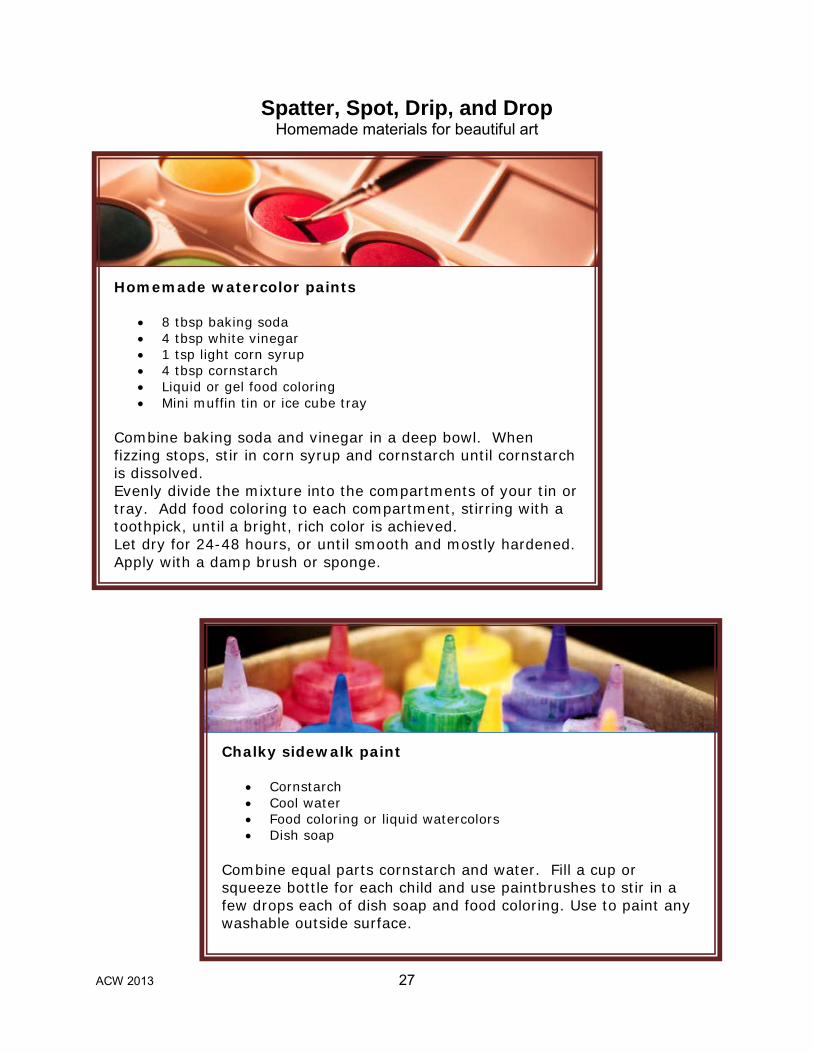
Homemade watercolor paints
• 8 tbsp baking soda • 4 tbsp white vinegar • 1 tsp light corn syrup • 4 tbsp cornstarch • Liquid or gel food coloring • Mini muffin tin or ice cube tray
Combine baking soda and vinegar in a deep bowl. When fizzing stops, stir in corn syrup and cornstarch until cornstarch is dissolved. Evenly divide the mixture into the compartments of your tin or tray. Add food coloring to each compartment, stirring with a toothpick, until a bright, rich color is achieved. Let dry for 24-48 hours, or until smooth and mostly hardened. Apply with a damp brush or sponge.
Chalky sidewalk paint
• Cornstarch • Cool water • Food coloring or liquid watercolors • Dish soap
Combine equal parts cornstarch and water. Fill a cup or squeeze bottle for each child and use paintbrushes to stir in a few drops each of dish soap and food coloring. Use to paint any washable outside surface.
ACW 2013 28
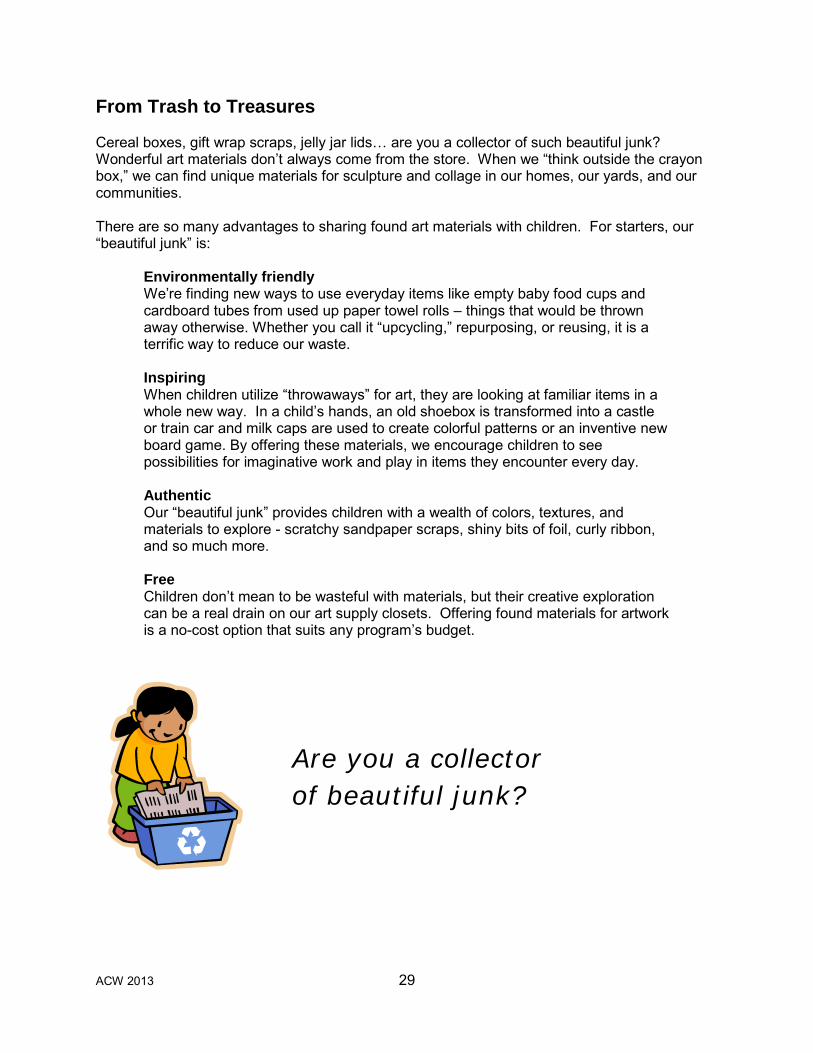
Rainbow glue
• Partially used bottles of white school glue • Old markers (not permanent) • Pliers • Tweezers
Using pliers, remove the end cap from the maker. Use tweezers to pull out the ink-soaked felt cartridge that runs the length of the inside of the marker. Carefully place this cartridge in a glue bottle and cap tightly. Let soak overnight and then shake well to mix. The longer the cartridge is remains in the glue, the brighter the color will become.
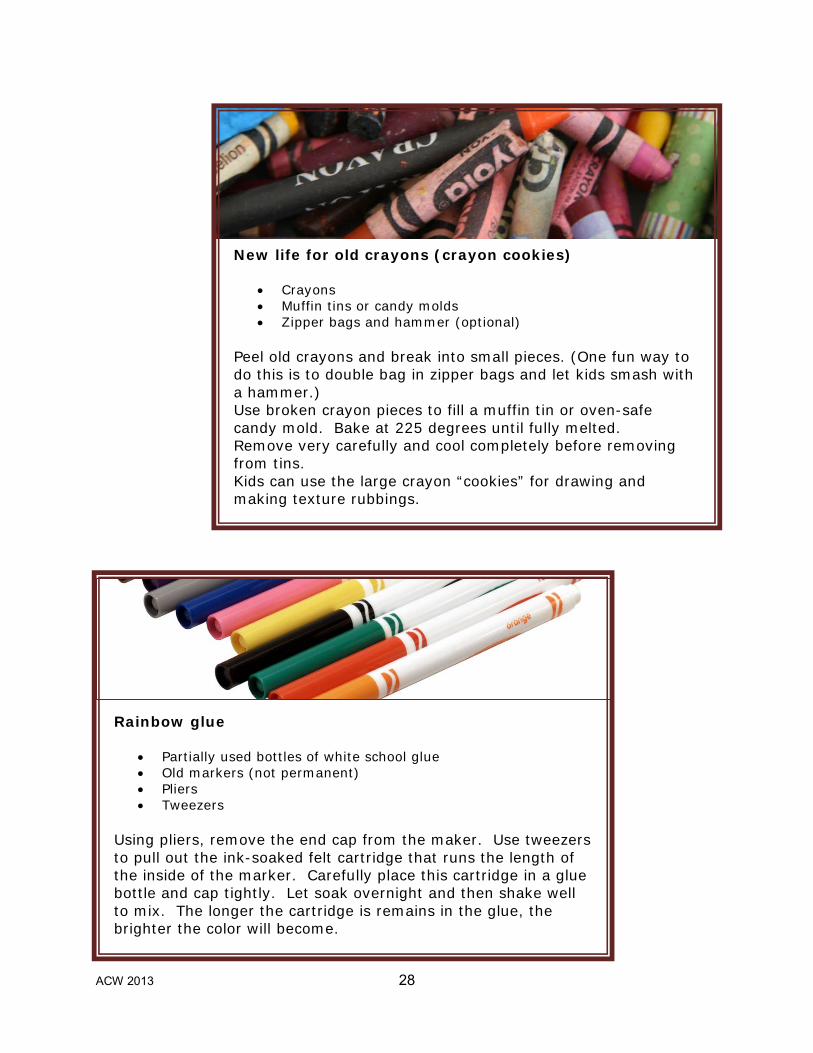
New life for old crayons (crayon cookies)
• Crayons • Muffin tins or candy molds • Zipper bags and hammer (optional)
Peel old crayons and break into small pieces. (One fun way to do this is to double bag in zipper bags and let kids smash with a hammer.) Use broken crayon pieces to fill a muffin tin or oven-safe candy mold. Bake at 225 degrees until fully melted. Remove very carefully and cool completely before removing from tins. Kids can use the large crayon “cookies” for drawing and making texture rubbings.
ACW 2013 29
From Trash to Treasures Cereal boxes, gift wrap scraps, jelly jar lids… are you a collector of such beautiful junk? Wonderful art materials don’t always come from the store. When we “think outside the crayon box,” we can find unique materials for sculpture and collage in our homes, our yards, and our communities. There are so many advantages to sharing found art materials with children. For starters, our “beautiful junk” is:
Environmentally friendly We’re finding new ways to use everyday items like empty baby food cups and cardboard tubes from used up paper towel rolls – things that would be thrown away otherwise. Whether you call it “upcycling,” repurposing, or reusing, it is a terrific way to reduce our waste. Inspiring When children utilize “throwaways” for art, they are looking at familiar items in a whole new way. In a child’s hands, an old shoebox is transformed into a castle or train car and milk caps are used to create colorful patterns or an inventive new board game. By offering these materials, we encourage children to see possibilities for imaginative work and play in items they encounter every day. Authentic Our “beautiful junk” provides children with a wealth of colors, textures, and materials to explore - scratchy sandpaper scraps, shiny bits of foil, curly ribbon, and so much more. Free Children don’t mean to be wasteful with materials, but their creative exploration can be a real drain on our art supply closets. Offering found materials for artwork is a no-cost option that suits any program’s budget.
Are you a collector of beautiful junk?
ACW 2013 30
Selecting Materials: 3 S’s for Success Use these guidelines to ensure that repurposed materials are appropriate for children’s art and/or use elsewhere in the classroom. Is it Safe? All materials should be non-toxic. Be on the lookout for sharp edges, broken pieces, splinters, and other possible hazards. When in doubt, throw it out. (Or, better yet, take it to your community recycling center!) Is it Suitable? Materials should match the ages and abilities of the children. Small objects pose a choking hazard for infants, toddlers, and children who put things in their mouths. Styrofoam and latex foam should also be avoided with infants and toddlers. Look through donated magazines and catalogs to ensure that the contents are “G-rated” before use with children. Is it Sanitary? Wash all glass and plastic food containers in warm, soapy water and sanitize with a bleach and water solution. Dairy containers, especially, can get super stinky if they aren’t cleaned well. When using cardboard tubes, paper towel tubes and gift wrap tubes are a much more sanitary choice than toilet tissue tubes. If TP-sized tubes are needed, cut longer tubes to size. Egg cartons and used meat trays pose a serious risk of exposure to Salmonella and other contaminants and should be avoided. Any container that has come in contact with raw meat or eggs should not be used in children’s play.
ACW 2013 31
Getting started with beautiful junk As valuable as found materials are to your program’s art activities, all those stray bits and pieces can turn into a random, cluttered mess if you don’t have a solid plan in place to successfully find, store, and use them. Finding materials Communicate within your program. Every program produces a lot of trash, and many of those items can be repurposed for art activities. Whether the preschool teachers need baby food jars or the school-age kids are collecting milk jugs, other groups can be a big help if they know what is needed. Post a “help wanted” note in the staff room, take time to talk with kitchen staff, or share your wish list at your program’s next staff meeting. Enlist help from home. Consider asking families to gather specific materials each month. When everyone works together, you can create a large collection in no time. Include a “collectibles” list in your newsletters or on your program’s Facebook page or blog. Sample parent letter:
Dear families, Our trash may be our children’s treasures! Many household “throwaways” can be recycled as unique art materials for our classrooms. This month, we’re collecting _____________________________________________. If you have any of these items, please bring them to school any time this month. Every little bit helps! Your clean, dry donations can be dropped off _____________________________________________. Thanks so much for your help!
ACW 2013 32
Create a designated place for families to drop off their contributions, such as a “Donation Depot” in the program lobby with a set of labeled, plastic storage bins or a drop-off box on top of the classroom cubbies. Connect with the community. Local businesses and manufacturers can be a wonderful resource for bulk materials. Make a donation request letter on program letterhead to take to merchants asking them to save their “throwaways” for your program. Examples include:
• Shoe stores - shoe boxes, tissue paper, cardboard • Home improvement stores -wallpaper samples, wood scraps, paint color swatches • Offices - Old CDs, envelopes, file folders, cardboard packing tubes • Restaurants – Corks, unused pizza and carry-out boxes • Grocery stores - Berry baskets, plastic film canisters from photo kiosks, paper sacks
Don’t forget to express gratitude for your community partners with a thank-you card from the children. Photos of children enjoying the donations can be an especially nice way to show your appreciation. Storing materials Sort collected “loose parts” by type, size, material and/or color and organize in storage containers. Remember, donated materials can also be used as storage containers. Shoeboxes, milk jugs, plastic ice cream tubs, baby wipe boxes, and coffee cans can all be repurposed as useful storage containers. Cut the top off of an old cereal box to create a magazine holder. Once everything has a place, clearly label each container so that items can be located quickly and easily, and new/leftover materials can be returned to the correct place. Designate a closet, cabinet, shelf, or lidded tub for storing the collection of art supplies and make a plan to routinely tidy the storage space to keep it clean and organized.
ACW 2013 33
Using materials with children Create a well-organized station or center where children can work with materials. This area should contain manageable, easy-to-reach containers of “loose parts”, as well as “joiners” such as tape, thick paste or glue, and modeling clay. If possible, locate the children’s work area near a sink for washing hands and provide a wastebasket within easy reach. Working with found materials will be a new experience for many children; wise adults introduce the materials gradually and provide ongoing support as children learn about the work space, safety rules, and clean-up procedures. Ideally, children are allowed to use the materials in their own, unique way with adult supervision and guidance provided to ensure safety. In time, children will learn to use materials with thoughtfulness and care. Create a drying area where children’s finished work will be protected. Consider ways to help children work on projects over the course of several days. For example, a child might create a sculpture by gluing together cardboard cartons one day, paint it the next, and embellish with stickers on the third day. For complex work like this to be possible, children must have a safe place to store their artwork throughout the day and overnight.
Did you know…
• Americans throw away about 20 billion jars every year.
• Enough plastic bottles are thrown away in the United States each year to circle the Earth four times.
• In the U.S., we throw away enough office paper and writing paper every year to build a
wall 12 feet high stretching from New York to Los Angeles.
Does your program do its part to reduce waste, recycle, and reuse for art?
ACW 2013 34
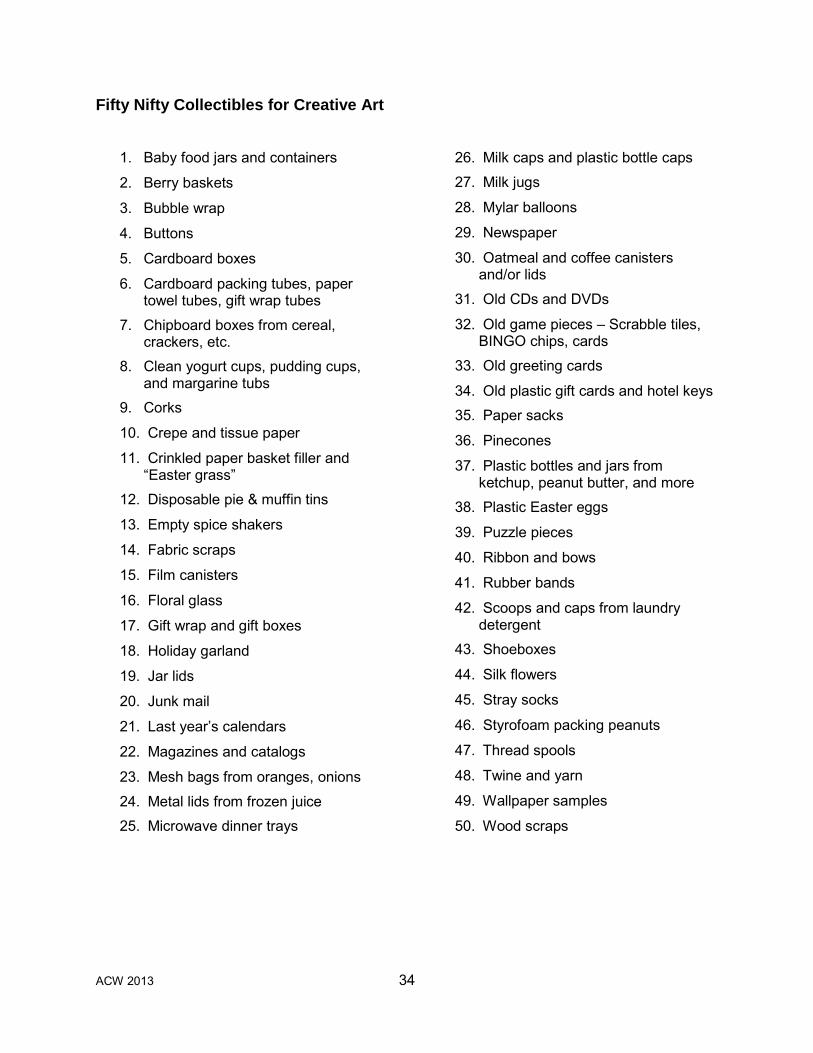
Fifty Nifty Collectibles for Creative Art
1. Baby food jars and containers
2. Berry baskets
3. Bubble wrap
4. Buttons
5. Cardboard boxes
6. Cardboard packing tubes, paper towel tubes, gift wrap tubes
7. Chipboard boxes from cereal, crackers, etc.
8. Clean yogurt cups, pudding cups, and margarine tubs
9. Corks
10. Crepe and tissue paper
11. Crinkled paper basket filler and “Easter grass”
12. Disposable pie & muffin tins
13. Empty spice shakers
14. Fabric scraps
15. Film canisters
16. Floral glass
17. Gift wrap and gift boxes
18. Holiday garland
19. Jar lids
20. Junk mail
21. Last year’s calendars
22. Magazines and catalogs
23. Mesh bags from oranges, onions
24. Metal lids from frozen juice
25. Microwave dinner trays
26. Milk caps and plastic bottle caps
27. Milk jugs
28. Mylar balloons
29. Newspaper
30. Oatmeal and coffee canisters and/or lids
31. Old CDs and DVDs
32. Old game pieces – Scrabble tiles, BINGO chips, cards
33. Old greeting cards
34. Old plastic gift cards and hotel keys
35. Paper sacks
36. Pinecones
37. Plastic bottles and jars from ketchup, peanut butter, and more
38. Plastic Easter eggs
39. Puzzle pieces
40. Ribbon and bows
41. Rubber bands
42. Scoops and caps from laundry detergent
43. Shoeboxes
44. Silk flowers
45. Stray socks
46. Styrofoam packing peanuts
47. Thread spools
48. Twine and yarn
49. Wallpaper samples
50. Wood scraps
ACW 2013 35
Putting it all together: A checklist for using beautiful junk ___ Program staff are aware of the value of providing found materials for children’s art. ___ We have a designated space to store our materials. There is a plan in place to keep this area tidy and well-organized. ___ Families have an opportunity to share reusable materials from home. We have a system in place to let them know which materials we’re collecting, and why. ___ There is a designated collection space in our classroom or lobby to allow families to quickly and easily drop off materials. ___ We’ve explored ways to connect with businesses and manufacturers in our community to gather usable materials. There is a plan in place to collect these materials and to show our appreciation for donations. ___ All donated materials are carefully checked to ensure that they are safe, sanitary, and suited to the ages and abilities of the children. ___ In our classrooms/learning spaces, we provide a special area where children can construct and create using our gathered materials. This area is well arranged and well organized. ___ Masking tape, paste, and/or other “joiners” are always available to allow children to work successfully with the materials. ___ Children are allowed to explore materials in many ways – constructing sculptures, creating collages, and painting pieces. Children’s work is unique and individualized; we do not require children to create identical craft projects. ___ Adults supervise the work area carefully, providing guidance as needed to ensure safety. Adults talk with children to facilitate planning and problem solving and invite children to tell about their creations. ___ A designated place is provided to dry artwork and store ongoing projects.
ACW 2013 36
Real Tools for Young Artists
Brush
Butter knife
Clipboard
Comb
Cotton swabs
Dough press, extruder
Dropper
Hole punch
Large embroidery needle
Mallet
Palette, mixing tray
Roller, brayer
Rolling pin Ruler, measuring tape Scissors Scraper Sculpting tools Sponge Spray bottle Squeeze bottles String Tape dispenser Weaving loom
Many household items can also have creative uses as tools for art. For example:
• Punch a hole in the center of a paper plate and place in on an old record player. As the plate spins, kids can make designs with markers, gel crayons, or paint brushes. You can create a similar effect by taping paper to a lazy susan tray.
• Place round piece of paper to the bowl of a salad spinner. Add some thin paint to the middle, put the lid on tightly, and give it a whirl!
• Use an old hair dryer to melt crayons. (Close supervision required)
ACW 2013 37
Teacher Talk: Real questions and
answers about art for infants and toddlers
Isn’t it dangerous to give art materials to infants and toddlers? I’m worried that it doesn’t seem safe. Art activities can be safe for infants and toddlers, but there are some important guidelines to remember:
• The single, most important thing that providers can do to ensure that art activities are safe is to supervise carefully! When children work with art materials, they need an adult nearby.
• All materials used with infants and toddlers should be non-toxic. Check labels on paint, chalks, markers, and glue to ensure that the product is clearly marked “non-toxic”. Small craft objects, such as small beads, pompoms, and broken crayons, should be avoided because they pose a choking hazard. Even with close supervision, it only takes a second for hands (and materials) to go in mouths!
• Loose glitter is not safe for use by – or around – infants and toddlers. The tiny flakes
can scratch eyes and even be inhaled into lungs. If you want sparkly art, glitter glue or glitter paint is a safer option!
When is the best age to begin offering art experiences for children? Just as children reach milestones for walking and talking at different ages, their readiness for, and interest in, art activities will vary. As soon as a child is able to grasp a marker, crayon, or paintbrush and touch it to the page, he/she may be ready to explore art activities, but will likely need one-on-one support at this age. Some infants enjoy dabbling in paint even sooner. Many teachers report that their children develop a strong fascination with mark making and similar art experiences around 11-12 months of age.
By the way, allowing children to observe your purposeful mark making – such as filling out their daily report forms – is a wonderful way to spark their interest in making marks of their own! Consider talking with infants and toddlers about what you’re doing when they see you use writing tools throughout the day. (Thanks to Kim Kearney for this great tip!)
ACW 2013 38
I’d like to provide art activities for my infants and toddlers, but I’m afraid of the mess – messy floors, messy tables, messy clothes, and messy kids! Any tips? Yes! Although many art activities are inherently messy, you can prepare and plan to set your children up for success! Protect your floors by offering messy activities on easy-to-clean hard floors. Or, protect carpets and rugs with a vinyl drop cloth, tablecloth, or shower curtain. Protect children’s clothing with bibs for infants or smocks for older toddlers. Talk with families ahead of time about your program’s art policies and enlist their help in sending children in play clothes – with spare clothes to change into if needed – on days when very messy projects are planned. Children make less mess when materials are easier to manage. Ways to set children up for success include:
• Taping the very young child’s paper to the page so that it does not slide around as he/she attempts to make marks.
• Using a tray to provide boundaries for clay, play dough, or paint.
• Spraying both the paper and paint tray with water when children first experiment with watercolor paints and tempera cakes. Allow color mixing; you can always rinse or wipe the trays off later!
• Preparing all needed materials ahead of time, staying near to provide support during the
activity, and having wipes or damp washcloths on-hand for a quick and easy clean up when the child is finished.
I feel like the parents expect us to send home cute crafts, like handprint and footprint “art”. They don’t seem to care about the children’s scribble pictures. What can I do to help them value their child’s artwork? The crafts that you are describing are sometimes called “parent pleasers” because families really do seem to love those cute little projects! Of course, those projects aren’t really art activities because the adult has all of the control over how they look. Helping families understand that the artistic process is more meaningful to their child than the finished product can be a challenge.
ACW 2013 39
For starters, find ways to help families understand all of the things a child is doing when she/he explores art materials in her own way. Infants and toddlers are rarely concerned with the idea of “making something to keep”; they simply enjoy the sensory and motor experience of working with the materials.
Observe a young child at work and you’ll notice how she leans down to look closely at the materials, smells them, and maybe even tastes them. She is exploring with all of her senses. Watch as she explores the different ways she can use her hands and arms: fingers and fists; small, deliberate motions and large, sweeping ones. She is experimenting with cause and effect. The finished product may look like a muddy mess, but a lot of learning took place as the child worked with the materials! Some providers have found that a video tape of infants and toddlers at work can be a wonderful way to relay this information during a parent meeting. Another way to help families value their child’s individualized artwork is to use frames when displaying children’s work in the classroom, hallway, and/or program lobby. Use real frames (without glass) or frames cut from paper. Consider posting photos of the children at work alongside their displayed artwork. What about using food for art – such as letting the babies fingerpaint with pudding? This is one of the great debates of early childhood! Some programs encourage infants and toddlers to enjoy sensory exploration, color mixing, and painting using edible ingredients such as pudding, whipped cream, or yogurt. Other programs have policies in play prohibiting the use of food for art. Let’s explore the “pros and cons” of painting with food. Benefits could include:
• Edible art products could require less supervision and be safer for very young children. Since “paints” like pudding and whipped cream are edible, there is less worry about children putting their messy hands in their mouths.
• Food-based “paints” may be affordable and readily available. Non-toxic art supplies can be expensive and hard to find. Products like pudding could offer an inexpensive, convenient alternative.
On the other hand, risks associated with using food for art could include:
• We could be sending mixed messages to children. Is it OK to eat paint? Is appropriate to spread food around? This could be especially confusing to children from homes with strict rules about playing with food.
ACW 2013 40
• Using food for art could be considered wasteful, especially when some families do not have enough to eat.
• Food-based “paints” can pose a health and safety concern. Dried yogurt or pudding
“paintings” can grow bacteria or mold, and young children may try to eat the food substance long after it is safe to do so. There have also been reports of artwork using food attracting pests, such as ants and mice.
Ultimately, each program has a choice to make about whether or not to use food for art and sensory experiences. Consider the possible advantages and concerns carefully as you make this decision. My toddlers love play dough! I think they would spend all day at the play dough table if I let them. What can I do to make play dough time a learning time? It is wonderful that you are considering ways to help your children build skills as they play! We know that meaningful, concrete experiences – such as your toddlers’ work at the play dough table – are the most appropriate and effective ways for young children to learn. Here are some ways that you can enrich and expand their experiences:
• Offer different tools and materials to explore with the play dough, such as:
o toy cars or animals or large seashells for print making
o popsicle sticks for sticking into the dough and drawing designs
o a variety of tools, such as plastic scissors, rolling pins, and butter knives
o small containers to fill and empty, such as ice cube trays, muffin tins, candy molds, and small metal tins from candy or breath mints.
• Experiment with different styles and textures of dough, including both thick and thin homemade play dough, play dough mixed with sand, non-toxic modeling clay, and even real clay.
ACW 2013 41
• Work and play alongside children. Help children build vocabulary and understanding of concepts by using specific words to describe their actions and experiences. For example:
o “You took that large ball of red play dough and tore it apart into lots of smaller pieces. Would you like to count them?”
o “Tashia is patting her play dough to make it very flat. What do you think she’ll do next?”
o “This clay feels wet and slippery, doesn’t it? It reminds me of mud.” o “I saw Jacob roll the truck across his play dough. Look – it made tire tracks!”
• Provide plenty of time for children to work at the play dough table and opportunities to try
the same activities over and over again. Young children learn and expand their understanding through repetition.
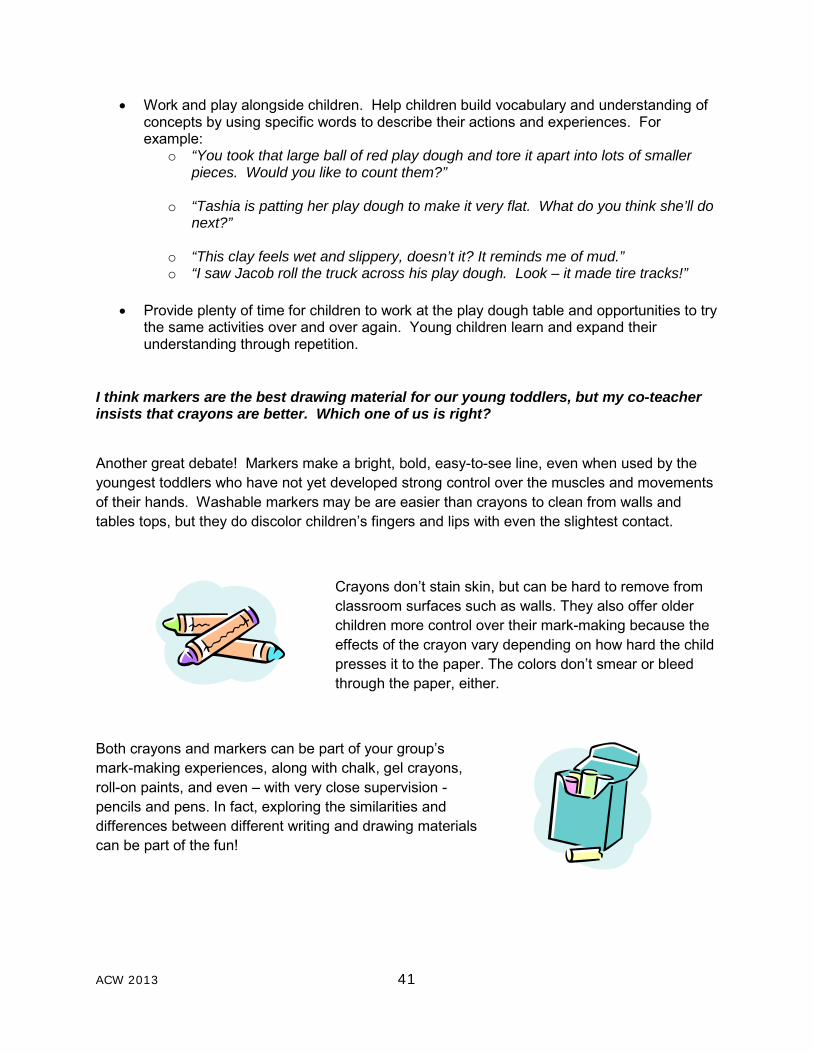
I think markers are the best drawing material for our young toddlers, but my co-teacher insists that crayons are better. Which one of us is right?
Another great debate! Markers make a bright, bold, easy-to-see line, even when used by the youngest toddlers who have not yet developed strong control over the muscles and movements of their hands. Washable markers may be are easier than crayons to clean from walls and tables tops, but they do discolor children’s fingers and lips with even the slightest contact.
Crayons don’t stain skin, but can be hard to remove from classroom surfaces such as walls. They also offer older children more control over their mark-making because the effects of the crayon vary depending on how hard the child presses it to the paper. The colors don’t smear or bleed through the paper, either.
Both crayons and markers can be part of your group’s mark-making experiences, along with chalk, gel crayons, roll-on paints, and even – with very close supervision - pencils and pens. In fact, exploring the similarities and differences between different writing and drawing materials can be part of the fun!
ACW 2013 42
’d like some new ideas to try with my group. Any suggestions?
Sure! It is so valuable for early childhood professionals to network with one another to share activities and ideas. Here are three simple art activities for infants and toddlers.
Sticky paper collages
Use masking tape to attach a large piece of clear contact paper to your table, sticky side up. Provide a basket of materials for children to press to the paper, such as paper shapes, leaves, and craft feathers. After the paper is filled – or when children lose interest – cover with a second sheet of contact paper to seal.
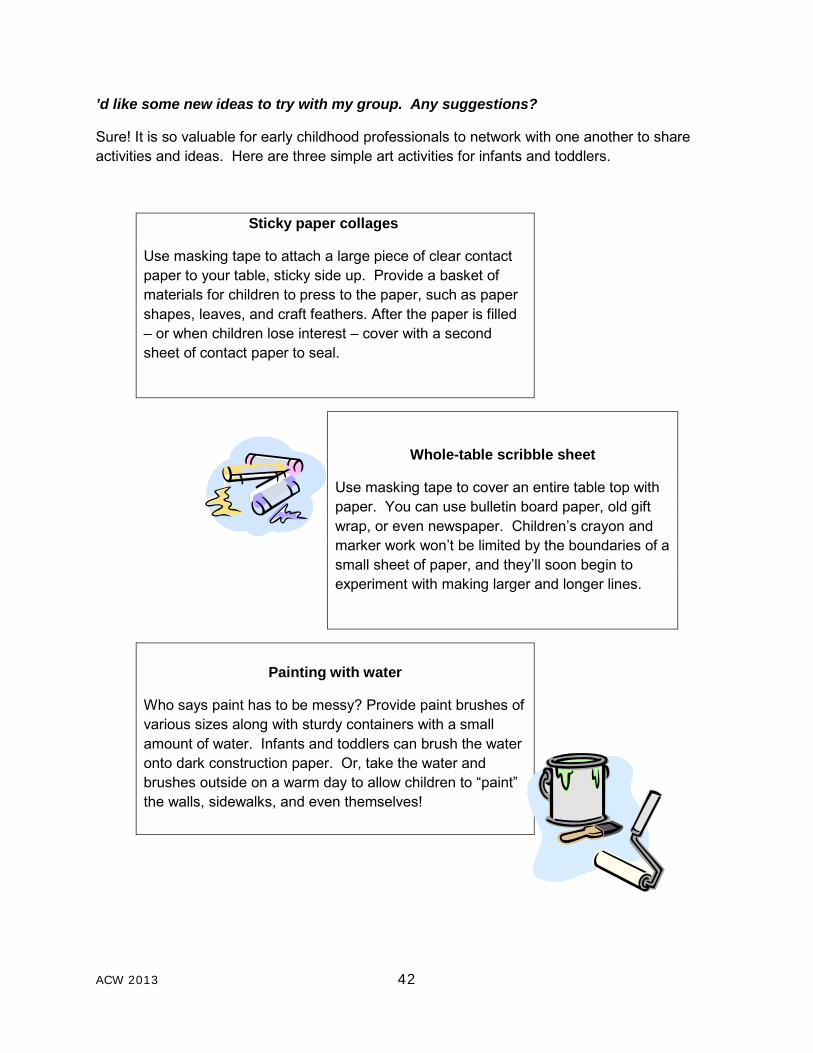
Whole-table scribble sheet
Use masking tape to cover an entire table top with paper. You can use bulletin board paper, old gift wrap, or even newspaper. Children’s crayon and marker work won’t be limited by the boundaries of a small sheet of paper, and they’ll soon begin to experiment with making larger and longer lines.
Painting with water
Who says paint has to be messy? Provide paint brushes of various sizes along with sturdy containers with a small amount of water. Infants and toddlers can brush the water onto dark construction paper. Or, take the water and brushes outside on a warm day to allow children to “paint” the walls, sidewalks, and even themselves!
ACW 2013 43
Teacher Talk: Real questions and answers about art
with school-age kids
Our afterschool program has a strong academic focus. Parents appreciate when we plan activities that help their kids do better in school. How can I justify our art activities? Americans for the Arts, a non-profit organization promoting art education, lists the following academic benefits of artistic exploration for children and youth:
• Stimulates and develops the imagination and refines creative thinking skills.
• Strengthens problem-solving and critical-thinking skills, adding to overall academic achievement and school success.
• Develops a sense of craftsmanship, quality task performance, and goal-setting—skills needed to succeed in the classroom and beyond.
• Teaches children life skills such as developing an informed perception; articulating a vision; learning to solve problems and make decisions; building self-confidence and self-discipline; developing the ability to imagine what might be; and accepting responsibility to complete tasks from start to finish.
• Nurtures important values, including team-building skills; respecting alternative
viewpoints; and appreciating and being aware of different cultures and traditions. For more information, including resources that can be shared with families, visit www.artsusa.org .
ACW 2013 44
Many of the kids in our schoolage group don’t want to join in planned art activities because they say they aren’t “good” at art. What can I do to increase participation? Very young children draw and paint for the sheer joy of exploring the materials; they really don’t worry about what anyone thinks of their work. Sadly, as kids grow into the middle elementary years and beyond, they begin to compare their work to others. They may fret that someone will criticize their work or make fun of what they have created. It is not uncommon for kids to become self-conscious and hesitant, unwilling to draw and paint in a setting where someone might look over their shoulder. Professionals working with kids ages 8 and up in out-of-school time environments - such as afterschool clubs, summer day camps, and youth centers - are encouraged to seek ways to create a safe, judgment-free setting for working with art materials.
• Create a culture of caring. Help kids develop a sense of camaraderie and learn to express themselves without being deliberately unkind or hurtful to others.
• Pass up whole-group activities that require kids to sketch, draw, or sculpt something specific. For example, avoid asking all of the kids to draw pictures of their families or create identical origami swans. Especially during the first few weeks of the program, plan activities that allow every participant to find success without a predetermined finished product that could lead kids to worry, “Is mine as good as yours?”. Possibilities include:
o Tie dye o Abstract paint activities such as “spatter art” or paint pendulums o Magazine collages o Printmaking with geometric stamps o Many ways to explore a theme. For example, instead of having everyone draw a
picture of their favorite animal, give a choice of drawing, painting, sculpting, or writing about the topic
Give kids the “power to pass” on whole group art activities. Offer alternatives, such as reading books or working on a jigsaw puzzle, for kids who don’t wish to join in a planned activity. Believe it or not, kids are often more willing to participate when they feel empowered to make the choice. Rather than feeling defensive about being forced to do something they don’t feel comfortable with, they may feel safe enough to try something new.
ACW 2013 45
• Avoid competitive art activities, such as coloring contests where ribbons or prizes are
awarded to the best work.
• If possible, create a free choice art area where kids can work with a wide range of materials in their own, unique way. Give kids the freedom to determine the medium and the subject matter, and include activities that will draw “reluctant artists” over to “fool around” with materials without feeling pressured to create a final product.
• Work with art materials alongside kids, modeling a positive attitude. Avoid saying things like, “My drawing looks terrible” or “I’m no good at weaving.” Instead, try statements such as, “I’ve never tried to draw a motorcycle before, but I’ll try” and “I really like the way this clay feels and smells.”
• As you talk with kids about their art, avoid making judgment statements such as, “That’s really pretty” or “You did a good job”. Instead, comment on colors, textures and lines with statements such as “You’ve made such an intricate design. Did you use an ink pen to make these lines?” or “Look how the different shades of blue paint blend along the edge of the page.” Not only are you helping kids build art-related vocabulary, but they’ll appreciate that you are taking the time to really at their work with them. Try asking kids to reflect on their own work in a positive way with questions such as, “What did you like best about working with the glitter glue?”
By setting a safe, positive tone, selecting activities carefully, and offering choices, you can create a place where schoolagers gain confidence, have fun, and find success with art activities. The kids in my first and second grade group adore their art corner, but they make such a mess. Glitter, paint, and glue get everywhere! I’m wondering if I should take away the messy materials. Who is responsible for cleaning up the art area? If you’re doing all of the work, there’s no real motivation for kids to be mindful of messes. Empower kids to be responsible for their own clean-up tasks with a nearby wastebasket, hand brooms and dust pans, washcloths or sponges for wiping down tables, and maybe even a handheld mini vacuum.
ACW 2013 46
Gigantic jugs of paint and jumbo canisters of glitter can be hard for kids to manage without spills. If your program buys art supplies in bulk, portion materials out into smaller containers, saving the super-sized containers for refills. Work trays are another way to provide boundaries for moist materials like paint, clay, and glue. Of course, some messiness is part of the fun, and part of using the materials creatively. Minimize the damage done by protecting floors with a drop cloth and the kids’ clothes with smocks. Old, adult-sized t-shirts make great smocks for kids this age.
I’ve found some really cool project ideas online that the kids would love. Some of them call for tools like a glue gun, an iron, and a hammer. Is that safe? When schoolage activities include materials such as these, supervision and guidance are crucial. Consider how you might introduce the materials to kids in a way that will help them understand important safety risks and rules. It cannot be assumed that young people will know how to use new tools correctly; these skills must be modeled and taught. Ideally, a designated adult will be available to oversee risky activities, staying nearby and focused on supervision throughout. It is nearly impossible to ensure safety if a single adult is tasked with supervising potentially dangerous tools, meeting families to sign kids out, helping with homework, and supervising other play activities. Therefore, it is advisable to introduce tools only when several adults are present. The youngest and most impulsive children, especially, will need very careful supervision and some activities may not be suitable for them or should be adapted for safety. For example, using a low-temperature warming tray to melt crayons is a manageable activity for most kindergarten groups, but using a hot iron to melt crayons is probably too risky. Any activity selected for mixed-age groups should be safe for every member of the group, with adult support provided as needed. When adults are attuned to the abilities of the children and make careful, concrete plans to introduce new materials and supervise carefully, schoolage kids can learn to manage art tools successfully.

ACW 2013 47
The kids in my K-4 program love coloring books, but one of my co-teachers told me that coloring books are bad for kids. Are they? Coloring books are the subject of much discussion and dispute among both educators and artists. Let’s look at the pros and cons.
Advantages of coloring books Disadvantages of coloring books Skill building For younger kids, coloring activities may build fine motor skills, persistence, direction following, and attention to detail as kids work carefully to stay within the lines.
Skill limiting After exposure to the “perfect” drawings in coloring books, kids may become less willing to draw their own pictures because they feel their own work isn’t good enough. In addition, some kids become upset when they can’t color perfectly, crumpling their page in frustration when an errant crayon mark strays outside the lines.
Appealing Affordable, easy-to-find material. Kids are especially attracted to coloring books that feature favorite cartoon and movie characters.
Highly commercial Repeated exposure to marketed characters may inhibit kids from generating their own, unique themes for play, art, and storytelling. Some commercial coloring books feature questionable content, such as fighting and other violence and highly stereotypical gender roles.
Comforting Kids who enjoy coloring describe it as relaxing. Pre-drawn pages are a stress free, low risk activity. Because coloring doesn’t require much thought, kids can work on the pages while chatting with friends. Some older kids find coloring to be nostalgic fun. For our over-scheduled schoolagers, a little “down time” can be a good thing.
Passive Coloring doesn’t require much thought. It doesn’t stimulate creative thinking, reasoning, or problem solving in the way that open-ended drawing materials can.
Easy “time filler” The guest speaker from the wildlife preserve calls to tell you she is running late for her presentation with the kids. Passing around color sheets of local wildlife can fill the waiting time until her arrival, keeping kids occupied and “on topic” with little mess.
Overused Color sheets seem to be everywhere – school, Sunday School, afterschool, even in restaurants. Kids may grow tired of them and those who don’t like them may “act out” in frustration. These kids may scribble and scrub to hurriedly complete the task but not find any interest in the work or refuse to color at all.
Color choices Some kids have fun picking colors and making the work their own. How about purple trees, neon pink squirrels, and a bright green sky?
Unimaginative Some kids feel obligated to use the “right” colors. Even when kids make creative color choices, coloring books still aren’t especially creative. They may teach kids that there is one “right” way to represent something, and there’s not much room for originality.
ACW 2013 48
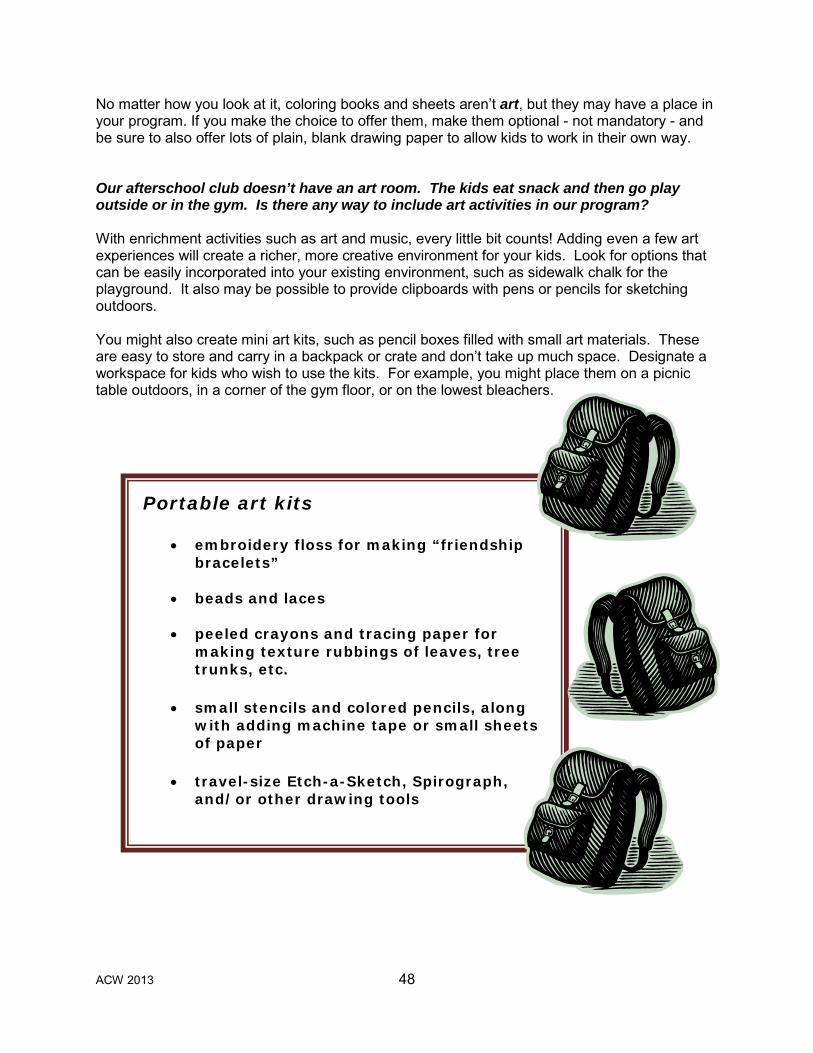
No matter how you look at it, coloring books and sheets aren’t art, but they may have a place in your program. If you make the choice to offer them, make them optional - not mandatory - and be sure to also offer lots of plain, blank drawing paper to allow kids to work in their own way. Our afterschool club doesn’t have an art room. The kids eat snack and then go play outside or in the gym. Is there any way to include art activities in our program? With enrichment activities such as art and music, every little bit counts! Adding even a few art experiences will create a richer, more creative environment for your kids. Look for options that can be easily incorporated into your existing environment, such as sidewalk chalk for the playground. It also may be possible to provide clipboards with pens or pencils for sketching outdoors. You might also create mini art kits, such as pencil boxes filled with small art materials. These are easy to store and carry in a backpack or crate and don’t take up much space. Designate a workspace for kids who wish to use the kits. For example, you might place them on a picnic table outdoors, in a corner of the gym floor, or on the lowest bleachers.
Portable art kits
• embroidery floss for making “friendship bracelets”
• beads and laces
• peeled crayons and tracing paper for making texture rubbings of leaves, tree trunks, etc.
• small stencils and colored pencils, along with adding machine tape or small sheets of paper
• travel-size Etch-a-Sketch, Spirograph, and/or other drawing tools
ACW 2013 49
During our schoolage summer program, we do a daily craft project with the kids. The younger kids have fun with it, but the kids in the 4th – 6th grade group seem really bored. What can I do to make their art and craft activities more meaningful? While some older kids enjoy most any craft, others don’t see the point of arbitrary crafts. Plus, after all their years in preschool and afterschool care, your kids may have already “been there and done that”. The handprint turkeys and paper plate crafts seem like “little kid stuff” and just don’t appeal to them anymore. How do you think your group might respond to activities especially planned to allow them to delve into more complex and authentic art experiences? Consider offering a choice of clubs or projects for in-depth, ongoing exploration of topics such as:
• Photography • Cartooning/Manga • Computer animation • Knitting and/or weaving • Clay work
Collaborative projects, such as working together to paint a large mural, can also be popular with kids this age. Not sure where to start? Ask your kids to tell you about their interests! Here are some other resources that are especially suited for sharing art with older schoolagers. Art Lab for Kids by Susan Schwake and Ranier Schwake, Quarry Books, 2012 Creative Doodling and Beyond by Stephanie Corfee, Walter Foster, 2011 The Great Clay Adventure by Ellen Kong, Davis, 1999 The Kids’ Guide to Digital Photography by Jenni Bidner, Sterling, 2011 The Klutz Book of Animation: Everything You Need to Make Your Own Stop Motion Movies by Nicholas Berger, Klutz, 2010
ACW 2013 50
Cameras and Kids Sharing Photography with Children
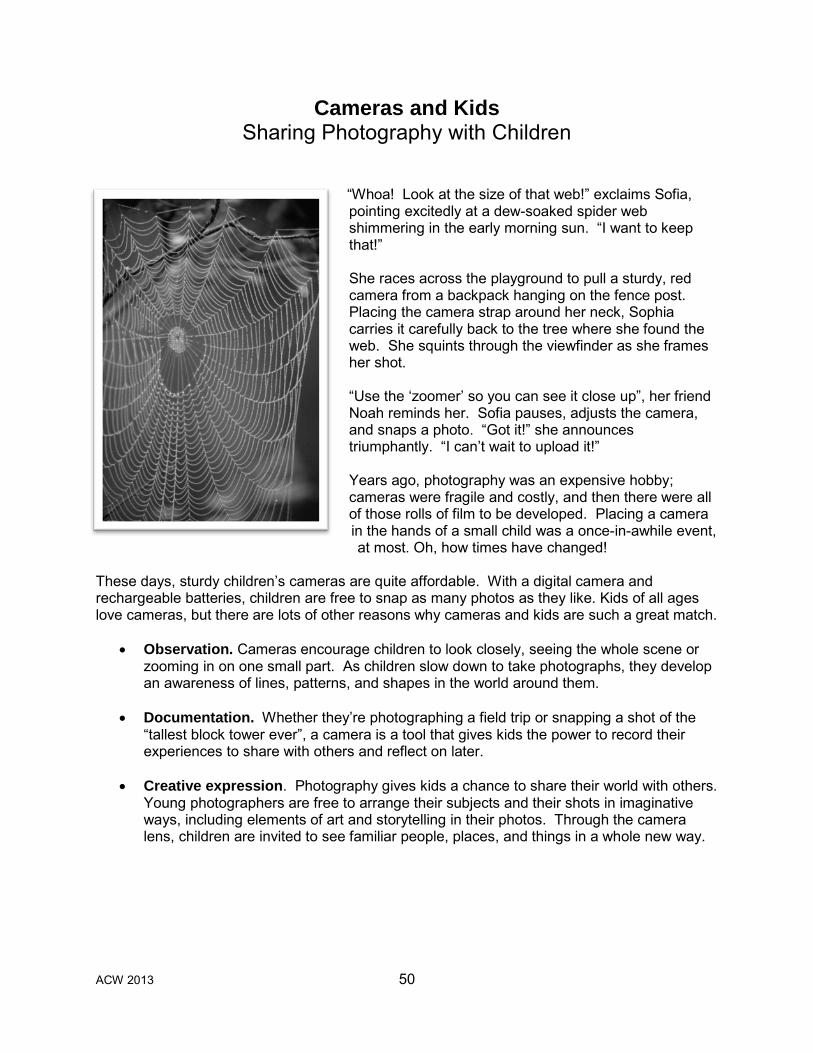
“Whoa! Look at the size of that web!” exclaims Sofia, pointing excitedly at a dew-soaked spider web shimmering in the early morning sun. “I want to keep that!” She races across the playground to pull a sturdy, red camera from a backpack hanging on the fence post. Placing the camera strap around her neck, Sophia carries it carefully back to the tree where she found the web. She squints through the viewfinder as she frames her shot. “Use the ‘zoomer’ so you can see it close up”, her friend Noah reminds her. Sofia pauses, adjusts the camera, and snaps a photo. “Got it!” she announces triumphantly. “I can’t wait to upload it!” Years ago, photography was an expensive hobby; cameras were fragile and costly, and then there were all of those rolls of film to be developed. Placing a camera in the hands of a small child was a once-in-awhile event, at most. Oh, how times have changed!
These days, sturdy children’s cameras are quite affordable. With a digital camera and rechargeable batteries, children are free to snap as many photos as they like. Kids of all ages love cameras, but there are lots of other reasons why cameras and kids are such a great match.
• Observation. Cameras encourage children to look closely, seeing the whole scene or zooming in on one small part. As children slow down to take photographs, they develop an awareness of lines, patterns, and shapes in the world around them.
• Documentation. Whether they’re photographing a field trip or snapping a shot of the “tallest block tower ever”, a camera is a tool that gives kids the power to record their experiences to share with others and reflect on later.
• Creative expression. Photography gives kids a chance to share their world with others.
Young photographers are free to arrange their subjects and their shots in imaginative ways, including elements of art and storytelling in their photos. Through the camera lens, children are invited to see familiar people, places, and things in a whole new way.
ACW 2013 51
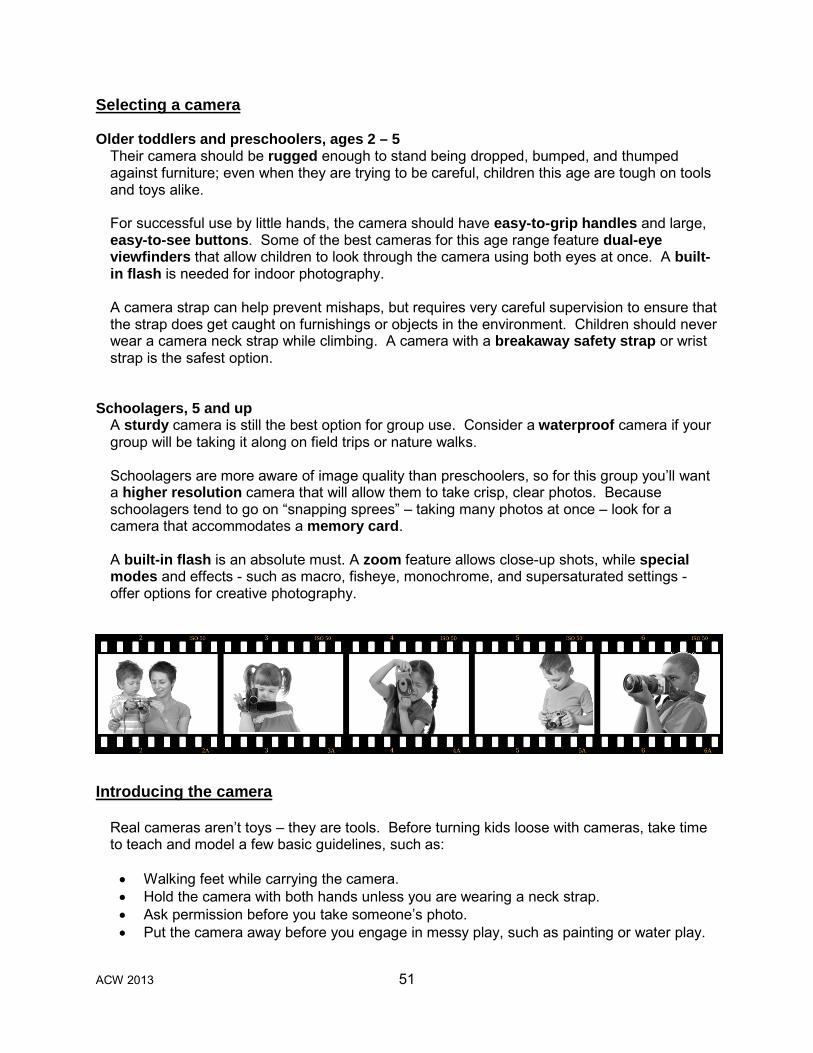
Selecting a camera Older toddlers and preschoolers, ages 2 – 5
Their camera should be rugged enough to stand being dropped, bumped, and thumped against furniture; even when they are trying to be careful, children this age are tough on tools and toys alike. For successful use by little hands, the camera should have easy-to-grip handles and large, easy-to-see buttons. Some of the best cameras for this age range feature dual-eye viewfinders that allow children to look through the camera using both eyes at once. A built-in flash is needed for indoor photography. A camera strap can help prevent mishaps, but requires very careful supervision to ensure that the strap does get caught on furnishings or objects in the environment. Children should never wear a camera neck strap while climbing. A camera with a breakaway safety strap or wrist strap is the safest option.
Schoolagers, 5 and up
A sturdy camera is still the best option for group use. Consider a waterproof camera if your group will be taking it along on field trips or nature walks. Schoolagers are more aware of image quality than preschoolers, so for this group you’ll want a higher resolution camera that will allow them to take crisp, clear photos. Because schoolagers tend to go on “snapping sprees” – taking many photos at once – look for a camera that accommodates a memory card. A built-in flash is an absolute must. A zoom feature allows close-up shots, while special modes and effects - such as macro, fisheye, monochrome, and supersaturated settings - offer options for creative photography.
Introducing the camera
Real cameras aren’t toys – they are tools. Before turning kids loose with cameras, take time to teach and model a few basic guidelines, such as: • Walking feet while carrying the camera. • Hold the camera with both hands unless you are wearing a neck strap. • Ask permission before you take someone’s photo. • Put the camera away before you engage in messy play, such as painting or water play.
ACW 2013 52
4 Fabulous Projects for Young
Photographers
1. Photo Scavenger Hunt Send kids off on a mission to find and photograph things that fit a given description, such as:
• Something fuzzy • Something yellow • Something that can spin • Something that looks like the first letter of your
name
Preschoolers will enjoy a single, daily challenge, while schoolagers may be ready to tackle the whole list at once.
2. Classroom Scrapbook Encourage your group to become photojournalists, using their camera to record important classroom events such as field trips, guest speakers, and birthday celebrations. Use photos and words to create a scrapbook or “timeline” wall display to remind children and families of all the fun you’ve had.
3. Bug Safari Head outdoors to hunt for insects and spiders. Rather than catching them to keep, snap a photo of each one. Older kids will enjoy using field guides or online resources (www.enature.com) to identify their finds.
4. Seasonal Snapshots Pick an outdoor subject, such as a favorite tree or a class garden. Every week or so throughout the year, snap a photo of this item/area from the exact same spot. In time, you’ll be able to create a photo display or digital slideshow that reflects the changing weather and seasons.
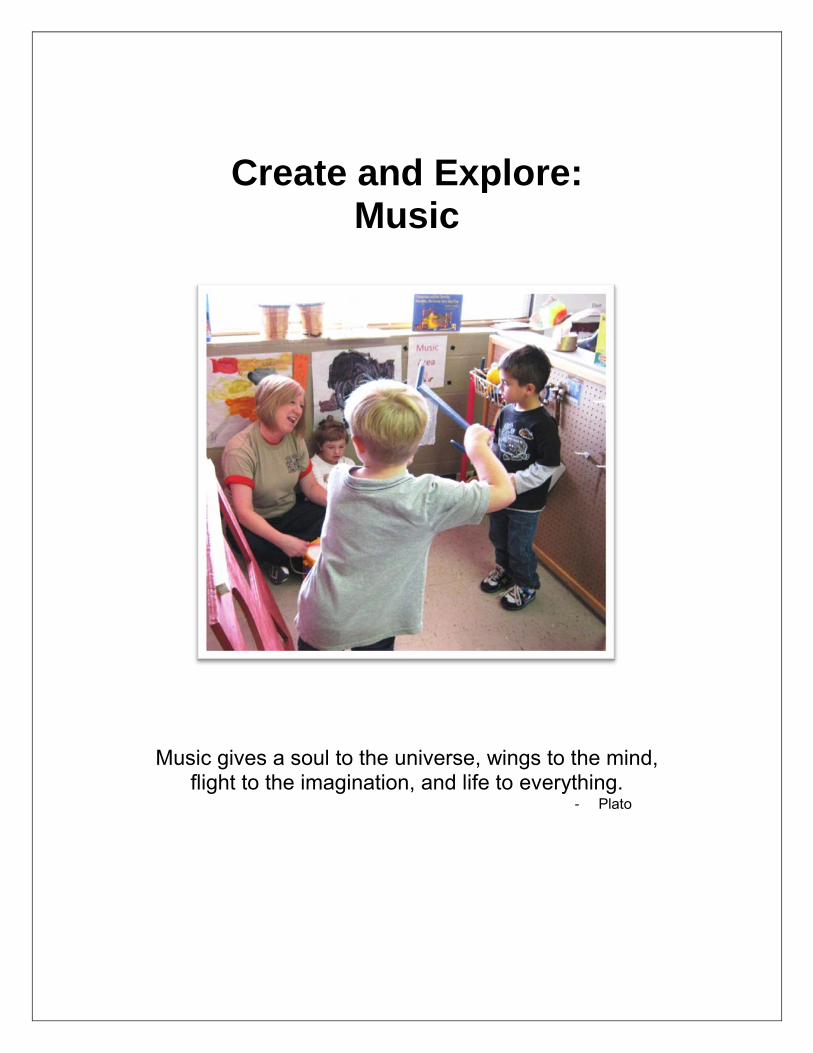
Create and Explore: Music
Music gives a soul to the universe, wings to the mind, flight to the imagination, and life to everything.
- Plato
ACW 2013 54
A Word about Music
Music experiences provide many opportunities to build the child’s vocabulary. Look for songs that contain new words that can be introduced to the children. Encourage children to practice pronouncing the new word, talk about how it feels when they say it, and give them a simple definition. Use the word outside the music experience so that children develop a clearer understanding of the new word.
Children are interested in new words and can learn musical terminology. You may know many of these words, but if not, you will enjoy learning basic terms with the children! Many of the words have come to English form Italian and are fun to say. To expand your music vocabulary, go to http://www.classicsforkids.com; click the More about Music tab to access the Musical Dictionary. Here’s a short list of musical terms to get you started.
Tempo: the speed of the music. This song changes the tempo—it’s much slower than the last song. Pitch: how high or low the music is. Oh, I think I pitched that song a bit too
low for us. Let’s start it with a higher pitch. Dynamics: the volume of the music from very soft to very loud. We could change the dynamics of that song and it would sound very different. Let’s try it louder….If we sing it very softly, that would change the dynamics again. A capella: singing without instrumental accompaniment. It might be fun to sing a capella, without the CD or any instruments. Melody: the tune of the music. Listen to the melody while I play it on the xylophone. Let’s hum the melody. Crescendo: the increase in volume when the music gets louder. We’re going to start singing softly, then there’ll be a big crescendo and we’ll get louder. Solo: music sung or played by one voice or instrument. You’re singing a solo, all by yourself! Duet: two people singing together or two instruments playing together. Michael and Jill, you’re singing together—it’s a duet!
ACW 2013 55
Music through the Day Whether dancing around the playground on a sunny morning or settling down for an afternoon nap with soothing lullabies, music sets the tone for our days. Here are some of the best ways to use music to enhance everyday activities. Saying Hello, Saying Good-bye Use songs or chants to greet children at the beginning of each day and/or as a closing activity at the end of the day. Rituals such as these help children feel welcome, get to know one another, and develop a sense of togetherness and belonging.
Slowing Down Use music to create a calm, soothing tone while babies are sleeping, as preschoolers begin their rest time, or when schoolagers are ready to take a break and cool off after a busy field trip. Try lullabies, as well as some new age and classical music. A word to the wise: just because music is classical doesn’t automatically make it restful. Look for selections that are gentle and melodic; avoid frenetic or dramatic pieces.
Waking Up Again Playful, upbeat music can get the whole group up and moving with smiles on their faces. Use these selections to energize kids when you’re ready for action.
Finding Focus When we’re trying to concentrate, fast-paced music can be over-stimulating, but music with a slow tempo can make us sleepy and sluggish. Studies show that music with a tempo of 50 – 80 beats per second is “just right” for focused work. These selections might be a fit during journaling, work with fine motor manipulatives, and even during homework time for schoolagers.
ACW 2013 56
Switching Gears Familiar songs can help kids focus on transition-time tasks such as picking up toys, washing hands, or getting ready to go outside.
Links to Learning In the toddler room, a caregiver softly sings “Rain, Rain, Go Away” to a little boy as they look out the window together at a gray, drizzly day. Just down the hall, a group of preschool children sing and dance to “The Wheels on the Bus”, a natural fit for their ongoing transportation unit. In the afterschool room, children’s voices brightly chant, “Mercury, Venus, Earth and Mars, whirling and twirling among the stars…” Today, their teacher has introduced a song to recall the order of the planets in the solar system. Music is a wonderful way to support children’s interests and accentuate and enliven topics of study in the classroom.
Listening with Purpose: Do’s and Don’ts for Sharing Music with Kids
Do share recorded music often, with purpose. Don’t leave music on all day as meaningless “background noise”.
Don’t limit your selections to “children’s music”.
Do introduce children to many different styles of music, including jazz, blues, pop music, and music from around the world. Any music with age-appropriate lyrics can be shared with children.
Do “crank it up” and play loud music to have fun and energize
your group every once in awhile. Don’t use high volume for everyday play. Play music at a
lower level that does not interfere with normal conversation. Check volume on children’s headphones, too.
ACW 2013 57
A Music through the Day Playlist
Saying Hello, Saying Goodbye
“Shake Hands with Friends”, Ella Jenkins, Growing Up with Ella Jenkins “The More We Get Together”, Raffi, Singable Songs for the Very Young “This is My School Family”, Dr. Becky Bailey and Jack Hartmann, It Starts in the Heart
Slowing Down
“Cradle Song”, Ricardo Cobo, Guitar Lullaby “The Carnival of the Animals/the Swan”, Camille Saint-Saëns (composer), Cello for Relaxation “What a Wonderful World”, Louis Armstrong, various recordings
Waking Up
“Clap Your Hands”, They Might Be Giants, No! “Funky Town”, Lipps, Inc., various recordings “I Can Dance”, Trout Fishing in America, Family Music Party
Switching Gears
“Clean Up”, Shawn Brown, Superfun Transitions “Put it Away”, Sesame Street, Havin’ Fun with Ernie and Bert “Wash Your Hands”, The Wiggles, Let’s Eat
Links to Learning (thematic albums)
Birds, Beasts, Bugs, and Fishes Little and Big, Pete Seeger Sea Music, Dan Zanes Wee Sing thematic CDs: America, Animals, Bugs, Dinosaurs, Trains, and more; Wee Sing
ACW 2013 58
Predictable Songs Using predictable songs supports cognitive development in the following ways.
Lyrics and tunes satisfy the brain’s need for patterns and the familiar
Music is intertwined with language development.
Music is an essential element of optimal brain development.
Enjoy these songs with children. Sing them at group times, sing them on the playground, sing them on the bus or in the car, sing them while you play. Encourage children to change the words and to create new verses for familiar songs. Listed below are some examples of predictable songs—traditional songs that have easily recognizable patterns. “Bingo” “She’ll Be Comin’ Round the Mountain” “The Wheels on the Bus” “Where Is Thumbkin?” “Old Mac Donald” “Here We Go Round the Mulberry Bush” “If You’re Happy and You Know It” “I Know an Old Lady Who Swallowed a Fly”
I Had a Cat
I had a cat and my cat pleased me, Fed my cat by yonder tree, Cat goes fiddle-i-fee. I had a dog and my dog pleased me, Fed my dog by yonder tree, Dog goes bow-wow, Cat goes fiddle-i-fee.
I had a hen and my hen pleased me, Fed my hen by yonder tree, Hen goes chimmy-chuck, chimmy- chuck, Cat goes fiddle-i-fee. I had a cow and my cow pleased me, Fed my cow by yonder tree, Cow goes moo-moo, moo-moo, Cat goes fiddle-i-fee.

ACW 2013 58
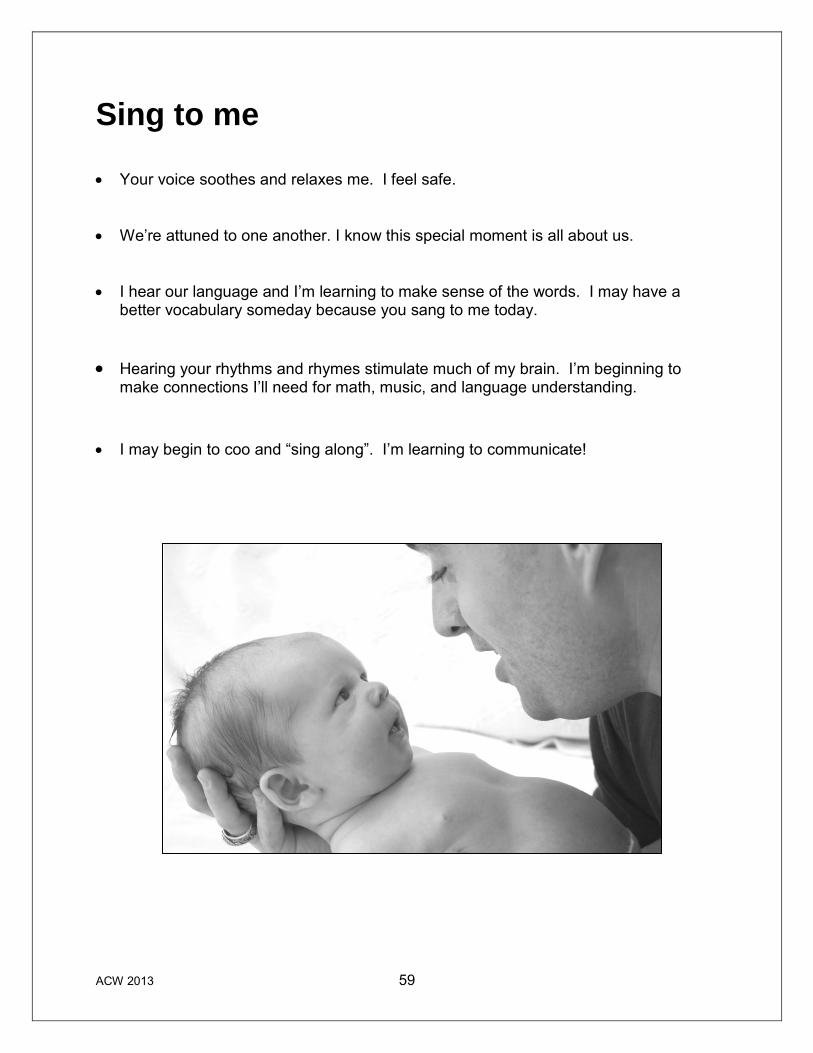
ACW 2013 59
Sing to me • Your voice soothes and relaxes me. I feel safe.
• We’re attuned to one another. I know this special moment is all about us.
• I hear our language and I’m learning to make sense of the words. I may have a better vocabulary someday because you sang to me today.
• Hearing your rhythms and rhymes stimulate much of my brain. I’m beginning to make connections I’ll need for math, music, and language understanding.
• I may begin to coo and “sing along”. I’m learning to communicate!
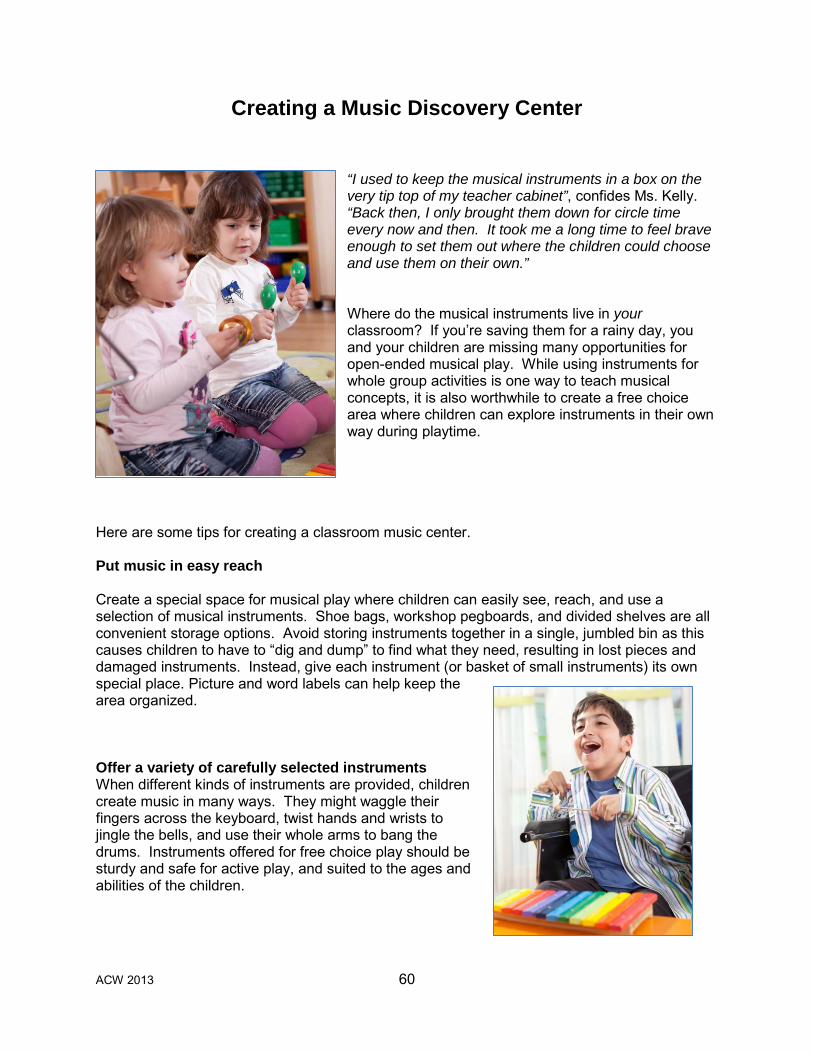
ACW 2013 60
Creating a Music Discovery Center
“I used to keep the musical instruments in a box on the very tip top of my teacher cabinet”, confides Ms. Kelly. “Back then, I only brought them down for circle time every now and then. It took me a long time to feel brave enough to set them out where the children could choose and use them on their own.” Where do the musical instruments live in your classroom? If you’re saving them for a rainy day, you and your children are missing many opportunities for open-ended musical play. While using instruments for whole group activities is one way to teach musical concepts, it is also worthwhile to create a free choice area where children can explore instruments in their own way during playtime.
Here are some tips for creating a classroom music center. Put music in easy reach Create a special space for musical play where children can easily see, reach, and use a selection of musical instruments. Shoe bags, workshop pegboards, and divided shelves are all convenient storage options. Avoid storing instruments together in a single, jumbled bin as this causes children to have to “dig and dump” to find what they need, resulting in lost pieces and damaged instruments. Instead, give each instrument (or basket of small instruments) its own special place. Picture and word labels can help keep the area organized. Offer a variety of carefully selected instruments When different kinds of instruments are provided, children create music in many ways. They might waggle their fingers across the keyboard, twist hands and wrists to jingle the bells, and use their whole arms to bang the drums. Instruments offered for free choice play should be sturdy and safe for active play, and suited to the ages and abilities of the children.

ACW 2013 61
Consider rotating instruments to spark interest and provide variety. At any given time, the music center might contain a few old favorites, as well as something new to discover. What might your children think of a ukulele, an autoharp, a rain stick, or a washboard? While many instruments are well suited for inclusion in a learning center, a few are not. Very loud instruments, such as cymbals, and high-pitched instruments, such as triangles, may be best saved for once-in-awhile use or outdoor play. Harmonicas, recorders, and other instruments that touch mouth or lips should only be offered if they can be cleaned and sanitized after each use. Encourage experimentation, within bounds Model proper uses of instruments, but also allow “messing around” as children experiment with using materials in their own way. Any safe, non-destructive use is probably OK, but children may need reminders if play becomes inappropriate. Ask yourself, “Is this likely to harm the child or the instrument?” If the answer is yes, guidance is needed.
Another important boundary is the definition of the music area itself. Use rugs, low furniture, or other cues to create a clearly defined play area. Ideally, the music play area is located far from quiet work areas, such as the classroom library. Every now and then it can be fun to march around the whole room making music, but for everyday play a special music area will offer freedom to make music to children who seek this experience, while providing other, less noisy areas for children who prefer quieter play.
ACW 2013 62
Provide space to move and props for movement Children enjoy engaging in music activities with their whole bodies, so why limit their play to a tiny corner? Make the music center as roomy as your space will allow. In addition to instruments and music to listen to, consider props for dance and imaginative musical play, such as scarves, ribbons, microphones, and tutus.
Ready for more?
Expand your music area with one or more of these enjoyable additions.
• Small platform stage
• Full length, unbreakable mirror(s)
• Musical recorder and/or video recorder
• Outdoor music area
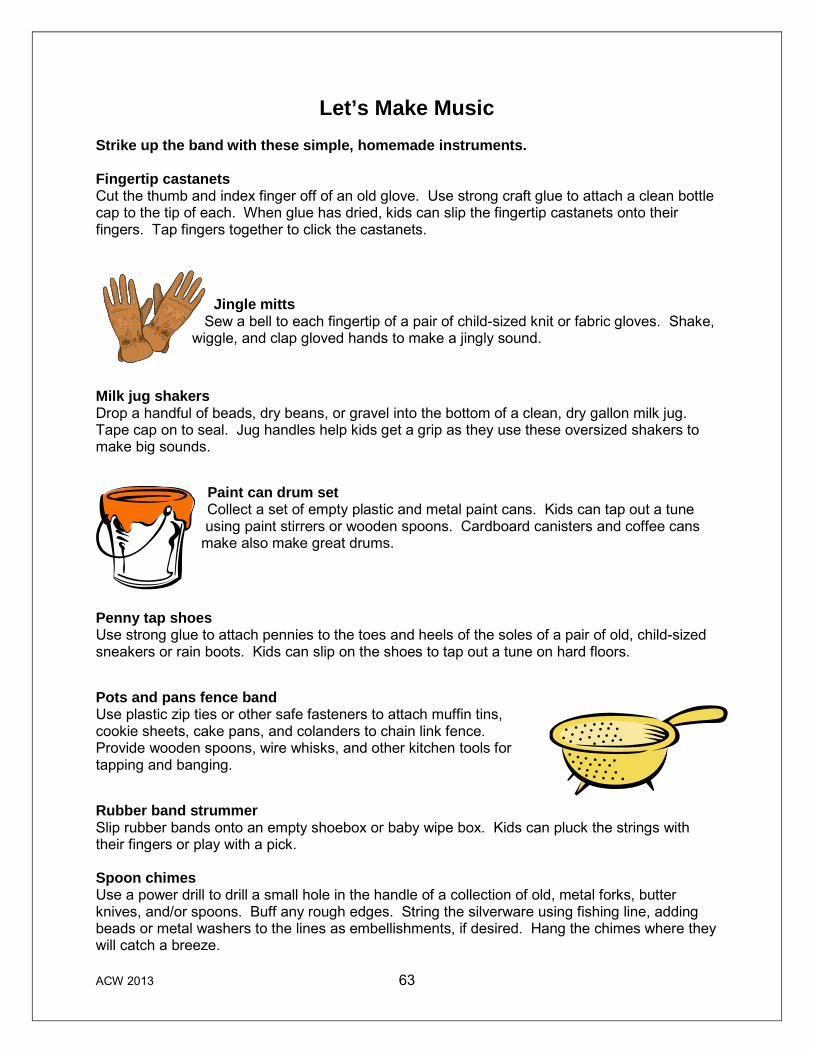
ACW 2013 63
Let’s Make Music Strike up the band with these simple, homemade instruments. Fingertip castanets Cut the thumb and index finger off of an old glove. Use strong craft glue to attach a clean bottle cap to the tip of each. When glue has dried, kids can slip the fingertip castanets onto their fingers. Tap fingers together to click the castanets.
Jingle mitts
Sew a bell to each fingertip of a pair of child-sized knit or fabric gloves. Shake, wiggle, and clap gloved hands to make a jingly sound.
Milk jug shakers Drop a handful of beads, dry beans, or gravel into the bottom of a clean, dry gallon milk jug. Tape cap on to seal. Jug handles help kids get a grip as they use these oversized shakers to make big sounds.
Paint can drum set Collect a set of empty plastic and metal paint cans. Kids can tap out a tune using paint stirrers or wooden spoons. Cardboard canisters and coffee cans
make also make great drums.
Penny tap shoes Use strong glue to attach pennies to the toes and heels of the soles of a pair of old, child-sized sneakers or rain boots. Kids can slip on the shoes to tap out a tune on hard floors. Pots and pans fence band Use plastic zip ties or other safe fasteners to attach muffin tins, cookie sheets, cake pans, and colanders to chain link fence. Provide wooden spoons, wire whisks, and other kitchen tools for tapping and banging. Rubber band strummer Slip rubber bands onto an empty shoebox or baby wipe box. Kids can pluck the strings with their fingers or play with a pick. Spoon chimes Use a power drill to drill a small hole in the handle of a collection of old, metal forks, butter knives, and/or spoons. Buff any rough edges. String the silverware using fishing line, adding beads or metal washers to the lines as embellishments, if desired. Hang the chimes where they will catch a breeze.
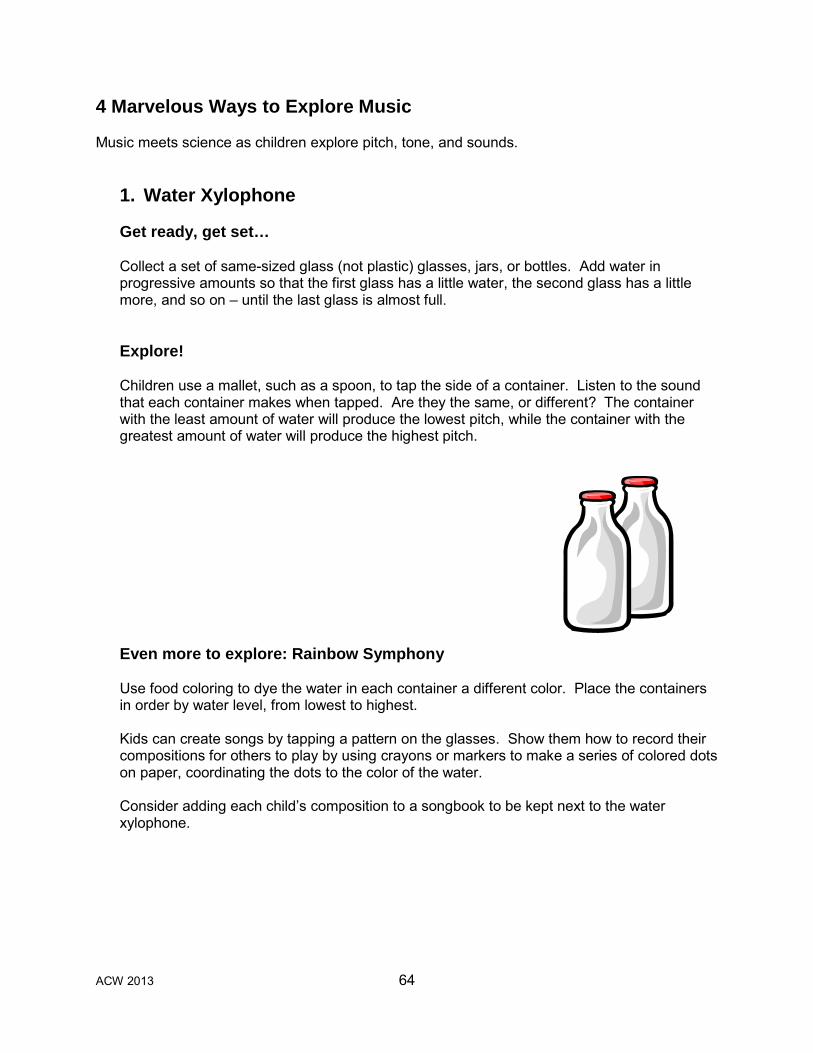
ACW 2013 64
4 Marvelous Ways to Explore Music Music meets science as children explore pitch, tone, and sounds.
1. Water Xylophone
Get ready, get set… Collect a set of same-sized glass (not plastic) glasses, jars, or bottles. Add water in progressive amounts so that the first glass has a little water, the second glass has a little more, and so on – until the last glass is almost full. Explore! Children use a mallet, such as a spoon, to tap the side of a container. Listen to the sound that each container makes when tapped. Are they the same, or different? The container with the least amount of water will produce the lowest pitch, while the container with the greatest amount of water will produce the highest pitch. Even more to explore: Rainbow Symphony Use food coloring to dye the water in each container a different color. Place the containers in order by water level, from lowest to highest. Kids can create songs by tapping a pattern on the glasses. Show them how to record their compositions for others to play by using crayons or markers to make a series of colored dots on paper, coordinating the dots to the color of the water. Consider adding each child’s composition to a songbook to be kept next to the water xylophone.
ACW 2013 65
2. Egg-cellent Sound Matching
Get ready, get set… Collect a set of plastic Easter eggs. Fill pairs of eggs with various objects, such as:
• Pennies • Bells • Gravel • Rice • Sand
Be sure to make two eggs with each “filling”. Tape closed. Explore! Children shake the eggs to create sounds. Can they match the eggs with the same fillings by listening closely the sounds?
Even more to explore: A Sound Hypothesis On index cards, list each of the items used as filler. Challenge a small group of children to try to match each egg to the correct card. Use questions and comments to encourage children to think it through.
• You think that the blue egg has bells inside it? What makes you say that?
• You’ve figured out the bells, the pennies, and rice. Now that you have narrowed down the choices, what do we have left?
• How are sand and gravel different? I wonder how their sounds would differ.
Open the eggs to check your work, and then seal them again so that children can complete the experiment again independently. You may also consider providing empty eggs for kids to fill with items that they find around the classroom or outdoors.
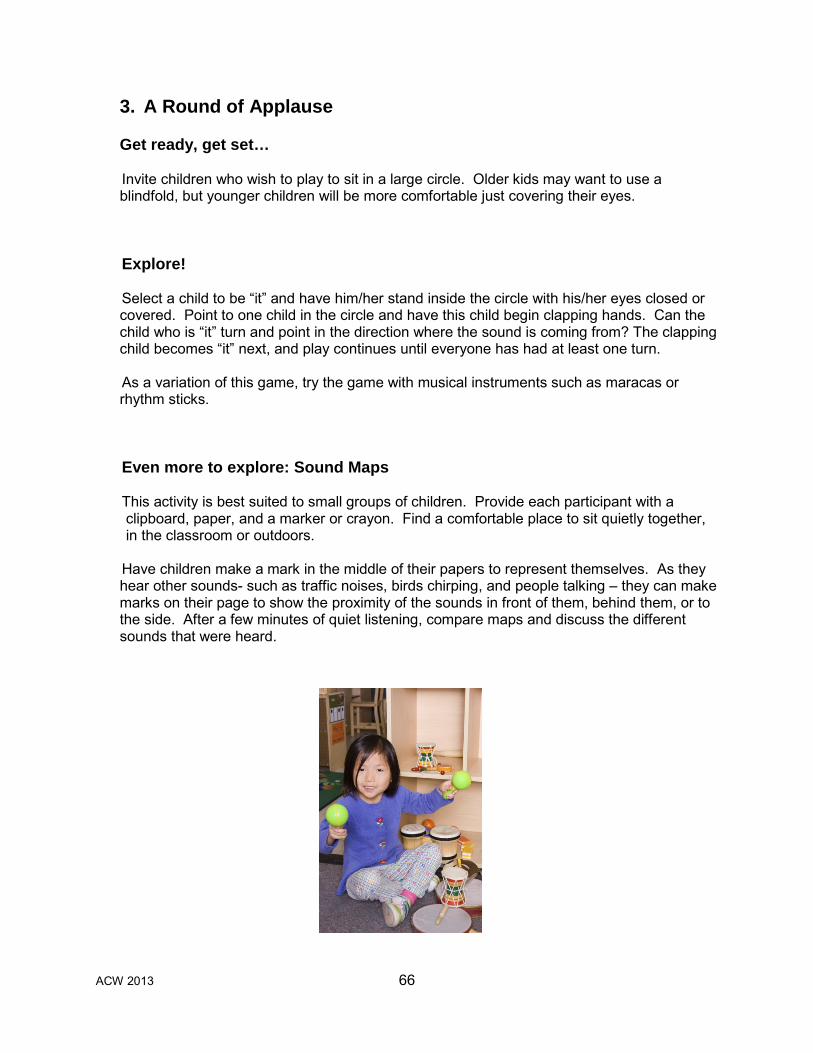
ACW 2013 66
3. A Round of Applause Get ready, get set… Invite children who wish to play to sit in a large circle. Older kids may want to use a blindfold, but younger children will be more comfortable just covering their eyes. Explore! Select a child to be “it” and have him/her stand inside the circle with his/her eyes closed or covered. Point to one child in the circle and have this child begin clapping hands. Can the child who is “it” turn and point in the direction where the sound is coming from? The clapping child becomes “it” next, and play continues until everyone has had at least one turn. As a variation of this game, try the game with musical instruments such as maracas or rhythm sticks. Even more to explore: Sound Maps This activity is best suited to small groups of children. Provide each participant with a clipboard, paper, and a marker or crayon. Find a comfortable place to sit quietly together, in the classroom or outdoors. Have children make a mark in the middle of their papers to represent themselves. As they hear other sounds- such as traffic noises, birds chirping, and people talking – they can make marks on their page to show the proximity of the sounds in front of them, behind them, or to the side. After a few minutes of quiet listening, compare maps and discuss the different sounds that were heard.
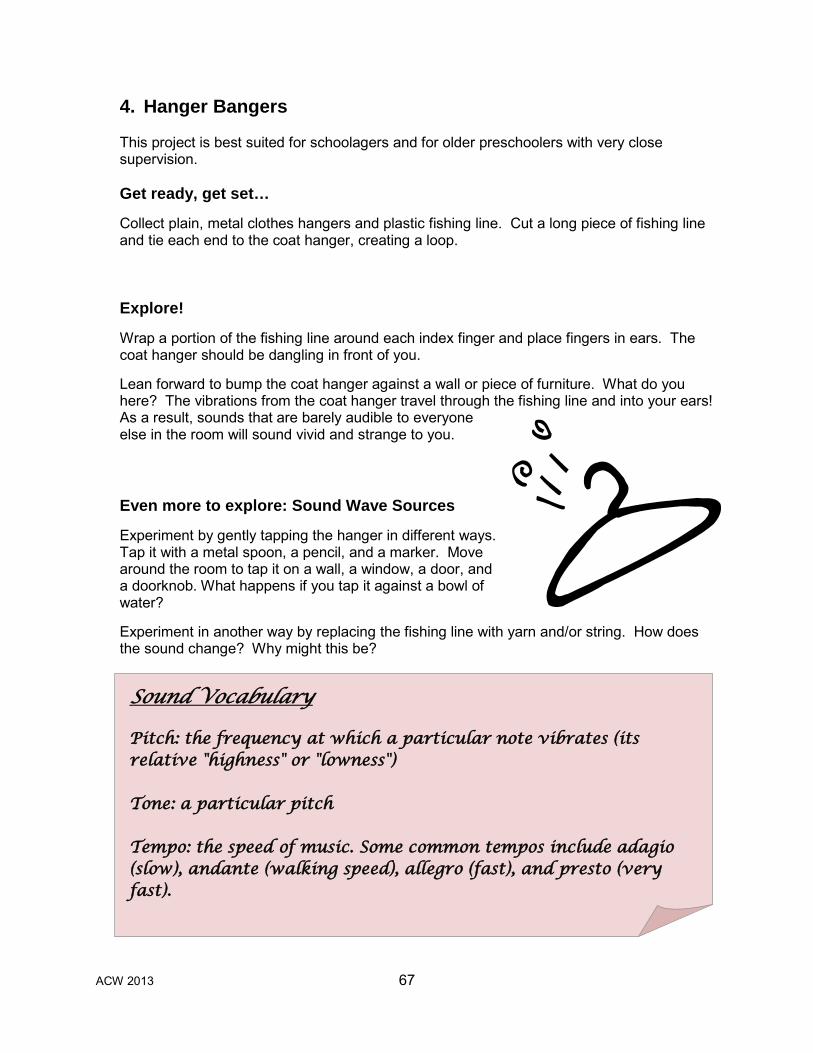
ACW 2013 67
4. Hanger Bangers This project is best suited for schoolagers and for older preschoolers with very close supervision. Get ready, get set… Collect plain, metal clothes hangers and plastic fishing line. Cut a long piece of fishing line and tie each end to the coat hanger, creating a loop. Explore! Wrap a portion of the fishing line around each index finger and place fingers in ears. The coat hanger should be dangling in front of you. Lean forward to bump the coat hanger against a wall or piece of furniture. What do you here? The vibrations from the coat hanger travel through the fishing line and into your ears! As a result, sounds that are barely audible to everyone else in the room will sound vivid and strange to you. Even more to explore: Sound Wave Sources Experiment by gently tapping the hanger in different ways. Tap it with a metal spoon, a pencil, and a marker. Move around the room to tap it on a wall, a window, a door, and a doorknob. What happens if you tap it against a bowl of water? Experiment in another way by replacing the fishing line with yarn and/or string. How does the sound change? Why might this be?
Sound Vocabulary Pitch: the frequency at which a particular note vibrates (its relative "highness" or "lowness") Tone: a particular pitch Tempo: the speed of music. Some common tempos include adagio (slow), andante (walking speed), allegro (fast), and presto (very fast).
Create and Explore: Resources
It is not that I'm so smart. But I stay with the questions much longer.
- Albert Einstein
ACW 2013 69
Books for Children
The Art Lesson by Tomie dePaola
In the Garden with Van Gogh, by J. Merberg
The Legend of the Indian Paintbrush, Tomie dePaola
Linnea in Monet’s Garden, Christina Bjork
Beautiful Oops!, by Barney Saltzberg
Snowflake Bentley, by Jacqueline Briggs Martin
From the Mixed-Up Files of Mrs. Basil E. Frankweiler, by E.L. Konigsburg (for ages 8 and up)
Harold and the Purple Crayon, by Crocket Johnson
Mouse Paint, by Ellen Stoll Walsh
Can You Hear It?, by William Lach
When Clay Sings, by Byrd Baylor
Song and Dance Man, by Karen Ackerman
Abiyoyo, by Pete Seeger
Ben’s Trumpet, by Rachel Isadora
Lizard’s Song, by George Shannon
Max Found Two Sticks, by Brian Pinkney
Clickety Clack, by Robert Spence
Rain Song, by Lezlie Evans
Chicken Soup with Rice, by Maurice Sendak
Banjo Granny, by Sarah Martin Busse
Barn Dance, by Bill Martin, Jr. and John Archambault
Parade, by Donald Crews
The Art Book for Children, from Phaidon Press
The Dot, by Peter H. Reynolds
Not a Box, by Antoinette Portis
Museum ABC, by NY Metropolitan Museum of Art
Saturday Night at the Dinosaur Stomp, by Carol Diggory Shields
Color Dance, by Ann Jonas
Spirals, Curves, Fanshapes, and Lines, by Tana Hoban
ACW 2013 70
Resources for Teachers
First Art, by MaryAnn Kohl
Mudworks, by MaryAnn Kohl
Art for the Very Young, by Elizabeth Kelly and Joanne McConville
Young at Art, by Susan Striker
The Story in the Picture, by Christine Mulcahey
The Colors of Learning, by Margaret Johnson, Sharon T. Mitchell, and Rosemary Althouse
The Language of Art, by Ann Pelo
Considering Children’s Art: Why and How to Value Their Works, by Brenda S. Engel
Art: Basic for Young Children, by Lila Lasky and Rose Mukerji-Bergeson
Creative Art for the Developing Child, by Clare Cherry
Don’t Move the Muffin Tins, by Bev Bos
The Ooey Gooey Handbook, by Lisa Murphy
Art and Creative Development for Young Children, by Robert Schirrmacher
Making Amazing Art, by Sandi Henry (for school age)
Crafts Across America, by Cindy A. Littlefield (for school age)
Using Color in Your Art, by Sandi Henry (for school age)
Ecoart!, by Laurie Carlson (for ages 3-9)
Music and Movement: A Way of Life for the Young Child, by Edwards, Bayless, and Ramsey
Connect with Music, by Roberta Newman
The I Can't Sing Book, by Jackie Silberg
Show Time, by Lisa Bany-Winters (for school age)
ACW 2013 71
Web-based Resources
Websites Early Childhood News, index of articles on Creative Arts http://www.earlychildhoodnews.com/earlychildhood/articles.aspx?ArticleID=282 Art and Creativity in Early Childhood Education. A blog by Anna Reyner. http://annareyner.wordpress.com/?ref=spelling Head Start Domain 5: Creative Arts http://eclkc.ohs.acf.hhs.gov/hslc/tta-system/teaching/eecd/domains%20of%20child%20development/creative%20arts/edudev_art_00015_061705.html Bright Ring Publishing http://www.brightring.com Classics for Kids http://www.classicsforkids.com Articles Music Play http://www.naeyc.org/files/tyc/file/MusicPlay.pdf Learning through Music: The Support of Brain Research http://www.communityplaythings.com/resources/articles/musicandmovement/learningthroughmusic.html The Power of Music in the Learning Process http://www.communityplaythings.com/resources/articles/musicandmovement/learningthroughmusic.html Art Talk: Developing Visual and Verbal Literacy http://www.communityplaythings.com/resources/articles/ArtwithChildren/ArtTalk.html Child-Centered Art vs. Teacher-Directed Projects http://www.communityplaythings.com/resources/articles/ArtwithChildren/childcenteredart.html Don’t Be Afraid of the Mess: Brining Collage, Paint, and Clay into the Classroom http://www.earlychildhoodnews.com/earlychildhood/article_view.aspx?ArticleID=493 When Children Draw http://www.earlychildhoodnews.com/earlychildhood/article_view.aspx?ArticleID=130 Art: Essential for Early Learning. (A position paper from the Early Childhood Art Issues Group of the National Art Education Association) http://www.arteducators.org/community/committees-issues-groups/ECAE_Position_Statement.pdf
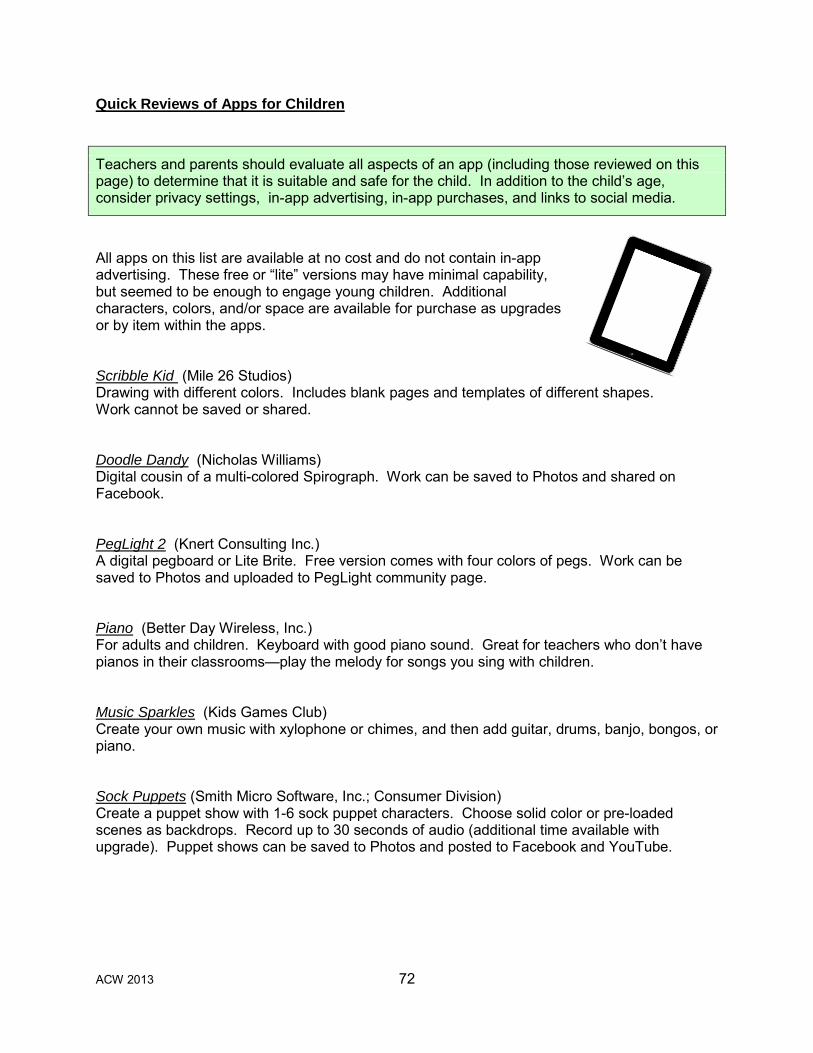
ACW 2013 72
Quick Reviews of Apps for Children
Teachers and parents should evaluate all aspects of an app (including those reviewed on this page) to determine that it is suitable and safe for the child. In addition to the child’s age, consider privacy settings, in-app advertising, in-app purchases, and links to social media.
All apps on this list are available at no cost and do not contain in-app advertising. These free or “lite” versions may have minimal capability, but seemed to be enough to engage young children. Additional characters, colors, and/or space are available for purchase as upgrades or by item within the apps. Scribble Kid (Mile 26 Studios) Drawing with different colors. Includes blank pages and templates of different shapes. Work cannot be saved or shared. Doodle Dandy (Nicholas Williams) Digital cousin of a multi-colored Spirograph. Work can be saved to Photos and shared on Facebook. PegLight 2 (Knert Consulting Inc.) A digital pegboard or Lite Brite. Free version comes with four colors of pegs. Work can be saved to Photos and uploaded to PegLight community page. Piano (Better Day Wireless, Inc.) For adults and children. Keyboard with good piano sound. Great for teachers who don’t have pianos in their classrooms—play the melody for songs you sing with children. Music Sparkles (Kids Games Club) Create your own music with xylophone or chimes, and then add guitar, drums, banjo, bongos, or piano. Sock Puppets (Smith Micro Software, Inc.; Consumer Division) Create a puppet show with 1-6 sock puppet characters. Choose solid color or pre-loaded scenes as backdrops. Record up to 30 seconds of audio (additional time available with upgrade). Puppet shows can be saved to Photos and posted to Facebook and YouTube.


![[Challenge:Future] Explore and Share new Job Opportunities (or Create them)](https://img.pdfslide.us/doc/110x75/58f090411a28ab5d5d8b45cf/challengefuture-explore-and-share-new-job-opportunities-or-create-them.jpg)