Embed Size (px)
Citation preview
Create and conduct a profiling testCreate and conduct a profiling test

1. Access EyeQuestion Open your browser (e.g. Internet Explorer) Surf to your EyeQuestion server
2
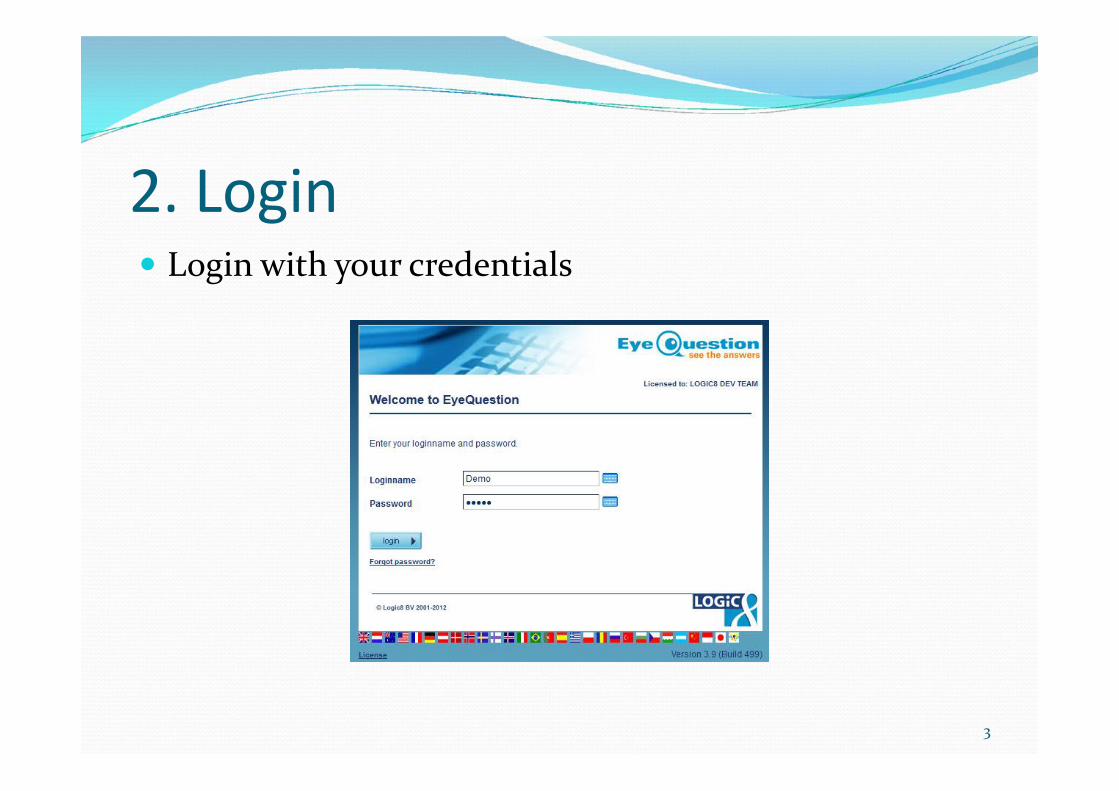
2. Login Login with your credentials
3
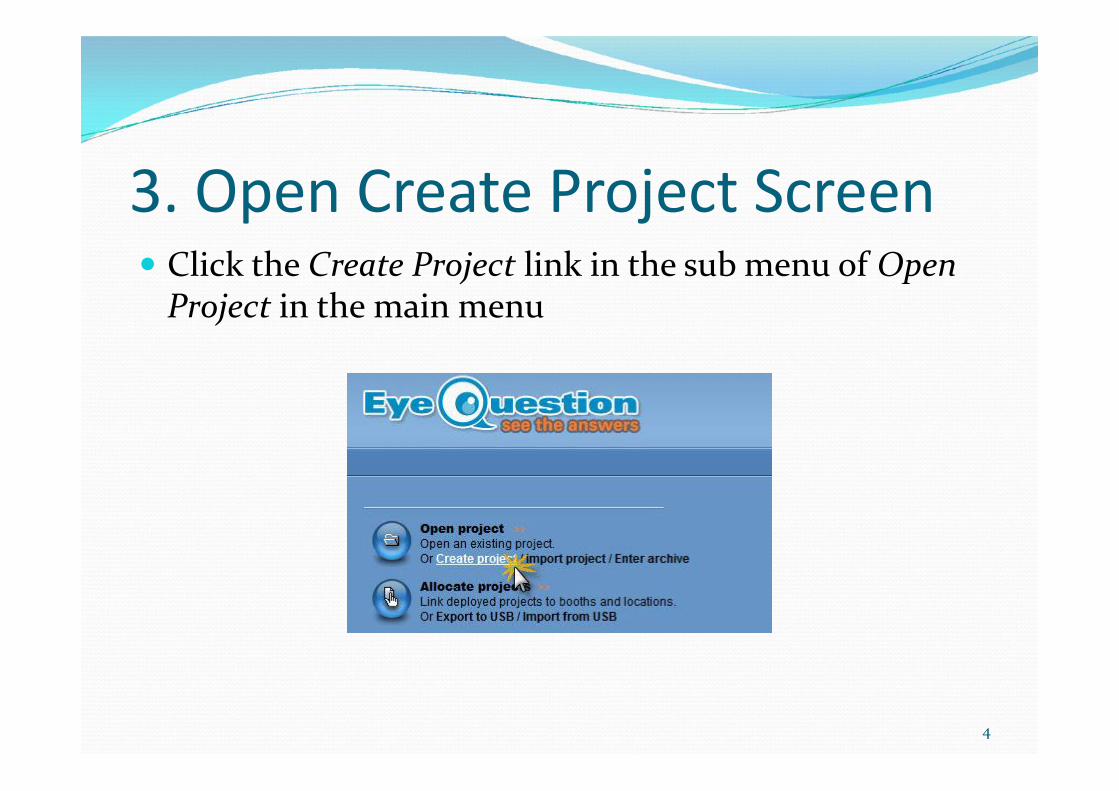
3. Open Create Project Screen Click the Create Project link in the sub menu of Open
Project in the main menu
4

4. Give your project a name Enter a unique name in the project name field of the
Create Project form
5

5. Select a Project Template Select the Profiling Template from the Sensory
Templates list
6
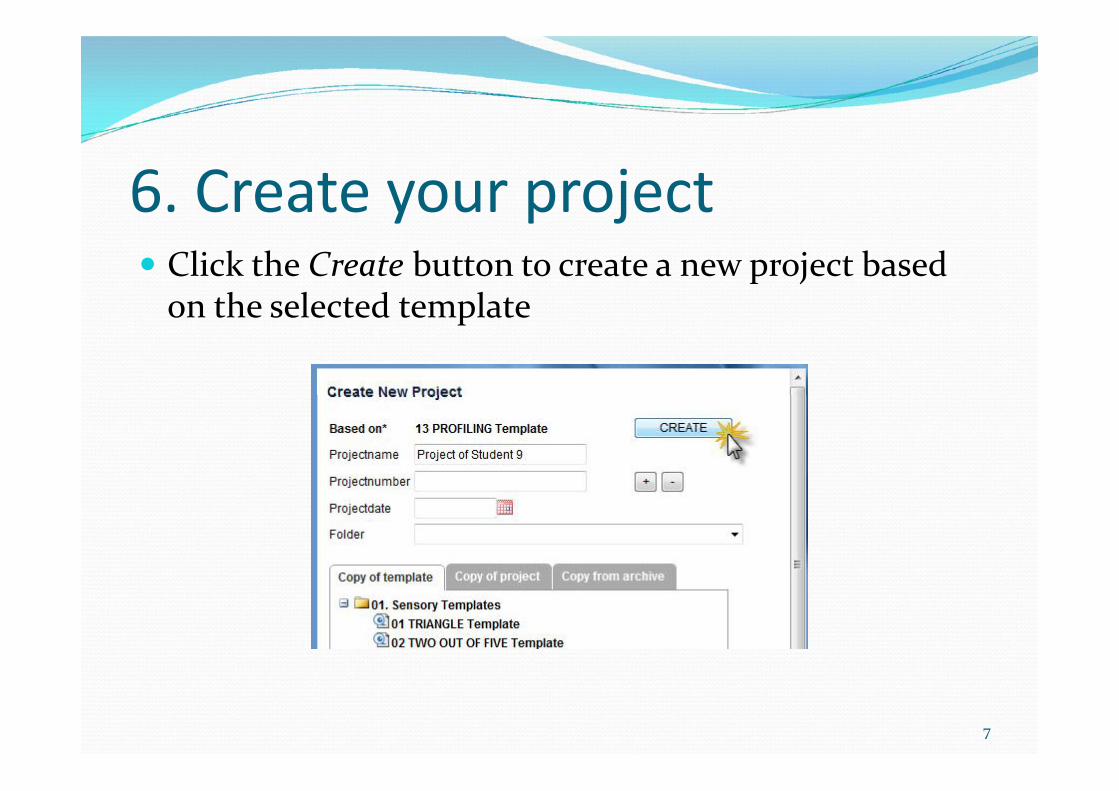
6. Create your project Click the Create button to create a new project based
on the selected template
7
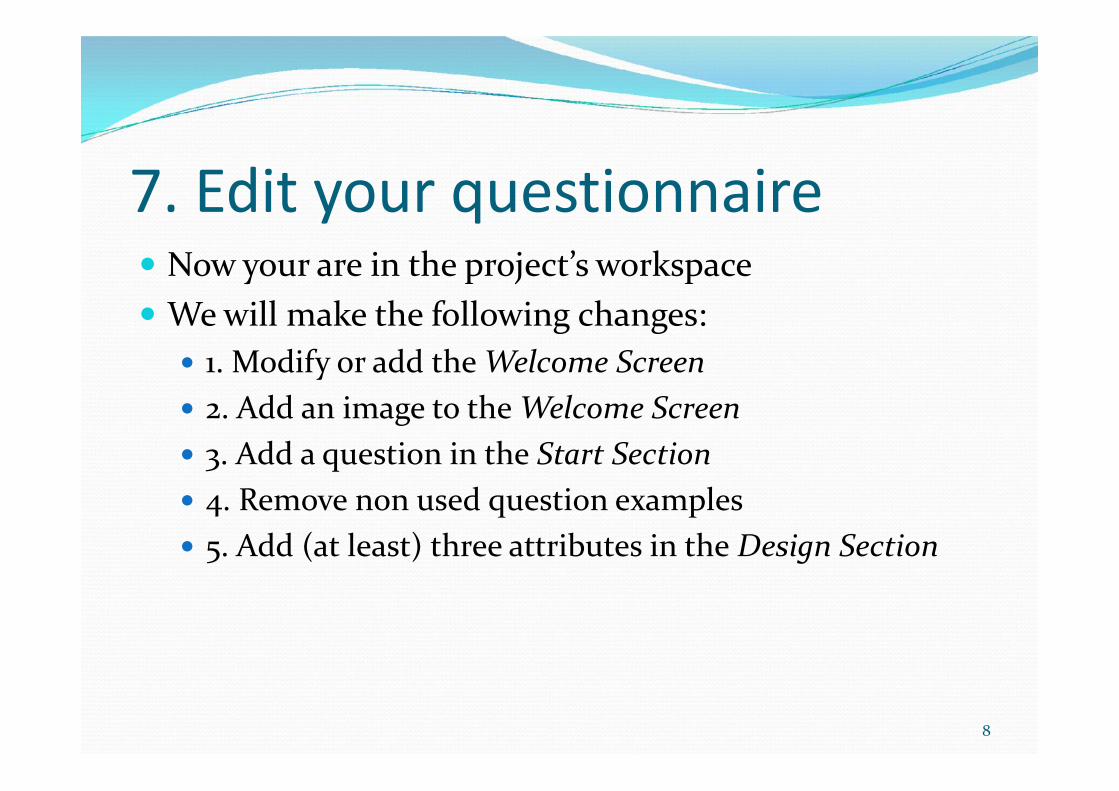
7. Edit your questionnaire Now your are in the project’s workspace We will make the following changes: 1. Modify or add the Welcome Screen 2. Add an image to the Welcome Screen 3. Add a question in the Start Section 4. Remove non used question examples 5. Add (at least) three attributes in the Design Section
Now your are in the project’s workspace We will make the following changes: 1. Modify or add the Welcome Screen 2. Add an image to the Welcome Screen 3. Add a question in the Start Section 4. Remove non used question examples 5. Add (at least) three attributes in the Design Section
8
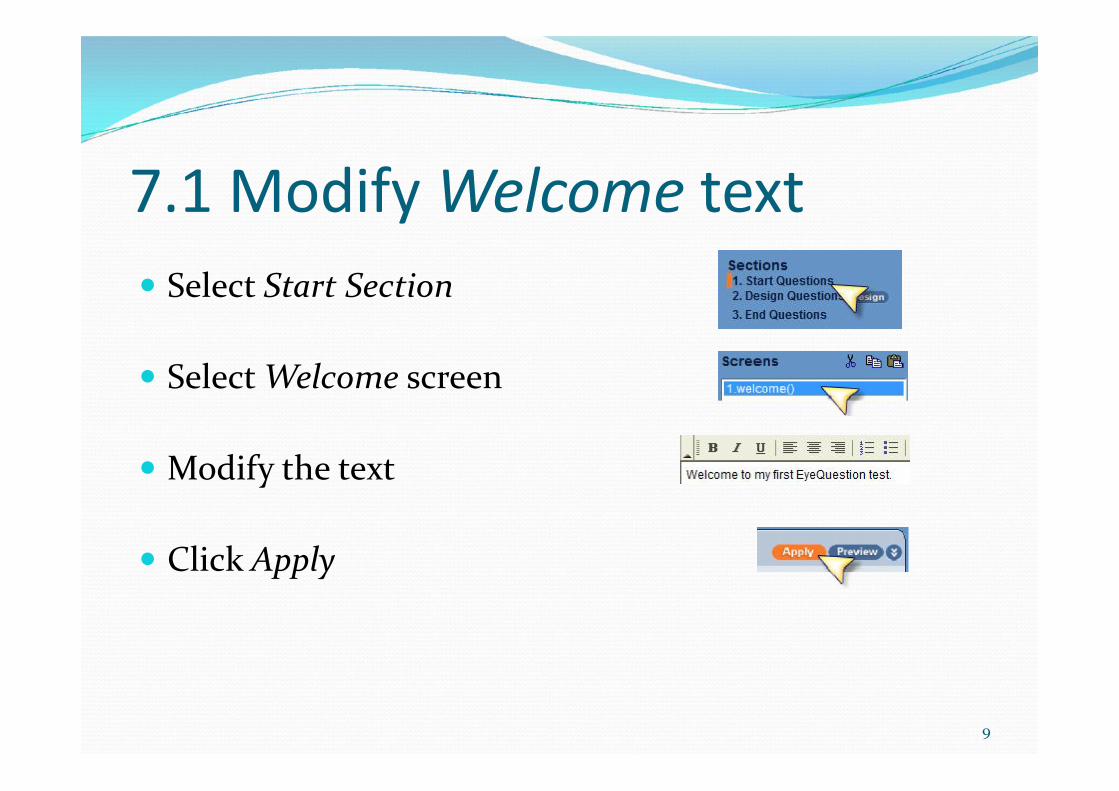
7.1 ModifyWelcome text Select Start Section
Select Welcome screen
Modify the text
Click Apply
Select Start Section
Select Welcome screen
Modify the text
Click Apply
9

Open Welcome Screen (see 7.1) Click icon in the Text Editor menu Click Browse/Bladeren op server in the Pop up form
Select/Click an image in new Pop up screen
Click OK to confirm and insert the image Click Apply to submit changes
7.2 Add an image Open Welcome Screen (see 7.1) Click icon in the Text Editor menu Click Browse/Bladeren op server in the Pop up form
Select/Click an image in new Pop up screen
Click OK to confirm and insert the image Click Apply to submit changes
10
Select the Start Section
Click the + icon to add a new question
Select the Gender question template in the list ofpredefined questions
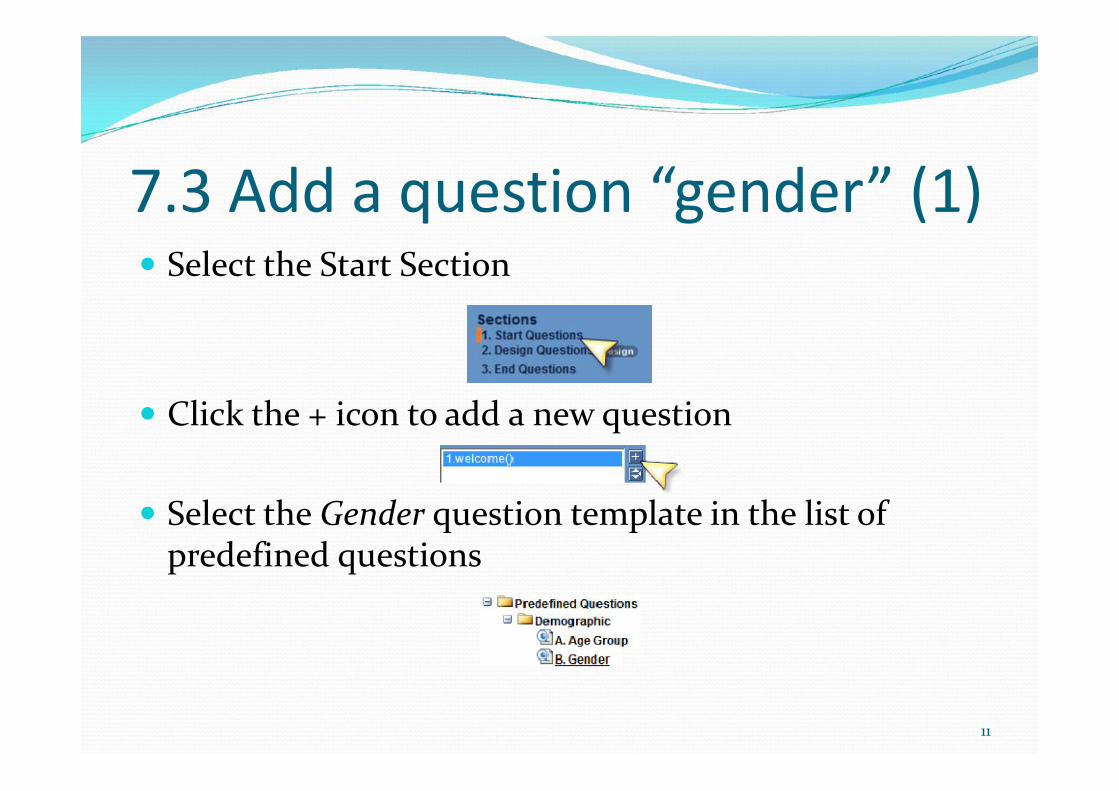
7.3 Add a question “gender” (1) Select the Start Section
Click the + icon to add a new question
Select the Gender question template in the list ofpredefined questions
11
Enter the question’s label (variable description)
Click Apply Click Preview to preview the screen you just added
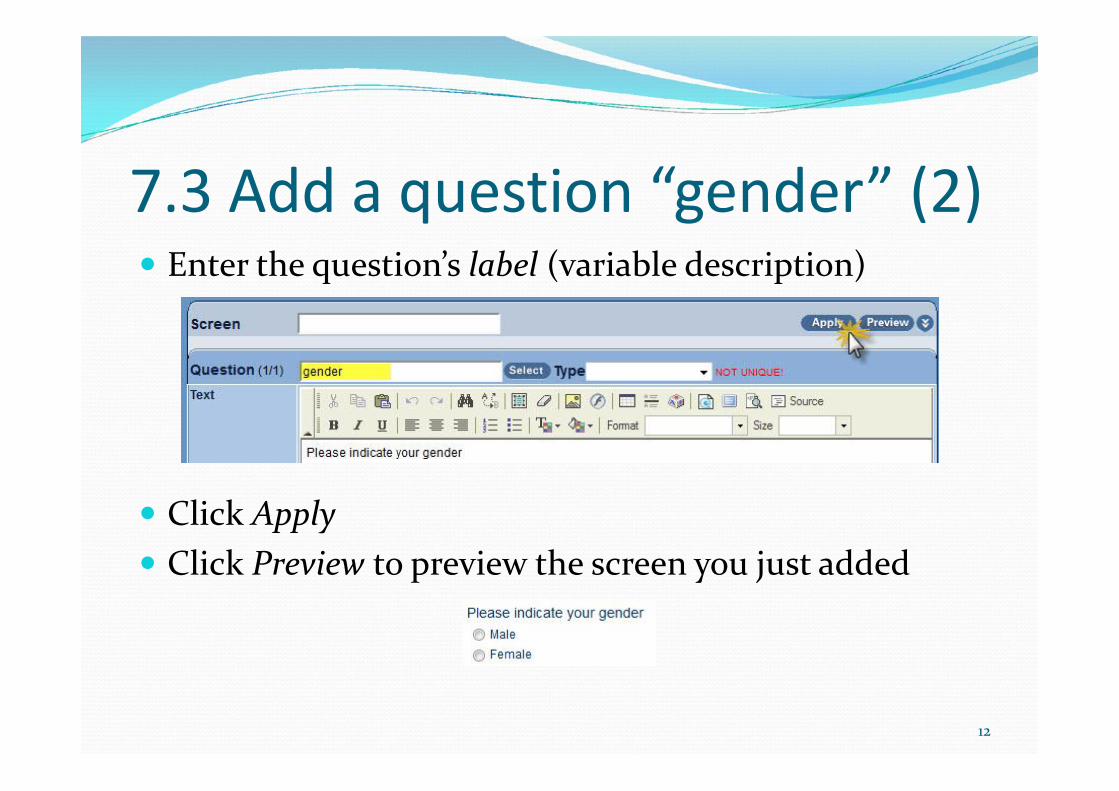
7.3 Add a question “gender” (2) Enter the question’s label (variable description)
Click Apply Click Preview to preview the screen you just added
12

7.4 Remove a question Removing the template’s ‘Bitter’ question by first
selecting the Design Questions Section
Select the ‘Bitter’ screen Remove the Bitter screen with the – icon
Removing the template’s ‘Bitter’ question by firstselecting the Design Questions Section
Select the ‘Bitter’ screen Remove the Bitter screen with the – icon
13

7.5 Add an attribute (1) Click the Design Questions Section Click the + icon to add a question/attribute
Select the Line Scale Standard Change the question text to ‘Sweet’ and click Apply
Click the Design Questions Section Click the + icon to add a question/attribute
Select the Line Scale Standard Change the question text to ‘Sweet’ and click Apply
14

7.5 Adding an attribute (2) Change the screen label to ‘attributes Change the question label to ‘sweetness’ Change the question text to ‘How sweet?’
Click Apply to confirm, Preview to preview
Change the screen label to ‘attributes Change the question label to ‘sweetness’ Change the question text to ‘How sweet?’
Click Apply to confirm, Preview to preview
15
7.5 Adding an 2nd attribute (3) Select the screen to which you want to add another
question/attribute
Click the + icon in the bottom right pane named‘QUESTIONS’ to add a question to a screen instead ofadding a complete new screen
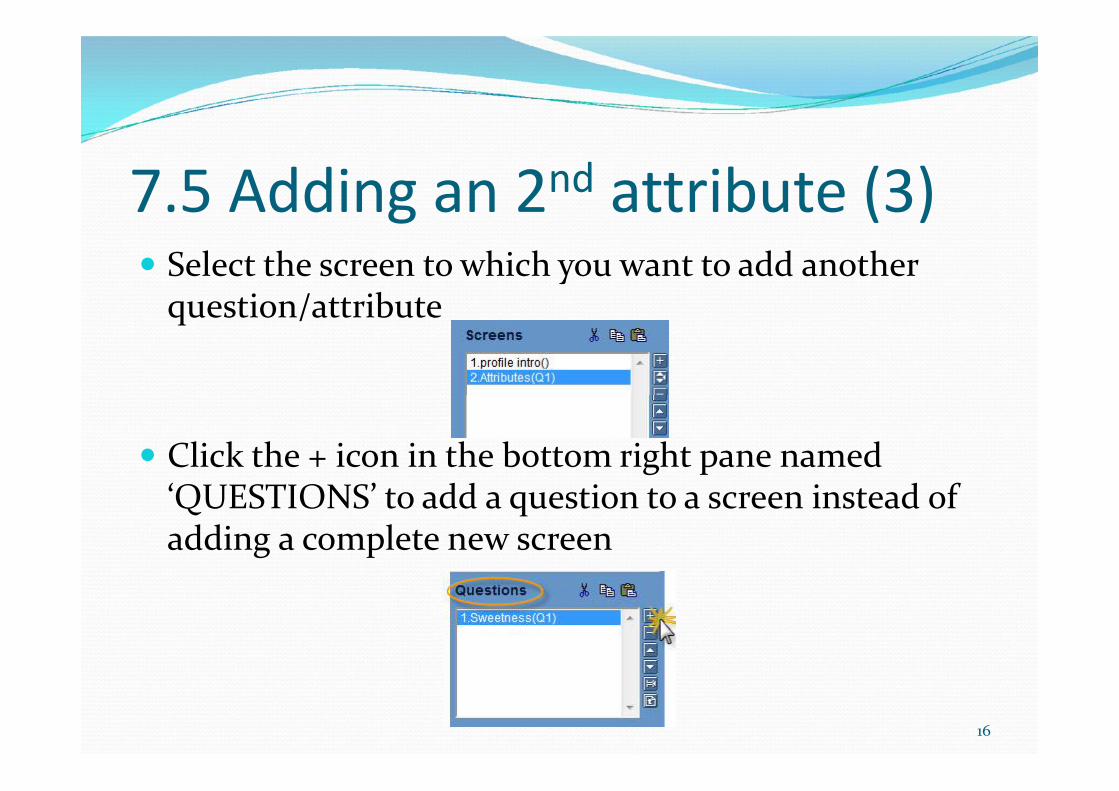
Select the screen to which you want to add anotherquestion/attribute
Click the + icon in the bottom right pane named‘QUESTIONS’ to add a question to a screen instead ofadding a complete new screen
16
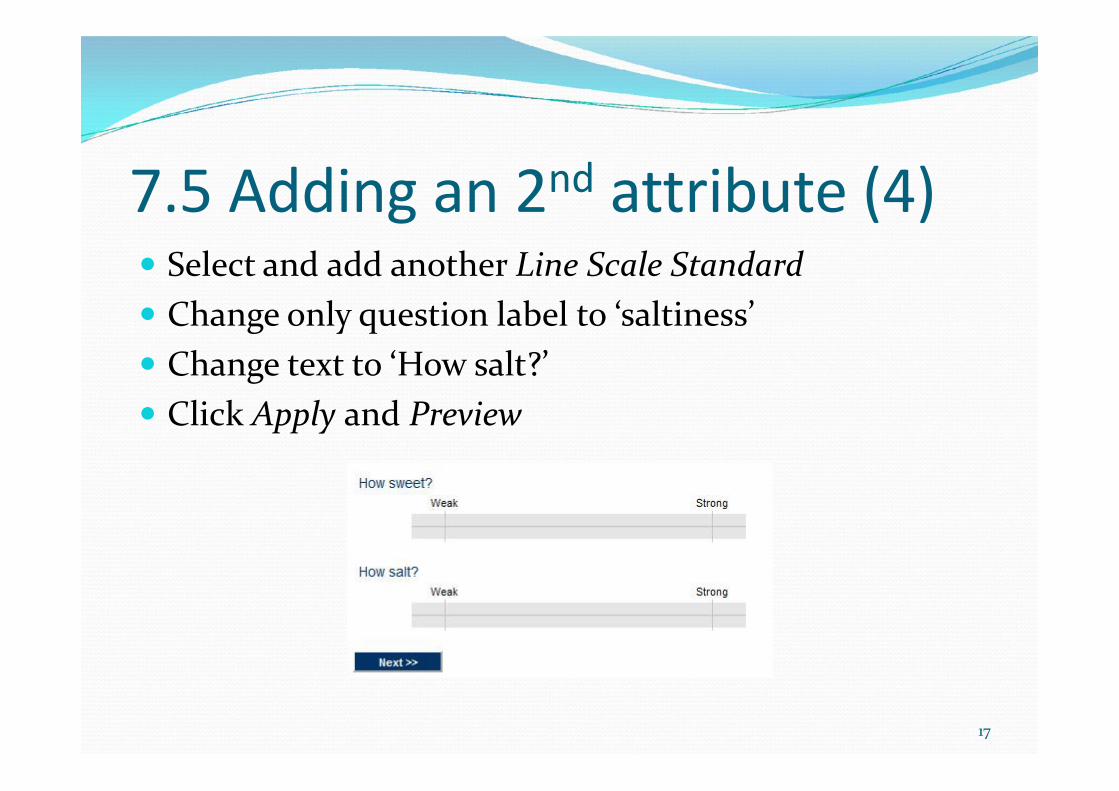
7.5 Adding an 2nd attribute (4) Select and add another Line Scale Standard Change only question label to ‘saltiness’ Change text to ‘How salt?’ Click Apply and Preview
Select and add another Line Scale Standard Change only question label to ‘saltiness’ Change text to ‘How salt?’ Click Apply and Preview
17

7.5 Adding an 3rd attribute (5) Add another Line Scale Standard on this screen Change only the question label to ‘crunchiness’ Change text to ‘How crunchy?’ Click Apply and Preview
Add another Line Scale Standard on this screen Change only the question label to ‘crunchiness’ Change text to ‘How crunchy?’ Click Apply and Preview
18
IMPORTANT:It is important for this example tohave at least three line scales in thedesign questions section!
IMPORTANT:It is important for this example tohave at least three line scales in thedesign questions section!
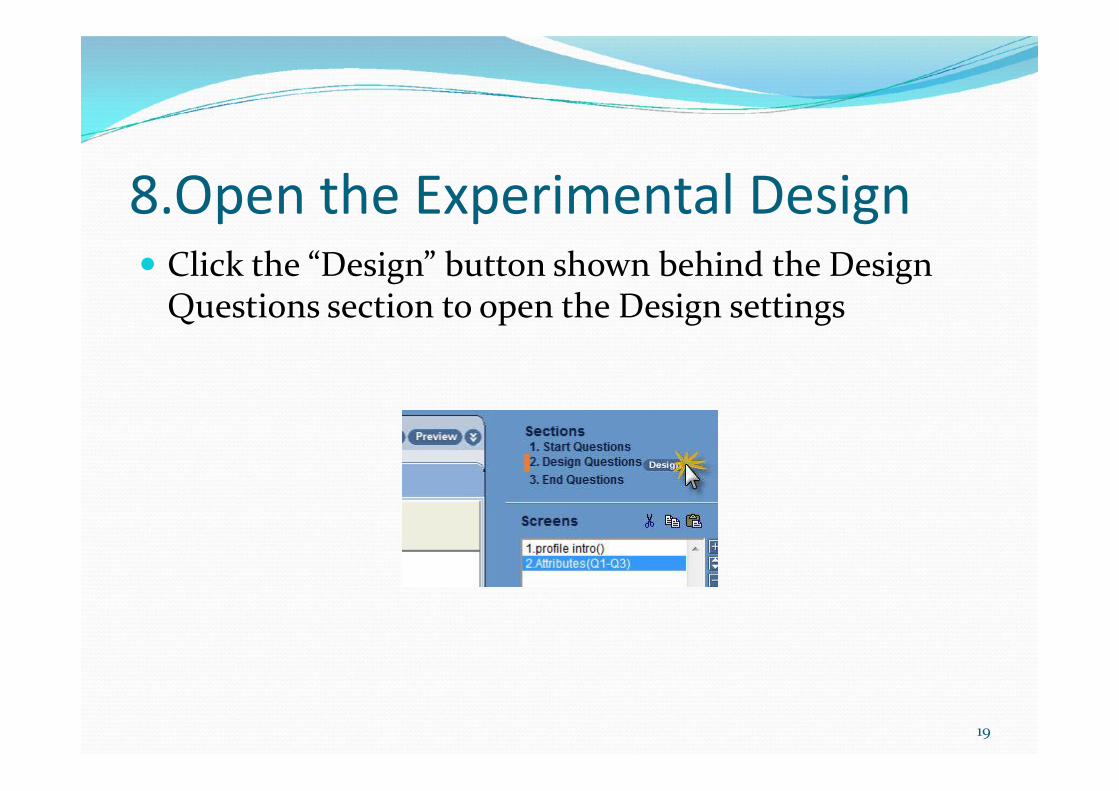
8.Open the Experimental Design Click the “Design” button shown behind the Design
Questions section to open the Design settings
19
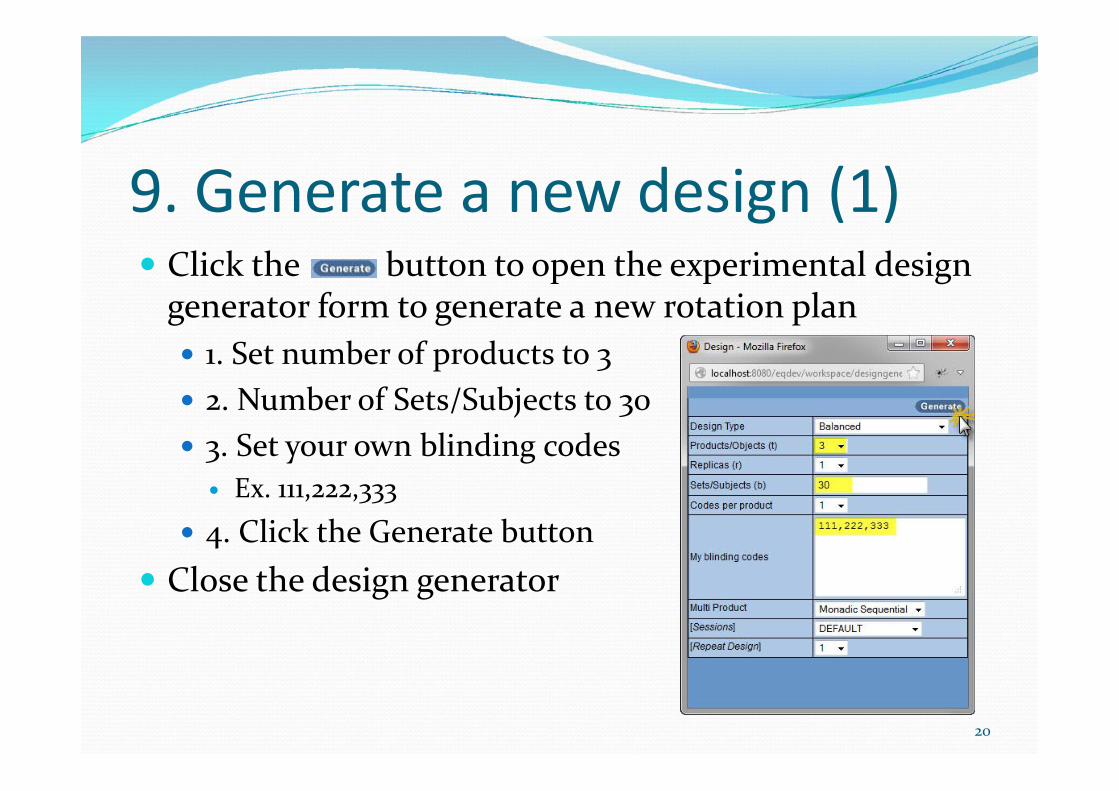
9. Generate a new design (1) Click the button to open the experimental design
generator form to generate a new rotation plan 1. Set number of products to 3 2. Number of Sets/Subjects to 30 3. Set your own blinding codes Ex. 111,222,333
4. Click the Generate button Close the design generator
Click the button to open the experimental designgenerator form to generate a new rotation plan 1. Set number of products to 3 2. Number of Sets/Subjects to 30 3. Set your own blinding codes Ex. 111,222,333
4. Click the Generate button Close the design generator
20
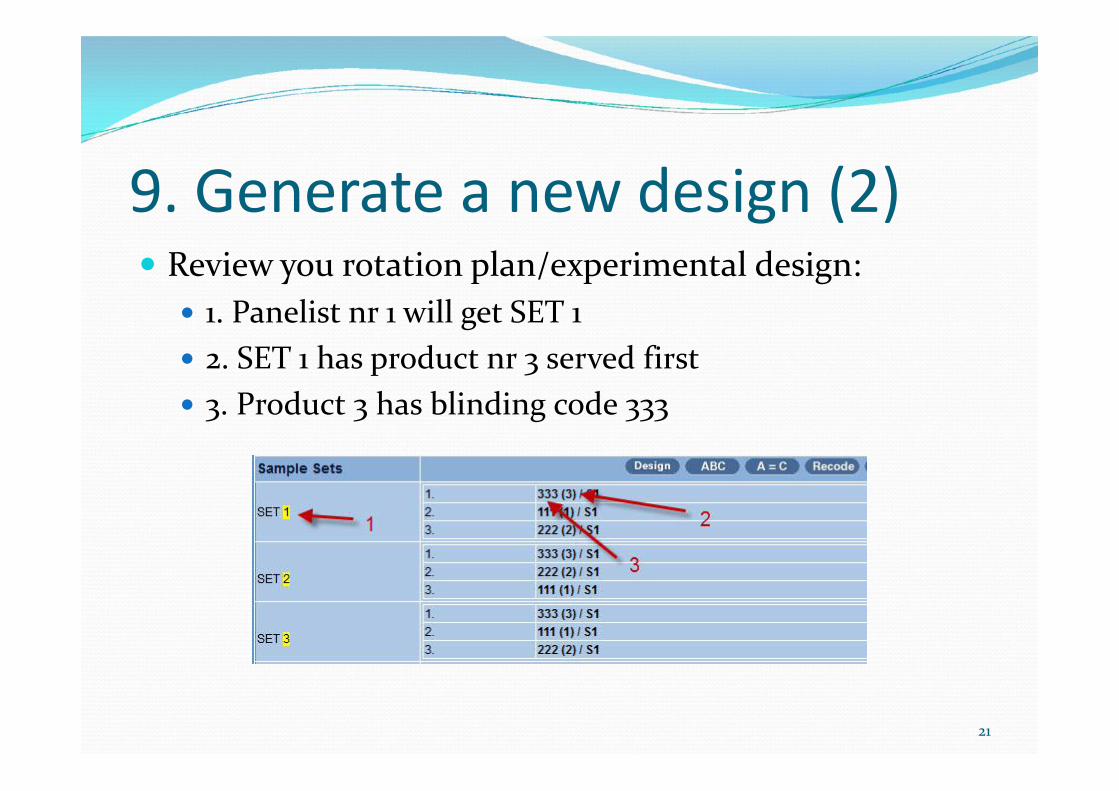
9. Generate a new design (2) Review you rotation plan/experimental design: 1. Panelist nr 1 will get SET 1 2. SET 1 has product nr 3 served first 3. Product 3 has blinding code 333
Review you rotation plan/experimental design: 1. Panelist nr 1 will get SET 1 2. SET 1 has product nr 3 served first 3. Product 3 has blinding code 333
21
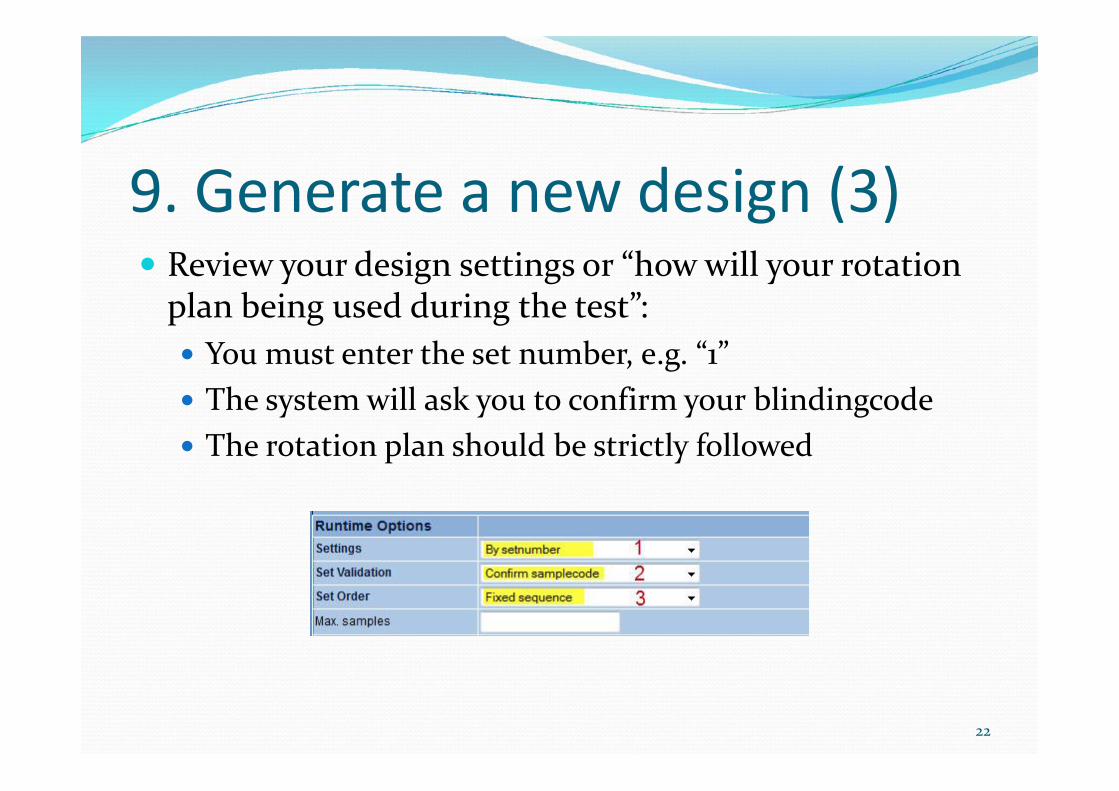
9. Generate a new design (3) Review your design settings or “how will your rotation
plan being used during the test”: You must enter the set number, e.g. “1” The system will ask you to confirm your blindingcode The rotation plan should be strictly followed
Review your design settings or “how will your rotationplan being used during the test”: You must enter the set number, e.g. “1” The system will ask you to confirm your blindingcode The rotation plan should be strictly followed
22

9. Generate a new design (4) Let’s change the design settings to: 1. You can enter any valid blinding code 2. The system will ask you to enter a sample code 3. You have the freedom to evaluate in any sequence
Let’s change the design settings to: 1. You can enter any valid blinding code 2. The system will ask you to enter a sample code 3. You have the freedom to evaluate in any sequence
23

10. Export your design to Excel Export your design/rotation plan to an Excel file for
the sample preparation team
24

11.1 Preview your test Click the Preview tab in the project workspace to give
your questionnaire a test run
25

11.2 Print your questionnaire Click the Print button to print a summary of your
questionnaire to paper
26
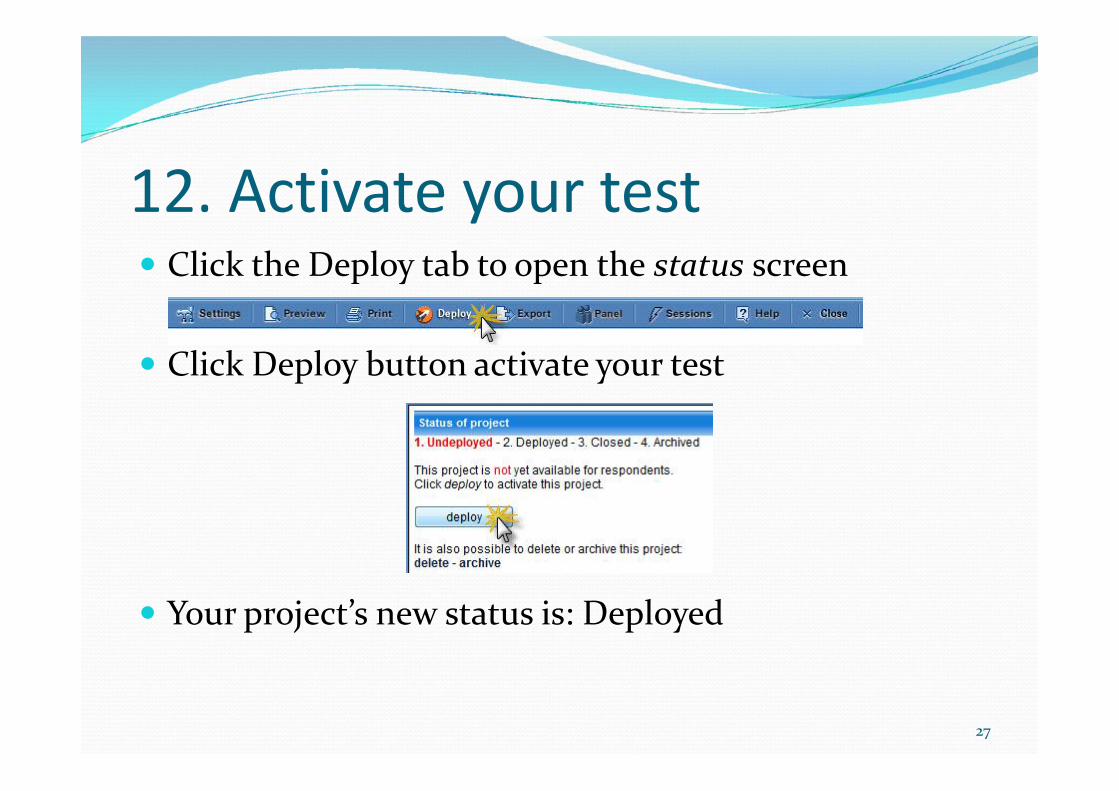
12. Activate your test Click the Deploy tab to open the status screen
Click Deploy button activate your test
Your project’s new status is: Deployed
Click the Deploy tab to open the status screen
Click Deploy button activate your test
Your project’s new status is: Deployed
27

13.1 Let’s collect some data! In the Deploy tab, click on the first link icon to run the
test as a (in this case anonymous) panelist
28

13.2 Let’s collect some data! Answer all questions until you reach the Thank You
screen and click the Submit button
Secondly click the Close Window button, so the openDeploy tab windows appears again of step 14.1
IMPORTANT: When the system asksyou for a sample code, enter a validblinding code from your design (whichyou exported in step 10
IMPORTANT: When the system asksyou for a sample code, enter a validblinding code from your design (whichyou exported in step 10
Answer all questions until you reach the Thank Youscreen and click the Submit button
Secondly click the Close Window button, so the openDeploy tab windows appears again of step 14.1
29
IMPORTANT: When the system asksyou for a sample code, enter a validblinding code from your design (whichyou exported in step 10
IMPORTANT: When the system asksyou for a sample code, enter a validblinding code from your design (whichyou exported in step 10

14. Login again Since you started as a panelist, you are logged out of
the system. Close your all your browser windows Start a new Internet Explorer instance and login again (see step 1. Access EyeQuestion, first sheet) Open your project again.
Since you started as a panelist, you are logged out ofthe system. Close your all your browser windows Start a new Internet Explorer instance and login again (see step 1. Access EyeQuestion, first sheet) Open your project again.
30
To be continued …