Embed Size (px)
Citation preview

CREAM
Chore Book
Feeding Three Feeding Shifts: Early AM
• Feed high and low diets to CREAM string o Record weights of high and low diets with and without water on the
corresponding feed sheets • Do not pick up orts
Mid AM
• Feed and water calf hutches, heifers in the heifer barn, and refill the TMR bucket in the calf room
Early PM
• Pick up orts at the beginning of the shift o Record weight of orts of high and low diets on the corresponding feed sheets
• Feed high and low diets to CREAM string o Record weights of high and low diets with and without water on the
corresponding feed sheets
The Data Ranger: Location
• It is parked next to the orts pile in the feed barn • The computer says CREAM on the side. This is the data ranger that stores all of our
recipe information. • In the winter, the data ranger is parked in the barn between the CREAM string and third
string o On early AM and early PM shifts, park the data ranger outside the barn doors
when done feeding so that research feeder can feed the research cows. The research feeder will move the CREAM data ranger into the barn when he or she is done feeding.
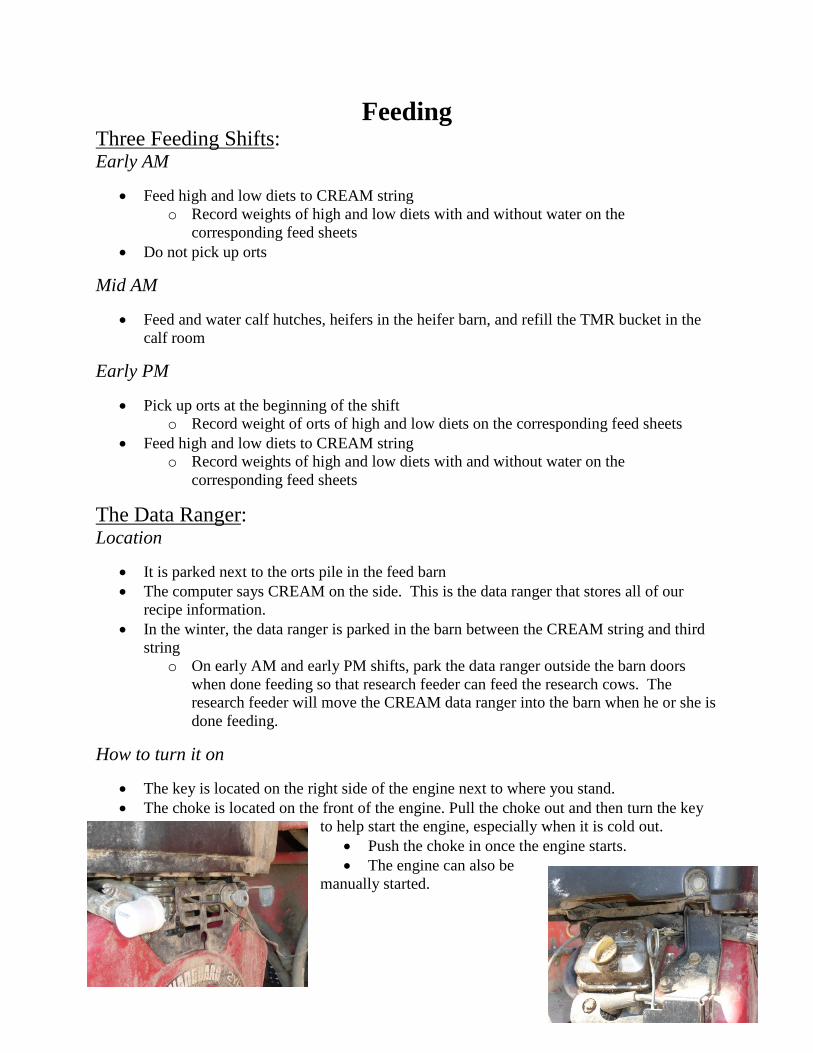
How to turn it on
• The key is located on the right side of the engine next to where you stand. • The choke is located on the front of the engine. Pull the choke out and then turn the key
to help start the engine, especially when it is cold out. • Push the choke in once the engine starts. • The engine can also be
manually started.
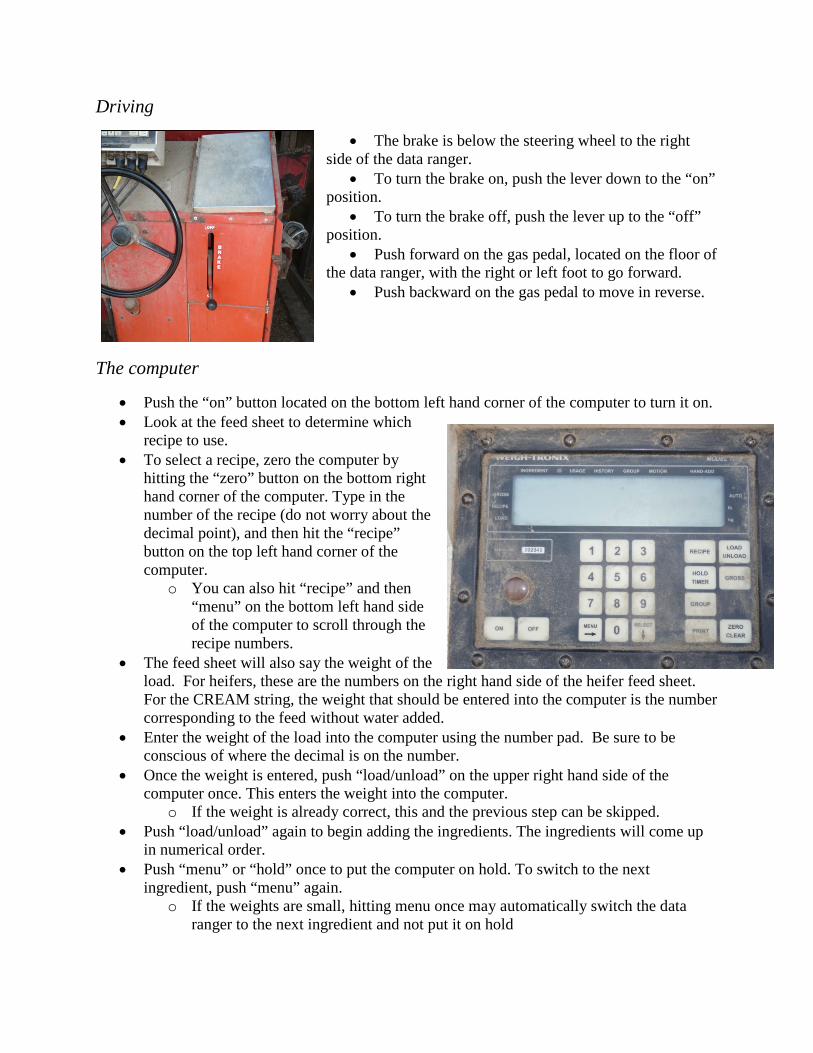
Driving
• The brake is below the steering wheel to the right side of the data ranger.
• To turn the brake on, push the lever down to the “on” position.
• To turn the brake off, push the lever up to the “off” position.
• Push forward on the gas pedal, located on the floor of the data ranger, with the right or left foot to go forward.
• Push backward on the gas pedal to move in reverse.
The computer
• Push the “on” button located on the bottom left hand corner of the computer to turn it on. • Look at the feed sheet to determine which
recipe to use. • To select a recipe, zero the computer by
hitting the “zero” button on the bottom right hand corner of the computer. Type in the number of the recipe (do not worry about the decimal point), and then hit the “recipe” button on the top left hand corner of the computer.
o You can also hit “recipe” and then “menu” on the bottom left hand side of the computer to scroll through the recipe numbers.
• The feed sheet will also say the weight of the load. For heifers, these are the numbers on the right hand side of the heifer feed sheet. For the CREAM string, the weight that should be entered into the computer is the number corresponding to the feed without water added.
• Enter the weight of the load into the computer using the number pad. Be sure to be conscious of where the decimal is on the number.
• Once the weight is entered, push “load/unload” on the upper right hand side of the computer once. This enters the weight into the computer.
o If the weight is already correct, this and the previous step can be skipped. • Push “load/unload” again to begin adding the ingredients. The ingredients will come up
in numerical order. • Push “menu” or “hold” once to put the computer on hold. To switch to the next
ingredient, push “menu” again. o If the weights are small, hitting menu once may automatically switch the data
ranger to the next ingredient and not put it on hold
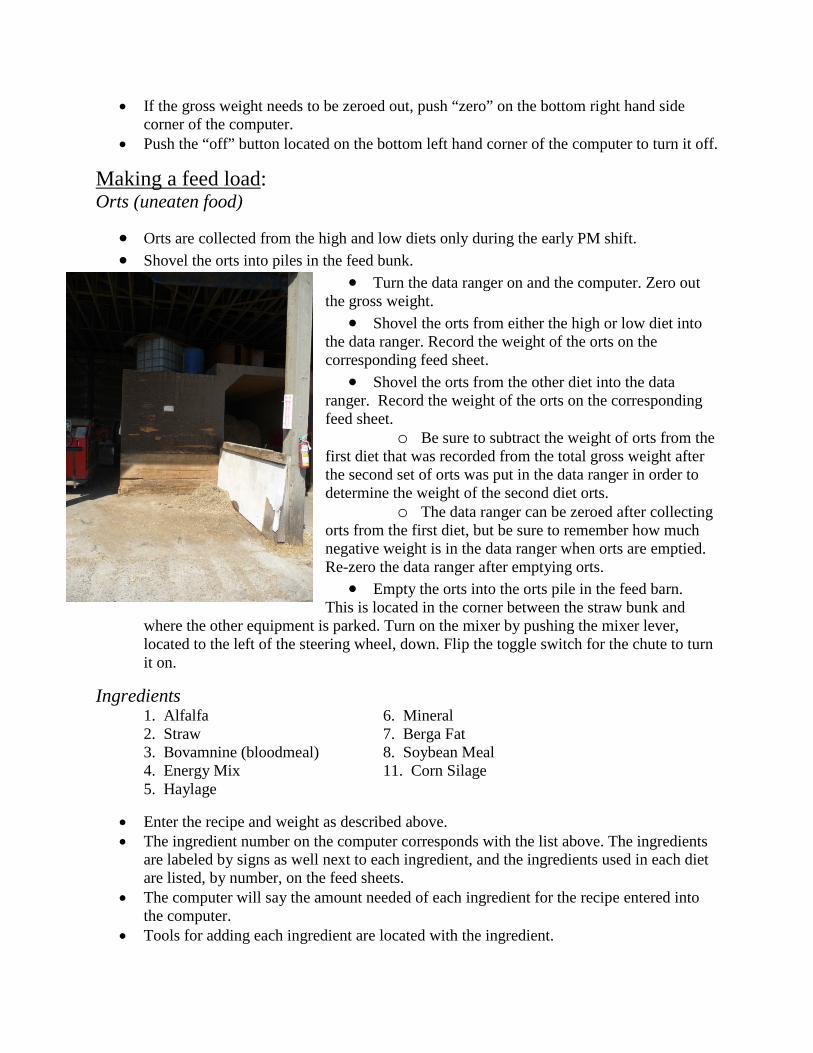
• If the gross weight needs to be zeroed out, push “zero” on the bottom right hand side corner of the computer.
• Push the “off” button located on the bottom left hand corner of the computer to turn it off.
Making a feed load: Orts (uneaten food)
• Orts are collected from the high and low diets only during the early PM shift. • Shovel the orts into piles in the feed bunk.
• Turn the data ranger on and the computer. Zero out the gross weight.
• Shovel the orts from either the high or low diet into the data ranger. Record the weight of the orts on the corresponding feed sheet.
• Shovel the orts from the other diet into the data ranger. Record the weight of the orts on the corresponding feed sheet.
o Be sure to subtract the weight of orts from the first diet that was recorded from the total gross weight after the second set of orts was put in the data ranger in order to determine the weight of the second diet orts.
o The data ranger can be zeroed after collecting orts from the first diet, but be sure to remember how much negative weight is in the data ranger when orts are emptied. Re-zero the data ranger after emptying orts.
• Empty the orts into the orts pile in the feed barn. This is located in the corner between the straw bunk and
where the other equipment is parked. Turn on the mixer by pushing the mixer lever, located to the left of the steering wheel, down. Flip the toggle switch for the chute to turn it on.
Ingredients 1. Alfalfa 6. Mineral 2. Straw 7. Berga Fat 3. Bovamnine (bloodmeal) 8. Soybean Meal 4. Energy Mix 11. Corn Silage 5. Haylage
• Enter the recipe and weight as described above. • The ingredient number on the computer corresponds with the list above. The ingredients
are labeled by signs as well next to each ingredient, and the ingredients used in each diet are listed, by number, on the feed sheets.
• The computer will say the amount needed of each ingredient for the recipe entered into the computer.
• Tools for adding each ingredient are located with the ingredient.

• Put in the amount of each ingredient that is called for. There are yellow lights on the sides of the data ranger. These lights will flash when the weight is within five pounds of the required weight. The lights will stop flashing and remain lit once the correct amount of the ingredient is put into the data ranger.
o When adding small weights (like when adding straw), the lights may not flash, and the weight should be monitored on the computer.
• Once the ingredient is put into the data ranger, push “hold” or “menu” once to put the computer on hold.
• Move to the next ingredient. Not all ingredients will be used in all diets. • Push “menu” again to begin adding the next ingredient. • Mix the load in-between adding ingredients. Turn on the
mixer by pushing the mixer lever up or down (forward) which is located to the left of the steering wheel. The off position is directly in the middle. Turn the mixer off before adding the next ingredient.
• Bloodmeal (#3) and Berga fat (#7) are expensive, so be as accurate as possible when adding these ingredients to the data ranger.
• Haylage (#5) and Corn Silage (#11) are added by positioning the data ranger under the hopper for the desired ingredient and using the start and stop buttons on the dangling control box to turn the hopper on and off.
• Corn silage (#11) comes out of the silo much faster than the haylage does. Be aware of this when adding it to the data ranger.
• When adding haylage (#5) or corn silage (#11), the mixer should be on. Turn the hopper and the mixer off when the weight added is within 30-50lbs of the desired weight and add the remainder in small amounts to get the most accurate addition. Make sure the mixer is off before switching to the next ingredient on the computer.
• Once the final ingredient is added, push “menu” to show the gross weight. • Do not combine loads into one large load. Split up and feed loads as designated on the
feed sheets. o Recipes may be broken up into several loads because the weight capacity of the
data ranger is 1300 pounds including water. (max before adding water= 1180)
Feeding the load out
• Mix the load when driving up to the main barn or the heifer barn by turning the mixer on.
• Water is added to the high and low diets for the CREAM string. Do not put the hose directly into the data ranger while the mixer is on.
• In order to feed out the load, turn the mixer on first. The toggle to turn on the chute is to the left of the mixer lever. Push the toggle up to turn the chute on.
• At the end of each shift, refill the gas tank with gas. The gas is
located in the feed barn by the haylage in a metal cabinet o Make sure to turn the data ranger off before refilling the
gas. • Push up feed to where the cows can reach it using one of the
shovels with yellow tape on the handle.
Feeding heifers
• All instructions for the use of the data ranger and mixing loads are the same.
• No water is added to the feed • Feed the correct amount to each pen as described on the heifer feed
sheet. The pens are labeled on the back walls above the pens. • Turn the toggle switch for the chute off to drive between pens. • Deposit food only where there are headgates so that the heifers can get to the feed.
• The heifer feed sheet tells how many pounds of each load go to each pen. Subtract the weight of each load from the total weight so that you know when to stop the chute. Stop the chute before it gets to exactly the right weight to make sure too much doesn’t get fed to one pen.
• When feeding recipe #13 to pens 4, 5, and 6, feed pen 4 first.
o This will ensure that younger heifers will get more nutrients since the load isn’t as well mixed towards the end.
• When feeding the calf hutches and the nursery, make sure to empty
the buckets of old feed before refilling them. Empty them up against the cement block on the side closest to the hutches.
Milking Two Milking Shifts: Early AM
• Milk the CREAM string • Sanitize the tank immediately if the milk truck came over night
o The milk truck comes every other night o Check with the fulltime and research staff because they may have already
sanitized the tank o The milk room will smell strongly of chemicals if the tank has already been
sanitized • No copper sulfate foot bath
Early PM
• Milk the CREAM string • Do not sanitize the tank • Fill the copper sulfate foot bath if it is available.
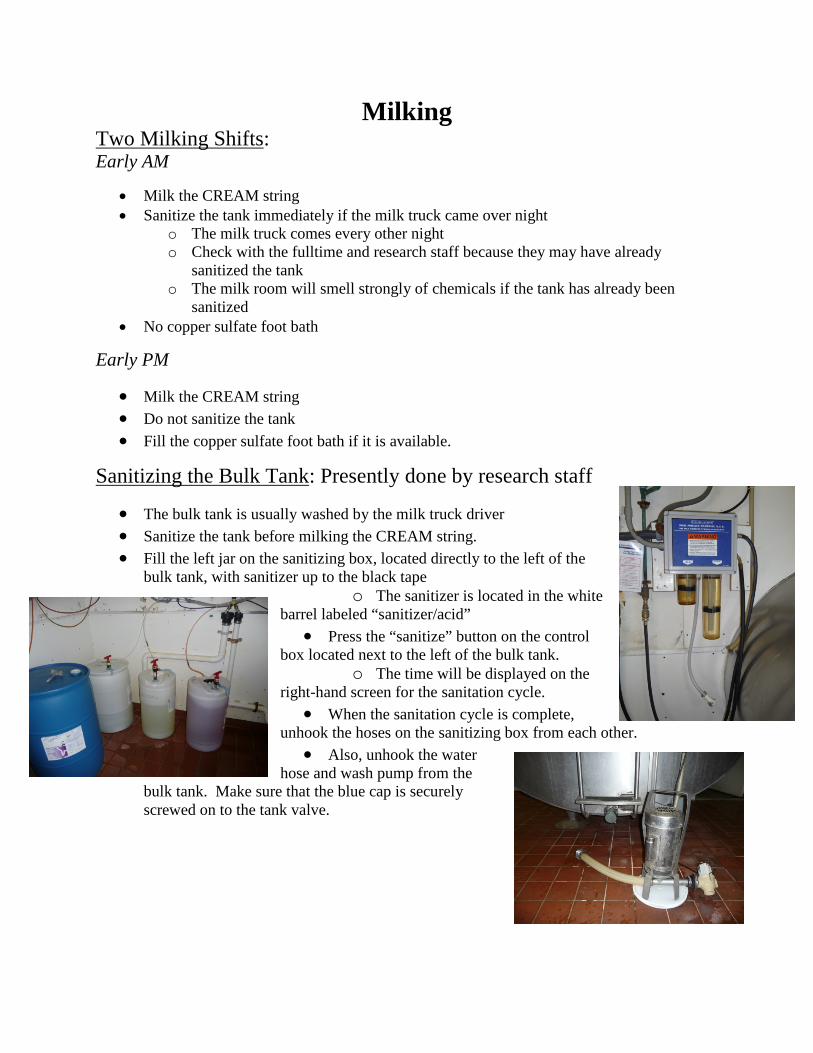
Sanitizing the Bulk Tank: Presently done by research staff
• The bulk tank is usually washed by the milk truck driver • Sanitize the tank before milking the CREAM string. • Fill the left jar on the sanitizing box, located directly to the left of the
bulk tank, with sanitizer up to the black tape o The sanitizer is located in the white
barrel labeled “sanitizer/acid” • Press the “sanitize” button on the control
box located next to the left of the bulk tank. o The time will be displayed on the
right-hand screen for the sanitation cycle. • When the sanitation cycle is complete,
unhook the hoses on the sanitizing box from each other. • Also, unhook the water
hose and wash pump from the bulk tank. Make sure that the blue cap is securely screwed on to the tank valve.

Setting Up: Milk Tank
• Unhook the vertical wash tank pipe by undoing the clamp.
o Make sure the rubber bushing is between the metal cover and the pipe.
• Put the clamp back on. • Hook up the milk pipe to the bulk tank.
• First grab the pipe attachment from the white shelf and place in the leftmost opening on the top of the bulk tank.
• Undo the clamp to the milk pipe and make sure the rubber bushing is still attached to the bottom of the milk pipe.
• Swing the milk pipe over to the bulk tank and place on the pipe attachment.
o Let water drain out of the milk pipe.
• Put the clamp back on. • Make sure that the lever on the
end of the milk pipe is parallel to the pipe. It should always be parallel and should not have to be touched.
Milking Parlor
• Grab the following to bring down to the milking parlor and place on the black table in the middle:
o A pair of gloves o The two iodine bottles located by the sink o The two teat stoppers hanging above the left side of
the sink. These are used for any 3 quartered cows. o The white bucket located either under the sink or on
the white shelf • Fill the black tub half way with water.
o Use the blue hose to fill it up. The switch to turn the hose on is located above the blue hose.
• Place the black hose laying next to the water tub into the hole in the side of the black tub.

o A continual drip of water comes out of the black hose while the cows are being milked.
• Fill the copper sulfate bath at the end of the return alley (PM only). o Put half a bag of copper sulfate in the foot bath. o Use the blue hose to fill the foot bath with water until ½ inch from the top lip of
the foot bath. o Be sure to mix the copper sulfate well.
• Pull the black covers off of the milking machines. • Unhook the milking machines and lay on the grate. • To the right of the stairs leading out of the milking
parlor into the holding area, there is a black screwcap on the pipe. Loosen the top of the screwcap and turn the black rubber piece so that the two notches are parallel with the pipe.
Milking: Turning on the system
• Start milking at 4:30am on the early AM shift and at 3:30pm on the early PM shift.
o Do not turn on the system any earlier than 10 minutes before these stated times.
• Between the bulk tank and the white shelf in the milking room is a control box for the bulk tank.
• Push the “prestart” button on the bottom left hand corner of the control box.
• On the wall to the left of the wash tank, turn the switch on the control box from wash to milk. Toggle switch to milk on side of box.
• Turn the yellow lever down to milk on the wall to turn on the plate cooler.
• Quickly walk to the milking parlor. • Push and hold the green button on the
first computer on each side of the milking parlor until the number in the center of the screen is 0.0 to
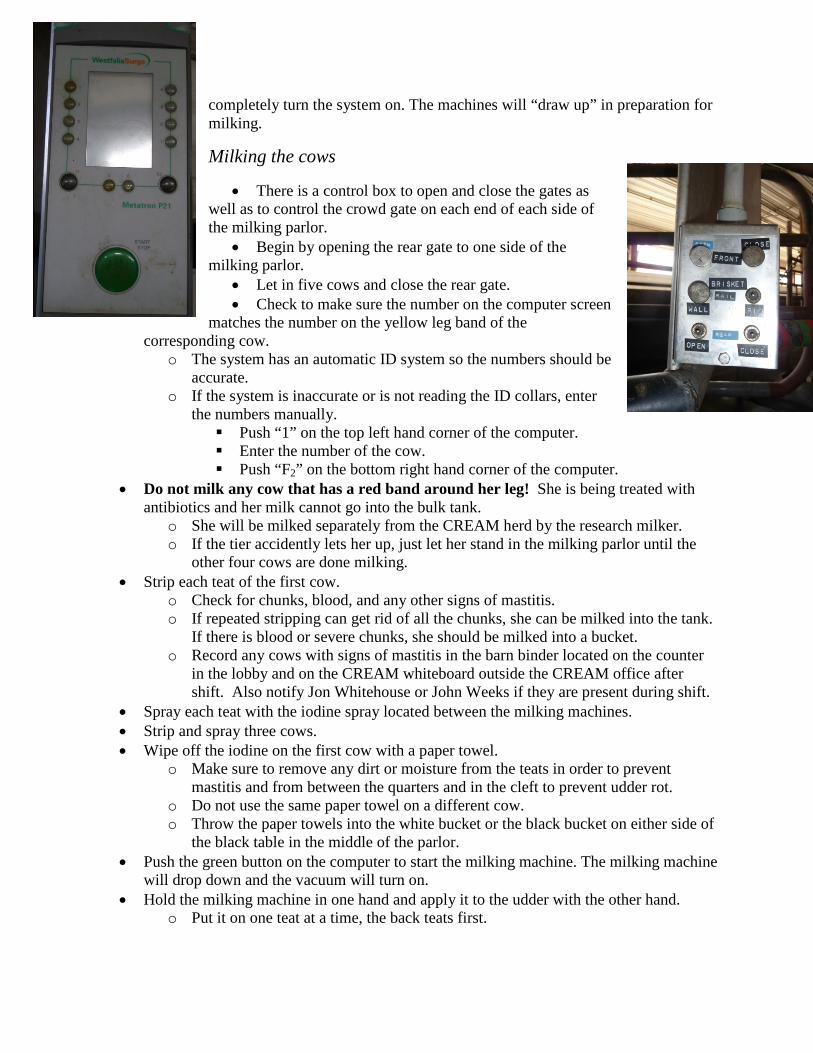
completely turn the system on. The machines will “draw up” in preparation for milking.
Milking the cows
• There is a control box to open and close the gates as well as to control the crowd gate on each end of each side of the milking parlor.
• Begin by opening the rear gate to one side of the milking parlor.
• Let in five cows and close the rear gate. • Check to make sure the number on the computer screen
matches the number on the yellow leg band of the corresponding cow.
o The system has an automatic ID system so the numbers should be accurate.
o If the system is inaccurate or is not reading the ID collars, enter the numbers manually. Push “1” on the top left hand corner of the computer. Enter the number of the cow. Push “F2” on the bottom right hand corner of the computer.
• Do not milk any cow that has a red band around her leg! She is being treated with antibiotics and her milk cannot go into the bulk tank.
o She will be milked separately from the CREAM herd by the research milker. o If the tier accidently lets her up, just let her stand in the milking parlor until the
other four cows are done milking. • Strip each teat of the first cow.
o Check for chunks, blood, and any other signs of mastitis. o If repeated stripping can get rid of all the chunks, she can be milked into the tank.
If there is blood or severe chunks, she should be milked into a bucket. o Record any cows with signs of mastitis in the barn binder located on the counter
in the lobby and on the CREAM whiteboard outside the CREAM office after shift. Also notify Jon Whitehouse or John Weeks if they are present during shift.
• Spray each teat with the iodine spray located between the milking machines. • Strip and spray three cows. • Wipe off the iodine on the first cow with a paper towel.
o Make sure to remove any dirt or moisture from the teats in order to prevent mastitis and from between the quarters and in the cleft to prevent udder rot.
o Do not use the same paper towel on a different cow. o Throw the paper towels into the white bucket or the black bucket on either side of
the black table in the middle of the parlor. • Push the green button on the computer to start the milking machine. The milking machine
will drop down and the vacuum will turn on. • Hold the milking machine in one hand and apply it to the udder with the other hand.
o Put it on one teat at a time, the back teats first.
• Place the milking hose in the metal holder and push it backward towards the cow so that the milking unit hangs straight down from the udder, not at an angle.
• Wipe and apply the milking machines to the next two cows. • Strip, spray, wipe, and apply the milking machine to the last two cows on that side. • Open the rear gate to the other side of the milking parlor, let in five cows, and close the
rear gate. • Strip, spray, wipe, and apply the milking machines to the first three cows.
• Strip, spray, wipe, and apply the milking machine to the last two cows on that side.
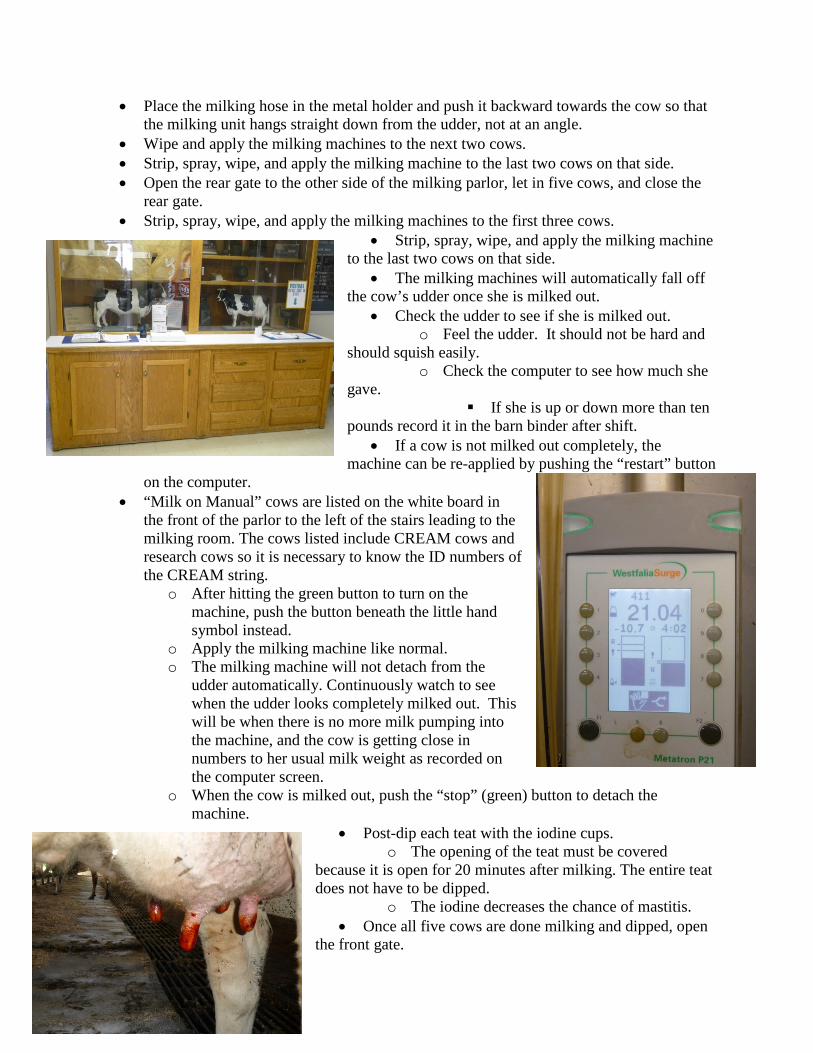
• The milking machines will automatically fall off the cow’s udder once she is milked out.
• Check the udder to see if she is milked out. o Feel the udder. It should not be hard and
should squish easily. o Check the computer to see how much she
gave. If she is up or down more than ten
pounds record it in the barn binder after shift. • If a cow is not milked out completely, the
machine can be re-applied by pushing the “restart” button on the computer.
• “Milk on Manual” cows are listed on the white board in the front of the parlor to the left of the stairs leading to the milking room. The cows listed include CREAM cows and research cows so it is necessary to know the ID numbers of the CREAM string.
o After hitting the green button to turn on the machine, push the button beneath the little hand symbol instead.
o Apply the milking machine like normal. o The milking machine will not detach from the
udder automatically. Continuously watch to see when the udder looks completely milked out. This will be when there is no more milk pumping into the machine, and the cow is getting close in numbers to her usual milk weight as recorded on the computer screen.
o When the cow is milked out, push the “stop” (green) button to detach the machine.
• Post-dip each teat with the iodine cups. o The opening of the teat must be covered
because it is open for 20 minutes after milking. The entire teat does not have to be dipped.
o The iodine decreases the chance of mastitis. • Once all five cows are done milking and dipped, open
the front gate.
o Do not open the gate until all cows are done! o Make sure the milking units and metal holders are pulled out from under the cows
toward the center of the parlor to avoid them tripping or stepping on the units. • Close the front gate once all five cows are in the return alley. Move them out of walkway
between parlor and milkroom and around corner. • Begin with the next five cows. • If there is a problem with any cow, always feel free to ask for help or suggestions from
the research milker. It is ok to leave the parlor to get help and leave cows milking as long as the milking machines that are not attached to cows are turned off.
• Research milks the research cows after, so once all the CREAM cows are milked, the milking shift is done.
o If there are an uneven number of CREAM cows, let the research cows into the milking parlor so that there are always five cows being milked at a time.
o The milker for research is usually in the milking parlor to take over.
Tying Two Tying Shifts: Early AM
• Un-clip all non-red chain/band CREAM cows and get them to the holding area • Scrape and re-bed stalls • Return cows to the correct stalls • No lime under the bedding • No copper sulfate foot bath
Early PM
• Help the milker with the copper sulfate foot bath • Un-clip the CREAM string and get them to the holding area • Scrape and re-bed stalls • Spread lime in stalls before re-bedding • Return cows to the correct stalls
Getting Ready:
Foot bath
• The foot bath is only done in the afternoon • If there is copper sulfate (the blue powder in the bags by the door right before you get to
the ramp that goes down to the barn), dump ½ bag into the square foot bath which is that dip in the cement at the end of the lane the cows use to exit the milking parlor (right before the ramp again).
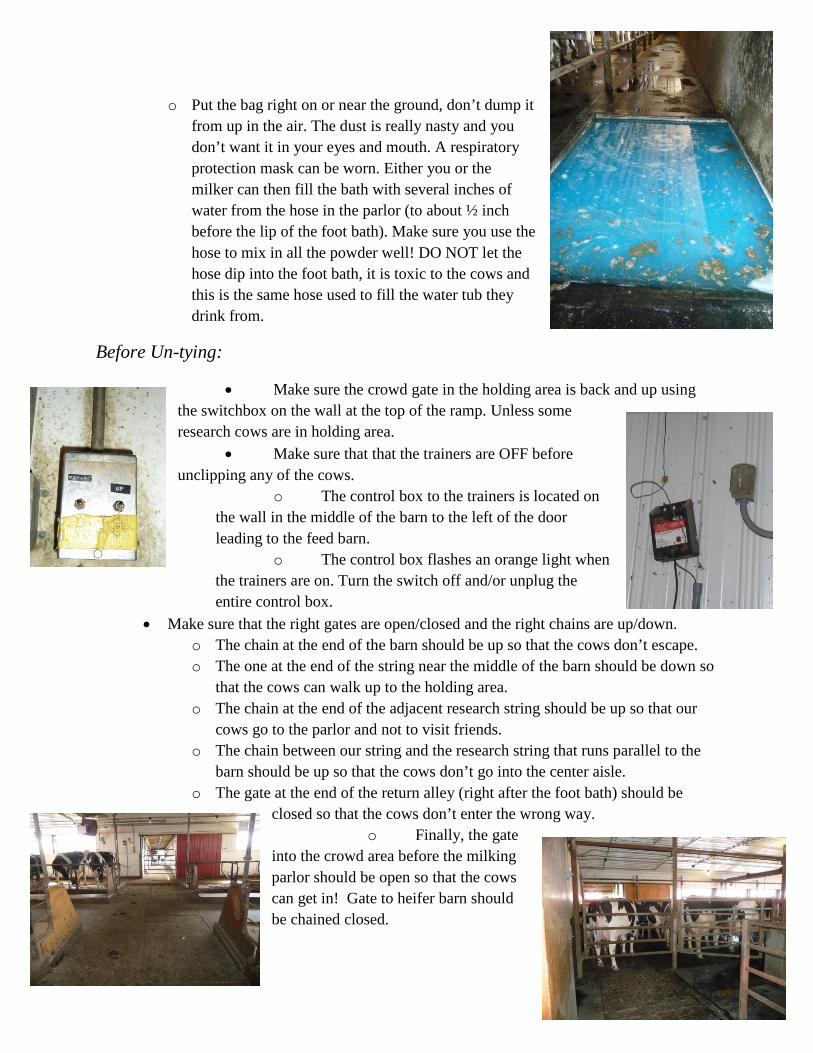
o Put the bag right on or near the ground, don’t dump it from up in the air. The dust is really nasty and you don’t want it in your eyes and mouth. A respiratory protection mask can be worn. Either you or the milker can then fill the bath with several inches of water from the hose in the parlor (to about ½ inch before the lip of the foot bath). Make sure you use the hose to mix in all the powder well! DO NOT let the hose dip into the foot bath, it is toxic to the cows and this is the same hose used to fill the water tub they drink from.
Before Un-tying:
• Make sure the crowd gate in the holding area is back and up using the switchbox on the wall at the top of the ramp. Unless some research cows are in holding area.
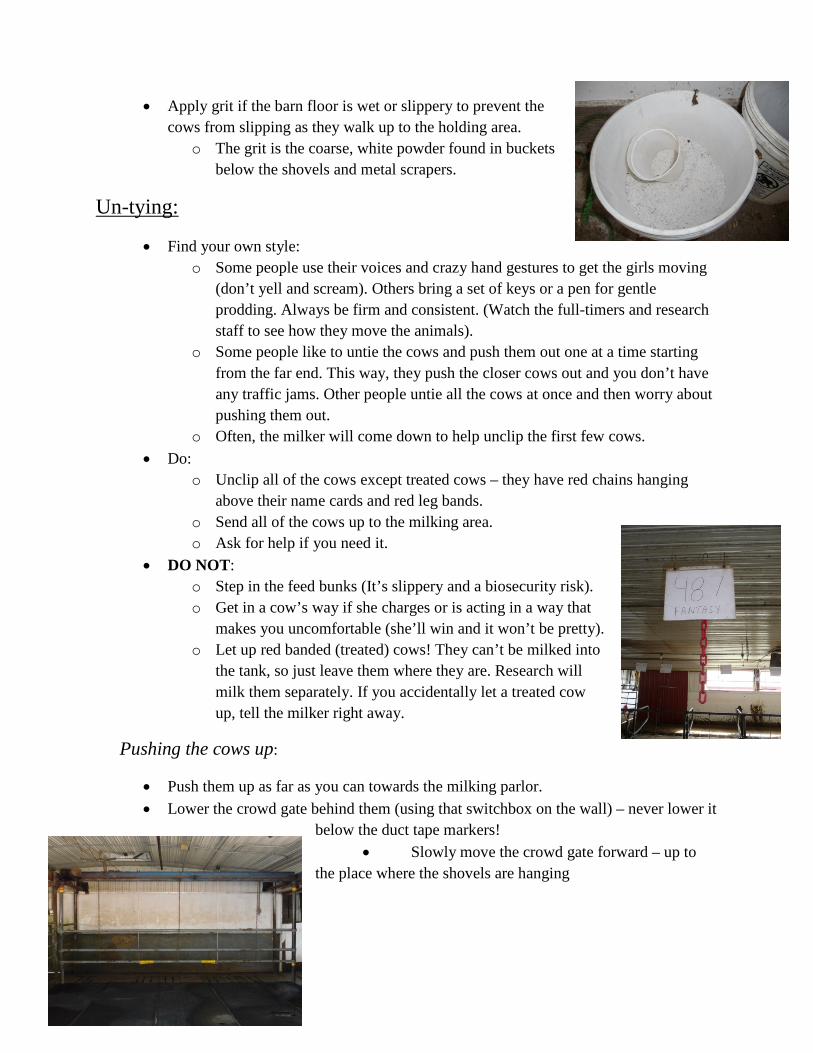
• Make sure that that the trainers are OFF before unclipping any of the cows.
o The control box to the trainers is located on the wall in the middle of the barn to the left of the door leading to the feed barn.
o The control box flashes an orange light when the trainers are on. Turn the switch off and/or unplug the entire control box.
• Make sure that the right gates are open/closed and the right chains are up/down. o The chain at the end of the barn should be up so that the cows don’t escape. o The one at the end of the string near the middle of the barn should be down so
that the cows can walk up to the holding area. o The chain at the end of the adjacent research string should be up so that our
cows go to the parlor and not to visit friends. o The chain between our string and the research string that runs parallel to the
barn should be up so that the cows don’t go into the center aisle. o The gate at the end of the return alley (right after the foot bath) should be
closed so that the cows don’t enter the wrong way. o Finally, the gate
into the crowd area before the milking parlor should be open so that the cows can get in! Gate to heifer barn should be chained closed.
• Apply grit if the barn floor is wet or slippery to prevent the cows from slipping as they walk up to the holding area.
o The grit is the coarse, white powder found in buckets below the shovels and metal scrapers.
Un-tying:
• Find your own style: o Some people use their voices and crazy hand gestures to get the girls moving
(don’t yell and scream). Others bring a set of keys or a pen for gentle prodding. Always be firm and consistent. (Watch the full-timers and research staff to see how they move the animals).
o Some people like to untie the cows and push them out one at a time starting from the far end. This way, they push the closer cows out and you don’t have any traffic jams. Other people untie all the cows at once and then worry about pushing them out.
o Often, the milker will come down to help unclip the first few cows. • Do:
o Unclip all of the cows except treated cows – they have red chains hanging above their name cards and red leg bands.
o Send all of the cows up to the milking area. o Ask for help if you need it.
• DO NOT: o Step in the feed bunks (It’s slippery and a biosecurity risk). o Get in a cow’s way if she charges or is acting in a way that
makes you uncomfortable (she’ll win and it won’t be pretty). o Let up red banded (treated) cows! They can’t be milked into
the tank, so just leave them where they are. Research will milk them separately. If you accidentally let a treated cow up, tell the milker right away.
Pushing the cows up:
• Push them up as far as you can towards the milking parlor. • Lower the crowd gate behind them (using that switchbox on the wall) – never lower it
below the duct tape markers! • Slowly move the crowd gate forward – up to
the place where the shovels are hanging
While the cows are being milked:
• Scrape out all the areas of wet and dirty bedding and feed that has piled up in the bedding area. Scrape all of this junk into the grate. You can use a shovel (one without yellow tape on it – those are for feed) or a metal scraper.
o Do not scrape bailing twine, long hay, placentas, sticks, stones, hair, or any other solid objects into the grates.
• Use a shovel or your foot to even out any lumps and bumps in the shavings. • Lime is used in the afternoon only:
o It’s the fine, white powder found in buckets (and bags) through the sliding door that leads down to the feed hopper area (where you find all the shovels and brooms). The grit used for traction on the barn floors is the coarser, white powder next to the lime.
o Grab a bucket with a mug in it and use the mug to distribute a fine layer over any bare or wet patches of mat where there aren’t any shavings. This helps to keep the area dry.
• Use the shovel and shavings in alley leading to feed room to spread out shavings over the spots of thin or no shavings. There should be enough shavings at the front of the stalls to pull back from when the stalls are scraped by the herdsman and enough at the back of the stall to keep the udder area clean and dry. You should try not to use more than one cart full of shavings for the string.
When cows start to come down from the parlor:
• They will come in groups of 5 as the milker releases them. • Make sure all of the chains and gates are in the correct positions again. Keep the cows
moving down to the barn and direct them back to the proper stall. Most know where they’re going, but some try to give you a hard time. Remember to remain firm and consistent with the animals, and don’t hesitate to ask for help if you need it!
• As soon as a cow is in the right stall, re-clip her. o If she is a chronic escape artist notify Jon he will change her clip
• Wet spots in the aisle should be sprinkled with grit to prevent ice and slipping.
If a cow slips and falls:
• Do not try to aid her with your hands or body. Give her a second to get her legs under her. If she struggles to get up, throw down some grit. Better safe than sorry, if lots of cows are slipping, put some grit down to prevent accidents.
Between groups of cows:
• Re-fill the shavings cart. The shavings are down in one of the bays near where the feed is located. Sometimes there are full carts, and sometimes you need to re-fill your own cart. If there are full carts through the sliding door that leads down to the feed hopper area (where you find all the shovels and brooms), you may use one of them.
• Double check often that all cows are in the correct stall and clipped.
After all the cows come back to the string:
• Sweep the aisle. Sweep debris down the grate. You may need to make several passes and keep tapping the broom to get most of the gunk clear. You may start sweeping before all of the cows are back on the string, but if they make a mess after you have swept, you need to clean it up. Anything wet should be shoveled or scraped into the grate before sweeping so the brooms don’t get ruined.
If you finish before the milker and feeder:
• Grab a feed shovel (one with yellow tape) and push up feed. You can also help research move their cows if they need it.
Calves and Maternity Two Calf and Maternity Shifts: Mid AM
• Chores split up as the group seems fit. • Usually:
o One picks the pack and cleans maternity pens o One does calves o One feeds heifers
Mid PM
• Don’t Feed heifers or pick the pack • One person does maternity, and the other does calves.
* The person doing maternity almost always finishes before the person doing calves, and should always go and help the other person as soon as they finish.
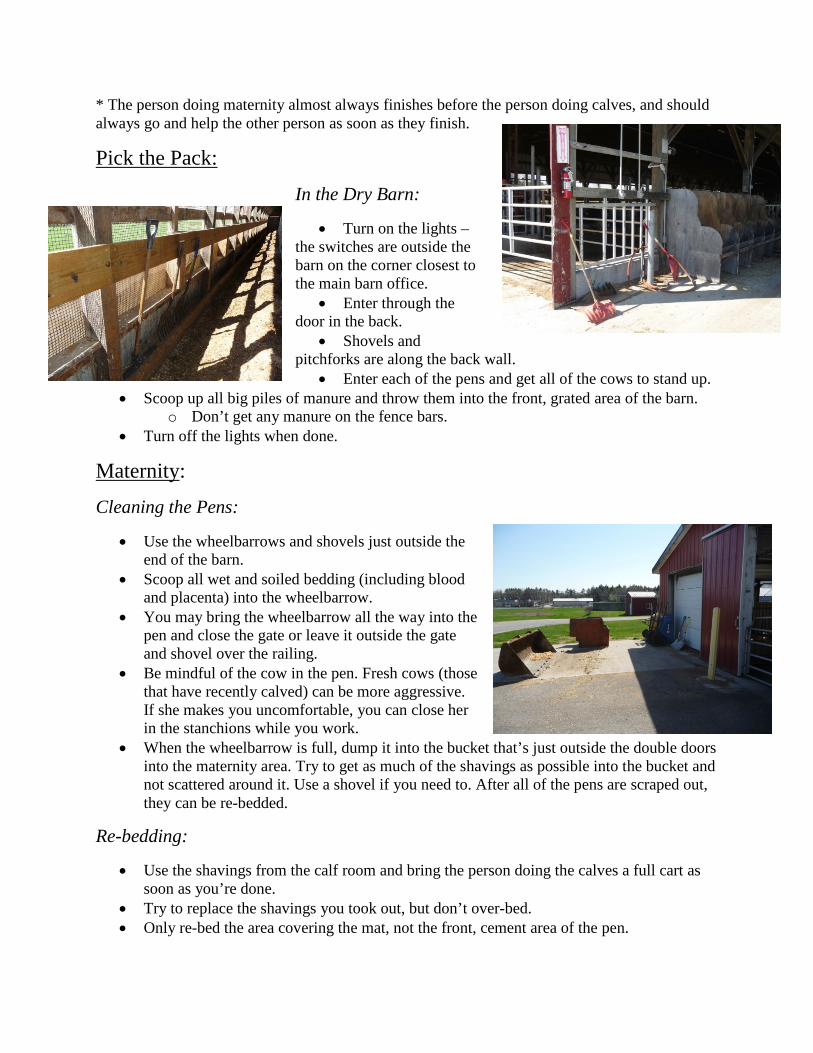
Pick the Pack:
In the Dry Barn:
• Turn on the lights – the switches are outside the barn on the corner closest to the main barn office.
• Enter through the door in the back.
• Shovels and pitchforks are along the back wall.
• Enter each of the pens and get all of the cows to stand up. • Scoop up all big piles of manure and throw them into the front, grated area of the barn.
o Don’t get any manure on the fence bars. • Turn off the lights when done.
Maternity:
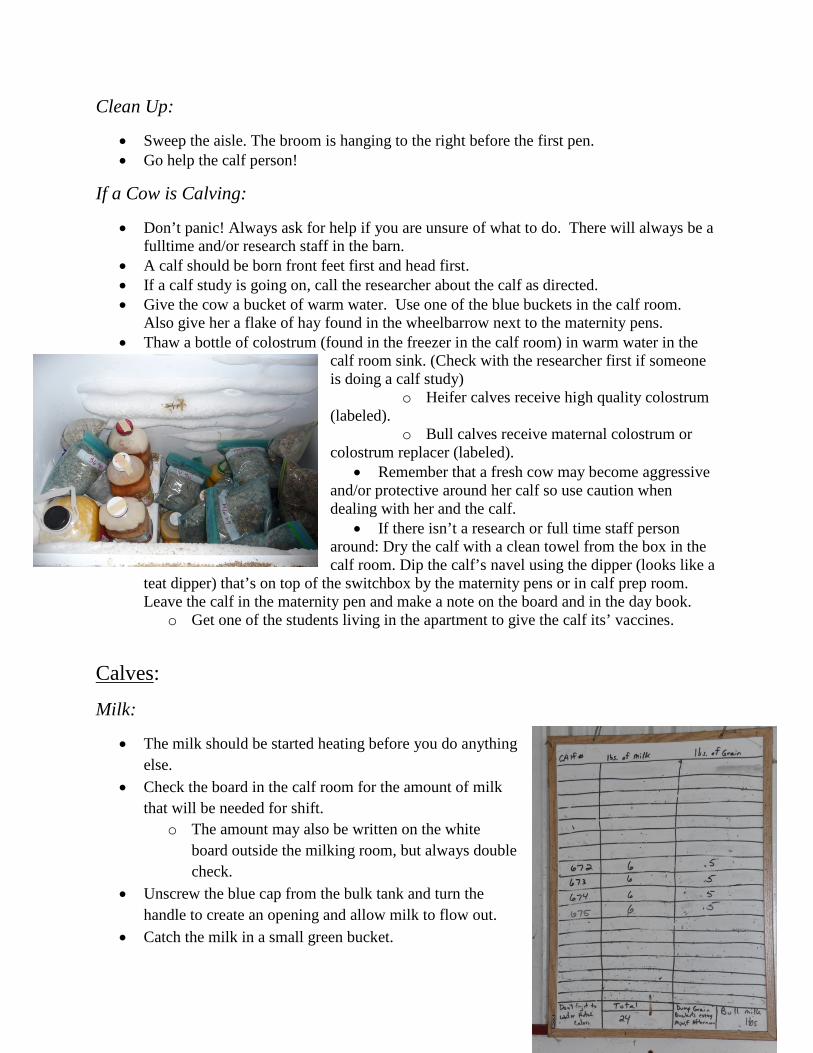
Cleaning the Pens:
• Use the wheelbarrows and shovels just outside the end of the barn.
• Scoop all wet and soiled bedding (including blood and placenta) into the wheelbarrow.
• You may bring the wheelbarrow all the way into the pen and close the gate or leave it outside the gate and shovel over the railing.
• Be mindful of the cow in the pen. Fresh cows (those that have recently calved) can be more aggressive. If she makes you uncomfortable, you can close her in the stanchions while you work.
• When the wheelbarrow is full, dump it into the bucket that’s just outside the double doors into the maternity area. Try to get as much of the shavings as possible into the bucket and not scattered around it. Use a shovel if you need to. After all of the pens are scraped out, they can be re-bedded.
Re-bedding:
• Use the shavings from the calf room and bring the person doing the calves a full cart as soon as you’re done.
• Try to replace the shavings you took out, but don’t over-bed. • Only re-bed the area covering the mat, not the front, cement area of the pen.
Clean Up:
• Sweep the aisle. The broom is hanging to the right before the first pen. • Go help the calf person!
If a Cow is Calving:
• Don’t panic! Always ask for help if you are unsure of what to do. There will always be a fulltime and/or research staff in the barn.
• A calf should be born front feet first and head first. • If a calf study is going on, call the researcher about the calf as directed. • Give the cow a bucket of warm water. Use one of the blue buckets in the calf room.
Also give her a flake of hay found in the wheelbarrow next to the maternity pens. • Thaw a bottle of colostrum (found in the freezer in the calf room) in warm water in the
calf room sink. (Check with the researcher first if someone is doing a calf study)
o Heifer calves receive high quality colostrum (labeled).
o Bull calves receive maternal colostrum or colostrum replacer (labeled).
• Remember that a fresh cow may become aggressive and/or protective around her calf so use caution when dealing with her and the calf.
• If there isn’t a research or full time staff person around: Dry the calf with a clean towel from the box in the calf room. Dip the calf’s navel using the dipper (looks like a
teat dipper) that’s on top of the switchbox by the maternity pens or in calf prep room. Leave the calf in the maternity pen and make a note on the board and in the day book.
o Get one of the students living in the apartment to give the calf its’ vaccines.
Calves:
Milk:
• The milk should be started heating before you do anything else.
• Check the board in the calf room for the amount of milk that will be needed for shift.
o The amount may also be written on the white board outside the milking room, but always double check.
• Unscrew the blue cap from the bulk tank and turn the handle to create an opening and allow milk to flow out.
• Catch the milk in a small green bucket.

• Transfer the correct milk weight (plus an extra pound or two just in case) to one or two of the big metal milk cans.
• Wash off the blue cap and the nozzle of the bulk tank with the hose before putting the cap back on once you have finished.
• Place the milk in the sink and fill it with hot water. This can be done in the sink in the milk room or down in the calf room, but it will heat faster in the milk room.
Cleaning the Stalls:
• Use one of the scrapers in the nursery, and scrape out all wet and soiled shavings from each calf stall. Try to stay outside the stalls and scrape them out by reaching the scraper
under the gate. o Do not use the same shovels or metal scrapers as used on
the cows. Only use the ones in the nursery. • If you cannot get all of the soiled shavings this way, and have to
enter the stall, it is best to wash off your boots with the yellow cleaning liquid. There is a bucket with a scrub brush inside the door of the calf room.
• Scrape the shavings up on to the floor of the nursery, not into the gutter.
• Shovel as much of the shavings that you scraped out of the stalls as you can into a wheelbarrow, and dump the wheelbarrow in the bucket outside the maternity area.
Re-bedding:
• There is a shavings cart and a shovel in the nursery. • Replace the shavings you took out (about a shovel-full to each stall, depending on how
dirty they were) • Cover the back mat, but not the front, cement area of the stall. Sprinkle a small amount
right in front of the mat though, so the calf doesn’t slip. • Bring the shavings cart out to the maternity person if they still need it when you’re done.
Feeding:
*for calves that are not on study
• Empty the grain buckets every Monday, Wednesday, and Friday afternoon (or any time the feed is dirty or mushy). They should be dumped outside, up against the cement block, closest to the calf hutches.
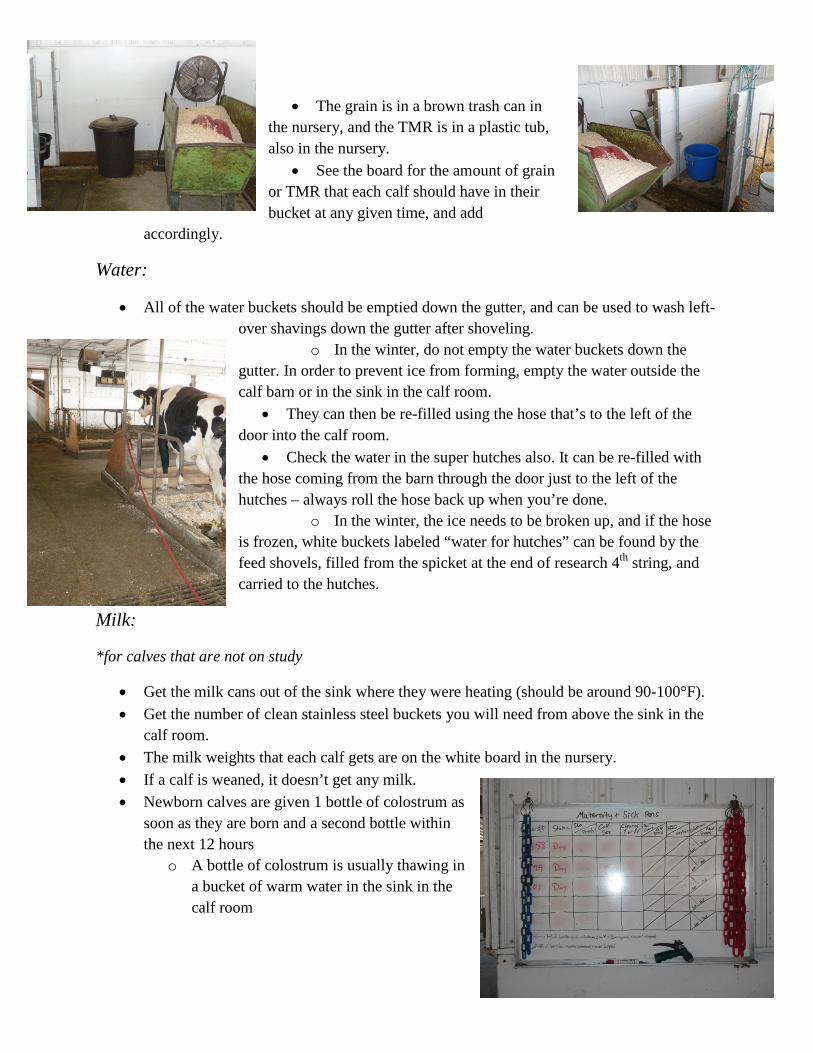
• The grain is in a brown trash can in the nursery, and the TMR is in a plastic tub, also in the nursery.
• See the board for the amount of grain or TMR that each calf should have in their bucket at any given time, and add
accordingly.
Water:
• All of the water buckets should be emptied down the gutter, and can be used to wash left-over shavings down the gutter after shoveling.
o In the winter, do not empty the water buckets down the gutter. In order to prevent ice from forming, empty the water outside the calf barn or in the sink in the calf room.
• They can then be re-filled using the hose that’s to the left of the door into the calf room.
• Check the water in the super hutches also. It can be re-filled with the hose coming from the barn through the door just to the left of the hutches – always roll the hose back up when you’re done.
o In the winter, the ice needs to be broken up, and if the hose is frozen, white buckets labeled “water for hutches” can be found by the feed shovels, filled from the spicket at the end of research 4th string, and carried to the hutches.
Milk:
*for calves that are not on study
• Get the milk cans out of the sink where they were heating (should be around 90-100°F). • Get the number of clean stainless steel buckets you will need from above the sink in the
calf room. • The milk weights that each calf gets are on the white board in the nursery. • If a calf is weaned, it doesn’t get any milk. • Newborn calves are given 1 bottle of colostrum as
soon as they are born and a second bottle within the next 12 hours
o A bottle of colostrum is usually thawing in a bucket of warm water in the sink in the calf room
o If you are unsure of whether or not a newborn calf should receive colostrum, check the whiteboard outside the calf room above the green hose.
• Hang an empty bucket on the scale to gauge its weight, and then add the desired poundage of milk from the metal can (or dump a small amount into a clean transfer bucket first)
• Remove the calf’s feed bucket and replace it with the milk. Put the food bucket back when they finish the milk.
• If a calf needs to be bottle fed, the bottles are in the calf room behind the sink. (Bull calves usually get one bottle in the AM and one in the PM) Any special instructions will be on the board or hanging over a calf’s stall.
• If a calf won’t drink from a bucket, you may need to bucket train her. Make sure your hands are clean and use your fingers or a bottle nipple to entice the calf to the bucket and get her to drink.
• When all calves are finished with their milk, make sure all of the buckets are removed and that the feed buckets are replaced.
Cleaning Up:
• All of the buckets that were used should be collected and cleaned in the calf room sink using hot water, a clean scrub brush from the dish rack, and the chlorine-soap powder in the 5-gallon pail right near the sink. After a good rinsing, they can then be hung back on the pegs above the sink.
o It’s ok to fill the sink with hot water and soap to wash all of the buckets, however, each bucket should be rinsed thoroughly before being placed in the sink and scrubbed well with soap and water. Buckets can also be washed individually with clean water, but take care not to use too much soap.
• The metal milk pails can be washed in the same manner in the calf room or the milk room. Make sure they are rinsed well and put back on the shelf.
• When it’s warm out, the floor in the nursery can be hosed down and the extra shavings bits can be washed down the gutter. In the winter, the floor must be swept with the broom in the nursery.
*Calves on Study:
• Calves on study will have their own special instructions. • Ex. kelp study calves are labeled as such on the board and above their stalls. Their milk
should be weighed using the electronic scale and recorded in the binder on the shelf in the nursery. Their orts should be collected into the bags labeled with their number in the crate in the calf room, and they should be fed only from the bags in the crate labeled with their number.
• If a calf has a sign that says DO NOT FEED, then don’t feed it!


![Nutrition, Diets, Feeding, and Swallowing Management in ...infonomics-society.org/wp-content/uploads/ijcdse/... · Individuals with Swallowing and/or Feeding Disorders [2] designed](https://img.pdfslide.us/doc/110x75/5f79d26f4da5055412698f40/nutrition-diets-feeding-and-swallowing-management-in-infonomics-individuals.jpg)