Embed Size (px)
Citation preview
8/8/2019 Craft Workshop1
http://slidepdf.com/reader/full/craft-workshop1 1/16
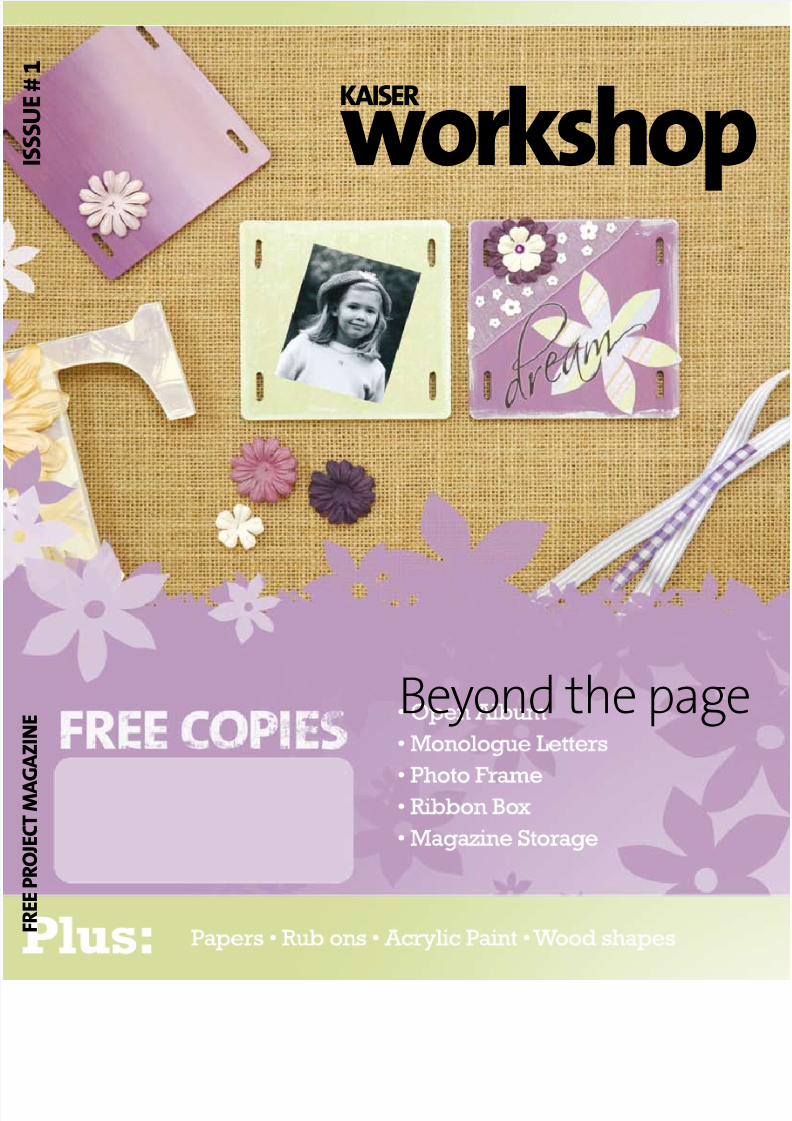
I s s s u e # 1
workhopKAIseR
Beyond the page
FReePROJeCTMA
GAZINe

8/8/2019 Craft Workshop1
http://slidepdf.com/reader/full/craft-workshop1 2/16
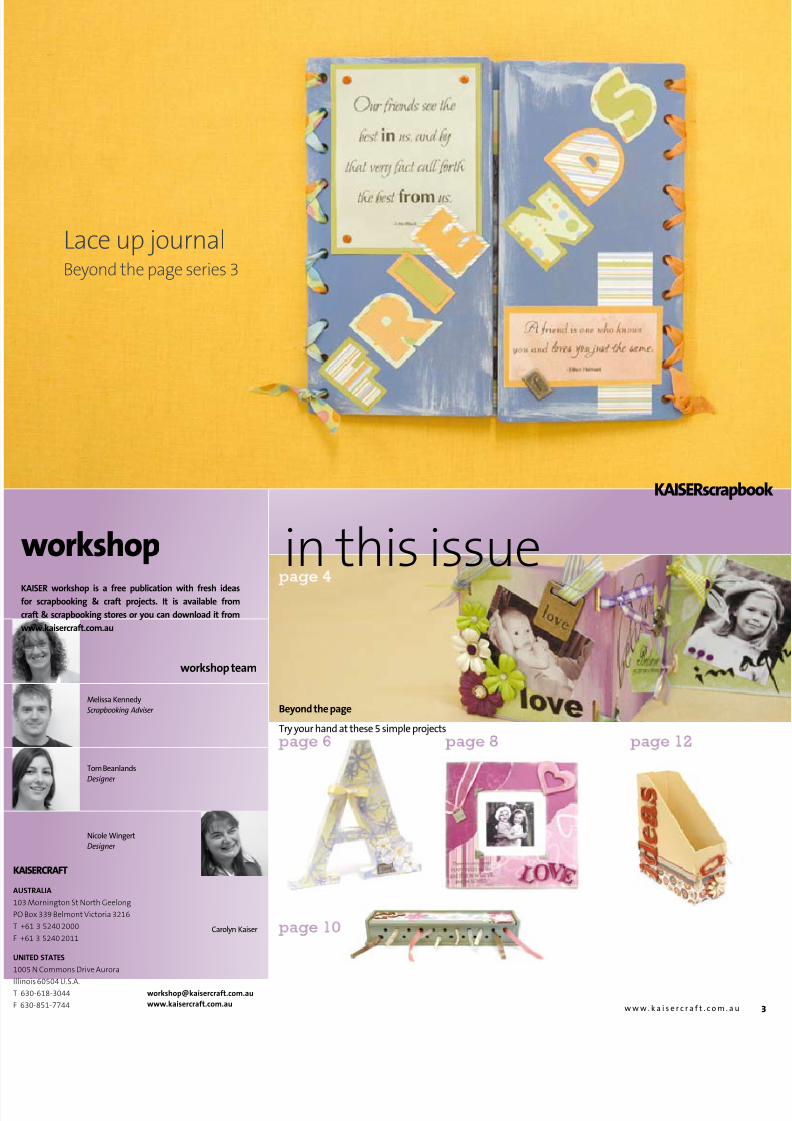
Scrapbkig is aicive. Sooner or later
you are going to want to put on display your
creativity rather than keeping it all hidden in
albums.Going beyond the page gives you the chance
o taking something that normally would be
looked at as plain and boring and turning it
into something unique and beautiul, that
can either be used to decorate your home
or given to someone as a wonderul git.
A Beyond the Page git is extra special as
the person receiving it can see how much
work has gone into it, combined with extra journaling; it can make it so much more special.
I bet i we all take a look at our scrapbooking
supplies we have loads o little bits and
pieces let over rom when we brought an
embellishment to put that nal nishingtouch onto a page. We can use these
little let over bits on our Beyond the Page
products and make them more productive.
All the projects we have eatured here are
quick and simple to make. There are so many
thousands o embellishments out there so
you can be as adventurous as you wish and
create a work o art that is unique and has
its own personality – but most o all enjoy itand have un.
Melissa Kennedy
why go ‘beyond the page’?
workhop I s s u e # 1 B e y o n d t h e p a g e
Beyond the page series 3 coming soon.You’ll love what we’ve got...
8/8/2019 Craft Workshop1
http://slidepdf.com/reader/full/craft-workshop1 3/16

8/8/2019 Craft Workshop1
http://slidepdf.com/reader/full/craft-workshop1 4/16workhop I s s u e # 1 B e y o n d t h e p a g e
square open album
vvvvvvvvvvvvvvvvvvvvvvvvvvvvvvvvvvvvvvvvvvv
As ese abms cme wi ve pieces, you will need to decide how many o those you will
attach a photo to. Choose your photos and careully crop them to your desired size, keeping in
mind that some o your photos may need to be printed smaller to t.
As the next step is choosing paint and paper that co-ordinate and compliment these photos,
you may want them printed in black and white so that they will match any color scheme you
choose. In this example we have chosen the complimentary colors o lime and violet.

8/8/2019 Craft Workshop1
http://slidepdf.com/reader/full/craft-workshop1 5/16
Rub on tranfr
AIseRcrapbook
xpress your message on almost any surace with
ur range o rub-ons. They are ideal or all your
rapbooking and card making needs and come
a variety o themes and alphabet sets to add
at nal touch to your project. Easy to use with
e included applicator. Check out our ull range at
ww.kaisercrat.com.au
Gey rb sapaper ver e pieces to remove any rough edges.
Decide which pieces you want to cover in paper and which to
paint and do so. Once these are dry you can give them an aged
or distressed eect by either sanding (use a nail le or small
sanding block), painting or inking the edges. I desired mat your
photos, otherwise just adhere them in place to the pieces. To add
urther interest your photos can be placed on angles.
Now it’s time to decorate and give your work some personal-
ity. Layer the fowers on each side o the album, add brads or
bling to the centres or extra eect and adhere in place. In this
example two fowers were cut rom scrap paper strips and
ribbon that were glued together.
You can print messages and quotes on tags and adhere, use
rubons and other embellishments to decorate. The options here
are endless, and limited only to your imagination.
Randomly thread ribbon through the side notches and knot to
join the pieces together. Again dierent colors and textures will
give extra eect.
Whoever you give this too is bound to love it.
w w w . k a i s e r c r a t . c o m . a u
4
8/8/2019 Craft Workshop1
http://slidepdf.com/reader/full/craft-workshop1 6/16
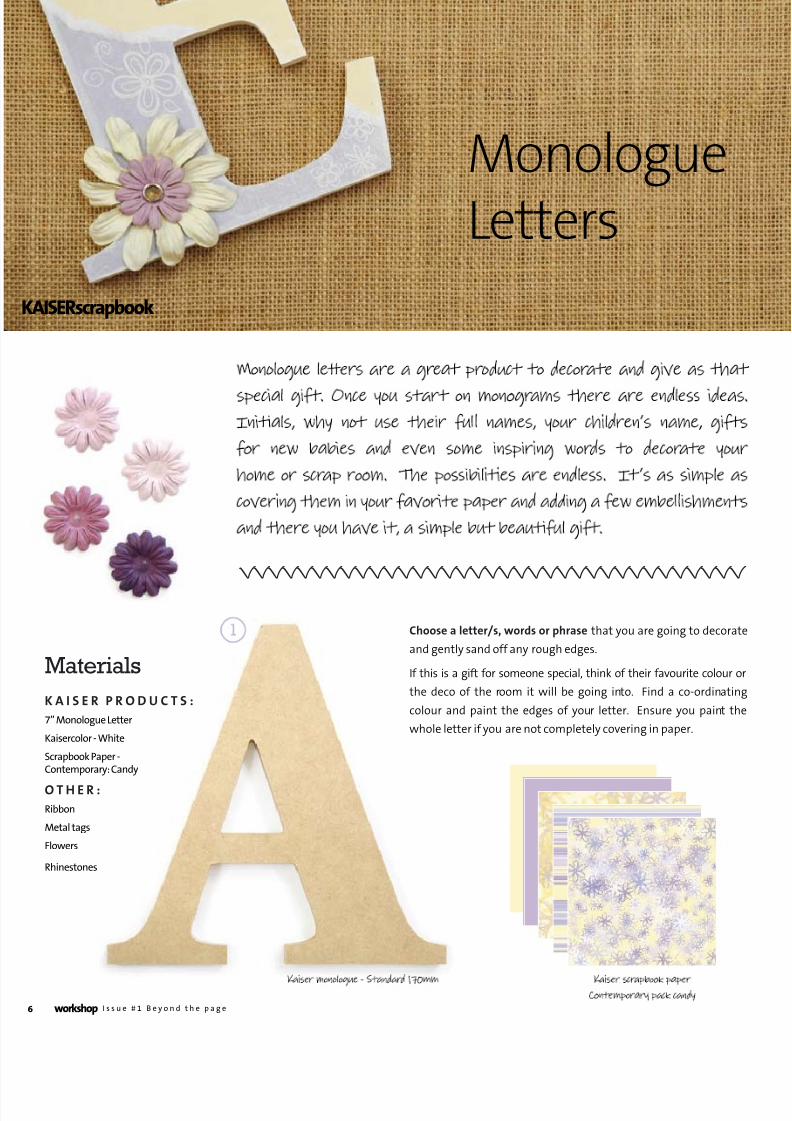
Cse a eer/s, wrs r prase that you are going to decorate
and gently sand o any rough edges.
I this is a git or someone special, think o their avourite colour or
the deco o the room it will be going into. Find a co-ordinating
colour and paint the edges o your letter. Ensure you paint the
whole letter i you are not completely covering in paper.
MonologueLetters
vvvvvvvvvvvvvvvvvvvvvvvvvvvvvvvvvvv
Materials
K A I S E R P R o d u C t S :
7” Monologue Letter
Kaisercolor - White
Scrapbook Paper -Contemporary: Candy
o t h E R :Ribbon
Metal tags
Flowers
Rhinestones
AIseRcrapbook
workhop I s s u e # 1 B e y o n d t h e p a g e
8/8/2019 Craft Workshop1
http://slidepdf.com/reader/full/craft-workshop1 7/16
Monologu Lttr
AIseRcrapbook
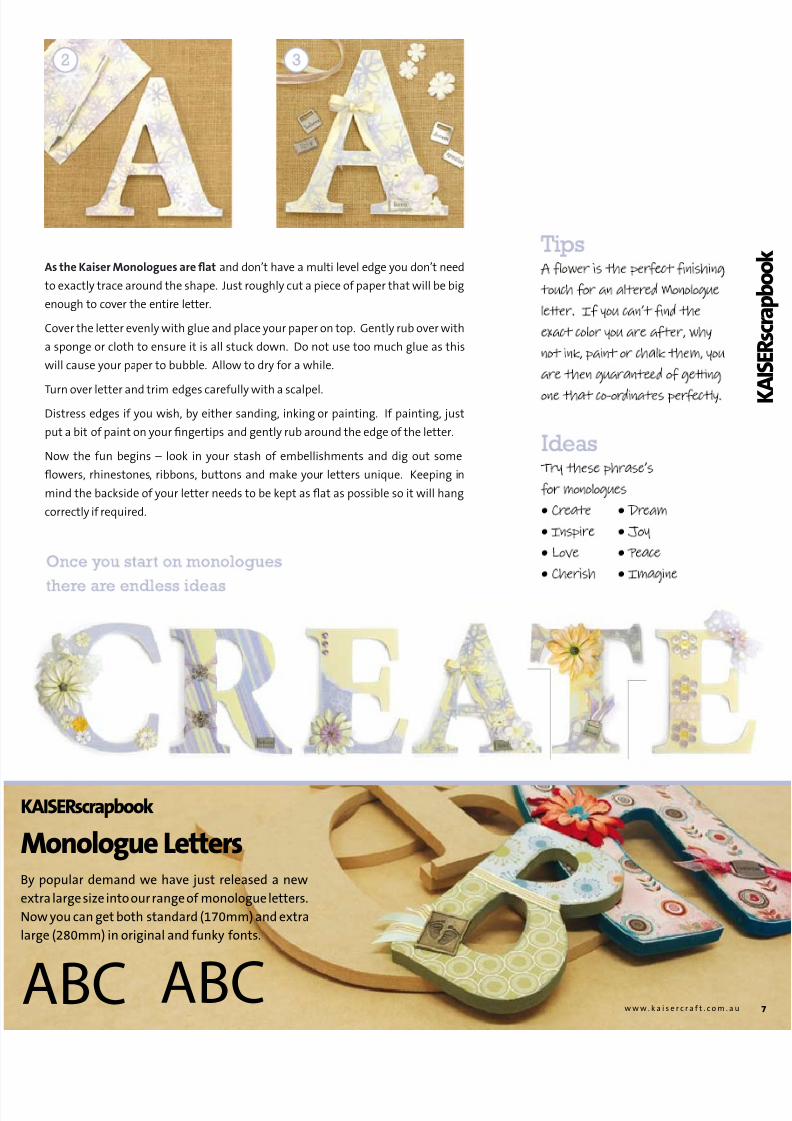
As e Kaiser Mges are fa and don’t have a multi level edge you don’t need
to exactly trace around the shape. Just roughly cut a piece o paper that will be big
enough to cover the entire letter.
Cover the letter evenly with glue and place your paper on top. Gently rub over with
a sponge or cloth to ensure it is all stuck down. Do not use too much glue as this
will cause your paper to bubble. Allow to dry or a while.
Turn over letter and trim edges careully with a scalpel.Distress edges i you wish, by either sanding, inking or painting. I painting, just
put a bit o paint on your ngertips and gently rub around the edge o the letter.
Now the un begins – look in your stash o embellishments and dig out some
fowers, rhinestones, ribbons, buttons and make your letters unique. Keeping in
mind the backside o your letter needs to be kept as fat as possible so it will hang
correctly i required.
w w w . k a i s e r c r a t . c o m . a u
y popular demand we have just released a new
xtra large size into our range o monologue letters.
ow you can get both standard (170mm) and extra
rge (280mm) in original and unky onts.
ABC ABC
8/8/2019 Craft Workshop1
http://slidepdf.com/reader/full/craft-workshop1 8/16
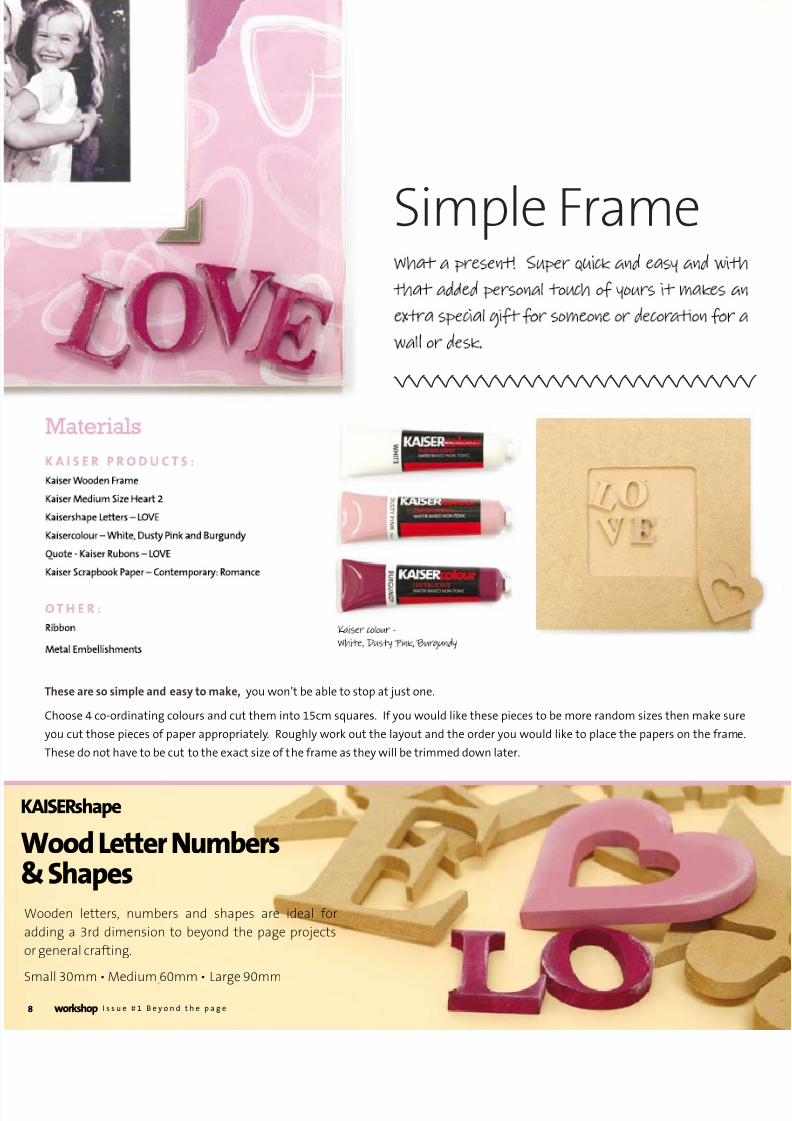
Simple Frame
vvvvvvvvvvvvvvvvvvvvvvvvv
tese are s simpe a easy make, you won’t be able to stop at just one.
Choose 4 co-ordinating colours and cut them into 15cm squares. I you would like these pieces to be more random sizes then make sure
you cut those pieces o paper appropriately. Roughly work out the layout and the order you would like to place the papers on the rame.
These do not have to be cut to the exact size o the rame as they will be trimmed down later.
Wood Lttr Numbr& shap
AIseRhap
Wooden letters, numbers and shapes are ideal for
dding a 3rd dimension to beyond the page projects
r general crafting.
mall 30mm • Medium 60mm • Large 90mm
workhop I s s u e # 1 B e y o n d t h e p a g e
8/8/2019 Craft Workshop1
http://slidepdf.com/reader/full/craft-workshop1 9/16
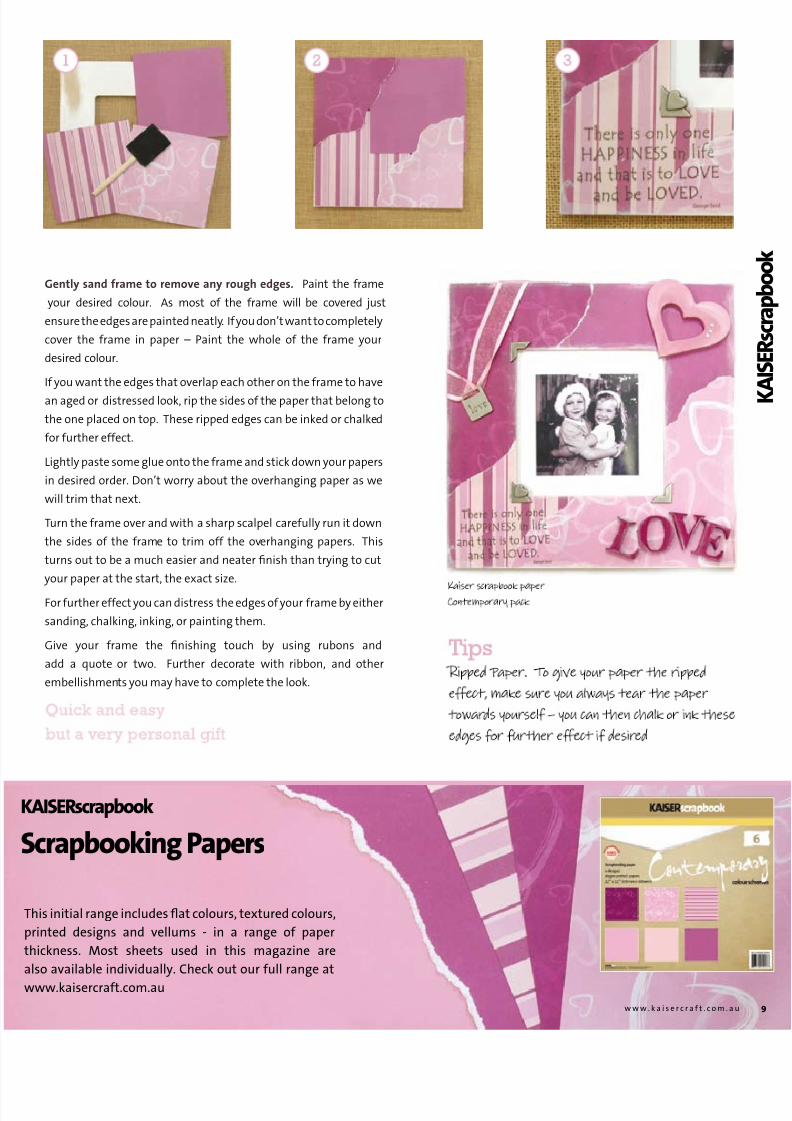
Gey sa rame remve ay rg eges. Paint the rame
your desired colour. As most o the rame will be covered just
ensure the edges are painted neatly. I you don’t want to completely
cover the rame in paper – Paint the whole o the rame your
desired colour.
I you want the edges that overlap each other on the rame to have
an aged or distressed look, rip the sides o the paper that belong to
the one placed on top. These ripped edges can be inked or chalked
or urther eect.
Lightly paste some glue onto the rame and stick down your papers
in desired order. Don’t worry about the overhanging paper as we
will trim that next.
Turn the rame over and with a sharp scalpel careully run it down
the sides o the rame to trim o the overhanging papers. This
turns out to be a much easier and neater nish than trying to cut
your paper at the start, the exact size.
For urther eect you can distress the edges o your rame by either
sanding, chalking, inking, or painting them.
Give your rame the nishing touch by using rubons and
add a quote or two. Further decorate with ribbon, and other
embellishments you may have to complete the look.
scrapbooking Papr
AIseRcrapbook
his initial range includes fat colours, textured colours,
rinted designs and vellums - in a range o paper
hickness. Most sheets used in this magazine are
so available individually. Check out our ull range at
www.kaisercrat.com.au
w w w . k a i s e r c r a t . c o m . a u
8/8/2019 Craft Workshop1
http://slidepdf.com/reader/full/craft-workshop1 10/16
8/8/2019 Craft Workshop1
http://slidepdf.com/reader/full/craft-workshop1 11/16
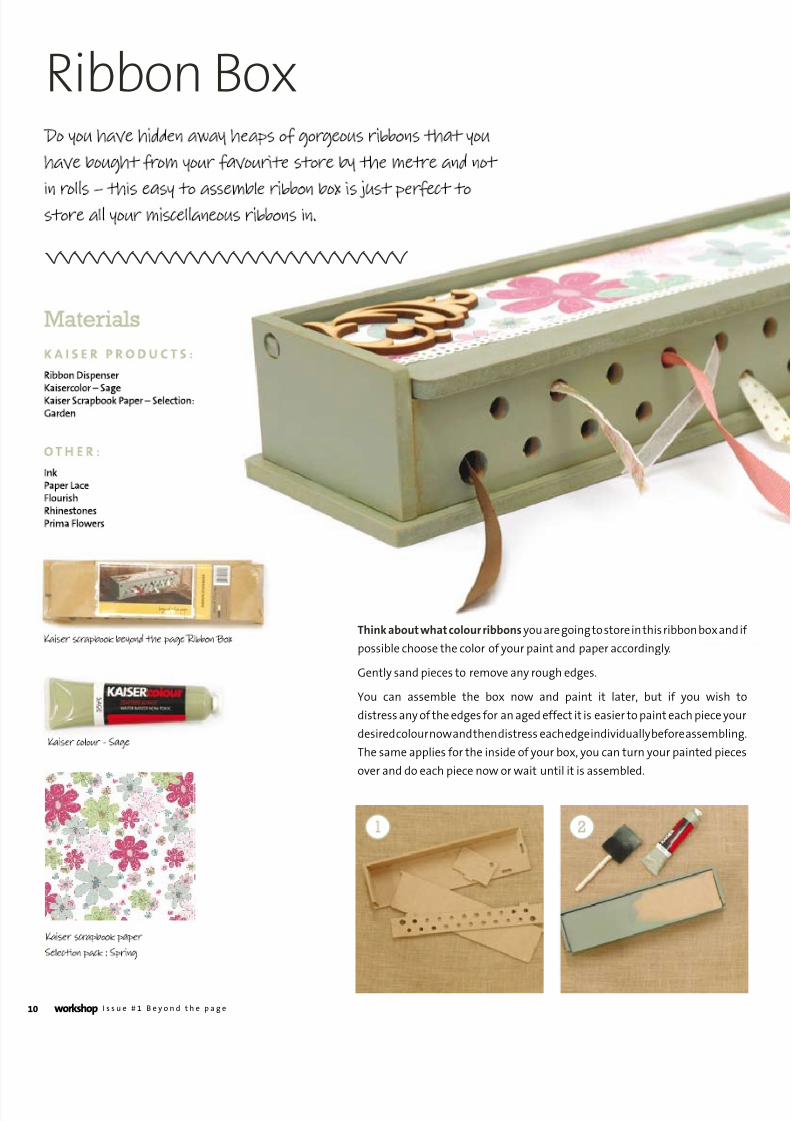
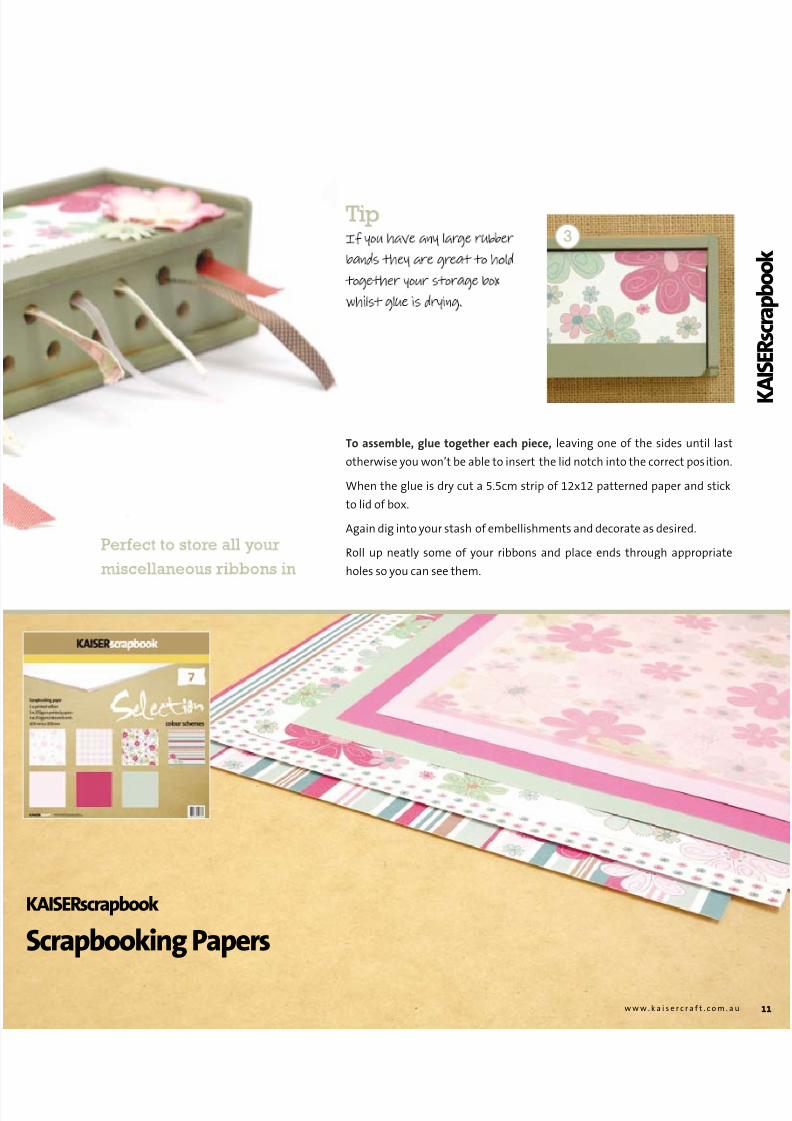
t assembe, ge geer eac piece, leaving one o the sides until last
otherwise you won’t be able to insert the lid notch into the correct position.
When the glue is dry cut a 5.5cm strip o 12x12 patterned paper and stick
to lid o box.
Again dig into your stash o embellishments and decorate as desired.
Roll up neatly some o your ribbons and place ends through appropriate
holes so you can see them.
w w w . k a i s e r c r a t . c o m . a u
scrapbooking Papr
KAIseRcrapbook
8/8/2019 Craft Workshop1
http://slidepdf.com/reader/full/craft-workshop1 12/16
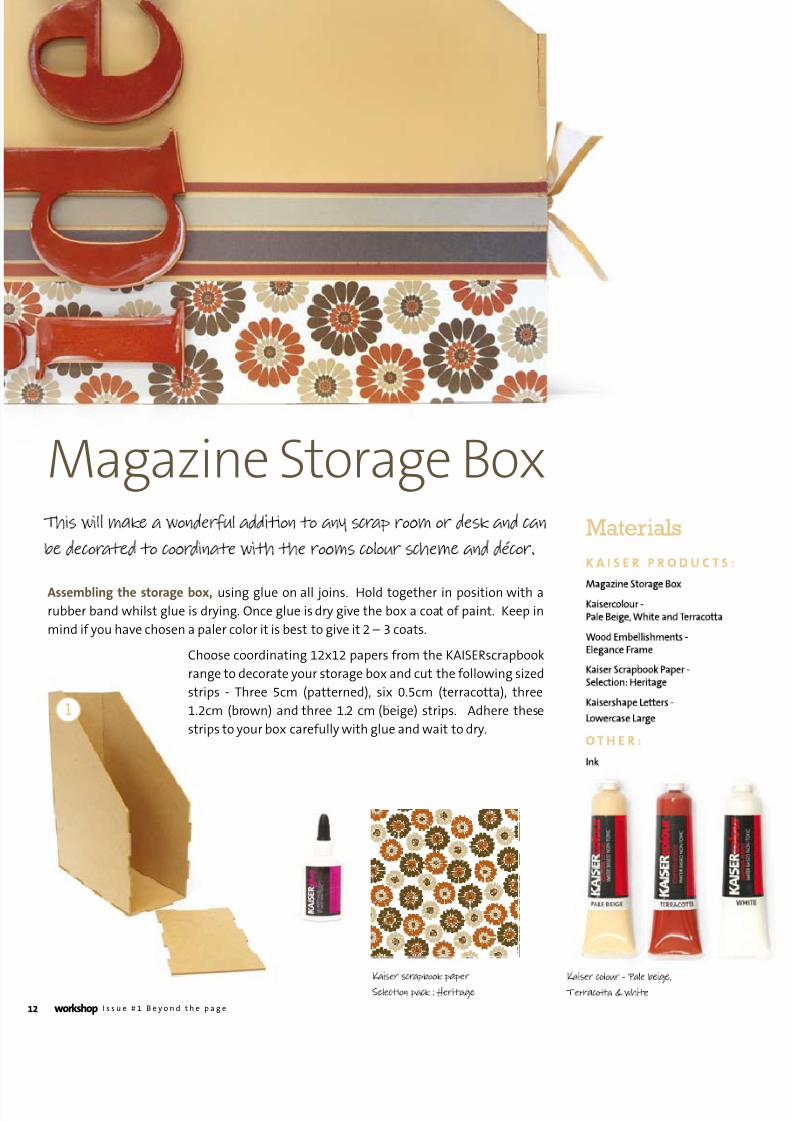
Assembig e srage bx, using glue on all joins. Hold together in position with arubber band whilst glue is drying. Once glue is dry give the box a coat o paint. Keep in
mind i you have chosen a paler color it is best to give it 2 – 3 coats.
Magazine Storage Box
2 workhop I s s u e # 1 B e y o n d t h e p a g e
Choose coordinating 12x12 papers rom the KAISERscrapbook
range to decorate your storage box and cut the ollowing sized
strips - Three 5cm (patterned), six 0.5cm (terracotta), three
1.2cm (brown) and three 1.2 cm (beige) strips. Adhere these
strips to your box careully with glue and wait to dry.
8/8/2019 Craft Workshop1
http://slidepdf.com/reader/full/craft-workshop1 13/16w w w . k a i s e r c r a t . c o m . a u
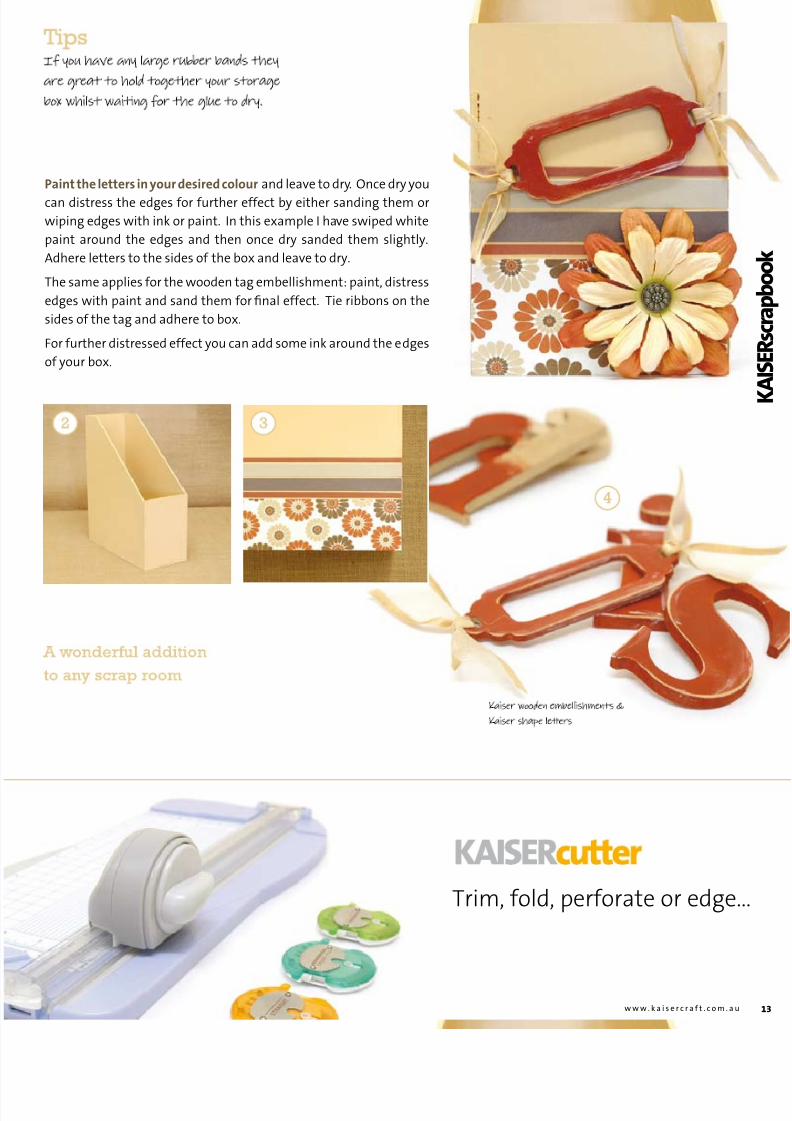
Pai e eers i yr esire cr and leave to dry. Once dry you
can distress the edges or urther eect by either sanding them or
wiping edges with ink or paint. In this example I have swiped white
paint around the edges and then once dry sanded them slightly.
Adhere letters to the sides o the box and leave to dry.
The same applies or the wooden tag embellishment: paint, distress
edges with paint and sand them or nal eect. Tie ribbons on the
sides o the tag and adhere to box.
For urther distressed eect you can add some ink around the edges
o your box.
Trim, fold, perforate or edge...
8/8/2019 Craft Workshop1
http://slidepdf.com/reader/full/craft-workshop1 14/164 workhop I s s u e # 1 B e y o n d t h e p a g e
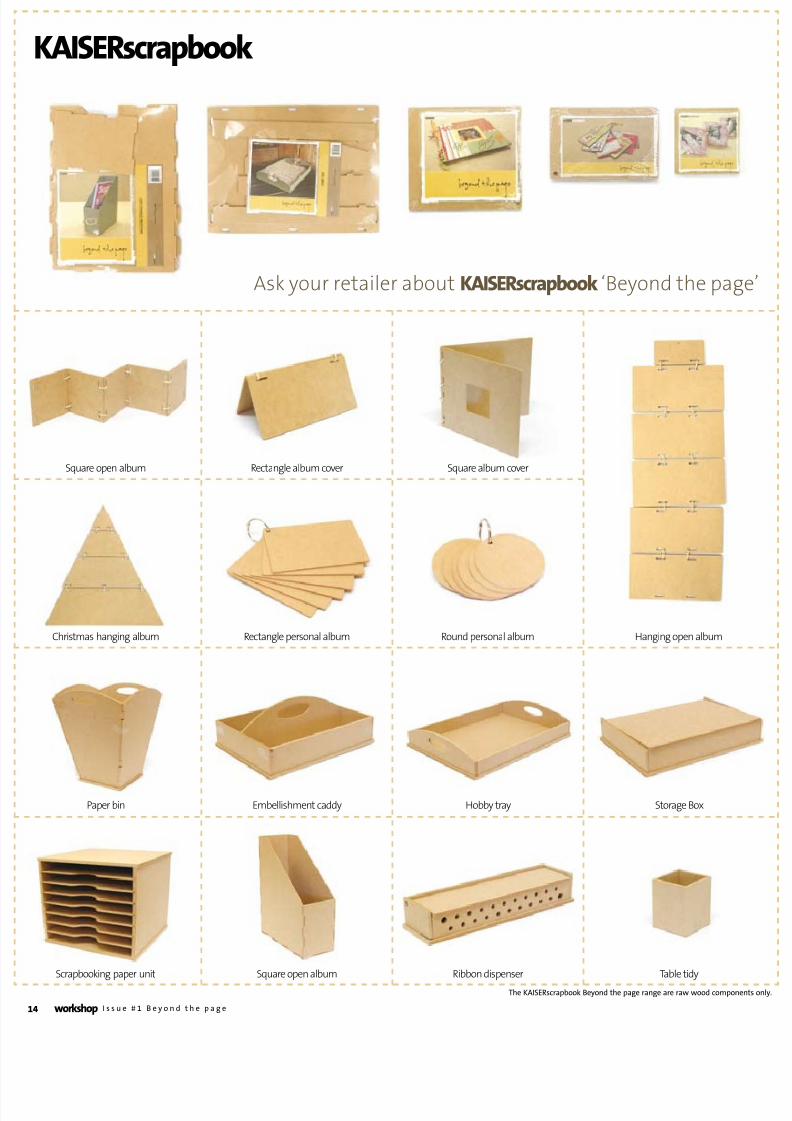
KAIseRcrapbook
Ask your retailer about KAIseRcrapbook ‘Beyond the page
Square open album Ribbon dispenser Table tidyScrapbooking paper unit
Embellishment caddy Hobby tray Storage BoxPaper bin
Rectangle personal album Round personal album Hanging open albumChristmas hanging album
Rectangle album cover Square album coverSquare open album
The KAISERscrapbook Beyond the page range are raw wood component
8/8/2019 Craft Workshop1
http://slidepdf.com/reader/full/craft-workshop1 15/16w w w . k a i s e r c r a t . c o m . a u
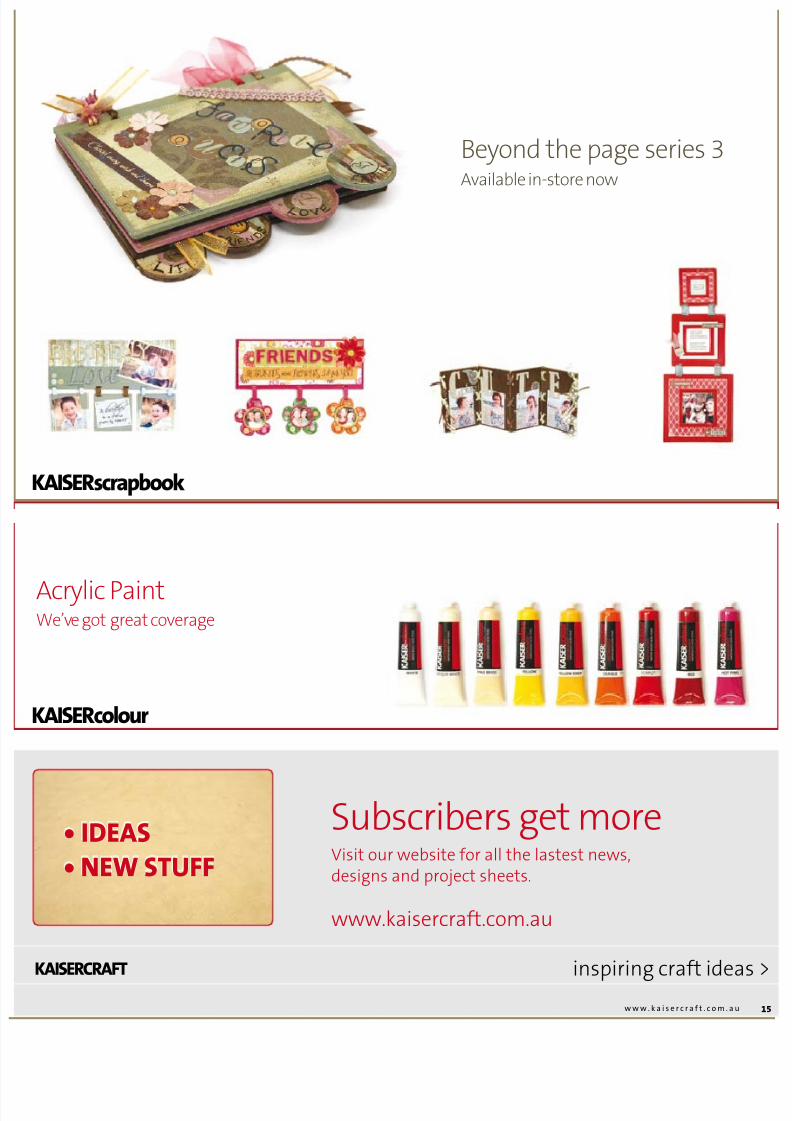
Beyond the page series 3Available in-store now
KAIseRcrapbook
Acrylic PaintWe’ve got great coverage
Subscribers get more
KAIseRcolour
KAIseRCRAFT inspiring craft ideas
Visit our website for all the lastest news,designs and project sheets.
• ideas
• new stuff
www.kaisercraft.com.au
8/8/2019 Craft Workshop1
http://slidepdf.com/reader/full/craft-workshop1 16/16
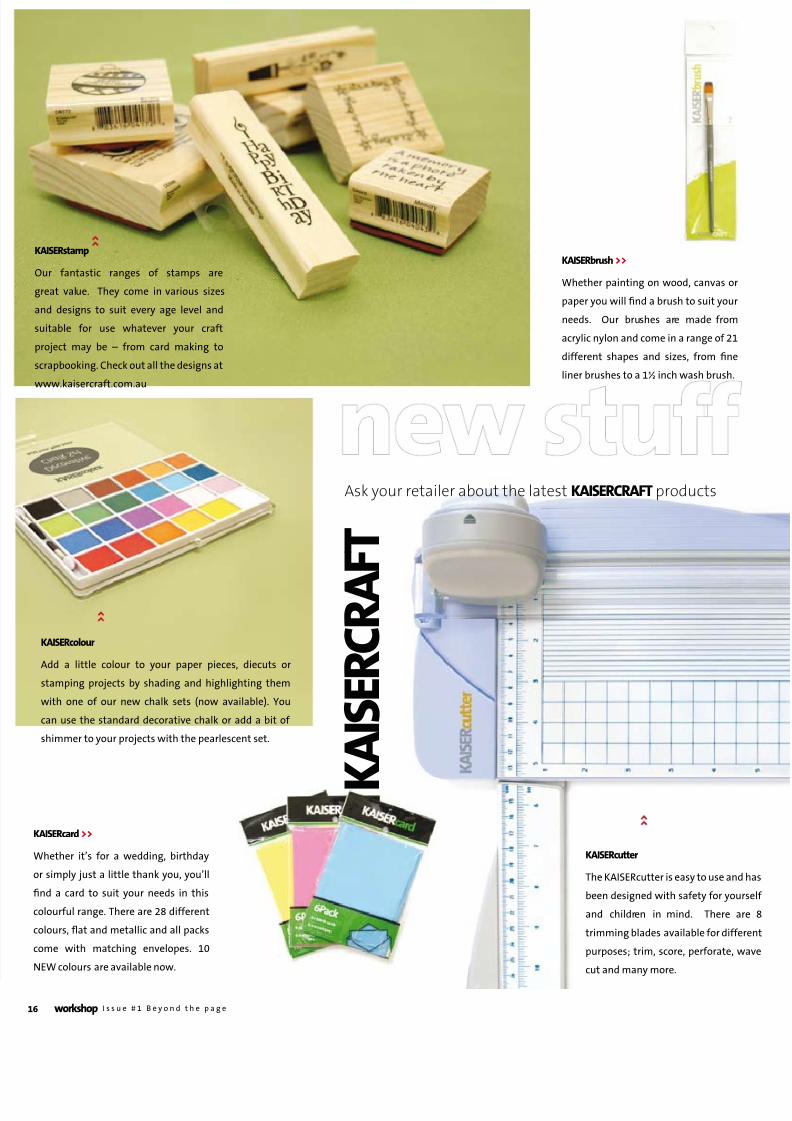
KAIseRcuttr
The KAISERcutter is easy to use and h
been designed with saety or yours
and children in mind. There are
trimming blades available or diere
purposes; trim, score, perorate, wa
cut and many more.
KAIseRbruh >>
Whether painting on wood, canvas or
paper you will nd a brush to suit your
needs. Our brushes are made rom
acrylic nylon and come in a range o 21
dierent shapes and sizes, rom ne
liner brushes to a 1½ inch wash brush.
KAIseRtamp
Our antastic ranges o stamps are
great value. They come in various sizes
and designs to suit every age level and
suitable or use whatever your crat
project may be – rom card making to
scrapbooking. Check out all the designs at
www.kaisercrat.com.au
KAIseRcolour
Add a little colour to your paper pieces, diecuts or
stamping projects by shading and highlighting them
with one o our new chalk sets (now available). You
can use the standard decorative chalk or add a bit o
shimmer to your projects with the pearlescent set.
KAIseRcard >>
Whether it’s or a wedding, birthday
or simply just a little thank you, you’ll
nd a card to suit your needs in this
colourul range. There are 28 dierent
colours, fat and metallic and all packs
come with matching envelopes. 10
NEW colours are available now.
K
A I s e R C R A
F T
Ask your retailer about the latest KAIseRCRAFT products