Embed Size (px)
Citation preview
COS Filesystem Gateway Release 1.6 User Guide
May 2, 2017
Cisco Systems, Inc.www.cisco.com
Cisco has more than 200 offices worldwide. Addresses, phone numbers, and fax numbers are listed on the Cisco website at www.cisco.com/go/offices.
THE SPECIFICATIONS AND INFORMATION REGARDING THE PRODUCTS IN THIS MANUAL ARE SUBJECT TO CHANGE WITHOUT NOTICE. ALL STATEMENTS, INFORMATION, AND RECOMMENDATIONS IN THIS MANUAL ARE BELIEVED TO BE ACCURATE BUT ARE PRESENTED WITHOUT WARRANTY OF ANY KIND, EXPRESS OR IMPLIED. USERS MUST TAKE FULL RESPONSIBILITY FOR THEIR APPLICATION OF ANY PRODUCTS.
THE SOFTWARE LICENSE AND LIMITED WARRANTY FOR THE ACCOMPANYING PRODUCT ARE SET FORTH IN THE INFORMATION PACKET THAT SHIPPED WITH THE PRODUCT AND ARE INCORPORATED HEREIN BY THIS REFERENCE. IF YOU ARE UNABLE TO LOCATE THE SOFTWARE LICENSE OR LIMITED WARRANTY, CONTACT YOUR CISCO REPRESENTATIVE FOR A COPY.
The Cisco implementation of TCP header compression is an adaptation of a program developed by the University of California, Berkeley (UCB) as part of UCB’s public domain version of the UNIX operating system. All rights reserved. Copyright © 1981, Regents of the University of California.
NOTWITHSTANDING ANY OTHER WARRANTY HEREIN, ALL DOCUMENT FILES AND SOFTWARE OF THESE SUPPLIERS ARE PROVIDED “AS IS” WITH ALL FAULTS. CISCO AND THE ABOVE-NAMED SUPPLIERS DISCLAIM ALL WARRANTIES, EXPRESSED OR IMPLIED, INCLUDING, WITHOUT LIMITATION, THOSE OF MERCHANTABILITY, FITNESS FOR A PARTICULAR PURPOSE AND NONINFRINGEMENT OR ARISING FROM A COURSE OF DEALING, USAGE, OR TRADE PRACTICE.
IN NO EVENT SHALL CISCO OR ITS SUPPLIERS BE LIABLE FOR ANY INDIRECT, SPECIAL, CONSEQUENTIAL, OR INCIDENTAL DAMAGES, INCLUDING, WITHOUT LIMITATION, LOST PROFITS OR LOSS OR DAMAGE TO DATA ARISING OUT OF THE USE OR INABILITY TO USE THIS MANUAL, EVEN IF CISCO OR ITS SUPPLIERS HAVE BEEN ADVISED OF THE POSSIBILITY OF SUCH DAMAGES.
Cisco and the Cisco logo are trademarks or registered trademarks of Cisco and/or its affiliates in the U.S. and other countries. To view a list of Cisco trademarks, go to this URL: www.cisco.com/go/trademarks. Third-party trademarks mentioned are the property of their respective owners. The use of the word partner does not imply a partnership relationship between Cisco and any other company. (1110R)
Any Internet Protocol (IP) addresses and phone numbers used in this document are not intended to be actual addresses and phone numbers. Any examples, command display output, network topology diagrams, and other figures included in the document are shown for illustrative purposes only. Any use of actual IP addresses or phone numbers in illustrative content is unintentional and coincidental.
© 2017 Cisco Systems, Inc. All rights reserved.
C O N T E N T S
Overview 1-1
Product Description 1-1
Gateway Function 1-1
Feature Summary 1-1
Deployment 2-1
Bare Metal Installation 2-1
Recommended Hardware 2-1
Automated Installation via ISO Image 2-2
Manual Installation via RPMs 2-5
Installation on the FSGW VM 2-5
Hardware Prerequisites 2-5
Software Prerequisites 2-6
Deploy the FSGW OVA 2-6
Configure FSGW on the COS PAM and Tenant PAM 2-8
Adding a Cache and Log to a Zpool (Optional) 2-8
Operation and Routine Maintenance 3-1
Configuration Using the Tenant PAM GUI 3-1
Creating or Updating a COS Device Pool 3-2
Checking Statistics on the Tenant PAM 3-5
Configuration Using the CLI 3-7
Recommended Routine Maintenance 3-8
Daily Tasks 3-8
Weekly Tasks 3-8
File Locations 3-8
Using the FSGW GUI 4-1
Accessing the FSGW GUI 4-1
COS FSGW Home Page 4-2
FSGW Pool Creation/Deletion Page 4-2
Creating a New Pool 4-3
Deleting a Pool 4-3
Updating an Existing Pool 4-4
iiiCisco COS Filesystem Gateway Release 1.6 User Guide
Contents
Status Page 4-5
FSGW Backup and Restore Page 4-5
Downloading the Configuration File 4-5
Importing the Configuration File 4-6
Logout 4-7
Reset Page 4-7
Troubleshooting 4-7
Troubleshooting 5-1
Modules are Loaded Properly 5-1
Configuring Support to Add or Delete a Container 5-1
Reading or Writing to a Pool 5-2
Global Namespace Option A-1
Overview A-1
Feature Summary A-1
Hardware Support A-2
System Requirements A-2
Restrictions and Limitations A-3
Installation and Configuration A-3
Install Filesystem Gateway (FSGW) Server A-3
Install the GlusterFS Server on the FSGW Node A-3
Start the GlusterFS Servers A-4
Create a Zpool on the FSGW Server A-4
Create the GlusterFS Volume A-5
Install the FSGW Proxy A-5
Mount the GlusterFS Share on the Client Server A-6
Option: Using the GlusterFS Native Client as a User Client A-6
Option: Using CTDB to Manage Samba Shares for GlusterFS Volumes Created using Cisco modified ZFS A-7
Option: Sharing GlusterFS Volumes over NFS Ganesha A-11
ivCisco COS Filesystem Gateway Release 1.6 User Guide
Preface
This preface describes who should read the Cisco COS Filesystem Gateway Release 1.6.1 User Guide, how the guide is organized, and its document conventions. It contains the following sections:
• Audience, page v
• Document Organization, page v
• Document Conventions, page vi
• Related Publications, page vii
• Obtaining Documentation and Submitting a Service Request, page vii
AudienceThis guide is for networking professionals managing the Cloud Object Storage (COS) product and its Filesystem Gateway (FSGW) option. Before using this guide, you should have experience working with Linux platforms and be familiar with the concepts and terminology of Ethernet, local area networking, clustering and high-availability, and network services such as DNS and NTP.
Document OrganizationThis document contains the following chapters and appendices:
Chapters or Appendices Descriptions
Overview Briefly describes the FSGW product, its function, and its key features.
Deployment Provides deployment prerequisites and describes the steps to install and configure the FSGW.
Operation and Routine Maintenance Gives procedures for updating the FSGW configuration, checking FSGW statistics using the COS PAM GUI or the CLI, performing routine maintenance, and checking logs.
Using the FSGW GUI Describes the use of the native FSGW GUI, an alternative to the PAM GUI for use with non-PAM COS releases.
vCisco COS Filesystem Gateway Release 1.6 User Guide
PrefaceDocument Conventions
Document ConventionsThis document uses the following conventions:
Note Means reader take note. Notes contain helpful suggestions or references to material not covered in the manual.
Tip Means the following information will help you solve a problem. The tips information might not be troubleshooting or even an action, but could be useful information, similar to a Timesaver.
Caution Means reader be careful. In this situation, you might perform an action that could result in equipment damage or loss of data.
Timesaver Means the described action saves time. You can save time by performing the action described in the paragraph.
Troubleshooting Provides tips for resolving common issues during FSGW installation and operation.
Global Namespace Option Describes the Global Namespace (GNS) cost option available for FSGW Release 1.6.1.
Chapters or Appendices Descriptions
Convention Indication
bold font Commands and keywords and user-entered text appear in bold font.
italic font Document titles, new or emphasized terms, and arguments for which you supply values are in italic font.
[ ] Elements in square brackets are optional.
{x | y | z } Required alternative keywords are grouped in braces and separated by vertical bars.
[ x | y | z ] Optional alternative keywords are grouped in brackets and separated by vertical bars.
string A nonquoted set of characters. Do not use quotation marks around the string or the string will include the quotation marks.
courier font Terminal sessions and information the system displays appear in courier font.
< > Nonprinting characters such as passwords are in angle brackets.
[ ] Default responses to system prompts are in square brackets.
!, # An exclamation point (!) or a pound sign (#) at the beginning of a line of code indicates a comment line.
viCisco COS Filesystem Gateway Release 1.6 User Guide
PrefaceRelated Publications
Warning IMPORTANT SAFETY INSTRUCTIONS
This warning symbol means danger. You are in a situation that could cause bodily injury. Before you work on any equipment, be aware of the hazards involved with electrical circuitry and be familiar with standard practices for preventing accidents. Use the statement number provided at the end of each warning to locate its translation in the translated safety warnings that accompanied this device.
SAVE THESE INSTRUCTIONS
Warning Statements using this symbol are provided for additional information and to comply with regulatory and customer requirements.
Related PublicationsRefer to the following documents for additional information about COS FSGW:
• Release Notes for Filesystem Gateway 1.6.1
Obtaining Documentation and Submitting a Service RequestFor information on obtaining documentation, using the Cisco Bug Search Tool (BST), submitting a service request, and gathering additional information, see What’s New in Cisco Product Documentation.
To receive new and revised Cisco technical content directly to your desktop, you can subscribe to the What’s New in Cisco Product Documentation RSS feed. The RSS feeds are a free service.
viiCisco COS Filesystem Gateway Release 1.6 User Guide
PrefaceObtaining Documentation and Submitting a Service Request
viiiCisco COS Filesystem Gateway Release 1.6 User Guide
Cisco
C H A P T E R 1
OverviewProduct DescriptionCisco Filesystem Gateway (FSGW) for Cisco Cloud Object Storage (COS) is an available option for COS 3.8.1 and compatible later releases. While earlier COS releases allowed access only to object storage, the FSGW option gives COS the ability to access files using Network File System (NFS) or Common Internet File System (CIFS), the two main file systems used by network attached storage (NAS).
NFS and CIFS are the client-server file systems used by the Linux and Windows operating systems, respectively. Adding FSGW enables COS to manage storage for existing Linux or Windows NAS media libraries directly, without the need to first convert these libraries to object data. For service providers with large existing media libraries, adding FSGW greatly improves COS utility and deployment speed.
Gateway Function
NAS filesystem access does not directly allow the ability to perform the random writes and rewrites that occur routinely with object storage access. Enabling COS to access NAS files means that some logical intermediation must occur to allow the NAS filesystem to perform random writes and rewrites.
FSGW serves this intermediation (gateway) function. FSGW uses the ZFS file system to perform file integrity checks, compression, per-user and per-group quotas and reporting, and construction of virtual device pools to provide resiliency. Additionally, by associating a virtual device to a COS container, FSGW can provide secure multi-tenancy using multiple filesystem gateways and COS containers.
Feature Summary
The FSGW option adds the following features and enhancements to compatible COS releases:
• Native graphical user interface (GUI) for use with non-PAM COS releases
• Support for ISO installation on compatible bare metal servers
• Storage throughput of up to 15 Gbps on compatible bare metal servers
• Storage throughput of 1-6 Gbps on VM servers
• Global Namespace (GNS) option for high availability and scaling
• NFS and CIFS access for varying workloads, including small files and media objects
1-1 COS Filesystem Gatway Release 1.6 User Guide
Chapter 1 Overview Product Description
• Multi-tenancy and security features including administration of tenants, with the administrator having rights to only configure and administer tenant storage without access to the actual storage data, and tenants only having access to their own data
• Data resiliency with options for number of copies and choice of mirroring or erasure coding (software RAID) for storage savings, and multi-site resiliency where the number of copies is less then or equal than the number of sites
• Per-user and per-group quotas and reporting
• Ability to enable compression of filesystem data when creating a pool. The default compression algorithm is LZ4.
• Integrity checks on data retrieval when configuring mirroring or RAID for data resiliency. With mirroring, any corrupted data copies discovered are repaired automatically using mirrored data. With RAID, any corrupted stripes discovered are repaired automatically using resilient stripes.
• Integration with Microsoft Active Directory
See the remaining chapters of this guide for details on these features, and for instructions for configuring and using them.
1-2Cisco COS Filesystem Gatway Release 1.6 User Guide
Cisco C
C H A P T E R 2
DeploymentThis section provides instructions for installing and configuring the software. FSGW Release 1.6.1 supports ISO installation directly on bare metal servers, or OVA installation on VM servers. This section describes both options.
• Bare Metal Installation, page 2-1
• Installation on the FSGW VM, page 2-5
• Configure FSGW on the COS PAM and Tenant PAM, page 2-8
• Adding a Cache and Log to a Zpool (Optional), page 2-8
Bare Metal InstallationFSGW Release 1.6.1 supports two approaches to bare metal installation:
• Automated installation using the FSGW ISO image
• Manual installation on other compatible hardware using RPMs
This section includes procedures for both installation methods.
Note Automated installation requires the recommended hardware described below. Manual installation is supported on other compatible hardware. See Hardware Prerequisites, page 2-5 for details.
Recommended Hardware
The following hardware is recommended for FSGW Release 1.6.1, and is required for automated installation from the ISO image:
• 4 x 10 GB network adapters
• 264 GB RAM
• 56 virtual CPU cores
2-1OS Filesystem Gateway Release 1.6 User Guide
Chapter 2 Deployment Bare Metal Installation
Note • In lab testing, the configuration specified above achieved read-write throughput of up to 15 Gbps.
• The Cisco UCS C240 Rack Server meets the requirement for 56 virtual CPU cores by having 2 CPU sockets, each with 14 physical cores and 2 threads per core available.
Automated Installation via ISO Image
Note This procedure uses the FSGW Release 1.6.1 ISO image and requires the hardware configuration described in Recommended Hardware, page 2-1. If not using the recommended hardware, use the procedure described in Manual Installation via RPMs, page 2-5.
Complete the following steps for automated installation:
Step 1 Verify that all cables are connected, and that CIMC has been set for the bare metal server before starting the installation.
Step 2 Open a supported web browser and navigate to https://<CIMC-IP>/login.html, where <CIMC-IP> is the CIMC IP address. The CIMC login page opens.
Step 3 Log in to CIMC using appropriate credentials.
Note See the CIMC documentation for supported browsers and login credentials.
Step 4 From the CIMC main menu, navigate to the Server > Summary page and launch KVM Console.
Note Use Java 6 Update 45 to launch KVM if higher Java versions cause failure to launch.
Step 5 Navigate to the Server > BIOS page and confirm that Virtual CD/DVD ROM is first in the boot order.
Step 6 Activate Virtual Devices, and then map the FSGW ISO file to Virtual CD/DVD ROM.
Step 7 Apply power to the server and confirm that it boots the ISO image.
When bootup is complete, the following installation options appear onscreen:
• Automated Kickstart Installation – the default option; requires no user intervention
• Manual Installation – allows the user to define the partition, time zone, and so on
• Boot from local drive – boots from the existing installation
Step 8 Choose Automated Kickstart Installation, or wait 30 seconds for automated installation to begin.
Note If necessary to interrupt installation, wait for 30 seconds following bootup for the interrupt option.
The following packages are installed during automated installation.
• % packages
• @base - Base utilities
2-2Cisco COS Filesystem Gateway Release 1.6 User Guide
Chapter 2 Deployment Bare Metal Installation
• @core - Core Utilities
• @cos-fsgw - COSFSGW packages
• kexec-tools
Step 9 When installation is finished, reboot the server.
Step 10 When prompted, log in to the server using the root user name and password.
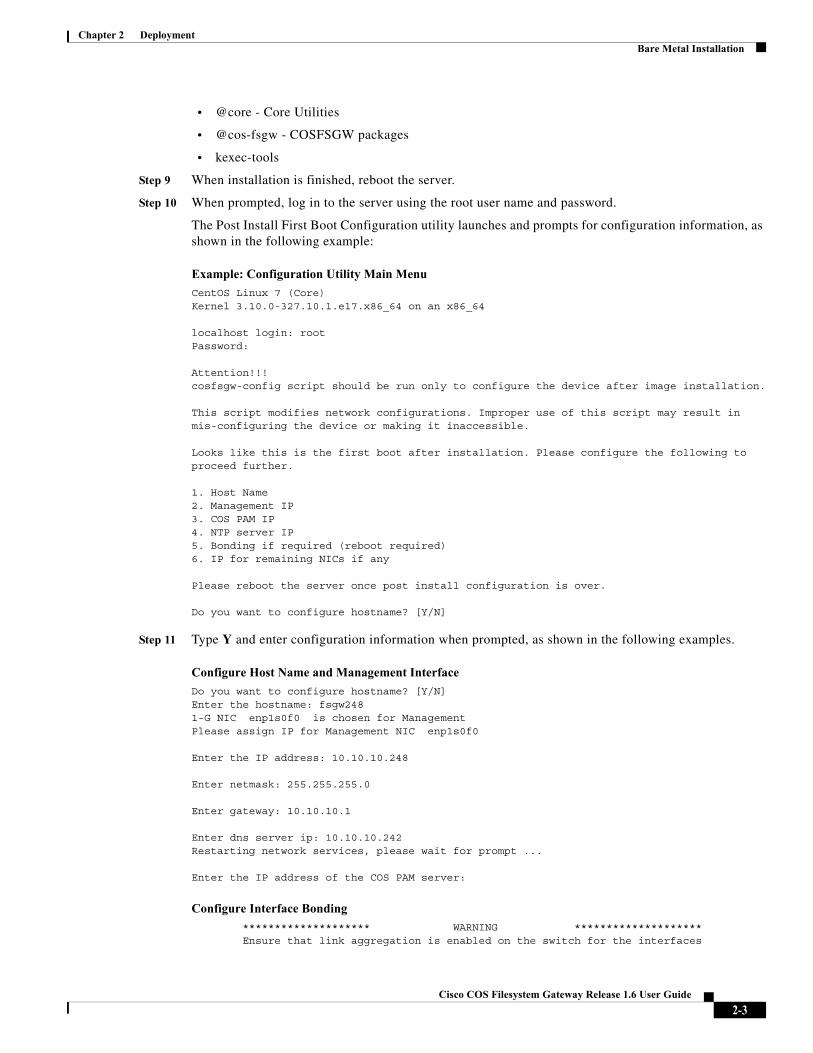
The Post Install First Boot Configuration utility launches and prompts for configuration information, as shown in the following example:
Example: Configuration Utility Main Menu
CentOS Linux 7 (Core)Kernel 3.10.0-327.10.1.e17.x86_64 on an x86_64
localhost login: rootPassword:
Attention!!!cosfsgw-config script should be run only to configure the device after image installation.
This script modifies network configurations. Improper use of this script may result inmis-configuring the device or making it inaccessible.
Looks like this is the first boot after installation. Please configure the following to proceed further.
1. Host Name2. Management IP3. COS PAM IP4. NTP server IP5. Bonding if required (reboot required)6. IP for remaining NICs if any
Please reboot the server once post install configuration is over.
Do you want to configure hostname? [Y/N]
Step 11 Type Y and enter configuration information when prompted, as shown in the following examples.
Configure Host Name and Management Interface
Do you want to configure hostname? [Y/N]Enter the hostname: fsgw2481-G NIC enp1s0f0 is chosen for ManagementPlease assign IP for Management NIC enp1s0f0
Enter the IP address: 10.10.10.248
Enter netmask: 255.255.255.0
Enter gateway: 10.10.10.1
Enter dns server ip: 10.10.10.242Restarting network services, please wait for prompt ...
Enter the IP address of the COS PAM server:
Configure Interface Bonding
******************** WARNING ********************Ensure that link aggregation is enabled on the switch for the interfaces
2-3Cisco COS Filesystem Gateway Release 1.6 User Guide

Chapter 2 Deployment Bare Metal Installation
If link aggregation is not enabled BONDING will not work as expected************************************************************************
Modifying the existing bond configurations ...Bonding module not loaded yet !!!Restarting network services, please wait for prompt ...Enter the name for the bond interface (or) Q to quit :bond0
Enter the IP address: 10.10.10.88
Enter netmask: 255.255.255.0Do you want to add enp1s0f1 as slave for bond0 [Y/N]nDo you want to add enp3s0f1 as slave for bond0 [Y/N]yDo you want to add enp3s0f0 as slave for bond0 [Y/N]yDo you want to add enp130s0f0 as slave for bond0 [Y/N]nDo you want to add enp130s0f1 as slave for bond0 [Y/N]n************************************************************************** Please REBOOT the server for bonding configurations to take effect **************************************************************************Enter the name for the bond interface (or) Q to quit :_
List Configurations
Restarting network services, please wait for prompt . . .fsgw-config> list
******************** Listing NIC Configurations ******************** ==========> Management <========== *** Interface : enp1s0f0 IP : 10.10.10.248-------------------------------------------------------------------- =========> Existing bond configuration(s) <========== *** Interface : bond0 IP : None ------------------------------------------------------------------------------------------- ==========> IN-MEM Bond configuration(s) <========== *** Interface : bond0 IP : 10.10.10.88 Slaves : [‘enp3s0f1’, ‘enp3s0f0’] ------------------------------------------------------------------------------------------- =========> Individual NICs <========== *** Interface : enp130s0f0 IP : None ---------------------- *** Interface : enp130s0f1 IP : None ---------------------- *** Interface : enp1s0f1 IP : None ------------------------------------------------------------------------------------------
fsgw-config> list_allDevice : bond0 IP assigned : NoneDevice : enp130s0f0 IP assigned : NoneDevice : enp130s0f1 IP assigned : NoneDevice : enp1s0f0 IP assigned : 10.10.10.248Device : enp1s0f1 IP assigned : NoneDevice : enp3s0f1 IP assigned : NoneDevice : enp3s0f1 IP assigned : NoneDevice : lo IP assigned : 10.10.10.1
fsgw-config>
Step 12 After entering the appropriate configuration options, choose Reboot to reboot the server.
2-4Cisco COS Filesystem Gateway Release 1.6 User Guide
Chapter 2 Deployment Installation on the FSGW VM
Changing Configuration Settings
To change any of these configuration settings later, enter cosfsgw-config to invoke the configuration utility. The utility supports the following command line options:
• bconfig – to configure bonding
• hconfig – to configure host name
• nconfig_by_name – to configure IP for a particular NIC
• list – to list all the configurations with bond related bindings
• list_all – to list all NICs without bond related bindings
• Reboot – to reboot the server
• quit – to exit configuration shell
Manual Installation via RPMs
If the installation is not on recommended hardware, complete the following steps to install and configure FSGW Release 1.6.1 on a bare metal server:
Step 1 Install the CentOS7 operating system, kernel version 3.10.0-327.10.1.el7.x86_64, on the server.
Step 2 Download the current FSGW Release 1.6.1 RPM package from the Cisco software download page.
Step 3 At the server prompt, enter the command rpm -i <rpm-path> to install the RPMs:
Step 4 Configure FSGW Release 1.6.1 as described in Configure FSGW on the COS PAM and Tenant PAM, page 2-8.
Installation on the FSGW VMThese instructions apply only for installing FSGW Release 1.6.1 on a VM.
Hardware Prerequisites
FSGW Release 1.6.1 supports installation on any server hardware meeting the following minimum requirements:
• 8 x vCPU
• vmxnet3
• 64 GB memory
• 40 GB system disk (including log)
• 2 x 100 GB SSDs for log and cache (optional but recommended):
2-5Cisco COS Filesystem Gateway Release 1.6 User Guide
Chapter 2 Deployment Installation on the FSGW VM
– 20 GB total allocated for ZIL log
– 180 GB total allocated for L2ARC cache
• 1 x 1G NIC for management
• 1 x 10G NIC for SMB/NFS clients
• 1 x 10G NIC for COS internal
Note FSGW Release 1.6.1 was tested on a Cisco UCS-C Series Rack Server with 10G network adapters, or a Cisco UCS-B Series Blade Server with 10G network adapters.
Software Prerequisites
FSGW Release 1.6.1 has the following software prerequisites:
• VMware vSphere Hypervisor 5.5.0 (or later version) installed on UCS server
– Three vSwitch virtual switches vSwitch0(1G) for management network, vSwitch1 (10G) for COS data network, and vSwitch2 (10G) for client (NFS and Samba) network
– 250 GB minimum free space in Storage Datastore
• DNS server for PAM
– Named dns-1
– See the Cisco Cloud Object Storage Release 3.8.1 User Guide for installation instructions
• COS PAM and Tenant PAM
– COS configured on the COS PAM
– COS configured on the Tenant PAM
– See the Cisco Cloud Object Storage Release 3.8.1 User Guide for installation instructions
• COS cluster
– See the Cisco Cloud Object Storage Release 3.8.1 User Guide for installation instructions
• NTP server
• Win2008R2 for AD authentication and DNS service
– For DNS service, named as dns-2
– Set AD server as DNS server on FSGW to use AD authentication.
– Set AD server as DNS server in gateway resolv.conf file.
– For DNS setting, add dns forwarder as dns-1.
Note The dns-2 server can resolve all dns-1 hosts.
Deploy the FSGW OVA
The FSGW OVA is an archive file containing the FSGW virtual machine. Confirm that you have the latest OVA file (for example, cisco_cos_fsgw_1.6.1-243.ova) before proceeding.
2-6Cisco COS Filesystem Gateway Release 1.6 User Guide
Chapter 2 Deployment Installation on the FSGW VM
Step 1 Confirm that the COS cluster, COS-PAM, Tenant-PAM, Windows AD server, NTP server, and DNS server are installed and configured correctly.
Step 2 Log in to the ESXi host using vCenter.
Step 3 Check the ESXi host hardware and software for the following:
• Storage – At least 300 GB free space
• Network – Three vSwitch virtual switches:
– vSwitch0(1G) for management network
– vSwitch1(10G) for COS data network
– vSwitch2(10G) for client (NFS and Samba) network
• Host NTP setting
Step 4 Deploy the FSGW OVA file and complete the following steps in the installation wizard:
a. Accept the license agreement, then click Next.
b. On the Name and Location page, enter the name of the VM and select its installation location, then click Next.
c. On the Storage page, select the storage to be used (at least 280 GB free space required), then click Next.
d. On the Disk Format page, choose Thin Provision as the disk format option, then click Next.
e. On the Network Mapping page, choose the corresponding network from the drop-down list, then click Next.
f. On the Properties page, enter the following parameters:
– Hostname
– System Password (enter twice to confirm)
– COS PAM Server IP address
– Network Time Server IP address
– Domain Name Server IP addresses (separated by commas or spaces)
Recheck your entries, then click Next.
g. On the Ready to Complete page, recheck all settings, then click Finish.
Note If you check Power on after deployment, the VM starts after you click Finish.
Step 5 Start the FSGW VM, if not started automatically through the wizard.
Step 6 Confirm that the VM is registered to the COS PAM as follows:
a. Log in to the COS Service Manager GUI as described in the Cisco Cloud Object Storage Release 3.8.1 User Guide.
b. Choose Infrastructure > Storage > FSG Tenant in the GUI navigation panel.
c. On the FSG Tenant page, open the Filesystem Gateway Nodes drop-down list and confirm that the name of the deployment just deployed appears in the list.
d. In the GUI navigation panel, choose Service Domain Object > Profiles > Auth Profiles.
e. On the Auth Profiles page, create a user account using the default name auth-1.
2-7Cisco COS Filesystem Gateway Release 1.6 User Guide
Chapter 2 Deployment Configure FSGW on the COS PAM and Tenant PAM
curl -v -X PUT -H "X-Auth-Admin-User: .super_admin" -H "X-Auth-Admin-Key: rootroot" -H "X- Account-Suffix: 123" http://auth03.fsgw.com/auth/v2/auth-1
f. Create a user with the default name jdoe and the default key a86850deb2742ec3cb41518e26aa2d89
curl -v -X PUT -H "X-Auth-Admin-User: .super_admin" -H "X-Auth-Admin-Key: rootroot" -H "X- Auth-User-Key: a86850deb2742ec3cb41518e26aa2d89" -H "X-Auth-User-Reseller-Admin: true" http://auth03.fsgw.com/auth/v2/auth-1/jdoe
Configure FSGW on the COS PAM and Tenant PAMTo configure the FSGW tenant on the COS and Tenant PAMs:
Step 1 Log on to the COS PAM as described in the Cisco Cloud Object Storage 3.8.1 User Guide.
Step 2 In the Service Manager GUI navigation panel, select Panel Infrastructure > Storage > FSG Tenant.
Step 3 On the FSG Tenant page, create a new tenant (or update an existing one) with the following parameters:
• Tenant Name – use the Tenant PAM GUI user name
• Auth Profile – Tenant PAM authorization profile
• Tenant Domain – Tenant PAM domain FQDN or IP address
• Initial Password – Current password for the Tenant PAM GUI
• COS Cluster – Cluster to which the Tenant PAM is assigned
• FSG Nodes – FSGW nodes of the Tenant PAM
Step 4 Find the FSGW VM host, select its COS cluster, and save the configuration.
Step 5 Log in to the Tenant PAM, edit the FSGW VM configuration as described in Configuration Using the Tenant PAM GUI, page 3-1, and save the changes.
Step 6 Log in to the FSGW VM via SSH and confirm that all of these configuration settings are in effect:
• zpool status or zpool list
• cat /etc/samba/smb.conf
• cat /etc/exports
• realm list
Step 7 Access the FSGW shared folder using the NFS or SMB client.
Adding a Cache and Log to a Zpool (Optional)FSGW Release FSGW supports adding a Level 2 Adjustable Replacement Cache (L2ARC) virtual drive and a ZFS Intent Log (ZIL) virtual drive to a Linux Z file system (ZFS) virtual storage pool (zpool). If the node on which you install FSGW uses SSD drives, we recommend adding both a cache and a log to a zpool, as they will greatly improve performance.
To add a cache and log to a zpool:
2-8Cisco COS Filesystem Gateway Release 1.6 User Guide
Chapter 2 Deployment Adding a Cache and Log to a Zpool (Optional)
Step 1 Confirm that the FSGW VM was deployed on SSD storage. See step 4c of Deploy the FSGW OVA, page 2-6.
Step 2 Confirm that the FSGW includes three virtual disks (vDisks):
• One 40 GB disk (sda) for system use
• Two 100 GB disks (sdb, sdc) for cache and logging
Step 3 Format the sdb and sdc virtual disks into two partitions, one 10 GB and the other 90 GB, to create four virtual disks total: sdb1 and sdc1 at 10 GB each, and sdb2 and sdc2 at 90 GB each.
[root@cosgateway186 ~]# fdisk -1 /dev/sdbWARNING: fdisk support is currently new, and therefore in an experimental phase. Use at your own discretion.
Disk /dev/sdb: 107.4 GB, 107374182400 bytes, 209715200 sectorsUnits = sectors of 1 * 512 = 512 bytesSector size (logical/physical): 512 bytes / 512 bytesI/O size (minimal/optimal): 512 bytes / 512 bytesDisk label type: gpt
# Start End Size Type Name1 2048 20973567 10G Linux filesystem2 20973568 209715166 90G Linux filesystem
[root@cosgateway186 ~]# fdisk -1 /dev/sdcWARNING: fdisk support is currently new, and therefore in an experimental phase. Use at your own discretion.
Disk /dev/sdc: 107.4 GB, 107374182400 bytes, 209715200 sectorsUnits = sectors of 1 * 512 = 512 bytesSector size (logical/physical): 512 bytes / 512 bytesI/O size (minimal/optimal): 512 bytes / 512 bytesDisk label type: gpt
# Start End Size Type Name1 2048 20973567 10G Linux filesystem2 20973568 209715166 90G Linux filesystem
[root@cosgateway186 ~]#
Step 4 Use the zpool status command to check the current zpool status.
[root@cosgateway186 ~]# zpool statuspool: test
state: onlinescan: none requested
config:
NAME STATE READ WRITE CKSUMtest ONLINE 0 0 0/root/mount/auth05.fsgw.com#container6 ONLINE 0 0 0
logsmirror-1 ONLINE 0 0 0
sdb1 ONLINE 0 0 0sdc1 ONLINE 0 0 0
cachesdb2 ONLINE 0 0 0sdc2 ONLINE 0 0 0
errors: No known data errors[root@cosgateway186 ~]#
2-9Cisco COS Filesystem Gateway Release 1.6 User Guide
Chapter 2 Deployment Adding a Cache and Log to a Zpool (Optional)
Step 5 Run the command:
zpool add <zpool_name> log mirror /dev/sdb1 /dev/sdc1 cache /dev/sdb2 /dev/sdc2
This defines sdb1 as the log mirror for sdc1, and sdb2 as the cache mirror for sdc2.
2-10Cisco COS Filesystem Gateway Release 1.6 User Guide
Cisco C
C H A P T E R 3
Operation and Routine MaintenanceFSGW operation and routine maintenance consists mainly of updating the FSGW node configuration as needed through the Tenant PAM GUI, and periodically monitoring FSGW node status by reviewing statistics and log files through the GUI or the FSGW CLI. This section describes both GUI and CLI operations.
• Configuration Using the Tenant PAM GUI, page 3-1
• Checking Statistics on the Tenant PAM, page 3-2
• Configuration Using the CLI, page 3-7
• Recommended Routine Maintenance, page 3-8
• File Locations, page 3-8
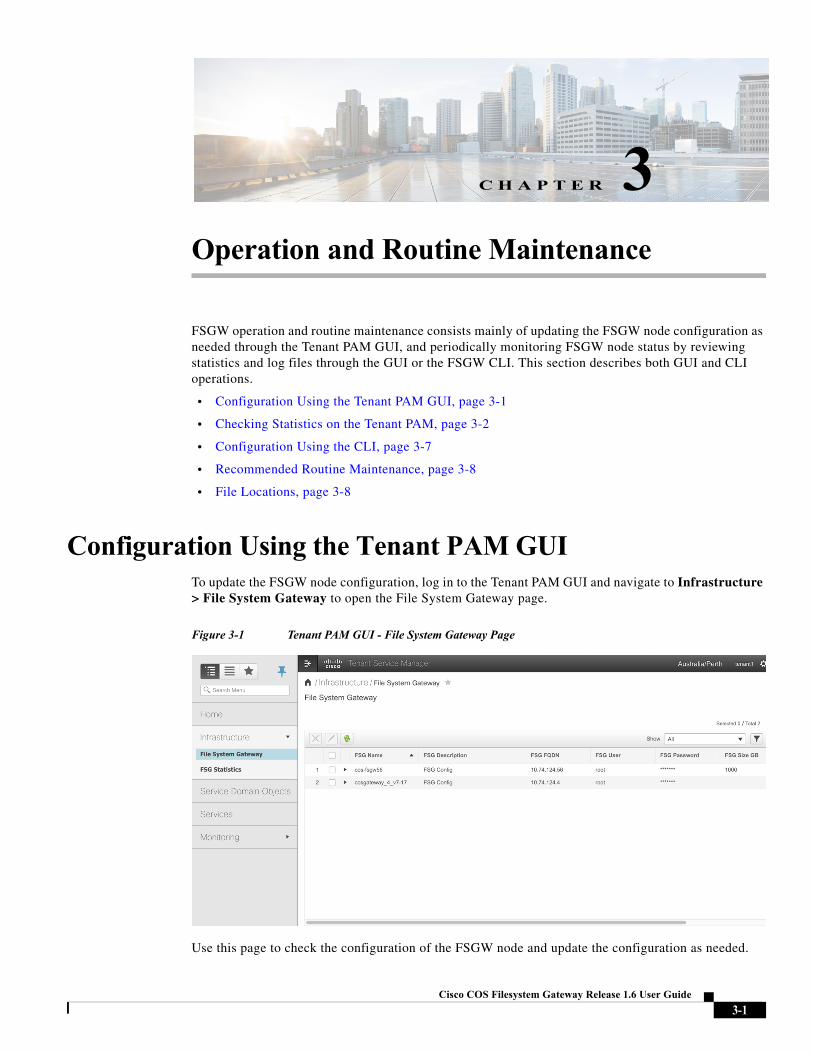
Configuration Using the Tenant PAM GUITo update the FSGW node configuration, log in to the Tenant PAM GUI and navigate to Infrastructure > File System Gateway to open the File System Gateway page.
Figure 3-1 Tenant PAM GUI - File System Gateway Page
Use this page to check the configuration of the FSGW node and update the configuration as needed.
3-1OS Filesystem Gateway Release 1.6 User Guide
Chapter 3 Operation and Routine Maintenance Configuration Using the Tenant PAM GUI
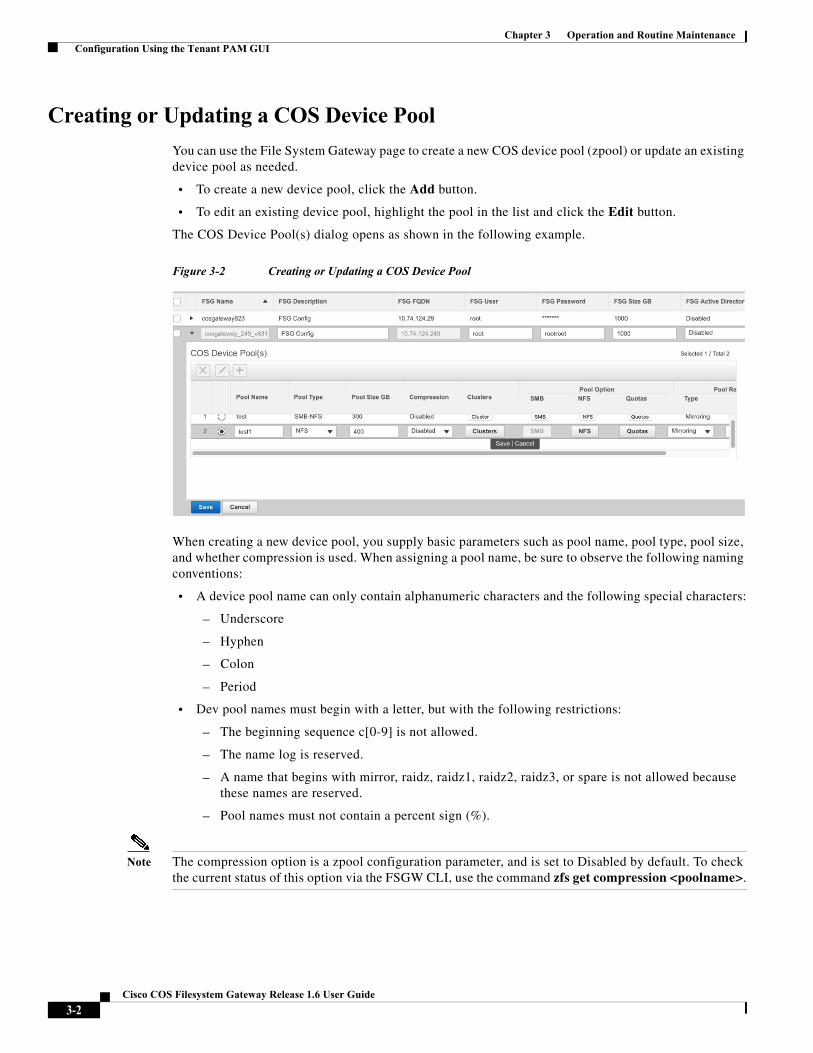
Creating or Updating a COS Device Pool
You can use the File System Gateway page to create a new COS device pool (zpool) or update an existing device pool as needed.
• To create a new device pool, click the Add button.
• To edit an existing device pool, highlight the pool in the list and click the Edit button.
The COS Device Pool(s) dialog opens as shown in the following example.
Figure 3-2 Creating or Updating a COS Device Pool
When creating a new device pool, you supply basic parameters such as pool name, pool type, pool size, and whether compression is used. When assigning a pool name, be sure to observe the following naming conventions:
• A device pool name can only contain alphanumeric characters and the following special characters:
– Underscore
– Hyphen
– Colon
– Period
• Dev pool names must begin with a letter, but with the following restrictions:
– The beginning sequence c[0-9] is not allowed.
– The name log is reserved.
– A name that begins with mirror, raidz, raidz1, raidz2, raidz3, or spare is not allowed because these names are reserved.
– Pool names must not contain a percent sign (%).
Note The compression option is a zpool configuration parameter, and is set to Disabled by default. To check the current status of this option via the FSGW CLI, use the command zfs get compression <poolname>.
3-2Cisco COS Filesystem Gateway Release 1.6 User Guide
Chapter 3 Operation and Routine Maintenance Configuration Using the Tenant PAM GUI
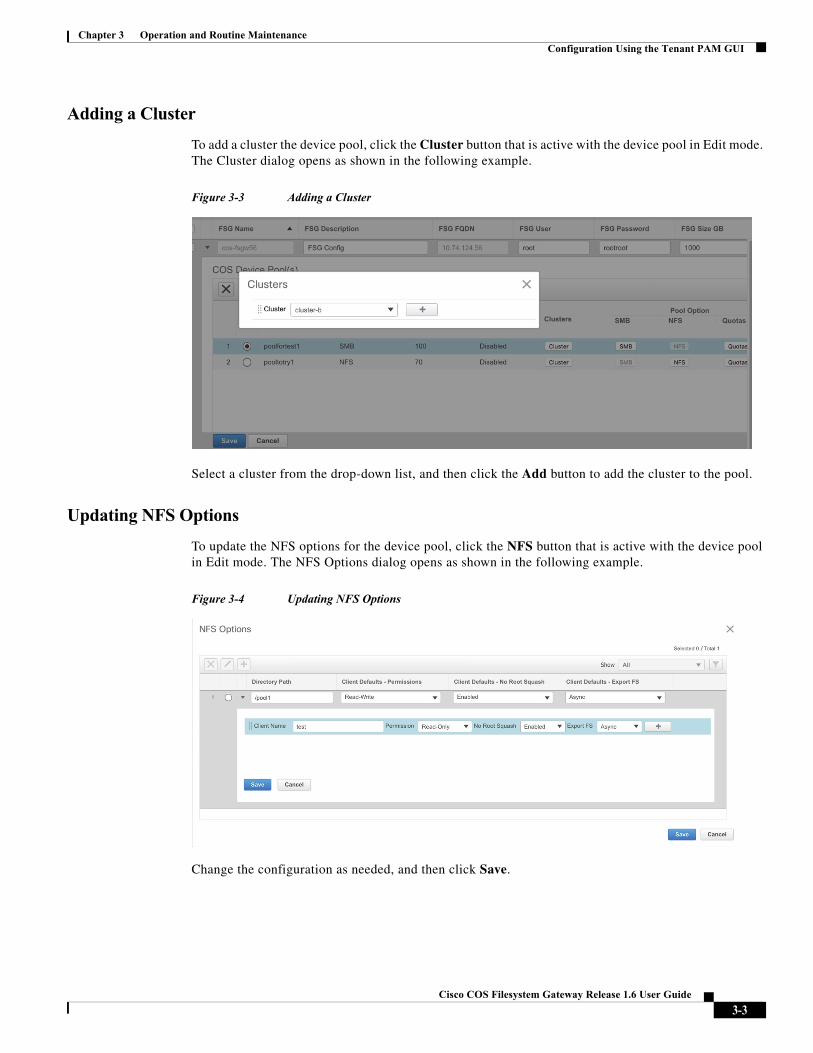
Adding a Cluster
To add a cluster the device pool, click the Cluster button that is active with the device pool in Edit mode. The Cluster dialog opens as shown in the following example.
Figure 3-3 Adding a Cluster
Select a cluster from the drop-down list, and then click the Add button to add the cluster to the pool.
Updating NFS Options
To update the NFS options for the device pool, click the NFS button that is active with the device pool in Edit mode. The NFS Options dialog opens as shown in the following example.
Figure 3-4 Updating NFS Options
Change the configuration as needed, and then click Save.
3-3Cisco COS Filesystem Gateway Release 1.6 User Guide
Chapter 3 Operation and Routine Maintenance Configuration Using the Tenant PAM GUI
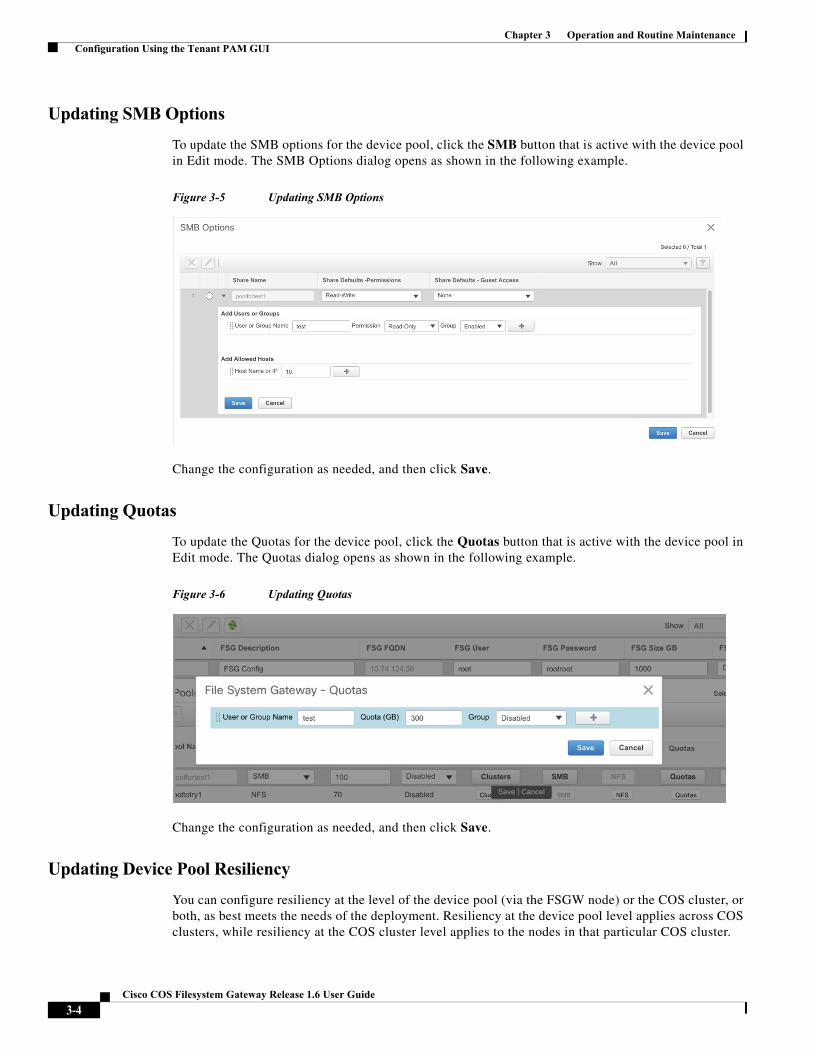
Updating SMB Options
To update the SMB options for the device pool, click the SMB button that is active with the device pool in Edit mode. The SMB Options dialog opens as shown in the following example.
Figure 3-5 Updating SMB Options
Change the configuration as needed, and then click Save.
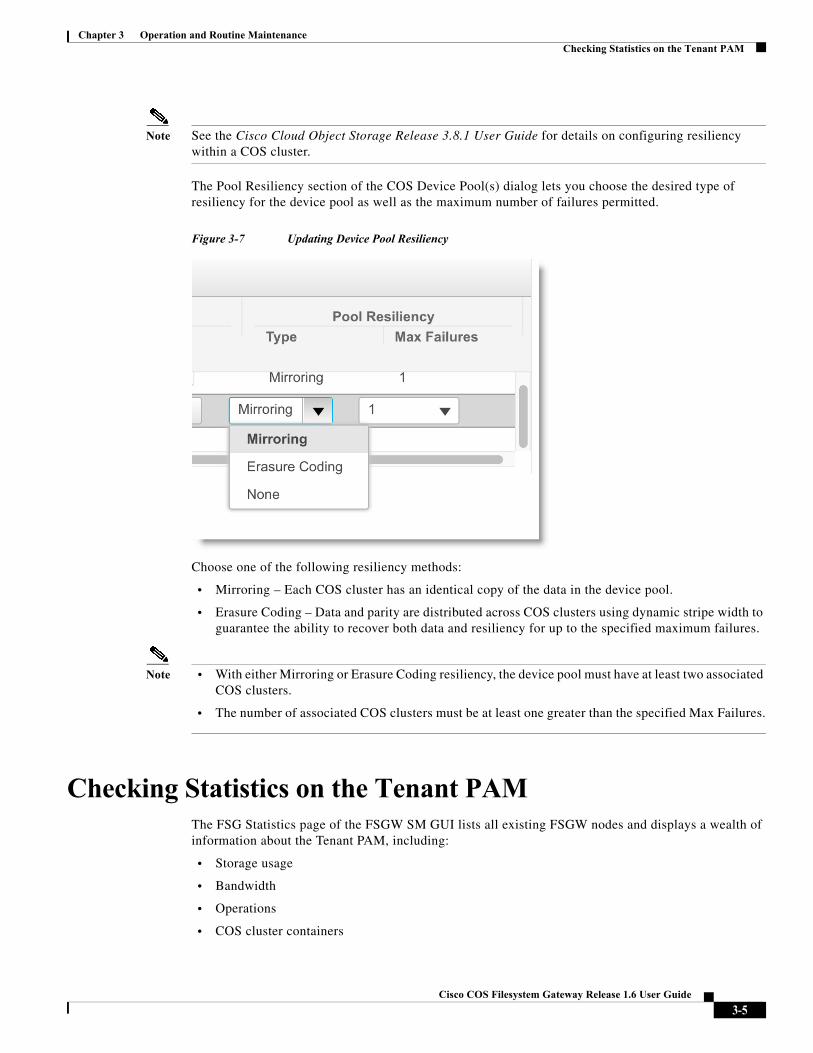
Updating Quotas
To update the Quotas for the device pool, click the Quotas button that is active with the device pool in Edit mode. The Quotas dialog opens as shown in the following example.
Figure 3-6 Updating Quotas
Change the configuration as needed, and then click Save.
Updating Device Pool Resiliency
You can configure resiliency at the level of the device pool (via the FSGW node) or the COS cluster, or both, as best meets the needs of the deployment. Resiliency at the device pool level applies across COS clusters, while resiliency at the COS cluster level applies to the nodes in that particular COS cluster.
3-4Cisco COS Filesystem Gateway Release 1.6 User Guide
Chapter 3 Operation and Routine Maintenance Checking Statistics on the Tenant PAM
Note See the Cisco Cloud Object Storage Release 3.8.1 User Guide for details on configuring resiliency within a COS cluster.
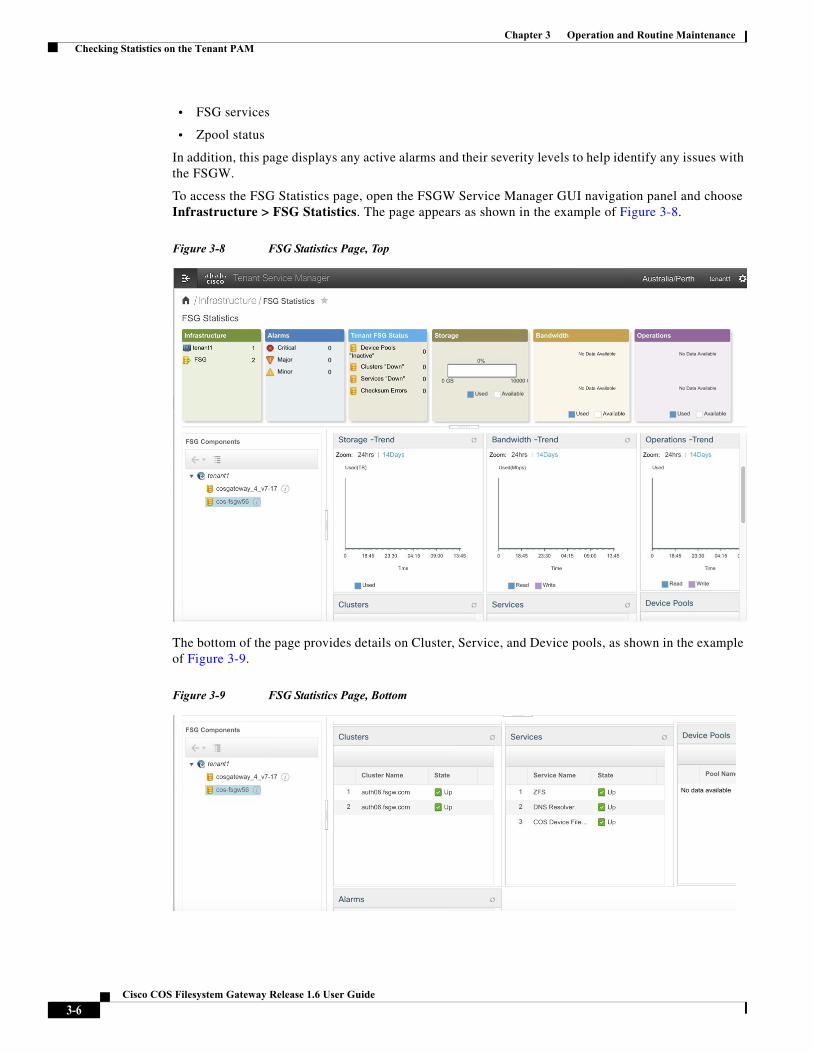
The Pool Resiliency section of the COS Device Pool(s) dialog lets you choose the desired type of resiliency for the device pool as well as the maximum number of failures permitted.
Figure 3-7 Updating Device Pool Resiliency
Choose one of the following resiliency methods:
• Mirroring – Each COS cluster has an identical copy of the data in the device pool.
• Erasure Coding – Data and parity are distributed across COS clusters using dynamic stripe width to guarantee the ability to recover both data and resiliency for up to the specified maximum failures.
Note • With either Mirroring or Erasure Coding resiliency, the device pool must have at least two associated COS clusters.
• The number of associated COS clusters must be at least one greater than the specified Max Failures.
Checking Statistics on the Tenant PAMThe FSG Statistics page of the FSGW SM GUI lists all existing FSGW nodes and displays a wealth of information about the Tenant PAM, including:
• Storage usage
• Bandwidth
• Operations
• COS cluster containers
3-5Cisco COS Filesystem Gateway Release 1.6 User Guide
Chapter 3 Operation and Routine Maintenance Checking Statistics on the Tenant PAM
• FSG services
• Zpool status
In addition, this page displays any active alarms and their severity levels to help identify any issues with the FSGW.
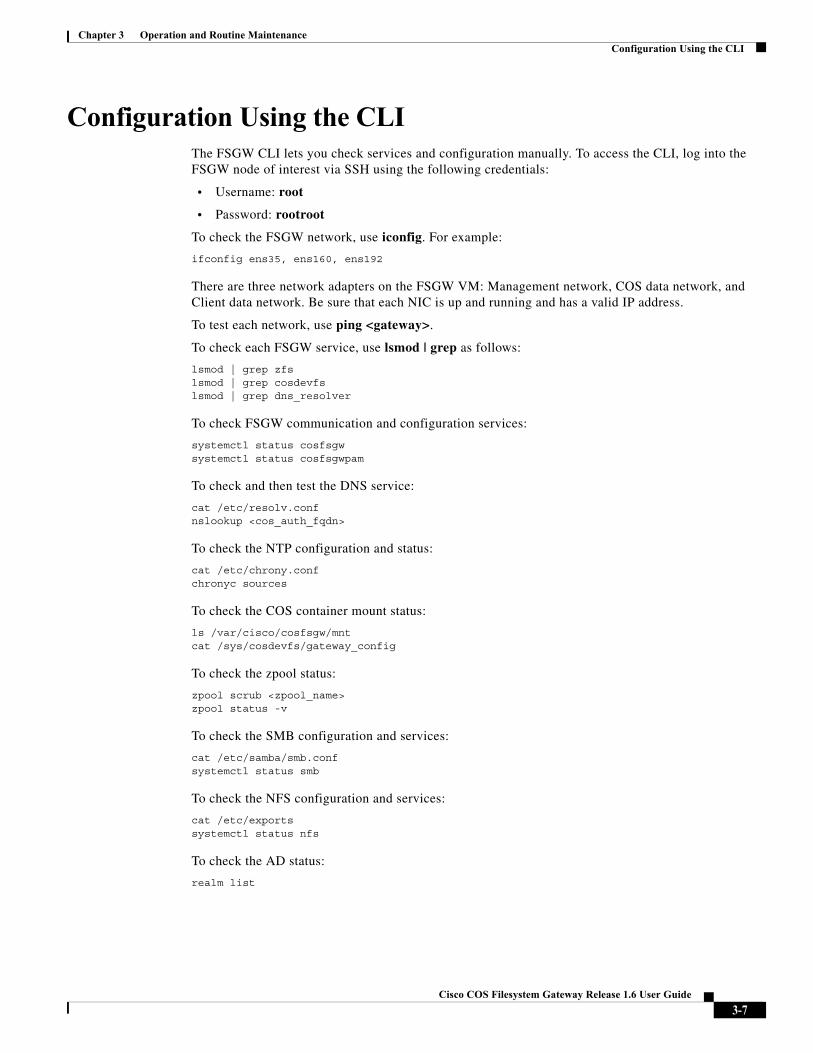
To access the FSG Statistics page, open the FSGW Service Manager GUI navigation panel and choose Infrastructure > FSG Statistics. The page appears as shown in the example of Figure 3-8.
Figure 3-8 FSG Statistics Page, Top
The bottom of the page provides details on Cluster, Service, and Device pools, as shown in the example of Figure 3-9.
Figure 3-9 FSG Statistics Page, Bottom
3-6Cisco COS Filesystem Gateway Release 1.6 User Guide
Chapter 3 Operation and Routine Maintenance Configuration Using the CLI
Configuration Using the CLIThe FSGW CLI lets you check services and configuration manually. To access the CLI, log into the FSGW node of interest via SSH using the following credentials:
• Username: root
• Password: rootroot
To check the FSGW network, use iconfig. For example:
ifconfig ens35, ens160, ens192
There are three network adapters on the FSGW VM: Management network, COS data network, and Client data network. Be sure that each NIC is up and running and has a valid IP address.
To test each network, use ping <gateway>.
To check each FSGW service, use lsmod | grep as follows:
lsmod | grep zfslsmod | grep cosdevfslsmod | grep dns_resolver
To check FSGW communication and configuration services:
systemctl status cosfsgwsystemctl status cosfsgwpam
To check and then test the DNS service:
cat /etc/resolv.confnslookup <cos_auth_fqdn>
To check the NTP configuration and status:
cat /etc/chrony.confchronyc sources
To check the COS container mount status:
ls /var/cisco/cosfsgw/mntcat /sys/cosdevfs/gateway_config
To check the zpool status:
zpool scrub <zpool_name>zpool status -v
To check the SMB configuration and services:
cat /etc/samba/smb.confsystemctl status smb
To check the NFS configuration and services:
cat /etc/exportssystemctl status nfs
To check the AD status:
realm list
3-7Cisco COS Filesystem Gateway Release 1.6 User Guide

Chapter 3 Operation and Routine Maintenance Recommended Routine Maintenance
Recommended Routine Maintenance
Daily Tasks
• Check the Tenant PAM GUI to be sure that there are no major alarms or errors displayed.
• Check the COS PAM to be sure that there are no major issues on the COS side.
Weekly Tasks
• Run the zpool scrub <zpool_name> CLI command on FSGW to be sure that zpool is in good state after running for a week.
File LocationsThe FSGW logs are at the following locations:
• /var/log/
• /var/log/cisco/cosfsgw/
The configuration files are at the following location:
• /etc/cisco/cosfsgw/
Usage Example
[root@cosgateway_4_720 ~]# cd /etc/cisco/cosfsgw/[root@cosgateway_4_720 cosfsgw]# lltotal 20-rw-r--r-- 1 root root 239 Jul 20 22:03 announce.json-rw-r--r-- 1 root root 2912 May 19 15:04 current.pam.json-rw-r--r-- 1 root root 111 Jul 20 19:59 events_monitoring.json-rw-r--r-- 1 root root 107 Jul 21 00:32 init.json-rw-r--r-- 1 root root 190 Jul 18 21:03 stats_monitoring.json
To check the FSGW version, check the FSGW rpm as follows:
[root@cosgateway_4_720 ~]# rpm -qa | grep cosfsgw-aiccosfsgw-aic-client-1.2.1-164.el7.centos.x86_64[root@cosgateway_4_720 ~]#
3-8Cisco COS Filesystem Gateway Release 1.6 User Guide
Cisco C
C H A P T E R 4
Using the FSGW GUIBeginning with Release 1.6.1, FSGW provides a native graphical user interface (GUI) to allow for the use of FSGW with COS 3.12.x and other releases that do not use the PAM GUI as their management interface. This chapter describes the use of the FSGW GUI.
Note The FSGW GUI may work with other common browsers, but was tested with Mozilla Firefox Release 52.0.2 (32-bit), so Firefox is the recommended choice.
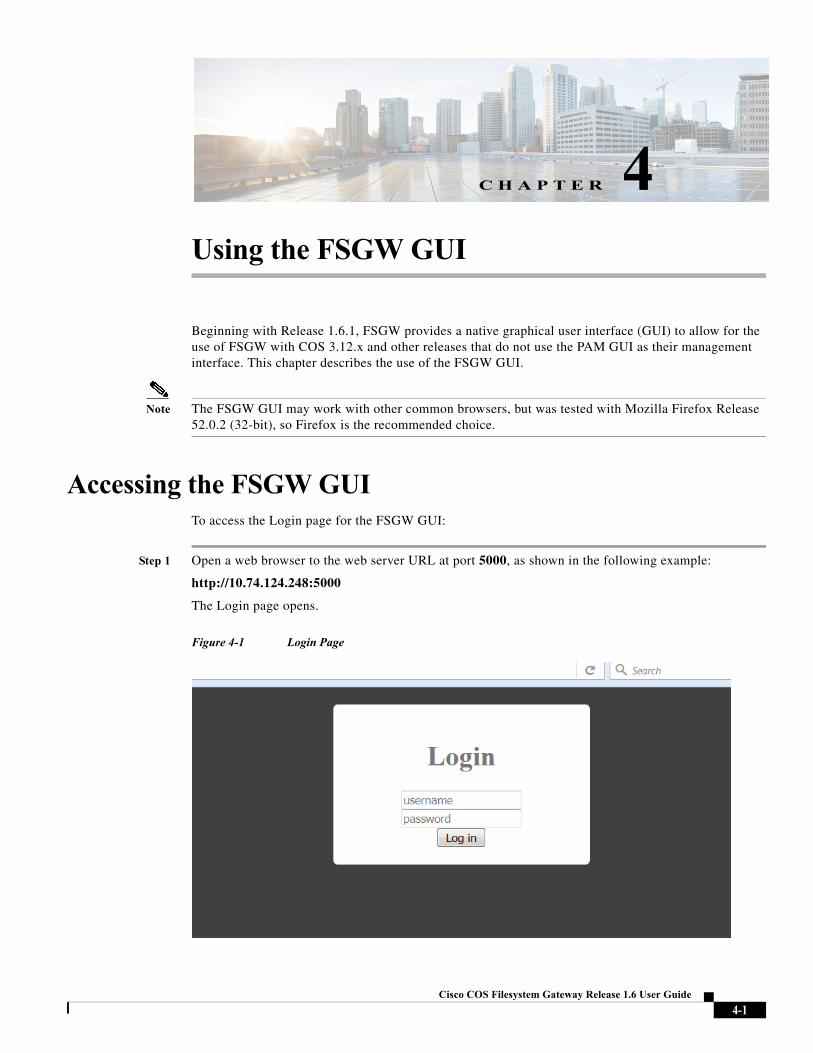
Accessing the FSGW GUITo access the Login page for the FSGW GUI:
Step 1 Open a web browser to the web server URL at port 5000, as shown in the following example:
http://10.74.124.248:5000
The Login page opens.
Figure 4-1 Login Page
4-1OS Filesystem Gateway Release 1.6 User Guide
Chapter 4 Using the FSGW GUI COS FSGW Home Page
Step 2 Enter your username and password in the spaces provided.
The default values are:
• Username: admin
• Password: adminadmin
The password can (and should) be reset following login, as described in Reset Page, page 4-7.
Step 3 Click Login. The COS FSGW Home page opens.
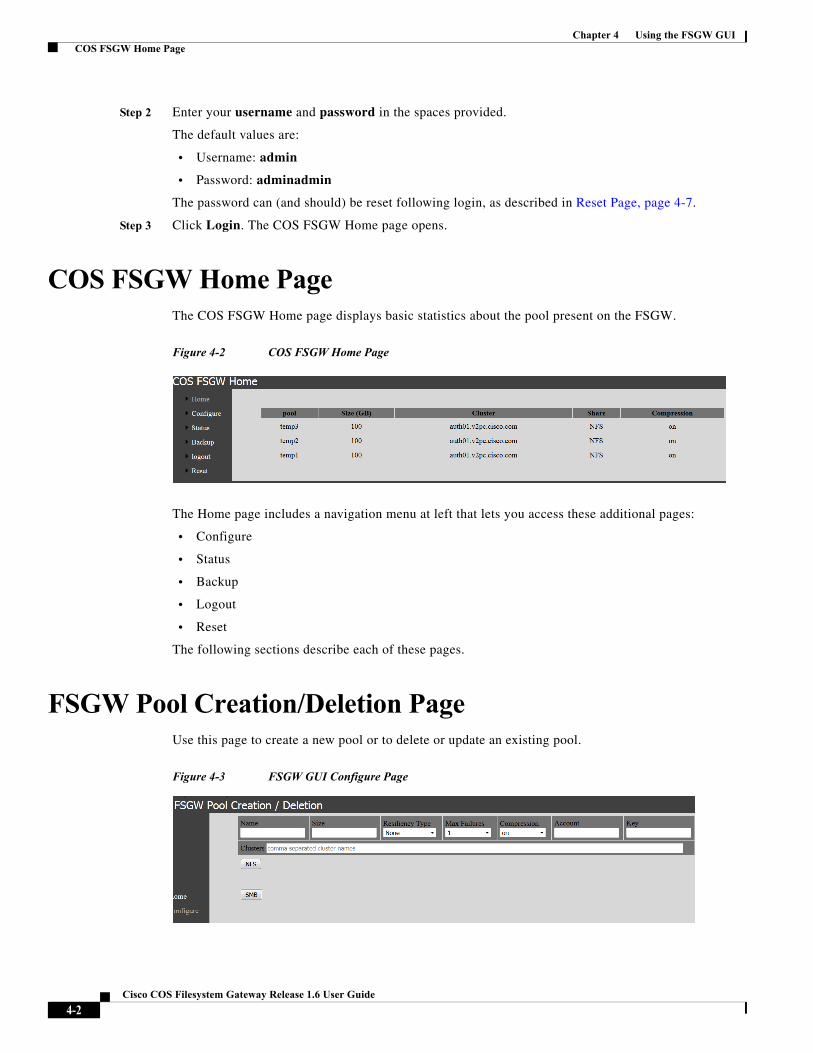
COS FSGW Home PageThe COS FSGW Home page displays basic statistics about the pool present on the FSGW.
Figure 4-2 COS FSGW Home Page
The Home page includes a navigation menu at left that lets you access these additional pages:
• Configure
• Status
• Backup
• Logout
• Reset
The following sections describe each of these pages.
FSGW Pool Creation/Deletion PageUse this page to create a new pool or to delete or update an existing pool.
Figure 4-3 FSGW GUI Configure Page
4-2Cisco COS Filesystem Gateway Release 1.6 User Guide

Chapter 4 Using the FSGW GUI FSGW Pool Creation/Deletion Page
Creating a New Pool
To create a new pool, enter the following:
• Name – Name of the pool to create.
• Size – Size of the pool.
• Resiliency Type
– None – ZFS resiliency not supported.
– Mirror – Enable ZFS mirror resiliency support.
– Erasure coding – This is not supported in this release.
• Max Failures – The number of resiliency copy for mirroring.
• Compression – Enable or disable ZFS compression (enabled by default).
• Account – The user and account information.
• Key – The user authorization key.
• Clusters – The COS cluster FQDN. For mirroring, enter a comma-separated cluster FQDN without a space after comma, as shown in the following example.
Figure 4-4 Sample COS Cluster FQDN
Deleting a Pool
To delete a pool, enter the following:
• Name – Name of the pool to delete.
• Size – Enter a size of zero.
• Resiliency Type
– None – ZFS resiliency not supported.
– Mirror – Enable ZFS mirror resiliency support.
– Erasure coding – This is not supported in this release.
• Max Failures – The number of resiliency copy for mirroring.
• Compression – Enable or disable ZFS compression. Enabled by default.
• Account – The user and account information.
• Key – The user authorization key.
• Clusters – The COS cluster FQDN (see example at Figure 4-4).
4-3Cisco COS Filesystem Gateway Release 1.6 User Guide
Chapter 4 Using the FSGW GUI FSGW Pool Creation/Deletion Page
Updating an Existing Pool
To update an existing pool, enter or modify the following:
• Name – Name of the pool to update.
• Size – Enter a size which is greater than the current pool size.
• Resiliency Type
– None – ZFS resiliency not supported.
– Mirror – Enable ZFS mirror resiliency support.
– Erasure coding – This is not supported in this release.
• Max Failures – The number of resiliency copy for mirroring.
• Compression – Enable or disable ZFS compression. Enabled by default.
• Account – The user and account information.
• Key – The user authorization key.
• Clusters – The COS cluster FQDN.
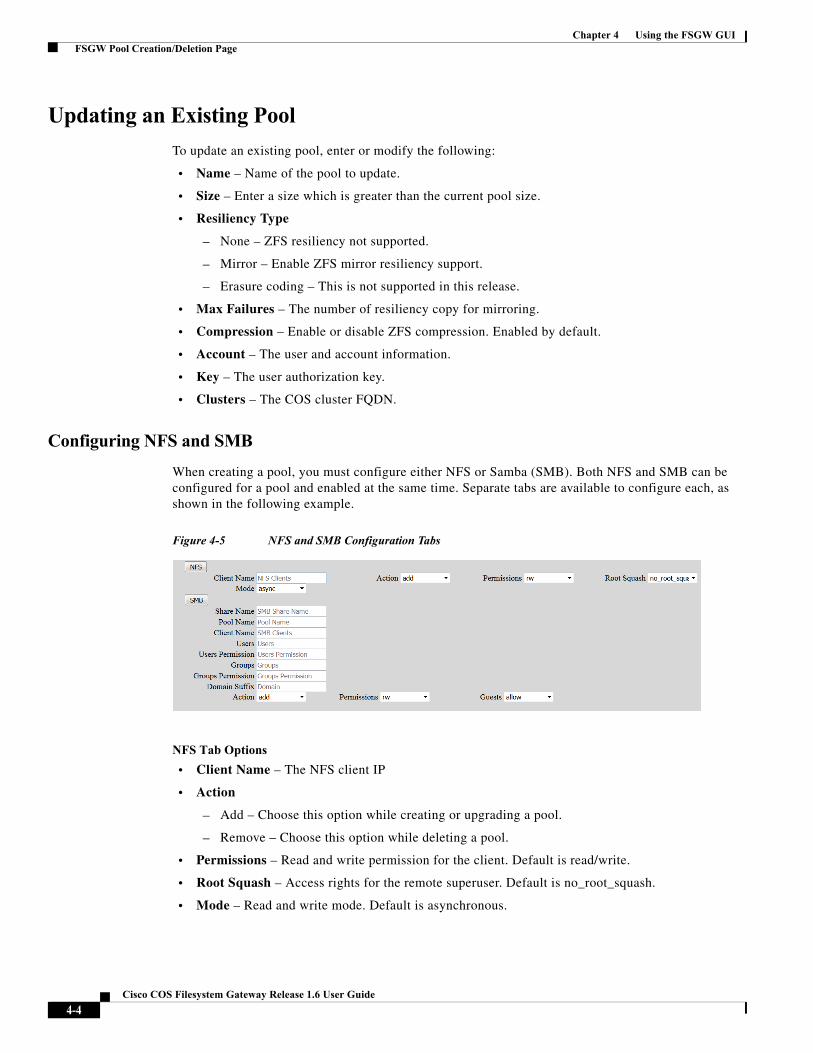
Configuring NFS and SMB
When creating a pool, you must configure either NFS or Samba (SMB). Both NFS and SMB can be configured for a pool and enabled at the same time. Separate tabs are available to configure each, as shown in the following example.
Figure 4-5 NFS and SMB Configuration Tabs
NFS Tab Options
• Client Name – The NFS client IP
• Action
– Add – Choose this option while creating or upgrading a pool.
– Remove – Choose this option while deleting a pool.
• Permissions – Read and write permission for the client. Default is read/write.
• Root Squash – Access rights for the remote superuser. Default is no_root_squash.
• Mode – Read and write mode. Default is asynchronous.
4-4Cisco COS Filesystem Gateway Release 1.6 User Guide
Chapter 4 Using the FSGW GUI Status Page
SMB Tab Options
• Share Name – The name of the smb share which will be used for smb mount.
• Pool Name – Name of the pool to be exported for smb mount.
• Client Name – The samba client IP.
• Users/User Permissions – The users and associated permission.
• Groups/Groups Permission – The group and associated permission.
• Action
– Add – Choose this option while creating or upgrading a pool.
– Remove – Choose this option while deleting a pool.
• Permissions – Read and write permission for the client. Default is read/write.
• Guest – Access options for guest user.
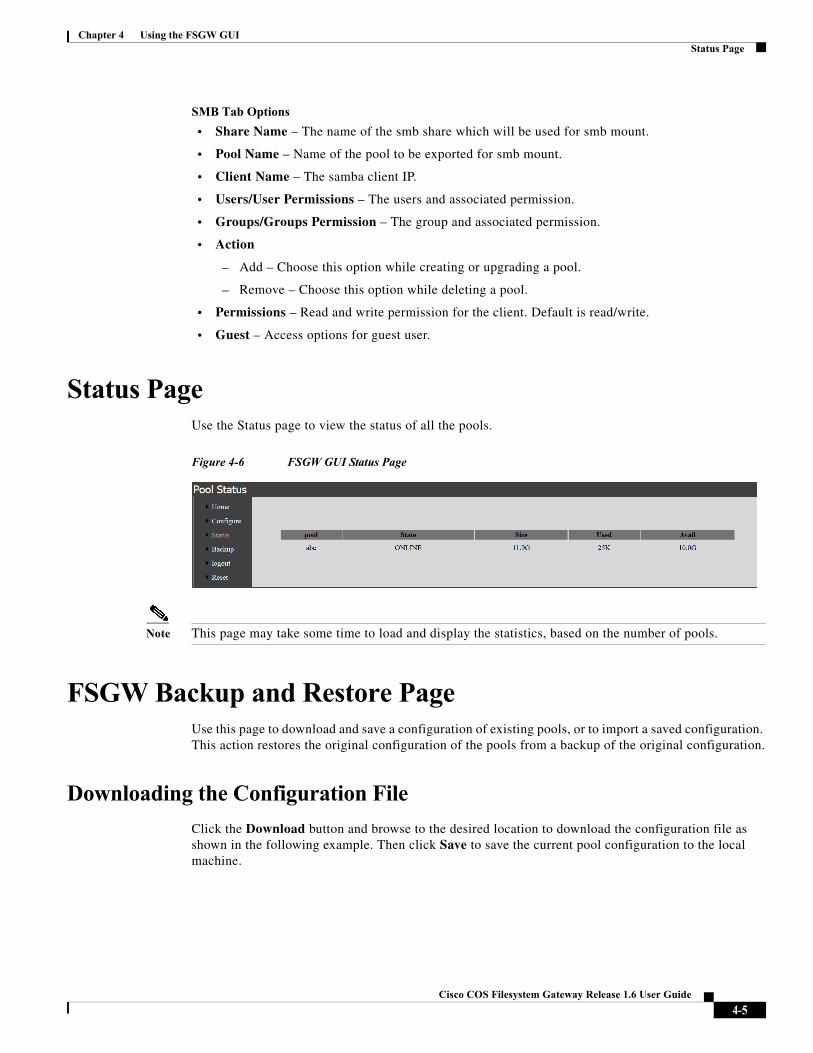
Status PageUse the Status page to view the status of all the pools.
Figure 4-6 FSGW GUI Status Page
Note This page may take some time to load and display the statistics, based on the number of pools.
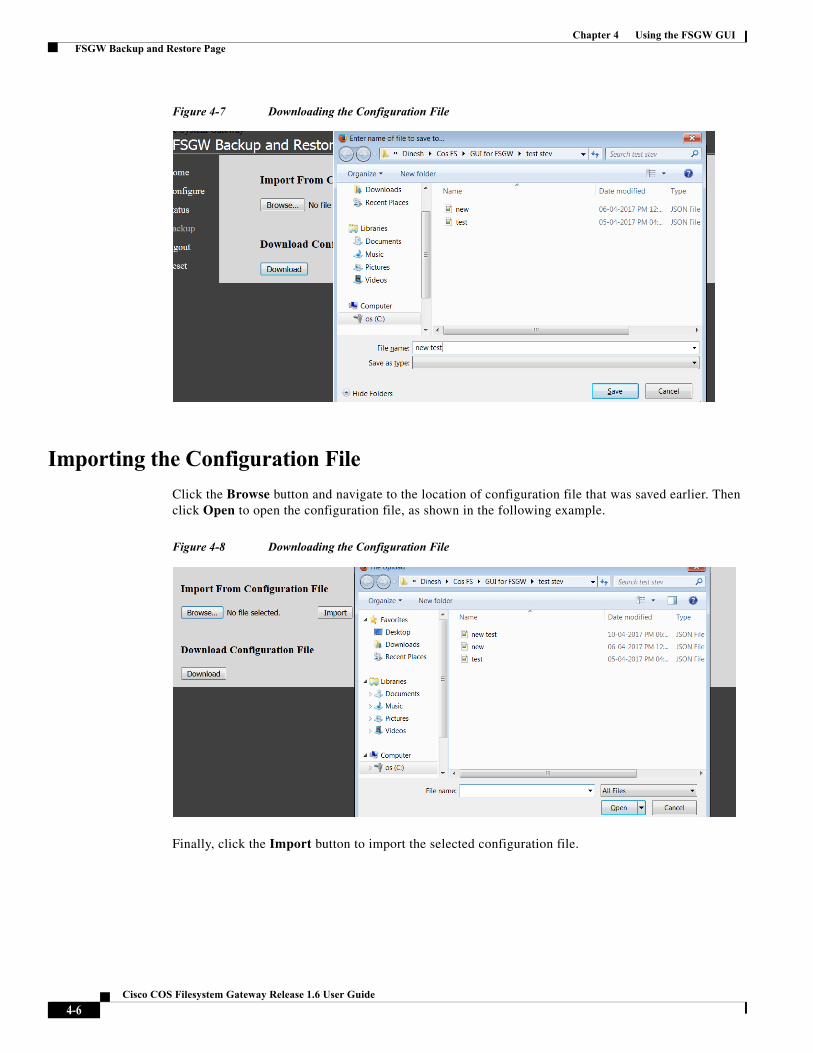
FSGW Backup and Restore PageUse this page to download and save a configuration of existing pools, or to import a saved configuration. This action restores the original configuration of the pools from a backup of the original configuration.
Downloading the Configuration File
Click the Download button and browse to the desired location to download the configuration file as shown in the following example. Then click Save to save the current pool configuration to the local machine.
4-5Cisco COS Filesystem Gateway Release 1.6 User Guide
Chapter 4 Using the FSGW GUI FSGW Backup and Restore Page
Figure 4-7 Downloading the Configuration File
Importing the Configuration File
Click the Browse button and navigate to the location of configuration file that was saved earlier. Then click Open to open the configuration file, as shown in the following example.
Figure 4-8 Downloading the Configuration File
Finally, click the Import button to import the selected configuration file.
4-6Cisco COS Filesystem Gateway Release 1.6 User Guide
Chapter 4 Using the FSGW GUI Logout
Note • For new installations, pools import immediately when you click the Import button.
• After importing a saved configuration to a gateway that already has some pools configured, a message appears asking you to reboot so that the new configuration will take effect.
LogoutClick Logout on the COS FSGW Home page to end your session and close the FSGW GUI.
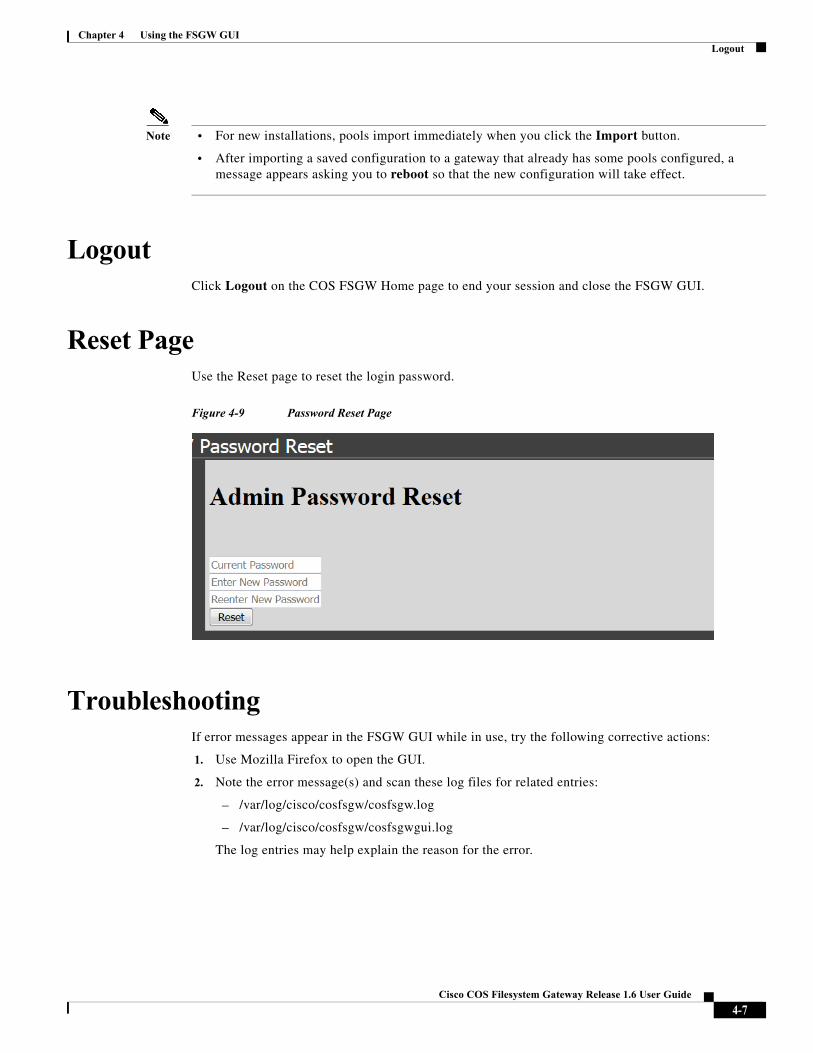
Reset PageUse the Reset page to reset the login password.
Figure 4-9 Password Reset Page
TroubleshootingIf error messages appear in the FSGW GUI while in use, try the following corrective actions:
1. Use Mozilla Firefox to open the GUI.
2. Note the error message(s) and scan these log files for related entries:
– /var/log/cisco/cosfsgw/cosfsgw.log
– /var/log/cisco/cosfsgw/cosfsgwgui.log
The log entries may help explain the reason for the error.
4-7Cisco COS Filesystem Gateway Release 1.6 User Guide
Chapter 4 Using the FSGW GUI Troubleshooting
4-8Cisco COS Filesystem Gateway Release 1.6 User Guide
Cisco C
C H A P T E R 5
TroubleshootingThis section identifies some common issues you may encounter with FSGW Release 1.6.1, and provides suggestions for diagnosing and resolving these issues.
• Modules are Loaded Properly, page 5-1
• Configuring Support to Add or Delete a Container, page 5-1
• Reading or Writing to a Pool, page 5-2
Modules are Loaded ProperlyThe zpool list command should list the pool created. If the pool is not listed:
• Check to see if the zfs, cosdevfs, and dns_resolver modules are loaded.
[root@cosgateway1 cosdevfs]# lsmod | grep "zfs\| dns_resolver\|cosdevfs"tmpfs on /run/user/0 type tmpfs (rw,nosuid,nodev,relatime,size=800768k,mode=700)
• Check to see if the cosdevfs is mounted.
[root@cosgateway1 cosdevfs]# mount | grep cosdevfscosdevfs on /home/dinesh/queue_metaslab/fs_gateway/cosdevfs/mount type cosdevfs (rw,relatime)
Or, check to see if the default mount point have the following file:
[root@cosgateway1 cosdevfs]# ls -lh ./mount/ total 0c--x--x--x 1 root root 0, 0 Jul 19 07:28 cosdev_data
• The following message in the cosdevfs log indicates that the cosdevfs module is loaded.
Jul 20 04:42:20 cosgateway1 kernel: app-name: kern.cosdevfs, thread: insmod, desc: cosdevfs module loaded
Configuring Support to Add or Delete a ContainerA command to add or delete a container object may result in an error message like that shown in the following example.
[root@cosgateway1 cosdevfs]# zpool create -f -O recordsize=2M raidtst /home/dinesh/ queue_metaslab/fs_gateway/cosdevfs/mount/auth02.p2.cisco.com#donaldCannot resolve path/home/dinesh/queue_metaslab/fs_gateway/cosdevfs/mount/auth02.p2.cisco.com#donald
5-1OS Filesystem Gateway Release 1.6 User Guide
Chapter 5 Troubleshooting Reading or Writing to a Pool
In the example above, the error message indicates that the configuration is not added and that vdev is not available in the mount path.
A command to create or delete a container object also may result in an error message like that shown in the following example:
[root@cosgateway1 ~]# echo "cmd:add,cluster:auth02.p2.cisco.com,container:donald,size:300,account:test:eric,key:eric" > /sys/ cosdevfs/gateway_config-bash: /sys/cosdevfs/gateway_config: No such file or directory
In this case, the error message indicates that the cosdevfs module is not loaded.
The following sample error message in the cosdevfs log indicates that the cosdevfs module is not mounted:
Jul 20 04:44:24 cosgateway1 kernel: app-name: kern.cosdevfs, api: cosdevfs_sysfs_store, line: 411, thread: bash, status: ERROR, desc: Please mount cosdevfs before configuring
The following sample error message indicates that the authentication failed due to an invalid user account in the configuration add command:
Jul 20 04:48:18 cosgateway1 kernel: app-name: kern.cosdevfs, api: cosdevfs_auth_with_obj_store, line: 653, thread: conf_2, status: ERROR, desc: Authentication failed with http status 401
The following sample error message indicates that the cluster (auth07.p7.com) is either not available or is an invalid cluster name.
Jul 20 04:57:52 cosgateway1 kernel: app-name: kern.cosdevfs, api: cosdevfs_connect_to_socket, line: 464, thread: conf_1, status: ERROR, desc: auth07.p7.cisco.com host resolution failed error
The following sample error message indicates that the add configuration failed due to either an invalid user account, an unavailable cluster, or an invalid cluster name.
Jul 20 04:57:52 cosgateway1 kernel: app-name: kern.cosdevfs, api: cosdevfs_config_worker, line: 251, thread: conf_1, status: ERROR, desc: Config update failed
The following sample error message indicates that the add configuration was successful.
Jul 20 05:30:35 cosgateway1 kernel: app-name: kern.cosdevfs, thread: conf_3, desc: completed config update successfully
In this successful case, the mount directory will contain a file similar to the one listed below.
[root@cosgateway1 cosdevfs]# ls -lh ./mount/ total 0 -rwxr-xr-x 1 root root 300G Jul 20 05:30 auth02.p2.cisco.com#donald -> Container Name
Reading or Writing to a PoolFor every Read or Write transaction, each thread having a BEGIN status should be associated with a COMPLETE status, as shown in the following examples.
Jul 20 06:00:37 cosgateway1 kernel: app-name: kern.cosdevfs, txn: WRITE, thread: IO_3_10, object: cosdevfs-obj-399360-1024, status: BEGIN, desc: Write begining
Jul 20 06:00:37 cosgateway1 kernel: app-name: kern.cosdevfs, txn: WRITE, thread: IO_3_10, object: cosdevfs-obj-399360-1024, status: COMPLETE,desc: Write completed
After writing data to the container, running zpool scrub and checking zpool status should result in a report of no data errors returned, as shown in the following example.
5-2Cisco COS Filesystem Gateway Release 1.6 User Guide
Chapter 5 Troubleshooting Reading or Writing to a Pool
[root@cosgateway1 raidtst]# zpool status pool: raidtststate: ONLINEscan: scrub repaired 0 in 0h0m with 0 errors on Wed Jul 20 06:09:27 2016………. errors: No known data errors
Note All of the log examples shown above are from /var/log/cisco/cosfsgw/cosdevfs.log. In general, you can use the Linux grep command to search for the status string ERROR as a way to track down errors.
5-3Cisco COS Filesystem Gateway Release 1.6 User Guide

Chapter 5 Troubleshooting Reading or Writing to a Pool
5-4Cisco COS Filesystem Gateway Release 1.6 User Guide
Cisco COS F
A
P P E N D I X A
Global Namespace OptionThis section describes the Global Namespace (GNS) option available for COS Filesystem Gateway (FSGW) Release 1.6.1. GNS is a cost option that can be installed and configured separately following installation of FSGW to enable horizontal scalability and improve throughput.
OverviewFSGW alone supports a single virtual machine (VM) configuration that does not directly support the clustering of network resources. FSGW throughput is thus limited to the capacity of the VM, making FSGW a potential bottleneck to the performance of COS systems as they scale.
Adding the GNS option creates an aggregation layer that enables clustering of FSGW servers, allowing throughput to scale horizontally. GNS provides the logical intermediation needed to coordinate a group of FSGW servers so that they operate as a cluster.
The GNS option is implemented using Red Hat GlusterFS, a scalable open-source file system that aggregates distributed network resources in a single global namespace. The GlusterFS server performs volume setup, manages the bricks (logical components) in the volume, and manages communication with the nodes. The GlusterFS Native Client also provides a proxy layer above the GlusterFS server to perform load-balancing, file locking, and failover for the FSGW cluster.
Note See http://redhatstorage.redhat.com/products/glusterfs/ for additional information on GlusterFS and its system architecture.
Feature Summary
GNS adds the following features and enhancements to compatible FSGW releases:
• Horizontal scaling of FSGW servers
• Single FSGW node write throughput up to 5 Gbps
• Horizontal scaling of FSGW proxies
• Approximately linear increase of throughput when adding more FSGW servers and FSGW proxies to the architecture
• Automatic failover of FSGW servers
• File locking when CTDB is added in FSGW proxies
A-1ilesystem Gateway Release 1.6 User Guide
Appendix A Global Namespace Option Overview
Hardware Support
GNS supports installation on server hardware meeting the following minimum requirements:
• 8 x vCPU
• vmxnet3
• 64 GB memory
• 40 GB system disk (including log)
• 2 x 100 GB SSDs for zpool log and cache (optional but recommended)
– 20 GB total allocated for ZIL log
– 180 GB total allocated for L2ARC cache
• 1 x 1G NIC for management
• 1 x 10G NIC for SMB/NFS clients
• 1 x 10G NIC for COS internal (not needed for FSGW Proxies)
System Requirements
GNS uses FSGW Release 1.6.1 and COS Release 3.8.1 (or the COS 3.10.1 pre-release) as its companion release. COS and FSGW use the same COS PAM component, with an additional Tenant PAM for FSGW.
Software Components
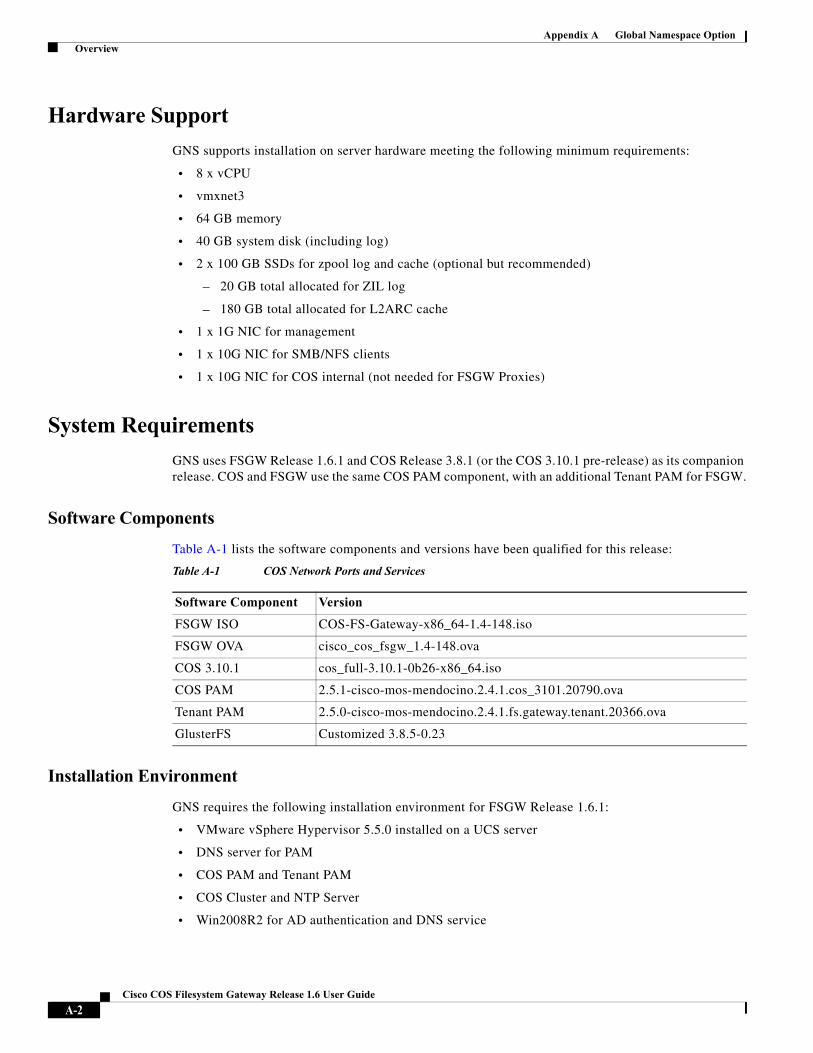
Table A-1 lists the software components and versions have been qualified for this release:
Installation Environment
GNS requires the following installation environment for FSGW Release 1.6.1:
• VMware vSphere Hypervisor 5.5.0 installed on a UCS server
• DNS server for PAM
• COS PAM and Tenant PAM
• COS Cluster and NTP Server
• Win2008R2 for AD authentication and DNS service
Table A-1 COS Network Ports and Services
Software Component Version
FSGW ISO COS-FS-Gateway-x86_64-1.4-148.iso
FSGW OVA cisco_cos_fsgw_1.4-148.ova
COS 3.10.1 cos_full-3.10.1-0b26-x86_64.iso
COS PAM 2.5.1-cisco-mos-mendocino.2.4.1.cos_3101.20790.ova
Tenant PAM 2.5.0-cisco-mos-mendocino.2.4.1.fs.gateway.tenant.20366.ova
GlusterFS Customized 3.8.5-0.23
A-2Cisco COS Filesystem Gateway Release 1.6 User Guide
Appendix A Global Namespace Option Installation and Configuration
Restrictions and Limitations
• GNS does not provide a strictly linear performance increase when adding more nodes to a FSGW cluster.
• GNS does not support file locking for NFS v3. File locking is not supported when using Common Internet File System (CIFS) alone, but byte range locking is supported when using CIFS and Cluster Trivial Database (CTDB).
Installation and ConfigurationGNS installation and configuration involves the following procedures:
• Install Filesystem Gateway (FSGW) Server, page A-3
• Install the GlusterFS Server on the FSGW Node, page A-3
• Start the GlusterFS Servers, page A-4
• Create a Zpool on the FSGW Server, page A-4
• Create the GlusterFS Volume, page A-5
• Install the FSGW Proxy, page A-5
• Mount the GlusterFS Share on the Client Server, page A-6
• Option: Using the GlusterFS Native Client as a User Client, page A-6
• Option: Using CTDB to Manage Samba Shares for GlusterFS Volumes Created using Cisco modified ZFS, page A-7
• Option: Sharing GlusterFS Volumes over NFS Ganesha, page A-11
Install Filesystem Gateway (FSGW) Server
FSGW Release 1.6.1 must be installed on a server before GNS can be installed and configured as a layer upon FSGW. For FSGW server installation instructions, see Deployment, page 2-1.
Install the GlusterFS Server on the FSGW Node
To install the GlusterFS server on the FSGW node, a customized GlusterFS RPM package is required to ensure compatibility with the cosdevfs component of FSGW.
Step 1 Download the customized GlusterFS RPM package from the Cisco Software Downloads site.
Step 2 Install the customized GlusterFS components as show in the following example:
rpm -ivh glusterfs-libs-3.8.5-0.23.git494dbb8.el7.centos.x86_64.rpmrpm -ivh python-gluster-3.8.5-0.23.git494dbb8.el7.centos.noarch.rpmrpm -ivh glusterfs-extra-xlators-3.8.5-0.23.git494dbb8.el7.centos.x86_64.rpmrpm -ivh glusterfs-client-xlators-3.8.5-0.23.git494dbb8.el7.centos.x86_64.rpmrpm -ivh glusterfs-3.8.5-0.23.git494dbb8.el7.centos.x86_64.rpmrpm -ivh glusterfs-api-3.8.5-0.23.git494dbb8.el7.centos.x86_64.rpmrpm -ivh glusterfs-fuse-3.8.5-0.23.git494dbb8.el7.centos.x86_64.rpmrpm -ivh glusterfs-cli-3.8.5-0.23.git494dbb8.el7.centos.x86_64.rpmyum install centos-release-gluster
A-3Cisco COS Filesystem Gateway Release 1.6 User Guide
Appendix A Global Namespace Option Installation and Configuration
yum install userspace-rcurpm -ivh glusterfs-server-3.8.5-0.23.git494dbb8.el7.centos.x86_64.rpm
Start the GlusterFS Servers
Step 1 Complete the steps described in Install the GlusterFS Server on the FSGW Node, page A-3 for each FSGW node to be included in the cluster.
Step 2 Start the GlusterFS server on all nodes to be included in the cluster as shown in the following example:
service glusterd startchkconfig glusterd on
Step 3 On one of the FSGW nodes, find all other FSGW nodes and add them into the cluster as follows:
gluster peer probe <server_data_ip>
Create a Zpool on the FSGW Server
A zpool is used as a brick of the GlusterFS volume. It can be created through the Tenant PAM GUI or using the CLI. You must create a zpool on each node in the FSGW cluster.
Using the Tenant PAM
For instructions on using the Tenant PAM to create a zpool, see Deployment, page 2-1.
Using the CLI
To create a zpool on one FSGW node through the CLI:
Step 1 Create a container on the COS cluster and mount the container on the FSGW node.
Example
echo"cmd:add,cluster:auth12.fsgw.com,container:test12,size:20000,account:auth-1:jdoe,key:a86850deb2742ec3cb4> /sys/cosdevfs/gateway_config
Step 2 Create the zpool by mounting the container as shown in the following example.
Example
zpool create -f -O recordsize=2M test6 /var/cisco/cosfsgw/mnt/auth12.fsgw.com#test12
A-4Cisco COS Filesystem Gateway Release 1.6 User Guide
Appendix A Global Namespace Option Installation and Configuration
Create the GlusterFS Volume
Step 1 On each FSGW node in the cluster, create a subdirectory from the zpool mount point.
Example
mkdir -p /test6/bricks/share/brick1
Step 2 On one FSGW node in the cluster, create the GlusterFS volume.
Example
gluster vol create test6 10.10.10.58:/test6/bricks/share/brick1 10.10.10.53:/test6/bricks/share/ brick1 10.10.10.55:/test6/bricks/share/brick1 10.10.10.12:/test6/bricks/share/brick1gluster vol start test6
Install the FSGW Proxy
The FSGW proxy is a server that holds the GlusterFS Native Client and mounts the GlusterFS volume as a GlusterFS share. The FSGW proxy then exports the mounted share as needed via either an NFS server or Samba server. Clients can then mount the share using the NFS or Samba protocol, as dictated by the needs of the clients.
Note The FSGW proxy can be a CentOS7 server with a basic configuration.
The procedure to install the GlusterFS native client is identical to that for installing the GlusterFS server on the FSGW node. See Install the GlusterFS Server on the FSGW Node, page A-3 for instructions.
Mount the GlusterFS Volume on the FSGW Proxy
Step 1 On each FSGW proxy, add a new route to each FSGW node data IP address via its client IP.
Example
route add -net 10.10.10.58 netmask 255.255.255.255 gw 10.10.10.58 metric 10 dev ens192route add -net 10.10.10.55 netmask 255.255.255.255 gw 10.10.10.55 metric 11 dev ens192route add -net 10.10.10.53 netmask 255.255.255.255 gw 10.10.10.53 metric 12 dev ens192route add -net 10.10.10.12 netmask 255.255.255.255 gw 10.10.10.12 metric 13 dev ens192
Step 2 Mount the GlusterFS share from one of the FSGW nodes.
Syntax
mount -t glusterfs <server_client_ip>:<glusterfs_vol_name> <mountpoint>
A-5Cisco COS Filesystem Gateway Release 1.6 User Guide
Appendix A Global Namespace Option Installation and Configuration
Export the Mounted GlusterFS Share
Export the mounted GlusterFS share using NFS or Samba server, according to the needs of the clients.
Export via NFS Server
Add an entry to /etc/exports and then restart nfs service, as shown in the following example:
/mnt/share *(rw,fsid=1,no_root_squash,async)service nfs restart
Export via Samba Server
Add a section in /etc/samba/smb.conf and then restart the smb service, as shown in the following example.
[share]comment = shared path = /mnt/share guest ok = yes read only = no public = yes writable = yeshosts allow = 10. 20. valid users = rootservice smb restart
Mount the GlusterFS Share on the Client Server
After the GlusterFS share is exported from each FSGW proxy node, it can be mounted by the NFS or Samba clients in the usual manner.
For NFS Client
Mount the client using the following command syntax:
mount <fsgw_proxy_client_ip>:<export_path> <mount_point>
For Samba Client
Create the samba user on samba client and set a password using the following command syntax:
mount -t cifs <fsgw_proxy_client_ip>:<export_path> <mount_point> -o user=<smb_user>,pass=<password>
For instructions on mounting the Samba share, see Option: Using CTDB to Manage Samba Shares for GlusterFS Volumes Created using Cisco modified ZFS, page A-7.
Option: Using the GlusterFS Native Client as a User Client
The GlusterFS Native Client and GlusterFS volume can also be installed directly on a user node. With this approach, the client acts as a user client, and there is no need for an FSGW proxy or intermediation by NFS or Samba.
Complete the following steps to install the GlusterFS Native Client on a user node:
Step 1 Install the customized GlusterFS RPMs on the user node as described in Install the GlusterFS Server on the FSGW Node, page A-3.
Step 2 On the user node, add a route to each FSGW node data IP address via its client IP address.
Example
route add -net 10.10.10.58 netmask 255.255.255.255 gw 10.10.10.58 metric 10 dev ens192
A-6Cisco COS Filesystem Gateway Release 1.6 User Guide
Appendix A Global Namespace Option Installation and Configuration
route add -net 10.10.10.55 netmask 255.255.255.255 gw 10.10.10.55 metric 11 dev ens192route add -net 10.10.10.53 netmask 255.255.255.255 gw 10.10.10.53 metric 12 dev ens192route add -net 10.10.10.12 netmask 255.255.255.255 gw 10.10.10.12 metric 13 dev ens192
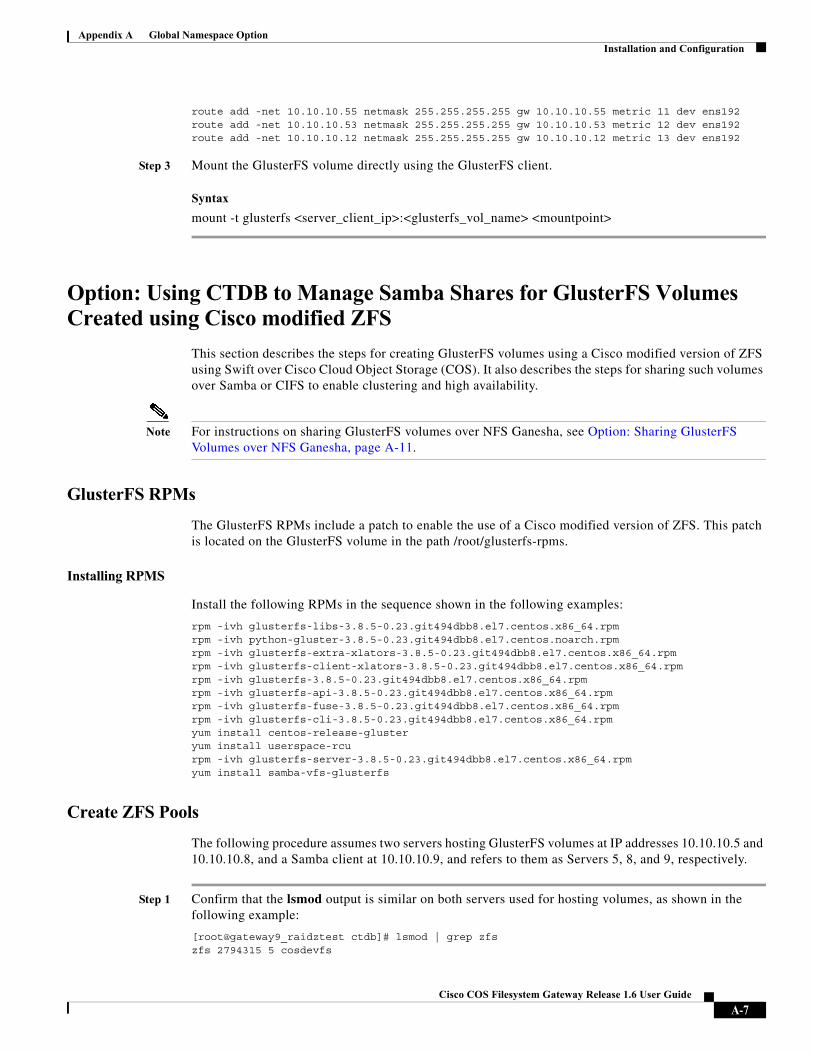
Step 3 Mount the GlusterFS volume directly using the GlusterFS client.
Syntax
mount -t glusterfs <server_client_ip>:<glusterfs_vol_name> <mountpoint>
Option: Using CTDB to Manage Samba Shares for GlusterFS Volumes Created using Cisco modified ZFS
This section describes the steps for creating GlusterFS volumes using a Cisco modified version of ZFS using Swift over Cisco Cloud Object Storage (COS). It also describes the steps for sharing such volumes over Samba or CIFS to enable clustering and high availability.
Note For instructions on sharing GlusterFS volumes over NFS Ganesha, see Option: Sharing GlusterFS Volumes over NFS Ganesha, page A-11.
GlusterFS RPMs
The GlusterFS RPMs include a patch to enable the use of a Cisco modified version of ZFS. This patch is located on the GlusterFS volume in the path /root/glusterfs-rpms.
Installing RPMS
Install the following RPMs in the sequence shown in the following examples:
rpm -ivh glusterfs-libs-3.8.5-0.23.git494dbb8.el7.centos.x86_64.rpmrpm -ivh python-gluster-3.8.5-0.23.git494dbb8.el7.centos.noarch.rpmrpm -ivh glusterfs-extra-xlators-3.8.5-0.23.git494dbb8.el7.centos.x86_64.rpmrpm -ivh glusterfs-client-xlators-3.8.5-0.23.git494dbb8.el7.centos.x86_64.rpmrpm -ivh glusterfs-3.8.5-0.23.git494dbb8.el7.centos.x86_64.rpmrpm -ivh glusterfs-api-3.8.5-0.23.git494dbb8.el7.centos.x86_64.rpmrpm -ivh glusterfs-fuse-3.8.5-0.23.git494dbb8.el7.centos.x86_64.rpmrpm -ivh glusterfs-cli-3.8.5-0.23.git494dbb8.el7.centos.x86_64.rpmyum install centos-release-glusteryum install userspace-rcurpm -ivh glusterfs-server-3.8.5-0.23.git494dbb8.el7.centos.x86_64.rpmyum install samba-vfs-glusterfs
Create ZFS Pools
The following procedure assumes two servers hosting GlusterFS volumes at IP addresses 10.10.10.5 and 10.10.10.8, and a Samba client at 10.10.10.9, and refers to them as Servers 5, 8, and 9, respectively.
Step 1 Confirm that the lsmod output is similar on both servers used for hosting volumes, as shown in the following example:
[root@gateway9_raidztest ctdb]# lsmod | grep zfszfs 2794315 5 cosdevfs
A-7Cisco COS Filesystem Gateway Release 1.6 User Guide
Appendix A Global Namespace Option Installation and Configuration
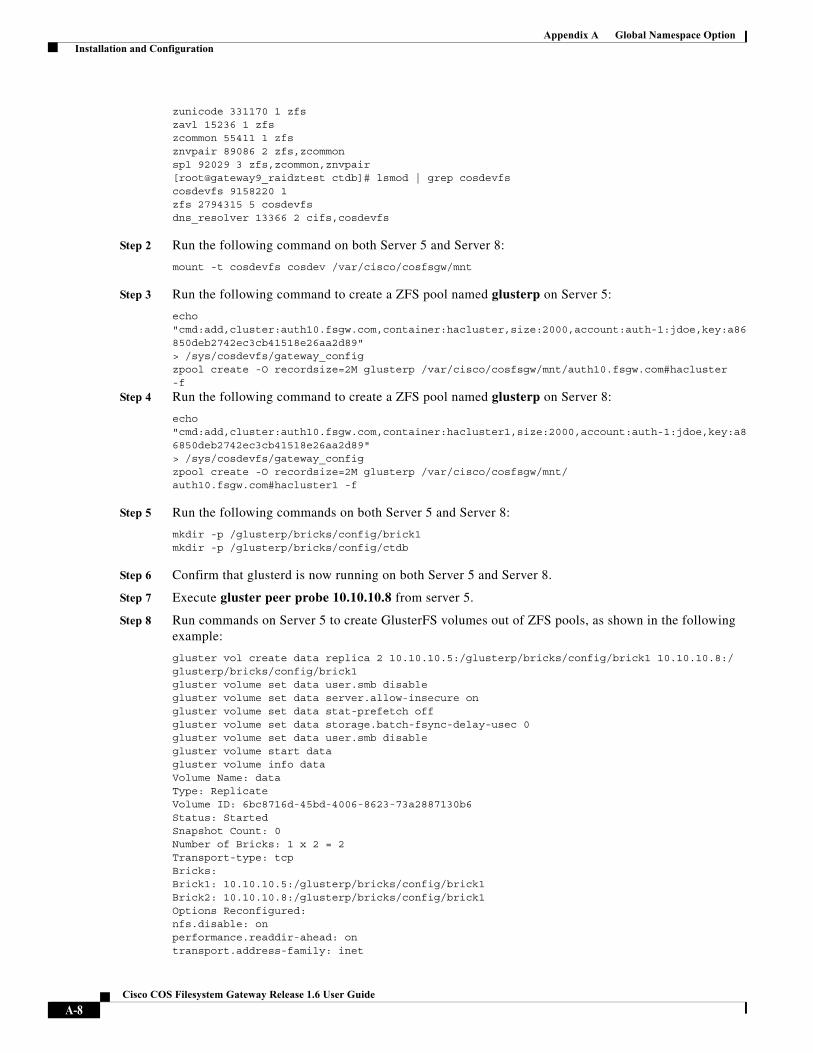
zunicode 331170 1 zfszavl 15236 1 zfszcommon 55411 1 zfsznvpair 89086 2 zfs,zcommonspl 92029 3 zfs,zcommon,znvpair[root@gateway9_raidztest ctdb]# lsmod | grep cosdevfscosdevfs 9158220 1zfs 2794315 5 cosdevfsdns_resolver 13366 2 cifs,cosdevfs
Step 2 Run the following command on both Server 5 and Server 8:
mount -t cosdevfs cosdev /var/cisco/cosfsgw/mnt
Step 3 Run the following command to create a ZFS pool named glusterp on Server 5:
echo"cmd:add,cluster:auth10.fsgw.com,container:hacluster,size:2000,account:auth-1:jdoe,key:a86850deb2742ec3cb41518e26aa2d89"> /sys/cosdevfs/gateway_configzpool create -O recordsize=2M glusterp /var/cisco/cosfsgw/mnt/auth10.fsgw.com#hacluster-f
Step 4 Run the following command to create a ZFS pool named glusterp on Server 8:
echo"cmd:add,cluster:auth10.fsgw.com,container:hacluster1,size:2000,account:auth-1:jdoe,key:a86850deb2742ec3cb41518e26aa2d89"> /sys/cosdevfs/gateway_configzpool create -O recordsize=2M glusterp /var/cisco/cosfsgw/mnt/auth10.fsgw.com#hacluster1 -f
Step 5 Run the following commands on both Server 5 and Server 8:
mkdir -p /glusterp/bricks/config/brick1mkdir -p /glusterp/bricks/config/ctdb
Step 6 Confirm that glusterd is now running on both Server 5 and Server 8.
Step 7 Execute gluster peer probe 10.10.10.8 from server 5.
Step 8 Run commands on Server 5 to create GlusterFS volumes out of ZFS pools, as shown in the following example:
gluster vol create data replica 2 10.10.10.5:/glusterp/bricks/config/brick1 10.10.10.8:/glusterp/bricks/config/brick1gluster volume set data user.smb disablegluster volume set data server.allow-insecure ongluster volume set data stat-prefetch offgluster volume set data storage.batch-fsync-delay-usec 0gluster volume set data user.smb disablegluster volume start datagluster volume info dataVolume Name: dataType: ReplicateVolume ID: 6bc8716d-45bd-4006-8623-73a2887130b6Status: StartedSnapshot Count: 0Number of Bricks: 1 x 2 = 2Transport-type: tcpBricks:Brick1: 10.10.10.5:/glusterp/bricks/config/brick1Brick2: 10.10.10.8:/glusterp/bricks/config/brick1Options Reconfigured:nfs.disable: onperformance.readdir-ahead: ontransport.address-family: inet
A-8Cisco COS Filesystem Gateway Release 1.6 User Guide
Appendix A Global Namespace Option Installation and Configuration
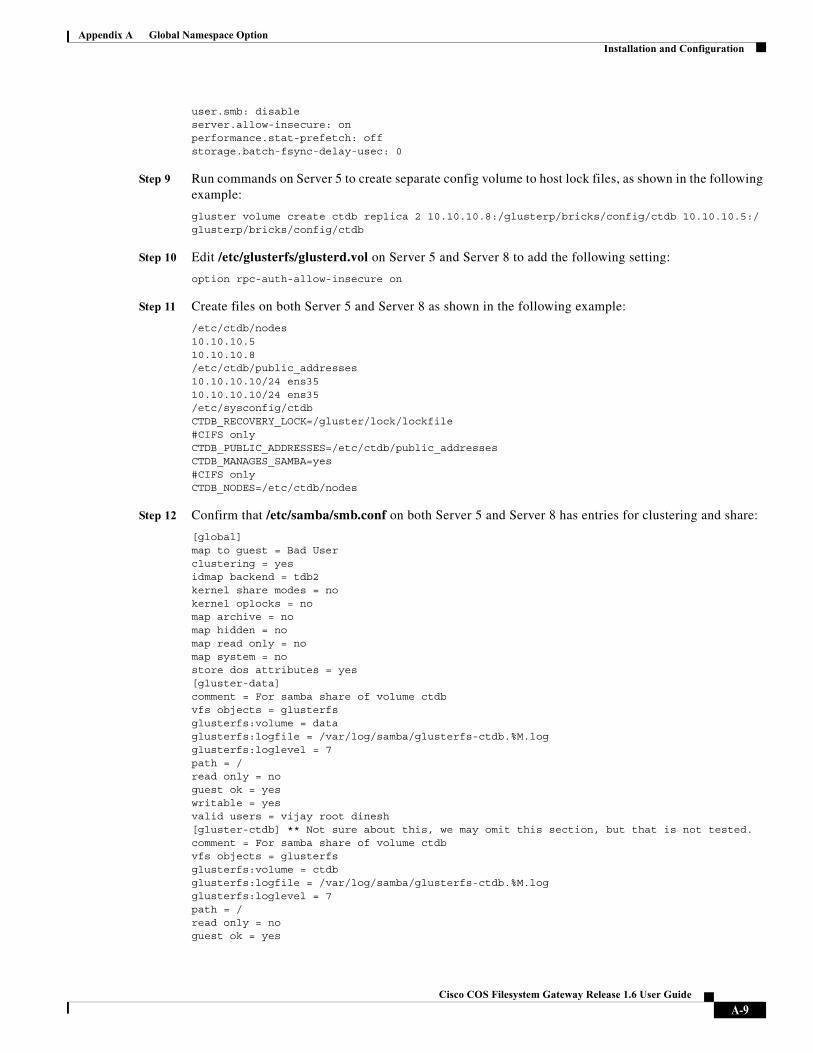
user.smb: disableserver.allow-insecure: onperformance.stat-prefetch: offstorage.batch-fsync-delay-usec: 0
Step 9 Run commands on Server 5 to create separate config volume to host lock files, as shown in the following example:
gluster volume create ctdb replica 2 10.10.10.8:/glusterp/bricks/config/ctdb 10.10.10.5:/glusterp/bricks/config/ctdb
Step 10 Edit /etc/glusterfs/glusterd.vol on Server 5 and Server 8 to add the following setting:
option rpc-auth-allow-insecure on
Step 11 Create files on both Server 5 and Server 8 as shown in the following example:
/etc/ctdb/nodes10.10.10.510.10.10.8/etc/ctdb/public_addresses10.10.10.10/24 ens3510.10.10.10/24 ens35/etc/sysconfig/ctdbCTDB_RECOVERY_LOCK=/gluster/lock/lockfile#CIFS onlyCTDB_PUBLIC_ADDRESSES=/etc/ctdb/public_addressesCTDB_MANAGES_SAMBA=yes#CIFS onlyCTDB_NODES=/etc/ctdb/nodes
Step 12 Confirm that /etc/samba/smb.conf on both Server 5 and Server 8 has entries for clustering and share:
[global]map to guest = Bad Userclustering = yesidmap backend = tdb2kernel share modes = nokernel oplocks = nomap archive = nomap hidden = nomap read only = nomap system = nostore dos attributes = yes[gluster-data]comment = For samba share of volume ctdbvfs objects = glusterfsglusterfs:volume = dataglusterfs:logfile = /var/log/samba/glusterfs-ctdb.%M.logglusterfs:loglevel = 7path = /read only = noguest ok = yeswritable = yesvalid users = vijay root dinesh[gluster-ctdb] ** Not sure about this, we may omit this section, but that is not tested.comment = For samba share of volume ctdbvfs objects = glusterfsglusterfs:volume = ctdbglusterfs:logfile = /var/log/samba/glusterfs-ctdb.%M.logglusterfs:loglevel = 7path = /read only = noguest ok = yes
A-9Cisco COS Filesystem Gateway Release 1.6 User Guide
Appendix A Global Namespace Option Installation and Configuration
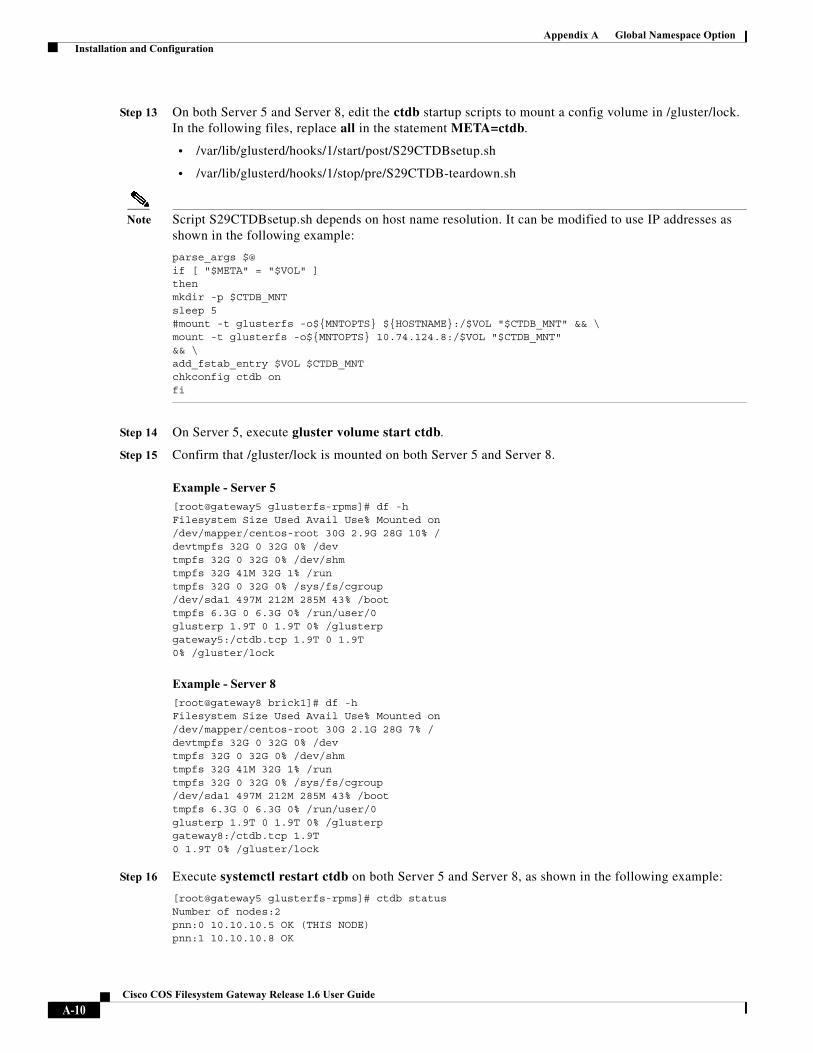
Step 13 On both Server 5 and Server 8, edit the ctdb startup scripts to mount a config volume in /gluster/lock. In the following files, replace all in the statement META=ctdb.
• /var/lib/glusterd/hooks/1/start/post/S29CTDBsetup.sh
• /var/lib/glusterd/hooks/1/stop/pre/S29CTDB-teardown.sh
Note Script S29CTDBsetup.sh depends on host name resolution. It can be modified to use IP addresses as shown in the following example:
parse_args $@if [ "$META" = "$VOL" ]thenmkdir -p $CTDB_MNTsleep 5#mount -t glusterfs -o${MNTOPTS} ${HOSTNAME}:/$VOL "$CTDB_MNT" && \mount -t glusterfs -o${MNTOPTS} 10.74.124.8:/$VOL "$CTDB_MNT"&& \add_fstab_entry $VOL $CTDB_MNTchkconfig ctdb onfi
Step 14 On Server 5, execute gluster volume start ctdb.
Step 15 Confirm that /gluster/lock is mounted on both Server 5 and Server 8.
Example - Server 5
[root@gateway5 glusterfs-rpms]# df -hFilesystem Size Used Avail Use% Mounted on/dev/mapper/centos-root 30G 2.9G 28G 10% /devtmpfs 32G 0 32G 0% /devtmpfs 32G 0 32G 0% /dev/shmtmpfs 32G 41M 32G 1% /runtmpfs 32G 0 32G 0% /sys/fs/cgroup/dev/sda1 497M 212M 285M 43% /boottmpfs 6.3G 0 6.3G 0% /run/user/0glusterp 1.9T 0 1.9T 0% /glusterpgateway5:/ctdb.tcp 1.9T 0 1.9T0% /gluster/lock
Example - Server 8
[root@gateway8 brick1]# df -hFilesystem Size Used Avail Use% Mounted on/dev/mapper/centos-root 30G 2.1G 28G 7% /devtmpfs 32G 0 32G 0% /devtmpfs 32G 0 32G 0% /dev/shmtmpfs 32G 41M 32G 1% /runtmpfs 32G 0 32G 0% /sys/fs/cgroup/dev/sda1 497M 212M 285M 43% /boottmpfs 6.3G 0 6.3G 0% /run/user/0glusterp 1.9T 0 1.9T 0% /glusterpgateway8:/ctdb.tcp 1.9T0 1.9T 0% /gluster/lock
Step 16 Execute systemctl restart ctdb on both Server 5 and Server 8, as shown in the following example:
[root@gateway5 glusterfs-rpms]# ctdb statusNumber of nodes:2pnn:0 10.10.10.5 OK (THIS NODE)pnn:1 10.10.10.8 OK
A-10Cisco COS Filesystem Gateway Release 1.6 User Guide
Appendix A Global Namespace Option Installation and Configuration
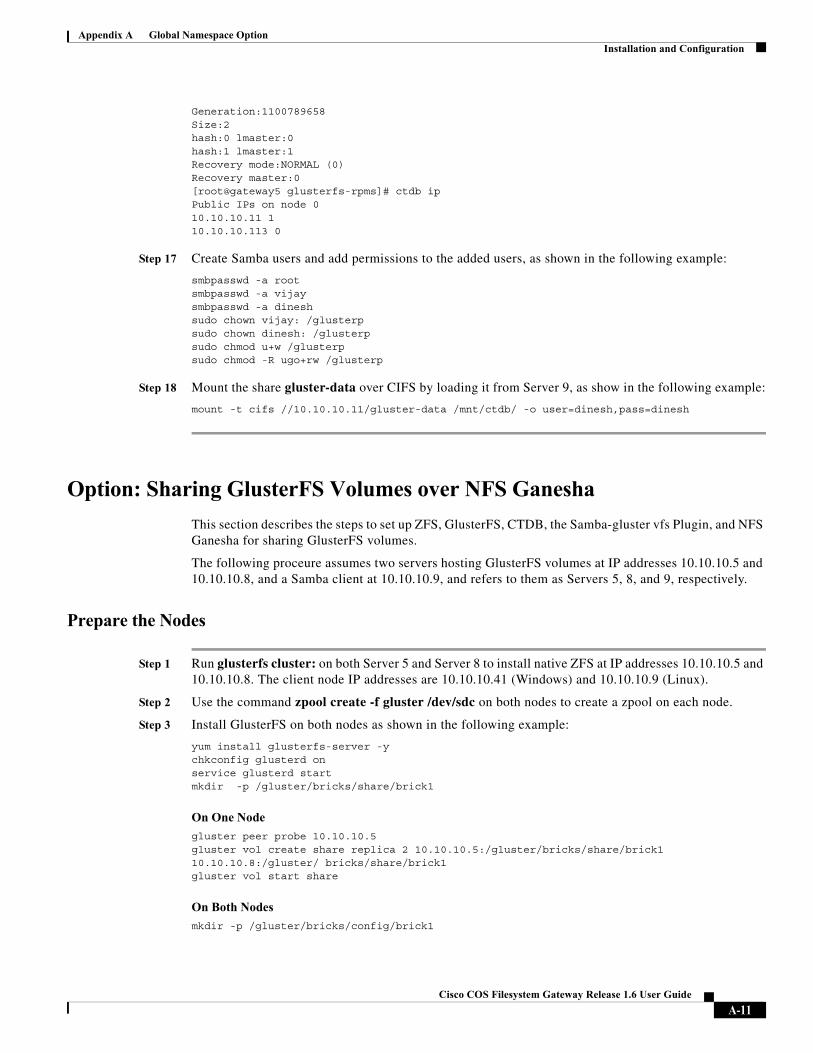
Generation:1100789658Size:2hash:0 lmaster:0hash:1 lmaster:1Recovery mode:NORMAL (0)Recovery master:0[root@gateway5 glusterfs-rpms]# ctdb ipPublic IPs on node 010.10.10.11 110.10.10.113 0
Step 17 Create Samba users and add permissions to the added users, as shown in the following example:
smbpasswd -a rootsmbpasswd -a vijaysmbpasswd -a dineshsudo chown vijay: /glusterpsudo chown dinesh: /glusterpsudo chmod u+w /glusterpsudo chmod -R ugo+rw /glusterp
Step 18 Mount the share gluster-data over CIFS by loading it from Server 9, as show in the following example:
mount -t cifs //10.10.10.11/gluster-data /mnt/ctdb/ -o user=dinesh,pass=dinesh
Option: Sharing GlusterFS Volumes over NFS Ganesha
This section describes the steps to set up ZFS, GlusterFS, CTDB, the Samba-gluster vfs Plugin, and NFS Ganesha for sharing GlusterFS volumes.
The following proceure assumes two servers hosting GlusterFS volumes at IP addresses 10.10.10.5 and 10.10.10.8, and a Samba client at 10.10.10.9, and refers to them as Servers 5, 8, and 9, respectively.
Prepare the Nodes
Step 1 Run glusterfs cluster: on both Server 5 and Server 8 to install native ZFS at IP addresses 10.10.10.5 and 10.10.10.8. The client node IP addresses are 10.10.10.41 (Windows) and 10.10.10.9 (Linux).
Step 2 Use the command zpool create -f gluster /dev/sdc on both nodes to create a zpool on each node.
Step 3 Install GlusterFS on both nodes as shown in the following example:
yum install glusterfs-server -ychkconfig glusterd onservice glusterd startmkdir -p /gluster/bricks/share/brick1
On One Node
gluster peer probe 10.10.10.5 gluster vol create share replica 2 10.10.10.5:/gluster/bricks/share/brick1 10.10.10.8:/gluster/ bricks/share/brick1gluster vol start share
On Both Nodes
mkdir -p /gluster/bricks/config/brick1
A-11Cisco COS Filesystem Gateway Release 1.6 User Guide
Appendix A Global Namespace Option Installation and Configuration
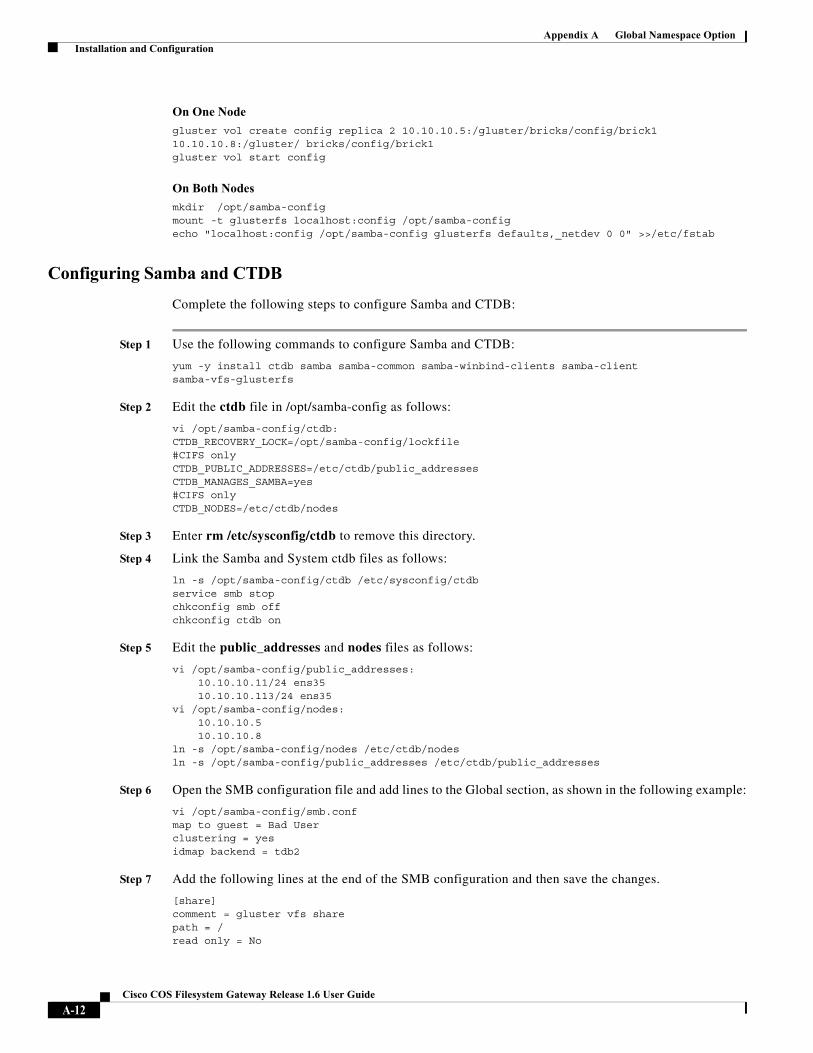
On One Node
gluster vol create config replica 2 10.10.10.5:/gluster/bricks/config/brick1 10.10.10.8:/gluster/ bricks/config/brick1gluster vol start config
On Both Nodes
mkdir /opt/samba-configmount -t glusterfs localhost:config /opt/samba-configecho "localhost:config /opt/samba-config glusterfs defaults,_netdev 0 0" >>/etc/fstab
Configuring Samba and CTDB
Complete the following steps to configure Samba and CTDB:
Step 1 Use the following commands to configure Samba and CTDB:
yum -y install ctdb samba samba-common samba-winbind-clients samba-client samba-vfs-glusterfs
Step 2 Edit the ctdb file in /opt/samba-config as follows:
vi /opt/samba-config/ctdb:CTDB_RECOVERY_LOCK=/opt/samba-config/lockfile#CIFS onlyCTDB_PUBLIC_ADDRESSES=/etc/ctdb/public_addressesCTDB_MANAGES_SAMBA=yes#CIFS onlyCTDB_NODES=/etc/ctdb/nodes
Step 3 Enter rm /etc/sysconfig/ctdb to remove this directory.
Step 4 Link the Samba and System ctdb files as follows:
ln -s /opt/samba-config/ctdb /etc/sysconfig/ctdbservice smb stopchkconfig smb offchkconfig ctdb on
Step 5 Edit the public_addresses and nodes files as follows:
vi /opt/samba-config/public_addresses:10.10.10.11/24 ens3510.10.10.113/24 ens35
vi /opt/samba-config/nodes:10.10.10.510.10.10.8
ln -s /opt/samba-config/nodes /etc/ctdb/nodesln -s /opt/samba-config/public_addresses /etc/ctdb/public_addresses
Step 6 Open the SMB configuration file and add lines to the Global section, as shown in the following example:
vi /opt/samba-config/smb.confmap to guest = Bad Userclustering = yesidmap backend = tdb2
Step 7 Add the following lines at the end of the SMB configuration and then save the changes.
[share]comment = gluster vfs sharepath = /read only = No
A-12Cisco COS Filesystem Gateway Release 1.6 User Guide
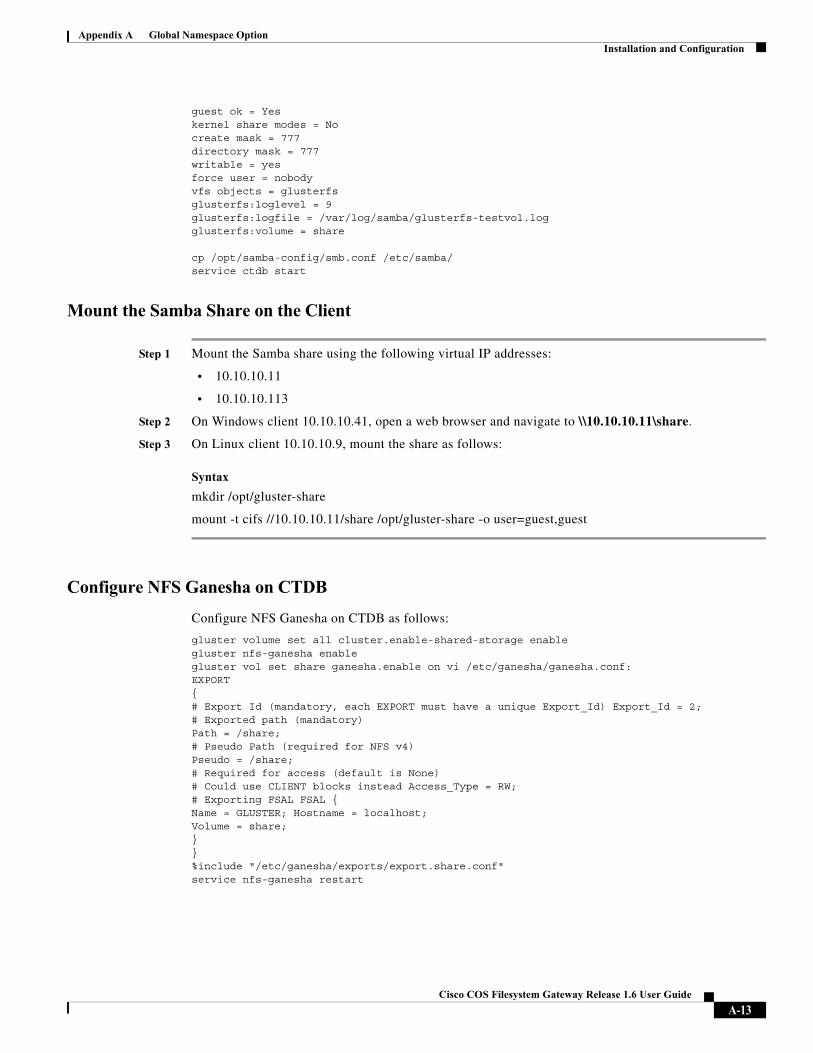
Appendix A Global Namespace Option Installation and Configuration
guest ok = Yeskernel share modes = Nocreate mask = 777directory mask = 777writable = yesforce user = nobodyvfs objects = glusterfsglusterfs:loglevel = 9glusterfs:logfile = /var/log/samba/glusterfs-testvol.logglusterfs:volume = share
cp /opt/samba-config/smb.conf /etc/samba/service ctdb start
Mount the Samba Share on the Client
Step 1 Mount the Samba share using the following virtual IP addresses:
• 10.10.10.11
• 10.10.10.113
Step 2 On Windows client 10.10.10.41, open a web browser and navigate to \\10.10.10.11\share.
Step 3 On Linux client 10.10.10.9, mount the share as follows:
Syntax
mkdir /opt/gluster-share
mount -t cifs //10.10.10.11/share /opt/gluster-share -o user=guest,guest
Configure NFS Ganesha on CTDB
Configure NFS Ganesha on CTDB as follows:
gluster volume set all cluster.enable-shared-storage enablegluster nfs-ganesha enablegluster vol set share ganesha.enable on vi /etc/ganesha/ganesha.conf:EXPORT{# Export Id (mandatory, each EXPORT must have a unique Export_Id) Export_Id = 2;# Exported path (mandatory)Path = /share;# Pseudo Path (required for NFS v4)Pseudo = /share;# Required for access (default is None)# Could use CLIENT blocks instead Access_Type = RW;# Exporting FSAL FSAL {Name = GLUSTER; Hostname = localhost;Volume = share;}}%include "/etc/ganesha/exports/export.share.conf"service nfs-ganesha restart
A-13Cisco COS Filesystem Gateway Release 1.6 User Guide
Appendix A Global Namespace Option Installation and Configuration
Mount NFS Share on Linux Clients
Use the following command to mount the NFS share on all Linux clients:
mount 10.10.10.113:/share /opt/nfstest/
A-14Cisco COS Filesystem Gateway Release 1.6 User Guide