Embed Size (px)
Citation preview
CorelDRAW 10Graduation work
Merdan Semko

I am a graduating student in Turkish Bosnian Sarajevo College and this is my graduation work. I am sure that you will find all needed information about CorelDraw 10 in this book supported by graphic and picture illustrations.All others information about me, you can find on the official web site of this book.
About me...
CorelDRAW 10 3

Short Contents
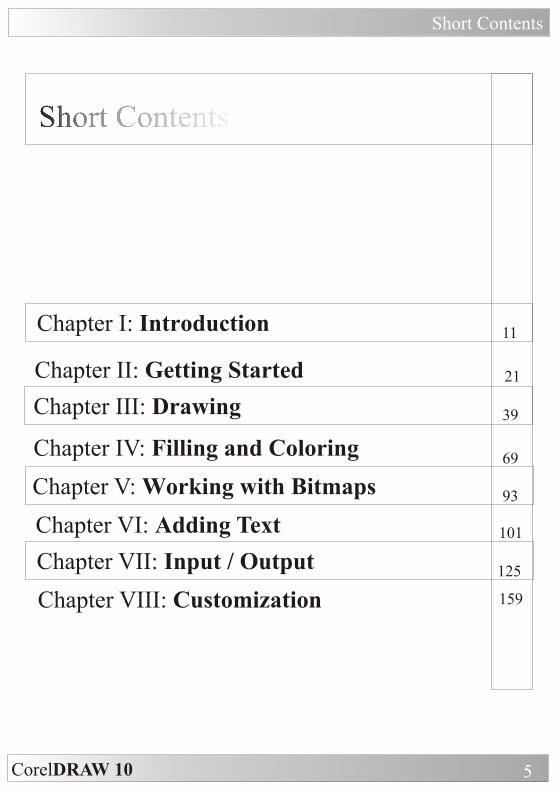
Chapter I: Introduction
Chapter II: Getting Started
Chapter IV: Filling and Coloring
Chapter V: Working with Bitmaps
Chapter VI: Adding Text
Chapter VII: Input / Output
Chapter VIII: Customization
Chapter III: Drawing
CorelDRAW 10 5
11
21
39
69
93
101
125
159
Contents
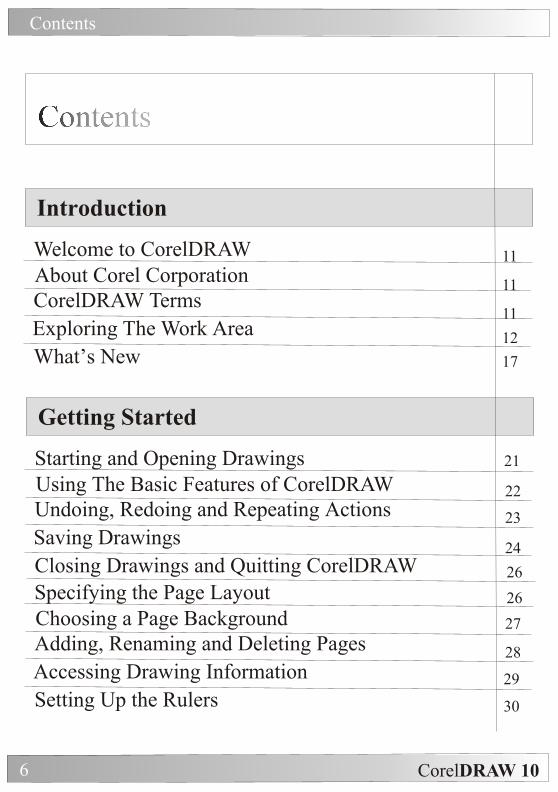
Introduction
Getting Started
Welcome to CorelDRAW
Starting and Opening Drawings
Specifying the Page Layout
About Corel Corporation
Using The Basic Features of CorelDRAW
Choosing a Page Background
CorelDRAW Terms
Undoing, Redoing and Repeating Actions
Adding, Renaming and Deleting Pages
Exploring The Work Area
Saving Drawings
Accessing Drawing Information
What’s New
Closing Drawings and Quitting CorelDRAW
Setting Up the Rulers
CorelDRAW 106
11
11
11
12
17
21
22
23
24
26
26
27
28
29
30
Contents
Drawing
Filling and Coloring
Calibrating the Rulers
Working with Lines, Outlines and Brush Strokes
Filling Objects
Changing the Transparency of Object
Setting Up the Grid
Drawing Shapes
Working with Color
Using Lenses with Object
Setting Up Guidelines
Previewing a Drawing
Working with Objects
Adding Three-dimensional Effects to Object
Setting the Drawing Scale
Working with Views
Shaping Objects
Zooming and Panning
Creating Web-enabled Objects
CorelDRAW 10 7
30
31
31
33
34
39
44
48
58
65
69
75
80
88
91
35
37
Working with Bitmaps
Adding Text
Input / Output
Working with Bitmapped images
Working with Text
Printing
Importing and Exporting Files
Changing Color Modes
Shaping Text
Commercial Printing
Object Linking and Embedding
Working with Asian and Middle Eastern text
Publishing to PDF
File Formats
Managing Fonts
Publishing to the Web
CorelDRAW 10
Contents
8
93
95
101
117
119
125
130
137
144
146
121
150
151
Contents
CorelDRAW 10 9
Customization
Customization Corel ApplicationsWorking with Styles and TemplatesWorking with Layers
159
165
167

CorelDRAW 10 11
Chapter
IIn this chapter
Welcome to CorelDRAW
About Corel Corporation
CorelDRAW Terms
CorelDRAW Terms
Exploring The Work Area
What’s New
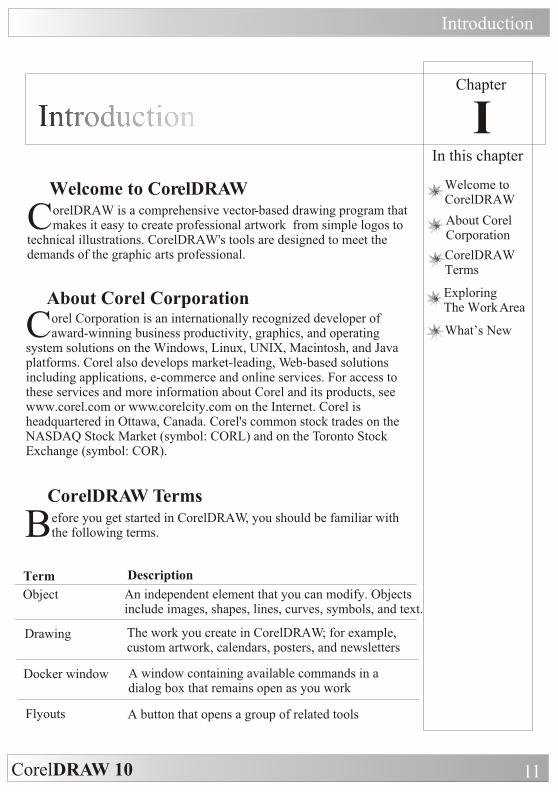
Welcome to CorelDRAWorelDRAW is a comprehensive vector-based drawing program that Cmakes it easy to create professional artwork from simple logos to
technical illustrations. CorelDRAW's tools are designed to meet the demands of the graphic arts professional.
orel Corporation is an internationally recognized developer of Caward-winning business productivity, graphics, and operating system solutions on the Windows, Linux, UNIX, Macintosh, and Java platforms. Corel also develops market-leading, Web-based solutions including applications, e-commerce and online services. For access to these services and more information about Corel and its products, see www.corel.com or www.corelcity.com on the Internet. Corel is headquartered in Ottawa, Canada. Corel's common stock trades on the NASDAQ Stock Market (symbol: CORL) and on the Toronto Stock Exchange (symbol: COR).
efore you get started in CorelDRAW, you should be familiar with Bthe following terms.
About Corel Corporation
Introduction
Term Description
An independent element that you can modify. Objects include images, shapes, lines, curves, symbols, and text.
The work you create in CorelDRAW; for example,custom artwork, calendars, posters, and newsletters
Object
Drawing
Docker window A window containing available commands in a dialog box that remains open as you work
Flyouts A button that opens a group of related tools
CorelDRAW 10
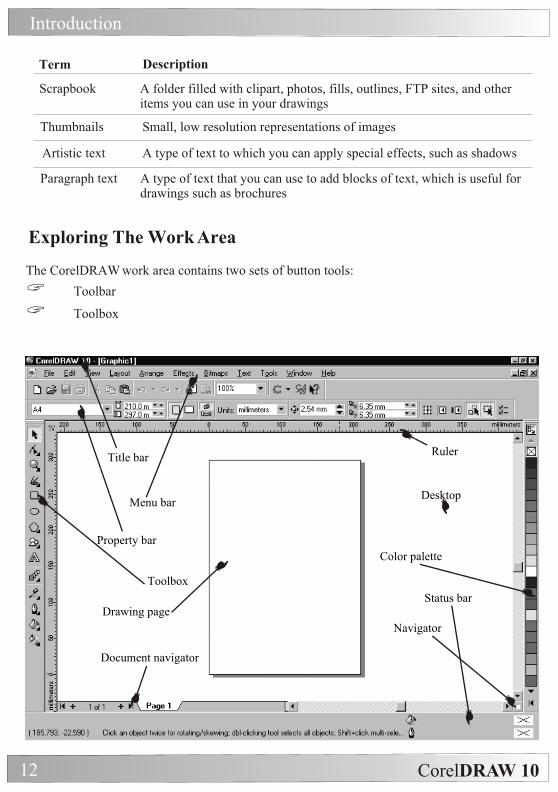
Exploring The Work Area
The CorelDRAW work area contains two sets of button tools:
? Toolbar
? Toolbox
Title bar
Menu bar
Property bar
Toolbox
Drawing page
Document navigator
Ruler
Desktop
Color palette
Status bar
Navigator
Introduction
12
Term Description
Scrapbook A folder filled with clipart, photos, fills, outlines, FTP sites, and other items you can use in your drawings
Thumbnails Small, low resolution representations of images
Artistic text A type of text to which you can apply special effects, such as shadows
Paragraph text A type of text that you can use to add blocks of text, which is useful for drawings such as brochures
Introduction
CorelDRAW 10 13
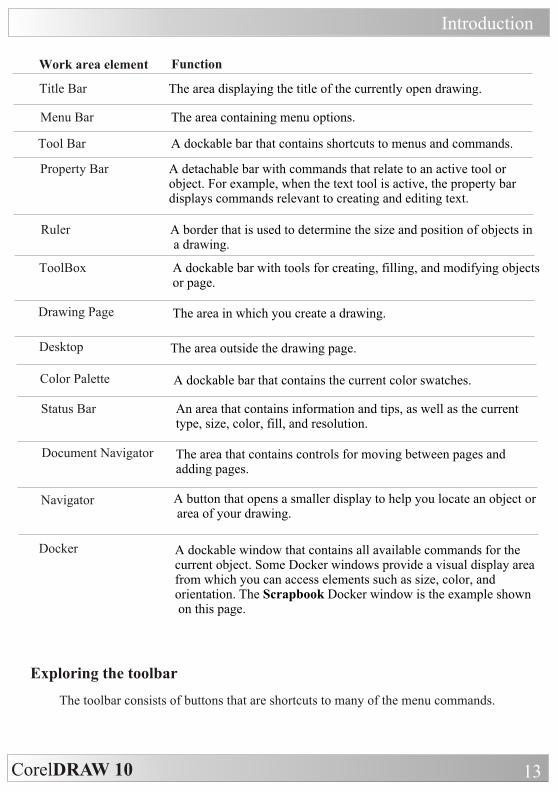
Work area element Function
Title Bar
Color Palette
Ruler
Docker
The area displaying the title of the currently open drawing.
A dockable bar that contains the current color swatches.
A border that is used to determine the size and position of objects in a drawing.
A dockable window that contains all available commands for the current object. Some Docker windows provide a visual display area from which you can access elements such as size, color, and orientation. The Scrapbook Docker window is the example shown on this page.
Menu Bar
Status Bar
ToolBox
The area containing menu options.
An area that contains information and tips, as well as the current type, size, color, fill, and resolution.
A dockable bar with tools for creating, filling, and modifying objects or page.
Property Bar
Navigator
Desktop
A detachable bar with commands that relate to an active tool or object. For example, when the text tool is active, the property bar displays commands relevant to creating and editing text.
A button that opens a smaller display to help you locate an object or area of your drawing.
The area outside the drawing page.
Tool Bar
Document Navigator
Drawing Page
A dockable bar that contains shortcuts to menus and commands.
The area that contains controls for moving between pages and adding pages.
The area in which you create a drawing.
Exploring the toolbar
The toolbar consists of buttons that are shortcuts to many of the menu commands.
Introduction
CorelDRAW 1014
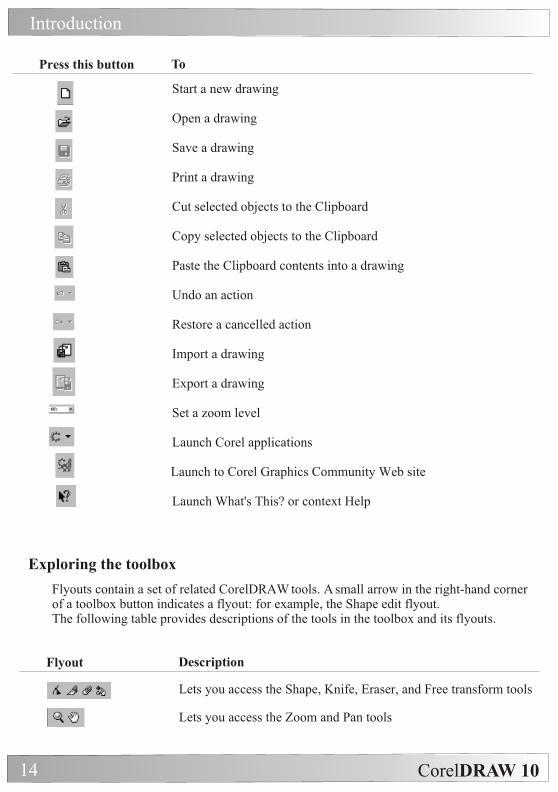
Press this button
Flyout
To
Description
Start a new drawing
Open a drawing
Save a drawing
Print a drawing
Cut selected objects to the Clipboard
Copy selected objects to the Clipboard
Paste the Clipboard contents into a drawing
Undo an action
Restore a cancelled action
Import a drawing
Export a drawing
Set a zoom level
Launch Corel applications
Launch to Corel Graphics Community Web site
Launch What's This? or context Help
Exploring the toolbox
Flyouts contain a set of related CorelDRAW tools. A small arrow in the right-hand corner of a toolbox button indicates a flyout: for example, the Shape edit flyout.The following table provides descriptions of the tools in the toolbox and its flyouts.
Lets you access the Shape, Knife, Eraser, and Free transform tools
Lets you access the Zoom and Pan tools
Introduction
CorelDRAW 10 15
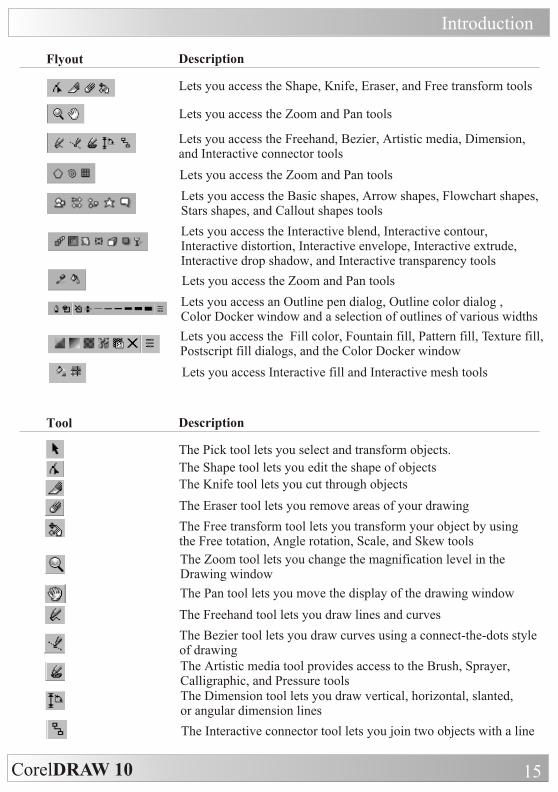
Flyout Description
Lets you access the Shape, Knife, Eraser, and Free transform tools
Lets you access the Freehand, Bezier, Artistic media, Dimension, and Interactive connector tools
Lets you access the Basic shapes, Arrow shapes, Flowchart shapes, Stars shapes, and Callout shapes tools
Lets you access an Outline pen dialog, Outline color dialog , Color Docker window and a selection of outlines of various widths
Lets you access the Fill color, Fountain fill, Pattern fill, Texture fill, Postscript fill dialogs, and the Color Docker window
Lets you access the Interactive blend, Interactive contour, Interactive distortion, Interactive envelope, Interactive extrude, Interactive drop shadow, and Interactive transparency tools
Lets you access the Zoom and Pan tools
Lets you access the Zoom and Pan tools
Lets you access the Zoom and Pan tools
Lets you access Interactive fill and Interactive mesh tools
Tool Description
The Pick tool lets you select and transform objects.
The Shape tool lets you edit the shape of objects
The Knife tool lets you cut through objects
The Eraser tool lets you remove areas of your drawing
The Pan tool lets you move the display of the drawing window
The Interactive connector tool lets you join two objects with a line
The Freehand tool lets you draw lines and curves
The Free transform tool lets you transform your object by using the Free totation, Angle rotation, Scale, and Skew tools
The Zoom tool lets you change the magnification level in the Drawing window
The Bezier tool lets you draw curves using a connect-the-dots style of drawingThe Artistic media tool provides access to the Brush, Sprayer, Calligraphic, and Pressure toolsThe Dimension tool lets you draw vertical, horizontal, slanted, or angular dimension lines
Introduction
CorelDRAW 1016
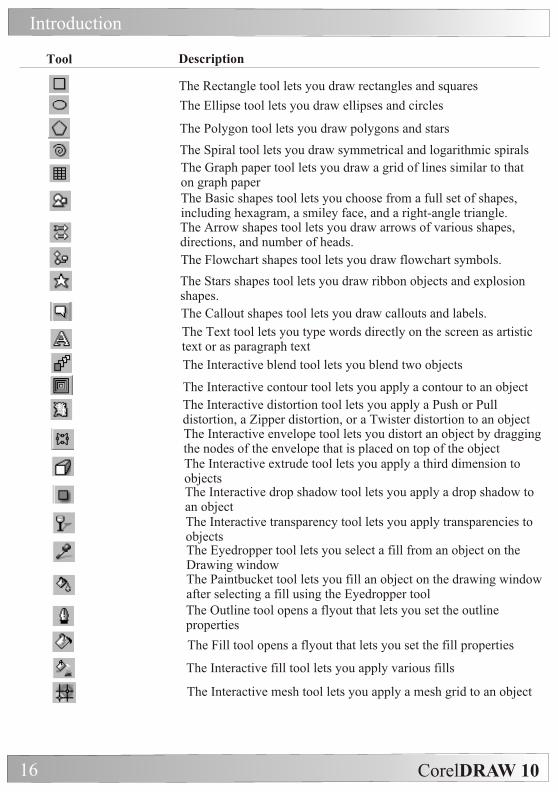
Tool Description
The Rectangle tool lets you draw rectangles and squares
The Ellipse tool lets you draw ellipses and circles
The Polygon tool lets you draw polygons and stars
The Spiral tool lets you draw symmetrical and logarithmic spirals
The Flowchart shapes tool lets you draw flowchart symbols.
The Graph paper tool lets you draw a grid of lines similar to that on graph paperThe Basic shapes tool lets you choose from a full set of shapes, including hexagram, a smiley face, and a right-angle triangle.The Arrow shapes tool lets you draw arrows of various shapes, directions, and number of heads.
The Callout shapes tool lets you draw callouts and labels.
The Interactive blend tool lets you blend two objects
The Interactive contour tool lets you apply a contour to an object
The Stars shapes tool lets you draw ribbon objects and explosion shapes.
The Text tool lets you type words directly on the screen as artistic text or as paragraph text
The Interactive distortion tool lets you apply a Push or Pull distortion, a Zipper distortion, or a Twister distortion to an objectThe Interactive envelope tool lets you distort an object by dragging the nodes of the envelope that is placed on top of the objectThe Interactive extrude tool lets you apply a third dimension to objectsThe Interactive drop shadow tool lets you apply a drop shadow to an objectThe Interactive transparency tool lets you apply transparencies to objectsThe Eyedropper tool lets you select a fill from an object on the Drawing windowThe Paintbucket tool lets you fill an object on the drawing window after selecting a fill using the Eyedropper toolThe Outline tool opens a flyout that lets you set the outline properties
The Fill tool opens a flyout that lets you set the fill properties
The Interactive fill tool lets you apply various fills
The Interactive mesh tool lets you apply a mesh grid to an object
Introduction
CorelDRAW 10 17
What’s New
On Screen Look And Feel
Productivity and Performance
Customization
Common Workspace
Export / Import Workspace
Undo Docker
Presets
Real Time Preview
Page Sorter View
All the commands available in the applications can be displayed in a single list in the Options dialog box, allowing you to customize the menus, toolbox, toolbars, and status bar all at once. You can also drag-and-drop menu items from the menu to a property bar or to another menu by holding down the ALT key.
The toolbox and all of the menus and property bars have been revisited so that icons and tool placement matches throughout the applications.
You can export your customized workspace, or portions of it, and share it with others. Also included is a built-in option to export your customized workspace to email.
A new Undo Docker window, similar to the one found in Corel PHOTO-PAINT keeps track of all the actions you perform, so that you can undo multiple actions in one step or save a series of actions as a Microsoft Visual Basic for Applications script.
Many of the interactive tools now come with presets that let you view and apply predefined settings for those tools quickly and easily.
You can now preview formatting options and effects before applying them to your document using RealTime Preview. You can scroll through and preview formatting options and effects, such as fitting text to a path, and see how they affect the active object or document.
The new Page Sorter lets you view thumbnails of all the pages in a document. The Page Sorter has drag-and-drop functionality that allows you to reorder and manage pages in their document. You can also reorder pages by using the page tabs located at the bottom of the workspace.
Introduction
CorelDRAW 1018
Tools
Text Handling
Import / Export Types
Perfect Shapes
Multilingual Text
Interactive Distortion Tool
Selecting And Editing Text
Interactive Contour Tool
Knife Tool And Eraser Tool
Interactive Extrude Tool
Extensive support for popular file formats have been added, including AutoCAD 2000 (.dxf and .dwg) and Scalable Vector Graphics (.svg).
The addition of PerfectShapes lets you save time when creating complex objects by giving users a library of ready-made objects in a variety of useful categories, such as arrows, stars, callouts, and flowchart shapes.
CorelDRAW 10 now supports text in multiple languages within the same text box, letting you create and correct multilingual documents without having to change the language of the writing tools.
Change the shape of an object by manipulating the object's nodes and you can now apply distortions to paragraph frames to achieve interesting text effects.
The text cursor now flashes when text is being edited, and there is no longer a white box surrounding text that is being edited.
You can now contour an object or group of objects, as well as control the object acceleration and color acceleration of a contour.
The Knife tool and Eraser tool have been enhanced, so you can now use these tools on bitmapped images as well as on vector graphics.
New drag-and-drop functionality you drag colors from the color palette to any of the extruded surfaces and to the bevel. You can also extrude a single object from within a group of objects, or extrude all the objects in the group.
Introduction
CorelDRAW 10 19
Web Features
Format Text Dialog
Export To HTML (dialog)
Roll Overs
Quick Correct
HTML Preflight
Image Optimizer
Web Connector Docker
The Format Text dialog box has been changed to reflect the use of styles and to make it easier to recognize formatting options working at a character level versus a paragraph level.
The Publish To The Web feature has been enhanced to give you more control over the resulting graphics and HTML code.
Create rollover graphics, known as Web Buttons from the Object Properties Docker window, the Internet toolbar, or the Effects menu. Each Web Button can have up to four different states (Normal, Down, Over, and Out) that react to the viewer's mouse actions.
Type Assist has been replaced with QuickCorrect, which uses the WordPerfect libraries.
A Preflight tab has been added to the Publish To the Web dialog, saving you time by providing preflight warnings that will alert you to potential problems prior to publishing to the World Wide Web.
Corel Image Optimizer helps you reduce the file size of an image, letting you save bandwidth for faster downloading of Web pages. Image Optimizer lets you see four separate, live previews of possible export modes or other image variations before sending an image to the Internet.
The new Web Connector Docker window lets you browse the World Wide Web right from the application This lets you connect to Corel's community Web site for graphic designers at http://www.designer.com/ on the Internet without leaving the application.
Introduction
CorelDRAW 1020
Color And Printing
Print Separations
Color Management
In-RIP Trapping
Publish To PDF
Color Sliders
You can now specify the order of color separations and can align all printers' marks to the edge of a graphic or to the edge of a page.
A completely redesigned UI makes color management more intuitive by combining all the essential color management options in one redesigned dialog box. You can now take advantage of the predefined color management styles, or save your own color management profiles.
You can streamline their workflow by specifying trapping and separations parameters in advance with a full range of In-RIP trapping options for PostScript 3 output devices and In-RIP separations options.
You can now embed an ICC color profile, author and keyword information, and any type of file into a PDF file. Fountain fills and Mesh fills are now exported as native PDF 1.3 objects, resulting in smaller file sizes and faster and more accurate rendering.
New color sliders have been added to the Color Docker window that work with all the standard color models as well as with Web-safe colors.
Getting Started
CorelDRAW 10 21
Chapter
IIIn this chapter
Starting and Opening Drawing
Using The Basic Features
Undoing, Redoing and Repeating Actions
Saving Drawings
Closing Drawings and Quitting
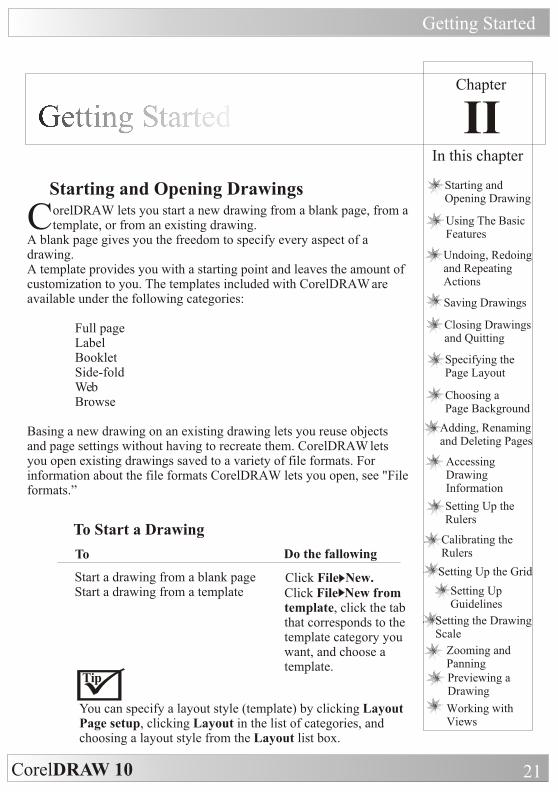
Starting and Opening Drawings
To Start a Drawing
orelDRAW lets you start a new drawing from a blank page, from a Ctemplate, or from an existing drawing.A blank page gives you the freedom to specify every aspect of a drawing.A template provides you with a starting point and leaves the amount of customization to you. The templates included with CorelDRAW are available under the following categories:
Full pageLabelBookletSide-foldWebBrowse
Basing a new drawing on an existing drawing lets you reuse objects and page settings without having to recreate them. CorelDRAW lets you open existing drawings saved to a variety of file formats. For information about the file formats CorelDRAW lets you open, see "File formats.”
Specifying the Page Layout
Choosing a Page Background
Adding, Renaming and Deleting Pages
Accessing Drawing Information
Setting Up the Rulers
Calibrating the Rulers
Setting Up the Grid
Setting Up Guidelines
Previewing a Drawing
Setting the Drawing Scale
Working with Views
Zooming and Panning
To Do the fallowing
Start a drawing from a blank pageStart a drawing from a template
Click File New.Click File New fromtemplate, click the tabthat corresponds to thetemplate category youwant, and choose a template.
You can specify a layout style (template) by clicking Layout Page setup, clicking Layout in the list of categories, and choosing a layout style from the Layout list box.
Tip
Getting Started
CorelDRAW 10
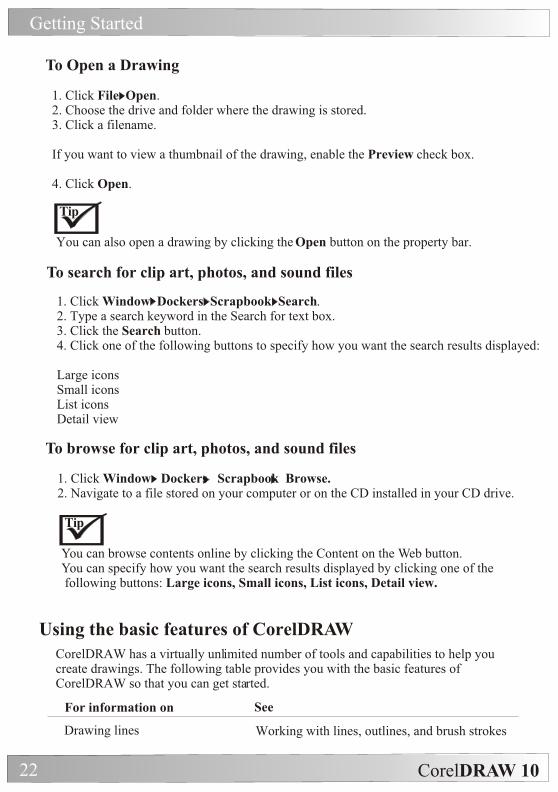
To Open a Drawing
To search for clip art, photos, and sound files
To browse for clip art, photos, and sound files
1. Click File Open.2. Choose the drive and folder where the drawing is stored.3. Click a filename.
If you want to view a thumbnail of the drawing, enable the Preview check box.
4. Click Open.
1. Click Window Dockers Scrapbook Search.2. Type a search keyword in the Search for text box.3. Click the Search button.4. Click one of the following buttons to specify how you want the search results displayed:
Large iconsSmall iconsList iconsDetail view
1. Click Window Dockers Scrapbook Browse.2. Navigate to a file stored on your computer or on the CD installed in your CD drive.
Tip
Tip
You can also open a drawing by clicking the Open button on the property bar.
You can browse contents online by clicking the Content on the Web button.You can specify how you want the search results displayed by clicking one of the following buttons: Large icons, Small icons, List icons, Detail view.
CorelDRAW has a virtually unlimited number of tools and capabilities to help you create drawings. The following table provides you with the basic features of CorelDRAW so that you can get started.
Using the basic features of CorelDRAW
For information on See
Drawing lines Working with lines, outlines, and brush strokes
22
Getting Started
CorelDRAW 10 23
For information on See
Drawing shapes
Adding color to objects
Creating drawings for use on the World Wide Web
Creating and manipulating objects
Adding text to a drawing
Printing drawings
Drawing shapes
Filling objects
Publishing to the Web
Working with objects
Working with text
Printing
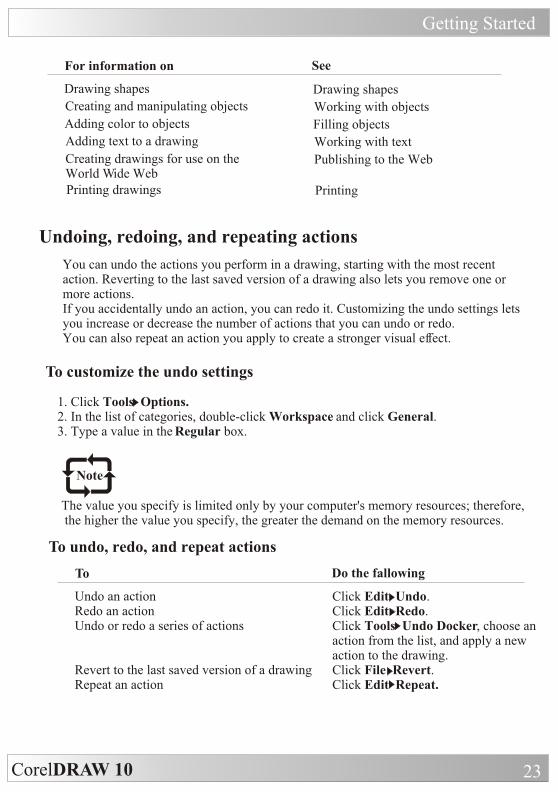
Undoing, redoing, and repeating actions
You can undo the actions you perform in a drawing, starting with the most recent action. Reverting to the last saved version of a drawing also lets you remove one or more actions.If you accidentally undo an action, you can redo it. Customizing the undo settings lets you increase or decrease the number of actions that you can undo or redo.You can also repeat an action you apply to create a stronger visual effect.
To customize the undo settings
To undo, redo, and repeat actions
1. Click Tools Options.2. In the list of categories, double-click Workspace and click General.3. Type a value in the Regular box.
Note
The value you specify is limited only by your computer's memory resources; therefore, the higher the value you specify, the greater the demand on the memory resources.
To Do the fallowing
Undo an actionRedo an actionUndo or redo a series of actions
Revert to the last saved version of a drawingRepeat an action
Click Edit Undo.Click Edit Redo.Click Tools Undo Docker, choose an action from the list, and apply a new action to the drawing.Click File Revert.Click Edit Repeat.
Getting Started
CorelDRAW 1024
Note
When you undo a series of actions, all actions listed below the action you choose are undone.When you redo a series of actions, the action you choose and all actions listed between it and the last undone action are redone.
Tip
You can also undo or redo a single or series of actions in the Undo Docker window, by clicking the last action you want to appear. Actions below the selected action in the list are undone or redone.
Saving drawings
CorelDRAW lets you save a drawing as you work. When you save a drawing for the first time, you must specify a filename, drive, and folder. CorelDRAW offers advanced options that let you assign notes, keywords, and thumbnails to drawings so that you can find them more easily. You can also save textures, blends and extrusions with a drawing. This option increases the size of your drawing, and therefore uses more of your computer's resources. If you want to reduce the size of a drawing, you can rebuild each of these special effects every time you open a drawing as well as compress bitmapped images and vector graphics.
By default, drawings are saved to the CorelDRAW file format; however, advanced save options let you choose other file formats as well. For example, if you want to use a drawing in Corel WordPerfect, you can save it to the Corel WordPerfect Graphic (WPG) format. If you are saving a drawing to use in another application, you must save it to a file format that is supported by that application. You can also save a drawing to a previous version of CorelDRAW.Drawings can also be saved as templates, letting you create drawings based on the properties of saved drawings.
CorelDRAW also lets you save selected objects in a drawing. If you are working on a large drawing, saving only the selected objects can decrease the time it takes to load a drawing, and reduce the demands on your computer's memory.To protect changes to a drawing as you work, you can specify autobackup settings. When you save automatically, you specify a time interval in which a backup of the current drawing is saved.
To Save a Drawing1. Click File Save.2. Choose the drive and folder where you want to save the file.3. Choose a file type from the Files of type list box.4. Type a filename in the Filename box.If you want to specify advanced settings, click Advanced, and specify the settings you want in the Options dialog box.5. Click Save.
Getting Started
CorelDRAW 10 25
Tip
You can also save a drawing by clicking the Save button on the property bar.You can save a drawing to an earlier version of CorelDRAW by choosing CDR-CorelDRAWfrom the Files of type list box and choosing a version number from the Version list box.
To save a drawing with a new filename1. Click File Save as.2. Type a filename in the Filename box.If you want to change the location where the renamed drawing is stored, choose a drive and folder.3. Click Save.
To save a drawing as a template1. Click File Save as.2. Choose CDT - CorelDRAW Template from the Files of type list box.3. Choose the drive and folder where CorelDRAW is installed.4. Choose the folder where the CorelDRAW templates are stored.5. Choose a category in which to save the drawing.6. Type a filename in the Filename box.7. Click Save.
Note
In most installations, the folder in which CorelDRAW templates are stored isProgram Files/Corel/Graphics10/Draw/Template.
To save only selected objects1. Select the objects.2. Click File Save as.3. Enable the Selected only check box.4. Type a filename in the File name box.5. Choose a file type from the Files of type list box.6. Click Save.
To specify auto backup settings1. Click Tools Options.2. In the list of categories, double-click Workspace, and click Save.3. Enable the Auto-backup check box, and type a value in the Minutes box.4. Enable one of the following options:Save back-up to same folder as the CDR file-lets you save auto backup drawings in the same location as the original drawing and to the CorelDRAW file format (CDR)Always back-up to-lets you specify the location where you want to save the auto backup drawings
Getting Started
CorelDRAW 1026
Closing drawings and quitting CorelDRAW
Specifying the page layout
You can close one or all open drawings at any time. You can also quit CorelDRAW.
You can begin working on a drawing by specifying settings for the size, orientation, and layout style of the page.There are two options for specifying a page size: choosing a preset page size or creating your own. You can choose from hundreds of preset page sizes ranging from legal paper and envelopes to posters and Web pages. If a preset page size does not meet your needs, you can create a custom page size by specifying a drawing's dimensions.The orientation of the page can be landscape or portrait. Landscape orientation defines whether the drawing's width is greater than its height, while portrait orientation defines whether the drawing's height is greater than its width. Any pages you add to a drawing project assume the current orientation; however, you can give single pages in a drawing project a different orientation. The options you choose when specifying the page layout can be used as a default for all new drawings you create. You can also adjust the orientation settings of the drawing to match the standard paper size for printing.
To close drawings
To close Do the fallowing
One drawingAll open drawings
Click File Close.Click Window Close all.
To quit CorelDRAWClick File Exit.
To match the orientation settings to the printer settings1. Click Layout Page setup.2. Enable the Normal paper option.3. Click Set from printer.
To set the page size and orientation
To Do the fallowing
Choose a preset page size
Specify a custom page size
Set the page orientation for all pages in a drawing
Click Layout Page setup, and choose a paper type and size from the Paper list box.Click Layout Page Setup, choose Custom from the Paper list box, and type values in the Width and Height boxes.Click Layout Page Setup, and enable the Landscape or the Portrait option.
Getting Started
CorelDRAW 10 27
To Do the fallowing
Set the page orientation for an individual page in a drawing
Click the bottom half of the Set default or current page size and orientation button on the property bar, and click the Landscape or Portrait button.
Tip
You can also specify the page size and orientation for individual pages by clicking View Page sorter view, clicking a page, and specifying your options using the buttons on the property bar.
To start new documents with specific page layout options1. Click Tools Options.2. In the list of categories, click Document.3. Enable the Save options as defaults for new documents check box.
Choosing a page background
You can choose the color and type of background for a drawing. For example, you can use a solid color if you want a uniform background, or if you want a more intricate or dynamic background, you can use a bitmapped image. Some examples of bitmapped images include textured designs, photographs, and clipart.When you use a bitmapped image as the background, you must link it to the drawing or embed it in the drawing. If you link a bitmapped image to the drawing and later change the source of that image, the change is automatically applied to the drawing. This means that if you send the drawing to someone else, you must also send all the linked bitmapped images so that the drawing reflects any changes and displays accurately. If you choose to embed a bitmapped image in a drawing, changes to the source image aren't updated in the drawing.
You can also ensure that the bitmapped image used as the background can be printed and exported, and because the bitmapped image is tiled across the drawing page, you can change the size of the bitmapped image to create smaller or larger tiles.If you no longer need a background, you can remove it.
To use a solid color as the background1. Click Layout Page background.2. Enable the Solid option.3. Open the Color picker, and click a color.
To remove a background1. Click Layout Page background.2. Enable the No background option.
Getting Started
CorelDRAW 1028
To use a bitmapped image as the background1. Click Layout Page background.2. Enable the Bitmap option.3. Click Browse.4. Choose a file format from the Files of type list box.5. Choose the drive and folder where the file is stored.6. Double-click the filename.7. Enable one of the following options:
Linked-links the bitmapped image to the drawing so that changes made to the source file are reflected in the bitmapped image backgroundEmbed-dedembeds the bitmapped image in the drawing so that changes made to the source file are not reflected in the bitmapped image backgroundIf you want the background to be printable and exportable, enable the Print and export background check box.
8. Enable one of the following options:
Default size-lets you either tile or crop the bitmapped image to fit the page. If the bitmappedimage is larger than the page, the bitmapped image will be cropped. If it's smaller than thepage, it will be tiled to create a background.Custom size-lets you specify the dimensions of the bitmapped image. Type values in theH and V boxes.
Tip
You can specify non-proportional height and width values by disabling the Maintain aspect ratio check box.
Adding, renaming, and deleting pages
CorelDRAW lets you add a page to a drawing, rename it anytime, and delete a single page or an entire range of pages.You can also rearrange the order of pages after you have created a multipage drawing.
To add a page1. Click Layout Insert page.2. Type the number of pages you want to add in the Insert pages box.3. Enable one of the following options: Before After
Tip
You can also add pages by clicking the Add page button on the Document Navigator, if you'reon the first or last page.You can also choose where to add a page by right-clicking an existing page in the DocumentNavigator and clicking Insert page after or Insert page before.
Getting Started
CorelDRAW 10 29
To rename a page1. Click Layout Rename page.2. Type the name of the page in the Page name box.
To delete a page1. Click Layout Delete page.2. In the Delete page dialog box, type the number of the page you want to delete.
Tip
You can delete a range of pages by enabling the Through to page check box and typing the number of the last page in the Through to page box.
To rearrange the order of pages
To access drawing information
1. Click View Page sorter view.2. Click and drag a page to its new location.
1. Click File Document info.2. Enable the check box beside each type of information you want to display.
You can also
You can also
Copy a page
Return to normal view
Save drawing information
Print drawing information
Right-click and drag the page you want to copy and click Copy here from the pop-up menu.Return to normal viewDouble-click a page to get back to the regular view of that page.
Click Save as, specify a drive, folder, and filename, and click Save.Click Print
Tip
You can also change the layout and orientation of individual pages, by clicking the relevant buttons on the property bar while in Page sorter view.You can also rearrange the order of pages by clicking and dragging the page tabs on the Document Navigator at the bottom of the drawing window.
Accessing drawing information
You can access drawing information such as the number of pages in a drawing, and the types of objects it contains, as you work. You can also save and print this information.

Getting Started
CorelDRAW 1030
Setting up the rulers
The rulers display in the drawing window by default and can help you size, align, and draw objects precisely. You can hide the rulers or move them to another position in the drawing window. You can also customize the ruler settings to suit your needs. For example, you can set the ruler origin, choose a unit of measure and specify how many marks or ticks display between each full unit mark.By default, CorelDRAW applies the same units used for the rulers to the duplicate and nudge distances. For more information about nudging, see "Positioning objects."Main You can change the default so that you can specify different units for these and other settings.
To hide or display the rulersClick View Rulers.
To move a rulerHold down SHIFT and drag a ruler to a new position in the drawing window.
To customize ruler settings1. Click View Grid and ruler setup.2. In the list of categories, click Rulers.3. In the Units area, choose a unit of measure from the Horizontal list box:4. In the Origin area, type values in the following boxes: Horizontal origin Vertical origin5. Type a value in the Tick divisions box.If you don't want the unit of measure for the placement of duplicate objects and for the nudge value to be the same as the ruler units, disable the Same units for duplicate distance, nudge and rulers check box.
Tip
You can specify a different unit of measure for each ruler by disabling the Same units for horizontal and vertical rulers check box and typing values in the boxes.You can access ruler settings directly by right-clicking on a ruler and clicking Ruler setup.You can specify nudge settings by typing values in the Nudge, Super nudge, and Micro nudge boxes.
Calibrating the rulers
You can specify that one inch on your screen equals one inch of "real" distance. You'll find this tool particularly useful if you are drawing in 1:1 Zoom mode, as it lets you work using real world distances as opposed to relative distances that depend on screen resolution.Before you can perform this procedure, you must have a clear plastic ruler for comparing real-world and on-screen distances. This ruler should use the same unit of measurement you set for the grid and rulers. For information about using the rulers and the grid, see "Setting up the rulers.”
Getting Started
CorelDRAW 10 31
To calibrate the rulers to match real world distance1. Right-click the Zoom tool on the Zoom flyout, and select Properties.2. Click Calibrate Rulers.3. Place a plastic ruler under the on-screen horizontal ruler.4. Click the Up or Down Arrow on the Horizontal box to match one unit of measurement on the on-screen ruler with one unit of measurement on the actual ruler.5. Place the ruler beside the on-screen vertical ruler.6. Click the Up or Down Arrow button on the Vertical box to match one unit of measurement on the on-screen ruler with one unit of measurement on the actual ruler.
Setting up the grid
The grid is a series of intersecting dashed lines or dots you can use to precisely align and position objects in the drawing window. You can set the distance between the grid lines or dots by specifying the frequency or spacing. Frequency refers to the number of lines or dots that display between each horizontal and vertical unit. Spacing refers to the exact distance between each line or dot. High frequency values or low spacing values can help you align and position objects more precisely.
You can have objects snap to the grid so that when you move an object it jumps between the nearest grid line or dot.
To display or hide the gridClick View Grid.
To set the distance between the grid lines1. Click View Grid and ruler setup.2. Click one of the following options: Frequency-specifies the grid spacing as a number of lines per unit of measure specified Spacing-specifies the distance between each grid line3. Type values in the following boxes: Horizontal Vertical
To have objects snap to the grid1. Click View Snap to grid.2. Move the objects using the Pick tool.
Setting up guidelines
Guidelines let you align and position objects with precision. There are three types of guidelines: horizontal, vertical, and slanted. By default, CorelDRAW displays guidelines you add to the drawing window; however, you can hide them at any time.You can add a guideline wherever you need one; however, you can also choose to add preset guidelines. There are two types of preset guidelines: Corel presets and user defined presets.
Getting Started
CorelDRAW 1032
An example of a Corel preset is a guideline that displays within one inch of the page border. User defined presets are guidelines whose location you specify by adding margins and columns.
After you add a guideline, you can select it, move it, rotate it, lock it in place, change its color, or delete it.You can have objects snap to the guidelines to help you position and align objects more precisely or to center objects to the guidelines.
To hide or display the guidelinesClick View Guidelines.
To add a guideline1. Click View Guidelines setup.2. In the list of categories, click one of the following: Horizontal Vertical Guides3. Specify the guideline settings you want.4. Click Add.
Tip
You can also add a guideline by dragging one from the horizontal or vertical ruler.
To add preset guidelines1. Click View Guidelines setup.2. In the list of categories, click Presets.3. Enable one of the following options: Corel presets User defined presets4. Enable the check boxes beside each guideline setting you want.
If you enabled the User defined presets option, type values in the Margins, Columns and Grid boxes.
5. Click Apply presets.
To Do the fallowing
Select a single guidelineSelect all guidelinesMove a guideline
Rotate a guideline
Click the guideline using the Pick tool.Click Edit Select all Guidelines.Drag a guideline to a new position in the drawing windowClick a guideline twice using the Pick tool and rotate it when skewing handles appear.
To modify guidelines
Getting Started
CorelDRAW 10 33
To Do the fallowing
Lock a guideline
Unlock a guideline
Delete a guideline
Delete a preset guideline
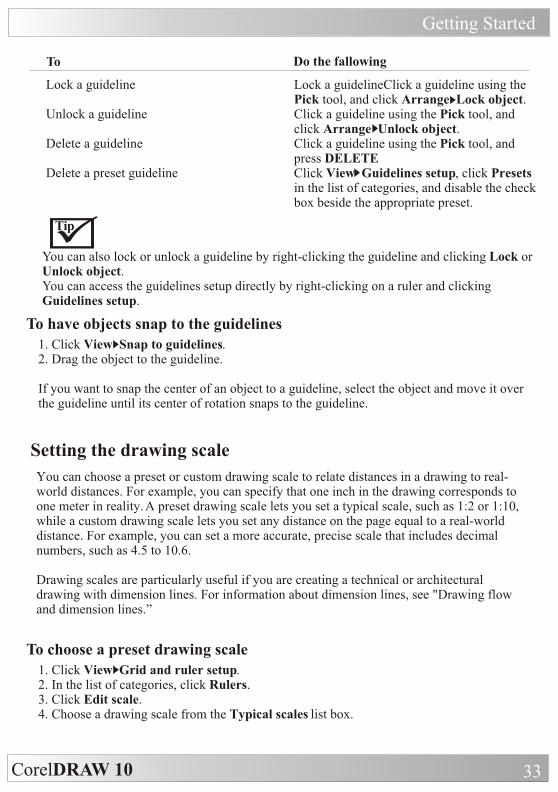
Lock a guidelineClick a guideline using the Pick tool, and click Arrange Lock object.Click a guideline using the Pick tool, and click Arrange Unlock object.Click a guideline using the Pick tool, and press DELETEClick View Guidelines setup, click Presets in the list of categories, and disable the check box beside the appropriate preset.
Tip
You can also lock or unlock a guideline by right-clicking the guideline and clicking Lock or Unlock object.You can access the guidelines setup directly by right-clicking on a ruler and clicking Guidelines setup.
To have objects snap to the guidelines1. Click View Snap to guidelines.2. Drag the object to the guideline.
If you want to snap the center of an object to a guideline, select the object and move it over the guideline until its center of rotation snaps to the guideline.
Setting the drawing scale
You can choose a preset or custom drawing scale to relate distances in a drawing to real-world distances. For example, you can specify that one inch in the drawing corresponds to one meter in reality. A preset drawing scale lets you set a typical scale, such as 1:2 or 1:10, while a custom drawing scale lets you set any distance on the page equal to a real-world distance. For example, you can set a more accurate, precise scale that includes decimal numbers, such as 4.5 to 10.6.
Drawing scales are particularly useful if you are creating a technical or architectural drawing with dimension lines. For information about dimension lines, see "Drawing flow and dimension lines.”
To choose a preset drawing scale1. Click View Grid and ruler setup.2. In the list of categories, click Rulers.3. Click Edit scale.4. Choose a drawing scale from the Typical scales list box.
Getting Started
CorelDRAW 1034
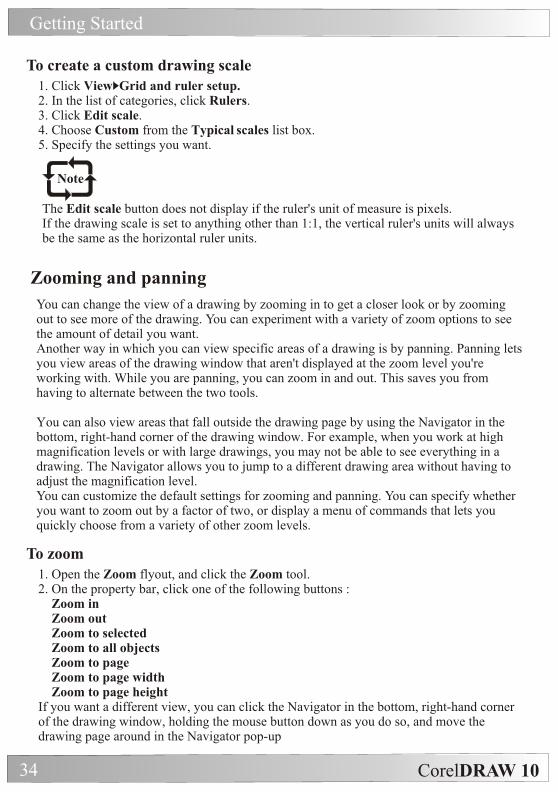
To create a custom drawing scale1. Click View Grid and ruler setup.2. In the list of categories, click Rulers.3. Click Edit scale.4. Choose Custom from the Typical scales list box.5. Specify the settings you want.
Note
The Edit scale button does not display if the ruler's unit of measure is pixels.If the drawing scale is set to anything other than 1:1, the vertical ruler's units will always be the same as the horizontal ruler units.
Zooming and panning
You can change the view of a drawing by zooming in to get a closer look or by zooming out to see more of the drawing. You can experiment with a variety of zoom options to see the amount of detail you want.Another way in which you can view specific areas of a drawing is by panning. Panning lets you view areas of the drawing window that aren't displayed at the zoom level you're working with. While you are panning, you can zoom in and out. This saves you from having to alternate between the two tools.
You can also view areas that fall outside the drawing page by using the Navigator in the bottom, right-hand corner of the drawing window. For example, when you work at high magnification levels or with large drawings, you may not be able to see everything in a drawing. The Navigator allows you to jump to a different drawing area without having to adjust the magnification level.You can customize the default settings for zooming and panning. You can specify whether you want to zoom out by a factor of two, or display a menu of commands that lets you quickly choose from a variety of other zoom levels.
To zoom1. Open the Zoom flyout, and click the Zoom tool.2. On the property bar, click one of the following buttons : Zoom in Zoom out Zoom to selected Zoom to all objects Zoom to page Zoom to page width Zoom to page heightIf you want a different view, you can click the Navigator in the bottom, right-hand corner of the drawing window, holding the mouse button down as you do so, and move the drawing page around in the Navigator pop-up
Getting Started
CorelDRAW 10 35
Note
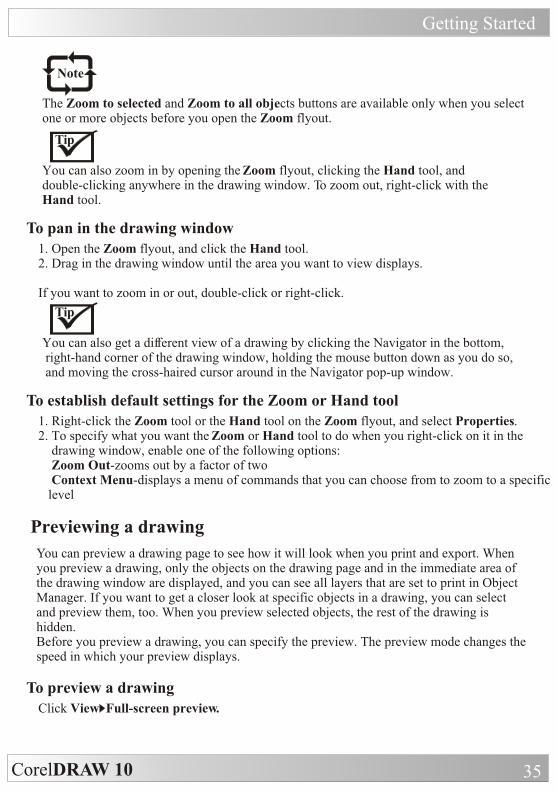
The Zoom to selected and Zoom to all objects buttons are available only when you select one or more objects before you open the Zoom flyout.
Tip
You can also zoom in by opening the Zoom flyout, clicking the Hand tool, and double-clicking anywhere in the drawing window. To zoom out, right-click with the Hand tool.
To pan in the drawing window1. Open the Zoom flyout, and click the Hand tool.2. Drag in the drawing window until the area you want to view displays.
If you want to zoom in or out, double-click or right-click.
Tip
You can also get a different view of a drawing by clicking the Navigator in the bottom, right-hand corner of the drawing window, holding the mouse button down as you do so, and moving the cross-haired cursor around in the Navigator pop-up window.
To establish default settings for the Zoom or Hand tool1. Right-click the Zoom tool or the Hand tool on the Zoom flyout, and select Properties.2. To specify what you want the Zoom or Hand tool to do when you right-click on it in the drawing window, enable one of the following options: Zoom Out-zooms out by a factor of two Context Menu-displays a menu of commands that you can choose from to zoom to a specific level
Previewing a drawing
You can preview a drawing page to see how it will look when you print and export. When you preview a drawing, only the objects on the drawing page and in the immediate area of the drawing window are displayed, and you can see all layers that are set to print in Object Manager. If you want to get a closer look at specific objects in a drawing, you can select and preview them, too. When you preview selected objects, the rest of the drawing is hidden.Before you preview a drawing, you can specify the preview. The preview mode changes the speed in which your preview displays.
To preview a drawingClick View Full-screen preview.
Getting Started
CorelDRAW 1036
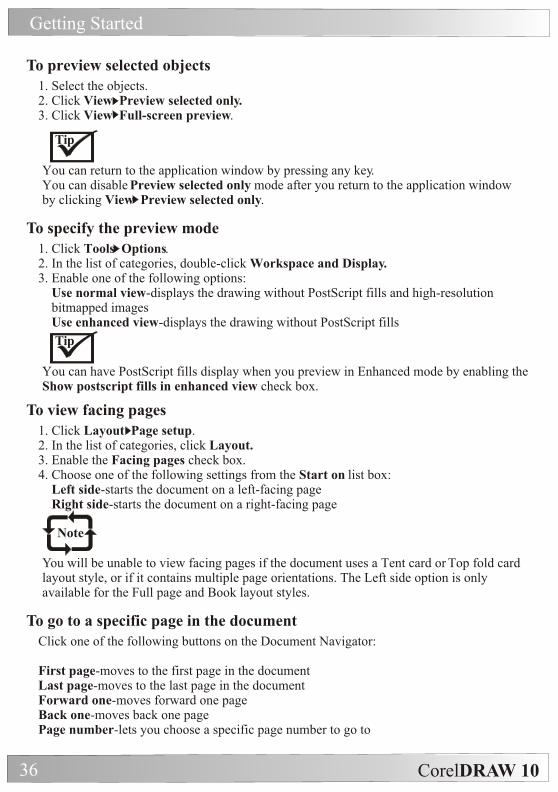
To preview selected objects1. Select the objects.2. Click View Preview selected only.3. Click View Full-screen preview.
Tip
You can return to the application window by pressing any key.You can disable Preview selected only mode after you return to the application window by clicking View Preview selected only.
To specify the preview mode1. Click Tools Options.2. In the list of categories, double-click Workspace and Display.3. Enable one of the following options: Use normal view-displays the drawing without PostScript fills and high-resolution bitmapped images Use enhanced view-displays the drawing without PostScript fills
Tip
You can have PostScript fills display when you preview in Enhanced mode by enabling the Show postscript fills in enhanced view check box.
To view facing pages1. Click Layout Page setup.2. In the list of categories, click Layout.3. Enable the Facing pages check box.4. Choose one of the following settings from the Start on list box: Left side-starts the document on a left-facing page Right side-starts the document on a right-facing page
Note
You will be unable to view facing pages if the document uses a Tent card or Top fold card layout style, or if it contains multiple page orientations. The Left side option is only available for the Full page and Book layout styles.
To go to a specific page in the documentClick one of the following buttons on the Document Navigator:
First page-moves to the first page in the documentLast page-moves to the last page in the documentForward one-moves forward one pageBack one-moves back one pagePage number-lets you choose a specific page number to go to

Getting Started
CorelDRAW 10 37
Working with views
As you work, CorelDRAW lets you display a drawing in any of the following modes:
Simple wireframe-displays an outline of the drawing by hiding fills, extrusions, contours, dropshadows, and intermediate blend shapes, also displays the bitmapped images in monochrome Wireframe-displays an outline of the drawing by hiding fills only Draft-displays a drawing's fills and bitmapped images using a low resolution Normal-displays a drawing without PostScript fills and high-resolution bitmapped images Enhanced-displays a drawing with PostScript fills and high-resolution bitmapped images
The view you choose affects the amount of time it takes for a drawing to refresh or open. For example, a drawing displayed in Simple wireframe view takes less time to refresh or open than does a drawing displayed in Enhanced view.
You can save a view of any part of a drawing so that you can return to that view later. For example, you can save a view of an object in Wireframe view at 230 per cent magnification, and then switch to this specific view at any time.
To save a view1. Click Tools View manager.2. Use the Zoom tools in the View manager Docker window to set up a view.3. Click Add current view.pgx_addview_button
Note
If you disable the Page icon beside a saved view in the View manager Docker window, CorelDRAW reverts to the magnification level only, not the page. Similarly, if you disablethe Magnifying glass icon, CorelDRAW reverts to the page only, not the magnification level.
You can also
Rename a view
Delete a saved view
Double-click a view name and type a new name.Click a view and click Delete current view button.
To switch to a saved view1. Click Tools View manager.2. Click a view in the View manager Docker window.3. Click the flyout button, and click Switch to view.

Drawing
CorelDRAW 10 39
Chapter
IIIIn this chapter
Working with Lines, Outlines and Brush Strokes
Drawing Shapes
Working with Objects
Working with Lines, Outlines and Brush StrokesorelDRAW lets you add lines and brush strokes using a variety of Ctechniques and tools. After you draw lines or apply brush strokes
to lines, you can format them. You can also format the outlines that surround objects.
Shaping Objects
Creating Web-enabled Objects
Drawing lines
CorelDRAW lets you draw all kinds of different lines, from curved or straight freehand lines to calligraphic lines. Curved freehand lines look hand drawn. If you make a mistake while you're drawing freehand lines, curved or straight, you have the option to erase the most recently created portion of the line.Another type of line you can draw is a bezier line. You can draw straight or curved segments, adding one segment at a time. Bezier lines have nodes and control points that you can manipulate to shape lines as you draw. You can change the types of nodes after you complete a line. For information about node types, see "Working with curve objects."CorelDRAW also lets you simulate the effect of a calligraphic pen when you draw lines. Calligraphic lines vary in thickness according to the direction of the line and the angle of the pen nib. By default, calligraphic lines display as closed shapes drawn with a pencil. You can control the thickness of a calligraphic line by changing the angle of the line you draw in relation to the calligraphic angle you choose. For example, when you draw perpendicular to the calligraphic angle, the line is at the maximum thickness specified by the pen width. Lines drawn at the calligraphic angle, however, have little or no thickness.CorelDRAW lets you create pressure-sensitive lines which vary in thickness . You can create this effect using the mouse or a pressure-sensitive pen and graphics tablet. Both methods result in lines with curved edges and varying widths along a path. For information about using a pressure-sensitive pen on a graphics tablet, see the manufacturer's instructions.CorelDRAW provides preset lines that let you create thick strokes in a variety of shapes. After you draw a calligraphic or preset line, you can apply a fill to it as you would to any other object. For information about applying fills, see "Filling objects."
Drawing
CorelDRAW 1040
To draw Do the fallowing
A straight line
A curved line
Open the Curve flyout, and click the Freehand tool. Click where you want to start the line, and click where you want to end it.Open the Curve flyout, and click the Freehand tool. Click and drag across the drawing page.
Tip
You can constrain the angle at which you draw a straight line by holding down CTRL as you drag.You can erase a portion of a curved line before you release the mouse button by holdingdown SHIFT and dragging back over the line.You can use these procedures to add segments to a selected line by clicking the line's end node and dragging. If you want to draw a closed shape, draw a line connecting the end node to the beginning node.
To draw a straight or curved line
To draw Do the fallowing
A straight or jagged bezier line
A curved bezier line
Open the Curve flyout, and click the Bezier tool. Click where you want to start the line, and click where you want to change direction. Press SPACEBAR to finish the line.Open the Curve flyout, and click the Bezier tool. Click and drag to shape the line.
Tip
You can draw a closed shape while you draw a bezier line, by clicking the first node created.
To draw bezier lines
To draw a calligraphic line1. Open the Curve flyout, and click the Artistic media tool.2. Click the Calligraphic button on the property bar.3. Type a value in the Calligraphic angle box on the property bar.If you want to smooth the edges of the line, type a value in the Freehand smoothing box on the property bar.4. Drag until the line is the shape you want.If you want to set the width of the line, type a value in the Artistic media tool width box on the property bar.
Drawing
CorelDRAW 10 41
Tip
You can also access calligraphic lines by clicking Effects Artistic media, and specifying the settings you want in the Artistic media Docker window.
Note
The width you set is the maximum line width. The angle of the line you draw in relation to the calligraphic angle determines the line's actual width.
To draw a pressure-sensitive line1. Open the Curve flyout, and click the Artistic media tool.2. Click the Pressure button on the property bar. If you want to smooth the edges of the line, type a value in the Freehand smoothing box on the property bar.3. Drag until the line is the shape you want. If you want to change the width of the line, type a value in the Artistic media tool width box on the property bar.
Note
The width you set represents the line's maximum width. The amount of pressure you apply determines the line's actual width.
Tip
If you are using the mouse, press the UP ARROW or DOWN ARROW to vary the pen pressure, and, therefore, the width of the line.You can also access pressure-sensitive lines by clicking Effects Artistic media, and specifying the settings you want in the Artistic media Docker window.
To draw a preset line1. Open the Curve flyout, and click the Artistic media tool.2. Click the Preset button on the property bar.3. Choose a preset line shape from the Preset stroke list list box. If you want to smooth the edges of the line, type a value in the Freehand smoothing box on the property bar.4. Drag until the line is the shape you want. If you want to set the width of the line, type a value in the Artistic media tool width box on the property bar.
Drawing
CorelDRAW 1042
Formatting lines and outlines
You can change the appearance of both lines and outlines. For example, you can specify their color, width, style, corner shape, and cap style. You can also remove a line or outline, and you can create your own line or outline style by adjusting the distance between segments in the line.CorelDRAW also lets you copy customized outlines to other objects, convert outlines to objects so that you can apply a fill to them, and create calligraphic outlines.Setting the miter limit for outlines lets you specify whether the spike that forms when two lines meet at a sharp angle is either mitered (pointed) or beveled (squared-off).
You can also Do the fallowing
Create a new line style
Edit an existing line style
Click Edit style and adjust the slider in the Edit line style dialog box. By clicking the boxes to the left of the slider, you can specify the placement and frequency of the dots in the new line style you create.Choose a line style from the Style list box and click Edit style. Create a new line style in the Edit line style dialog box, and click Replace.
Tip
You can change the outline color of a selected object by right-clicking a color on the color palette.You can choose a default line and outline color by clicking a blank area on the drawing page, right-clicking a color on the color palette, and enabling any of the following check boxes: Graphic, Artistic text, or Paragraph text.
To specify line and outline settings1. Select an object.2. Open the Outline tool flyout, and click the Outline tool.3. Specify the settings you want.
To copy an outline to another object1. Open the Eyedropper flyout, and click the Eyedropper tool.2. Click the Eyedropper fill/outline button on the property bar.3. Click the edge of the object whose outline you want to copy.4. Open the Eyedropper flyout, and click the Paintbucket tool.5. Click the edge of the object to which you want to copy the outline.
Note
The color of copied outlines may not match the color of the original outline. In some cases, the closest equivalent RGB color displays.
Drawing
CorelDRAW 10 43
To convert an outline to an object1. Select an object.2. Click Arrange Convert outline to object.
To create a calligraphic outline1. Select an object.2. Open the Outline tool flyout, and click the Outline pen dialog button3. In the Corners area, enable a corner style option.4. Type a value in the Stretch box.5. Type a value in the Angle box.
To set the miter limit1. Click Tools Options.2. In the list of categories, double-click Workspace, and click Edit.3. Type a value the Miter limit box.
Applying brush strokes
CorelDRAW lets you apply a variety of preset brush strokes, ranging from strokes with arrowheads to ones that are filled with rainbow patterns. When you draw a preset brush stroke, you can specify some of its attributes. For example, you can change the width of a brush stroke and specify its smoothness.You can also create custom brush strokes using an object or a group of objects. For information about grouping objects, see "Grouping and combining objects." The objects that you use to create a brush stroke can be vector objects or bitmapped images, including those with dropshadows or transparencies. When you create a custom brush stroke, you can save it as a preset.
To apply a preset brush stroke1. Open the Curve flyout, and click the Artistic media tool.2. Click the Brush button on the property bar.3. Choose a brush stroke from the Brush stroke list box. If you want to smooth the edges of the brush stroke, type a value in the Freehand smoothing box on the property bar.4. Drag until the stroke is the shape you want. If you want to set the width of the stroke, type a value in the Artistic media tool width box on the property bar
Tip
You can apply a brush stroke that isn't listed in the Brush stroke list box by clicking the Browse button on the property bar, and locating the brush stroke file.
Drawing
CorelDRAW 1044
Tip
You can create custom brush strokes by clicking Effects Artistic media, and specifying the settings you want in the Artistic media Docker window.
Drawing shapesorelDRAW lets you draw basic shapes, which you can transform using special effects and Creshaping tools.
Drawing rectangles and squares
CorelDRAW lets you draw rectangles and squares. After you draw a rectangle or square, you can reshape it by rounding one or more of its corners.
To draw a Do the following
Rectangle
Square
Click the Rectangle tool, and drag in the drawing window until the rectangle is the size you want.Click the Rectangle tool, hold down CTRL, and drag diagonally in the drawing window until the square is the size you want.
Tip
You can draw a rectangle or a square from its center outward by holding down SHIFT as you drag.You can draw a rectangle that covers the drawing page by double-clicking the Rectangle tool.
To draw a rectangle or a square
To round the corners of a rectangle or a square1. Open the Shape flyout, and click the Shape tool.2. Click a rectangle or a square.3. Drag a corner node along the outline of the shape.
Tip
To round a single corner of a rectangle or a square, click a node with a Shape tool, pause and drag along the outline of the shape.
Drawing ellipses, circles, arcs, and wedges
You can draw an ellipse or circle and change the shape into an arc or wedge. You can also change the direction of arcs and wedges.
Drawing
CorelDRAW 10 45
To draw Do the fallowing
An ellipse
A circle
Click the Ellipse tool, and drag in the drawing window until the ellipse is the shape you wantClick the Ellipse tool, hold down CTRL, and drag in the drawing window until the circle is the size you want.
Tip
You can draw an ellipse or a circle from its center outward by holding down SHIFT as you drag.
To draw an ellipse or a circle
To draw a Do the fallowing
An arc
A wedge
Open the Shape flyout, and click the Shape tool. Click the node of the ellipse or circle, and drag outside the shape's perimeter.Open the Shape flyout, and click the Shape tool.Click the node of the ellipse or circle, and drag inside the shape's perimeter.
Tip
You can change the direction of a selected arc or a wedge by clicking the Clockwise/counterclockwise arcs or pies button on the property bar.You can constrain the movement of the node to 15-degree increments by holding down CTRL as you drag.
To draw an arc or a wedge
Drawing polygons and stars
CorelDRAW lets you draw polygons and stars and then reshape them. For example, you can convert polygons to stars and stars to polygons, change the number of sides on a polygon or the number of points on a star, and sharpen the points of a star.Changes made to a single node of a polygon or star can be applied to all other nodes so that all changes are symmetrical.
To draw a Do the fallowing
Polygon
Star
Open the Object flyout, click the Polygon tool, and drag in the drawing window until the polygon is the size you want.Open the Object flyout, click the Polygon tool, drag in the drawing window until the polygon is the size you want, and click the Star button on the property bar.
To draw a polygon or a star

Drawing
CorelDRAW 1046
Tip
You can draw a polygon or a star from its center by holding down SHIFT as you drag.You can draw a symmetrical polygon or a star from its center by holding down CTRL as you drag.
To Do the fallowing
Change a polygon to a star or a star to a polygonChange the number of sides of a polygon or number of points on a star
Sharpen a star's points
Select a polygon or a star, and click the Polygon/star button on the property bar.Select a polygon or star, type a value in the Number of points on polygon box on the property bar, and press ENTER.Select a star, and move the Sharpness slider on the property bar.
To reshape a polygon or a star
Note
The Sharpness slider displays only if the star you select has at least seven points. The sensitivity of the slider increases with the number of points.
Drawing spirals
You can draw two types of spirals: symmetrical and logarithmic. Symmetrical spirals expand evenly so that the distance between each revolution is equal. Logarithmic spirals expand with increasingly larger distances between revolutions. You can set the rate by which a logarithmic spiral expands outward.
To draw a spiral1. Open the Object flyout, and click the Spiral tool.2. Type a value in the Spiral revolutions box on the property bar.3. On the property bar, click one of the following buttons: Symmetrical spiral Logarithmic spiral If you want to change the amount by which the spiral expands as it moves outward, move the Spiral expansion slider.4. Drag diagonally in the drawing window until the spiral is the required size.
Tip
You can draw a spiral from its center outward by holding down SHIFT as you drag.You can also draw a spiral with even horizontal and vertical dimensions by holding down CTRL as you drag.
Drawing
CorelDRAW 10 47
Drawing grids
You can draw a grid and set the number of rows and columns. A grid is a grouped set of rectangles, which you can break apart.
To draw a grid1. Open the Object flyout, and click the Graph paper tool.2. Type values in the top and bottom portions of the Graph paper columns and rows box on the property bar. The value you type in the top portion specifies the number of columns; the value in the bottom portion specifies the number of rows.3. Position the cursor where you want the grid to appear.4. Drag diagonally to draw the grid. If you want to draw the grid from its center point outward, hold down SHIFT.
Tip
You can break apart a grid into its component rectangles by selecting the grid with a Pick tool and clicking Ungroup on the Group property bar.
Drawing pre-defined shapes
You can draw pre-defined shapes, such as basic shapes, arrows, stars, and callouts using the Perfect Shapes collection. Basic shapes, arrows shapes, star shapes, and callout shapes have glyphs which let you modify their appearance. The right-angle, heart, lightning bolt, and explosion shapes do not have glyphs.You can add text to the inside or outside of the shape. For example, you might want to put a label inside a flowchart symbol or a callout.
To draw a pre-defined shape1. Open the Perfect shapes flyout, and click one of the following tools: Basic shapes Arrows shapes Flowchart shapes Star shapes Callout shapes2. Open Perfect shapes picker on the property bar, and click a shape.3. Drag in the drawing window until the shape is the size you want.
To change a pre-defined shape using its glyphs1. Select a shape with a glyph.2. Drag a glyph until the shape is the form you want.
Note
Flowchart shapes do not have glyphs.
Drawing
CorelDRAW 1048
To add text to a pre-defined form1. Click the Text tool.2. Position the cursor inside the shape's outline until it changes to a Text cursor box.3. Type and format the font inside the shape.
Working with objectsorking with objects is an essential part of creating drawings.W
Selecting objects
Before you can change an object, you must select it. You can select visible objects, hidden objects, and a single object in a group or a nested group. You can also select all objects at once.
To select Do the fallowing
An objectMultiple objects
An object, starting with the first object created and moving toward the last object createdAn object, starting with the last object created and moving toward the first object createdAll objectsAn object in a groupAn object in a nested group
A hidden object
Multiple hidden object
A hidden object in a group
Click an object with the Pick tool.Hold down SHIFT, and click each object you want to select.Press TAB until a selection box displays around the object you want to select.
Press SHIFT + TAB until a selection box displays around the object you want to select.
Click Edit Select all Objects.Hold down CTRL, and click an object in a group.Hold down CTRL, and click an object you want to select until a selection box displays around it.Hold down ALT, and click the topmost object until a selection box displays around the hidden object you want to select.Hold down ALT + SHIFT, and click the topmost object until a selection box displays around the hidden objects you want to select.Hold down CTRL + SHIFT, and click the topmost object until a selection box displays around the hidden object you want to select.
To select objects
Note
The status bar displays a description of each hidden object as you select it.
Drawing
CorelDRAW 10 49
Tip
You can also select one or more objects by dragging around the object or objects with the Pick tool.
To deselect Do the fallowing
A single object
A single object in multiple selected objects
Click the Pick tool, and click a blank space in the drawing window.Hold down SHIFT, and click the object using the Pick tool.
To deselect objects
Copying, duplicating, and deleting objects
CorelDRAW gives you two ways to copy objects. You can cut or copy an object to place it on the Clipboard and paste it into a drawing or you can duplicate an object.You can copy entire objects or just their fill properties. Cutting an object to the Clipboard removes it from the drawing; copying an object to the Clipboard leaves the original in the drawing; and duplicating an object places a copy directly in the drawing window, not the Clipboard.You can create a transformed duplicate of an object while keeping the original object intact. If you decide that you want to keep the original object, you can delete the duplicate. Duplicating an object is also faster than cutting and pasting.
When you no longer need an object, you can delete it.
To place an object on the Clipboard1. Select an object.2. Click Edit, and click one of the following: Cut Copy
Tip
You can also cut or copy an object by right-clicking the object and clicking Cut or Copy.
To paste an object into a drawingClick Edit Paste.
To duplicate an object1. Select an object.2. Click Edit Duplicate.

Drawing
CorelDRAW 1050
To copy an object's fill properties to another object1. Click the Pick tool.2. Select the object to which you want to copy another object's properties.3. Click Edit Copy properties from.4. Enable any of the following check boxes: Outline pen Outline color Fill Text properties5. Click OK.6. Click the object whose properties you want to copy.
To create a transformed duplicate1. Select an object.2. Click Window Toolbars Transform.3. Click Apply to duplicate on the Transform toolbar.4. Type new values in the Transform toolbar boxes, then press ENTER.
Tip
You can clear a transformation by selecting an object and clicking Under arrange Clear transformations.
To delete an object1. Select an object.2. Click Edit Delete.
Tip
You can also delete an object by right-clicking the object and clicking Delete.
Positioning objects
You can position objects by dragging them to a new location, by nudging, or by specifying their horizontal and vertical position.The values you set in super nudging, and micro nudging allow you to move objects into place by increments. By default, you can nudge objects in 0.1-inch increments, but you can change the nudge values to suit your needs.When you specify the position of an object, you can set horizontal and vertical coordinates that are relative to the object's center anchor point or to another anchor point. You can also position objects by placing them at specific horizontal and vertical coordinates in the drawing window according to the center or one that you specify in the object. By default, the point of origin (0,0) is at the lower left corner of the drawing page.When you enable the Relative position check box in the Transformation Docker window, the H and V boxes identify the position of the center anchor point as 0,0. When you specify a different position using the H and V boxes, the values represent a change from the object's current position as measured from the center anchor point.
Drawing
CorelDRAW 10 51
To move an objectDrag an object to a new position in the drawing.
Tip
You can move an object to another page by dragging the object to a page number tab.
To Do the fallowing
Nudge a selected object by the nudge distanceNudge a selected object by a fraction of the nudge distanceNudge a selected object by a mulitple of the nudge distance
Press an Arrow key.
Hold down CTRL, and press an Arrow key.
Hold down SHIFT, and press an Arrow key.
To nudge an object
To set nudge distances1. Click Tools Options.2. In the list of categories, double-click Document and click Rulers.3. Type a value in the Nudge box.4. Type a value in either the Super nudge or the Micro nudge box.5. Choose a unit of measure from the Units list box.
Tip
You can also set the nudge distance by deselecting all objects and typing a value in the Nudge Offset box in the property bar.
To position an object1. Select an object.2. On the property bar, type values in the following stacked boxes: x-lets you position the object on the x axis y-lets you position the object on the y axis3. Press ENTER.
To position an object using a different anchor point1. Select an object.2. Click Window Dockers Transformations Positions.3. Disable the Relative position check box.4. Type value in the following boxes: H-lets you specify a value for the horizontal position of an object V-lets you specify a value for the vertical position of an object5. Enable the check box that corresponds to the anchor point that you want to set.6. Click Apply.
Drawing
CorelDRAW 1052
Sizing and scaling objects
CorelDRAW lets you size and scale objects. In both cases, you change the dimensions of an object proportionally by preserving its aspect ratio You can size an object's dimensions by specifying values or changing the object directly. Scaling changes an object's dimensions by a specified percentage.You can change an object's anchor point from its center to any of its eight selection handles. CorelDRAW also lets you reset the anchor point to the center of an object.
To Do the fallowing
Size a selected objectSize a selected object from its center
Size a selected object to a multiple of its original sizeStretch a selected object as you size it
Drag any of the corner selection handles.Hold down SHIFT, and drag one of the selection handles.Hold down CTRL, and drag one of the selection handles.Hold down ALT, and drag one of the selection handles.
To size an object
Tip
You can also set a precise size for the object by typing values in the Object size boxes on the property bar.
To scale an object1. Select an object.2. Click Window Dockers Transformations Scale.3. Type values in the following boxes: H-lets you specify a percentage by which you want to scale the object horizontally V-lets you specify a percentage by which you want to scale the object verticallyIf you want to change the object's anchor point, enable the check box that corresponds to the anchor point you want to set.
Tip
You can also scale an object by dragging a selection handle.If you want to maintain the aspect ratio, disable the Non-proportional check box.
Skewing and stretching objects
You can skew and stretch objects in CorelDRAW. When you skew an object, you specify the degree by which you want to slant the object.Stretching changes an object's vertical and horizontal dimensions nonproportionally. You can stretch an object from its center and in increments of 100%.CorelDRAW also lets you change the skew anchor point of an object from its default center position. If you move the skew anchor point, you can reset it to the center again.
Drawing
CorelDRAW 10 53
To skew an object1. Select an object.2. Click Window Dockers Transformations Skew.3. Type a value in one or both of the following boxes: H-lets you specify the number of degrees by which you want to skew the object horizontally V-lets you specify the number of degrees by which you want to skew the object vertically4. Click Apply.
Tip
You can also skew an object interactively by dragging one of its skew handles.
To stretch an object1. Select an object.2. Click Window Dockers Transformations Size.3. Enable the Non-proportional check box. If you want to change the object's anchor point, enable the check box that corresponds to the anchor point you want to set.4. Type a value in one of the following boxes: H-lets you specify the width of a selected object V-lets you specify the height of a selected object5. Click Apply.
You can also Do the following
Stretch an object from its center
Stretch an object in increments of 100%
Hold down SHIFT, and drag a corner selection handleHold down CTRL, and drag a corner selection handle.
Note
To revert the object to its original one-to-one proportions before transforming it again, you must disable the Non-proportional check box, and then re-type the equal values.
Tip
You can stretch an object non-proportionally by holding down ALT and drag a corner selection handle.
Rotating and mirroring objects
CorelDRAW lets you rotate and create mirror images of objects.You can rotate an object in a drawing by specifying horizontal and vertical coordinates. You can move the center of rotation to a specific ruler coordinate or to a point that is relative to the current position of the object depending on the effect you are creating.Mirroring an object horizontally flips it from left to right, top to bottom, or vice versa. By default, the mirror anchor point is in the center of the object.
Drawing
CorelDRAW 1054
To rotate an object1. Select an object.2. Click Window Dockers Transformations Rotate.3. Disable the Relative center check box. To rotate an object around a point relative to its current position, enable the Relative center check box.4. Type a value in the Angle box.5. Type values in any of the following boxes: H-lets you specify the horizontal coordinates around which you want to rotate the object V-lets you specify the vertical coordinates around which you want to rotate the object6. Click Apply.
Tip
You can also rotate a selected object by dragging a rotation handle clockwise or counterclockwise.
To rotate an object around a ruler coordinate1. Select an object.2. Open the Shape edit flyout, and click the Free transform tool..3. Disable the Relative to object button on the property bar.4. Type values in one or both of the following Center of rotation position boxes: X-lets you specify the object's position on the horizontal ruler y-lets you specify the object's position on the vertical ruler5. Type a value in the Angle of rotation box on the property bar.6. Press ENTER.
To mirror an object1. Select an object.2. Click Window Dockers Transformation Scale.3. Click one of the following buttons: Horizontal mirror-lets you flip the object left to right Vertical mirror-lets you flip the object top to bottom4. Enable the check box that corresponds to the anchor point you want to set.5. Click Apply.
Tip
You can also mirror a selected object by holding down CTRL and dragging a selection handle to the opposite side of the object.
Changing the order of objects
You can change the stacking order of objects on a layer by sending objects to the front or back, or behind or in front of other objects. You can also position objects precisely in the stacking order, as well as reverse the stacking order of multiple objects.
Drawing
CorelDRAW 10 55
To change the order of an object1. Select an object.2. Click Arrange Order, and click one of the following: To front-moves the selected object to the front of all other objects. To back-moves the selected object behind all other objects. Forward one-moves the selected object forward one position Back one-moves the selected object behind one position In front of-moves the selected object in front of a specific object Behind-moves the selected object behind a specific object
To reverse the order of multiple objects1. Select the objects.2. Click Arrange Order Reverse order.
Grouping and combining objects
You can group and combine objects in CorelDRAW.When you group two or more objects, they are treated as a single unit. This lets you apply the same formatting, properties, and other changes to all the objects within the group at the same time. CorelDRAW also lets you group grouped objects to create nested groups.If you want to edit an object in a group individually, you can ungroup the objects. You can also add and delete objects to and from a group.Combining two or more objects creates a single object with common fill and outline attributes. You can combine rectangles, ellipses, polygons, stars, spirals, graphs, or text. CorelDRAW converts these objects to a single curve object. If you need to modify the attributes of an object that is combined, you can break the combined object apart.
To group objects1. Select the objects.2. Click Arrange Group. You can create a nested group, by selecting two or more groups of objects and clicking Arrange Group.
Note
You can select objects from different layers and group them; however, once grouped, the objects will reside on the same layer.
Tip
You can also group objects by clicking Window Dockers Object manager, and dragging an object's name in the Object manager Docker window over the name of another object.
Drawing
CorelDRAW 1056
To add an object to a group1. Click Window Dockers Object manager.2. In the Object manager window, drag the name of the object to the name of the group you want to add it to. If you're removing an object from a group, click the object in the object list, and drag it out of the group. If you want to delete an object from a group, select the object in the object list and click Edit Delete.
To remove an object from a group1. Click Window Dockers Object manager.2. Double-click the name of the group in the Object manager Docker window.3. Drag an object from the group to a position outside the group.
To ungroup objects1. Select a grouped object or all grouped objects.2. Click Arrange Ungroup.
Tip
You can also ungroup objects by clicking the Ungroup all button on the property bar.
To combine objects1. Select the objects.2. Click Arrange Combine.
Note
Combined text objects become larger blocks of text
Tip
You can also combine selected objects by clicking the Combine button on the property bar.
To break apart combined objects1. Select a combined object.2. Click Arrange Break apart.
Note
f you break apart a combined object that contains artistic text, the text breaks apart into lines first, then into words. Paragraph text breaks into separate paragraphs.
Drawing
CorelDRAW 10 57
Aligning, distributing, and snapping objects
CorelDRAW lets you align and distribute objects in a drawing.Aligning objects lines any series of objects precisely. You can, for example, align a series of objects horizontally and vertically.You can distribute objects at equal intervals in a specified area.Snapping links one object to another. For example, a callout snapped to an object will move with that object.
To align a series of objects1. Select the objects.2. Click Arrange Align and Distribute.3. Click the Align tab.4. Enable the check boxes that correspond to the horizontal and vertical alignment you want. If you want to align objects vertically, enable the Left, Center, or Right check box.5. In the Align area, enable one of the following check boxes: Edge of page-aligns objects with the edge of the page Center of page-centers objects on the page Align to grid-aligns objects with the nearest grid line
Tip
You can also align objects by selecting them and clicking the Align button on the property bar.
To distribute objects1. Select the objects.2. Click Arrange Align and Distribute.3. Click the Distribute tab.4. Enable the check boxes that correspond to the distribution you want.5. In the Distribute area, enable a check box that corresponds to the distribution area.
Tip
Click the Preview button to preview the distributed object.
To snap objects1. Select the objects.2. Click View Snap to objects.
Cloning objects
When you clone an object, you create a copy of an object that is linked to the original. Any changes to the original (or master) object will be reflected automatically in the clone (copy). You can, however, change the clone independently. If you want, you can remove those changes by reverting back to the original.
Drawing
CorelDRAW 1058
To clone an object1. Select an object.2. Click Edit Clone.
You can also
Specify a clone's master objectSpecify a master's clone object
Right-click the clone, and click Select master.Right-click the master, and click Select clones.
To revert to a clone's master1. Right-click a modified clone, and click Revert to master.2. Enable any of the following check boxes: Clone fill-restores the master fill attributes Clone outline-restores the master outline attributes Clone path shape-restores the master shape attributes Clone transformations-restores the master shape and size attributes Clone bitmap color mask-restores the master color settings
Note
If you change a clone's attribute, that attribute will be no longer linked with the master.You can only restore attributes that have changed from the master object's properties.
Shaping objectsorelDRAW lets you shape objects in various ways.C
Applying distortion effects
You can apply three types of distortion effects to shape objects.
Distortion effect Description
Push and pull
Zipper
Twister
Lets you push the edges of an object in or pull the edges of an object outLets you apply a saw tooth effect to the edges of the object. You can adjust the amplitude and frequency of the effect.Lets you rotate an object to create a swirl effect. You can choose the direction of the swirl, as well as the origin, degree, and amount of rotation.
After you distort an object, you can change the effect by altering the center of distortion. This point is identified by a diamond-shaped handle, around which a distortion appears. It is similar to a mathematical compass, where the pencil moves around a stationary point. You can place the center of distortion anywhere in the drawing window, or choose to center it in the middle
Drawing
CorelDRAW 10 59
of an object so that the distortion is distributed evenly and the shape of the object changes in relation to its center.
You can create an even more dramatic effect by applying a new distortion to an already distorted object. You don't lose the effect of the original distortion if, for example, you apply a zipper distortion on top of a twister distortion.
To distort an object1. Open the Interactive tool flyout,pgx_interactive_flyout and click the Interactive distortion tool.2. On the property bar, click one of the following buttons and specify the settings you want: Push and pull distortion Zipper distortion Twister distortion3. Click where you want to place the center of distortion.4. Drag until the object is the shape you want.
You can also
Change the center of distortion
Adjust the number of points on a zipper distortion
Drag the diamond-shaped position handle to a new location.Move the slider on the center of the distortion handle.
Note
You can reapply the effects to distorted objects.
Tip
You can center a distortion by clicking the Center distortion button on the property bar.
To remove a distortion1. Select a distorted object.2. Click Effects Clear distortion.
Note
Removing a distortion this way clears the most recent distortion you've applied.
Tip
You can also remove a distortion from a selected object by clicking the Clear distortion button on the property bar.
To copy a distortion1. Select the object to which you want to copy a distortion.2. Click Effects Copy effect Distortion from.3. Click a distorted object.
Drawing
CorelDRAW 1060
Shaping objects using envelopes
CorelDRAW lets you shape objects, including lines, artistic text, and paragraph text frames by applying envelopes to them. Envelopes are made of multiple nodes that you can move to shape the envelope, and as a result, change the shape of the object. You can apply a basic envelope that conforms to the shape of an object or a preset envelope. After you apply an envelope, you can edit it, or add a new envelope to continue changing the object's shape. CorelDRAW also lets you copy and remove envelopes.
You can edit an envelope by adding and positioning its nodes. Adding nodes gives you more control over the shape of the object contained in the envelope. CorelDRAW also lets you delete nodes, move multiple nodes simultaneously, change nodes from one type to another, and change a segment of an envelope to a line or curve. For more information about the different types of nodes, see "Working with curve objects."You can also change the mapping mode of an envelope to specify how the object fits to the envelope. For example, you can stretch an object to fit the basic dimensions of the envelope, and then apply the horizontal mapping mode to compress it horizontally so that it fits the shape of the envelope.
To apply an envelope1. Select an object.2. Open the Interactive tools flyout, and click the Interactive envelope tool.3. On the property bar, click one of the following buttons: Envelope straight line mode-creates envelopes based on straight lines, adding perspective to objects Envelope single arc mode-creates envelopes with an arc shape on one side, giving objects a concave or convex appearance Envelope double arc mode-creates envelopes with an S shape on one or more sides Envelope unconstrained mode-creates freeform envelopes, that let you change the properties of the nodes,glos_nodes and add and delete the nodes4. Drag the nodes to shape the envelope. If you want to reset the envelope, press ESC before releasing the mouse.
You can also
Apply a preset envelope
Apply an envelope to an object with an envelope
Remove an envelope
Click the Add preset picker on the property bar and click an envelope shape.Click the Add new envelope button on the property bar, and drag the nodes to change the shape of theenvelope.Click Effects Clear envelope.
Tip
You can prevent the object's straight lines from being converted to curves by enabling the Keep lines button on the property bar.
Drawing
CorelDRAW 10 61
To copy an envelope1. Select an object.2. Click Effects Copy effect Envelope from.3. Select the object from which you want to copy the envelope.
Tip
You can also copy an envelope by selecting an object, clicking the Copy envelope properties button on the property bar, and selecting an object with the envelope you want to copy.
To edit an envelope's nodes and segments1. Open the Interactive tools flyout, click the Interactive envelope tool,2. Select an object with an envelope.3. Double-click the envelope to add a node or double-click a node to delete it.
You can also
Move several envelope nodes at once
Move opposing nodes an equal distance in the same directionMove opposing nodes an equal distance in the opposite direction
Change an envelope node type
Change an envelope segment to a straight line or curve
Click the Envelope unconstrained mode button on the property bar, marquee select the nodes you want to move, and drag any node to a new position.Hold down SHIFT, select two opposing nodes, and drag them to a new position.Click the Envelope unconstrained mode button on the property bar so that it appears raised, hold down SHIFT, select two opposing nodes, and drag them to a new position.Click the Envelope unconstrained mode button on the property bar so that it appears pressed, and click either the Make node a cusp, Make node smooth, or Make node symmetrical button.Click the Envelope unconstrained mode button on the property bar so that it appears pressed, click a line segment, and click the Convert curve to line pgx_convert_curve_button or the Convert line to curve button.
To change the mapping mode1. Open the Interactive tools flyout, and click the Interactive envelope tool.2. Click an object with an envelope.3. On the property bar, choose one of the following from the Mapping mode list box: Horizontal-stretches the object to fit the basic dimensions of the envelope, and then compresses the object horizontally to fit the shape of the envelope Original-maps the corner handles of the object's selection box to the envelope's corner nodes. The other nodes are mapped linearly along the edge of the object's selection box. Putty-maps the corner handles of the object's selection box to the envelope's corner nodes Vertical-stretches the object to fit the basic dimensions of the envelope, and then compresses the object vertically to fit the shape of the envelope4. Drag the nodes or the nodes' control points.
Drawing
CorelDRAW 1062
Note
You can't change the mapping mode of paragraph text frames to which you've applied an envelope.
Splitting and erasing portions of objects
You can split a bitmapped image or vector object in two and reshape it by redrawing its path. You can split a closed object along a straight or jagged line. CorelDRAW lets you choose between splitting an object into two objects, or leaving it as one object composed of two or more subpaths. You can specify whether you want to close paths automatically or keep them open.CorelDRAW lets you erase unwanted portions of bitmapped images and vector objects. Erasing automatically closes any affected paths and converts the object to curves. If you erase connecting lines, CorelDRAW creates subpaths rather than individual objects.
To split an object1. Open the Shape edit flyout, and click the Knife tool.2. Position the Knife tool over the object's outline where you want to start cutting. The Knife tool snaps upright when positioned properly.3. Click the outline to start cutting.4. Position the Knife tool where you want to stop cutting, and click again.
You can also
Split an object along a freehand line
Split an object along a bezier line
Redraw a path along a freehand line
Redraw a path along a bezier line
Split an object into two subpaths
Drag from where you want the cut to start to where you want it to end.Hold down SHIFT, click where you want to start cutting an object, and click each time you want to change the direction of the line. If you want to constrain the line by 15-degree increments, hold down CTRL + SHIFT.Split the object along a freehand line, but before you click where you want the cut to end, press TAB once or twice to choose the cut you want.Split the object along a bezier line, and press TAB until you get the path you want.Click the Leave as one object button on the property bar.
Note
By default, objects are split into two objects and paths are automatically closed.When you use the Knife tool on a selected object, the object becomes a curve object.
Tip
YYou can leave new paths open so that they don't automatically close after splitting by disabling the Auto-close on cut button on the property bar.
Drawing
CorelDRAW 10 63
To break a path
To Do the following
Break a path
Extract a path from an object
Open the Shape edit flyout, click the Shape tool,pgx_shape_tool right-click a path, and click Break apart.Open the Shape edit flyout click the Shape tool, select a segment, node, or group of nodes that represents the portion of the path you want to extract, and click the Extract subpath button on the property bar.
To erase portions of an object1. Select an object.2. Open the Shape edit flyout, and click the Eraser tool.3. Drag over the object.
You can also
Change the size of the eraser nib
Change the shape of the eraser nibMaintain the nodes of the area being erased
Type a value in the Eraser thickness box on the property bar, and press ENTER.Click the Circle/square button on the property bar.Disable the Auto-reduce on erase button on the property bar.
Note
When you erase portions of objects, any affected paths are closed.
Tip
You can erase in straight lines by clicking where you want to start erasing, and then clicking where you want to finish erasing. Hold down CTRL if you want to constrain the line's angle.You can also erase an area of a selected object by double-clicking the area with the Eraser tool.
Creating PowerClip objects
CorelDRAW lets you place vector objects and bitmapped images, such as photos, inside other objects, or containers. A container can be any object, for example artistic text or a rectangle. When you place an object into a container that is larger than the container, the object, called the content, is cropped to fit the form of the container. This creates a PowerClip object.You can create more complex PowerClip objects by placing one PowerClip object inside another PowerClip object to produce a nested PowerClip object. You can also copy the contents of one PowerClip object to another PowerClip object.After you create a PowerClip object you can modify the content and the container. For example, you can lock the content, so that when you move the container, the content moves with it. CorelDRAW also lets you extract the content from a PowerClip object, so that you can delete the content or modify it without affecting the container.
Drawing
CorelDRAW 1064
To create a PowerClip object1. Select an object.2. Click Effects PowerClip Place inside container.3. Click the object you want to use as the container. If you want to create a nested PowerClip object, drag the PowerClip object inside a container.
Tip
You can also create a PowerClip object by holding down the right mouse button and dragging an object onto a container, releasing the mouse button, and clicking PowerClip inside.
To copy the content of a PowerClip object1. Select an object.2. Click Effects Copy effect PowerClip from.3. Click a PowerClip object.
To edit the content of a PowerClip object1. Select a PowerClip object.2. Click Effects PowerClip Edit contents.3. Edit the contents of the PowerClip object.4. Click Effects PowerClip Finish editing this level.
Note
While you edit, the container displays in Wireframe mode and cannot be selected.
To lock or unlock the content of a PowerClip objectRight-click a PowerClip object, and click Lock contents to PowerClip.
Note
If you move the container while the content is unlocked, the content remains stationary and is not visible until you move the container over it.
To extract the content of a PowerClip object1. Select a PowerClip object.2. Click Effects PowerClip Extract contents.
Note
You must extract the contents of each level in a nested PowerClip separately.
orelDRAW lets you create Web-enabled objects for optimum viewing in browsers. You Ccan convert text to a Web compatible format so that it can be edited in a browser, add Web form objects such as radio buttons and check boxes, and create interactive rollovers from CorelDRAW objects.In this section, you'll learn about
Creating Web-enabled objects
Drawing
Creating Web-compatible text
When you convert paragraph text to Web-compatible text, you can edit the text of your published document in an HTML browser. You can change text font characteristics, including the font type, size, and style. The Web-compatible text sizes, numbered 1 through 7, correspond to particular point sizes between the 10-point and 48-point range. For more information about formatting text, see "Formatting paragraph text."The default Web font style is used automatically, unless you override it with another font. If you choose to override it, the default font is used when visitors to your Web site don't have the same font installed on their computers. The bold, italic, and underline text styles, are also available. You can apply uniform fills, but not outlines, to Web-compatible text.
Any non-Web-compatible text in your drawing is converted to bitmapped images when you publish your drawing to the World Wide Web as HTML.
To make text Web-compatible
To Do the following
Change paragraph text to Web-compatible textMake new text Web-compatible
Select the paragraph text. Click Text Make text web compatible.Click Tools Options. In the list of categories, double-click Workspace, Text, and click Paragraph. .Enable the Make all new paragraph text frames web compatible check box.
Note
Ensure that the Web-compatible text does not intersect or overlap other Internet objects or extend beyond the boundaries of the drawing page; otherwise the text will be converted to a bitmapped image, and it will lose its Internet properties.Artistic text cannot be converted to Web-compatible text and is always treated as a bitmapped image. However, you can convert it to paragraph text and then make it Web compatible.
Using preset Internet objects
CorelDRAW provides you with a set of Internet objects, such as radio buttons, Java applets, text edit boxes, pop-up menus, and check boxes to use when designing an HTML page. You can customize Internet objects by adjusting their parameters.If your document has form-related Internet objects, you need a CGI script address to enable these Internet objects to be automated once a document is published to the World Wide Web as
CorelDRAW 10 65
Drawing
CorelDRAW 1066
an HTML file. Except for Java applets and embedded files, the Internet objects provided by CorelDRAW are form-related.
After you create a preset Internet object, you can save it. For information about optimizing, see "Optimizing bitmapped images for the World Wide Web.”
To add or customize an Internet object
To Do the following
Add an Internet object
Customize an Internet object
Add a CGI Script address to an Internet object
Click Edit Insert Internet object, and click the object you want. Click where you want to place the Internet object.Right-click an Internet object, and click Properties. In the Object properties Docker window, click the Internet object's tab and specify the attributes you want to add.Deselect any objects. Click Edit Properties. Click the Form tab, and type the CGI Script address inthe URL of CGI script box. Choose an HTML equivalent method from the Method list box and a frame type from the Target list box.
Note
All Internet objects, except for Java applets and embedded files, require a CGI Script address to function properly after you publish a drawing to the World Wide Web.
To save objects to Web-compatible format1. Click File Publish to the Web HTML.2. Choose the HTML layout from the HTML layout method list box.3. Choose a destination folder.4. Choose an image subfolder5. Choose an export range.
Tip
You can check to see whether there are any issues by clicking the Issues tab.
Creating rollovers
You can create rollovers using objects. Rollovers are interactive objects that change in appearance when you click or point to them.To create a rollover, you add and edit the following rollover states:Normalthe default state of a button when no mouse activity is associated with the buttonOverthe state of a button when the cursor passes over itDownthe state of a clicked buttonBefore you publish an object to the Internet, you must save it to a Web-compatible file format by publishing as HTML or Macromedia Flash (.swf).
Drawing
CorelDRAW 10 67
To create a rollover object1. Select an object.2. Click Effects Rollover Create rollover.
Note
You cannot create a rollover from a clone.
To edit a rollover object1. Select an object.2. Click Effects Rollover Edit rollover.3. Specify attributes of the object.4. Click Effects Rollover Finish editing rollover.
Note
You cannot close a drawing in which you are editing a rollover. You must finishing editing the button first.
Tip
You can also edit a rollover object by clicking the Edit rollover button on the Internet toolbar.

Filling and Coloring
CorelDRAW 10 69
Chapter
IVIn this chapter
Filling Objects
Working with Color
Adding Three-dimensional Effects to Object
Filling objectsou can add colored, patterned, textured, and other fills to the Yinside of objects. After you apply a fill, you can customize it and
set it as a default, so that each object you draw has the same fill.
Changing the Transparency of Object
Using Lenses with Object
To apply a uniform fill
CorelDRAW lets you apply a uniform fill to objects. Uniform fills are solid colors you can choose or create using color models and color palettes. For information about creating colors, see "Working with color.”
To edit a rollover object1. Select an object.2. Open the Interactive fill flyout, and click the Interactive fill tool.3. Choose Uniform fill from the Fill type list box on the property bar.4. Specify the settings you want on the property bar.
Tip
You can also fill a selected object by clicking a color on the color palette.You can mix colors in a uniform fill by selecting an object, pressing CTRL, and clicking a color on the color palette.
Applying fountain fills
A fountain fill is a smooth progression of two or more colors that adds depth to an object. There are four types of fountain fills: linear, radial, conical, and square. A linear fountain fill flows in a straight line across the object. A conical fountain fill circles from the center of the object, a radial fountain fill radiates from the center of the object, and a square fountain fill is dispersed in concentric squares from the center of the object.You can apply preset fountain fills, two-color fountain fills, and custom fountain fills to objects. Custom fountain fills can contain two or more colors, which you can position anywhere in the fill's
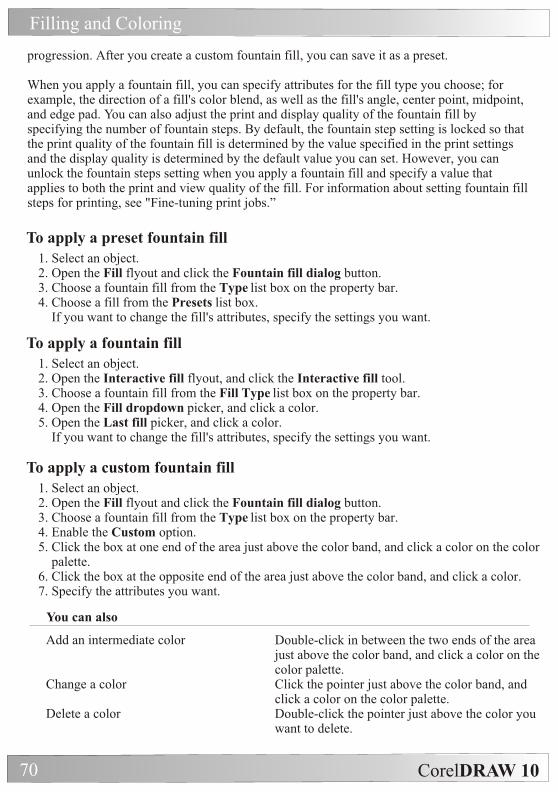
Filling and Coloring
CorelDRAW 1070
progression. After you create a custom fountain fill, you can save it as a preset.
When you apply a fountain fill, you can specify attributes for the fill type you choose; for example, the direction of a fill's color blend, as well as the fill's angle, center point, midpoint, and edge pad. You can also adjust the print and display quality of the fountain fill by specifying the number of fountain steps. By default, the fountain step setting is locked so that the print quality of the fountain fill is determined by the value specified in the print settings and the display quality is determined by the default value you can set. However, you can unlock the fountain steps setting when you apply a fountain fill and specify a value that applies to both the print and view quality of the fill. For information about setting fountain fill steps for printing, see "Fine-tuning print jobs.”
To apply a preset fountain fill1. Select an object.2. Open the Fill flyout and click the Fountain fill dialog button.3. Choose a fountain fill from the Type list box on the property bar.4. Choose a fill from the Presets list box. If you want to change the fill's attributes, specify the settings you want.
To apply a fountain fill1. Select an object.2. Open the Interactive fill flyout, and click the Interactive fill tool.3. Choose a fountain fill from the Fill Type list box on the property bar.4. Open the Fill dropdown picker, and click a color.5. Open the Last fill picker, and click a color. If you want to change the fill's attributes, specify the settings you want.
To apply a custom fountain fill1. Select an object.2. Open the Fill flyout and click the Fountain fill dialog button.3. Choose a fountain fill from the Type list box on the property bar.4. Enable the Custom option.5. Click the box at one end of the area just above the color band, and click a color on the color palette.6. Click the box at the opposite end of the area just above the color band, and click a color.7. Specify the attributes you want.
You can also
Add an intermediate color
Change a color
Delete a color
Double-click in between the two ends of the area just above the color band, and click a color on the color palette.Click the pointer just above the color band, and click a color on the color palette.Double-click the pointer just above the color you want to delete.

Filling and Coloring
CorelDRAW 10 71
You can also
Change the position of a colo
Save the fill as a preset
Drag the pointer just above the color to a new location.Click the Add button and type a name in the Presets box.
Tip
You can also create a custom fountain fill by dragging colors from the color palette in the drawing window onto the object's interactive vector handles.
To change the fountain fill quality1. Select an object.2. Open the Interactive fill flyout, and click the Interactive fill tool.3. Choose a fountain fill from the Fill type list box on the property bar4. Click the Fountain step lock/unlock button, and type a value in the Fountain step box.
Note
When the Fountain step box is locked, the number of steps in the printed fountain fill is determined by the value specified in the Print dialog box. For information about setting fountain fill steps for printing, see "Fine-tuning print jobs."
Tip
You can mix colors in a two-color fountain fill by selecting one of the interactive vector handles, pressing CTRL, and clicking a color on the color palette.You can add a color to a fountain fill by pressing CTRL and dragging a color from the color palette to an object.
To set the display quality for fountain fills1. Click Tools Options.2. In the list of categories, double-click Workspace, and click Display.3. Type a value in the Preview fountain steps box.
Applying texture fills
A texture fill is a randomly generated fill that you can use to give your objects a natural appearance. Texture fills increase the size of a file and the time it takes to print. Therefore, you may want to use these fills sparingly, especially with larger objects.CorelDRAW provides preset textures, and each texture has a set of options that you can change. You can use colors from any color model or palette to customize texture fills. Since texture fills can only hold RGB colors, however, other color models and palettes can cause a color shift when you display or print the files. For information about color models, see "Understanding color models."You can change the tile size of texture fills. Decreasing the size of a texture tile increases the density of the fill. You can also specify exactly where these fills begin by setting the tile origin. CorelDRAW also lets you offset tiles in a fill. Adjusting the horizontal or vertical
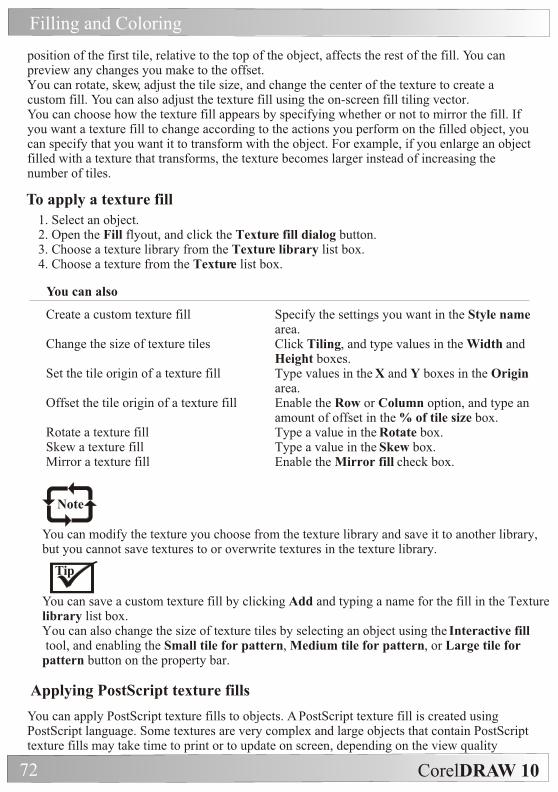
Filling and Coloring
CorelDRAW 1072
position of the first tile, relative to the top of the object, affects the rest of the fill. You can preview any changes you make to the offset.You can rotate, skew, adjust the tile size, and change the center of the texture to create a custom fill. You can also adjust the texture fill using the on-screen fill tiling vector. You can choose how the texture fill appears by specifying whether or not to mirror the fill. If you want a texture fill to change according to the actions you perform on the filled object, you can specify that you want it to transform with the object. For example, if you enlarge an object filled with a texture that transforms, the texture becomes larger instead of increasing the number of tiles.
To apply a texture fill1. Select an object.2. Open the Fill flyout, and click the Texture fill dialog button.3. Choose a texture library from the Texture library list box.4. Choose a texture from the Texture list box.
You can also
Create a custom texture fill
Change the size of texture tiles
Set the tile origin of a texture fill
Offset the tile origin of a texture fill
Rotate a texture fillSkew a texture fillMirror a texture fill
Specify the settings you want in the Style name area.Click Tiling, and type values in the Width and Height boxes.Type values in the X and Y boxes in the Origin area.Enable the Row or Column option, and type an amount of offset in the % of tile size box.Type a value in the Rotate box.Type a value in the Skew box.Enable the Mirror fill check box.
Note
You can modify the texture you choose from the texture library and save it to another library, but you cannot save textures to or overwrite textures in the texture library.
Tip
You can save a custom texture fill by clicking Add and typing a name for the fill in the Texture library list box.You can also change the size of texture tiles by selecting an object using the Interactive fill tool, and enabling the Small tile for pattern, Medium tile for pattern, or Large tile for pattern button on the property bar.
Applying PostScript texture fills
You can apply PostScript texture fills to objects. A PostScript texture fill is created using PostScript language. Some textures are very complex and large objects that contain PostScript texture fills may take time to print or to update on screen, depending on the view quality
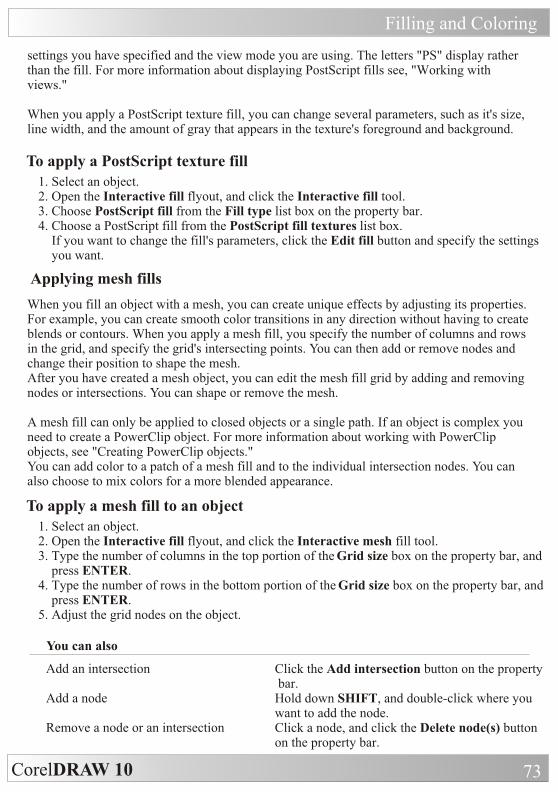
Filling and Coloring
CorelDRAW 10 73
settings you have specified and the view mode you are using. The letters "PS" display rather than the fill. For more information about displaying PostScript fills see, "Working with views."
When you apply a PostScript texture fill, you can change several parameters, such as it's size, line width, and the amount of gray that appears in the texture's foreground and background.
To apply a PostScript texture fill1. Select an object.2. Open the Interactive fill flyout, and click the Interactive fill tool.3. Choose PostScript fill from the Fill type list box on the property bar.4. Choose a PostScript fill from the PostScript fill textures list box. If you want to change the fill's parameters, click the Edit fill button and specify the settings you want.
Applying mesh fills
When you fill an object with a mesh, you can create unique effects by adjusting its properties. For example, you can create smooth color transitions in any direction without having to create blends or contours. When you apply a mesh fill, you specify the number of columns and rows in the grid, and specify the grid's intersecting points. You can then add or remove nodes and change their position to shape the mesh.After you have created a mesh object, you can edit the mesh fill grid by adding and removing nodes or intersections. You can shape or remove the mesh.
A mesh fill can only be applied to closed objects or a single path. If an object is complex you need to create a PowerClip object. For more information about working with PowerClip objects, see "Creating PowerClip objects."You can add color to a patch of a mesh fill and to the individual intersection nodes. You can also choose to mix colors for a more blended appearance.
To apply a mesh fill to an object1. Select an object.2. Open the Interactive fill flyout, and click the Interactive mesh fill tool.3. Type the number of columns in the top portion of the Grid size box on the property bar, and press ENTER.4. Type the number of rows in the bottom portion of the Grid size box on the property bar, and press ENTER.5. Adjust the grid nodes on the object.
You can also
Add an intersection
Add a node
Remove a node or an intersection
Click the Add intersection button on the property bar.Hold down SHIFT, and double-click where you want to add the node.Click a node, and click the Delete node(s) button on the property bar.
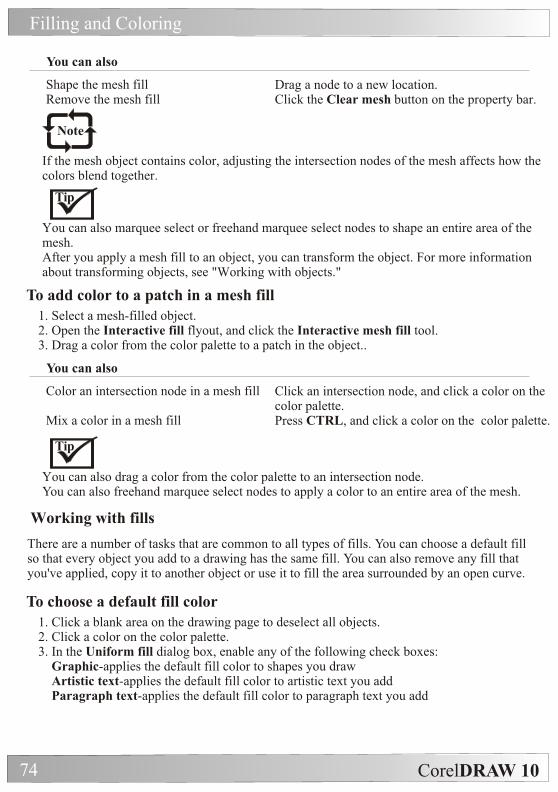
Filling and Coloring
CorelDRAW 1074
You can also
Shape the mesh fillRemove the mesh fill
Drag a node to a new location.Click the Clear mesh button on the property bar.
Note
If the mesh object contains color, adjusting the intersection nodes of the mesh affects how the colors blend together.
Tip
You can also marquee select or freehand marquee select nodes to shape an entire area of the mesh.After you apply a mesh fill to an object, you can transform the object. For more information about transforming objects, see "Working with objects."
To add color to a patch in a mesh fill1. Select a mesh-filled object.2. Open the Interactive fill flyout, and click the Interactive mesh fill tool.3. Drag a color from the color palette to a patch in the object..
You can also
Color an intersection node in a mesh fill
Mix a color in a mesh fill
Click an intersection node, and click a color on the color palette.Press CTRL, and click a color on the color palette.
Tip
You can also drag a color from the color palette to an intersection node.You can also freehand marquee select nodes to apply a color to an entire area of the mesh.
Working with fills
There are a number of tasks that are common to all types of fills. You can choose a default fill so that every object you add to a drawing has the same fill. You can also remove any fill that you've applied, copy it to another object or use it to fill the area surrounded by an open curve.
To choose a default fill color1. Click a blank area on the drawing page to deselect all objects.2. Click a color on the color palette.3. In the Uniform fill dialog box, enable any of the following check boxes: Graphic-applies the default fill color to shapes you draw Artistic text-applies the default fill color to artistic text you add Paragraph text-applies the default fill color to paragraph text you add

Filling and Coloring
CorelDRAW 10 75
To copy a fill to another object1. Open the Eyedropper flyout, and click the Eyedropper tool.2. On the property bar, click one of the following buttons: Fill/outline-lets you choose the color of the object's fill or outline 1X1-lets you choose the average color in a 1X1 pixel area of the object 3X3-lets you choose the average color in a 3X3 pixel area of the object 5X5-lets you choose the average color in a 5X5 pixel area of the object Selection-lets you choose the average color in marquee selected area of the object3. Click the object whose fill you want to copy.4. Open the Eyedropper flyout, and click the Paintbucket tool.5. Click the object to which you want to apply the fill.
Note
Fills you copy may not match the original fill. The closest equivalent RGB color is applied.
To remove a fill 1. Select an object.2. Open the Fill flyout, and click the No fill button.
Tip
You can also remove a fill from a selected object by clicking the No color swatch on the color palette.
To apply fills to open curves1. Click Tools Options.2. In the list of categories, double-click Document, and click General.3. Enable the Fill open curves check box.
Working with colororel graphics applications let you choose and create colors using Cvarious color models.
Choosing colors
You can choose fill and outline colors using fixed or custom color palettes, color viewers, color harmonies, or color blends.For information about applying the colors you choose, and choosing default colors, see "Applying uniform fills" and "Formatting lines and outlines."
Choosing a color using fixed or custom color palettes
Fixed color palettes are provided by third-party manufacturers. Some examples of these are PANTONE, HKS, and TRUMATCH. It may be useful to have on hand a manufacturer's swatch book, which is a collection of color samples that shows exactly what each color looks like when printed.
Filling and Coloring
CorelDRAW 1076
The PANTONE, HKS, and TRUMATCH fixed color palettes are collections of spot colors. If you create color separations when you print, each color from these color palettes requires a separate printing plate. This can significantly increase the cost of your print job. If you want to use these colors but you don't want to use spot colors, convert the spot colors to process colors when printing. For more information, see "Printing color separations."
Custom color palettes can include colors from any color model or fixed color palette. Custom color palettes are saved as color palette files.
Choosing a color using color viewers
Color viewers give a representation of a range of colors using either one-dimensional or three-dimensional shapes. The default color viewer is based on the HSB color model, but you can use this viewer to choose CMYK, CMY, or RGB colors. For information about color models, see "Understanding color models."
Choosing a color using color harmonies
Color harmonies work by superimposing a shape, such as a rectangle or a triangle, over a color wheel. Each vertical row in the color grid begins with the color located at one of the points on the superimposed shape.The colors at each corner of the shape are always complementary, contrasting, or harmonious, depending on the shape you choose. The color harmonies allow you to choose the color model you prefer to use, and are most useful when you're choosing several colors for a project.
Choosing a color using color blends
When you choose a color using color blends, you combine base colors to get the color you want. The color blender displays a grid of colors that it creates from the four base colors you choose.
To choose a color using a fixed or custom color palette1. Select an object.2. Do one of the following: Open the Fill tool flyout, and click the Fill color dialog tool. Open the Outline tool flyout, and click the Outline color dialog tool.3. Click the Palettes tab.4. Choose a fixed or custom palette from the Palette list box.5. Click the color scroll bar to set the range of colors displayed in the color selection area.6. Click a color in the color selection area.
Note
Each color swatch on a fixed color palette is marked with a small white square.You should use the same color model for all the colors in a drawing.
Filling and Coloring
CorelDRAW 10 77
Tip
You can display or hide the names of fixed or custom colors by clicking Options Show color names.You can swap the old and new colors by clicking Options Swap color.
To choose a color using a color viewer1. Select an object.2. Do one of the following: Open the Fill tool flyout, and click the Fill color dialog tool. Open the Outline tool flyout, and click the Outline color dialog tool.3. Click the Models tab.4. Choose a color model from the Model list box.5. Click Options Color viewers, and click a color viewer.6. Click the color scroll bar to set the range of colors displayed in the color selection area.7. Click a color in the color selection area.
Note
If you choose a color that is out of the printer's gamut, the color in the smaller swatch next to the New color swatch is the closest in-gamut color to the color you choose. You can click this closest in-gamut color, or you can correct the out-of-gamut color. For information about color correction, see "Reproducing colors accurately."You should use the same color model for all the colors in a drawing
Tip
You can swap the old and new colors by clicking Options Swap color.You can disable the gamut alarm by clicking Options Gamut alarm.
To choose a color using color harmonies1. Select an object.2. Do one of the following: Open the Fill tool flyout, and click the Fill color dialog tool. Open the Outline tool flyout, and click the Outline color dialog tool.3. Click the Mixers tab.4. Click Options Mixers Color harmonies.5. Choose a shape from the Hues list box.6. Choose an option from the Variation list box.7. Drag the black dot on the color wheel.8. Click a color swatch on the color palette below the color wheel.
Note
If you choose a color that is out of the printer's gamut, the color in the smaller swatch next to the New color swatch is the closest in-gamut color to the color you choose. You can click this closest in-gamut color, or you can correct the out-of-gamut color. For information about color correction, see "Reproducing colors accurately."
Filling and Coloring
CorelDRAW 1078
Tip
You can change the number of swatches in the color grid by typing a value in the Number box.You can swap the old and new colors by clicking Options Swap color
To choose a color using color blends1. Select an object.2. Do one of the following: Open the Fill tool flyout, and click the Fill color dialog tool. Open the Outline tool flyout, and click the Outline Color Dialog tool.3. Click the Mixers tab.4. Click Options Mixers Color blend.5. Open each color picker, and click a color.6. Click a color in the color selection area.
Note
You can only blend colors that are in the default color palette. If you want to blend other colors, change the default on-screen color palette. For information about how to change the default color palette, see "To open a custom color palette."
Tip
You can change the cell size of the color grid by moving the Size slider.You can swap the old and new colors by clicking Options Swap color.
Working with custom color palettes
Custom color palettes are collections of colors that you save as a color palette file. A number of preset custom color palettes are available; however, you can create color palettes from scratch. Custom color palettes are useful when you repeatedly choose the same colors, or when you want to work with a set of colors that look good together.You can create a custom color palette using the Palette Editor, from an object in a document, or from all the colors used in a document. When you create a custom color palette, the color palette is empty; however, you can edit it by adding the colors you want to include, as well as changing, deleting, sorting, and renaming colors.
You can also open a custom color palette, and set a custom color palette as the default on-screen color palette.For more information about customizing color palettes, see "Customizing color palettes.”
To create a custom color palette
To Do the following
Create a palette from the Palette Editor
Create a palette from an object
Click Window Color palettes Palette Editor, click New palette, type a filename, and click Save.Select an object, click Window Color palettes Create palette from selection, type a filename, and click Save.
Filling and Coloring
CorelDRAW 10 79
To Do the following
Create a palette from a document Click Window Color palettes Create palette from document, type a filename, and click Save.
To open a custom color palette1. Click Window Color palettes.2. Click Open palette.3. Choose the drive and folder where the custom color palette is stored.4. Double-click the filename.
Tip
You can close a custom color palette by right-clicking its border, and clicking Palette Close.You can set the opened custom color palette as the default on-screen palette by right-clicking the top of the palette and clicking Set as default.
To edit a custom color palette1. Click Window Color palettes Palette Editor.2. Choose a palette from the list box.3. Click Add color.4. Click a color from the color selection area.5. Click Add to palette.
You can also
Change a color in a palette
Delete a color in a palette
Sort colors in a palette
Rename a color in a palette
Click Window Color palettes Palette Editor, choose a palette from the list box, click a color in the color selection area, click Edit color, and click a color in the color selection area.Click Window Color palettes Palette Editor, choose a palette from the list box, click a color n the color selection area, and click Delete color.Click Window Color palettes Palette Editor, choose a palette from the list box, click Sort colors, and choose a color sorting method.Click Window Color palettes Palette Editor, choose a palette from the list box, click a color in the color selection area, and type a name in the Name box.
Tip
You can delete multiple colors from a custom color palette by holding down SHIFT or CTRL when you click a color in the color selection area.
Filling and Coloring
CorelDRAW 1080
Adding three-dimensional effects to objectsou can create the illusion of three-dimensional depth in CorelDRAW objects by adding Ycontour, perspective, extrusion, or drop-shadow effects.
Contouring objects
You can contour an object to create lines that progress to the center, inside, or outside of the objects. The lines create a series of concentric steps within an object. CorelDRAW also lets you set the number and distance of the contour lines.After contouring an object, you can copy or clone its contour settings to another object.You can also change the colors of the fill between the contour lines and the contour lines themselves. You can set a color progression in the contour effect, where one color blends into another. The color progression can follow a straight, clockwise, or counterclockwise path through the color range of your choice.
To contour an object1. Open the Interactive tools flyout, and click the Interactive contour tool.2. Click an object or a set of grouped objects and drag the start handle toward the center to create an inside contour.3. Move the slider to change the number of contour steps.
You can also
Specify the number of contour lines
Specify the distance between contour linesAccelerate contour line progression
Click the Inside button on the property bar, and type a value in the Contour steps box on the property bar.Type a value in the Contour offset box on the property bar.Click the Object and color acceleration button on the property bar and adjust the object slider.
Tip
You can create an outside contour by dragging the start handle away from the center.
Do the following
To copy or clone a contour1. Select the object you want to contour.2. Click Effects and click one of the following: Copy effect Contour from Clone effect Contour from3. Click a contour object.
To specify an outline color for the contour object1. Open the Interactive tools flyout, and click the Interactive contour tool.2. Select a contour object.3. Open the Outline color picker on the property bar, and click a color.
Filling and Coloring
CorelDRAW 10 81
To set the fill color for a contour object1. Open the Interactive tools flyout, and click the Interactive contour tool.2. Select a contour object.3. Open the Fill color picker on the property bar, and click a color. If the original object has a fountain fill, a second color picker displays.
Tip
You can accelerate the fill color progression by clicking the Object and color acceleration button on the property bar.You can change the contour center's color by dragging a color from the color palette to the end fill handle.
To set the fill progression1. Open the Interactive tools flyout, and click the Interactive contour tool.2. Select a contour object.3. Click one of the following buttons on the property bar: Linear contour colors Clockwise contour colors Counterclockwise contour colors
Applying perspective to objects
You can create a perspective effect by shortening one or two sides of an object. This effect gives an object the appearance of receding in one or two directions, thereby creating a one-point perspective or a two-point perspective. You can add a perspective effect to objects or grouped objects. However, you can't add a perspective effect to paragraph text; bitmapped images; linked groups, such as contours, blends, extrusions; and objects created with the Artistic media tool.
After you apply a perspective effect, you can copy it to other objects in your drawing, and you can remove it from the object.
To apply a one-point perspective1. Select an object.2. Click Effects Add perspective.3. Hold down CTRL, and drag a node.
Note
Holding down CTRL constrains the node's movement to the horizontal or vertical axis to create a one-point perspective effect.
Tip
You can move opposing nodes the same distance in opposite directions, by holding down CTRL + SHIFT as you drag.
Filling and Coloring
CorelDRAW 1082
To apply a two-point perspective1. Select an object.2. Click Effects Add perspective.3. Drag two nodes to apply the effect you want.
To copy an object's perspective effect1. Select an object to which you want to apply a perspective effect.2. Click Effects Copy effect Perspective from.3. Select an whose perspective effect you want to copy.
To remove an object's perspective effect1. Select an object that has a perspective effect.2. Click Effects Clear perspective.
To adjust the perspective1. Open the Shape edit flyout, and click the Shape tool.2. Select an object that has a perspective effect.3. Drag a node to a new position.
Tip
You can also adjust the perspective by dragging one or both of the vanishing points.You can move opposing nodes the same distance in opposite directions by holding down CTRL + SHIFT.
Creating vector extrusions
You can make objects appear three-dimensional by creating vector extrusions. You can create vector extrusions by projecting points from an object and joining them to create an illusion of three dimensions.After you create an extrusion, you can copy or clone its attributes to a selected object. You can also change its form by rotating it, changing its direction, and rounding its corners.
BevelsAnother way in which you can give an object a three-dimensional appearance is by applying a beveled edge to an extrusion. A bevel creates the illusion that an object's extruded edges are cut on an angle. You can specify the angle and depth values of the bevel to control the effect.
Extruded fillsYou can apply fills to an entire vector extrusion, the extruded surfaces only, or to the beveled surfaces of a vector extrusion. You can cover each surface individually with the fill, or you can drape the fill so that it blankets the entire object with no breaks to the pattern or texture.
LightingYou can enhance vector extrusions by applying light sources. You can add up to three light sources to project toward the extruded object with varying intensity. When you no longer need light sources, you can remove them.
Filling and Coloring
CorelDRAW 10 83
Vanishing points
You can create a vector extrusion in which the lines of the extrusion converge at a vanishing point. The vanishing point of a vector extrusion can be copied to another object so that both objects appear to recede toward the same point. You can also give two vector extrusions the same vanishing point.
To create a vector extrusion1. Open the Interactive tools flyout, and click the Interactive extrude tool.2. Click the Vector extrusion mode button on the property bar.3. Choose an extrusion type from the Extrusion type list box on the property bar.4. Select an object.5. Drag the object's selection handles to set the direction and depth of the extrusion. If you want to reset the extrusion, press ESC before releasing the mouse button.
You can also
Apply preset settings to a vector extrusion
Apply an extrusion to a child object in a group.
Select an extrude object, click Interactive extrude tool, and choose a preset setting from the Preset list box on the property bar.Open the Interactive tools flyout, and click the Interactive extrude tool. Hold down CTRL, and click the child object. Drag the child object'sselection handles to set the direction and depth ofthe extrusion.Tip
You can apply preset extrusions by selecting the shape you want to extrude, clicking the Interactive extrude tool and choosing the Preset list box.
Do the following
To copy or clone a vector extrusion1. Select the object you want to extrude.2. Click Effects and click one of the following: Copy effect Extrude from Clone effect Extrude from3. Click an extruded object.
Note
You can't edit a cloned object's extrusion settings; any changes must be made to the master object.
To remove a vector extrusion1. Select an extruded object.2. Click Effects Clear extrude.
Tip
You can also remove a vector extrusion by clicking the Clear extrude button on the property bar.
Filling and Coloring
CorelDRAW 1084
To change a vector extrusion's form
To
Rotate an extrusion
Change the direction of an extrusion
Round the corners of an extruded rectangle or square
Select an extruded object. Click the Extrude rotation button on the property bar. Drag the Corel logo in the interactive display to rotate the extrusion.Double-click an extrusion. Drag to the direction you want.Open the Shape edit flyout, and click the Shapetool. Drag a corner node along the outline of the rectangle or square.
Do the following
To apply beveled edges to a vector extrusion1. Open the Interactive tools flyout, and click the Interactive extrude tool.2. Select an extruded object.3. Click the Bevels button on the property bar.4. Enable the Use bevel check box.5. Type a value in the Bevel depth box.6. Type a value in the Bevel angle box.
Tip
You can also set the bevel depth and angle by using the Interactive display box in the bevel pop-up.You can show only the bevel and hide the extrusion by enabling the Show bevel only check box.
To apply a fill to a vector extrusion1. Select an extruded object with the Interactive extrude tool.2. Click the Color button on the property bar.3. Click one of the following buttons: Use object fill-applies the object's fill to the extrusion. Use solid color-applies a solid color to the extrusion Use color shading-applies a gradient fill to the extrusion
Tip
You can drape the object's fill by enabling the Drape fill check box when you enable the Use object fill button.
You can also
Apply an extrude fill to bevels
Apply a solid fill to bevels
Click Use extrude fill for bevel and click a color on the Bevel color picker.Click Use solid color button and click a color on the Bevel color picker.
Filling and Coloring
CorelDRAW 10 85
To add light to a vector extrusion1. Select an extruded object.2. Click the Lighting button on the property bar.3. Click any of the three Light buttons. The lights appear as numbered circles in the preview window.4. Drag the numbered circles in the Light intensity preview window to position the lights. If you want to create more realistic shading, enable the Use full color range check box.
You can also
Adjust the intensity of a light source
Remove a light source
Select a light in the Light intensity preview window and move the Intensity slider.Click an active Light button.
To change the vanishing point of a vector extrusion
To
Lock a vanishing point
Copy a vanishing point
Set one vanishing point for two extrusions
Double-click an extruded object. Choose VPlocked to object or VP locked to page from the Vanishing point properties list box on the property bar.Double-click an extruded object. Choose Copy VP from the Vanishing point properties list box on the property bar. Select the extruded object that has the vanishing point you want to copy.Double-click an extruded object. Choose Shared vanishing point from the Vanishing point properties list box on the property bar. Select the extruded object that has the vanishing point you want to share.
Do the following
Creating bitmapped extrusions
You can apply extrusions to bitmapped objects created in CorelDRAW. You can also apply preset beveled edges to the front face of a bitmapped extrusion, the back face, or both, and specify the height and width of a bevel.You can change the depth and fill of a bitmapped extrusion as well as rotate it and change its position.You can add two kinds of lighting effectsambient and point. Ambient light is uniform, has no specific origin, and casts no shadows. It is the equivalent of daylight and radiates in every direction. You can position the point light to project it toward the object from one or more directions. You can also change the intensity and color of a point light.
To apply a bitmapped extrusion1. Open the Interactive tools flyout, and click the Interactive extrude tool.2. Select an object.3. Click the Bitmap extrusion mode button on the property bar.4. Double-click the object to create and add extrude effects.
Filling and Coloring
CorelDRAW 1086
Note
You cannot remove a bitmapped extrusion from an object.
Tip
You can render a bitmapped extrusion by clicking outside its bounding box.
To position a bitmapped extrusion1. Double-click a bitmapped extrusion.2. On the property bar, type values in the following boxes: X object(s) position Y object(s) position
To apply beveled edges to a bitmapped extrusion
To
Add beveled edges
Adjust the size of beveled edges
Double-click a bitmapped extrusion. Click Front bevel or Back bevel on the property bar to choose beveled edges for the extrusion.Double-click a bitmapped extrusion. Click the Bevels button on the property bar, and type values in the Bevel width and Bevel height boxes.
Do the following
To edit a bitmapped extrusion
To
Set the depth of a bitmapped extrusion
Rotate a bitmapped extrusion
Add a fill to a bitmapped extrusion
Double-click the bitmapped extrusion, and type avalue in the Extrude depth box.Double-click the bitmapped extrusion, to rotate the object along the cross-hairs.Double-click a bitmapped extrusion with the Picktool, and choose a color from the color palette or another fill from the Fill flyout,.
Do the following
Note
Texture fills significantly increase the size of a file and the time it takes to print.
To apply ambient light to a bitmapped extrusion1. Double-click a bitmapped extrusion.2. Click the Ambient light button on the property bar.3. Enable the On check box.4. Open the Color picker, and click a color.5. Move the Brightness slider.
Filling and Coloring
CorelDRAW 10 87
To apply a point light1. Double-click a bitmapped extrusion.2. Click the Point light button on the property bar.3. Click the Add light button.4. Drag the light source to position it in the preview window.5. Open the Color picker, and click a color.6. Move the Brightness slider.
Tip
You can remove a point light by clicking the light source in the preview window and clicking the Remove light button.
Creating drop shadows
Drop shadows simulate light falling on an object from one of five particular perspectives: flat, right, left, bottom, and top. You can add drop shadows to most objects or groups of objects, including artistic text, paragraph text, and bitmapped images. When you add a drop shadow, you can change its perspective, and you can adjust attributes such as color, opacity, fade level, angle, and feathering. After you create a drop shadow, you can copy it or clone it to a selected object. When you copy a drop shadow, the original and copy have no connection and can be edited independently. With cloning, master object's drop shadow attributes are automatically applied to its clone.
By separating a drop shadow from its object, you can gain more control over the drop shadow itself. You can also set the rendering resolution of a drop shadow.You can also remove a drop shadow.
To add a drop shadow1. Open the Interactive tools flyout, and click the Interactive drop shadow tool.2. Click an object.3. Drag from the center or side of the object until the drop shadow is the size you want.4. Specify any attributes on the property bar.
Note
You can't add drop shadows to linked groups, such as blended objects, contoured objects, beveled objects, extruded objects, objects created with the Artistic media tool, or other drop shadows.
To copy or clone a drop shadow1. Select the object to which you want to copy or clone a drop shadow.2. Click Effects and click one of the following: Copy effect Drop shadow from Clone effect Drop shadow from.3. Click an object that has a drop shadow
Filling and Coloring
CorelDRAW 1088
To adjust the resolution of a drop shadow1. Click Tools Options.2. In the list of categories, click General.3. Type a value in the Resolution box.
To separate a drop shadow from an object1. Select an object that has a drop shadow.2. Click Arrange Break drop shadow group apart.3. Drag the shadow.
To remove a drop shadow1. Select an object that has a drop shadow.2. Click Effects Clear drop shadow.
Tip
You can also remove a drop shadow from an object by clicking the Clear drop shadow button on the property bar.
Changing the transparency of objectsou can apply a transparency to an object so that all objects behind it show through. YCorelDRAW also lets you specify how the color of the transparent object combines with
the color of the object beneath it.
Applying a transparency
When you apply a transparency to an object, you create a grayscale mask similar to a fill. By positioning a transparent object on top of another object, you simulate a lens. You can apply transparencies using the same kind of fills you apply to objects; that is, uniform, fountain, texture, and pattern. For more information about these fills, see "Filling objects."After you decide what type of transparency you want to apply, you have a couple of options. By default, CorelDRAW applies all transparencies to the object's fill and outline; however you can specify whether you want the transparency to apply only to the object's outline or fill.
You can also copy a transparency from one object to another.
To apply a uniform transparency1. Select an object.2. Open the Interactive tools flyout, and click the Interactive transparency tool.3. On the property bar, choose Uniform from the Transparency type list box.4. Click a color on the color palette.5. Type a value in the Starting transparency box on the property bar, and press ENTER.
Tip
You can fix the contents of the transparency so that the contents move with the object, by clicking the Freeze button on the property bar.
Filling and Coloring
CorelDRAW 10 89
To apply a fountain transparency1. Select an object.2. Open the Interactive tools flyout, and click the Interactive transparency tool.3. On the property bar, choose one of the following fountain transparencies from the Transparency type list box: Linear Radial Conical Square4. Point to where you want the transparency to start on the object, and drag to where you want the transparency to end. If you want to reset the transparency, press ESC before releasing the mouse button.5. Type a value in the Transparency midpoint box on the property bar, and press ENTER.
Tip
You can fix the contents of the transparency so that the contents move with the object, by clicking the Freeze button on the property bar.You can create a custom fountain transparency by dragging colors from the color palette onto the object's interactive vector handles.
To apply a textured transparency1. Select an object.2. Open the Interactive tools flyout, and click the Interactive transparency tool.3. Choose Texture from the Transparency type list box on the property bar.4. Choose a sample from the Texture library list box on the property bar.5. Open the First transparency picker on the property bar and click a texture.6. On the property bar, type values in the following boxes: Starting transparency-lets you change the opacity of the starting color Ending transparency-lets you change the opacity of the ending color
Tip
You can fix the contents of the transparency so that the contents move with the object, by clicking the Freeze button on the property bar.
To apply a pattern transparency1. Select an object.2. Open the Interactive tools flyout, and click the Interactive transparency tool.3. On the property bar, choose one of the following from the Transparency type list box: Two-color pattern-a simple picture composed of "on" and "off" pixels. The only colors included in the picture are the two that you assign. Full-color pattern-a picture composed of lines and fills, instead of dots of color like bitmapped images. These vector graphics are smoother and more complex than bitmapped images and are easier to manipulate. Bitmap pattern-a color picture composed of patterns of light and dark or differently colored pixels in a rectangular array.
Filling and Coloring
CorelDRAW 1090
4. Open the First transparency picker on the property bar and click a pattern.5. On the property bar, type values in the following boxes: Starting transparency Ending transparency
Tip
You can fix the contents of the transparency so that the contents move with the object, by clicking the Freeze button on the property bar.
To specify the location of a transparency1. Open the Interactive tools flyout and click the Interactive transparency tool.2. Select the object.3. On the property bar, choose one of the following from the Apply transparency to list box: Fill Outline All
To copy a transparency1. Select an object.2. Click Effects Copy effect Lens from.3. Using the horizontal cursor, select an object with the transparency you want to copy.
Applying merge modes
You can apply a merge mode to a transparency to specify how the color of a transparency is combined with the color of the object behind it.
Merge mode
Normal
Add
Subtract
Difference
Multiply
Divide
Applies the transparency color on top of the base colorAdds the values of the transparency color and the base colorAdds the values of the transparency color and the base color together, and then subtracts 255Subtracts the transparency color from the base color and multiplies by 255. If the transparencycolor value is 0, the result will always be 255.Multiplies the base color by the transparency color, and then divides by 255. This has a darkeningeffect, unless you are applying color to white. Multiplying black with any color results in black. Multiplying white with any color leaves the colorunchanged.Divides the base color by the transparency color, or conversely, divides the transparency color by the base color, depending on which color has the higher value
Description
Filling and Coloring
CorelDRAW 10 91
To apply merge modes1. Open the Interactive tools flyout, and click the Interactive transparency tool.2. Select an object with a fountain, texture, or pattern transparency.3. Choose a merge mode from the Transparency operation list box on the property bar.
Using lenses with objectsenses contain creative effects that let you view objects from an interesting perspective.L
Applying lenses
Lenses change how the object area beneath the lens appears, not the actual properties and attributes of the objects. You can apply lenses to any vector object, such as a rectangle, ellipse, or polygon. You can also apply lenses to paragraph text, artistic text, and bitmapped images. When you apply a lens over a vector object, the lens itself becomes a vector image. Likewise, if the lens is placed over a bitmapped image, the lens also becomes a bitmapped image.
After you apply a lens, you can copy it and use it with another object.
To apply a lens1. Select an object.2. Click Effects Lens.3. Choose a lens type from the list box in the Lens Docker window.4. Specify the settings you want.
Note
You cannot apply the lens effect directly to linked groups such as blended objects, contouredobjects, beveled objects, extruded objects, drop shadows, or objects created with the Artistic media tool. If you apply a lens to a group, the lens applies separately to each object in the group.
Tip
You can preview the different types of lenses in real-time before applying one to a drawing by disabling the Lock button and then choosing a lens and settings to preview. Click Apply when you find the lens you want to use.You can apply a lens to a linked group by selecting an unrelated object, applying a lens to thatobject, and dragging the object over the linked group.
To copy a lens1. Select an object.2. Click Effects Copy effect Lens from.3. Click the object whose lens you want to copy.
Filling and Coloring
CorelDRAW 1092
Editing lenses
You can edit a lens to change how it affects the area beneath it. For example, you can change the viewpoint of a lens, indicated by an X in the drawing window, to display any part of a drawing. The viewpoint represents the center point of what is being viewed through the lens. You can position the lens anywhere in the drawing window, but it always shows the area around its viewpoint marker. For example, you can use the viewpoint marker on the magnify lens to enlarge part of a map.
You can also display a lens only where it overlaps other objects or the background. As a result, the lens effect is not seen where the lens covers blank space (white space) in the drawing window.Freezing the current view of a lens lets you move the lens without changing what's displayed through it. In addition, changes you make to the areas beneath the lens have no effect on the view.
To edit a lens1. Select an object.2. Click Effects Lens.3. Enable the Viewpoint check box in the Lens Docker window. If you want to display a lens only where it covers other objects, enable the Remove face check box.4. Click Edit to display the viewpoint marker.5. Drag the viewpoint marker in the drawing window to a new location.6. Click End. If you want to freeze the current view of a lens, enable the Frozen check box.7. Click Apply.
Note
The Remove face check box is not available for Fish Eye and Magnify lenses.
Working With Bitmaps
CorelDRAW 10 93
Chapter
VIn this chapter
Working with Bitmapped images
Changing Color Modes
Working with bitmapped imagesou can scan, import, and edit bitmapped images in CorelDRAW. YYou can also add special effects and change the color and tone of
the images.
Adding bitmapped images
You can import a bitmapped image into a drawing either directly or by linking to an external image file. When you externally link to an image file, any edits to the original file can be updated in the imported file.You can also add a bitmapped image by scanning it or by loading it from a digital camera.
To import a bitmapped image1. Click File Import.2. Choose the drive and folder where the bitmapped image is stored.3. Double-click the folder to open it. If you want to link the image to the drawing, enable the Link bitmap externally check box.4. Select the file.5. Click Import.6. Click where you want to place the bitmapped image.
Note
Ensure that Files of type is set to All file formats when you import an image.The status bar provides information about the bitmapped image, including color mode, size, and resolution.
Tip
You can import a bitmapped image in its original size by pressing SPACEBAR when you click the Import button.
Working With Bitmaps
CorelDRAW 1094
To scan a bitmapped image1. Click File Acquire image Select source.2. Select a scanner from the Select source dialog box, and click Select.3. Place an image on your scanner.4. Click File Acquire image Acquire.
Note
Refer to scanner's documentation for details on scanning procedures and options.
To load a bitmapped image from a digital camera1. Click File Acquire image Select source.2. From the Sources list, click the selection that corresponds to your digital camera.3. Click Select.4. Click File Acquire image Acquire.
Applying special effects to bitmapped images
You can apply a wide range of special effects to bitmapped images, such as three-dimensional and artistic effects.Adding plug-in filters to CorelDRAW provides additional features and effects that you can use to edit images. You can enable or disable plug-in filters and you can remove them when you no longer need them.
To apply a special effect1. Click Bitmaps, choose a special effect type. and click an effect.2. Adjust any special-effect settings.
To add a plug-in filter1. Click Tools Options.2. In the list of categories, double-click Plug-ins.3. Click Add.4. Select the folder in which the plug-in is stored.
Note
The Options dialog box does not show the files in the folder. You must know the folder before you use the Options dialog box.
To manage a plug-in filter
To
Enable a plug-in filter
Disable a plug-in filter
Click Tools Options and click Plug-ins. In the Plug-ins list, enable the check box that correspondsto a filter.Click Tools Options and click Plug-ins. In the Plug-ins list, disable check box that corresponds to a filter.
Do the following
To
Remove a plug-in filter Click Tools Options and click Plug-ins. From the Plug-ins list, choose the folder that contains the plug-in to remove. Click Remove.
Do the following
Working With Bitmaps
CorelDRAW 10 95
Applying color and tone effects
CorelDRAW lets you apply color and tone to a bitmapped image. For example, you can replace colors, shift them between RGB and CMYK color modes. and adjust the brightness, lightness, and darkness of colors.By applying color and tone effects, you can restore detail lost in shadows or highlights, remove color casts, correct underexposure or overexposure, and generally improve the quality of the bitmapped images.
To apply a color or tone effect1. Select a bitmapped image.2. Click Effects Adjust, and click a color or tone effect.3. Specify any settings.
Optimizing bitmapped images for the World Wide Web
You can save objects and optimize them for the World Wide Web.
To save and optimize a bitmapped image to Web-compatible format1. Click File Publish to the Web Web image optimizer.2. In each preview window, choose a file format.3. Choose a filter type.4. Click the Edit filter button to customize the filter options.5. In the export window of the file format you want to export to and customize the options you want.
You can also
Preview the file download time for a particular modem speedSave a custom filterDelete a custom filterPan to another section of the image
Zoom in the preview window
Choose a speed from the Modem speed list box.
Click AddClick Delete.Click the Hand tool and drag in the preview window.Choose a magnification from the Zoom level list box.
Changing color modeshanging an image to another color mode, such as RGB, CMYK or CGrayscale, changes a bitmapped image's color structure.
Working With Bitmaps
CorelDRAW 1096
Changing the color mode of bitmapped images
The colors of the images that you work with in CorelDRAW are based on color modes. Color modes define the color characteristics of images and are described by their component colors. The RGB color mode is composed of red, green, and blue values and the CMYK color mode is composed of cyan, magenta, yellow, and black values.Although you may not be able to see the difference between an image in the CMYK color mode and an image in the RGB color mode on screen, the images are quite different. Colors from the RGB color space can cover a greater range of the visual spectrum (that is, they have a larger color gamut) than those in the CMYK color space. For the same image dimensions, a CMYK image has a larger file size than an RGB image.
Each time you convert an image, you may lose color information. For this reason, you should save an edited image before you change it to a different color mode.For more information about color modes, see "Working with color".
To change the color mode of a bitmapped image1. Click a bitmapped image.2. Click Bitmaps Mode, and click one of the following: Grayscale (8-bit) RGB color (24-bit) Lab color (24-bit) CMYK color (32-bit)
Changing bitmapped images to the Black-and-White color mode
You can change any image to the 1-bit Black-and-White color mode. In addition to conversion settings such as threshold, screen type, and intensity, there are seven conversion options that affect how the converted images will look.
To change a bitmapped image to the Black-and-White color mode1. Click a bitmapped image.2. Click Bitmaps Mode Black-and-white (1-bit).3. Choose an option from the Conversion list box.4. Move the slider. If you want to view parts of the image, you can drag the image in the Preview window.
To change an image to the Paletted color mode1. Click a bitmapped image.2. Click Bitmaps Mode Paletted (8-bit).3. Click the Options tab.4. Choose a color palette type from the Palette list box.5. Choose an option from the Dithering list box.6. Move the Dithering intensity slider.
Working With Bitmaps
CorelDRAW 10 97
You can also
Save the conversion settings as a preset
Save the processed palette
Click Add preset, and type a name in the Save preset box.Click the Processed palette tab. and click Save. Choose the drive and folder where you want to save the processed color palette, and type afilename in the File name box.
Do the following
Note
You can achieve better color fidelity by choosing the palette you want to use when you change an image to a paletted bitmapped image or when you export a GIF or JPEG. For example, the standard color palette provides more colors than necessary for an image with a limited range of colors, but you can choose an optimized palette to ensure that color representation is accurate.
Tip
You can choose a custom color palette by clicking Open, locating the color palette file you want, and double-clicking the filename.You can load preset conversion settings by choosing a preset from the Preset list box.
To edit the processed color palette1. Click a bitmapped image.2. Click Bitmaps Mode Paletted (8-bit).3. Click the Processed palette tab.4. Click a color.5. Click the Edit button.6. In the Color table, specify the color you want, and click OK.7. In the Save palette as dialog box, choose the drive and folder where you want to store the color palette.8. Type a name in the File name box, and click Save.
To change a bitmapped image by setting range sensitivity1. Click a bitmapped image.2. Click Bitmaps Mode Paletted (8-bit).3. Click the Options tab.4. Choose Optimized from the Palette list box.5. Enable the Color range sensitivity to check box.6. Click the Eyedropper tool, and click a color in the image.7. Click the Range sensitivity tab.8. Move the range sensitivity sliders. If you want to preview the color palette, click the Processed palette tab
Working With Bitmaps
CorelDRAW 1098
To change multiple files to the Paletted color mode1. Click a bitmapped image.2. Click Bitmaps Mode Paletted (8-bit).3. Click the Batch tab.4. From the left column, choose each file you want to change, and click Add.
Tip
You can preview an image by choosing it from the Preview image list box and clicking the Preview button.
Changing bitmapped images to the Duotone color mode
To convert an image to the Duotone color mode, you can change a bitmapped image to the grayscale color mode and enhance it using one to four additional inks, giving the image greater tonal depth.The following four variations of the color mode correspond to the number of additional inks: Monotonea grayscale image colored with a single ink Duotonea grayscale image colored with two inks. In most cases, one ink is black and the other ink is colored. Tritonea grayscale image colored with three inks. In most cases, one ink is black and the other inks are colored. Quadtonea grayscale image colored with four inks. In most cases, one ink is black and the other inks are colored.
Adjusting tone curvesWhen you change an image to the Duotone color mode, a tone curve grid that represents the dynamic ink curves that are used throughout the conversion is displayed. The horizontal plane (x-axis) displays the 256 possible shades of gray in a grayscale image (0 is black; 255 is white). The vertical plane (y-axis) indicates the intensity of an ink (from 0 to 100 percent) that is applied to the corresponding grayscale values. For example, a grayscale pixel with a color value of 25 is printed with a 25-percent tint of the ink color. By adjusting the tone curves, you can control the color and intensity of the ink that is added to an image.
Saving and loading inksYou can save an adjusted Duotone tone curve and ink settings and then load them for use with other bitmapped images.
Specifying how overprint colors displayWhen you change an image to the Duotone color mode, you can specify which colors will overprint when you print an image. Overprint colors are the colors that have too much ink when two or more colors overlap. When you display the image, each color is applied on the screen in sequence, creating a layered effect.
You can view all instances in which the colors you choose for the Duotone conversion overlap. Associated with each instance is the color that is produced by the overlap. You can also choose new overprint colors to see how they overlap.

Working With Bitmaps
CorelDRAW 10 99
To change an image to the Duotone color mode1. Click a bitmapped image.2. Click Bitmaps Mode Duotone (8-bit).3. Click the Curves tab.4. Choose a Duotone type from the Type list box.5. Double-click an ink color in the Type window.6. In the Select color dialog box, choose a color, and click OK. If you want to adjust the color's tone curve, click the ink tone curve on the grid to add a node.7. Drag the node to adjust the percentage of color at that point on the curve.8. Repeat steps 5 to 7 for each ink color you want to use.
You can also
Display all the ink tone curves on the grid.Save the ink settings
Specify how overprint colors display
Enable the Show all check box.
Click Save. Choose the drive and folder where you want to save the file, and type a filename in the File name box.Click the Overprint tab, and enable the Useoverprint check box. Double-click the color you want to edit, and choose a new color.
Tip
You can load ink settings by clicking Load, locating the file in which the ink settings are stored, and double-clicking the filename.

Adding Text
CorelDRAW 10 101
Chapter
VIIn this chapter
Working with Text
Shaping TextWorking with text
orelDRAW lets you use text to create or enhance drawings.CAdding and selecting text
There are two types of text you can add to drawingsartistic text and paragraph text. Artistic text can be used to add short lines of text to which you can apply a large range of effects, such as drop shadows. Paragraph text can be used for larger bodies of text that have greater formatting requirements.You can add text directly in the drawing window; however, you must create a text frame for each paragraph text object that you want to add.
A text frame can be fixed-sized or automatically sized. A fixed-sized text frame displays a limited amount of paragraph text. Any text that continues past the bottom right border of the text frame is hidden until you enlarge the text frame. An automatically sized text frame adjusts as you type to display all of the text.Inserting paragraph text frames in graphic objects lets you use objects as containers for text so that you can change the shape of the text frames. You can also separate a text frame from a container object. When you do, the text frame retains the object's shape.
To modify text, you must first select it. You can select entire text objects, specific characters, or single characters. The tool that you use to select text depends on whether you want to affect an entire text object (for example, a paragraph text frame) or only a portion of the text.
Working with Asian and Middle Eastern text
Managing Fonts
To add artistic textClick anywhere in the drawing window using the Text tool and type.
Adding Text
CorelDRAW 10102
To add paragraph text
To
Add paragraph text
Add paragraph text in an object
Separate a paragraph text frame from an object
Click the Text tool. Drag in the drawing window to size the paragraph text frame, and type.Click the Text tool. Move the cursor over the object's outline, and click the object when the cursor changes to an Insert in object cursor. Type inside the frame.Select the object using the Pick tool, and click Arrange Break paragraph text inside a path apart. Click a blank space in the drawing window and drag either the text frame or the object to a new location.
Do the following
Tip
You can adjust the size of a paragraph text frame by clicking the text frame using the Pick tool, and dragging any selection handle.
To add paragraph text in an automatically sized frame1. Click Tools Options.2. Double-click Text and click Paragraph in the list of categories.3. Enable the Expand and shrink paragraph text frames to fit text check box.
To manage a plug-in filter
To select text
An entire text objectSpecific characters
Click the text object using the Pick tool.Drag across the text using the Text tool.
Do the following
Tip
You can select multiple text objects by holding down SHIFT and clicking each text object.
Finding, editing, and converting text
You can find text in a drawing and replace it without having to retype the text. This is especially useful when a drawing consists of a lot of text. You can also retype selected text directly in the drawing window.CorelDRAW lets you convert artistic text to paragraph text if you decide you require more formatting options, and paragraph text to artistic text if you'd like to apply special effects. You can also convert artistic text to curves so that you can modify the shape of characters and preserve their appearance when you open a drawing on another computer.Converting text to curves transforms characters to single line and curve objects, letting you add, delete, or move the nodes of a character to alter its shape. By converting artistic text to curves, you can change the shape of individual characters. For more information, see "Working with curve objects.”

Adding Text
CorelDRAW 10 103
To find text1. Click Edit Find and replace Find text.2. Type the text you want to find in the Find what box. If you want to find the exact case of the text you specified, enable the Match case check box.3. Click Find next.
To find and replace text1. Click Edit Find and replace Replace text.2. Type the text you want to find in the Find what box. If you want to find the exact case of the text specified, enable the Match case check box.3. Type the replacement text in the Replace with box.4. Click Replace.
To edit text1. Select the text.2. Click Text Edit text.3. Retype the text.
You can also
Edit text in the drawing window Select the text using the Text tool, and retype the text.
Note
You can edit artistic text only if it hasn't been converted to curves.
To convert text
To convert
Paragraph text to artistic text
Artistic text to paragraph text
Select the text using the Pick tool, and click Text Convert to artistic text.Select the text using the Pick tool, and click Text Convert to paragraph text.
Do the following
Note
You cannot convert paragraph text to artistic text when the paragraph text is linked to another frame, has special effects applied to it, or overflows its frame.
Tip
You can also convert selected artistic text to curves by right-clicking the text, and clicking Convert to curves.
Adding Text
CorelDRAW 10104
Moving text
CorelDRAW lets you move paragraph text between frames, artistic text between artistic text objects, and both types of text between paragraph text and artistic text.
To move textDrag the text using the Pick tool.
Changing the appearance of text
You can enhance artistic text and paragraph text by modifying their character properties. For example, you can change the font type and size or make the text bold or italic. You can also change the default text style, so that every artistic or paragraph text object you create has the same properties, and change the case of text to lowercase or uppercase without deleting or replacing letters. If a drawing includes scientific notation, you can make text subscript or superscript.
You can also add underlines, overscores, and strikethrough lines to text and change the thickness of these lines, as well as the distance between text and a line.As you add text, you can change its appearance. By default, the unit of measure is points; you can change this setting for the active drawing and all subsequent drawings you create.Greeking text lets you increase the redraw speed by representing text with lines. You can make text readable again by reducing the greeking value.
To change font attributes1. Select the text.2. Click Text Format text.3. Click the Character tab.4. Specify the font attributes you want.
To change the default text style1. Click a blank space in the drawing window using the Pick tool.2. Click Text Format text.3. Click the Character tab.4. Specify the properties you want, and click OK.5. Enable any of the following boxes: Artistic text Paragraph text
Tip
You can also change the default text style by clicking Tools Graphic and text styles, and dragging a text object over either the Default artistic text, or Default paragraph text style in the Graphic and text styles Docker window.
Adding Text
CorelDRAW 10 105
To change text case1. Select the text.2. Click Text Change case.3. Enable one of the following options: Sentence case-capitalizes the initial letter of the first word in each sentence Lowercase-makes all text lowercase Uppercase-makes all text uppercase Title case-capitalizes the initial letter of each word Toggle case-reverses the case; all uppercase letters become lowercase and all lowercase letters become uppercase
To specify the increment by which to size text1. Click Tools Options.2. In the list of categories, click Text.3. Type a value in the Keyboard text increment box. If you want to specify a default unit of measure, choose a unit of measurement from the Default text units list box.
To greek text1. Click Tools Options.2. In the list of categories, click Text.3. Type a value in the Greek text below box.
Shifting, rotating, and spacing text
Shifting artistic and paragraph text vertically and horizontally can create an interesting effect. You can also rotate characters and straighten characters that you've angled or shifted. Straightening text pulls the text into its original position. You can return characters you've shifted vertically to the baseline and maintain a rotation.You can change character and word spacing in an entire paragraph text frame or in selected paragraphs only. Changing the spacing of artistic text and paragraph text can make it more readable. Changing the line spacing for artistic text applies the spacing to lines of text separated by a carriage return. For paragraph text, the spacing applies to lines of text within the same paragraph. You can also change the spacing before and after paragraphs in paragraph text, as well as the spacing between all characters, all words, or characters and words proportionately.
You can kern specific characters. Kerning balances the optical space between letters in a word. Kerning differs from spacing in that it affects only the white space between the specified characters. You can also specify whether character outlines are hidden or displayed when you space characters manually.
Adding Text
CorelDRAW 10106
To shift or rotate a character1. Select the character or characters.2. Click Text Format text.3. Click the Character tab.4. In the Shift area, type a value in one of the following boxes: Horizontal-moves a character to the right or the left Vertical-moves a character up or down Rotate-rotates a character
Tip
You can also shift or rotate characters you select using the Shape tool by typing values in the Horizontal shift box, Vertical shift box, or Angle of rotation box on the property bar.
To straighten a shifted or rotated character1. Select the text.2. Click Text Straighten text.
To return a vertically shifted character to the baseline1. Open the Shape edit flyout, and click the Shape tool.2. Select the node to the left of the character.3. Click Text Align to baseline.
To change the spacing of text1. Select the text.2. Click Text Format text.3. Click the Paragraph tab.4. In the Spacing area, type values in any of the boxes.
Note
All of the above values, excluding the Character values, range from 0 to 2000 percent. The character values range from -100 to 2000 percent.
Tip
You can also change the spacing between words and characters proportionately by selecting the text using the Shape tool and dragging the Interactive horizontal spacing arrow.
To apply range kerning1. Select two or more characters using the Text tool.2. Click Text Format text.3. Click the Character tab.4. Type a value in the Range kerning box.
Adding Text
CorelDRAW 10 107
Aligning text
You can align both paragraph and artistic text. Aligning paragraph text lines up text relative to the paragraph text frame. You can horizontally align all paragraphs or only selected paragraphs in a paragraph text frame. Furthermore, you can vertically align all paragraphs in the columns of a paragraph text frame.When you align artistic text, it is aligned with the point you clicked to type the text. If characters have not been shifted horizontally, applying no alignment produces the same result as applying left alignment. Artistic text can only be aligned horizontally.
To align text horizontally1. Select the text.2. Click Text Format text.3. Click the Paragraph tab.4. Choose an option from the Alignment list box.
To align paragraph text vertically1. Select the paragraph text.2. Click Text Format text.3. Click the Columns tab.4. Choose an alignment option from the Vertical justification list box.
Combining and linking paragraph text frames
You can combine paragraph text frames. You can also break paragraph text frames apart into subcomponentscolumns, paragraphs, bullets, lines, words, and characters. Every time you break apart a text frame, the subcomponents are placed in separate paragraph text frames.Linking paragraph text frames directs the flow of text from one text frame to another if the amount of text exceeds the size of the first text frame.Shrinking or enlarging a linked paragraph text frame or changing the size of the text automatically adjusts the amount of text in the next text frame. You can also create and link paragraph text frames before you begin typing text in the first text frame.You can link a paragraph text frame to an open or closed object. When you link a paragraph text frame to an open object (for example, a line), the text flows along the path of the line. Linking a text frame to a closed object (for example, a rectangle) inserts a paragraph text frame and directs the flow of text inside the object. If text exceeds the open or closed path, you can link it to another text frame or object. You can also link to paragraph text frames and objects across pages.You can remove links between paragraph text frames and between paragraph text frames and objects. When you have only two linked paragraph text frames and you remove the link, the text flows into the remaining paragraph text frame. Removing a link between paragraph text frames or objects with a series of links redirects the flow of text into the next paragraph text frame or object.After linking paragraph text frames, you can redirect the flow from one object or text frame to another. When you select the text frame or object, a blue arrow indicates the direction of the text flow. You can also hide or display the arrows that indicate the direction of the text flow.
Adding Text
CorelDRAW 10108
To combine or break apart paragraph text frames1. Select a text frame. If you are combining text frames, hold down SHIFT while making your selections.2. Click Arrange Combine or Break apart.
Note
The text in the first text frame you select appears first in the combined text frame.You can't combine text frames with envelopes or text fitted to a curve or linked frames.If you select a text frame with columns first, the combined text frame will have columns.
To link a paragraph text frame to an object or frame1. Marquee-select the text frame and the object or frame to which you want the text to flow.2. Click Text Link. If you want to link a paragraph text frame to an object or frame on a different page, click the Page tab on the Document navigator that contains the object or frame to which you want the text to flow.
Note
In order to link paragraph text frames successfully, the text frames cannot be automatically sized. For information, see "Adding and selecting text."You can also insert text inside an object with a closed path, then link to other objects and text frames. For more information on adding paragraph text in an object, see "Adding and selecting text."
Tip
You can also display or hide the link flow indicators by clicking Tools Options, clicking Text, Paragraph in the list of categories, and clicking the Show linking of text frames check box.
To remove links between frames or objects1. Marquee-select the text frames or object that you want to unlink.2. Click Text Unlink.
To change text flow to a different paragraph text frame or object1. Select the Text flow tab at the bottom of the text frame or object from which you want to change the link using the Pick tool.2. Select the new text frame or object into which you want the text flow to continue
Displaying nonprinting characters
You can specify which nonprinting characters, such as spaces and tabs, displays. For example, if you choose to display nonprinting characters, each space you add displays as a tiny black dot. You can display nonprinting characters only when you edit text or as part of your drawing when you add text.
Adding Text
CorelDRAW 10 107
To display nonprinting characters1. Select a text object.2. Click Text Edit Text.3. Click the Nonprinting characters button.
Tip
You can also display or hide nonprinting characters in the drawing window by clicking the Text tool, and clicking the Nonprinting characters button on the property bar.
To specify which nonprinting characters display1. Click Tools Options.2. In the list of categories, click Text.3. In the Non-printing character list, enable a check box.
Tip
By default, the nonprinting characters you specify will display in the Edit text dialog box. You can also display nonprinting characters in the drawing window by clicking the Text tool, and clicking the Nonprinting characters button on the property bar.
Assigning different languages to text
A drawing can consist of text that alternates between different languages. As long as you identify the language of each paragraph or word as you type, CorelDRAW will check the spelling of the drawing and automatically switch between the languages. For example, if you have a French language module installed on your computer, you can include a French word or paragraph in English text. In order for CorelDRAW to recognize the languages as being different, you have to identify them before or after you type the text. When you check the spelling of the text, CorelDRAW identifies each language, as opposed to indicating them as errors. You can use the writing tools the same way you would if the text was all in one language. For a list of jumps to all of the writing tools in CorelDRAW, see "Working with text.”
To assign a language1. Select the text.2. Click Text Writing tools Language.3. Choose a language.
Tip
You can also set the language you choose as the default language by enabling the Save as default writing tools language check box.
Specifying Quick Correct settings
Adding words to Quick Correct lets you replace abbreviations and words that you often mistype. The next time you type the misspelled word, Quick Correct corrects the word automatically
Adding Text
CorelDRAW 10110
Using Quick Correct, you can correct capitalization errors automatically and create shortcuts to frequently used words and phrases. For example, you can store the phrase "for your information" under the abbreviation "FYI" so that each time you type "FYI" followed by a space, it is replaced with the phrase. You can also undo a Quick Correct correction.
To add corrections to Quick Correct1. Click Tools Options.2. In the list of categories, double-click Text, and click Spelling.3. Enable the Add corrections to Quick Correct check box.
To customize Quick Correct1. Click Text Writing tools Quick Correct.2. In the Options dialog box, click Quick Correct in the list of categories.3. Enable any of the following check boxes: Capitalize first letter of sentences Change straight quotes to typographic quotes Correct two initial, consecutive capitals Capitalize names of days Replace text while typing, and type the text in the Replace box. Type the replacement text in the With box, and click Add.
Note
The Correct two initial, consecutive capitals option doesn't make a change when a capital letter is followed by a space or period, or if a word contains other capital letters.You can change the text case instead of enabling the Capitalize first letter of sentences check box to change selected text to sentence case. For more information, see "Changing the appearance of text."
To undo a Quick Correct correctionClick Edit Undo typing.
Using the Thesaurus
You can use the Thesaurus to refine your writing style. The Thesaurus lets you look up options such as Synonyms, Antonyms, and Related words. depending on the language and version of Thesaurus you're using. When you select more than one look-up option in the Options list box, the Thesaurus displays the look-up options selected and suggests words.The Thesaurus replaces or inserts words in a drawing. The Insert button becomes a Replace button when you want to replace a word in a drawing with a word the Thesaurus suggests. The Thesaurus does not specify word forms for verbs that appear the same in both the present and past tense and words used as multiple parts of speech. Thesaurus lets you choose the correct word form to insert or replace in a drawing.
You can customize the Thesaurus to automatically look up a word, help you with the spelling, or automatically close. You can also choose the language that you want to work in, and set
Adding Text
CorelDRAW 10 111
data files for that language for future use. Not all languages support all look up options. For information about which languages support which look up options, see Languages and supported look up options
Looking up words
You can look up a word in the Thesaurus and maintain a history list of the words looked up in the current drawing. When you look up a word, the Thesaurus provides a short definition and a list of the look up options selected. The Thesaurus also maintains a history list of the words that you have looked up. Each time you start the Thesaurus, it begins a new history list.
Replacing and inserting words in Thesaurus
The Thesaurus automatically replaces a word with a suggested word. When the insertion point is on a blank line or is surrounded by spaces, the Replace button changes to the Insert button to let you insert a word from the Thesaurus.
To look up a word1. Select the word you want to look up.2. Click Text Writing tools Thesaurus.3. Click Look up.
Tip
You can also look up a word directly from the Thesaurus dialog box by typing a word in the Look up list box.Use the left and right arrows to scroll through word lists.
To replace a word1. Select the word you want to replace.2. Click Text Writing tools Thesaurus.3. Click Look up.4. Choose a word from the list, and click Replace.
To insert a word1. Click Text Writing tools Thesaurus.2. Type a word in the Look up list box.3. Click in the drawing window where you want to insert the word.4. Choose a word from the list box and click Insert.
Customizing the Writing tools
You can customize how Spell check checks spelling in a drawing. You can choose how Spell check starts, searches for misspelled words, irregular capitalization, duplicate words, and words with numbers. You can also have Spell check spell check your text in a specific language and you can add words to a User word list or a Main word list.You can customize how Grammatik checks grammar in a drawing. You can customize Grammatik to start automatically, to prompt you before it automatically replaces words and to
Adding Text
CorelDRAW 10112
show spelling suggestions for misspelled words. You can also choose a different language, to check your grammar and add words to a User word list for future use.
You can customize the Thesaurus to look up words or close automatically. The Thesaurus can also be customized to suggest spelling suggestions for misspelled words and display multiple alternative word lists. You can also specify the language you want to look up a word in and to set a data file for that language.Not all Writing tools support all languages. For a list of writing tools and the languages they support, see Writing tools supported languages
Setting Spell check options
You can customize Spell check to start automatically and to prompt you for automatic replacement of words. The Prompt before automatic replacement option prompts you for words that have been added to a User word list. You can also have Spell check beep on misspelled words and show phonetic suggestions for words.
Setting Spell check text and style options
You can customize the way Spell check checks text. You can have Spell check check for irregular capitalization, words that contain both letters and numbers, and duplicate words. You can also have Spell check recheck text every time you check your spelling. By default, once you have spell checked a drawing, Spell check rechecks only new or changed text. You can recheck your entire drawing by clicking the Recheck All Text option.
Setting Grammatik options
You can customize Grammatik to start automatically, and to prompt you before it replaces words. The Prompt before automatic replacement option prompts you for words that have been added to a User word list. You can also customize Grammatik to show spelling suggestions during a proofreading session.
To look up a word and close the Thesaurus automatically
You can customize the Thesaurus to look up words and close automatically.
Setting display options
The Thesaurus can display spelling suggestions and multiple alternative word lists. Spelling assist displays spelling suggestions when you type a word the Thesaurus doesn't recognize. Multiple alternative words are useful when you work with large drawings.
Using User word lists
User word lists are lists of words and phrases that Spell check and Grammatik use to check for errors. During a checking session Spell check and Grammatik scan two types of word list files: User word lists and Main word lists. You can activate up to 10 lists of each type. Spell check and Grammatik first scan the active User Word lists. If it does not find a word or phrase,
Adding Text
CorelDRAW 10 113
Spell check and Grammatik then scan the Main Word lists you have activated. If you want to create or edit a Main word list, you can use the Spell utility. The utility can be used to merge main word lists together and to convert main word lists (formerly called dictionaries) from previous formats. Main word lists are available only in Spell check.
To set Spell check options1. Click Text Writing tools Spell check.2. Click Options and click one of the following: Auto start Beep on Misspelled Recheck all text Check words with numbers Check duplicate words Check irregular capitalization Prompt before auto replacement Show phonetic suggestions
Note
Any options you change will be effective the next time you open Spell check.
To set Grammatik options1. Click Text Writing tools Grammatik.2. Click Options and click one of the following: Auto start Prompt before auto replacement Suggest spelling replacements
Note
Any options you change will be effective the next time you open Grammatik.
To set Thesaurus options1. Click Tools Thesaurus.2. Click Options and click one of the following: Auto look up Auto close Spelling assist WordPerfect 8 Thesaurus
Note
Any options you change will be effective the next time you open the Thesaurus.
Adding Text
CorelDRAW 10114
Customizing look up options
The Thesaurus lets you customize look up options for synonyms, antonyms, related words, related information and cross references. You can also look up hypernyms, hyponyms, and phrases. However, not all languages support all look up options. For information about which languages support which look up options, see "Languages and supported look up options." The look up options that are available also depend on the version of Thesaurus you are using.
Looking up synonyms and antonyms
You can specify that the Thesaurus looks up synonyms and antonyms. Synonyms are words with the same meaning. For example, if you look up "happy," the Thesaurus lists words such as "glad," "carefree," and "lighthearted." Antonyms are words with an opposite meaning. For example, if you look up "ugly," Thesaurus lists words such as "attractive," "beautiful," and "pretty."
Looking up related words and related information
You can specify that the Thesaurus looks up related words and related information on a word. Related words are words that have a similar meaning to a word that you look up. For example, if you look up "old," the Thesaurus lists words such as "senior," "original," and "outdated." Related information lists all words associated to the genus of a word. For example, the related information for "tree" includes "plants," "leaves," "gardening," "pruning," and "roots."
Looking up hypernyms and hyponyms
You can specify that the Thesaurus looks up hypernyms and hyponyms. Hypernyms display the superordinate of a word. For example, the hypernym of "branch" is "tree." Hyponyms display the subordinate of a word. For example, the hyponym of "animal" is "cat."
Looking up cross references and phrases
You can specify that the Thesaurus looks up cross references and phrases. Cross references are useful when you want to look up information from other drawings. Phrases gives you different meanings of a word. For example, if you look up "time," the Thesaurus suggests lists phrases such as "it's about time", "time to go now", and "what time is it.”
To customize Thesaurus look up options1. Click Text Writing tools Thesaurus.2. Click Options and choose a look up option.3. Choose a word or type a word in the Replace with (or Insert) box.4. Click Look up.
Note
Not all languages support all look up options. For information about which languages support which look up options, click here.

Adding Text
CorelDRAW 10 115
Tip
You can also look up a word by clicking it in the list box in the Thesaurus window.
Using rule classes
Rule classes contain groups of grammar and style rules. Grammatik uses rule classes to detect common writing errors.You can enable or disable rule classes at any time during a Grammatik session. You can also choose which rule classes to apply during a Grammatik session, edit a rule class or save a new set of rules as a Checking style.
Enabling or disabling rule classes
You can enable or disable rule classes at any time during a Grammatik session. When you disable a rule, Grammatik ignores all of the errors associated with that rule during the current proofreading session.
Adding, deleting, or saving rule classes
You can customize rule classes to suit proofreading requirements. For example you can create rule classes for certain types of drawings such as technical reports. You can also add a rule, delete a rule, and save a set of rules as a new checking style.
To enable a rule1. Click Text Writing tools Grammatik.2. Click Options Turn on rules.3. Choose the rules you want to enable.
Note
The Turn on rules option is available only when you have disabled a rule during proofreading. Otherwise, it is grayed.
To disable a rule1. Click Text Writing tools Grammatik.2. When Grammatik alerts you to an error you do not want to flag, click Turn off.
To add or delete rule classes1. Click Text Writing tools Grammatik.2. Click Options Checking styles.3. In the Checking styles dialog box, choose a checking style and click Edit.4. In the Edit checking styles dialog box, enable or disable check boxes in the Rule classes list.
To save a set of rules as a new checking style1. Click Text Writing tools Grammatik.2. Click Options Save rules.3. Click Save as and type a name for the new checking style.

Adding Text
CorelDRAW 10116
Note
When you change a preset checking style, an asterisk (*) is added to the style name.The Save rules option is available only when a rule has been turned off.
Analyzing a drawing
Grammatik lets you analyze the grammatical structure of text in a drawing. You can analyze parts of a sentence and parts of speech. When Grammatik analyzes parts of a sentence it assigns a sentence part to each word or group of words. When Grammatik analyzes parts of speech, it assigns a part of speech to each word in a sentence.You can also analyze text by using three statistical reports: Basic counts, Flagged list, and Readability report. The Basic counts report analyzes the writing style in the drawing. The Flagged report displays the types of errors flagged in the drawing. The Readability report estimates the amount of skill required for a reader to understand the drawing.
Analyzing parts of a sentence
When Grammatik analyzes a sentence, it assigns a sentence part to each word or group of words. Grammatik uses Parse tree to let you view the parts of a sentence.
To view a parse tree1. Click Text Writing tools Grammatik.2. Click Options Analysis Parse tree.
Note
Only the current sentence will be shown in the Parse tree.
To view parts of speech1. Click Text Writing tools Grammatik.2. Click Options Analysis Parts of speech.
To view a Basic counts report1. Click Text Writing tools Grammatik.2. Click Options Analysis Basic counts.
To view a Flagged errors report1. Click Text Writing tools Grammatik.2. Click Options Analysis Flagged.
To view the readability of a drawing1. Click Text Writing tools Grammatik.2. Click Options Analysis Readability.3. Choose a comparison drawing from the Comparison document list box.
Adding Text
CorelDRAW 10 117
To add a comparison drawing1. Open the drawing you want to use as a comparison drawing.2. Click Text Writing tools Grammatik.3. Click Options Analysis Parts of speech.4. Click Add document.
Working with textorelDRAW lets you shape both paragraph and artistic text in unique ways. For example, Cyou can make paragraph text straddle an object or a sentence follow the outline of a
circle.
Wrapping paragraph text around objects and text
You can change the shape of text by wrapping a paragraph text frame around an object, artistic text, or another paragraph text frame. You can wrap text using contour or square wrapping styles. The contour wrapping styles follow the curve of the object. The square wrapping styles follow the bounding box of the object. You can also adjust the amount of space between paragraph text and the object or text, as well as remove any wrapping style you apply.
To wrap paragraph text around an object or text1. Select the object or text.2. Click Window Dockers Properties.3. In the Object properties Docker window, click the General tab and choose a wrapping style from the Wrap paragraph text list box. If you want to change the amount of space between wrapped text and the object or text, type a value in the Text wrap offset box.4. Click the Text tool, and either draw a new or drag an existing paragraph text frame over the object or text.5. Type text in the paragraph text frame.
Tip
You can wrap existing paragraph text around a selected object by applying a wrapping style to the object and dragging the paragraph text frame over the object.
To remove a wrapping style1. Select the object or wrapped text.2. Click Window Dockers Properties.3. In the Object properties Docker window, choose None from the Wrap paragraph text list box.
Fitting text to a path
You can position artistic text along the path of an open object (for example, a line) or a closed object (for example, a square).After you fit text to a path, you can adjust the text's position relative to that path. For example,
Adding Text
CorelDRAW 10118
you can place the text on the opposite side of the path, or you can adjust the distance between the text and the path.CorelDRAW treats text fitted to a path as one object; however, you can separate the text from the object if you no longer want it to be part of the path. When you separate text from a curved or closed path, the text retains the shape of the object to which it was fitted. Straightening reverts the text to its original appearance.
To fit text to a path1. Select the path using the Pick tool.2. Click Text Fit text to path.3. Type along the path.
Note
If the text is fitted to an closed path, the text is centered along the path. If the text is fitted to an open path, the text flows from the point of insertion.You can't fit text to the path of another text object.
Tip
You can also fit text to a path by clicking the Text tool, pointing over an object, clicking where you want the text to begin, and typing the text.
To adjust the position of text fitted to a path1. Select the text using the Pick tool.2. On the property bar, choose a setting from any of the following list boxes: Distance from path Vertical placement Horizontal offset Text orientation Text placement
Tip
You can also change the horizontal position of fitted text by selecting it with the Shape tool, and dragging the character nodes you want to reposition.Using the Pick tool, you can move text along the path by dragging the small red node that appears beside the text
To separate text from a path1. Select the fitted text using the Pick tool.2. Click Arrange Break apart.
To straighten text1. Select the fitted text using the Pick tool.2. Separate the text from the path.3. Click Text Straighten text.
Adding Text
CorelDRAW 10 119
Working with Asian and Middle Eastern textf you are running CorelDRAW on an Asian or Middle Eastern operating system, or if you Ihave an Input Method Editor (IME) installed on another operating system, you can take
advantage of the Asian and Middle Eastern text formatting capabilities available with CorelDRAW.
Formatting Asian text
You can choose a default font and text orientation (either horizontal or vertical) when typing text on an operating system that has Asian language support, and you can change either of these settings for new or existing text. When you type artistic or paragraph text, CorelDRAW uses a default artistic or paragraph text style. When you turn the Input Method Editor (IME) on, CorelDRAW uses the default Asian font and font attributes (such as size, style, outline, and fill).
You can also mix Latin and Asian text on one line and set the spacing between the two.Asian character input is only supported in CorelDRAW when using an Asian language (double byte) operating system or when an IME is installed on a non-Asian operating system such as Windows 98. CorelDRAW does not support the use of plug-ins for the English language version of Microsoft Windows. Asian text features are available for Asian language versions of Windows 98, Windows 2000, and Windows NT 4. You must use the Asian fonts appropriate to your operating system. For instance, Chinese Simplified fonts will not work on a Japanese operating system.
You can change the font properties of one or both languages in a block of Latin or Asian text.You can type and format Asian artistic and paragraph text the same way you do Latin text. You can also apply the same effects to Asian text that you can apply to Latin text, such as fitting text to a path or converting text to curves. For information about formatting text, see "Working with text.”
To choose a default font for Asian text1. Click a blank space in the drawing window.2. Click Text Format text.3. Click the Character tab.4. Choose Asian from the Script list box.5. Choose a font from the Font list box.
To specify spacing between Latin and Asian text1. Click Text Format text.2. Click the Paragraph tab.3. Type a value in the Language list box.
Note
The inter-language spacing is based on the percentage of a standard space. For example, two spaces is represented by typing a value of 200.
Adding Text
CorelDRAW 10120
To change the font properties of Latin and Asian text1. Select the text.2. Click Text Format text.3. Click the Character tab.4. Choose one of the following from the Script list box: Latin characters Asian characters5. Change any font properties.
Note
Text orientation applies to the entire text object. You cannot mix orientations in one text object.
Formatting Middle Eastern text
You can choose a default font for Middle Eastern text. When you use the Text tool in Middle Eastern mode, the default Middle Eastern font displays in the Font list. If you want to use another Middle Eastern font, you can choose the font you want from the list.When you use CorelDRAW on a Middle Eastern operating system, you can switch your input language to add both Latin and Middle Eastern text. CorelDRAW lets you format paragraph text either left-to-right (Latin) or right-to left (Middle Eastern).
When you type artistic or paragraph text, CorelDRAW uses a default artistic or paragraph text style. When you choose Middle Eastern as the input language, CorelDRAW uses the font size, style, outline, and fill attributes of the default style but uses the default Middle Eastern font. You can change the font properties of an artistic or paragraph text object. If the selected text object includes both Middle Eastern and Latin text, you can choose to apply the changes to the Middle Eastern text, Latin text, or both.
CorelDRAW lets you fully justify Arabic text. When you use full justification, the Kashidah character is inserted between letters to elongate the connection between words. CorelDRAW also substitutes ligatures for all the ligature combinations supported by the Middle Eastern version of Microsoft Windows. Also, CorelDRAW lets you type Middle Eastern diacritical marks.When you use the Text tool, the language you are using is controlled by your operating system. To alternate between Latin and Middle Eastern text modes, you must use either the language indicator on the system taskbar or the appropriate shortcut key combination. For more information about changing input languages on Microsoft Windows, consult your Windows manual.
To choose a default font for Middle Eastern text1Click a blank space in the drawing window.2Click Text Format text.3Click the Character tab.4Choose Middle Eastern from the Script list box.5Choose a font from the Font list box.
Adding Text
CorelDRAW 10 121
Tip
You must use the Middle Eastern fonts appropriate to your operating system. For instance, Arabic fonts will not work on a Hebrew operating system.
To change the font properties of Latin and Middle Eastern text1. Select the text.2. Click Text Format text.3. Click the Character tab.4. Choose one of the following from the Script list box: Latin characters Arabic/Hebrew characters5. Change any font properties.
To choose a default text direction for paragraph text1. Click Text Format text.2. Click the Paragraph tab.3. In the Text direction area, enable one of the following buttons: Latin-to format text left-to-right Arabic or Hebrew-to format text right-to-left
Note
To indicate the input language, the cursor displays a left arrow in Middle Eastern mode, and a right arrow in Latin mode.To switch between the two modesleft-to-right (Latin) and right-to-left (Middle Eastern)select the input language using the language indicator on the system taskbar.
Managing fontsorelDRAW lets you substitute missing fonts in drawings you open for those installed on Cyour computer. You can also embed fonts and format them.
Substituting unavailable fontsYou can use PANOSE to access a list of TrueType fonts that can be used as substitutes for fonts not installed on your computer. You can accept a substitute font, or you can choose another font to install. You can apply the substitution to the active drawing only or apply it to all drawings.You can also build a list of matches for uninstalled fonts and specify the Windows equivalents for Macintosh fonts in a drawing.
Adding Text
CorelDRAW 10122
To change a font substitution1. Open a drawing.2. In the PANOSE font matching results dialog box, enable one of the following options: Temporary-displays the font of your choice in place of the missing font, but only in the current session of the drawing. The missing font remains applied to the text. Permanent-substitutes the font of your choice for all text objects in the drawing that use the missing font3. Choose the missing font for which you want to find a match.4. Choose a new font from the Substituted font list box.
Note
In order for the PANOSE font matching results dialog box to display, the drawing that you open must contain fonts that aren't installed on your computer.
To build a list of matches for missing fonts1. Click Tools Options.2. In the list of categories, double-click Text, and click Fonts.3. Click PANOSE font matching.4. In the PANOSE font matching preferences dialog box, click Exceptions.5. In the PANOSE font matching exceptions dialog box, click Add.6. In the Add matching exceptions dialog box, type the name of the font you want to replace in the Missing font box.7. Choose a font that is installed on your computer from the Substituted font list.
Smoothing font edgesYou can change the on-screen appearance of text by smoothing the font edges. Anti-aliasing fills jagged pixels with intermediate color or shades of gray to increase clarity. The effect is easier to view on large fonts or by zooming in on the text.
To smooth edges of screen fonts1. Click Tools Options.2. In the list of categories, click Text.3. Enable the Smooth edges of screen fonts check box.
Note
If you are running in less than 256 colors, the Smooth edges of screen fontsoption is disabled.
Embedding fontsWhen you save a drawing, you can embed the fonts so that the drawing can be opened on computers on which any of the fonts in the drawing are not installed.
Adding Text
CorelDRAW 10 123
To embed fonts in a file1. Click File Save as.2. Enable the Embed fonts using TrueDoc check box.3. Click Save
Note
You can only embed TrueType fonts using TrueDoc.

Input / Output
CorelDRAW 10 125
Chapter
VIIIn this chapter
Printing
Commercial Printing
PrintingorelDRAW 10 provides extensive options for printing your work.C
Printing your work
In CorelDRAW, you can print multiple copies of the same drawing. You can specify what to print, as well as which parts of a drawing to print; for example, you can print selected vectors or bitmapped images.Before printing a drawing, you can specify printer properties, including paper size, graphics, and device options.
Publishing to PDF
Publishing to the Web
Importing and Exporting Files
Object Linking and Embedding
File FormatsTo set printer properties1. Click File Print.2. Click the General tab.3. Click Properties.4. In the Properties dialog box, set any properties.
To print your work1. Click File Print.2. Click the General tab.3. Choose a printer from the Name list box.4. Type a value in the Number of copies box. If you want the copies collated, enable the Collate check box.5. Enable one of the following options: Current document-prints the active drawing Current page-prints the active page Pages-prints the pages that you specify Documents-prints the drawings that you specify Selection-prints the objects that you specify
Note
You must select objects before printing a selection.
Input / Output
CorelDRAW 10126
Tip
You can preview your work by clicking on the Mini preview button on the title bar.
To print selected vectors, bitmapped images, or text1. Click File Print.2. Click the Misc tab.3. In the Proofing options area, enable any of the following check boxes: Print vectors Print bitmaps Print text
Tip
You can print graphics in full color, monochrome, or grayscale, by enabling the corresponding check boxes in the Bitmap downsampling area.You can print all text in black by enabling the Print all text in black check box.
To print selected layers1. Click Tools Object manager.2. Click the printer icon that corresponds to a layer.3. Click File Print.
Laying out print jobsYou can lay out a print job by specifying the size, position, and scale. Tiling a print job prints portions of each page on separate sheets of paper that you can assemble into one sheet. You would, for example, tile a print job that is larger than your printer paper.If the orientation of a print job differs from the orientation specified in the printer properties, a message prompts you to adjust the paper orientation of the printing device. You can disable this prompt, so that the printer adjusts paper orientation automatically.
To specify the size and position of a print job1. Click File Print.2. Click the Layout tab.3. Enable one of the following options: As in document-sizes and positions the printed image Fit to page-sizes and positions the print job to fit to a printed page Reposition images to-lets you reposition the print job by choosing a position from the list box
Note
Enabling the Reposition images to option lets you specify size, position, and scale in the corresponding boxes.
Input / Output
CorelDRAW 10 127
To tile a print job1. Click File Print.2. Click the Layout tab.3. Enable the Print tiled pages check box.4. Type values in the following boxes: Tile overlap-lets you specify the number of inches by which to overlap tiles % of page width-lets you specify the percentage of the page width the tiles will occupy # of tiles-lets you specify the number of horizontal and vertical tiles
Tip
Enable the Tiling marks check box to include tiling alignment marks.
To change the page orientation prompt1. Click Tools Options.2. In the list of categories, double-click Global, and click Printing.3. Choose Page orientation prompt from the Option list.4. Choose one of the following from the Setting list box: Off-always match orientation On-ask if orientations differ Off-don't change orientation
Applying print stylesA print style is a set of saved printing options. Each print style is a separate file. This lets you move a print style from one machine to another, back up a print style, and keep document specific styles in the same directory as the document file.You can select a print style or edit a print style and save your changes. You can also delete print styles.
To select a print style1. Click File Print.2. Choose one of the following from the Print Style list box: CorelDRAW defaults CorelR.A.V.E Corel PHOTO-PAINT defaults Browse
To save a print style1. Click File Print.2. Click the General tab.3. Set any printing options.4. Click Save as.5. Choose the drive and folder where you want to save the print style.6. Type a name for the style in the File name box.
CorelDRAW 10128
Input / Output
Tip
When you save a print style, a dialog box opens that includes a section called Settings to include. The settings in this section correspond to the printing options you have already selected. You can also specify which settings to include in a print style in this dialog box.You can also save a print style by clicking File Print preview mode.
To edit a print style1. Click File Print.2. Choose a print style from the Print style list box.3. Modify any of the printing options.4. Click Save as.5. Choose the drive and folder where the print style is stored.6. Click the filename.
Note
You should save the modified settings as a print style or apply the changes before canceling; otherwise, you'll lose all of the modified settings.
To delete a print style1. Click File Print preview.2. Select a print style.3. Click the minus sign (-).
Printing colors accuratelyTo print colors accurately, you can apply a generic International Color Consortium (ICC) color profile or you can choose a specific color profile for your printer.Using color management also helps you ensure accurate color reproduction. You can output color bitmapped images as CMYK, RGB, or grayscale. For more information on color management, see "Reproducing colors accurately.”
To apply the ICC color profile1. Click File Print.2. Click the Misc tab.3. Enable the Apply ICC profile check box.
Note
Applying the ICC color profile on the Misc page will override any settings that you specified for separations printer profiles in the Color management dialog box. For information about applying the ICC color profile in the Color management dialog box, see "To choose a color profile."
Input / Output
CorelDRAW 10 129
To output color bitmapped images1. Click File Print.2. Click the Misc tab.3. Choose one of the following from the Output color bitmaps as list box,: RGB Grayscale CMYK
Note
The CMYK option is available only for Postscript devices.
Using Print merge wizardYou can use Print merge wizard to combine text with a drawing; for example, you can personalize an invitation by printing a different recipient's name on each invitation.The following steps provide a general overview of the process of merging a document.
1. Create or open an existing data file-You can open a new file or an existing data file. CorelDRAW supports the following files: .txt, .csv, .rtf, CorelCENTRAL, Windows Address books and ODBC data sources.2. Create data fields-You can specify data field names.3. Input data in the data fields-Once you have created a list of data fields, you can input data under the data field names.4. Save the data file-You can save information in the data fields in a text file.5. Insert the fields in the drawing-You can specify fields and their position in a drawing clicking on the Insert selected print merge field icon, selecting a field name in the drop down list, and clicking anywhere on the drawing.6. Merge the data file and the drawing-You can preview the merged document in the Print Preview window. Data fields are merged with a drawing when you print the document.
To create merge fields1. Click File Print merge Create merge fields.2. Follow the instructions in the Print merge wizard.
Note
If you select a larger ODBC data files as your data source, your computer, depending upon its resources, may not be able to handle the file.
Tip
You can also create merge fields by clicking the Create/Load print merge fields button on the Print merge property bar.
To edit merge fields1. Click File Print merge Edit merge fields.2. Follow the instructions in the Print merge wizard.
CorelDRAW 10130
Input / Output
Note
If you select a larger ODBC data files as your data source, your computer, depending upon its resources, may not be able to handle the file.
Tip
You can also edit merge fields by clicking the Edit print merge fields button on the Print merge property bar.
To perform a merge1. Click File Print merge Perform merge.2. Specify any printer settings.3. Click Print. If you want to ensure that all fields and pages print, enable the Current document option.
Commercial printingith CorelDRAW, you can prepare a print job for commercial printing.W
Preparing a print job for a service bureauYou can use the Prepare for service bureau wizard to guide you through the process of sending a file to a service bureau. The wizard simplifies processes such as creating PostScript and PDF files; gathering different pieces required for outputting an image; and copying the original image, embedded image files, and fonts to a user-defined location.You can print a drawing to a file, which lets the service bureau send the file directly to an output device. If a PostScript file is to be trapped or imposed by a service bureau, you can ensure that the file conforms to the Document Structuring Convention (DSC). If you are unsure about which settings to choose, consult the service bureau.You can include a job information sheet with all the prepress settings that you have specified.For more information about commercial printing, see Reference: commercial printing.
To use the Prepare for Service Bureau wizard1. Click File Prepare for service bureau.2. Enable one of the following buttons: Gather all files associated with this document Choose a profile provided by your service bureau
Note
The PDF file settings created by the service bureau are identical to the PDF for prepress style settings. For information about the PDF for prepress style settings, see "Saving documents as PDF files."To create a service bureau profile, you need the Service Bureau Profiler utility, which you can custom install with Corel DRAW 10.
Input / Output
CorelDRAW 10 131
To print to a file1. Click File Print.2. Click the General tab.3. Enable the Print to file check box.4. Click the flyout arrow, and click one of the following commands: For Mac-saves the drawing to be readable on a Macintosh computer Single file-prints pages to a single file Pages to separate files-prints pages to separate files Plates to separate files-prints plates to separate files5. Click Print.6. Choose one of the following from the Save as type list box: Print file-saves the file as a .prn file PostScript file-saves the file as a .ps file7. Choose the drive and folder where you want to save the file.8. Type a filename in the File name box.
Note
If you prefer not to prepare PostScript files, service bureaus equipped with the application in which you created your work can take the original files (for example, CorelDRAW files) and apply the required prepress settings.
To conform to DSC1. Click File Print.2. Click the PostScript tab.3. Enable the Conform to DSC check box.
To include a job information sheet with the print job1. Click File Print.2. Click the Misc tab.3. Enable the Print job information sheet check box.4. Click Info settings.5. In the Information area, disable any of the options.6. In the Destination area, enable one of the following : send to text file send to printer
Maintaining OPI linksOpen Prepress Interface (OPI) lets you use low-resolution images as placeholders for the high-resolution images that appear in your final work. When a service bureau receives your file, the OPI server substitutes the low-resolution images for the high-resolution images.
To maintain OPI links1. Click File Print.2. Click the PostScript tab.3. Enable the Maintain OPI links check box.
CorelDRAW 10132
Input / Output
Note
The Maintain OPI links option is available for PostScript devices only.You can reduce your work time by using OPI and print management server solutions, such as Imation Color Central. Low-resolution samples are automatically created from the high-resolution originals and are placed in CorelDRAW. These files contain their own OPI comments, which the Imation Color Central server recognizes when it receives the job and then substitutes the low-resolution version of the file for the high-resolution version.When you import the low-resolution images into your document, they must be flagged as OPI images.
Printing color separationsWhen you send color work to a service bureau or printing shop, either you or the service bureau must create color separations. Color separations are necessary because a typical printing press applies only one color of ink at a time to a sheet of paper. You can specify the color separations to print, including the order in which they print.Printing presses produce color using either process color or spot color, or both. You can convert the spot colors to process colors at printing time. For more information on spot and process colors, see "Choosing colors."
Corel also supports Pantone Hexachrome, a type of printing process that increases the range of printable colors. To use Pantone Hexachrome color effectively, you can use the Pantone Hexachrome process color. Talk to the service bureau about whether you should use Pantone Hexachrome color.When setting halftone screens to print color separations, we recommend that you use default settings; otherwise, screens can be improperly set and result in undesirable moiré patterns and poor color reproduction. However, if you are using an imagesetter, the screen technology should be set to match the type of imagesetter the service bureau uses. Before customizing a halftone screen, consult the service bureau to determine the correct setting.
To print color separations1. Click File Print.2. Click the Separations tab.3. Enable the Print separations check box. If you want to print specific color separations, enable the corresponding check box in the list of color separations.
Tip
Although not recommended, you can print separations in color by enabling the Print separations in color check box in the Options area.You can change the order in which color separations print, by enabling the Use advanced settings check box, clicking Advanced, and choosing an order from the Order list box.
Input / Output
CorelDRAW 10 133
To use PANTONE Hexachrome process color1. Click File Print.2. Click the Separations tab.3. Enable the Print separations check box.4. Enable the Hexachrome plates check box in the Options area.
To convert spot colors to process colors1. Click File Print.2. Click the Separations tab.3. Enable the Print separations check box.4. Enable the Convert spot colors to process check box in the Options area.
Note
Changing the spot colors to process colors when you print does not affect the document, only the way it is printed.
To customize a halftone screen1. Click File Print.2. Click the Separations tab.3. Enable the Print separations check box.4. Enable the Use advanced settings check box.5. Click Advanced.6. Change any of the following settings: Screening technology Halftone type Resolution
Note
You can set the screen frequency, screen angle, and overprint options for spot colors as well as process colors. For example, if you have a fountain fill made up of two spot colors, you can set one to print at 45 degrees and the other at 90 degrees.
Working with color trappingTrapping intentionally overlaps colors so that minor problems with the alignment of printing plates are not noticed. To overlap colors and create color trapping, one color must overprint the other. Overprinting works best when the top color is much darker than the underlying color; otherwise, an undesirable third color may result (for example, cyan over yellow may result in a green object).You can choose to preserve overprint settings if you want to trap objects in a document.You can set specific objects to overprint; you can overprint each object's fill, outline, or both. You can also overprint specific color separations, specify in which order they will print, and specify whether you want to overprint graphics, text, or both.
CorelDRAW 10134
Input / Output
The two methods for color trapping automatically are always overprinting black and auto-spreading. Always overprinting black creates a color trap by causing any object that contains 95% black or more to overprint any underlying objects. This option is useful for artwork containing a lot of black text, but it should be used with caution on artwork with a high graphics content. You can adjust the threshold, if the service bureau recommends a black threshold value other than 95%.
Auto-spreading creates color trapping by assigning an outline to an object that is the same color as the object's fill and having it overprint underlying objects. Auto-spreading is created for all objects in the file that meet three conditions: they do not already have an outline, are filled with a uniform fill, and have not already been designated to overprint.For advanced trapping options, see "Specifying In-RIP trapping settings.”
To preserve document overprints1. Click File Print.2. Click the Separations tab.3. Enable the Print separations check box.4. Enable the Preserve document overprints check box in the Trapping area.
To trap by overprinting selected objects1. Right-click an object.2. Click any of the following options: Overprint fill Overprint outline
To overprint selected color separations1. Click File Print.2. Click the Separations tab.3. Enable the Print separations check box.4. Enable the Use advanced settings check box.5. Click Advanced.6. In the Advanced separations settings dialog box, choose a color separation from the Screening technology list box.7. In the Overprint column, click one or both of the following icons: Overprint graphics Overprint text
Note
The icons appear darker when the separation is set to overprint.
Tip
You can change the order in which color separations print by selecting a color separation and choosing an order from the Order list box.
Input / Output
CorelDRAW 10 135
To trap by always overprinting black1. Click File Print.2. Click the Separations tab.3. Enable the Print separations check box.4. Enable the Always overprint black check box in the Trapping area.
To set the overprint black threshold1. Click Tools Options.2. In the list of categories, double-click Global, and click Printing.3. Choose Overprint black threshold (PS) from the Option list.4. Choose a number from the Setting list box. The number you choose represents the percentage of black above which black objects overprint.
To trap by auto-spreading1. Click File Print.2. Click the Separations tab.3. Enable the Print separations check box.4. Enable the Auto-spreading check box.5. Type a value in the Maximum box.6. Enable the Fixed width check box. The Maximum box changes to the Width box when you enable the Fixed width check box.7. Type a value in the Text above box.
Note
The value that you type in the Text above box represents the minimum size to which auto-spreading is applied. If you set this value too low, small text may be rendered illegible when auto-spreading is applied.The amount of spread assigned to an object depends on the maximum trap value specified in the Maximum box and the object's color. The lighter the color, the greater the percentage of the maximum trap value. The darker the color, the smaller the percentage of the maximum trap value.
Specifying In-RIP trapping settingsIn-RIP trapping allows you to specify advanced trapping settings. Before selecting In-RIP trapping, ensure that your PostScript 3 printer has In-RIP options.You can select a trap widththe amount that one color spreads into another. You can also specify image trap placement, which determines where the trap occurs. You can, for example, specify whether the trap is a choke or a spread, depending upon the neutral densities of adjacent colors. Neutral density indicates the lightness or darkness of a color and helps determine how adjacent colors spread into one another.
CorelDRAW 10136
Input / Output
To select a trap width1. Click File Print.2. Click the Separations tab.3. Enable the In-RIP trapping check box.4. Click Settings.5. Type a value in the Trap width box. If you are trapping to black, type a value in the Black trap width box.
Note
To select In-RIP trapping options, you must have selected PostScript 3 from the Compatibility list box under the PostScript tab of the Print dialog box.
To specify image trap placement1. Click File Print.2. Click the Separations tab.3. Enable the In-RIP trapping check box.4. Click Settings.5. From the Image trap placement list box, choose one of the following placements: Neutral density-used to determine the lighter object and thus, the direction and placement of the trap Choke-used to trap a dark foreground object to a light background image Spread-used to trap a light foreground object to a dark background image Centerline-used when adjacent images and objects have similar neutral densities or when image density changes along an object's edge If you want to trap an object to an image, enable the Trap objects to images option.
Note
To select In-RIP trapping options, you must have selected PostScript 3 from the Compatibility list box under the PostScript tab of the Print dialog box.
To select a trap color reduction1. Click File Print.2. Click the Separations tab.3. Enable the In-RIP trapping check box.4. Click Settings.5. Type a value in the Trap color reduction box.
Note
A reduction value of 100% indicates no reduction, while a lower value reduces the neutral density.To select In-RIP trapping options, you must have selected PostScript 3 from the Compatibility list box under the PostScript tab in the Print dialog box.
Input / Output
CorelDRAW 10 137
Printing to filmYou can set up a print job to produce negative images. An imagesetter produces images on film that may need to be produced as negatives depending on which printing device you are using. Consult the service bureau or printing shop to determine whether you can produce images on film.You can specify to print with the emulsion down. Printing with the emulsion down produces a backward image on desktop printers.
To print a negative1. Click File Print.2. Click the Prepress tab.3. Enable the Invert check box.
Note
Do not choose negative film if you are printing to a desktop printer.
To specify film with the emulsion down1. Click File Print.2. Click the Prepress tab.3. Enable the Mirror check box.
Publishing to PDFDF is a file format designed to preserve fonts, images, graphics, and formatting of an Poriginal application file.
Saving documents as PDF filesYou can save a document as a PDF file. A PDF file can be viewed, shared, and printed on any platform provided that users have Adobe Acrobat or Acrobat Reader installed on their computers. A PDF file can also be placed on an Intranet or the World Wide Web. You can also export a selection or all of a document to a PDF file.When you save a document as a PDF file, you can choose from five preset PDF styles, which apply settings that are specific to a particular PDF style. For example, with the PDF for the Web style, the resolution of the images in the PDF file will be optimized for the World Wide Web. You can also create a PDF style or edit a preset style.
To create a PDF style1. Click File Publish to PDF.2. Click Settings.3. In the Publish to PDF dialog box, specify any settings.4. Click the General tab.5. Click the plus sign (+).6. Type a name for the style in the Save PDF style as list box.
CorelDRAW 10138
Input / Output
To edit a PDF style1. Click File Publish to PDF.2. Click Settings.3. In the Publish to PDF dialog box, make any changes to settings.4. Click the General tab.5. Click the plus sign.6. Choose a style from the Save PDF style as list box.
Note
If you save changes you make to preset style settings, the original settings will be overwritten. To avoid this, save any changes to preset style settings with a new name.
Including hyperlinks, bookmarks, and thumbnails in PDF filesYou can include hyperlinks, bookmarks, and thumbnails in a PDF file. Hyperlinks are useful for adding jumps to other web pages or to Internet URLs. Bookmarks allow you to link to specific areas in a PDF file. You can specify whether bookmarks or thumbnails are displayed when the PDF file is first opened in Adobe Acrobat or Acrobat Reader.For information about assigning hyperlinks and bookmarks, see "Working with bookmarks and hyperlinks.”
To include hyperlinks, bookmarks, and thumbnails in a PDF file1. Choose File Publish to PDF.2. Click Settings.3. Click the Document tab.4. Enable any of the following check boxes: Include hyperlinks Generate bookmarks Generate thumbnails If you want to display bookmarks or thumbnails on startup, enable the Bookmarks or Thumbnails button in the On start, display area.
Reducing PDF file sizeYou can compress bitmapped images, text, and line art to reduce the size of a PDF file. Bitmap compression is available for JPEG, LZW, or ZIP files. Bitmaps using JPEG compression have a quality scale ranging from 2 (high) to 255 (low). The higher the image quality, the larger the file size.Downsampling color, grayscale, or monochrome bitmapped images also reduces file size.
To compress text and line art in a PDF file1. Click File Publish to PDF.2. Click Settings.3. Click the Objects tab.4. Enable the Compress text and line art check box.
CorelDRAW 10 139
Input / Output
To compress bitmapped images in a PDF file1. Click File Publish to PDF.2. Click Settings.3. Click the Objects tab.4. Choose one of the following from the Compression type list box: None LZW JPEG ZIP
Tip
If you choose JPEG compression, you can specify the compression quality by adjusting the Quality factor slider.
To downsample bitmapped images in a PDF file1. Click File Publish to PDF.2. Click Settings.3. Click the Objects tab.4. Enable any of the following check boxes, and type a value in the corresponding box: Color Grayscale Monochrome
Note
Downsampling color, grayscale, or monochrome bitmapped images is effective only when the resolution of the bitmapped image is higher than the resolution specified in the Bitmap downsampling area.
Working with fonts in PDF filesYou can embed fonts in a PDF file, including base 14 fonts, which increases the file size but makes a PDF file more portable since the fonts do not have to reside on other systems. When you embed base 14 fonts, CorelDRAW adds the fonts to your system, thus eliminating font variances on different systems. The base 14 PostScript fonts are resident on all PostScript devices.You can also convert TrueType fonts to Type 1 fonts, which can increase file size if there are many fonts in a file. When you convert fonts, you can reduce file size by subsetting Type 1 fonts if you use only a smaller number of characters (for example English characters A to E). You can also include a percentage of fonts used. For example, you can create a subset of 50 percent of fonts. If the number of characters used in the document exceeds 50 percent, the whole set of characters is embedded. If the number of characters used in the document is less than 50 percent, only the characters used are embedded.
CorelDRAW 10140
Input / Output
To embed fonts in a PDF file1. Click File Publish to PDF.2. Click Settings.3. Click the Objects tab.4. Enable the Embed fonts in document check box. If you want to install the basic fonts to your computer, enable the Embed base 14 fonts check box.
Note
Enabling the Embed base 14 fonts check box increases file size, and, therefore, it is not recommended for publishing to the World Wide Web.
To convert TrueType fonts to Type 1 fonts1. Click File Publish to PDF.2. Click Settings.3. Click the Objects tab.4. Enable the Convert TrueType to Type 1 check box. If you want to reduce file size, you can create a subset of Type 1 fonts by enabling the Subset Type 1 Fonts and typing a percentage of fonts used in the Under % of charset box.
Note
If you create a subset of Type 1 fonts, you should not edit or correct the PDF file using Adobe Acrobat, since the characters you add when editing may not be present in the file.
To export text as curves1. Click File Publish to PDF.2. Click Settings.3. Click the Objects tab.4. Enable the Export all text as curves check box.
Exporting PDF files in an encoding formatASCII and binary are encoding formats. When you publish a file to PDF, you can choose between exporting ASCII or binary files. ASCII creates files that are fully portable to all platforms. Binary creates smaller files that are less portable, since some platforms cannot handle the file format.
To export a PDF file in an encoding format1. Click File Publish to PDF.2. Click Settings.3. Click the Objects tab.4. Enable one of the following options: ASCII Binary
CorelDRAW 10 141
Input / Output
Setting the number of fountain steps in PDF filesYou can increase or decrease the number of steps for fountain fills. A low number of steps prints faster, but the transition between shades may be rather coarse. The number of fountain steps can be set between 1 to 256
To set the number of steps for fountain fills in a PDF file1. Choose File Publish to PDF.2. Click Settings.3. Click the Advanced tab.4. Type a value in the Fountain steps box.
Embedding files in a PDF fileYou can embed any type of file in a PDF file. For example, you can embed the CorelDRAW file from which the PDF file was generated.You can choose how Encapsulated PostScript (EPS) files are treated in a PDF document. EPS files are PostScript files that are embedded in a document. They contain two parts: the PostScript portion and the preview portion. The PostScript portion includes high-resolution images. It is best suited to publishing to prepress. The Preview portion includes low-resolution images. Because of its small file size, it is best suited for publishing to the World Wide Web.
To embed a file in a PDF file1. Click File Publish to PDF.2. Click Settings.3. Click the Advanced tab.4. Enable the Embedded file check box.5. Click Browse.6. Choose the drive and folder where the embedded file is stored.7. Double-click the filename.
To choose an EPS file format1. Choose File Publish to PDF.2. Click Settings.3. Click the Advanced tab.4. Choose one of the following from the EPS files list box: PostScript Preview
Note
You cannot publish PostScript and preview EPS portions of a file at the same time.
CorelDRAW 10142
Input / Output
Outputting objects in PDF filesYou can output objects in a PDF file as RGB, CMYK, or Grayscale. If you choose to output objects as CMYK, you can apply a generic ICC profile to define the CMYK color space of your printer. For more information on ICC color profiles, see "Reproducing colors accurately.”
To output objects in a PDF file as RGB, CMYK, or grayscale1. Click File Publish to PDF.2. Click Settings.3. Click the Advanced tab.4. Choose one of the following from the Output all objects as list box:. Native RGB CMYK Grayscale If you want to use ICC profiles to define the CMYK color space of your printer, enable the Apply ICC profile and choose a printer profile from the list.
Note
The ICC color profile option is only available for CMYK.
Preparing PDF files for a service bureauA job ticket is useful when you want to send a PDF file to a service bureau, where the file is converted to film or plates. You can include specifications for publishing PDF files, including information about the customer, delivery, and the finishing of a job.Generating a job ticket lets you embed a job ticket file or save an external file. When you embed a job ticket file, you create a PDF file that contains a Portable Job Ticket object. When you create an external file, you create two separate files; a PDF file and a .jtf file, which can be opened by a Job Ticket Editor. Consult the service bureau or print shop before sending a .jtf file.
Open Prepress Interface (OPI) lets you use low-resolution images as placeholders for the high-resolution images that appear in your final work. When a service bureau receives your file, the OPI server substitutes the low-resolution images for the high-resolution images.
To maintain OPI links in a PDF file1. Choose File Publish to PDF.2. Click Settings.3. Click the Advanced tab.4. Enable the Maintain OPI links check box.
Note
Don't use OPI links if you are not sure whether your PDF file is destined for an OPI server.
CorelDRAW 10 143
Input / Output
To set up a job ticket for a PDF file1. Click File Publish to PDF.2. Click Settings.3. Click the Prepress tab.3. Enable the Include job ticket check box.4. Enable one of the following options: External file-lets you create two separate files, a PDF file and a .jtf file Embedded-lets you create a PDF file that contains a portable job ticket object5. Click Settings.6. In the Job ticket settings dialog box, type job specifications on any of the following pages: Customer info Delivery Finishing
Tip
If you enable the External option, you can save the .jtf file by clicking Browse and typing a filename in the File name box.
To include printer's marks in a PDF file1. Click File Publish to PDF.2. Click Settings.3. Click the Prepress tab.4. Enable any of the following check boxes: Crop marks File information Registration marks Densitometer scales If you want to include a bleed limit, enable the Include bleed check box, and type a bleed limit in the corresponding box.
Note
Usually, a bleed limit of .125 to .25 inches is sufficient. Any object extending beyond that uses memory needlessly and may cause problems when you print multiple pages with bleeds on a single sheet of paper.
Viewing Preflight summaries for PDF filesBefore printing your work, you can use Preflight to find potential problems. Preflight checks and displays a summary of errors, possible problems, and suggestions for resolving issues. By default, Preflight checks for many PDF issues, but you can disable the issues that you do not want Preflight to check.
CorelDRAW 10142
Input / Output
CorelDRAW 10144
Input / Output
To view the Preflight summary for a PDF file1. Click File Publish to PDF.2. Click Settings.3. Click the Issues tab. If there are issues that you don't want Preflight to check, click the Settings button, double-click Publishing to PDF, and disable the check boxes that correspond to the issues that you want Preflight to overlook.
Tip
You can save Preflight settings by clicking the plus sign (+) and typing a name in the Save as box.
Optimizing PDF filesYou can optimize PDF files for different versions of Adobe Acrobat or Acrobat Reader. You can select a compatibility depending upon what kind of viewer the recipients have. In CorelDRAW, you can select one of three compatibilities: Acrobat 3.0, Acrobat 4.0 or PDF/X-1. Different compatibilities have different options; for example, the bleed option is only available for Acrobat 4.0 and PDF/X-1.To optimize viewing of a PDF document on the Web, you can linearize a PDF file. Linearizing a file speeds up processing time by loading one page at a time.
To select a compatibility1. Click File Publish to PDF.2. Click Settings.3. Click the General tab.4. From the Compatibility list box, choose one of the following: Acrobat 3.0 Acrobat 4.0 PDF/X-1
To linearize a PDF file1. Click File Publish to PDF.2. Click Settings.3. Click the Advanced tab.4. Enable the Optimize PDF check box.
Publishing to PDFou can ensure that your CorelDRAW files and objects publish to HTML successfully by Ysetting document elements to be Web-compatible, selecting the settings you want, and
checking pre-flight issues. You can then use the HTML and images in HTML authoring software for creating a Web site or page.
CorelDRAW 10 145
Input / Output
Preparing files and objects for Web publishingYou can prepare your files and objects for the Web by setting preferences and verifying the objects before you export them.CorelDRAW provides options for publishing your document to the World Wide Web. You can determine layout options, set link colors, and select HTML text preferences.You can check the download times of your Web page objects through a browser preview. A statistics frame displays the downloading times of individual objects and entire pages for modems of different speeds.
To change HTML layout export preferences1. Click Tools Options.2. Type values in the following boxes: Position tolerance lets you specify the number of pixels text can be automatically nudged to avoid introducing rows or columns that are 1 or 2 pixels in size Image white space lets you specify the number of pixels that can occur in an empty cell before it's merged with an adjacent cell. This lets you avoid splitting a single graphic that spans adjacent cells. Cells, or tables, are used to position Internet objects in your Web document when you choose the HTML Tables layout method Position white space lets you specify the amount of white space allowed in an image
To view Web page performance1. Click Files Publish to the Web HTML.2. Click the General tab.3. Click the Browse preview button.
Publishing to HTMLCorelDRAW provides several options for publishing your document or selection for use on the World Wide Web. You can choose several options such as image format, HTML layout, export range, and file transfer protocol (FTP) site parameters for uploading your files.You can publish your document as a single image, from which CorelDRAW creates an image map. An image map is a hypergraphic whose hotspots link to different URLs when you view the HTML document with a browser. Note that image maps will cause slow downloads for those with a slow Internet connection.
You can export your graphics to preset JPEG, GIF, or PNG formats.
To set Web preflight options1. Click File Publish to the Web HTML.2. Click the Issues tab.3. Choose Web output in the Preflight for drop-down list.4. Click Settings.5. In the Issues to check for list, expand the Web publishing tree.6. Deselect the issues you do not want to check.
CorelDRAW 10142
Input / Output
CorelDRAW 10146
Input / Output
To publish to the Web1. Click File Publish to the Web HTML.2. Set the following options in the Publish to the Web dialog. General-contains options for HTML layout, folder for HTML file and images, and file transfer protocol (FTP) site and export range. You can also select, add, and move dialog presets. Details-contains details of HTML files produced, including page name and file name. Images-lists all images for the current HTML export. You can set individual objects to JPEG, GIF, and PNG. formats. Click Options to select presets for each image type. Advanced-provides options for generating Javascript and Cascading Style Sheets. Summary-shows statistics for files according to various download speeds Issues-a list of potential issues displays, including explanations, suggestions, and tips
Note
CorelDRAW assigns the extension .HTM to documents you publish in the HTML format. By default, .HTM files share the same name as the CorelDRAW .CDR source file and are saved in the last folder you used to store exported Web documents.
Tip
You can set all images to a single format-JPEG, GIF, or PNG-by clicking Tools Options. In the list of categories, double-click Document, Publish to the Web, and click Image. Enable the one of the image format options.
Importing and exporting filesorel applications provide filters that convert files from one format to another when you Cimport or export files.
Importing filesCorel applications let you import files created in other applications. For example, you can import a JPEG, GIF, or text file. You can import a file and place it in the active application window as an object. The imported file becomes part of the active file. You can also import a file by opening it in a new application window. While importing a graphic, you can resample it to change the number of pixels, eliminate unusable detail, and reduce the file size. You can also crop a graphic to select only the exact area and size of the image you want to import.
To import a file into an active drawing1. Click File Import.2. Choose the drive and folder where the file is stored.3. Choose a file format from the Files of type list box.4. Click the filename.5. Enable any of the following check boxes:
CorelDRAW 10 147
Input / Output
Link bitmap externally-lets you link a bitmapped image externally instead of saving it in a file Combine multi-layer bitmap-lets you import bitmapped images that contain multiple layers Extract embedded ICC profile-lets you save the embedded International Color Consortium (ICC) profile to the color directory where the application was installed Check for watermark-lets you check for an encoded Digimarc watermark when you import files Do not show filter dialog-lets you use the filter's default settings without opening its dialog box Maintain layers and pages-lets you maintain layers and pages when importing files6. Click Import.7. Position the import placement start cursor where you choose, and click on the drawing page.
Tip
You can also import a file by opening it in a new application window. For more information about opening a file in a new application window, see "To open a drawing".You can change the sorting order of the file formats in the Files of type list box by choosing a sorting method from the Sort type list box.
To resample a graphic while importing1. Click File Import.2. Choose the drive and folder where the file is stored.3. Choose a file format from the Files of type list box.4. Click the filename.5. Enable any of the following check boxes: Link bitmap externally-lets you link a bitmapped image externally instead of saving it in a file Combine multi-layer bitmap-lets you import bitmapped images that contain multiple layers Extract embedded ICC profile-lets you save the embedded International Color Consortium (ICC) profile to the color directory where the application was installed Check for watermark-lets you check for an encoded Digimarc watermark when you import files Do not show filter dialog-lets you use the filter's default settings without opening its dialog box Maintain layers and pages-lets you maintain layers and pages when importing files6. Choose Resample from the list box beside the Files of type list box.7. Click Import.8. In the Resample Image dialog box, type values in any of the following boxes: Width-specifies the width of the graphic Height-specifies the height of the graphic Percentage-specifies the percentage by which you want to resample the graphic9. Type values in the following boxes in the Resolution section. Horizontal-lets you specify the horizontal resolution of the graphic in pixels or dots per inch (dpi)
CorelDRAW 10142
Input / Output
CorelDRAW 10148
Input / Output
Note
If a dialog box for the import format opens, specify the options you want. For detailed information about file formats, see "File formats" in the online Help.You cannot increase the resolution of a file when importing.
Tip
You can change the units of measurement by choosing a unit type from the Units list box.
To crop a graphic while importing1. Click File Import.2. Choose the drive and folder where the file is stored.3. Choose a file format from the Files of type list box.4. Click the filename.5. Enable any of the following check boxes: Link bitmap externally-lets you link a bitmapped image externally instead of saving it in a file Combine multi-layer bitmap-lets you import bitmapped images that contain multiple layers Extract embedded ICC profile-lets you save the embedded International Color Consortium (ICC) profile to the color directory where the application was installed Check for watermark-lets you check for an encoded Digimarc watermark when you import files Do not show filter dialog-lets you use the filter's default settings without opening its dialog box Maintain layers and pages-lets you maintain layers and pages when importing files6. Choose Crop from the list box that appears beside the Files of type list box.7. Click Import.8. Type values in any of the following boxes: Top-specifies the area to remove from the top of the graphic Left-specifies the area to remove from the left edge of the graphic Width-specifies the width of the graphic you want to keep Height-specifies the height of the graphic you want to keep
Note
When you import 16-color bitmaps, they are automatically converted to 256-color.
Tip
You can also resize a graphic by dragging the selection box in the preview window.You can change the units of measurement by choosing a unit type from the Units list box.
CorelDRAW 10 149
Input / Output
Exporting filesCorel applications let you export and save files to a variety of file formats that can be used in other applications. For example, you can export a file to the JPEG or GIF format.You can export a file to a selected file format. You can also export a file by saving the open file under a different name or to a different file format while leaving the open file in its existing format.
To export a file1. Click File Export.2. Choose a file format from the Files of type list box.3. Type a filename in the File name box. The file extension for the file format you choose is appended to the filename automatically.4. Enable any of the following check boxes: Selected only-saves only the objects selected in the active drawing Web_safe_filenames-replaces the white space in a filename with an underscore. Special characters are replaced by characters suitable for Web-based filenames. Do not show filter dialog-suppresses dialog boxes that provide other options when exporting5. Click Export.
Note
If a dialog box for the export format opens, specify the options you want. For detailed information about file formats, see "File formats" in the online Help.
Tip
To compress an image while exporting, choose a compression type from the Compression Type list box.
To save a file to a different format1. Click File Save as.2. Choose a file format from the Files of type list box.3. Type a filename in the File name box. The file extension for the file format you choose is appended to the filename automatically.4. Enable any of the following check boxes: Selected only-saves only the objects selected in the active drawing Web_safe_filenames-replaces the white space in a filename with an underscore. Special characters are replaced by characters suitable for Web-based filenames. Embed fonts using TrueDoc-ensures that the fonts in a drawing can be viewed on a computer on which those fonts are not installed Save with embedded VBA project-saves a Visual Basic for Applications (VBA) project in your file5. Click Save
CorelDRAW 10142
Input / Output
CorelDRAW 10150
Input / Output
Object linking and embeddingbject linking and embedding (OLE) is a method of exchanging information between Oapplications. Using OLE, you can take selected objects or entire files from one
application, called the source application, and place them into another application, called the destination application. Objects that are placed into an application using OLE are called OLE objects. You can freely move objects and files between applications as long as all the applications involved support OLE. CorelDRAW lets you create and edit OLE objects, as well as insert objects and files created in other applications.
Inserting linked or embedded objectsYou can insert a linked or embedded object in a file. A linked object remains connected to its source file; whereas an embedded object is not linked to its source file but is integrated into the new file. Linking is useful when you want to use an object several times in the same file or in multiple files. Embedding results in a larger file size, but is useful when you want to include all objects in one file. You can insert an embedded object or create an embedded object. You can also insert a linked or embedded object by copying it into the source application and pasting it in the destination application.
To insert a linked object1. In the source application, select an object, and click Edit Copy.2. In the destination application, click Edit Paste special.3. Enable the Paste link option.
Note
The file from which you copy the object in the source application must be saved before you insert the object in the destination application.
To insert an embedded object1. Click Edit Insert new object.2. Enable the Create from file option.3. Click the Browse button.4. Click a filename.5. Click Insert.
Tip
You can also insert a linked object by enabling the Link check box.You can also create an embedded object by enabling the Create new option, and choosing the application in which you want to create the object from the Object type list box.You can also insert an embedded object by selecting an object in the source application, and dragging it to the destination application window.

CorelDRAW 10 151
Input / Output
Editing linked or embedded objectsYou can edit a linked or embedded object. You can edit a linked object by editing its source file. Any changes you make to the source file are automatically applied to the linked object. You can also modify a linked object; for example, you can update a linked object, substitute the source file of a linked object for another, or break a link between a linked object and its source file. An embedded object is edited without switching to the source application. Instead, the source application starts within the application window of the active application.
To edit a linked or embedded object1. Double-click the linked or embedded object to start the source application.2. Edit the object in the source application.3. Save the changes in the source application.4. Close the source application.5. Return to the active application window to review the edits.
Note
In most cases, you can edit OLE objects only in the source application. If you try to change an OLE object using CorelDRAW, note the following limitations. You cannot rotate, skew, clone, trim, weld, intersect, or combine OLE objects. Neither can you apply any of the effects in the Effects menu to OLE objects, except for PowerClip objects. You can only size, move, copy OLE objects and place them into PowerClip containers.
Tip
You can also edit linked or embedded objects by starting the source application and opening the file directly.
To modify a linked object1. Select a linked object with the Pick tool.2. Click Edit Links.3. Click one of the following buttons: Update now-updates the linked object to reflect changes made in the source file Open source-opens the object in the source application Change source-redirects the link to another file Break link-disconnects the link so that the object is embedded in the file
File formats file format defines how an application stores information in a file. When you name a file, Aan application automatically appends a filename extension, usually three characters in
length; for example, .cdr, .bmp, .tif, and .eps. This filename extension helps you and the computer differentiate between different file types or file formats.If you want to use a file created in a different application than the one you are currently using, you must import that file. Conversely, if you create a file in one application and want to use it in another application, you must export the file to a different file format.
CorelDRAW 10142
Input / Output
CorelDRAW 10152
Input / Output
3-D file formatsQuickDraw's 3-D metafile format (3DMF) can contain any 3-D information the user creates, including all types of geometries and objects, textures, lights, shaders, cameras, active renderers, material properties, and hierarchical information. Both text and binary formats are supported. The .3dmf files are supported across Mac, Windows, and UNIX platforms.You can import any 3-D model file saved as a QuickDraw Meta File (.3dmf), QuickDraw Binary 3-D File (.b3d), or Virtual Reality Modeling Language File (.wrl), directly into the image.
You can import 3-D images into Corel applications. When you import a 3-D image, it is rendered as a two-dimensional object in a drawing. You can view the model at any angle and degree of magnification by rotating the camera, moving the camera along the horizontal and vertical planes, and changing the camera lens magnification. You can also add a light to a 3-D model
To import a 3-D model into an active drawing1. Click File Import.2. Choose the drive and folder where the file is stored.3. Choose a file format from the Files of type list box.4. Click the filename.5. Click Import.
To select the way a 3-D model displays1. In the Import 3-D model dialog box, choose one of the following formats from the list box below the Preview window: QuickDraw 3-D Interactive-displays a regular 3-D model QuickDraw 3-D Wireframe-displays a wire frame of the 3-D model2. Click one of the following buttons: Rotate camera-rotates 3-D models in the 3-D Viewport Slide camera-moves the camera anywhere in the 3-D Viewport Zoom camera-changes the lens magnification of the camera in the 3-D Viewport3. Drag in the Preview window.
Tip
When you click Zoom camera, drag up to zoom in, or drag down to zoom out.
AIThe Adobe Illustrator file format (.ai files) was developed by Adobe Systems for the Windows and Macintosh platforms. It is primarily vector based although later versions, such as versions 6.0 and 7.0, support bitmap information.
To import an AI file1. Click File Import.2. Choose the drive and folder where the file is stored.3. Choose AI - Adobe Illustrator from the Files of type list box.4. Click the filename.5. Click Import.
CorelDRAW 10 153
Input / Output
To export an AI file1. Click File Export.2. Choose AI - Adobe Illustrator from the Files of type list box.3. Type a filename in the File name box.4 .Click Export.5. In the Compatibility list box, choose an Adobe Illustrator file format.6. In the Destination area, enable one of the following options: PC-lets you export a file that can be edited on a PC compatible computer Macintosh-lets you export a file that can be edited on a Macintosh system7. In the Export text as area, enable one of the following options: Curves-lets you export text as curves Text-lets you export text as editable characters8. Enable any of the check boxes corresponding to conversion options.
BMPThe Windows bitmap file format (.bmp files) was developed as a standard for representing graphic images as bitmapped images. Bitmapped images, also called raster or paint images, are made of individual dots, called pixels (picture elements), that are arranged and colored to form a pattern. Increasing the size of a bitmapped image has the effect of increasing individual pixels, making lines and shapes appear jagged.
To import a BMP file1. Click File Import.2. Choose the drive and folder where the file is stored.3. Choose BMP - Windows bitmap from the Files of type list box.4. Click the filename.5. Click Import.
To export a BMP file1. Click File Export.2. Choose BMP - Windows bitmap from the Files of type list box.3. Type a filename in the File name box.4. Click Export.5. In the Bitmap export dialog box, adjust any of the settings.
Note
The file name extension for the format you've chosen is appended to the filename automatically.
CDRCorelDRAW files (.cdr) are drawings made up of vector graphics. Vectors define a picture as a list of graphic primitives (rectangles, lines, text, arcs, and ellipses). Vectors are mapped point by point to the page, so if you reduce or increase the size of a vector graphic, the original image will not be distorted.
CorelDRAW 10142
Input / Output
CorelDRAW 10154
Input / Output
To import a file into an active drawing1. Click File Import.2. Choose the drive and folder where the file is stored.3. Choose a file format from the Files of type list box.4. Click the filename.5. Enable any of the following check boxes: Link bitmap externally-lets you link a bitmapped image externally instead of saving it in a file Combine multi-layer bitmap-lets you import bitmapped images that contain multiple layers Extract embedded ICC profile-lets you save the embedded International Color Consortium (ICC) profile to the color directory where the application was installed Check for watermark-lets you check for an encoded Digimarc watermark when you import files Do not show filter dialog-lets you use the filter's default settings without opening its dialog box Maintain layers and pages-lets you maintain layers and pages when importing files6. Click Import.7. Position the import placement start cursor where you choose, and click on the drawing page.
Tip
You can also import a file by opening it in a new application window. For more information about opening a file in a new application window, see "To open a drawing".You can change the sorting order of the file formats in the Files of type list box by choosing a sorting method from the Sort type list box.
To export a file1. Click File Export.2. Choose a file format from the Files of type list box.3. Type a filename in the File name box. The file extension for the file format you choose is appended to the filename automatically.4. Enable any of the following check boxes: Selected only-saves only the objects selected in the active drawing Web_safe_filenames-replaces the white space in a filename with an underscore. Special characters are replaced by characters suitable for Web-based filenames. Do not show filter dialog-suppresses dialog boxes that provide other options when exporting5. Click Export.
Note
If a dialog box for the export format opens, specify the options you want. For detailed information about file formats, see "File formats" in the online Help.
CorelDRAW 10 155
Input / Output
Tip
To compress an image while exporting, choose a compression type from the Compression Type list box.
CMXCorel Metafile Exchange (.cmx files) is a metafile format that supports bitmap and vector information and the full range of Pantone, RGB, and CMYK colors. It was developed to save files created in CorelDRAW with the data necessary to open and edit them in other Corel applications.
To import a file into an active drawing1. Click File Import.2. Choose the drive and folder where the file is stored.3. Choose a file format from the Files of type list box.4. Click the filename.5. Enable any of the following check boxes: Link bitmap externally-lets you link a bitmapped image externally instead of saving it in a file Combine multi-layer bitmap-lets you import bitmapped images that contain multiple layers Extract embedded ICC profile-lets you save the embedded International Color Consortium (ICC) profile to the color directory where the application was installed Check for watermark-lets you check for an encoded Digimarc watermark when you import files Do not show filter dialog-lets you use the filter's default settings without opening its dialog box Maintain layers and pages-lets you maintain layers and pages when importing files6. Click Import.7. Position the import placement start cursor where you choose, and click on the drawing page.
Tip
You can also import a file by opening it in a new application window. For more information about opening a file in a new application window, see "To open a drawing".You can change the sorting order of the file formats in the Files of type list box by choosing a sorting method from the Sort type list box.
To export a file1. Click File Export.2. Choose a file format from the Files of type list box.3. Type a filename in the File name box. The file extension for the file format you choose is appended to the filename automatically.4. Enable any of the following check boxes: Selected only-saves only the objects selected in the active drawing
CorelDRAW 10142
Input / Output
CorelDRAW 10156
Input / Output
Web_safe_filenames-replaces the white space in a filename with an underscore. Special characters are replaced by characters suitable for Web-based filenames. Do not show filter dialog-suppresses dialog boxes that provide other options when exporting5. Click Export.
Note
If a dialog box for the export format opens, specify the options you want. For detailed information about file formats, see "File formats" in the online Help.
Tip
To compress an image while exporting, choose a compression type from the Compression Type list box.
JPGJPEG is a standard format developed by the Joint Photographic Experts Group, allowing the transfer of files between a wide variety of platforms, using superior compression techniques. JPEG supports 8-bit grayscale and color depths up to 32-bit CMYK.For Internet use, you can save images to the GIF, JPG, or PNG format. If you want to publish an image to the World Wide Web and you are not sure which format to use, see "To save and optimize an image to a Web-compatible format".
To import a JPG file1. Click File Import.2. Choose the drive and folder where the file is stored.3. Choose JPG - JPEG bitmaps from the Files of type list box.4. Click the filename.5. Click Import.6. Position the import placement start cursor on the drawing page, and click.
Tip
You can drag on the drawing page to place the image proportionally at the size you choose.
To export a JPG file1. Click File Export.2. Choose the drive and folder where you want to save the file.3. Type a filename in the File name box.4. Choose JPG - JPEG bitmaps from the Files of type list box, and click Export.5. In the Bitmap export dialog box, any of the settings.6. Click OK.7. In the Encoding method area, enable one of the following check boxes: Progressive-loads the image gradually in certain browsers so that you can see portions of the image before it finishes loading Optimize-uses the optimal encoding method to produce the smallest file size
CorelDRAW 10 157
Input / Output
TIFThe Tagged Image File format (.tif files) is a raster format designed as a standard. Almost every graphics application can read and write .tif files. There are many variations of TIFF, considering that TIFF supports six different encoding routines and three different image modes: black and white, grayscale, and color. Uncompressed TIFF images may be 1, 4, 8, 24 bits per pixel. TIFF images compressed using the LZW algorithm may be 4, 8, or 24 bits per pixel. TIFF files can save RGB, CMYK, and Lab color mode information, but not duotones.
To import a file into an active drawing1. Click File Import.2. Choose the drive and folder where the file is stored.3. Choose a file format from the Files of type list box.4. Click the filename.5. Enable any of the following check boxes: Link bitmap externally-lets you link a bitmapped image externally instead of saving it in a file Combine multi-layer bitmap-lets you import bitmapped images that contain multiple layers Extract embedded ICC profile-lets you save the embedded International Color Consortium (ICC) profile to the color directory where the application was installed Check for watermark-lets you check for an encoded Digimarc watermark when you import files Do not show filter dialog-lets you use the filter's default settings without opening its dialog box Maintain layers and pages-lets you maintain layers and pages when importing files6. Click Import.7. Position the import placement start cursor where you choose, and click on the drawing page.
Tip
You can also import a file by opening it in a new application window. For more information about opening a file in a new application window, see "To open a drawing".You can change the sorting order of the file formats in the Files of type list box by choosing a sorting method from the Sort type list box.
To export a TIF file1. Click File Export.2. Choose TIF - TIFF Bitmap from the Files of type list box.3. Type a filename in the File name box.4. Click Export.5. In the Bitmap export dialog box, adjust any of the settings.


Customization
CorelDRAW 10 159
Chapter
VIIIIn this chapter
Customization Corel Applications
Working with Styles and Templates
Customizing Corel applicationsou can customize Corel graphics applications by arranging Ycommand bars and commands to suit your needs. Command bars
include menus, toolbars, the property bar, and the status bar.Corel online Help is based on an application's default settings. When you customize command bars, commands, and buttons, the Help topics associated with them do not reflect your changes.
Setting multiple workspaces
A workspace is a configuration of settings that specifies how the various command bars, commands, and buttons are arranged when you open the application. You can create, choose, and delete workspaces. You can also import and export workspaces to and from other computers using the same application. For example, you may want a group of users to have a similar look and feel to the workspace they are using
Working with Layers
To create a workspace1. Click Tools Options.2. In the list of categories, click Workspace.3. Click New.4. Type the name of the workspace in the Name of new workspace box.5. From the Base new workspace on list box, choose an existing workspace on which to base the new workspace. If you want to include a description of the workspace, type a description in the Description of new workspace box.
To choose a workspace1. Click Tools Options.2. In the list of categories, click Workspace.3. Enable a checkbox beside a workspace in the Workspaces available list.
Tip
You can restore the default workspace by pressing F8 while starting the application
CorelDRAW 10142
Input / Output
CorelDRAW 10160
Customization
To delete a workspace1. Click Tools Options.2. In the list of categories, click Workspace.3. Choose a workspace from the Workspaces available list.4. Click Delete.
Note
You cannot delete the default workspace.
To import a workspace1. Click Tools Options.2. In the list of categories, click Workspace.3. Click Import.4. Click Browse.5. Choose the drive and folder where the file is stored.6. Double-click the file.7. Follow the instructions on screen.
To export a workspace1. Click Tools Options.2. In the list of categories, click Workspace.3. Click Export.4. Enable the check boxes beside the workspace items you want to export.5. Click Save.6. Type a file name in the File name box.7. Click Save.8. Click Close.
Note
The workspace items available for export are toolbars, menu bars, and the status bar.
Tip
You can email a workspace as an attachment by clicking Email.
Customizing keyboard shortcutsAlthough Corel applications already have preset keyboard shortcuts, you can change these or add your own shortcuts to suit your working style. You can assign keyboard shortcuts to the commands and text styles that you use the most, and you can delete keyboard shortcuts. You can also print keyboard shortcuts. You can also save a list of the keyboard shortcuts to a file format that applications such as word processors or spreadsheets can open.
Customization
CorelDRAW 10 161
To assign a keyboard shortcut to a command1. Click Tools Customization .2 . In the list of categories, click Commands.3. Click the Shortcut keys tab.4. Choose a shortcut key table from the Shortcut key table list box.5. Choose an item from the list box.6. Click a command in the Commands list.7. Type a key combination in the New shortcut key box. If you want to see what keyboard shortcuts are overwritten as a result of the new shortcut, enable the Navigate to conflict check box.8. Click Assign.
Note
The shortcut keys currently assigned to the selected command are displayed in the Currently assigned to box.
Tip
You can reset keyboard shortcuts by clicking Reset all.You can view all of the existing keyboard shortcuts by clicking View all.
To delete a keyboard shortcut assigned to a command1. Click Tools Customization .2. In the list of categories, click Commands.3. Click the Shortcut keys tab.4. Choose a shortcut key table from the Shortcut key table list box.5. Choose an item from the list box.6. Click a command in the Commands list.7. Click a shortcut key in the Current shortcut keys box.8. Click Delete.
Note
You cannot delete the following keyboard shortcuts: F1, ALT + F6, ALT + TAB, ALT + ESC, CTRL + ESC, and CTRL + /.
To assign a keyboard shortcut to a text style1. Click Tools Customization.2 . In the list of categories, click Commands.3. Click the Shortcut keys tab.4. Choose a shortcut key table from the Shortcut key table list box.5. Double-click the Apply styles folder in the Commands list.6. Choose a text style from the list.7. Type a key combination in the New shortcut key box.8. Click Assign.
CorelDRAW 10142
Input / Output
CorelDRAW 10162
Customization
Note
The Current shortcut keys box contains all the shortcut keys assigned to the selected command.
Tip
You cannot reassign the following shortcuts F1, ALT + F6, ALT + TAB, ALT + ESC, CTRL + ESC, and CTRL + /.·You can reset keyboard shortcuts by clicking Reset all.
To print keyboard shortcuts1. Click Tools Customization.2 . In the list of categories, click Commands.3. Click the Shortcut keys tab.4. Choose a shortcut key table from the Shortcut key table list box.5. Click View all.6. Click Print.
To save keyboard shortcuts to a format readable by other programs1. Click Tools Customization.2. In the list of categories, click Commands.3. Click the Shortcut keys tab.4. Choose a shortcut key table from the Shortcut key table list box.5. Click View all.6. Click Export to CSV.7. Choose the drive and directory in which you want to save the file.8. Type a filename in the File name box.9. Click Save.
Customizing the property barYou have control over the placement and content of the property bar. You can move the property bar anywhere on screen. Placing it inside the application window creates a floating property bar with a title bar. Placing it on any of the four sides of the application window docks it, making it part of the window border.You can also set up a custom property bar by adding, removing, and rearranging toolbar items. This lets you customize what appears on the property bar when you choose various tools.
To add a toolbar item to the property bar1. Click Tools Customization.2. In the list of categories, click Command bars.3. Enable the check box beside Property bar.4. In the list of categories, click Commands.5. Choose an item from the list box.6. Drag the toolbar item icon to the property bar.
Customization
CorelDRAW 10 163
Tip
If you want to remove an item from the property bar, drag the toolbar item icon off the property bar.
To rearrange toolbar items on the property bar1. Click Tools Customization.2. In the list of categories, click Command bars.3. Enable the check box beside Property bar.4. In the list of categories, click Commands.5. Drag the toolbar item icon to a new position on the property bar.
Customizing the status barThe status bar gives you up-to-date information about your workspace, such as the colors you are working with and the position of the cursor. You can customize the status bar by resizing the status bar or a status bar item. If you want to see more of the application window, you can hide the status bar. You can also customize the status bar by adding and removing toolbar items.
To resize the status bar1. Click Tools Customization.2. In the list of categories, click Command bars.3. Click Status bar, and enable the check box.4. Type a value in the Number of lines when docked box.
Note
You can only choose one or two as the values for the Number of lines when docked box.
To resize a status bar item1. Click Tools Customization.2. In the list of categories, click Command bars.3. Choose one of the following options from the Button list box: Small Medium Large
To hide the status bar1. Click Tools Customization.2. In the list of categories, click Command bars.3. Enable the check box beside Status bar.
CorelDRAW 10142
Input / Output
CorelDRAW 10164
Customization
Customizing filtersFilters are used to convert files from one format to another. They are organized into three types: Raster, Vector, and Text. You can customize filter settings by adding or removing filters so that only the filters you need are loaded. You can also change the order of the list of filters and reset filters to the default setting.
To add a filter1. Click Tools Options.2. Double-click Global, and click Filters.3. Double-click a type of filter in the Available file types list.4. Click a filter.5. Click Add.
To remove a filter1. Click Tools Options.2. Double-click Global, and click Filters.3. Click a filter in the List of active filters.4. Click Remove.
Customizing file associationsYou can associate a number of different file types with Corel applications. When you double-click a file you have associated with an application, the application starts and the file opens. When you no longer need a file type association, you can break it.
To associate a file type with CorelDRAW1. Click Tools Options.2. Double-click Global, Filters.3. Click Associate.3. In the Associated file extensions with CorelDRAW list, enable the check box of the file type you want to associate.
Note
You can reset file associations by clicking Reset.
To break a CorelDRAW file type association1. Click Tools Options.2. Double-click Global, Filters.3. Click Associate.4. In the Associated file extensions with CorelDRAW list, disable the check box of the file type association you want break.
Note
You can reset file associations by clicking Reset.
Customization
CorelDRAW 10 165
Working with styles and templatesorelDRAW has three types of styles you can create and apply in drawings: graphic, text, Cand color. After you create a style, you can edit it and apply it to any number of graphic
and text objects. When you edit a style, all the objects using that style are automatically updated, letting you make design changes to a drawing in one step.A template is a set of styles and page layout settings that determine the appearance of a drawing. Templates are useful if you frequently use the same page outline. For example, if you regularly put together a newsletter, you can save the newsletter's page layout settings and styles to a template.
Creating, applying, and editing graphic or text stylesA style is a set of formatting attributes. When you apply a style to an object, all the attributes of the style are applied to that object in one step. Styles can save you considerable time if you must apply the same formatting to several objects.There are graphic styles and text styles. A graphic style consists of fill and outline settings that you can apply to graphic objects such as rectangles, ellipses, and curves. For example, if you have a group of objects in a drawing that use one graphic style, you can simultaneously change their fill by editing the graphic style. For more information on applying fills see "Filling objects." For more information about changing the appearance of outlines, see "Formatting lines and outlines."
A text style is a set of text settings such as font type and size. Text styles also include fill and outline attributes. For example, you can create a style that applies a texture fill to 72 point AvantGarde font. There are two types of text styles: artistic and paragraph. You can also change the properties of default artistic and paragraph text. For example, you can change the properties of default artistic text, so that every artistic text object you create has the same formatting. For information about default text, see "Changing the appearance of text."
You can create a graphic or text style from scratch or from the properties of an existing object, at which time the style is saved. When you apply a style to an object, CorelDRAW overrides the existing text or graphic properties with the properties of the current style. To use the style in another drawing, you can copy the style to the new drawing or save the style in a template. For more information about templates, see "Working with templates." If you copy or import a style with the same name as an existing style, CorelDRAW renames the style by adding a number to the style name. At any point, you can rename a style. You can also change the properties of an object back to its previous style if you made a mistake or decide that the previous style was better suited to that object.
After you create a style, you can edit its properties and find any object using a given style. For example, you can find all objects that use the default graphic style. Finding objects assigned a specific style makes editing that style even more efficient.

CorelDRAW 10142
Input / Output
CorelDRAW 10166
Customization
To find objects assigned a specific graphic or text style1. Click Tools Graphic and text styles.2. Choose a style from the list in the Graphic and text styles Docker window.3. Click the flyout button, and click Find.
Customizing the Graphic and text styles Docker windowYou can specify what types of stylesgraphic, artistic text, or paragraph textare displayed in the Graphic and text styles Docker window. You can also specify that only the styles available to selected objects will display. For example, when you select artistic text, only artistic text styles appear in the Graphic and text styles Docker window. If you are using several styles to format a drawing, displaying only the styles applicable to the selected object makes it easier to find the style you want. As you move your cursor over graphic objects and text objects, CorelDRAW automatically refreshes the Docker window and displays only the relevant styles.
To specify which styles display in the Graphics and text styles Docker window
1. Click Tools Graphic and text styles.2. Click the flyout button, in the Graphic and text styles Docker window.3. Click Show and click any of the following options: Graphic styles-to display graphic styles Artistic text styles-to display artistic text styles Paragraph text styles-to display paragraph text styles Auto-view-to display only those styles available to a selected object
Editing and sorting color stylesYou can edit both parent and child colors in CorelDRAW. When you change the hue of a parent color, all of its child colors are updated, based on the new hue and the original saturation and brightness values. For color styles using the Pantone Matching System, Pantone Hexachrome, and Custom spot color palettes, if you change the color of a parent, all child colors are updated, based on the new color and the original tint.If you want to change the color of the object later, you can edit the parent color, and CorelDRAW will automatically adjust the child colors. For example, if you change a parent color from red to yellow, CorelDRAW converts the child colors of the red parent to shades of yellow.
Sorting color styles allows you to locate a style in less time. Instead of having color styles appearing randomly in a list, you can sort color styles alphabetically by name, or you can have all parent colors with child colors listed first.
Customization
CorelDRAW 10 167
Moving and copying color stylesYou can move a child color from one parent to another. The child color will change color based on the new hue and the original saturation, brightness, or tint levels. You can also copy color styles from one drawing to another.
To copy a color style from one drawing to another1. Open the drawing with the color style you want to copy.2. Open the drawing to which you want to copy the style.3. Click Tools Color styles.4. In the Color styles Docker window, drag the color style to another drawing folder.
Working with layersou can work with layers in CorelDRAW to help you organize and arrange objects in Ycomplex illustrations.
Changing and moving layersYou can set a layer's editing properties to make a layer active, and allow the editing of all layers or the active layer only. When you are making changes to a drawing, you can lock a layer to prevent accidental changes to its objects. When you lock a layer you cannot select or edit it.Renaming layers can be used to indicate their contents, position in the stacking order, and relationship with other layers.You can change a layer's place in the stacking order.
To rename a layer1. Click Tools Object manager.2. Right-click the layer name, and click Rename.
Tip
You can also rename a layer by clicking the layer name and by typing a new name.
To change the position of a layer in the stacking order1. Click Tools Object manager.2. In the Layers list, drag a layer name tag to the new position.
Moving and copying objects between layersYou can move or copy selected objects to new layers, as long as the layers are unlocked and are on the same page (or on the Master Page and another page).Moving or copying an object to a layer below its current layer causes the object to become the top object on its new layer. Similarly, moving or copying an object to a layer above its current layer causes the object to become the bottom object.
CorelDRAW 10142
Input / Output
CorelDRAW 10168
Customization
To move or copy an object to another layer1. Click Tools Object manager.2. Click an object in the Object manager.3. Click the flyout button, and click one of the following: Move to layer Copy to layer4. Point to the layer to which you want to move or copy the object, and click.
Tip
You can move and copy an object to another layer by dragging an object to a new layer within the Object manager Docker window.
Printing layersEnabling the print setting of a layer lets you print the layer and its contents. If you disable a layer's print setting, the layer and its contents won't appear when you print the drawing.
To enable or disable printing for a specific layer1. Click Tools Object manager.2. Click the Printer icon beside the layer name.
Note
You can reset file associations by clicking Reset.
Tip
You can also enable or disable the printing of a layer by right-clicking the layer in the Object manager Docker window and clicking Printable.