Embed Size (px)
Citation preview
Copyright Information: This document contains proprietary information that is protected by copyright. All rights are reserved. No part of this publication may be reproduced in any form whatsoever or translated into any language without the prior, written permission of PerkinElmer, Inc. Copyright © 2005 PerkinElmer, Inc.
Trademarks: Registered names, trademarks, etc. used in this document, even when not specifically marked as such, are protected by law.
PerkinElmer is a register trademark of PerkinElmer, Inc. e-ssentials is trademark of PerkinElmer, Inc.
Notice: The information in this document is subject to change without notice. Except as specifically set forth in its terms and conditions of sale, PerkinElmer makes no warranty of any kind with regard to this document, including, but not limited to, the implied warranties of merchantability and fitness for a particular purpose. PerkinElmer shall not be liable for errors contained herein for incidental consequential damages in connection with furnishing, performance or use of this material. Release Information:
Manual Part No. Release Release Date 0993-6630 C December 2005

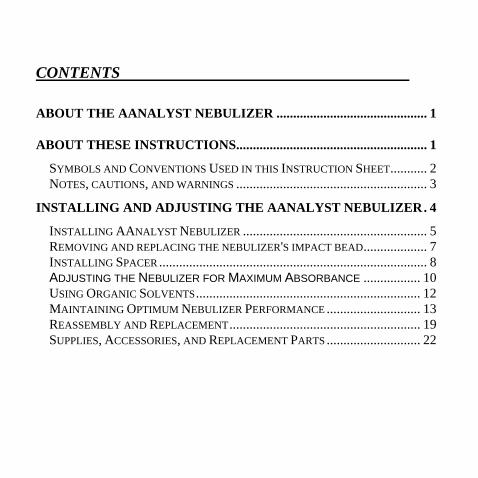
CONTENTS
ABOUT THE AANALYST NEBULIZER ............................................. 1
ABOUT THESE INSTRUCTIONS......................................................... 1 SYMBOLS AND CONVENTIONS USED IN THIS INSTRUCTION SHEET........... 2 NOTES, CAUTIONS, AND WARNINGS ......................................................... 3
INSTALLING AND ADJUSTING THE AANALYST NEBULIZER. 4 INSTALLING AANALYST NEBULIZER ....................................................... 5 REMOVING AND REPLACING THE NEBULIZER'S IMPACT BEAD................... 7 INSTALLING SPACER ................................................................................ 8 ADJUSTING THE NEBULIZER FOR MAXIMUM ABSORBANCE ................. 10 USING ORGANIC SOLVENTS................................................................... 12 MAINTAINING OPTIMUM NEBULIZER PERFORMANCE ............................ 13 REASSEMBLY AND REPLACEMENT......................................................... 19 SUPPLIES, ACCESSORIES, AND REPLACEMENT PARTS ............................ 22

1
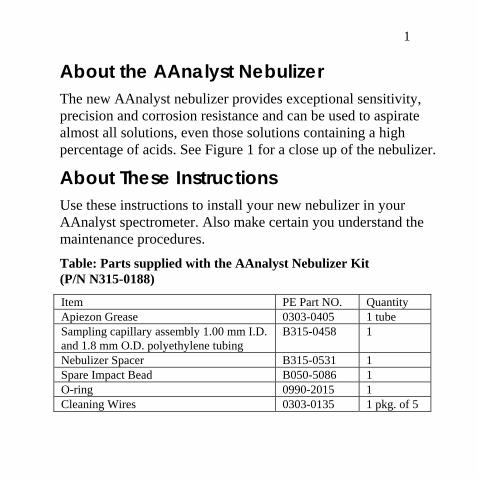
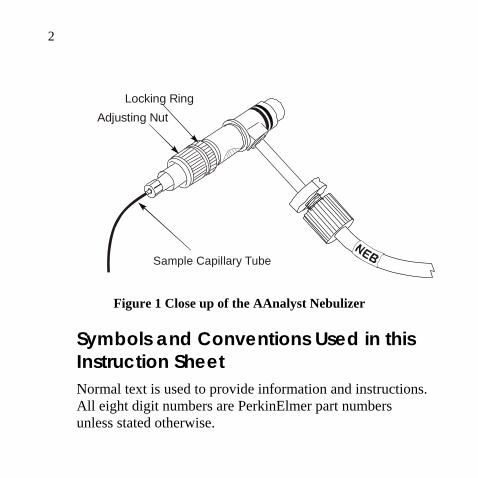
About the AAnalyst Nebulizer The new AAnalyst nebulizer provides exceptional sensitivity, precision and corrosion resistance and can be used to aspirate almost all solutions, even those solutions containing a high percentage of acids. See Figure 1 for a close up of the nebulizer.
About These Instructions Use these instructions to install your new nebulizer in your AAnalyst spectrometer. Also make certain you understand the maintenance procedures.
Table: Parts supplied with the AAnalyst Nebulizer Kit (P/N N315-0188)
Item PE Part NO. Quantity Apiezon Grease 0303-0405 1 tube Sampling capillary assembly 1.00 mm I.D. and 1.8 mm O.D. polyethylene tubing
B315-0458 1
Nebulizer Spacer B315-0531 1 Spare Impact Bead B050-5086 1 O-ring 0990-2015 1 Cleaning Wires 0303-0135 1 pkg. of 5
2
Adjusting Nut
Sample Capillary Tube
Locking Ring
Figure 1 Close up of the AAnalyst Nebulizer
Symbols and Conventions Used in this Instruction Sheet Normal text is used to provide information and instructions. All eight digit numbers are PerkinElmer part numbers unless stated otherwise.
3
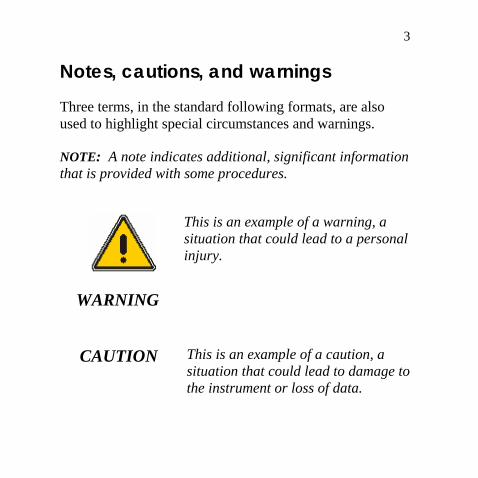
Notes, cautions, and warnings
Three terms, in the standard following formats, are also used to highlight special circumstances and warnings.
NOTE: A note indicates additional, significant information that is provided with some procedures.
WARNING
This is an example of a warning, a situation that could lead to a personal injury.
CAUTION This is an example of a caution, a situation that could lead to damage to the instrument or loss of data.
4
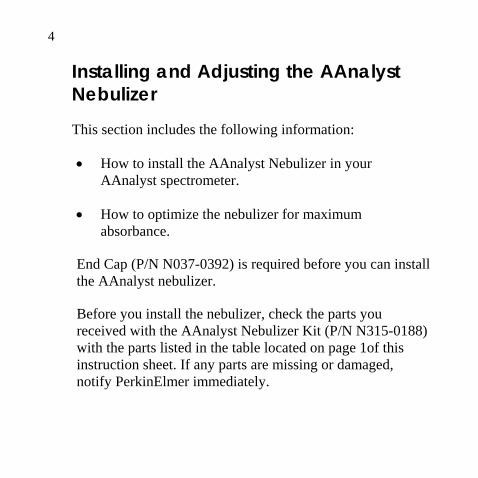
Installing and Adjusting the AAnalyst Nebulizer
This section includes the following information:
• How to install the AAnalyst Nebulizer in your AAnalyst spectrometer.
• How to optimize the nebulizer for maximum absorbance.
End Cap (P/N N037-0392) is required before you can install the AAnalyst nebulizer.
Before you install the nebulizer, check the parts you received with the AAnalyst Nebulizer Kit (P/N N315-0188) with the parts listed in the table located on page 1of this instruction sheet. If any parts are missing or damaged, notify PerkinElmer immediately.
5
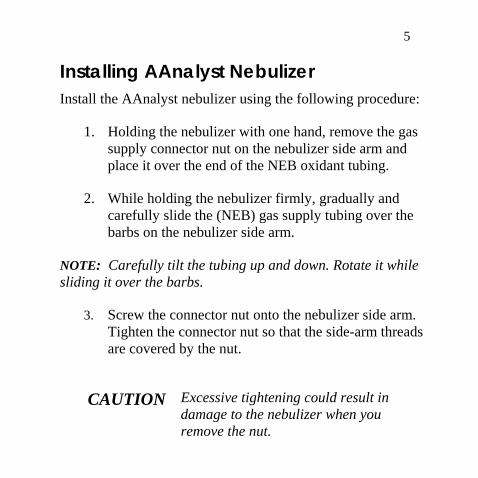
Installing AAnalyst Nebulizer Install the AAnalyst nebulizer using the following procedure:
1. Holding the nebulizer with one hand, remove the gas supply connector nut on the nebulizer side arm and place it over the end of the NEB oxidant tubing.
2. While holding the nebulizer firmly, gradually and carefully slide the (NEB) gas supply tubing over the barbs on the nebulizer side arm.
NOTE: Carefully tilt the tubing up and down. Rotate it while sliding it over the barbs.
3. Screw the connector nut onto the nebulizer side arm. Tighten the connector nut so that the side-arm threads are covered by the nut.
CAUTION Excessive tightening could result in damage to the nebulizer when you remove the nut.
6
4. Apply a small amount of Apiezon grease (P/N 030-0405) onto the o-rings (P/N 0990-2015). The nebulizer will then slide easily into the end cap when you perform steps 5 and 6, below.
5. Lift the end-cap spring clamp and insert the nebulizer in the center of the end cap. Then release the spring clamp while you make sure the spring clamp slips over the nebulizer flange.
CAUTION Use care installing the nebulizer as the impact bead is quite fragile.
6. Rock the nebulizer slightly to make sure it is set correctly in the end cap. If excessive movement doesn't occur, it is set properly.
7. The nebulizer installation is complete.

7
Removing and replacing the nebulizer's impact bead The AAnalyst nebulizer utilizes a ceramic, one-piece, impact-bead structure (P/N B050-5086) which improves nebulization efficiency. The bead itself is held by two fragile support arms.
The bead structure mounts directly on the nebulizer's body assembly, see Figure 2.
To Install Impact Bead 1. Hold the impact bead by its base and carefully push
it onto the body of the nebulizer in front of the venturi.
2. Then rotate it, holding only the base, approximately 1/8 turn clockwise, i.e., until it reaches a stop.
To Remove Impact Bead 1. Hold the impact bead by its base only.
2. Rotate it approximately 1/8 turn counterclockwise before carefully lifting it from the nebulizer’s body assembly.
8
Installing Spacer The addition of the spacer (P/N B315-0531) reduces the amount of sample delivered to the flame.
The nebulizer assembly can be used with or without the spacer when using the 10-cm burner head. Maximum sensitivity for Air-Acetylene elements can be achieved without the use of the spacer.
The spacer should be used for all elements analyzed with either the nitrous oxide or the 5-cm air-acetylene burner head and for elements which are air-acetylene flame sensitive such as calcium, chromium and gold. When analyzing some complex sample matrices, it may be desirable to add the spacer to reduce chemical interferences.
To Install Spacer 1. Carefully remove the impact bead by rotating it 1/8 turn
and then pull the impact bead off.
2. Place the spacer onto the back of the nebulizer and replace the impact bead.
9
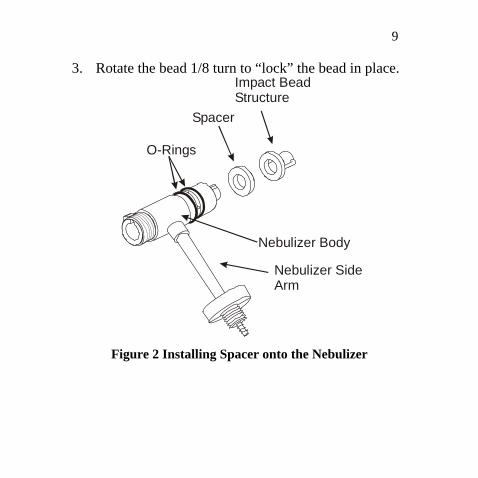
3. Rotate the bead 1/8 turn to “lock” the bead in place.
Nebulizer Side Arm
Nebulizer Body
Spacer
Impact Bead Structure
O-Rings
Figure 2 Installing Spacer onto the Nebulizer
10
Adjusting the Nebulizer for Maximum Absorbance Adjust the nebulizer to achieve maximum absorbance as follows:
1. Ignite the flame. Refer to the procedure for igniting the flame in your spectrometer manuals.
2. Set up the spectrometer for the determination of copper, magnesium, or another element which has an absorbing wavelength above 250 nm and whose sensitivity is not dependent on the fuel/oxidant ratio. Do not select an element requiring a nitrous oxide-acetylene flame. If necessary, adjust the burner height using the procedure described in your spectrometer hardware or operator's manual.
3. Aspirate a blank and let the flame stabilize as described in your spectrometer manuals. If you see bubbles at the end of the capillary tube (in the sample solution), loosen the nebulizer locking nut and slowly turn the adjustment nut clockwise until the bubbling stops.
11
4. Aspirate a standard and adjust the burner position as described in your spectrometer operating instructions. Optimize the burner position by using the rotational and horizontal adjustment knobs identified in your spectrometer manuals.
5. While still aspirating the standard, turn the nebulizer locking nut clockwise until it is free of the nebulizer adjustment nut.
6. Slowly turn the nebulizer adjustment nut counterclockwise until bubbles begin to appear at the end of the capillary tube in the sample solution.
7. Slowly turn the nebulizer adjustment nut clockwise until the absorbance goes to a maximum and then begins to decrease.
8. Lock the nebulizer adjustment nut in its current (optimum) position by turning the nebulizer locking nut counter-clockwise while carefully holding the nebulizer adjustment nut.
12
9. Check the characteristic concentration as instructed in your spectrometer manuals.
Using Organic Solvents It is often beneficial to lower the nebulizer uptake rate when aspirating organic solvents. The normal nebulizer uptake rate is typically 6-8 mL/min.
By reducing the uptake rate to 2-4 mL/min, it is usually possible to operate with a leaner (blue) flame than is possible with higher nebulizer uptake rates. This leaner flame typically provides improved precision, particularly when aspirating xylene.
To adjust the nebulizer uptake rate, unlock the nebulizer locking nut and rotate the nebulizer adjustment nut until you locate a position which provides reduced sample uptake. Then lock the nebulizer locking nut.
NOTE: The uptake rate is easily measured by using a graduated cylinder.
13
Maintaining Optimum Nebulizer Performance To maintain optimum nebulizer performance, you must periodically clean the capillary holder assembly, and occasionally replace the capillary (sample) tubing. See Figure 3 for an exploded view of the nebulizer.
Also, the nebulizer is only a part of the overall burner system. For optimum burner-system performance, it is important to periodically clean the nebulizer, burner chamber, burner heads, and the end cap.
When aspirating concentrated samples with complex matrices, it is especially important to keep the burner chamber and nebulizer free of sample deposits. In addition to regular cleaning, it is beneficial to periodically aspirate a dilute surfactant solution, such as 0.1% Triton X100, for several minutes to keep the system clean.
The surfactant solution will encourage constant drainage, which is required for obtaining optimum burner system performance.
14
When using the AAnalyst nebulizer, the impact bead may have to be replaced. Also, to avoid damage to the impact bead, the bead should be removed when cleaning the capillary holder assembly. Steps for removing and replacing the bead are included in this instruction document.
Cleaning the Capillary Holder Assembly Clean the capillary holder assembly whenever you notice degradation in absorbance values due to blockage of the capillary. There are two ways to clean the capillary holder:
• The first (simplified) way should be used if the nebulizer is not difficult to clear. This method involves simply passing one of the cleaning wires, supplied, through the capillary holder.
• The second (complete) procedure requires shutting down the spectrometer, removing the nebulizer from the end cap, and replacing the capillary tubing. This procedure must be performed if you have no success with the first method.

15
Simplified Cleaning Procedure For the AAnalyst Nebulizer
For simplified (light) cleaning of a standard the AAnalyst nebulizer capillary holder, proceed as follows:
1. Unscrew the capillary tubing from the nebulizer.
2. Take one of the cleaning wires (P/N 0303-0135) supplied, and push it through the capillary holder from its wider (open) end.
NOTE: It may take several attempts to pass the wire through the nebulizer.
3. Repeat step 2 several times. Then replace the capillary (sample) tubing.
4. Run several standards to determine if the capillary holder had been cleared. If it has been cleared, proceed with normal spectrometer operation: otherwise, proceed with the next procedure.
16
Complete Cleaning Procedure of AAnalyst Nebulizer
To clean a stubborn blockage from the nebulizer, perform the procedure below.
WARNING
Wear protective gloves when you remove the nebulizer from the end cap if you were analyzing toxic samples.
Removal and Disassembly
1. Turn off the spectrometer and turn off all gas supplies.
2. Lift the end-cap spring clamp and gently pull the nebulizer out of the burner end cap.
17
3. After removing the nebulizer from the end cap, carefully remove the instrument nebulizer gas supply tubing (labeled NEB) from the nebulizer side arm as follows:
• First loosen the connector nut (P/N N037-1485), see Figure 3 Exploded View of the Nebulizer.
• Then, while holding the nebulizer assembly in one hand, rock the supply tubing with the other hand while gently coaxing the tubing from the barbs at the end of the nebulizer side arm.
4. Remove the impact bead and if using the impact bead spacer, remove the spacer as well. Handle with care. (See the instructions on page 7.)
5. Unscrew the capillary tubing.
6. Refer to Figure 3. Loosen and remove the adjustment nut (P/N 037-1492).
18
7. Remove the capillary from the nebulizer body assembly.
Cleaning
1. While holding the capillary assembly in one hand, take one of the cleaning wires (P/N 0303-0135) supplied.
2. Push it through the capillary assembly from its wider (open) end.
NOTE: It may take several attempts to pass the wire through the nebulizer.
19
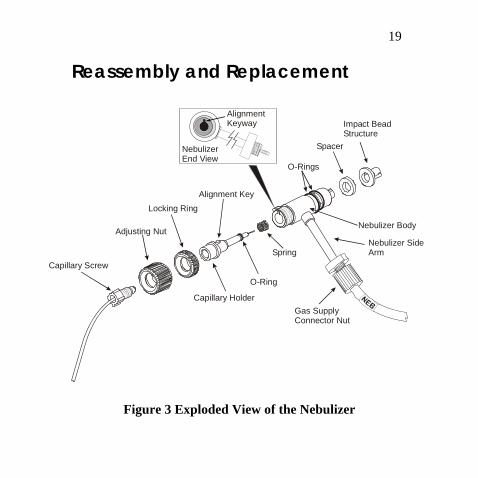
Reassembly and Replacement
Capillary Screw
Adjusting Nut
Locking RingAlignment Key
O-Ring
SpringNebulizer Side Arm
Nebulizer Body
Spacer
Impact Bead Structure
O-Rings
Capillary Holder
Alignment Keyway
Nebulizer End View
Gas Supply Connector Nut
Figure 3 Exploded View of the Nebulizer
20
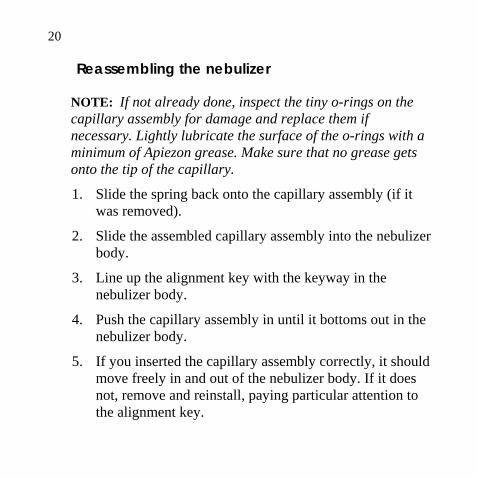
Reassembling the nebulizer
NOTE: If not already done, inspect the tiny o-rings on the capillary assembly for damage and replace them if necessary. Lightly lubricate the surface of the o-rings with a minimum of Apiezon grease. Make sure that no grease gets onto the tip of the capillary.
1. Slide the spring back onto the capillary assembly (if it was removed).
2. Slide the assembled capillary assembly into the nebulizer body.
3. Line up the alignment key with the keyway in the nebulizer body.
4. Push the capillary assembly in until it bottoms out in the nebulizer body.
5. If you inserted the capillary assembly correctly, it should move freely in and out of the nebulizer body. If it does not, remove and reinstall, paying particular attention to the alignment key.
21
6. Screw the adjusting nut onto the nebulizer body.
NOTE: If not already done, inspect the tiny o-rings on the capillary assembly for damage and replace them if necessary. Lightly lubricate the surface of the o-rings with a minimum of Apiezon grease. Make sure that no grease gets onto the tip of the capillary.
7. Where applicable, refit the fragile impact bead.
8. Reattach the nebulizer sample tube to the nebulizer by screwing the connector into the nebulizer body.
9. Reinstall the nebulizer in the end cap.
22
Supplies, Accessories, and Replacement Parts
Supplies, accessories, and replacement parts can be ordered directly from PerkinElmer. PerkinElmer's catalog service
, offers a full selection of high-quality atomic spectroscopy supplies.
To place an order for supplies and any replacement parts, request a free catalog, or ask for information:
• If you are located within the U.S., call toll free 1-800-762-4000, 8 a.m. to 8 p.m. EST. Your order will be shipped promptly, usually within 24 hours.
• If you are located outside of the U.S., call your local PerkinElmer sales or service representative.