Embed Size (px)
Citation preview
OpenOffice.org CookbookVersion 1.1
Sun Microsystems, Inc.901 San Antonio RoadPalo Alto, CA 94303U.S.A. 650-960-1300
May 2004
Table of Contents
1 Preface....................................................................................................... ...............................................4
2 How to write GUI-Tests........................................................................................... ............................5
2.1 Targets of this session part:............................................................................................................5
2.2 Schedule.............................................................................................................................................5
2.3 Declaration........................................................................................................................................6
2.3.1 Get and create the hid.lst.......................................................................................................6
2.3.2 Declare dialog in win file......................................................................................................7
2.3.3 Declare slot in sid file.............................................................................................................7
2.3.3.1 Extended Tips...................................................................................................................8
2.3.3.2 MenuGetItemId ...............................................................................................................8
2.3.3.3 UNO-Slot ..........................................................................................................................8
2.3.4 Verify your declarations........................................................................................................9
2.4 Resourcetest......................................................................................................................................9
2.4.1 Verify your testcase..............................................................................................................10
2.5 How does it look like today.........................................................................................................10
2.6 Handout...........................................................................................................................................10
3 CVS usage in OpenOffice.org QA....................................................................... ............................12
3.1 Terminology...................................................................................................................................12
3.2 What is CVS?..................................................................................................................................13
3.3 Managing Conflicts.......................................................................................................................14
3.4 Merging/Join..................................................................................................................................14
3.5 CVS filestructure............................................................................................................................15
3.6 Further reading..............................................................................................................................15
3.7 Frequent CVS tasks.......................................................................................................................16
3.8 Login to a CVS server ..................................................................................................................16
3.9 Checkout files.................................................................................................................................16
3.10 Update files ..................................................................................................................................17

3.11 Update files with options...........................................................................................................17
3.12 Add new files to the repository................................................................................................18
3.13 Checkin (commit) files to the repository.................................................................................18
4 Use of output and documentation in script-files for automated testing.................................20
4.1 Fileheaders......................................................................................................................................20
4.2 Bas-Files:..........................................................................................................................................20
4.3 INC-File...........................................................................................................................................20
4.4 Documentation in testtool-files:..................................................................................................21
4.5 Output in Testtool-Logfiles:........................................................................................................21
4.6 Specify output of Errors and warnings on Statuspage:.........................................................22
5 Debugging in TestTool................................................................................................... ...................23
5.1 Debug Evolutions - Six “Golden Rules”..................................................................................23
5.1.1 Preperation in advance .......................................................................................................23
5.1.2 Separate..................................................................................................................................23
5.1.3 “Top to bottom” mode.........................................................................................................24
5.1.4 Watch .....................................................................................................................................24
5.1.5 Ask the experts......................................................................................................................24
5.1.6 Split huge testcases...............................................................................................................24
5.2 Fault-Prone Areas..........................................................................................................................24
5.2.1 “Defaults”...............................................................................................................................24
5.2.2 Tab pages and dialogues.....................................................................................................24
5.2.3 Context menus and Toolbars..............................................................................................24
5.2.4 Close what you have opened.............................................................................................25
5.2.5 Setting breakpoints correctly..............................................................................................25
6 Alphabetical Index............................................................................................. .................................26
- Page 3 / 27

1 Preface
Target of the Seesions is to get a common ground of knowledge and to show somemethods. There may be other, better ways which show the same or better results - this isnice and they should be discussed and shown.
Page 4 / 27 - Preface
2 How to write GUI-Testsby [email protected]
2.1 Targets of this session part:• How to prepare a GUI-test.• What rules to follow.• What “traps” exist.
What need's to be done: 1. Schedule 2. Declare the dialog3. Resourcetest4. Functiontest
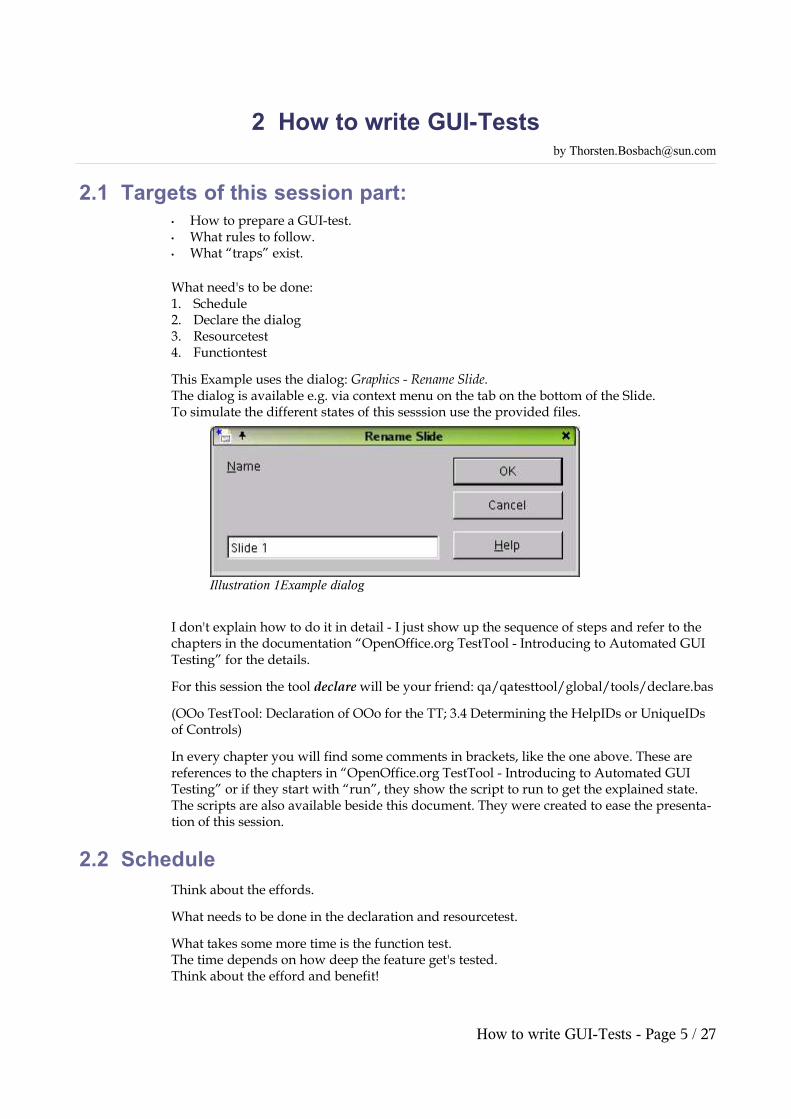
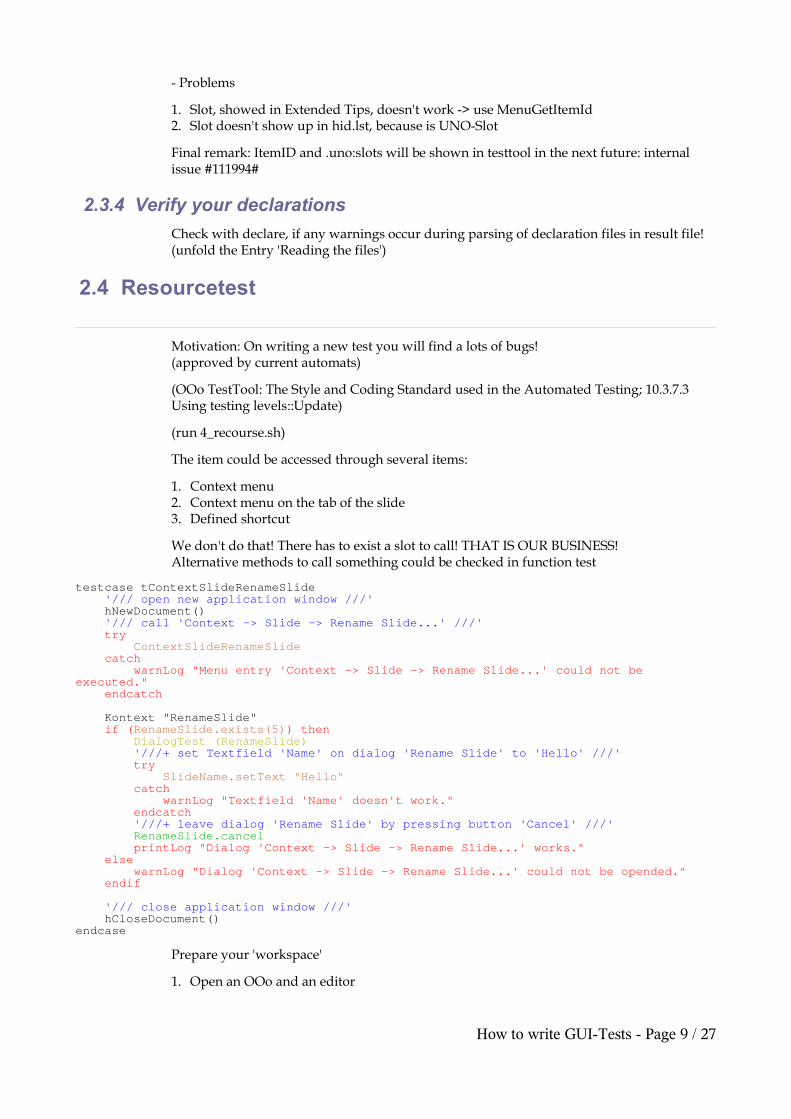
This Example uses the dialog: Graphics - Rename Slide. The dialog is available e.g. via context menu on the tab on the bottom of the Slide.To simulate the different states of this sesssion use the provided files.
I don't explain how to do it in detail - I just show up the sequence of steps and refer to thechapters in the documentation “OpenOffice.org TestTool - Introducing to Automated GUITesting” for the details.
For this session the tool declare will be your friend: qa/qatesttool/global/tools/declare.bas
(OOo TestTool: Declaration of OOo for the TT; 3.4 Determining the HelpIDs or UniqueIDsof Controls)
In every chapter you will find some comments in brackets, like the one above. These arereferences to the chapters in “OpenOffice.org TestTool - Introducing to Automated GUITesting” or if they start with “run”, they show the script to run to get the explained state.The scripts are also available beside this document. They were created to ease the presenta-tion of this session.
2.2 ScheduleThink about the effords.
What needs to be done in the declaration and resourcetest.
What takes some more time is the function test. The time depends on how deep the feature get's tested. Think about the efford and benefit!
How to write GUI-Tests - Page 5 / 27
Illustration 1Example dialog
2.3 Declaration
2.3.1 Get and create the hid.lst
Relationship between HID and longname.
There are: SlotID: menue to call something; HelpID: controls; UniqueID; I just call themnow HID!(OOo TestTool: Declaration of OOo for the TT; 3.2 Types of Declaration)(OOo TestTool: Declaration of OOo for the TT; 3.7 About the hid.lst File)
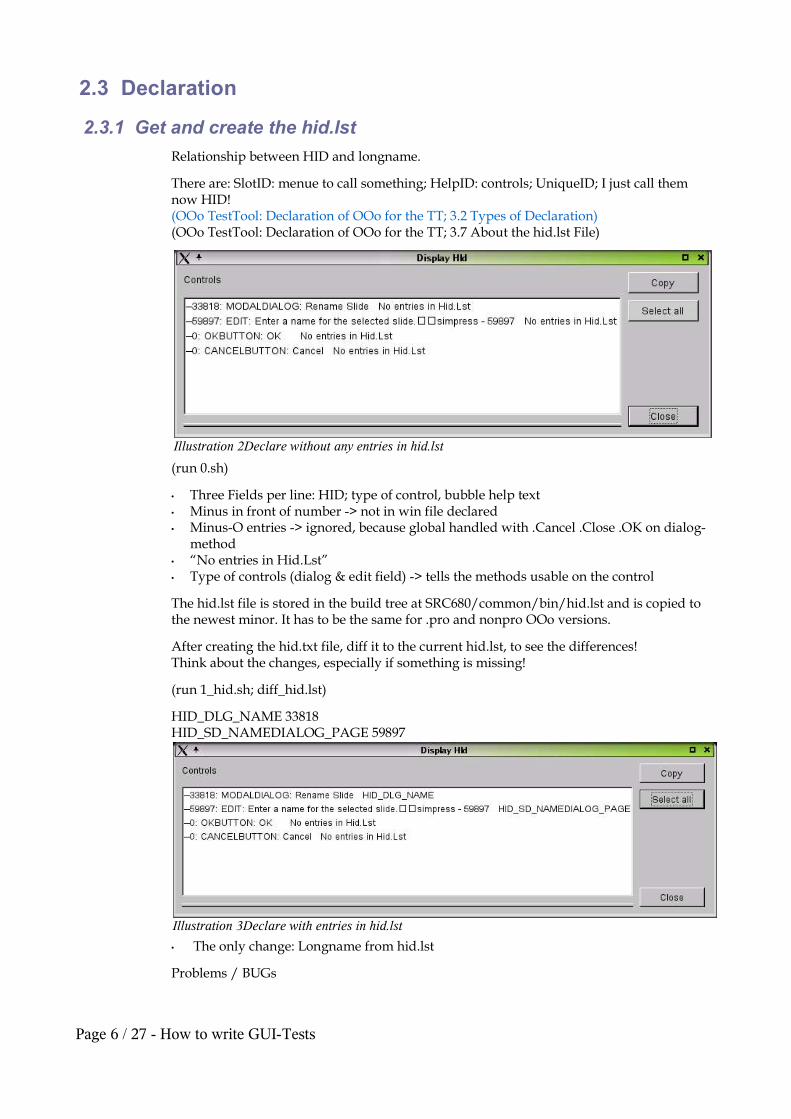
(run 0.sh)
• Three Fields per line: HID; type of control, bubble help text• Minus in front of number -> not in win file declared• Minus-O entries -> ignored, because global handled with .Cancel .Close .OK on dialog-
method• “No entries in Hid.Lst”• Type of controls (dialog & edit field) -> tells the methods usable on the control
The hid.lst file is stored in the build tree at SRC680/common/bin/hid.lst and is copied tothe newest minor. It has to be the same for .pro and nonpro OOo versions.
After creating the hid.txt file, diff it to the current hid.lst, to see the differences! Think about the changes, especially if something is missing!
(run 1_hid.sh; diff_hid.lst)
HID_DLG_NAME 33818HID_SD_NAMEDIALOG_PAGE 59897
• The only change: Longname from hid.lst
Problems / BUGs
Page 6 / 27 - How to write GUI-Tests
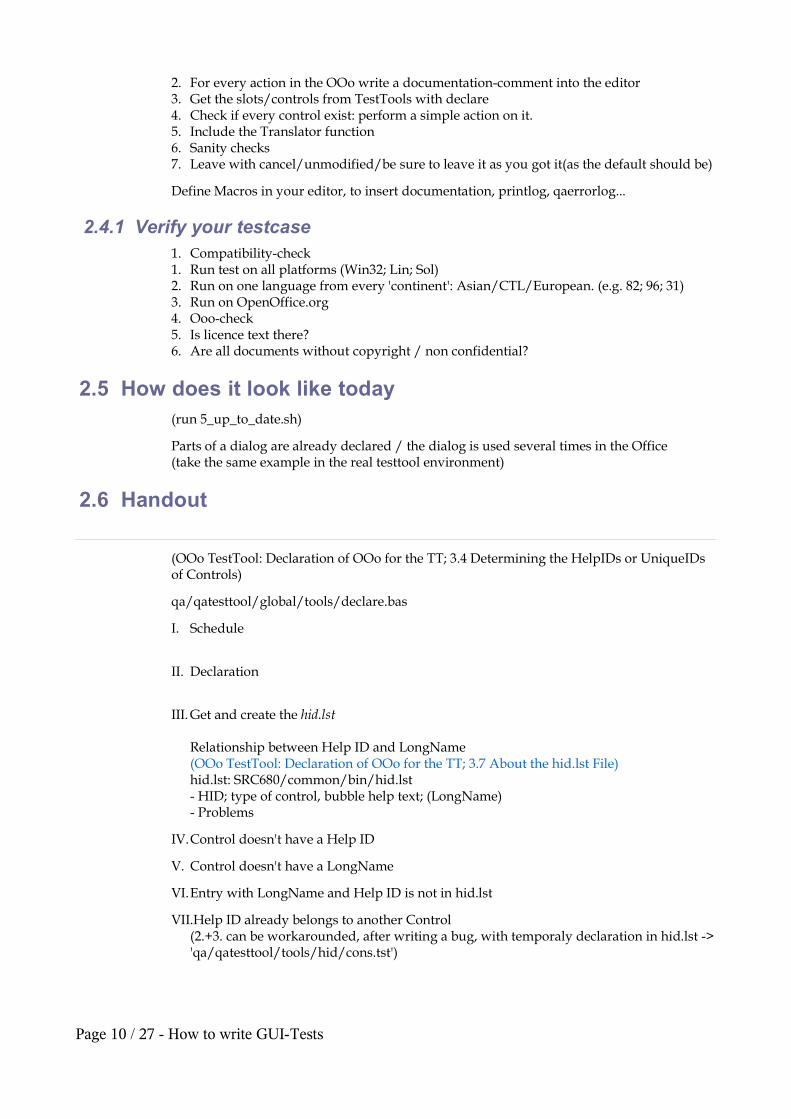
Illustration 2Declare without any entries in hid.lst
Illustration 3Declare with entries in hid.lst
1. Control doesn't have a Help ID2. Control doesn't have a Longname3. Entry with Longname and Help ID is not in hid.lst4. Help ID already belongs to another Control
(2.+3. can be workarounded, after writing a bug, with temporaly declaration in hid.lst ->'qa/qatesttool/tools/hid/cons.txt')
2.3.2 Declare dialog in win file
How to set the Kontext; How to call the control.
(OOo TestTool: Declaration of OOo for the TT; 3.6 Declaring a New Dialog or Control)
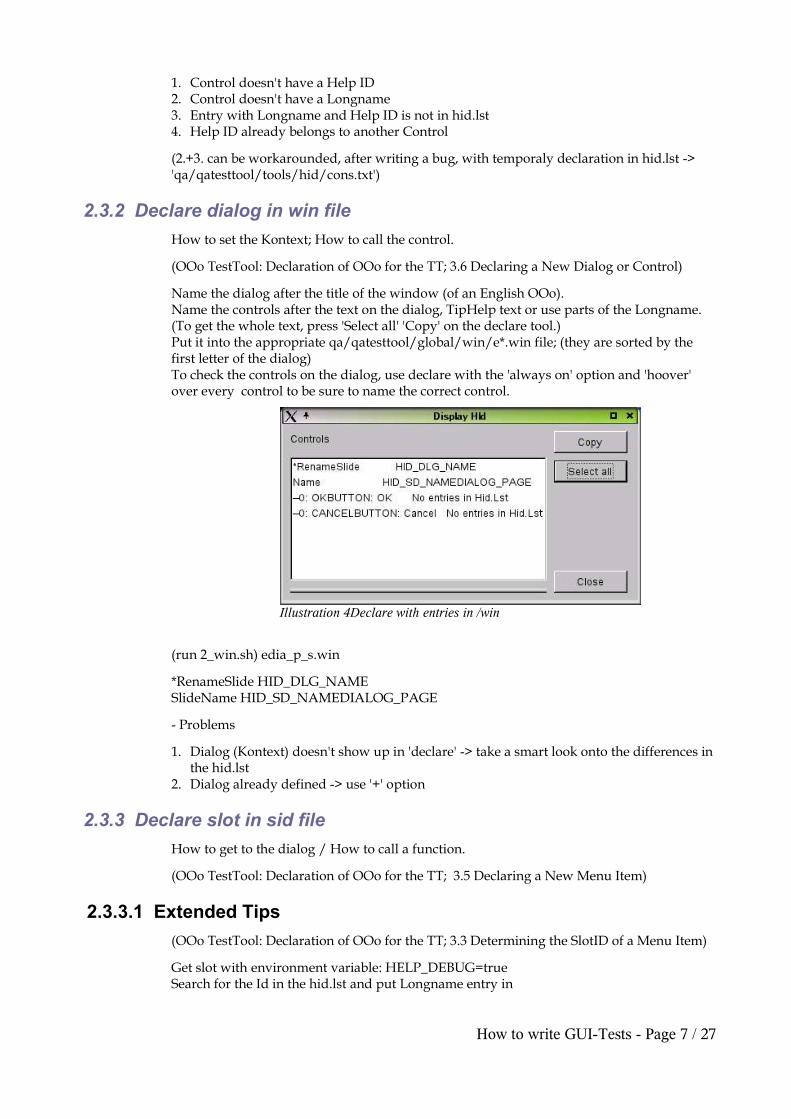
Name the dialog after the title of the window (of an English OOo).Name the controls after the text on the dialog, TipHelp text or use parts of the Longname.(To get the whole text, press 'Select all' 'Copy' on the declare tool.)Put it into the appropriate qa/qatesttool/global/win/e*.win file; (they are sorted by thefirst letter of the dialog)To check the controls on the dialog, use declare with the 'always on' option and 'hoover'over every control to be sure to name the correct control.
(run 2_win.sh) edia_p_s.win
*RenameSlide HID_DLG_NAMESlideName HID_SD_NAMEDIALOG_PAGE
- Problems
1. Dialog (Kontext) doesn't show up in 'declare' -> take a smart look onto the differences inthe hid.lst
2. Dialog already defined -> use '+' option
2.3.3 Declare slot in sid file
How to get to the dialog / How to call a function.
(OOo TestTool: Declaration of OOo for the TT; 3.5 Declaring a New Menu Item)
2.3.3.1 Extended Tips
(OOo TestTool: Declaration of OOo for the TT; 3.3 Determining the SlotID of a Menu Item)
Get slot with environment variable: HELP_DEBUG=trueSearch for the Id in the hid.lst and put Longname entry in
How to write GUI-Tests - Page 7 / 27
Illustration 4Declare with entries in /win
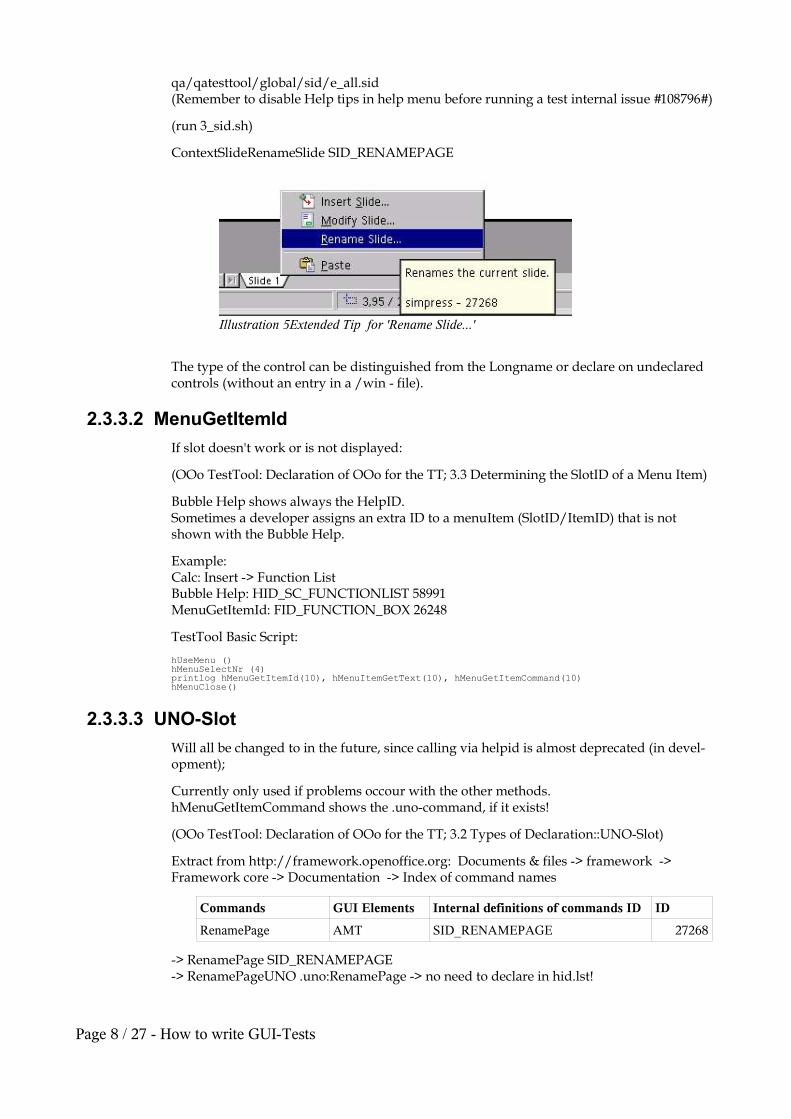
qa/qatesttool/global/sid/e_all.sid(Remember to disable Help tips in help menu before running a test internal issue #108796#)
(run 3_sid.sh)
ContextSlideRenameSlide SID_RENAMEPAGE
The type of the control can be distinguished from the Longname or declare on undeclaredcontrols (without an entry in a /win - file).
2.3.3.2 MenuGetItemId
If slot doesn't work or is not displayed:
(OOo TestTool: Declaration of OOo for the TT; 3.3 Determining the SlotID of a Menu Item)
Bubble Help shows always the HelpID.Sometimes a developer assigns an extra ID to a menuItem (SlotID/ItemID) that is notshown with the Bubble Help.
Example:Calc: Insert -> Function ListBubble Help: HID_SC_FUNCTIONLIST 58991MenuGetItemId: FID_FUNCTION_BOX 26248
TestTool Basic Script:
hUseMenu ()hMenuSelectNr (4)printlog hMenuGetItemId(10), hMenuItemGetText(10), hMenuGetItemCommand(10)hMenuClose()
2.3.3.3 UNO-Slot
Will all be changed to in the future, since calling via helpid is almost deprecated (in devel-opment);
Currently only used if problems occour with the other methods.hMenuGetItemCommand shows the .uno-command, if it exists!
(OOo TestTool: Declaration of OOo for the TT; 3.2 Types of Declaration::UNO-Slot)
Extract from http://framework.openoffice.org: Documents & files -> framework ->Framework core -> Documentation -> Index of command names
Commands GUI Elements Internal definitions of commands ID ID
RenamePage AMT SID_RENAMEPAGE 27268
-> RenamePage SID_RENAMEPAGE-> RenamePageUNO .uno:RenamePage -> no need to declare in hid.lst!
Page 8 / 27 - How to write GUI-Tests
Illustration 5Extended Tip for 'Rename Slide...'
- Problems
1. Slot, showed in Extended Tips, doesn't work -> use MenuGetItemId2. Slot doesn't show up in hid.lst, because is UNO-Slot
Final remark: ItemID and .uno:slots will be shown in testtool in the next future: internalissue #111994#
2.3.4 Verify your declarations
Check with declare, if any warnings occur during parsing of declaration files in result file! (unfold the Entry 'Reading the files')
2.4 Resourcetest
Motivation: On writing a new test you will find a lots of bugs!(approved by current automats)
(OOo TestTool: The Style and Coding Standard used in the Automated Testing; 10.3.7.3Using testing levels::Update)
(run 4_recourse.sh)
The item could be accessed through several items:
1. Context menu2. Context menu on the tab of the slide3. Defined shortcut
We don't do that! There has to exist a slot to call! THAT IS OUR BUSINESS!Alternative methods to call something could be checked in function test
testcase tContextSlideRenameSlide '/// open new application window ///' hNewDocument() '/// call 'Context -> Slide -> Rename Slide...' ///' try ContextSlideRenameSlide catch warnLog "Menu entry 'Context -> Slide -> Rename Slide...' could not beexecuted." endcatch Kontext "RenameSlide" if (RenameSlide.exists(5)) then DialogTest (RenameSlide) '///+ set Textfield 'Name' on dialog 'Rename Slide' to 'Hello' ///' try SlideName.setText "Hello" catch warnLog "Textfield 'Name' doesn't work." endcatch '///+ leave dialog 'Rename Slide' by pressing button 'Cancel' ///' RenameSlide.cancel printLog "Dialog 'Context -> Slide -> Rename Slide...' works." else warnLog "Dialog 'Context -> Slide -> Rename Slide...' could not be opended." endif
'/// close application window ///' hCloseDocument()endcase
Prepare your 'workspace'
1. Open an OOo and an editor
How to write GUI-Tests - Page 9 / 27
2. For every action in the OOo write a documentation-comment into the editor3. Get the slots/controls from TestTools with declare4. Check if every control exist: perform a simple action on it.5. Include the Translator function6. Sanity checks7. Leave with cancel/unmodified/be sure to leave it as you got it(as the default should be)
Define Macros in your editor, to insert documentation, printlog, qaerrorlog...
2.4.1 Verify your testcase1. Compatibility-check1. Run test on all platforms (Win32; Lin; Sol)2. Run on one language from every 'continent': Asian/CTL/European. (e.g. 82; 96; 31)3. Run on OpenOffice.org4. Ooo-check5. Is licence text there?6. Are all documents without copyright / non confidential?
2.5 How does it look like today(run 5_up_to_date.sh)
Parts of a dialog are already declared / the dialog is used several times in the Office(take the same example in the real testtool environment)
2.6 Handout
(OOo TestTool: Declaration of OOo for the TT; 3.4 Determining the HelpIDs or UniqueIDsof Controls)
qa/qatesttool/global/tools/declare.bas
I. Schedule
II. Declaration
III. Get and create the hid.lst
Relationship between Help ID and LongName(OOo TestTool: Declaration of OOo for the TT; 3.7 About the hid.lst File)hid.lst: SRC680/common/bin/hid.lst- HID; type of control, bubble help text; (LongName)- Problems
IV.Control doesn't have a Help ID
V. Control doesn't have a LongName
VI.Entry with LongName and Help ID is not in hid.lst
VII.Help ID already belongs to another Control(2.+3. can be workarounded, after writing a bug, with temporaly declaration in hid.lst ->'qa/qatesttool/tools/hid/cons.tst')
Page 10 / 27 - How to write GUI-Tests

VIII.Declare dialog in win-file
How to set the Kontext; How to name the control.(OOo TestTool: Declaration of OOo for the TT; 3.6 Declaring a New Dialog or Control)WIN-file: /qatesttool/global/win/e*.win;- Problems
IX. Dialog (Kontext) doesn't show up in 'declare' -> take a smart look onto the differences inthe hid.lst
X. Dialog already defined -> use '+' option
XI. Declare slot in sid file
How to get to the dialog / How to call a function.(OOo TestTool: Declaration of OOo for the TT; 3.5 Declaring a New Menu Item)
XII.Extended Tips
(OOo TestTool: Declaration of OOo for the TT; 3.3 Determining the SlotID of a MenuItem)HELP_DEBUG=trueSID-file qa/qatesttool/global/sid/e_all.sid
XIII.MenuGetItemId (OOo TestTool: Declaration of OOo for the TT; 3.3 Determining the SlotID of a MenuItem)
XIV.uno:Slot (OOo TestTool: Declaration of OOo for the TT; 3.2 Types of Declaration::UNO-Slot)http://framework.openoffice.org: Documents & files -> framework -> Frameworkcore -> Documentation -> Index of command names
XV.Verify your declarations
XVI.ResourcetestRegressions test!(OOo TestTool: The Style and Coding Standard used in the Automated Testing; 10.3.7.3Using testing levels::Update)
XVII.Verify your testcase
XVIII.Compatibility:
XIX.Run test on all platforms (Win32; Lin; Sol)
XX.Run on one language from every 'continent': Asian/CTL/European. (e.g. 82; 96; 31)
XXI.Run on OpenOffice.org
XXII.Ooo-check:
XXIII.Is licence text there?
How to write GUI-Tests - Page 11 / 27

XXIV.Are all documents without copyright / non confidential?
XXV.How does it look like today
Page 12 / 27 - How to write GUI-Tests

3 CVS usage in OpenOffice.org QAby [email protected]
When working with files that change frequently – be it documents, source code or binaryfiles – you will inevitably run into conflicts sooner or later.
Imagine two people working on the same file thus overwriting each other's changes. Thereare countless situations where things can go wrong, Murphy's law applies. Always.
In order to solve those problems the CVS (Concurrent Version System) has been inventedand is actively being worked on.
We use CVS in the OpenOffice.org QA to manage our files for automated testing and wewill soon start to use it to manage our manual testplans as well. This means: Everyone inthe OpenOffice.org QA will use in the future.
3.1 TerminologyWorkspace
In order to work with files everyone creates a local copy of the files that are stored on theCVS server. When changes to these files are completed thay are checked back in to therepository. You can – to some extent – compare workspaces to “Childworkspaces”
Repository
The way files are stored on a CVS server. CVS stores the changes to files (non-binary) or theentire changed file (binary).
Main Trunk
Files in CVS are organized as a tree. If not explicitly specified differently you will usuallywork on the main trunk and not on its branches. The main trunk thus contains the latestversions of your work.
Branch
If the product has matured that it is ready for production, you might want to freeze thestate of all the files related to this version. You can do so by making up a branch and givingit a speaking name such as e.g. “openofficeorg_20”. By convention branch names are alllowercase without special characters that have to start with a letter and my contain under-scores
Tag
A 'tag' is a name that can be given to a file at any time. By convention tags are all uppercasewithout special characters that have to start with a letter and my contain underscores.Neither names of tags nor names of branches can exist twice in one repository.
HEAD
HEAD is a so-called “Pseudo-Tag” that represents the most recent version of a file on abranch or the main trunk.
Merge
Merging means to incorporate changes from different files into one single file. If severalpeople change one file at the same time, those changes all have to be written into the single
CVS usage in OpenOffice.org QA - Page 13 / 27
copy on the cvs server. The first to check in his changes wins, everybody else will have to'merge' their changes into the file on cvs.
Module
A module usually is a subdirectory on a CVS-Server which can be checked out easily.
Join
To join means to update files on other branches than the one you are currently working on.If you checkout a file without any tags (like e.g. OPENOFFICEORG_20) then you willalways get the HEAD revision on the main trunk. When you checkin these files, they willend up on HEAD on the main trunk again.
If you want to propagate the file to the openofficeorg_20 branch, you can either create anisolated workspace for the openofficeorg_20 branch and copy the file there or you can jointhe file to the branch.
If you are working on a branch and want to commit a file to HEAD you can either use -j(join) or -A (strip tags) to put it there.
3.2 What is CVS?CVS is a kind of server that manages files and keeps track of changes to those files. It can beused locally or in a networked environment. Basically it works like a ftp-server just that ituses a different set of commands.
CVS is (in our environment) is a Client/Server solution where our CVS server is located atOpenOffice.org (anoncvs.services.openoffice.org).
CVS can do following things for you:
1. If you made a mistake older file-versions can be restored to undo your changes
2. Several people can work on the same set of files without killing the changes other peoplemade to files in the meantime
3. Changes between file-versions can easily be tracked by diffing two revisions of a file.
4. You can 'tag' special states of files.
Note: Using cvs is pretty simple as long as you keep a set of rules in mind:
1. Keep it simple yourself, stay away from using or creating complex scenarios.
2. Keep branches separated, don't ever mixup files from different branches in one directory
3. Everything you do takes its start from the file on your local workspace. This is the baseof all your actions
4. CVS works recursively unless you specify differently
3.3 Managing ConflictsImagine two people have checked out the same file to their local workspaces. One changesa line of code and checks the file into the cvs repository. Meanwhile the other has donechanges as well and wants to checkin the file later. When trying to commit the file he willbe warned that the file has been changed on the server and that he has to resolve theconflicts first. This process is called “merging”.
Page 14 / 27 - CVS usage in OpenOffice.org QA
CVS tries to solve conflicts automatically, but there might be parts of code that overlap.This might e.g. happens when you change only one line of code, adding or removing parts.
A simple diff will show which changes have been made and after a editing the file(correcting the conflict) you can check it back in.
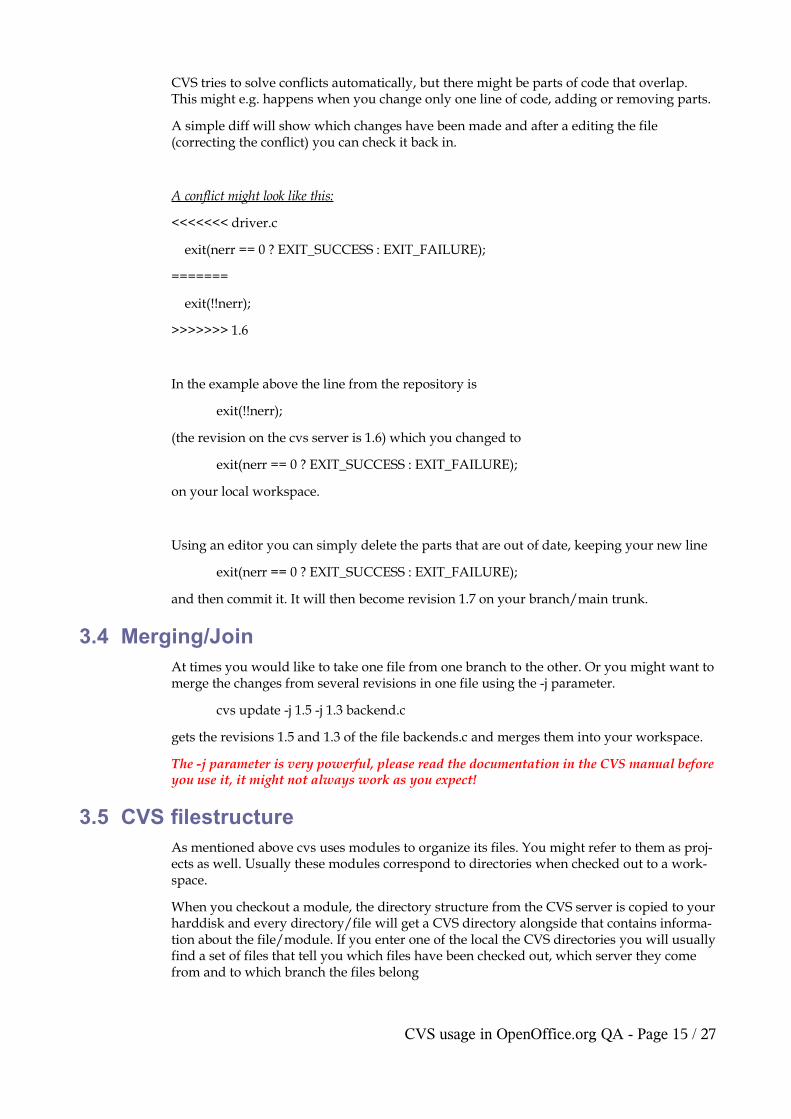
A conflict might look like this:
<<<<<<< driver.c
exit(nerr == 0 ? EXIT_SUCCESS : EXIT_FAILURE);
=======
exit(!!nerr);
>>>>>>> 1.6
In the example above the line from the repository is
exit(!!nerr);
(the revision on the cvs server is 1.6) which you changed to
exit(nerr == 0 ? EXIT_SUCCESS : EXIT_FAILURE);
on your local workspace.
Using an editor you can simply delete the parts that are out of date, keeping your new line
exit(nerr == 0 ? EXIT_SUCCESS : EXIT_FAILURE);
and then commit it. It will then become revision 1.7 on your branch/main trunk.
3.4 Merging/JoinAt times you would like to take one file from one branch to the other. Or you might want tomerge the changes from several revisions in one file using the -j parameter.
cvs update -j 1.5 -j 1.3 backend.c
gets the revisions 1.5 and 1.3 of the file backends.c and merges them into your workspace.
The -j parameter is very powerful, please read the documentation in the CVS manual beforeyou use it, it might not always work as you expect!
3.5 CVS filestructureAs mentioned above cvs uses modules to organize its files. You might refer to them as proj-ects as well. Usually these modules correspond to directories when checked out to a work-space.
When you checkout a module, the directory structure from the CVS server is copied to yourharddisk and every directory/file will get a CVS directory alongside that contains informa-tion about the file/module. If you enter one of the local the CVS directories you will usuallyfind a set of files that tell you which files have been checked out, which server they comefrom and to which branch the files belong
CVS usage in OpenOffice.org QA - Page 15 / 27
If you checkout files from more than one CVS server and copy them into one directory, oneof the CVS directories will be overwritten and thus the information is lost. This can bedangerous because the information about the files is incomplete and you can accidentiallycommit files to the incorrect branch/tag. Remove the directory and step into the subdirec-tory to commit your files from there if possible.
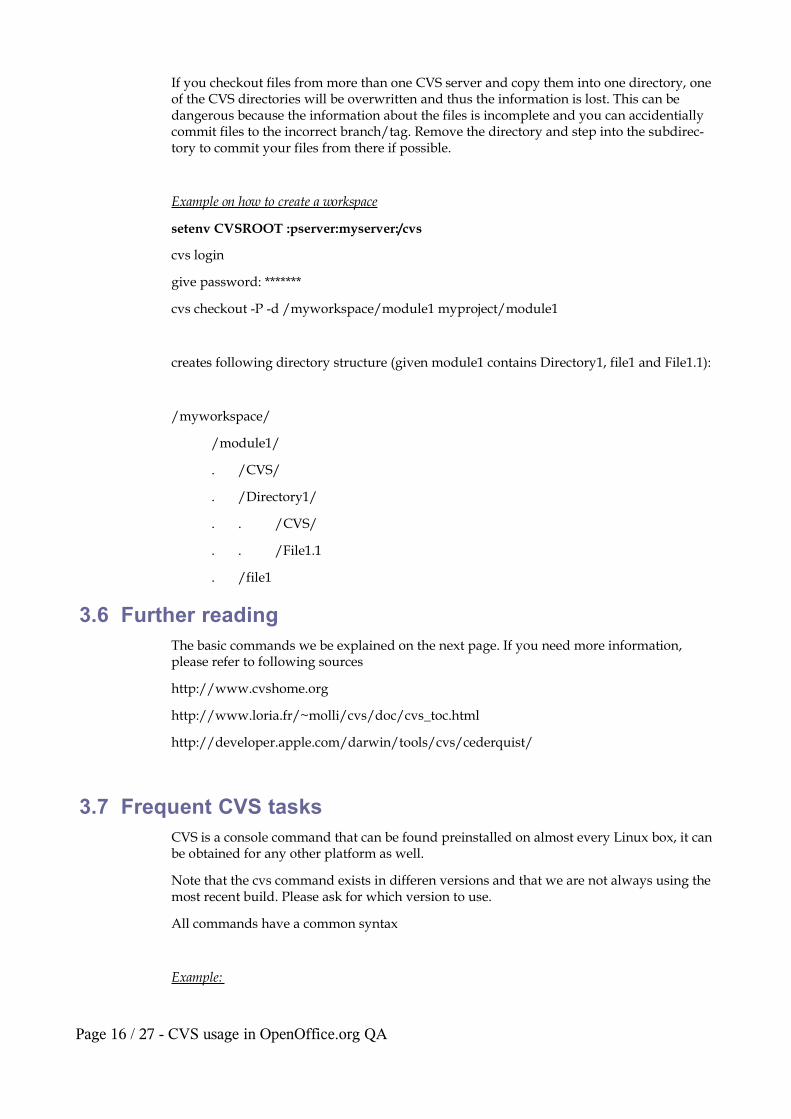
Example on how to create a workspace
setenv CVSROOT :pserver:myserver:/cvs
cvs login
give password: *******
cvs checkout -P -d /myworkspace/module1 myproject/module1
creates following directory structure (given module1 contains Directory1, file1 and File1.1):
/myworkspace/
/module1/
. /CVS/
. /Directory1/
. . /CVS/
. . /File1.1
. /file1
3.6 Further readingThe basic commands we be explained on the next page. If you need more information,please refer to following sources
http://www.cvshome.org
http://www.loria.fr/~molli/cvs/doc/cvs_toc.html
http://developer.apple.com/darwin/tools/cvs/cederquist/
3.7 Frequent CVS tasksCVS is a console command that can be found preinstalled on almost every Linux box, it canbe obtained for any other platform as well.
Note that the cvs command exists in differen versions and that we are not always using themost recent build. Please ask for which version to use.
All commands have a common syntax
Example:
Page 16 / 27 - CVS usage in OpenOffice.org QA
cvs [:protocol:username@servername:/path to cvs-root] command [options] file1, file2 ...
You should have a couple of environment variables in place before using CVS. These are
CVSROOT
This is the path to your cvs server and its repository. You can compare it to the root-direc-tory on your Linux/Solaris box. Below this directory you can find the modules.
Example: CVSROOT=:pserver:username@my-cvs-server:/cvs/qa
3.8 Login to a CVS server You have to log in to a cvs server once before using it. Your login information will be storedin your homedirectory in a file called .cvspass
cvs login :pserver:username@so-cvs-tunnel:/cvs
tkCVS
• use console
WinCVS
• Menu “Admin->Preferences”, set CVSROOT
• Menu “Admin->Login”, enter password
3.9 Checkout filesin order to create your own workspace to work on you need to checkout the files from therepository that you just logged in to. Project can be any of “framework”, “setup”, “writer”,“global” etc. Note that “co” is a short form of “checkout”, -P means “prune empty directo-ries” (do not checkout empty dirs).
Note: When checking out a module all 'heading'directories will be created resulting in adirectory tree that can be very long before the module appears.There are ways to avoid thisby using the optional -d parameter followed by the path where you want the module to beplaced.
cvs co -P -d myworkspace qa/qatesttool/<projekt>
TKCVS:
• Menu “File->Browse Modules”, select module
• Press red down-arrow to checkout the files
CVS usage in OpenOffice.org QA - Page 17 / 27

WinCVS:
• Menu “Create->Checkout Module”, enter path to module and target directory
3.10 Update files Once you have a working workspace and all the files you need are checked out, you mightencounter that somebody else has changed some of your files in the repository. In order toavoid conflicts you should check your workspace frequently for files that have beenchanged.
cvs update <filename(s)/modules>
TKCVS:
• Menu “File->Update” or use the red down-arrow
WinCVS:
• Select module/file
• Right-click to open context menu
• Select “update selection”
• Press ok on the dialog that opens
3.11 Update files with optionsIf you do not provide any options the files will be taken from the HEAD of the branch youinitially checked your files out from. If you want to checkout a file or module from a specialbranch, you can provide some checkout options to do so.
Note: This conflicts with rule 2 for easy cvs use: Do not mixup files from different branches.
cvs update -r <branch/tag/revision> <filename>
TKCVS:
• Menu “File->update with options”
WinCVS:
• Select Module(s)
• Open Kontext Menu (right click)
• Choose “Update selection”
• Set options in the dialog that open, press ok.
Page 18 / 27 - CVS usage in OpenOffice.org QA
3.12 Add new files to the repositoryBefore files can be used with cvs they need to be added to the repository. Adding themdoes nothing more than telling the cvs that you intend to checkin (commit) a new file andthat it should be handled by cvs in the way you specify.
Note: If you want to add a file that has binary content, you need to specify the -kbparameter. You have to commit the file after it has been added.
cvs [-kb] add <filename/directory>
TKCVS:
• Press the tiny '+' button
• eventually check the -kb button on the following dialog
WinCVS:
• Press the tiny 'red-croos' button on the iconbar, use the one to the right for binary files
3.13 Checkin (commit) files to the repositoryWhen you have finished working with your files, tested them thoroughly you usually wantto check them in to the cvs-server repository.
You should always diff your changes to the last revision on HEAD before committtingbecause you'll have to add a comment to each file you commit which explains the changesyou've made.
Note: co is an abbreviation for commit. If you do not specify the optional -m parameter aneditor will (hopefully) open to let you enter a comment and the command will be executedwhen you exit the editor.
cvs co -m “some comment” <file/module>
TKCVS:
• press the red up-arrow
• enter a comment
• press ok
WinCVS:
• Select Module
CVS usage in OpenOffice.org QA - Page 19 / 27

• Right-click to open context
• Select “Commit Selection”
Page 20 / 27 - CVS usage in OpenOffice.org QA
4 Use of output and documentation in script-files forautomated testing
4.1 FileheadersWe know 3 types of headers differ from filetype. Bas-Files know 1 header-type and inc-Filesknows 2 header-types. All headers start with the GLGPL/SISSL-header which is not nearlydescribed here. See documentation for further information
4.2 Bas-Files:'*..................'* All Rights Reserved.'*'* Contributor(s): _______________________________________'*'*'/***********************************************************************'*'* owner : [email protected]'*'* short description :'*'\***********************************************************************
A bas-file header should always end like this sample above. Only GLGPL/SISSL-headerand information about the owner and a short description. Documentation in bas-files willbe completely ignored from File-Parser. You will get the possibility to add documentationfor a bas-file later through Statuspage-Admin.
4.3 INC-File5. Header#1:
Looks like the same header as in a bas-File. The requirement is, the first sub in this include-file should be named like the file without extension. Imagine the file is named 'w_101_.inc'then the first sub should be named 'sub w_101_'. (case-sensitive)
'*..................'* All Rights Reserved.'*'* Contributor(s): _______________________________________'*'*'/***********************************************************************'*'* owner : [email protected]'*'* short description :'*'\***********************************************************************
sub w_101_
Call myTestcase1
Use of output and documentation in script-files for automated testing - Page 21 / 27
Call myTestcase2Call myTestcase3
end sub
6. Header#2:
This header is named 'Extended header'. It consist of the 'Header#1' and a list of all subs,functions and testcases whitin that file. See example:
'*..................'* All Rights Reserved.'*'* Contributor(s): _______________________________________'*'*'/***********************************************************************'*'* owner : [email protected]'*'* short description :'*'***********************************************************************'* #1 myTestcase1'* #0 myTestcase2'* #1 myTestcase3'*'\***********************************************************************
First sub in main could be named like file but don't have to. The '#X' string in front of thesub-name gives the option the check if documentation for this sub should be written or not.So if you have a '#0' in front your documentation will not be written through File-Parser. A'#1'-string signals the parser to check for documentation in that sub-function or testcase.
4.4 Documentation in testtool-files:Documentation for a testcase, sub or function is far easy. If you want a documentation beparsed by the file-parser, simply start your string with a quotation mark followed by threeslashes ( '/// ) End documentation with three slashes ( /// ). The string „'/// This is mydocumentation ///“ will be printed as „This is my documentation“ on Statuspage. If youdon't want to have a hard line-break simply add a „+“ to your string and tghe line breakwill be ignored:
'/// This is my documentation - ///
'/// + short but sweet ///
generates the output: „This is my documentation – short but sweet“ on Statuspage
4.5 Output in Testtool-Logfiles:Automation knows 3 different outputs that can be used in script-files to make it easier toread the logfiles and influence the status on statuspage.
5. Warnlog: A warnlog should be used to show the reader of a testtool-generated logfilethat there is an checked value not the same as expected. Warnlogs will be shown inlogfile as an orange entry. Warnlogs should always hint to an possible failure or bug inoffice. (w_104_.inc Line 444)
Page 22 / 27 - Use of output and documentation in script-files for automated testing
6. ErrorLog: The Errorlog is generated by testtool if a general error occured. It can be a hintto a GPF, no declared or not-found control. Errorlogs are red entrys in Logfile. If anError occures the complete testcase will be interrupted and set to base-state. You shouldalways workaround them (if it works) and output failure with a Warnlog ! (There aretwo commands: ErrorLog and ExceptLog. It returns the last error and writes it down tologfile without/with callstack.)
7. QAErrorLog: Writes a string to Logfile which is marked in a red-color (different fromErrorlog-color) specified by the developer. This command should be used to mark zonesin script hint to a specific problem like:
1. a bug has been found, issue has been written but bug will not be fixed in currentlytested version.2. a reference to a condition that should be fulfiled to run test correctly. (Empty direc-torys in some case or a specific path or whatever)
4.6 Specify output of Errors and warnings on Statuspage:'Statuspage' is a special InHouse feature. For further information look intoqa/qatesttool/global/system/inc/status.inc.
You are able to tell the Statuspage that in some cases the warnings or errors should not beevaluated. This could be something like: You can't workaround an error (see ErrorLog) or awarnlog is printed to Logfile but should not be affect to total result. (Green State)
Files for Testscripts (inc, bas) should have a header. In this header all your testcases arelisted. Simply add string „wrn:1“ or a string „err:1“ to testcasename in header if you expecta warning or an erro in this testcase, which should not affect the final result on Statuspage.If you enter both (wrn: and err:) split them with a pipe ( | ): wrn:1|err:1. If you only wantto exclude an error you have to enter the „wrn-String“, too. „Err:“ never can be alone, but a„wrn:“ is ok alone.
Example:
' #1 wDokSchreiben ' => OK' #1 wDocSetContext 'wrn:1 ' #1 wSetVorlage 'wrn:0|err:3 ' => OK' #1 wGetVorlage 'err:0 ' => not allowed
The „#1“ in front of the testcase means that documentation for this file should be written. A'#0' indicates that documentation shall be ignored.
Use of output and documentation in script-files for automated testing - Page 23 / 27

5 Debugging in TestToolby [email protected]
The experience of many years Testtool script development shows that prevention is the bestchoice to need as less debugging sessions as possible.
5.1 Debug Evolutions - Six “Golden Rules”
5.1.1 Preperation in advance
7. While writing the testcases you should avoid mistakes and – and often it is more impor-tant – you should add as many documentation to the code to be able to read the codealso years later. Example: The understanding of a called sub routine is much easier if you do not have tolook at it to understand what it is doing....
'/// Writing the text “Section Test”, selecting it and using the '/// menu item Insert -> Section to create a new section.Call fInsertSection("Section Test")'/// Pressing <RETURN> to get in the next row.Call wDokSchreiben "<RETURN>"'/// Writing the text “Western Test”, selecting it and using the '/// menu item Insert -> Section to create a new section.Call fInsertSection("Western Test")'/// Typing <UP> cursor key to get one line up.Call wDokSchreiben "<UP>" , 1...
1. It is very useful to add “Debug points” in [complex] loops.
Example: Other users will be able to understand what loops are doing and whichparameter they have to change to debug only one loop instead off the whole run.
'DEBUG: Here you can fastly test only one control if you change the 1 – 21.'DEBUG: for kControls = 18 to 18 would test only Currency Field.for iControls = 1 to 21 Call ListAllDelete (lsPropList())...
1. Adding a Call to an external function or sub outside your file and other users will beable to see that this function or sub routine is not included in this file.
2. Test your code under many environments and operating environments as you can get.
5.1.2 Separate
The experience showed it in the past that in a debugging session where you have to debugmany errors and warnings it is not time saving to debug all failed testcases together! It ismuch more effective to debug each failed testcase separately.
8. If an error has been occoured analyze it aloneMay be the failure is a problem of the sequence of the testcases. If so, the simple run of atestcase would pass.
9. Run one or more testcases in front of the failed one to resolve problems in the sequenceIf you could no resolve the problem in alone-runs of the testcase run one or more infront of the testcase. Sometimes you have to run all testcases in front of the failed one tofind the one which changed something in the application.
Page 24 / 27 - Debugging in TestTool
5.1.3 “Top to bottom” mode
Resolve each issue after another not all together and begin at the top. Sometimes one issuein upper testcases fixes also problems in later running testcases.
Also small fixes in sub-routines sometimes fix more than that analyzed issue if it is a globalroutine for the whole test script.
5.1.4 Watch
It is often needed really to watch what is happening on the screen! If you have problems toresolve the reason: Take time to watch the running test. Set breakpoints or use print orprintlog command if it's too fast for your eyes.
5.1.5 Ask the experts
If you have used too much time to resolve an issue, ask the other test script-developer tohelp. It is sometimes very helpful if more than two eyes analyze a problem.
5.1.6 Split huge testcases
If testcases need to much time (debugging and/or running) make a split in many small testscenarios.
5.2 Fault-Prone Areas
5.2.1 “Defaults”
Be sure that a evadable default in the application is really the default in all environments.Otherwise you have to set the settings you need in front of the testcase.
Example: If you need CJK features enabled in Tools » Options you have to verify and set itif it is not enabled.
5.2.2 Tab pages and dialogues
Be sure in your testcases that you really are working on the correct tab page or dialogue.
Kontext “{Object}”if {Object}.Exists(1) then...elsewarnlog “{Object}...”...
Sometimes the switch over tab pages does not work correctly or the default has beenchanged. A testcase without a verification like {Object}.Exists(1) would fail because it callscontrols on another, not reachable tab page.
It also makes sense to test exact manually the sequence of calling the tab pages.
Example: If you enter no data on some pages on data sources tab pages you will get anerror dialogue. This behaviour you can only find if you try it one time manually what thetestcase is doing automatically otherwise the unexpected dialogue would break the testcase.
5.2.3 Context menus and Toolbars
Both operations, opening and using a context menu and un-/docking a toolbar needs timealso in reality. Give the scripts also the time!
...{Object}.TypeKeys "<DOWN><RETURN>"sleep(2)
Debugging in TestTool - Page 25 / 27

{Object}.OpenContextMenusleep(2)hMenuSelectNr(4)sleep(2)...
...{Object}.TearOffsleep(2)...
5.2.4 Close what you have opened
Opening a context menu is fine but in some cases it un-/checks only something and youhave to close it in your script. Otherwise you would a GPF.
Also if you have opened dialogues the script should close them if they are not being closedautomatically from the application.
Kontext "{Object}" sleep(1) {Object2}.TypeKeys "<DOWN>" , 4 {Object2}.TypeKeys "<RIGHT>" {Object2}.TypeKeys "<DOWN>" , 2{Object}.Close
5.2.5 Setting breakpoints correctly
On an opened context menu or on some BASIC statements you can not set a breakpoint.
Page 26 / 27 - Debugging in TestTool

6 Alphabetical Index
Alphabetical Index - Page 27 / 27