Embed Size (px)
Citation preview
CONTENTS Collapse Project
Contents
1 Introduction 3
2 Concept and origins 5
3 Softwares 6
4 Levels 8
4.1 Components . . . . . . . . . . . . . . . . . . . . . . . . . . . . . . . . . . . . . . . . . 8
4.1.1 White Cube . . . . . . . . . . . . . . . . . . . . . . . . . . . . . . . . . . . . . 8
4.1.2 Grey Cube . . . . . . . . . . . . . . . . . . . . . . . . . . . . . . . . . . . . . 8
4.1.3 Starting Cube . . . . . . . . . . . . . . . . . . . . . . . . . . . . . . . . . . . . 9
4.1.4 Exit Cube . . . . . . . . . . . . . . . . . . . . . . . . . . . . . . . . . . . . . . 9
4.1.5 Gate . . . . . . . . . . . . . . . . . . . . . . . . . . . . . . . . . . . . . . . . . 9
4.1.6 Lever . . . . . . . . . . . . . . . . . . . . . . . . . . . . . . . . . . . . . . . . 9
4.1.7 Button . . . . . . . . . . . . . . . . . . . . . . . . . . . . . . . . . . . . . . . . 9
4.1.8 Pressure Plate . . . . . . . . . . . . . . . . . . . . . . . . . . . . . . . . . . . . 10
4.1.9 Laser . . . . . . . . . . . . . . . . . . . . . . . . . . . . . . . . . . . . . . . . 10
4.1.10 Sensor . . . . . . . . . . . . . . . . . . . . . . . . . . . . . . . . . . . . . . . . 10
4.2 Level Mechanics . . . . . . . . . . . . . . . . . . . . . . . . . . . . . . . . . . . . . . 11
4.3 The event system . . . . . . . . . . . . . . . . . . . . . . . . . . . . . . . . . . . . . . 13
5 Level Editor 14
5.1 Implementation . . . . . . . . . . . . . . . . . . . . . . . . . . . . . . . . . . . . . . . 14
5.2 Event Configuration . . . . . . . . . . . . . . . . . . . . . . . . . . . . . . . . . . . . . 17
6 Character 19
6.1 3D Model . . . . . . . . . . . . . . . . . . . . . . . . . . . . . . . . . . . . . . . . . . 19
6.2 Character Logic . . . . . . . . . . . . . . . . . . . . . . . . . . . . . . . . . . . . . . . 20
7 Worlds 21
7.1 World Mechanics . . . . . . . . . . . . . . . . . . . . . . . . . . . . . . . . . . . . . . 21
7.2 Navigation . . . . . . . . . . . . . . . . . . . . . . . . . . . . . . . . . . . . . . . . . . 22
8 Gallery 24
8.1 The local gallery . . . . . . . . . . . . . . . . . . . . . . . . . . . . . . . . . . . . . . 24
8.2 The online gallery . . . . . . . . . . . . . . . . . . . . . . . . . . . . . . . . . . . . . . 25
1
CONTENTS Collapse Project
9 The Collapse API 28
9.1 General Information . . . . . . . . . . . . . . . . . . . . . . . . . . . . . . . . . . . . . 28
9.2 Users . . . . . . . . . . . . . . . . . . . . . . . . . . . . . . . . . . . . . . . . . . . . 29
9.3 Registration . . . . . . . . . . . . . . . . . . . . . . . . . . . . . . . . . . . . . . . . . 30
9.4 Login . . . . . . . . . . . . . . . . . . . . . . . . . . . . . . . . . . . . . . . . . . . . 30
9.5 Levels Recovery . . . . . . . . . . . . . . . . . . . . . . . . . . . . . . . . . . . . . . . 31
9.6 Interaction with the Levels . . . . . . . . . . . . . . . . . . . . . . . . . . . . . . . . . 32
10 Main Menu 34
11 Cooperative Mode 36
12 Website 37
12.1 Front-end . . . . . . . . . . . . . . . . . . . . . . . . . . . . . . . . . . . . . . . . . . 37
12.2 Back-end . . . . . . . . . . . . . . . . . . . . . . . . . . . . . . . . . . . . . . . . . . 38
13 Personal Conclusion 39
13.1 Gael de FRANCONY . . . . . . . . . . . . . . . . . . . . . . . . . . . . . . . . . . . . 39
13.2 Edward CACIOPPO . . . . . . . . . . . . . . . . . . . . . . . . . . . . . . . . . . . . 40
13.3 Valentin BERLIER . . . . . . . . . . . . . . . . . . . . . . . . . . . . . . . . . . . . . 41
13.4 Emma PAYAN . . . . . . . . . . . . . . . . . . . . . . . . . . . . . . . . . . . . . . . 42
14 Conclusion 43
2
Collapse Project
1 Introduction
During the second semester we were asked to carry out a project using the C# programming language
running on Windows. The objective of this project was to put into practice the knowledge assimilated
during the course but also to improve our personal skills.
The objective of this report is to provide an in-depth look at the realization of the project. You will
find an explanation of the project and its implementation as well as parts detailing the contributions and
experience gained by each member.
The project is called Collapse and was realized by Gael de Francony, Valentin Berlier, Edward Ca-
cioppo and Emma Payan. We are all four students in the first year of preparatory class at the EPITA
school.
The project presented in this report is a video game made with Unity. Collapse is a game of reflexion
and agility featuring a character named Pip. After falling into a dark universe, Pip must try to find the
exit through different levels.
Visually, the game features a clean and minimalist interface. This creates a calm atmosphere in which
the player is invited to concentrate. All of our graphic resources, such as 3D models as well as textures,
were specially created by us.
The game is progressive, that is to say that as the player completes the different levels, the game
introduces new concepts and levels get increasingly difficult. Our game allows the player to solve alone
a set of predefined levels. However, it also contains a cooperative mode, in which two players need to
help each other and cooperate to complete levels that would otherwise be impossible alone. Finally, the
player is invited to express his creativity through the level editor. The level editor allows him to create his
own levels. The player can also share his creations with the player community and rate the levels created
by other players. All the different aspects of the game and their implementations will be explained in the
first part of this report.
3
Collapse Project
This project is for all of us our first real teamwork experience over a long period of time. We’ll
remind that we had to face a few difficulties regarding the composition of the group. In fact, our group
has not always been composed by the current members. Indeed, although the project began with a team
of four people, two people of our group left Epita just before we could hand back the book of specifica-
tions. We were only two left, Emma and Valentin. Gael and Edward were a group of two at the time and
were working on another project. Managing such a project with only two team members was impossible,
which is why our teams joined up just before the second defense to work together on the Collapse project.
Our team has therefore had to adapt several times and the change of project that Gael and Edward had
to go through resulted in a significant period of adaptation and familiarization with the project. During
the course of the development, each of us went through the experience in a different way and that’s why
we’ll present the our individual reports at the end.
4
Collapse Project
2 Concept and origins
Collapse game is a 3D game that combines puzzle and reflection. It features a wide range of interesting
and challenging levels. The main character lives in a simple universe deep in the darkness. Lost in the
middle of this universe, he discovers and completes different levels that gradually allow him to make his
way from world to world.
Each world is full of levels to complete. The different worlds allow the player to select levels. The
levels are arranged along a path extending to the right at the end of which a portal allows the player to
access the next world. In each world, there is only one path leading directly to the exit. The other paths
deviate from the main track and provide extra levels that can be completed as a bonus.
Our game also provides an advanced creative aspect as the player has access to an in-game level ed-
itor in which he can create and edit his own levels. The player can then play his own levels. He can also
share them online with the entire community around the world right from the game. The online gallery
allows him to play levels that were created by other players. The player can also rank levels made by
other players by giving them a star if they enjoy it.
Finally our game features a cooperative mode in which the player must team up with a friend in order
to be able to finish different levels. These levels appear in a second universe and are impossible to solve
alone.
The original idea of the game comes from Valentin BERLIER. However, each member of the team
contributed to the final concept of the game by suggesting improvements of existing ideas and / or new
ideas.
5
Collapse Project
3 Softwares
The game was developed in C# with Unity. Unity is a software, or more precisely, a video game engine
for 2D and 3D. It provides a framework that allows users to easily develop cross-platform games. Unity
allows developers to choose between two languages: Unityscript (a version of javascript adapted by the
game engine) as well as C# (Microsoft’s signature language).
In order to edit the game’s scripts we used MonoDevelop and Visual Studio. Both of these soft-
wares are powerful IDEs that allow editing and debugging of C# code. We also used Git 1, a version
control system that allows us to manage changes and the evolution of our code. Finally, we hosted a re-
mote repository of the project on GitHub 2 in order to make it easy for everyone in the team to contribute.
The components of our game have all been created and designed by the members of the group. We
used the 3D software Blender 3 which allows to model and apply textures to our models. We also used
image editors such as Photoshop and Paint.NET to create textures. All the animations that are in the
game were also created with Blender 3D.
In order to write our reports, we used Google Docs to share drafts and the main ideas of the report.
Then, we used Overleaf, a collaborative tool that allows us to give the appropriate format to the report
using LATEX.
Almost all of the concepts that we had to deal with were new to us so we therefore had to do a lot
of research. We relied heavily on Unity’s official documentation and tutorials. We have also used the
MSDN documentation to broaden our knowledge in C#.
1Git is a version control software, that is to say it follows the evolution of a code repository, saves the modifications carried outon each file and is thus be able to go back in case of problem. If two people modify the same file at the same time, their changeswill be able to merge without losing information. Very powerful and recent, Git was created by Linus Torvalds, who is amongothers, the man behind Linux.
2GitHub is a platform that provides hosting services for code repositories.3Blender is a free 3D modeling, animation and rendering software, created in 1995. It has advanced modeling, 3D sculpture,
3D animation, and rendering. It also manages video editing as well as various physic simulations such as particles, rigid bodies,soft bodies and fluids.
6
Collapse Project
Finally, let us share some of the tools and libraries that we used in order to create our website. Our
website is built with the Django web framework 4 and is primarily used to manage the backend 5 of the
website. Our game relies heavily on a REST API that we built in order to let players share and rate the
leves that they can create in-game. Django, combined with the django rest framework (or DRF for short)
made it really easy to build a fast and secure API 6 adapted to our needs.
The reason why we decided to create a Django application instead of something else in another
framework or language is primarily because python is very readable and powerful language. It’s not
hard to pick up and all of us already know at least the basics since our algorithm classes are taught with
python. Other interesting advantages of using python and Django over anything else in this situation
includes the overall quality of the application, the speed of development, the security of the final website
as well as the ease of maintenance over time.
4A framework designates in computer programming a set of tools and software components on the basis of a software or anapplication. It is the framework that establishes the foundations of a software.
5In computing, a back-end (sometimes also called a background) is a term designating an output stage of a software that mustproduce a result. It is opposed to the front-end (also called a frontal) which is the visible part of the iceberg
6API is an acronym for Applications Programming Interface. An API is a programming interface that allows you to ”plug in”to an application to exchange data. An API is open and offered by the owner of the program
7
Collapse Project
4 Levels
The entire game revolves around resolving puzzles and completing levels. In order to solve these levels,
the player will usually have to interact with a set of elements and deduce the different actions that he can
perform. He must finally use this information to make choices and make his way towards the end of the
level. We had to put in place a system that was both flexible and efficient to allow players to create and
share their own levels. We will be looking at the most significant aspects of our system.
4.1 Components
Each level consists of a set of components with which the player must be able to interact. We have
currently implemented a total of ten different components, each serving a particular role.
4.1.1 White Cube
This component is one of the main blocks, used in large quantities in
the levels. It does not have any special functionality. It is used
most of the time as a building block to form the overall look of the
level.
4.1.2 Grey Cube
This component also constitutes one of the main blocks, used in large quantities
in the levels. It does not have any special functionality either. It is used mostly
as a building block to give contrast to certain parts of the level or to delimit ar-
eas.
8
4.1 Components Collapse Project
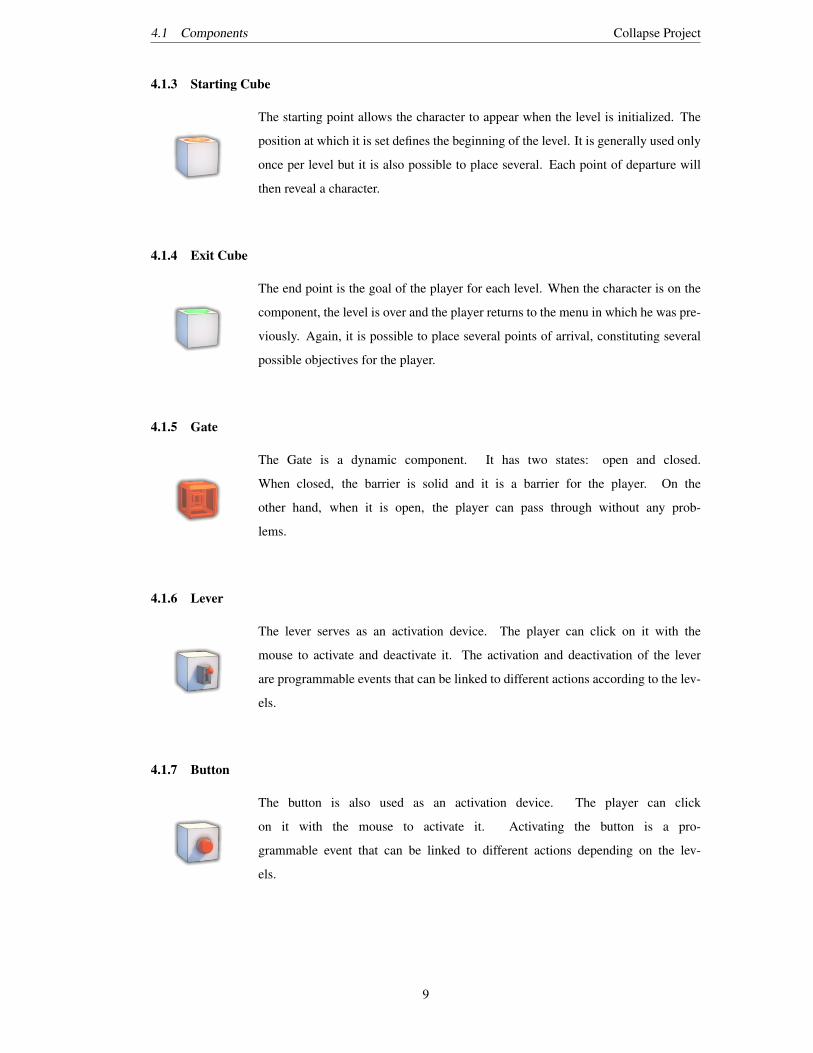
4.1.3 Starting Cube
The starting point allows the character to appear when the level is initialized. The
position at which it is set defines the beginning of the level. It is generally used only
once per level but it is also possible to place several. Each point of departure will
then reveal a character.
4.1.4 Exit Cube
The end point is the goal of the player for each level. When the character is on the
component, the level is over and the player returns to the menu in which he was pre-
viously. Again, it is possible to place several points of arrival, constituting several
possible objectives for the player.
4.1.5 Gate
The Gate is a dynamic component. It has two states: open and closed.
When closed, the barrier is solid and it is a barrier for the player. On the
other hand, when it is open, the player can pass through without any prob-
lems.
4.1.6 Lever
The lever serves as an activation device. The player can click on it with the
mouse to activate and deactivate it. The activation and deactivation of the lever
are programmable events that can be linked to different actions according to the lev-
els.
4.1.7 Button
The button is also used as an activation device. The player can click
on it with the mouse to activate it. Activating the button is a pro-
grammable event that can be linked to different actions depending on the lev-
els.
9
4.1 Components Collapse Project
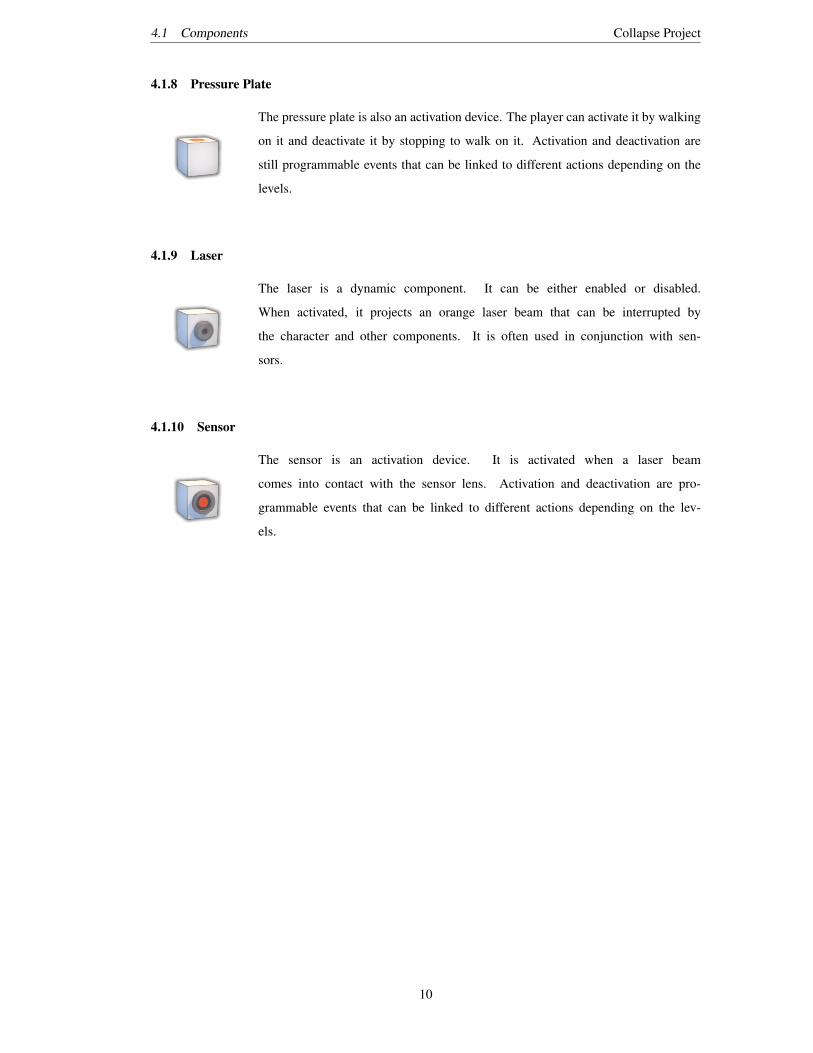
4.1.8 Pressure Plate
The pressure plate is also an activation device. The player can activate it by walking
on it and deactivate it by stopping to walk on it. Activation and deactivation are
still programmable events that can be linked to different actions depending on the
levels.
4.1.9 Laser
The laser is a dynamic component. It can be either enabled or disabled.
When activated, it projects an orange laser beam that can be interrupted by
the character and other components. It is often used in conjunction with sen-
sors.
4.1.10 Sensor
The sensor is an activation device. It is activated when a laser beam
comes into contact with the sensor lens. Activation and deactivation are pro-
grammable events that can be linked to different actions depending on the lev-
els.
10
4.2 Level Mechanics Collapse Project
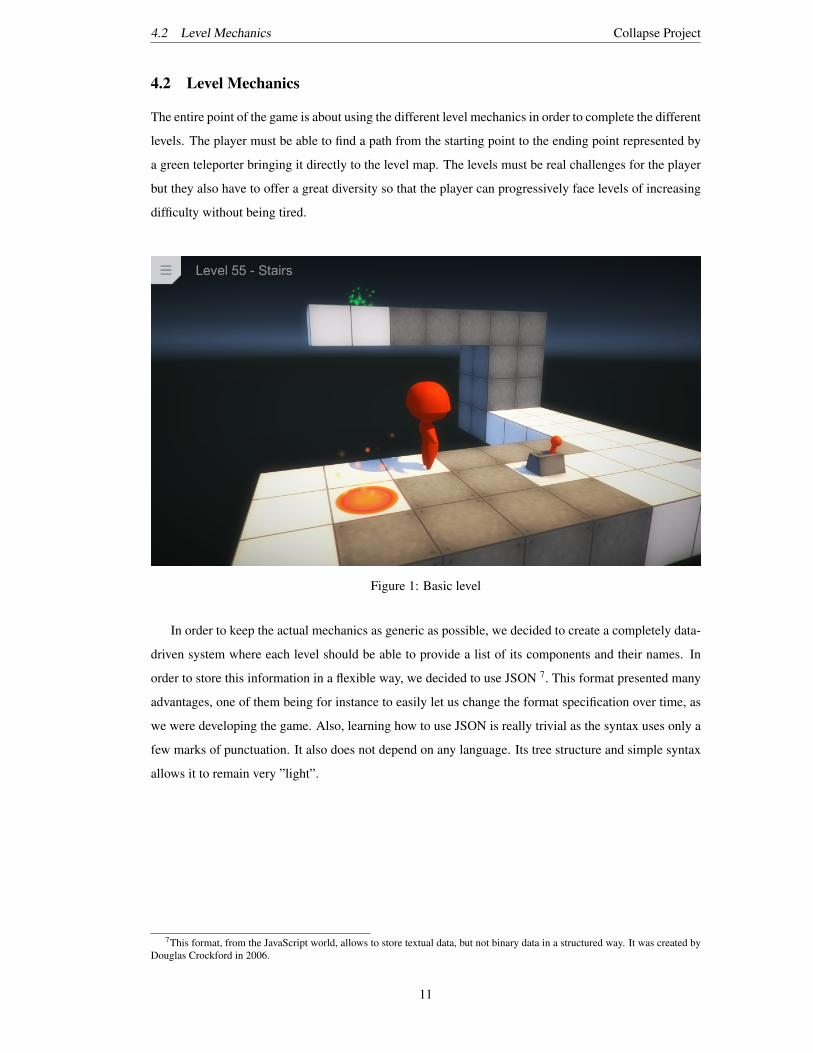
4.2 Level Mechanics
The entire point of the game is about using the different level mechanics in order to complete the different
levels. The player must be able to find a path from the starting point to the ending point represented by
a green teleporter bringing it directly to the level map. The levels must be real challenges for the player
but they also have to offer a great diversity so that the player can progressively face levels of increasing
difficulty without being tired.
Figure 1: Basic level
In order to keep the actual mechanics as generic as possible, we decided to create a completely data-
driven system where each level should be able to provide a list of its components and their names. In
order to store this information in a flexible way, we decided to use JSON 7. This format presented many
advantages, one of them being for instance to easily let us change the format specification over time, as
we were developing the game. Also, learning how to use JSON is really trivial as the syntax uses only a
few marks of punctuation. It also does not depend on any language. Its tree structure and simple syntax
allows it to remain very ”light”.
7This format, from the JavaScript world, allows to store textual data, but not binary data in a structured way. It was created byDouglas Crockford in 2006.
11

4.2 Level Mechanics Collapse Project
{"LevelName": "First level","DeadZone": -5,"Data": {
"#variable": [ "up", "south", "south", "north", "north", "down" ]},"Components": [
{ "Position": [ 1, 0, 1 ], "Prefab": "light_tile", "Ref": "TARGET_2" },{ "Position": [ 1, 0, 0 ], "Prefab": "light_tile" },{ "Position": [ 0, 0, 1 ], "Prefab": "light_tile" },{ "Position": [ 0, 0, 0 ], "Prefab": "start" },{ "Position": [ -1, 0, -1 ], "Prefab": "light_tile" },{ "Position": [ -1, 0, 0 ], "Prefab": "light_tile" },{ "Position": [ 0, 0, -1 ], "Prefab": "light_tile" },{ "Position": [ 1, 0, -1 ], "Prefab": "switch", "Rotation": [ 0, 90, 0 ],
"Events": {"On": [
{ "Action": "Animate", "Target": "TARGET_1", "Animation": [ "down","west", "west" ] },
{ "Action": "Animate", "Target": "TARGET_2", "Animation": "#variable" }],"Off": [
{ "Action": "Animate", "Target": "TARGET_1", "Animation": [ "east","east", "up" ] }
]} },{ "Position": [ -1, 0, 1 ], "Prefab": "light_tile" },{ "Position": [ -4, 1, 1 ], "Prefab": "end", "Ref": "TARGET_1" }
]}
Figure 2: Example of the JSON structure of a level
As you can see, the structure of a file is really basic. A file has two main properties: the level name
and the list of the different level components. The list is represented in JSON by a table. For each com-
ponent, this table contains a name that corresponds to an object model and a location. When launching a
Unity level loads the JSON file and instantiates the prefabs corresponding to the components in the array.
All prefabs that are instantiated in the level come from the same folder in the Resources directory.
This allows us to easily implement new components as we simply have to drop an object into the folder
to make it available as a level component.
Another aspect of level mechanics is the pause mode and start over. We wanted to allow the player
to pause the game and start a new level. To pause the game it is enough to set the time scale to 0. This
means that the time between two planes is multiplied by 0. To restart a level it is enough to reset all the
components of the level, the position of the player and the one of the camera.
12
4.3 The event system Collapse Project
4.3 The event system
As explained earlier, to save the levels, we used JSON files to store all their data. When a level is loaded,
all this information is read and all components are instantiated. These JSON files contain the name of the
level and a list of its components and their information, such as their position, name or rotation. Using
JSON files allows us to store information in a flexible and intuitive way.
We added elements capable of triggering actions. For example, button or lever that when clicked
have an effect on the game. For example, platform made up of white cubes that work as an elevator. We
needed a place to save all of these actions and movements. We finally found a way to store all this in the
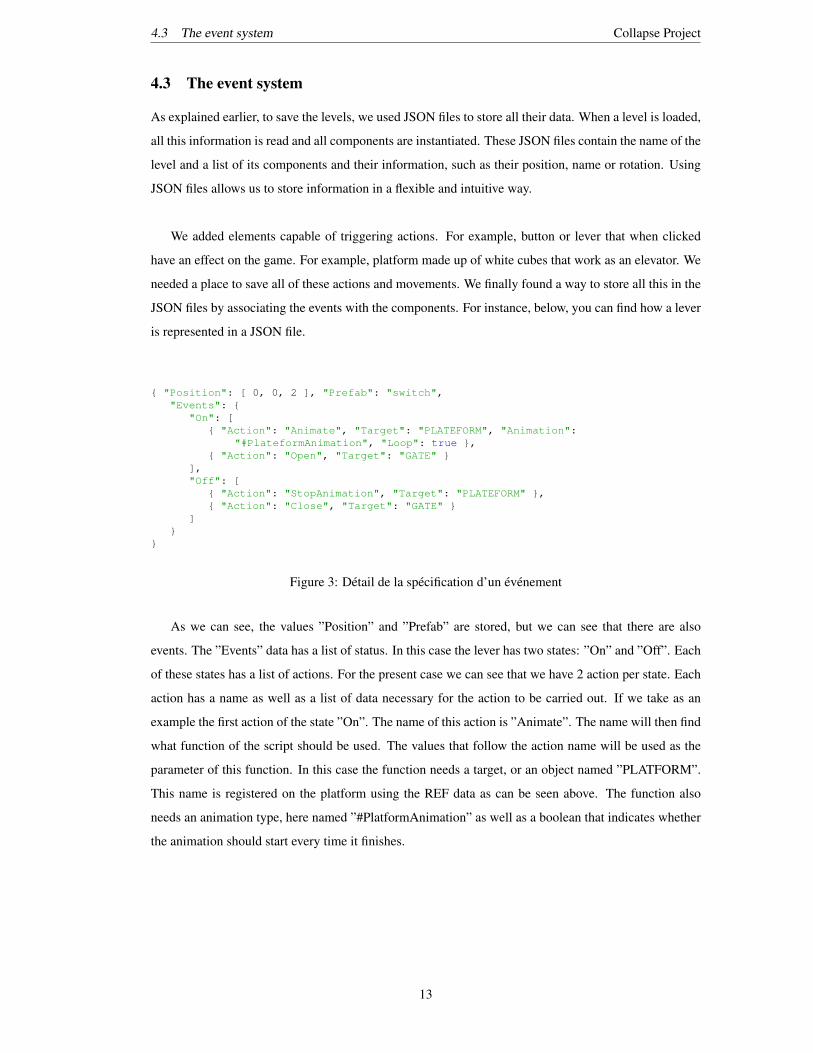
JSON files by associating the events with the components. For instance, below, you can find how a lever
is represented in a JSON file.
{ "Position": [ 0, 0, 2 ], "Prefab": "switch","Events": {
"On": [{ "Action": "Animate", "Target": "PLATEFORM", "Animation":
"#PlateformAnimation", "Loop": true },{ "Action": "Open", "Target": "GATE" }
],"Off": [
{ "Action": "StopAnimation", "Target": "PLATEFORM" },{ "Action": "Close", "Target": "GATE" }
]}
}
Figure 3: Detail de la specification d’un evenement
As we can see, the values ”Position” and ”Prefab” are stored, but we can see that there are also
events. The ”Events” data has a list of status. In this case the lever has two states: ”On” and ”Off”. Each
of these states has a list of actions. For the present case we can see that we have 2 action per state. Each
action has a name as well as a list of data necessary for the action to be carried out. If we take as an
example the first action of the state ”On”. The name of this action is ”Animate”. The name will then find
what function of the script should be used. The values that follow the action name will be used as the
parameter of this function. In this case the function needs a target, or an object named ”PLATFORM”.
This name is registered on the platform using the REF data as can be seen above. The function also
needs an animation type, here named ”#PlatformAnimation” as well as a boolean that indicates whether
the animation should start every time it finishes.
13
Collapse Project
5 Level Editor
5.1 Implementation
An essential aspect of our game is to encourage creativity. We decided to give players the opportunity to
create their own levels in order to see what kind of puzzles they are able to create. Therefore, we had to
develop a level editor directly in the game.
As explained earlier, the game entirely revolves around JSON files. The scenes we created in Unity
provide all the logic of a specific section of the game in the most generic way possible. The scene that
allows players to play levels is no exception. The format of the JSON levels is the most complex of
all the representations we have conceived. Making a full-fledged editor capable of generating them was
therefore a significant challenge.
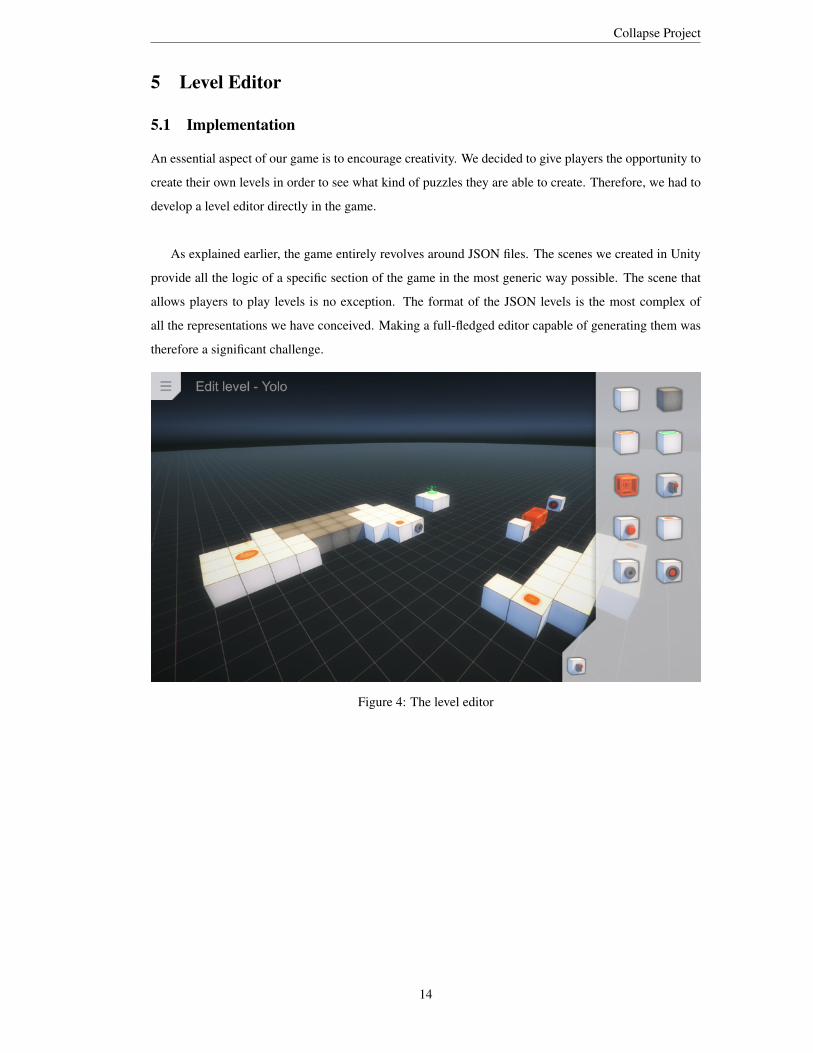
Figure 4: The level editor
14
5.1 Implementation Collapse Project
The level editor allows players to navigate the level by flying around in first person. This makes it
easy to get an overview of the scene. Commands Correspond to the horizontal and vertical standard axis
and the player can change the orientation of the camera by clicking on the center button of the mouse
and moving the mouse. All the other camera controllers that we could find were all too over-equipped
for what we wanted to do. So we decided to create controllers ourselves.
One of the key aspects of the level editor is that it can load the level data into a scene. Fortunately,
we had thought of it when we created the LevelScene scene. To load the levels from the JSON data in the
scene, we created a generic object called LevelEnvironment whose job is essentially to read the JSON
data directly on the files and instantiate all the objects in the scene. This is an important asset since this
behavior is truly generic. JSON data can come from anywhere and the LevelEnvironment script can be
included anywhere.
In the editor, to load the JSON data into the level, we simply copy and paste this script onto the Stage.
Then, the script EditorController, a script that essentially handles what happens globally in the scene,
loads the JSON data from the player’s computer and feeds the LevelEnvironment environment script.
That way, what is built inside the editor is exactly what is generated when you play the level since both
scenes use the same script but in a different context.
Now that the components are loaded into the editor, the next step was to make the player edit them.
We created an object that would act as a cursor and follow all the mouse movements while snapping to
the components of the level. In order to determine the location of the cursor, we used raycasting and
projected rays from the camera according to the mouse cursor position. If the ray hits an object, we
check that it’s a level component by verifying if it has the ”levelComponent” tag. Then, I simply set the
cursor’s position to the position of the component that the ray just hit. You might have noticed in the
screenshot that there is a transparent grid pattern on the floor, it makes it possible to place components
anywhere and not just against other components. The floor has a specific tag as well so I can detect it
and when I do I place the cursor at the same level.
15
5.1 Implementation Collapse Project
Creating and deleting components in the editor was quite easy. Functions were created in the Lev-
elEnvironment class that take care of deleting the object from the scene as well as updating the loaded
JSON data. All our JSON representations are associated with classes that allow us to process the data
they represent by mapping all JSON properties into simple class fields.
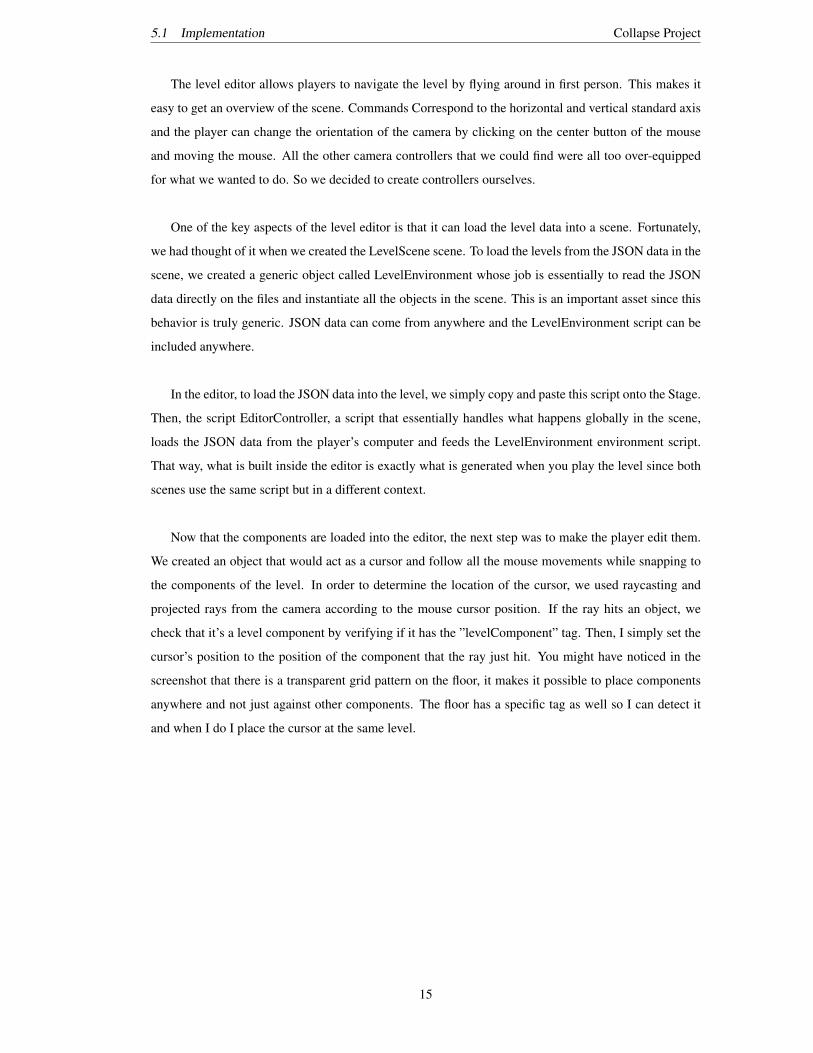
The player can select the component he wants to place by se-
lecting it from the sidebar that opens by approaching the mouse
on the right side of the screen. Then the controls are pretty
simple, left click to place the object and right click to delete
it. It is also possible to reorient the selected component by
pressing ”F”. This will position the component in front of
you.
16
5.2 Event Configuration Collapse Project
5.2 Event Configuration
The part that was a bit more complicated was the fact of being able to link actions to the component in-
side the editor. All components can trigger events and command another component to perform actions.
It is an essential part of the game. Having dynamic components that can communicate with each other
opens up a lot of possibilities for level design. It is important that players can use the event system fully
while keeping the interface as simple as possible.
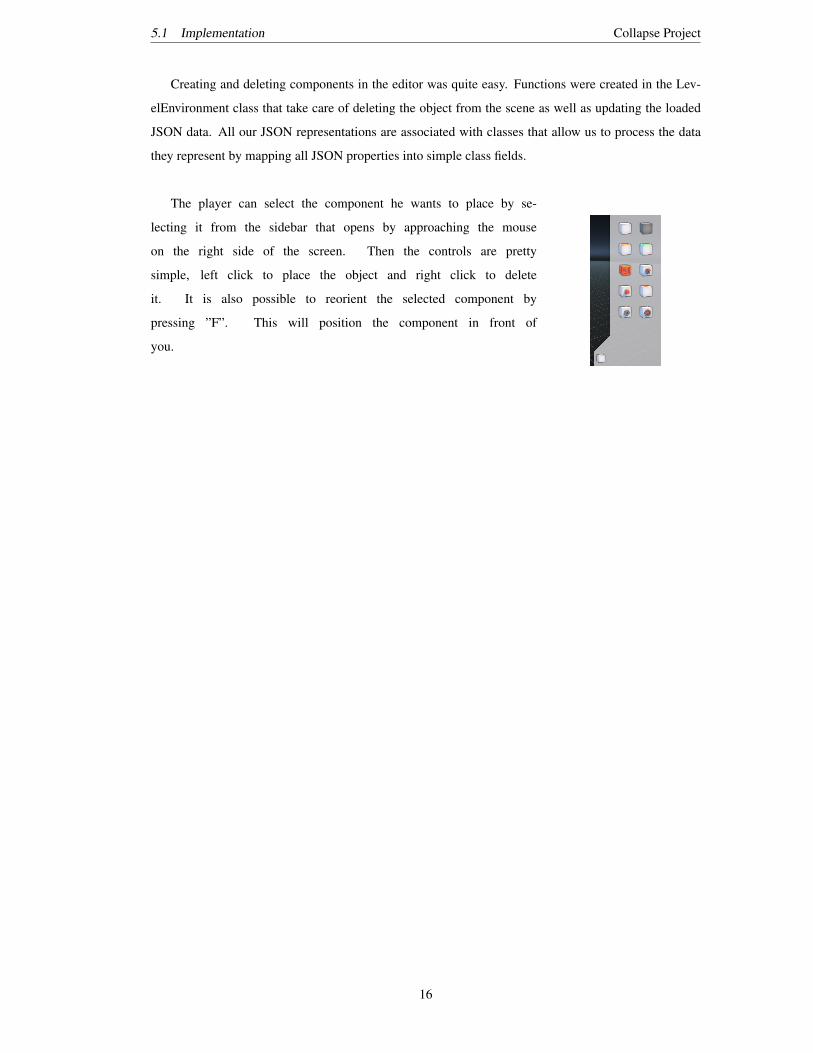
Figure 5: Screenshot of the event menu
One thing that I learned through this process is that making complex user interfaces in unity is really
time-consuming. This menu can be opened by pressing the left alt key and clicking on a component. On
the left, you can see that most of the screen is filled with a large ”list of lists” that allows the player to
add, delete or modify events as well as specific actions to link. On the right is a sidebar that displays the
component type with a small icon and allows you to change the ”Ref” or the component name so that
you can reference them later.
When you open up this menu, the left part of the screen is where the magic takes place. When you
first open it up, you will be able to see it. There is a big button that says ”New event” and lets you
bind a list of actions to a specific event. The large ”event panel” has a dropdown at the top that lets you
choose which event you want to listen to. This dropdown is dynamically updated with the list of events
that the selected component can fire. For instance, ”Start”, ”On”, ”Off” and ”Toggle”. On the other
hand a simple tile will only be able to fire the ”Start” event (The ”Start” event is fired by every compo-
nent when the level finishes loading) and therefore will only let your select ”Start” in the event dropdown
17
5.2 Event Configuration Collapse Project
At the bottom of the event panel, there is another drop-down list that contains all the actions that can
be performed by any level component. Note that even if events are triggered by components that define
actions, actions are ”transmitted” to and executed from target components. Anyway, once you select the
action you want to run, click the “+” button and it will instantiate a field that allows you to change the
target of the action (By default if the field is left blank the component will order itself to perform the
action) as well as additional fields depending on the action selected
There are quite a few actions to choose from, some of them are directly related to specific com-
ponents and others will work on any type of component. For instance, the laser can be ordered to do
actions that are very specific to its type such as to activate or deactivate itself. A more general action that
can be performed on any component would be the ”Animate” action. This action makes it possible to
move components around in the level by specifying a list of directions that the component should move
towards successively. It’s also possible to make the animation loop indefinitely, and to stop it by using
the ”Stop animation” action.
18
Collapse Project
6 Character
6.1 3D Model
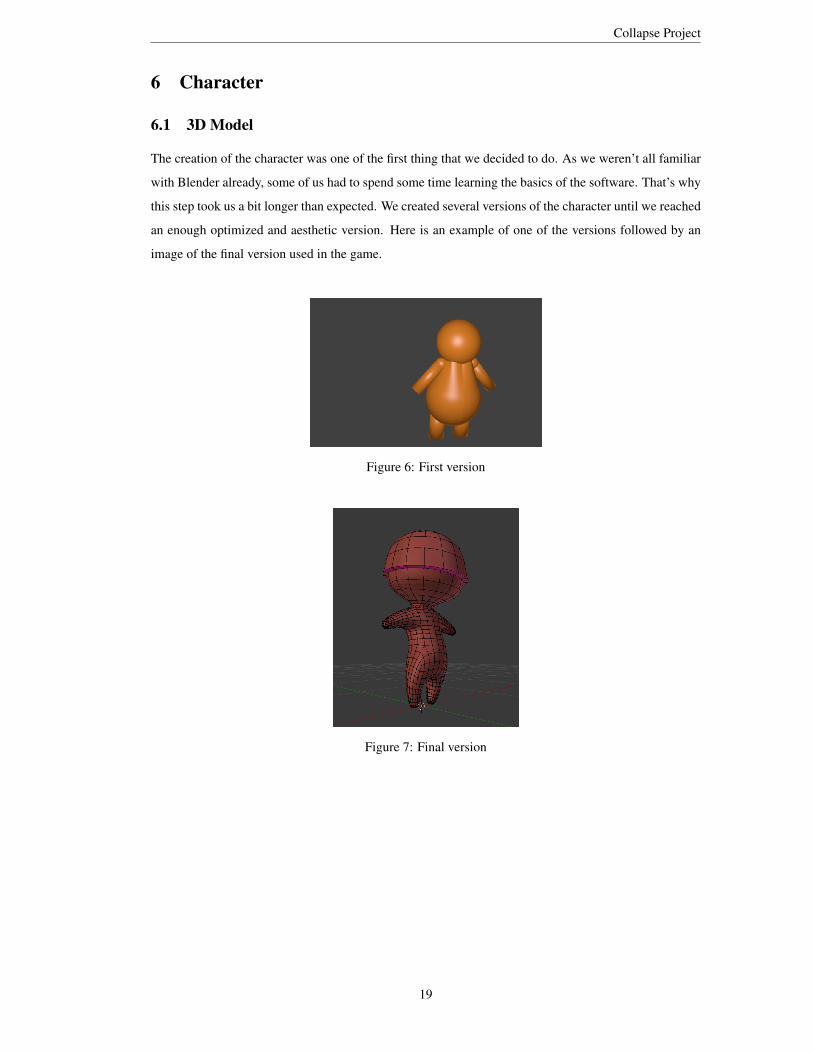
The creation of the character was one of the first thing that we decided to do. As we weren’t all familiar
with Blender already, some of us had to spend some time learning the basics of the software. That’s why
this step took us a bit longer than expected. We created several versions of the character until we reached
an enough optimized and aesthetic version. Here is an example of one of the versions followed by an
image of the final version used in the game.
Figure 6: First version
Figure 7: Final version
19
6.2 Character Logic Collapse Project
6.2 Character Logic
Once the final model was finished. We then focused on creating the character’s animations.
It took us a while to figure out how to make it work. It sounds trivial when you simply think about it,
but in practice there is a lot to think about. The first thing is to make sure that in Blender, the animations
are clearly separated on different tracks of action. The character was then imported to Unity. We had
to configure the animations to make them loop in a cycle. The next step was to create an animation
controller that would make transitions and interpolate between animations based on a certain state. This
state had to be driven, so we had to create a controller that would drive the animation according to the
input of the user.
At this point, we thought that there was necessarily a better way to do it. And we were right. Each
game needs a way to control a character in one way or another, so it turned out that a complete character
controller with animations was already part of the standard Unity components . So, instead of reinventing
the wheel, we started again and developed from the basic behavior that the default controller provided.
For example, we changed it so that we could control the character in mid air.
20
Collapse Project
7 Worlds
7.1 World Mechanics
The goal of each level is to help Pip illuminate the path that guides him through the different worlds.
When the player finishes a level, the background lights up and reveals to the player the rest of the way.
The levels are represented by small white cubes. If a level is lit it means that the player has access to it
and can try to solve it.
Here we had to find a way to load the level from the levels map. It was also necessary to have a
system flexible enough to be able to load any level and to point the levels that had already been played.
Like the levels, we decided to store the information of the worlds in files outside Unity. We had to
organize and structure the various files in order to keep a clear and clean plan.
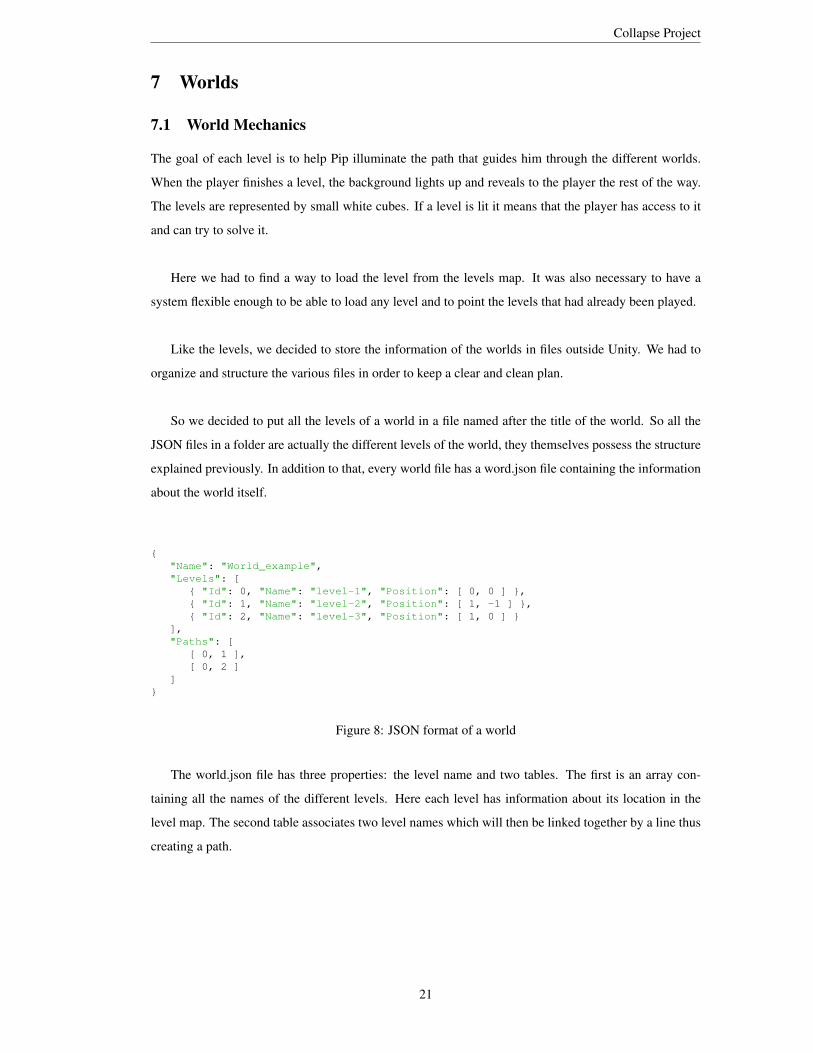
So we decided to put all the levels of a world in a file named after the title of the world. So all the
JSON files in a folder are actually the different levels of the world, they themselves possess the structure
explained previously. In addition to that, every world file has a word.json file containing the information
about the world itself.
{"Name": "World_example","Levels": [
{ "Id": 0, "Name": "level-1", "Position": [ 0, 0 ] },{ "Id": 1, "Name": "level-2", "Position": [ 1, -1 ] },{ "Id": 2, "Name": "level-3", "Position": [ 1, 0 ] }
],"Paths": [
[ 0, 1 ],[ 0, 2 ]
]}
Figure 8: JSON format of a world
The world.json file has three properties: the level name and two tables. The first is an array con-
taining all the names of the different levels. Here each level has information about its location in the
level map. The second table associates two level names which will then be linked together by a line thus
creating a path.
21
7.2 Navigation Collapse Project
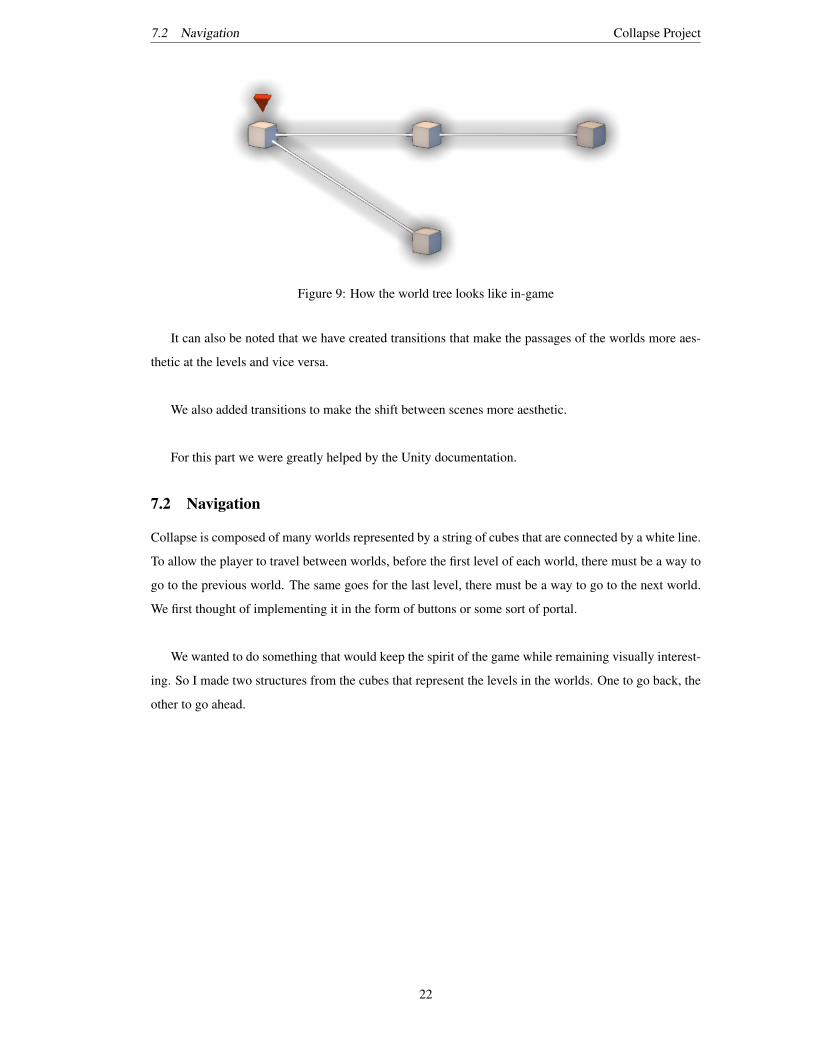
Figure 9: How the world tree looks like in-game
It can also be noted that we have created transitions that make the passages of the worlds more aes-
thetic at the levels and vice versa.
We also added transitions to make the shift between scenes more aesthetic.
For this part we were greatly helped by the Unity documentation.
7.2 Navigation
Collapse is composed of many worlds represented by a string of cubes that are connected by a white line.
To allow the player to travel between worlds, before the first level of each world, there must be a way to
go to the previous world. The same goes for the last level, there must be a way to go to the next world.
We first thought of implementing it in the form of buttons or some sort of portal.
We wanted to do something that would keep the spirit of the game while remaining visually interest-
ing. So I made two structures from the cubes that represent the levels in the worlds. One to go back, the
other to go ahead.
22
7.2 Navigation Collapse Project
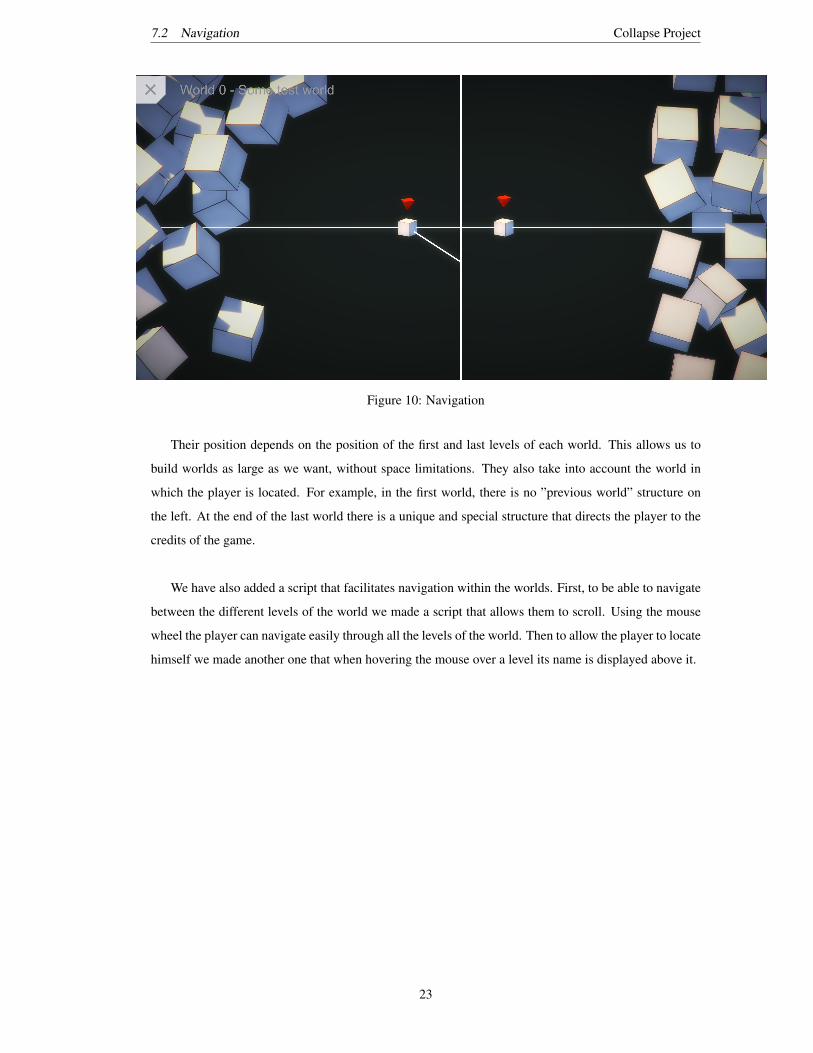
Figure 10: Navigation
Their position depends on the position of the first and last levels of each world. This allows us to
build worlds as large as we want, without space limitations. They also take into account the world in
which the player is located. For example, in the first world, there is no ”previous world” structure on
the left. At the end of the last world there is a unique and special structure that directs the player to the
credits of the game.
We have also added a script that facilitates navigation within the worlds. First, to be able to navigate
between the different levels of the world we made a script that allows them to scroll. Using the mouse
wheel the player can navigate easily through all the levels of the world. Then to allow the player to locate
himself we made another one that when hovering the mouse over a level its name is displayed above it.
23
Collapse Project
8 Gallery
The gallery is the creative side of the game. After collecting a number of components in the solo game,
players will be able to create increasingly complex levels and share them with the community.
8.1 The local gallery
The custom level gallery will allow the user to play all the levels he has made and continue to work on
them. This is essentially the equivalent of worlds, but for custom levels created by the player. However
there is still a big difference. Normal levels that can be played by selecting them in the base worlds
are loaded as ”Resources”. Resources are loaded in a very specific way by Unity. Once you have built
the game, all the resources are grouped into a single large component that you can access through the
Resources library. The problem is that this huge component can only be read. This raises a problem for
a level gallery where the player is supposed to be able to create and edit levels freely. Fortunately, Unity
provides us with ”Application.persistentDataPath”, a directory that can be used to persevere the data of
the game. Since this is a simple folder, we can do whatever we want inside... problem solved.
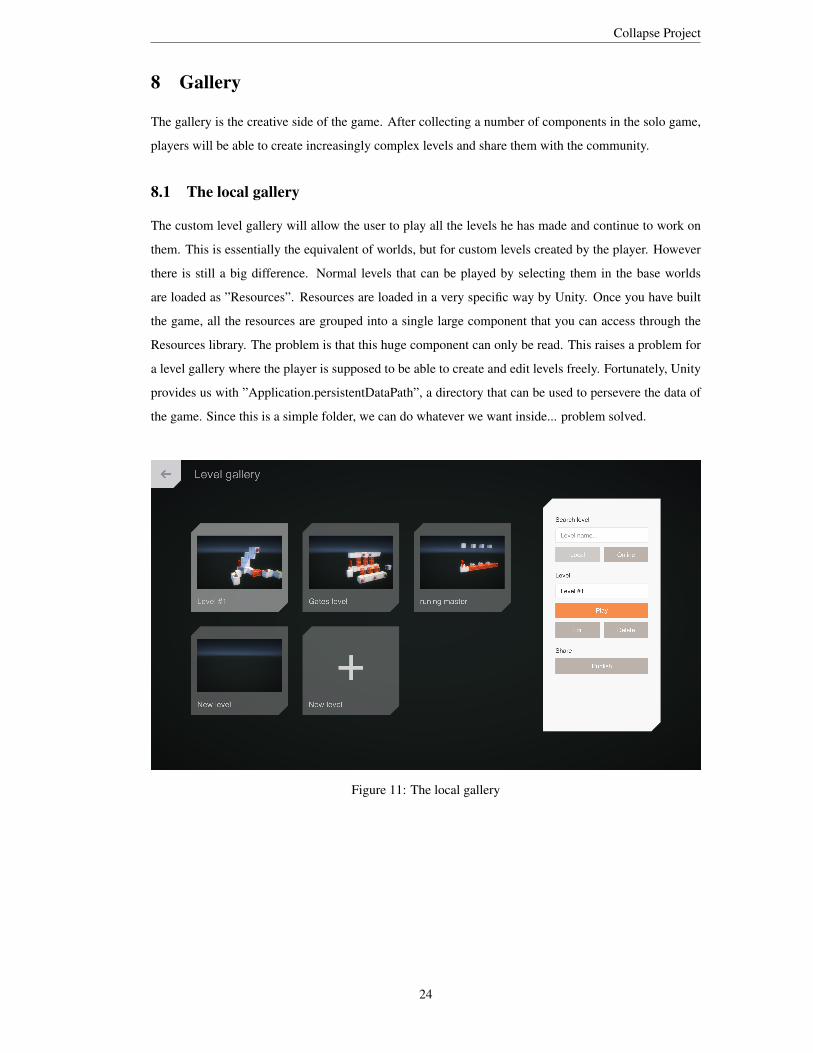
Figure 11: The local gallery
24
8.2 The online gallery Collapse Project
The gallery stores all the data it needs in JSON. We decided to adopt an architecture similar to the
one we used for the worlds. We save all the data we need in a subdirectory called ”LevelGallery”. The
most important file here is the one called gallery.json. This is an index of all levels in the gallery and
contains a list of all the names and identifiers of the levels created by the player.
All levels are stored as individual files in the same directory. They are called 0.json, 1.json, 2.json
and so on. The gallery.json file also contains a ”LastID” field that traces the track of the identifier of the
last level created. As you may have noticed in the screenshot, all levels have their own small thumbnails.
These are stored again in a subfolder called ”Thumbnails” following the same naming scheme as the
level files.
The idea behind the user interface was to make it easier for players to identify levels. To do this, we
essentially display a screenshot of the level with its name. The entire left side of the interface can be
scrolled and expanded as the levels are created. At the end of the level list, there is a button that allows
you to create a new level. When you click on it, the game creates a new empty level and loads the level
editor so that you can start building directly.
The sidebar on the right allows you to browse through all the levels you have created. If you start
typing the name of a level in the ”Search level” field, you will see that the level list will dynamically
filter all levels that do not match what you typed. This allows you to find the level you are looking for
more easily. The sidebar also allows you to play, modify and delete the level. When you click Play, the
game loads the LevelScene with the selected level, and when you click Edit, it loads the EditorScene. If
you click Delete, the game updates the gallery index and removes the level file and thumbnail. You can
also rename the currently selected level by simply typing a new name into the level name field.
8.2 The online gallery
The objective of the gallery is also to give the player the opportunity to share his creations with the rest
of the community. we had to think about the implications of such a functionality. We wanted the player
to be able to download and try levels created by others without leaving the game. He also had to be able
to upload his own levels from the game.
Behind the interface, the system relies on a REST API that handles all the logic of the online gallery.
The problem here was indeed to find how to make the navigation and experience of the player in general
more intuitive.
25
8.2 The online gallery Collapse Project
First, to switch between the online gallery and the local gallery, we have set up two buttons ”Local”
and ”Online” that allow you to display the levels created by the player and those created by the commu-
nity, the ones accessible through the API. When the player accesses the gallery from the main menu, the
gallery will be set to “Local” by default.
By clicking on the ”Online” button, the game sends an HTTP request to the API to retrieve the list of
levels of the first page. Each level appears in the same way as the levels in the local gallery, a button with
an image and a title. However, all images must be downloaded individually and waiting for all images to
arrive before displaying anything does not translate into a good user experience. That’s why we decided
to download the images asynchronously. The different levels are displayed as soon as the answer to our
first request has arrived, and the images then appear gradually.
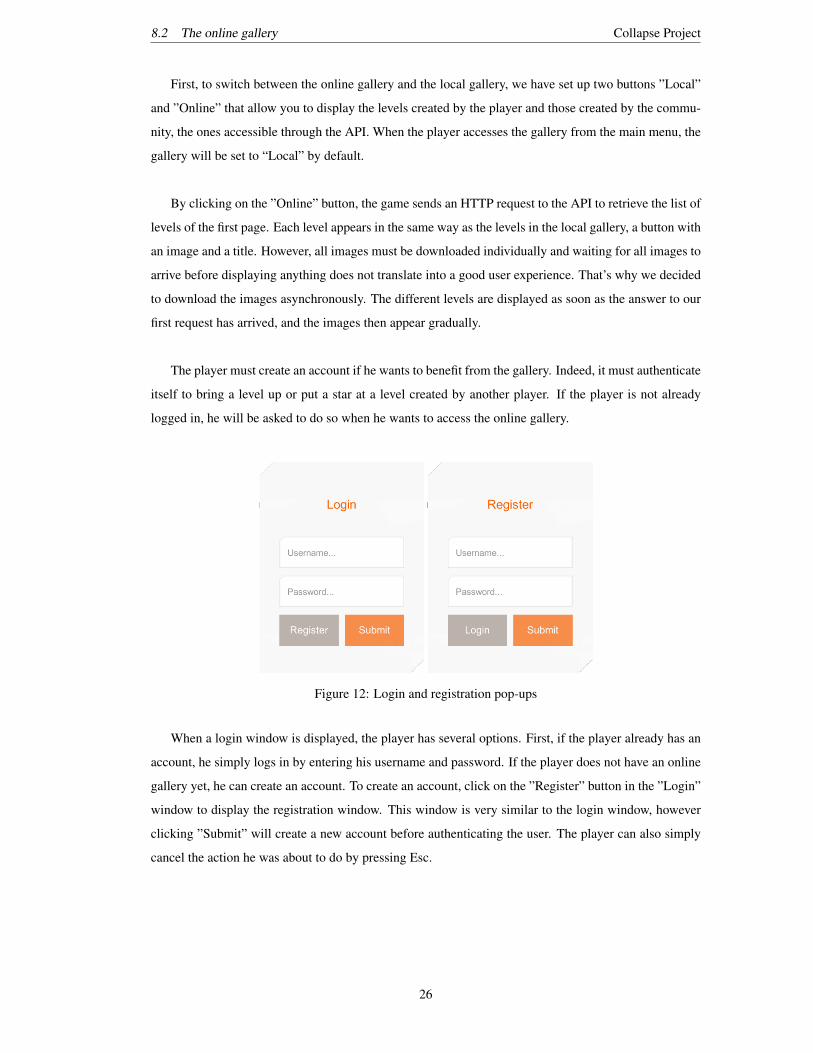
The player must create an account if he wants to benefit from the gallery. Indeed, it must authenticate
itself to bring a level up or put a star at a level created by another player. If the player is not already
logged in, he will be asked to do so when he wants to access the online gallery.
Figure 12: Login and registration pop-ups
When a login window is displayed, the player has several options. First, if the player already has an
account, he simply logs in by entering his username and password. If the player does not have an online
gallery yet, he can create an account. To create an account, click on the ”Register” button in the ”Login”
window to display the registration window. This window is very similar to the login window, however
clicking ”Submit” will create a new account before authenticating the user. The player can also simply
cancel the action he was about to do by pressing Esc.
26
8.2 The online gallery Collapse Project
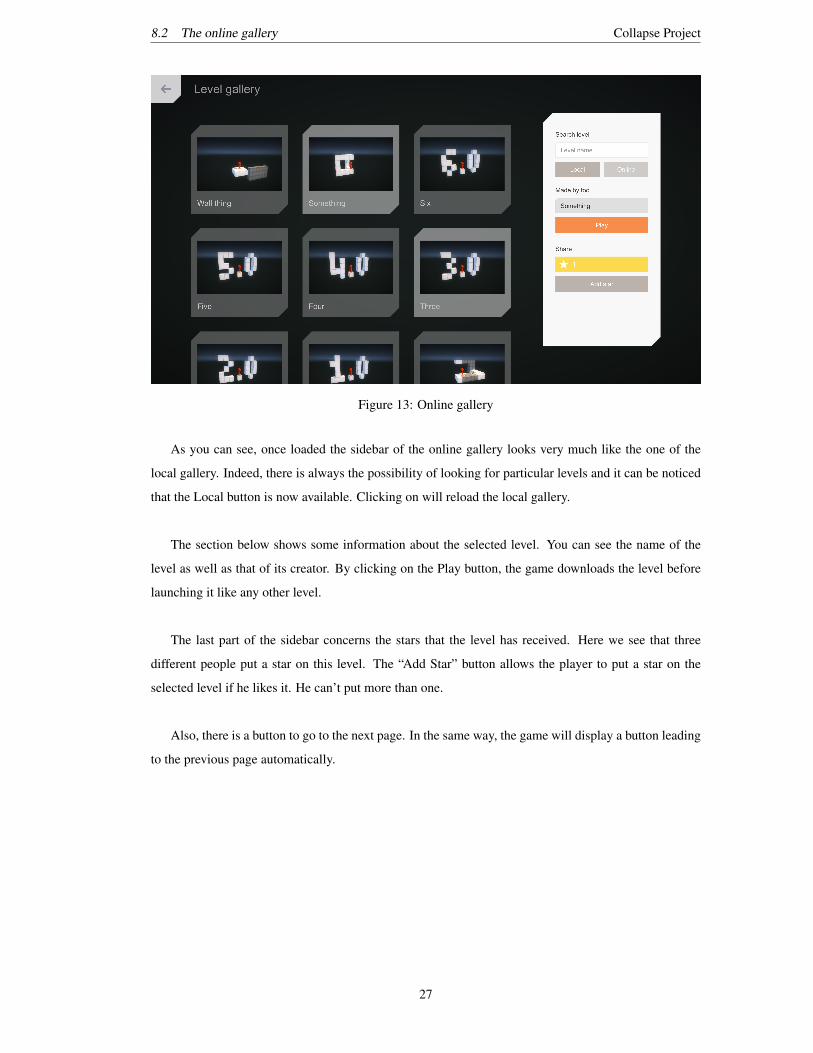
Figure 13: Online gallery
As you can see, once loaded the sidebar of the online gallery looks very much like the one of the
local gallery. Indeed, there is always the possibility of looking for particular levels and it can be noticed
that the Local button is now available. Clicking on will reload the local gallery.
The section below shows some information about the selected level. You can see the name of the
level as well as that of its creator. By clicking on the Play button, the game downloads the level before
launching it like any other level.
The last part of the sidebar concerns the stars that the level has received. Here we see that three
different people put a star on this level. The “Add Star” button allows the player to put a star on the
selected level if he likes it. He can’t put more than one.
Also, there is a button to go to the next page. In the same way, the game will display a button leading
to the previous page automatically.
27
Collapse Project
9 The Collapse API
As seen in the previous section, the game relies on a REST API to allow players to share their levels
between them. We will therefore look in depth at its different characteristics and its functioning.
9.1 General Information
Our REST API is developed in Python using the Django framework and complemented by the excellent
”Django rest framework”. The API relies entirely on the JSON format to serialize the response of the
different queries. The root of our API is located at the following address:
https://collapse3d.com/api/
If we make a request at the root, we get two links to the two lists of objects with which we will be
able to interact.
HTTP/1.1 200 OKContent-Length: 91Content-Type: application/json
{"levels": "https://collapse3d.com/api/levels/","users": "https://collapse3d.com/api/users/"
}
We can therefore access two different collections, the levels published by the players and the users,
the accounts of the players themselves.
28
9.2 Users Collapse Project
9.2 Users
Users are created from the game when the player has to log in but does not have an account yet. Once
created, the user account allows to retrieve all levels created by the user himself as well as all the levels
to which he has put a star. This is the format of the JSON returned by the API during a GET request on
the index:
{"count": 5,"next": null,"previous": null,"results": [
{// user object
},{
// user object},...
]}
As we can see, the list of users is paged. The ”next” and ”previous” keys contain respectively the
URLs leading to the next page and to the previous page if they exist. In case a next page exists, the value
of ”next” will be equal to ”https://collapse3d.com/api/levels/?page=2” if the previously requested page
was the first page. The ”count” field represents the total number of items in the collection.
We can now look at the structure of the object representing a user. Here is an example highlighting
the different information available by retrieving a particular user from the API:
{"url": "https://collapse3d.com/api/users/2/","id": 2,"username": "some_guy","custom_levels": [
"https://collapse3d.com/api/levels/40/","https://collapse3d.com/api/levels/43/"
],"stars": [
"https://collapse3d.com/api/levels/22/","https://collapse3d.com/api/levels/24/","https://collapse3d.com/api/levels/37/"
]}
So we have first the key ”URL” which contains the address to which we can retrieve this particular
user object alone, outside the list. The ”id” key contains the identifier used by the server to index our
particular user object. This identifier is unique. The ”username” key contains the user’s name of the
account that it represents. This name is unique and public.
29
9.3 Registration Collapse Project
The last two keys provide different information about particular levels. The ”custom levels” key
contains an array containing all links to user-posted levels. Finally, the ”star” key contains an array con-
taining all the links to the levels to which the user added a star.
9.3 Registration
To create a new account, you must go through the users list. Send a POST request to ”https://collapse3d.com/api/users/”
to create a new user. However, to specify the username and password for the new account, you must at-
tach a form containing the ”username” and ”password” fields to the body of the request. If successful,
our server returns a status of type 201 8, Specifying that the user was created.
Regarding security and password protection, we have configured our server so that it can only serve
the API under HTTPS with HSTS enabled. This makes the risk of Man-in-the-middle attacks 9 extremely
low.
On our server, we only store a database version of the password that has been chopped and can not
be decoded. This means that in the event of an attack on our server, a hacker will not have access to the
passwords of our users.
9.4 Login
Once registered, the user needs to be able to log in and start a session. Authentication is managed using
tokens 10 that expire after a fixed period of time. To generate a new token, simply send a POST request
to the address ”https://collapse3d.com/api/login/”. The server therefore needs our login credentials. A
form is then attached to the body of the request containing a ”username” field and a ”password” field.
If successful, the response contains a JSON object with a single key: a new token corresponding to
the user’s session.
This token must be kept at the client level because it will be used to authenticate itself everytime it
needs to connect to a url that requires the user to be connected. To access a url in an authenticated way,
8The HTTP status code 201 Created indicates that the request was successful and that a resource was created accordingly. Thenew resource is actually created before the reply is returned and is returned to the message body.
9The man-in-the-middle attack is an attack that intercepts communications between two parties, The other can not suspect thatthe channel of communication between them has been compromised. The most common channel is a lambda internet connection.The attacker must be able to observe and intercept messages from one victim to another.
10electronic boxes generating numbers for authentication or storing encrypted information
30
9.5 Levels Recovery Collapse Project
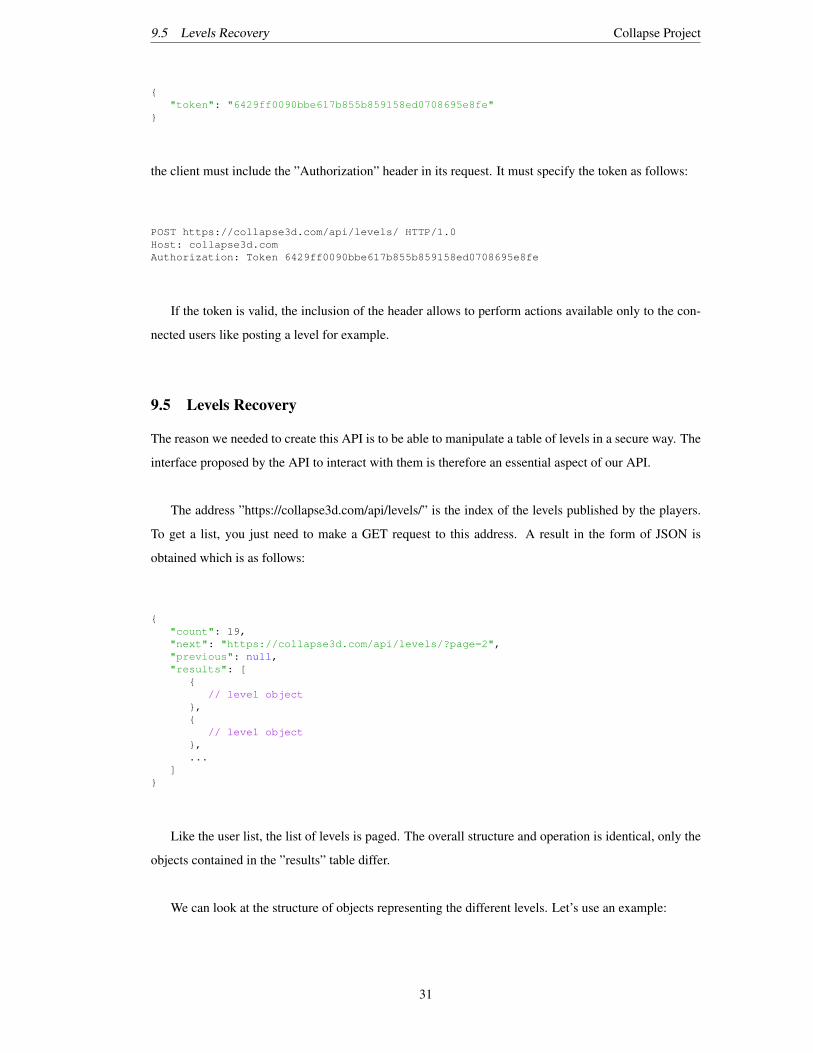
{"token": "6429ff0090bbe617b855b859158ed0708695e8fe"
}
the client must include the ”Authorization” header in its request. It must specify the token as follows:
POST https://collapse3d.com/api/levels/ HTTP/1.0Host: collapse3d.comAuthorization: Token 6429ff0090bbe617b855b859158ed0708695e8fe
If the token is valid, the inclusion of the header allows to perform actions available only to the con-
nected users like posting a level for example.
9.5 Levels Recovery
The reason we needed to create this API is to be able to manipulate a table of levels in a secure way. The
interface proposed by the API to interact with them is therefore an essential aspect of our API.
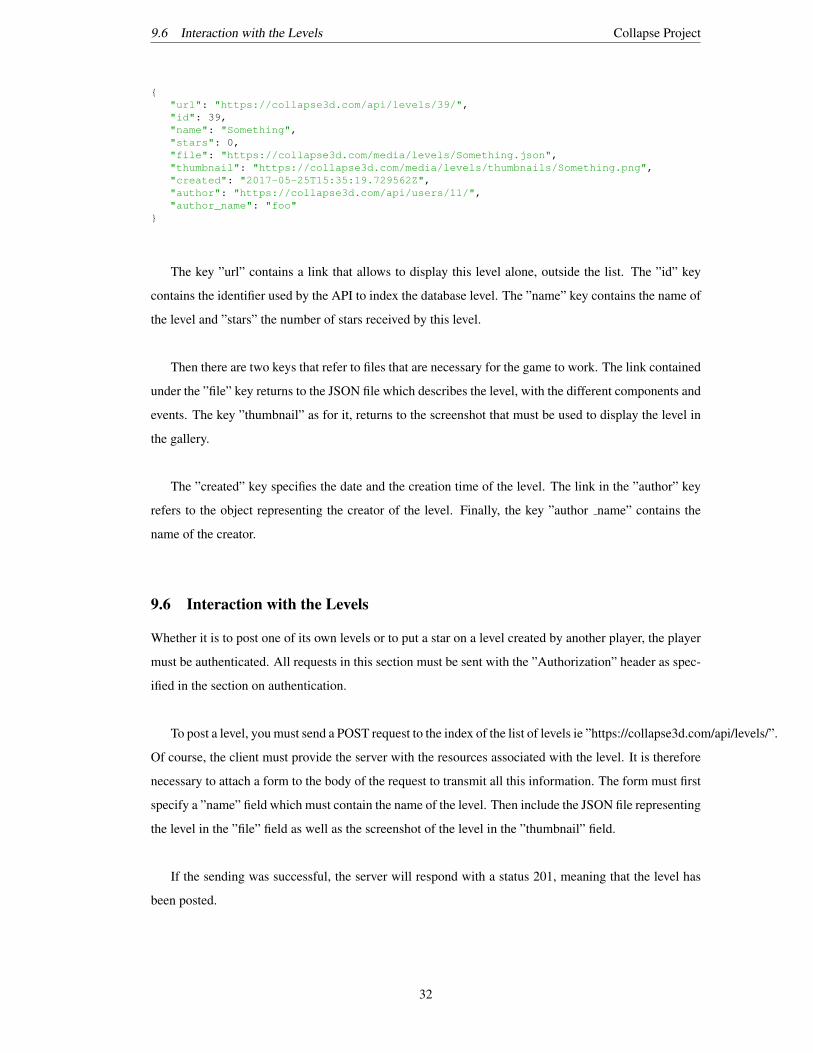
The address ”https://collapse3d.com/api/levels/” is the index of the levels published by the players.
To get a list, you just need to make a GET request to this address. A result in the form of JSON is
obtained which is as follows:
{"count": 19,"next": "https://collapse3d.com/api/levels/?page=2","previous": null,"results": [
{// level object
},{
// level object},...
]}
Like the user list, the list of levels is paged. The overall structure and operation is identical, only the
objects contained in the ”results” table differ.
We can look at the structure of objects representing the different levels. Let’s use an example:
31
9.6 Interaction with the Levels Collapse Project
{"url": "https://collapse3d.com/api/levels/39/","id": 39,"name": "Something","stars": 0,"file": "https://collapse3d.com/media/levels/Something.json","thumbnail": "https://collapse3d.com/media/levels/thumbnails/Something.png","created": "2017-05-25T15:35:19.729562Z","author": "https://collapse3d.com/api/users/11/","author_name": "foo"
}
The key ”url” contains a link that allows to display this level alone, outside the list. The ”id” key
contains the identifier used by the API to index the database level. The ”name” key contains the name of
the level and ”stars” the number of stars received by this level.
Then there are two keys that refer to files that are necessary for the game to work. The link contained
under the ”file” key returns to the JSON file which describes the level, with the different components and
events. The key ”thumbnail” as for it, returns to the screenshot that must be used to display the level in
the gallery.
The ”created” key specifies the date and the creation time of the level. The link in the ”author” key
refers to the object representing the creator of the level. Finally, the key ”author name” contains the
name of the creator.
9.6 Interaction with the Levels
Whether it is to post one of its own levels or to put a star on a level created by another player, the player
must be authenticated. All requests in this section must be sent with the ”Authorization” header as spec-
ified in the section on authentication.
To post a level, you must send a POST request to the index of the list of levels ie ”https://collapse3d.com/api/levels/”.
Of course, the client must provide the server with the resources associated with the level. It is therefore
necessary to attach a form to the body of the request to transmit all this information. The form must first
specify a ”name” field which must contain the name of the level. Then include the JSON file representing
the level in the ”file” field as well as the screenshot of the level in the ”thumbnail” field.
If the sending was successful, the server will respond with a status 201, meaning that the level has
been posted.
32
9.6 Interaction with the Levels Collapse Project
Now that players could post their own levels and share them with the community, we needed to make
sure they could give a star to their favorite levels.
We saw that it was possible to access a level by using an address of this form: ”https://collapse3d.com/api/levels/[id]/”
where ”id” is the identifier of the level in question. We made possible to call a ”function” that adds a star
to a particular level. Sending a POST request to the address ”https://collapse3d.com/api/levels/[id]/add-
star/” allows to call this function and add a star to the level whose identifier matches ”id”.
A player can only grant one star per level and he can not put a star at his own levels. We verify that
the authenticated user is not the same user who created the level.
33
Collapse Project
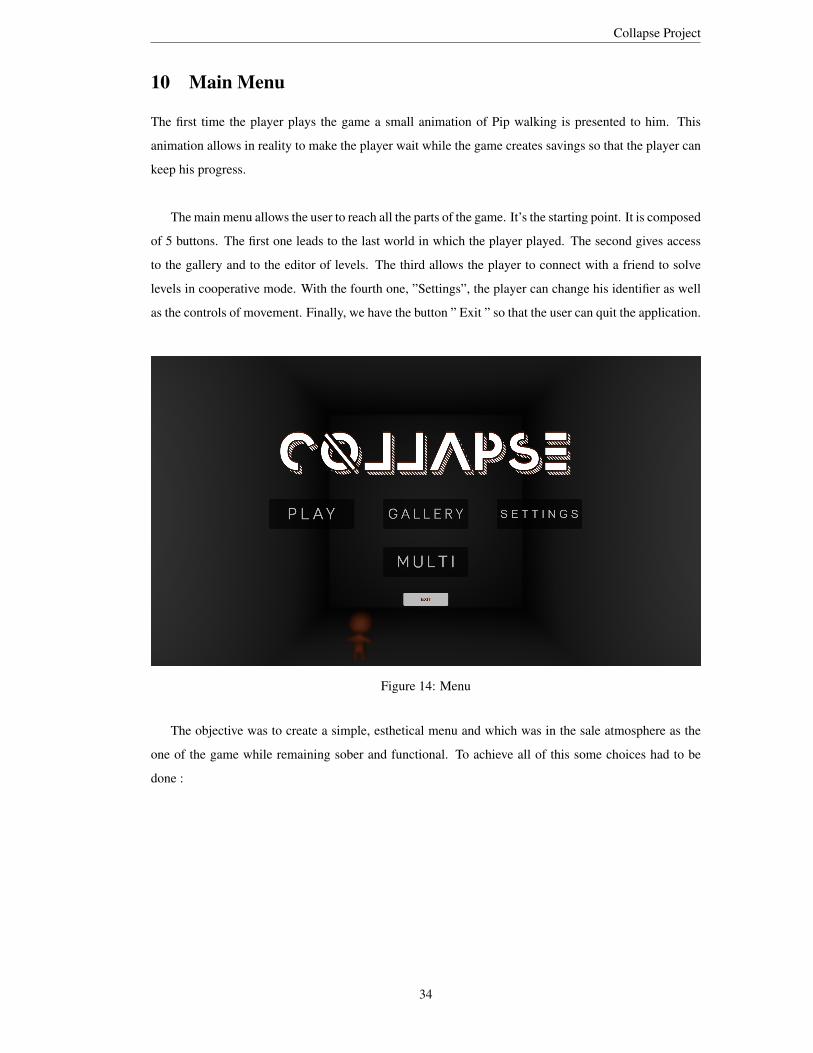
10 Main Menu
The first time the player plays the game a small animation of Pip walking is presented to him. This
animation allows in reality to make the player wait while the game creates savings so that the player can
keep his progress.
The main menu allows the user to reach all the parts of the game. It’s the starting point. It is composed
of 5 buttons. The first one leads to the last world in which the player played. The second gives access
to the gallery and to the editor of levels. The third allows the player to connect with a friend to solve
levels in cooperative mode. With the fourth one, ”Settings”, the player can change his identifier as well
as the controls of movement. Finally, we have the button ” Exit ” so that the user can quit the application.
Figure 14: Menu
The objective was to create a simple, esthetical menu and which was in the sale atmosphere as the
one of the game while remaining sober and functional. To achieve all of this some choices had to be
done :
34
Collapse Project
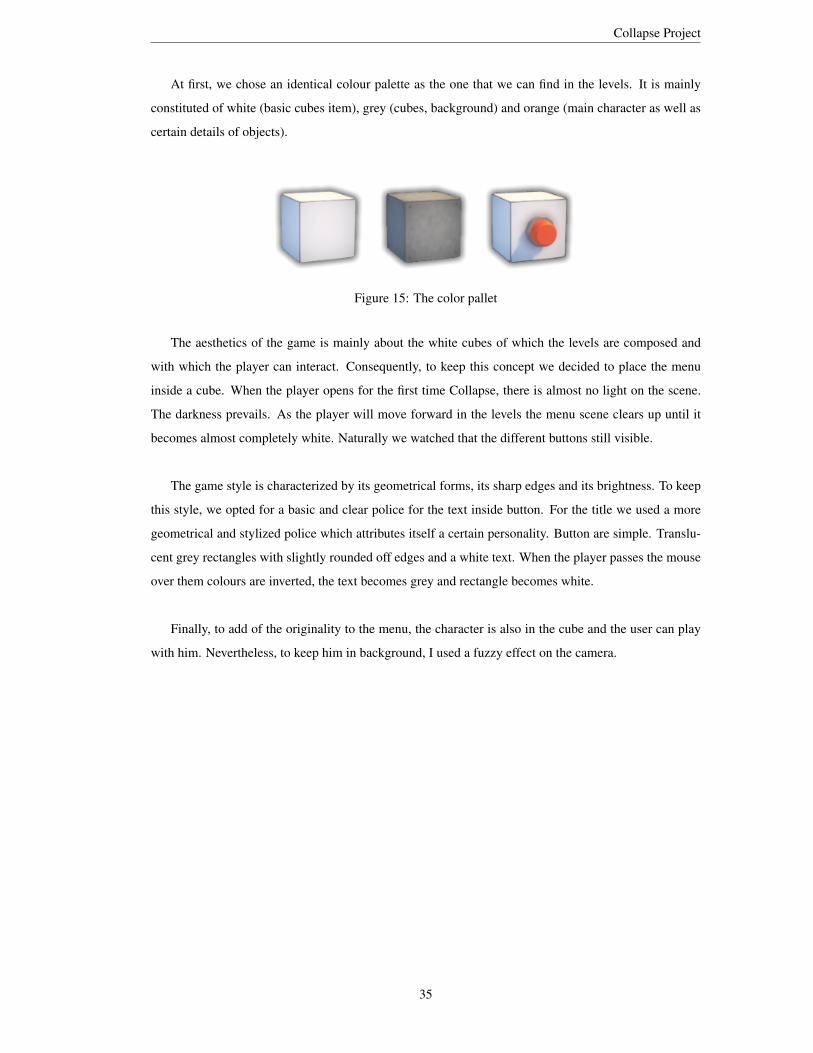
At first, we chose an identical colour palette as the one that we can find in the levels. It is mainly
constituted of white (basic cubes item), grey (cubes, background) and orange (main character as well as
certain details of objects).
Figure 15: The color pallet
The aesthetics of the game is mainly about the white cubes of which the levels are composed and
with which the player can interact. Consequently, to keep this concept we decided to place the menu
inside a cube. When the player opens for the first time Collapse, there is almost no light on the scene.
The darkness prevails. As the player will move forward in the levels the menu scene clears up until it
becomes almost completely white. Naturally we watched that the different buttons still visible.
The game style is characterized by its geometrical forms, its sharp edges and its brightness. To keep
this style, we opted for a basic and clear police for the text inside button. For the title we used a more
geometrical and stylized police which attributes itself a certain personality. Button are simple. Translu-
cent grey rectangles with slightly rounded off edges and a white text. When the player passes the mouse
over them colours are inverted, the text becomes grey and rectangle becomes white.
Finally, to add of the originality to the menu, the character is also in the cube and the user can play
with him. Nevertheless, to keep him in background, I used a fuzzy effect on the camera.
35
Collapse Project
11 Cooperative Mode
The cooperative mode allows two players to join in order to solve a set of levels which are impossible to
solve individually. These levels are situated in a ”parallel” universe to the solo levels one. However, a
difference is that there are a lot less cooperation levels than regular levels.
To be able to adapt the scripts that were already existing to the multiplayer mode, we had to under-
take many modifications into our code to integrate a logic of separation between the customer’s part and
the server’s part.
As a result, the multiplayer mode unfortunately doesn’t have all of the features that are available in
the regular singleplayer mode.
It turned out that our event system is pretty hard to translate into logic that can work across the
network. Indeed, we tried a lot of potential designs, but all of them ended up being too limited regarding
the capabilities of the different components. One of the common issues was handling the client authority
assignments in order for components to be able to send commands to the server. However, commands
can not accept just any type of argument and some of our trials made use of a lot of serializing and
parsing in order to retrieve the object that was firing the event.
In the end, we rolled back our various experimentations in order to be able to provide a clean build
of the game. Levels that can be played in the cooperation mode are therefore currently limited to static
levels, that is to say levels that don’t feature any dynamic component or animation.
Once this stage was done, we were able to connect together two authorities of the game in the same
level. There was however an important question to solve. How can an authority of the game connect
spontaneously to another one?
We decided to use the Unity matchmaking services and decided to build on top of it in order to
abstract all the room mechanics away from the foreign user. The final goal was to be able to either team
up with somebody randomly, or with a particular player by mentioning his user name. This way, the only
thing that the end user has to worry about is whether he wants be with someone in particular or not.
36
Collapse Project
12 Website
The web site allows the player to be informed about the news of the game, to connect in its personal
space, to be able to see all the levels that it created and to share them with the other players. He can also
discover the levels created by other players and note them.
12.1 Front-end
To be able to create the web site, we had to learn the HTML languages (which allows us to create the
contents of the site), CSS (which allows us to shape the site) but also the Javascript language allowing
us make a more dynamic site by adding for example fields of control of the password and the e-mail
address of the player.
What is always a little complicated when creating a web site, is that even if you have all the necessary
knowledges you never really know where to begin. We thus realized a paper model to visualize that we
wanted to obtain and that’s what allowed us to be more effective afterward.
The site consists of five HTML files: the homepage (which holds the player informed about the
various news), the page of the resources (on whom you can learn more about the design of the project,
download report and download the game), the gallery (in whom the player can find the levels of the other
players and note them) and finally pages of connection and registration.
The connection and registration pages allow the player to reach a personal space.
Thanks to the Javascript language the forms are able to verify the validity of the e-mail address of the
user and indicate him the security level of its password. In order to obtain password whose safety is
maximal, the latter has to contain at least a capital letter, a figure and has to have a length superior to
6. The information is then sent and red in order to verify the existence of the account in the case of the
connection page or to create one in the case of the registration page. The player can also receive his
password by e-mail if he forgot it.
Once connected the player has access to a personal gallery containing his own levels and all the in-
formation about them (grade of the level, the number of times it has been played, . . . ).
For each of the galleries we can sort out the levels according to various characteristics: from the more to
less recent, from the least popular and to most on and in alphabetical order.
37

12.2 Back-end Collapse Project
12.2 Back-end
The architecture of our back-end plays a crucial role in the implementation of the different features of
the game and of the website. Indeed, the community part of the game is entirely based on the API.
Our back-end consists of a Django application that runs under python 3.6. Django is a web frame-
work written in python and used by a lot of industry leaders such as Pinterest. The clarity of the Django
library allows us to develop a solid infrastructure that focuses on our application’s logic.
The database we decided to use is SQLite. The SQLite databases has the property of being stored in
a single file. This represents a big advantage for the development because we can easily copy-paste the
file to replace it with a new version. The advantage of using Django is also that we can automatically
export the fields of our database and reload them with another compatible database. It means that we
can make a change for a better database that will more adapted to the productions environments such as
PostgreSQL at any time.
In terms of server configuration, we decided to go with one of the most popular architecture amongst
Django users. We use Nginx to serve the static files and we redirect the other requests towards a Guni-
corn daemon on whom our application is running.
The site benefits of a secured connection thanks to a SSL certificate delivered by Let’s encrypt whom
we automatically renew using a cron task. Nginx was configured to redirect all the connections under
HTTPS. We also activated HTTP2 to allow a faster load as well as HSTS to limit at the maximum the
possibility of man-in-the-middle attacks.
38
Collapse Project
13 Personal Conclusion
13.1 Gael de FRANCONY
The group of Collapse has been recomposed several time. Originally, only Valentin and Emma worked
on this project. Edward and I worked on another game named ”Decrypted”. The fusion took place after
the first presentation. We decided to continue with the project ” Collapse ” because it interested all the
members of the group. The biggest challenge for me was thus the adaptation to this new project. It is the
challenge of understanding how the game works: the scripts, its mechanics, etc. As well as understand-
ing its spirit and objectives.
Concerning knowledges acquired by working on this project, for my first game ”Decrypts” I took
care of the Website. Thus I have make big progress in Css, HTML and JS as well as in server’ adminis-
tration. I also made most of the aspects bound to Unity. Thus I learned to master this software.
For Collapse I focused on certain aspects of the games bound to its mechanics. I had to work with
the some of the scripts. I had to learn how to use JSON files and to implement them in the game. I also
had to work a lot with overleaf since for the last presentation a was in charge of the report as well as the
operating document. Therefore, now, I feel quite comfortable with Latex. Finally, I had to many of the
levels. I have to admit I underestimated this part of project. To be able to create a complex puzzle that is
difficult to solve is harder than what we thought.
The production of this game taught me many things in general. I understood how much communica-
tion is important for a group based project as well as organization. It also allowed us to use our skills for
a concrete objective.
39
13.2 Edward CACIOPPO Collapse Project
13.2 Edward CACIOPPO
During my first defense I was working with Gael on a project called ”Decrypted”. During the creation
of our game, I had to learn to use various software under free license for the manipulation of 3D models
(Blender and Makehumans).
Despite the great work we did, it was not possible for us to continue being only 2, we were then put
in team with Valentin and Emma. After a meeting with this new team we agreed to continue Valentin
and Emma’s project.
Consequently it is a game with all these mechanics of inclusive bases, I had to at first get acquainted
with all the work already made to be able to work. So I learnt a new format, Json as well as its use in the
scripts with the language C #.
I have afterward been interested in various bookshops offered by Unity to give better sensations of
game. That is the creation of GUI or the use of the various peripheral rings of the computer, Unity taught
me the use of these various commands.
40
13.3 Valentin BERLIER Collapse Project
13.3 Valentin BERLIER
This project gave me an opportunity to experiment with a domain that always interested me, game de-
velopment. I was excited about it plus I was already familiar with the world of computer graphics as I’ve
used Blender a lot in the past for personal projects. In the same way, I’ve been really enjoying C# over
the last year and I was looking forward to work with the language a little bit more. What I’m trying to say
here is that I really liked working on this project as it provided an interesting but also a fun experience.
Unity features a large set of high-level tools that usually makes it easy to abstract away implementation
details, allowing you to really focus on the game logic.
Regarding the game’s development, I took care of the creation of the level editor as well as all the
parts of the project that needed to communicate with our server. The level editor was really interesting
to implement. I had to deal with a lot of different things at the same time and I think that it was for
me one of the most rewarding experience of the project. Another interesting learning experience was
the network handling for the cooperation mode, especially the logic that I implemented on top of the
matchmaking service.
Another interesting aspect of the project was the integration of our custom API. I’ve been looking
on and off into web development for a few years now and I think that I managed to use my experience
by setting up our back-end infrastructure, that is to say creating the API itself as well as configuring our
server.
Finally, I would say that this project allowed us to test and use our skills but more importantly
it allowed us to end up with a concrete result. That represented for me an interest of a whole new
dimension.
41
13.4 Emma PAYAN Collapse Project
13.4 Emma PAYAN
At the beginning of the year I frankly knew nothing to programming. This project not only allowed me
to put into practice some bases acquired during the first half of the year but I also discovered numerous
software such as Blender and learned new languages (HTML, CSS, Javascript) in particular thanks to
the conception of the website.
As I am attracted by the domain of the art and the design, I really liked discovering the Blender
software and realizing small animations such as levers or buttons. For the conception of the character
I was helped a lot by the on-line courts classes of the Openclassroom.fr website which explains lot of
different ways to realize Blender models.
I also enjoyed realizing the website, it is something which I had always wanted to make and I plan to
continue to learn new things in this domain to be able to improve myself.
Also, beyond the technical aspect I learned some rudiments related to the conception of a project such
as time management on a long lasting or the teamwork organization. Being a summer camp counselor,
I learned, during various stays of holidays, to work in team on short duration (1 or 2 weeks). But the
experience is very different in both cases. I also realized a expression courses during the Easter holidays
which helped me for the various presentations.
Finally, this project allowed me to imagine the work conditions of someone working in a company
and what a professional project could look like.
42
Collapse Project
14 Conclusion
All in all, we can say that we successfully managed to create a video game in C# over a period of 5
months. We reached most of the goals we had fixed in the book of specification regardless of the diffi-
culties we met.
This project took us as much of technique and personal involvement as of cooperation and team work.
It allowed us to expand our programming knowledges, to put in practice the knowledges we already had
thanks to the classes but we also discovered, during these five months, how to manage the time we had
and how to work in team. Those new skills seem now essential to us for anyone that plans to work in the
corporate world.
This game also reflects the motivation and involvement of each member of the group in what is a
first experience of a long term team project for us. Each one brought his knowledges to the project and
learned from the ones of the other members of the group.
43

![TELL ME (AN ASSISTANT FOR THE VISUALLY CHALLENGED) Me(IJNTSE).pdf · The Django Rest framework or simply DRF [11] is a powerful toolkit for developing web APIs, which is built on](https://img.pdfslide.us/doc/110x75/5ed653e17998195daf29d5a8/tell-me-an-assistant-for-the-visually-challenged-meijntsepdf-the-django-rest.jpg)