Embed Size (px)
Citation preview

Container and Vertical Gardening
Technology for the PoorJob S. Ebenezer
PresidentPrepared. By
John Otting
In the twenty first century we are facing food security problems due to population growth and shortage of arable lands. On top of this we face food safety issues caused by pollution of the air and soil due to use of chemicals. To counter this we need to reappraise our ways to grow garden produce in both rural and urban settings. One of the main barriers to garden production in both these areas is lack of safe soil. Another challenge we face is lack of open space able to sustain a garden, especially in apartment complexes and slum areas in the urban milieu and unfavorable terrain in the rural areas. Container garden along side vertical gardening is one solution we propose to alleviate these problems. In an effort to try and make this method of gardening applicable to as many communities world-wide as possible and keep price to a minimum we suggest that one use recycled or reclaimed materials first.
Container Gardening
The benefits of container gardening are manifold. Container Gardening at its simplest allows one to create a suitable space to garden in an area that would otherwise not be able to support plant growth. The largest constraint to what can be used as a container is mainly how well whatever the material of the container deals with the prolonged affects of the elements. Keeping that in mind what follows are some of the containers known to be useable so far.
• Three plastic bags (mainly of the grocery bag size but this need not always be the case) one inside the other and with a piece of cardboard cut in a rectangle, to give shape to the container, work well for one season.
• Feed sacks, USAID sacks or plastic weave sacks with the top end sealed, laying on their side, and with wholes cut into it to allow for plant growth also work well for one season. Or one can fill the sacks up half way with soil and roll the excess into a cuff and use them in mush the same way as the plastic bags. Depending on the severity of the weather these containers might need an extra sheet underneath to catch any loose soil as the sacks degrade over the season.
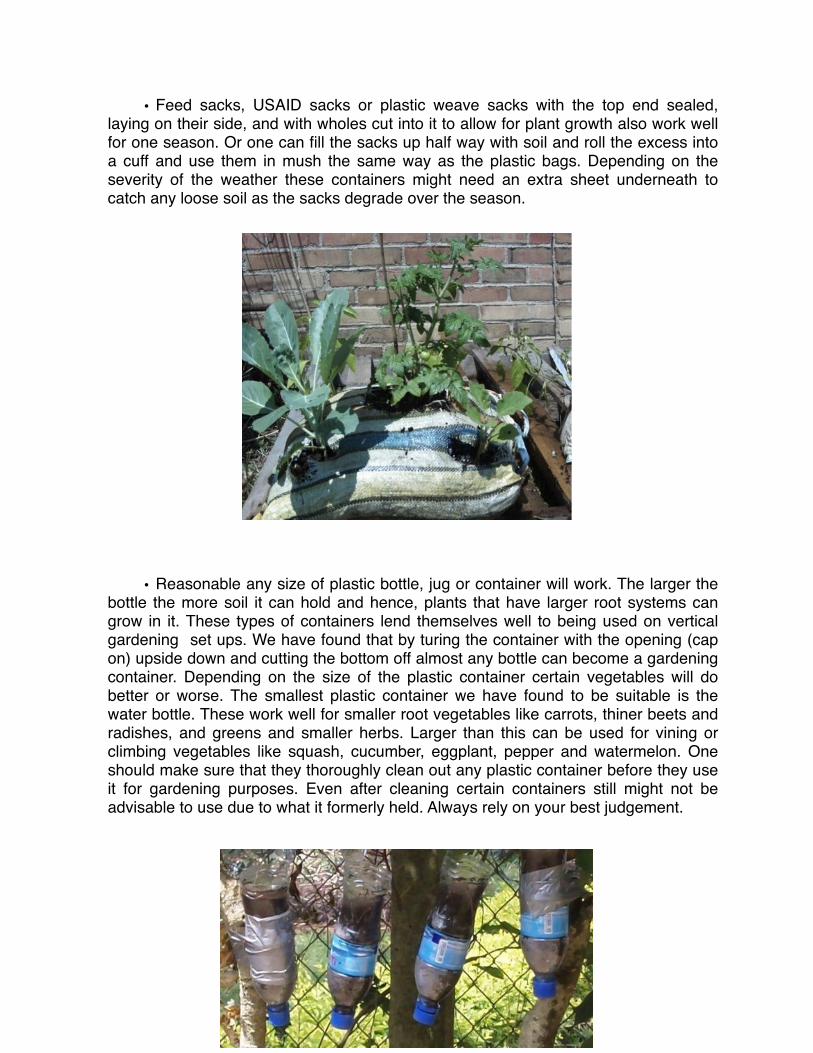
• Reasonable any size of plastic bottle, jug or container will work. The larger the bottle the more soil it can hold and hence, plants that have larger root systems can grow in it. These types of containers lend themselves well to being used on vertical gardening set ups. We have found that by turing the container with the opening (cap on) upside down and cutting the bottom off almost any bottle can become a gardening container. Depending on the size of the plastic container certain vegetables will do better or worse. The smallest plastic container we have found to be suitable is the water bottle. These work well for smaller root vegetables like carrots, thiner beets and radishes, and greens and smaller herbs. Larger than this can be used for vining or climbing vegetables like squash, cucumber, eggplant, pepper and watermelon. One should make sure that they thoroughly clean out any plastic container before they use it for gardening purposes. Even after cleaning certain containers still might not be advisable to use due to what it formerly held. Always rely on your best judgement.
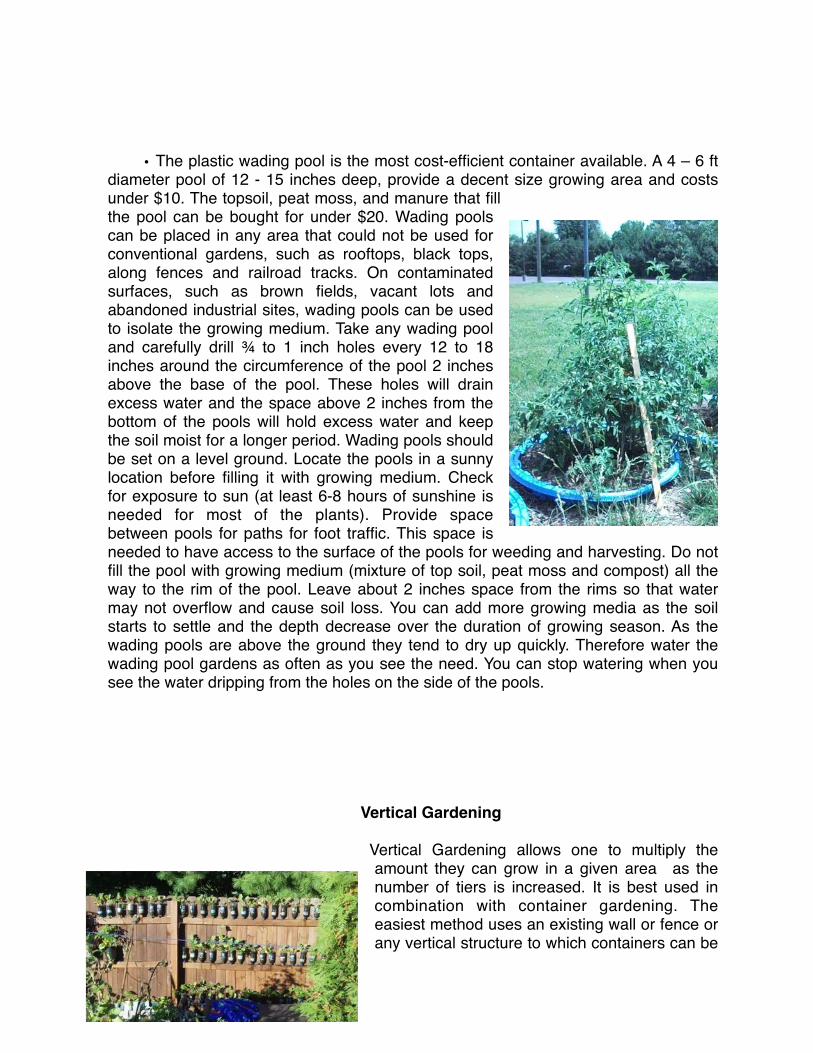
• The plastic wading pool is the most cost-efficient container available. A 4 – 6 ft diameter pool of 12 - 15 inches deep, provide a decent size growing area and costs under $10. The topsoil, peat moss, and manure that fill the pool can be bought for under $20. Wading pools can be placed in any area that could not be used for conventional gardens, such as rooftops, black tops, along fences and railroad tracks. On contaminated surfaces, such as brown fields, vacant lots and abandoned industrial sites, wading pools can be used to isolate the growing medium. Take any wading pool and carefully drill ¾ to 1 inch holes every 12 to 18 inches around the circumference of the pool 2 inches above the base of the pool. These holes will drain excess water and the space above 2 inches from the bottom of the pools will hold excess water and keep the soil moist for a longer period. Wading pools should be set on a level ground. Locate the pools in a sunny location before filling it with growing medium. Check for exposure to sun (at least 6-8 hours of sunshine is needed for most of the plants). Provide space between pools for paths for foot traffic. This space is needed to have access to the surface of the pools for weeding and harvesting. Do not fill the pool with growing medium (mixture of top soil, peat moss and compost) all the way to the rim of the pool. Leave about 2 inches space from the rims so that water may not overflow and cause soil loss. You can add more growing media as the soil starts to settle and the depth decrease over the duration of growing season. As the wading pools are above the ground they tend to dry up quickly. Therefore water the wading pool gardens as often as you see the need. You can stop watering when you see the water dripping from the holes on the side of the pools.
Vertical Gardening
Vertical Gardening allows one to multiply the amount they can grow in a given area as the number of tiers is increased. It is best used in combination with container gardening. The easiest method uses an existing wall or fence or any vertical structure to which containers can be
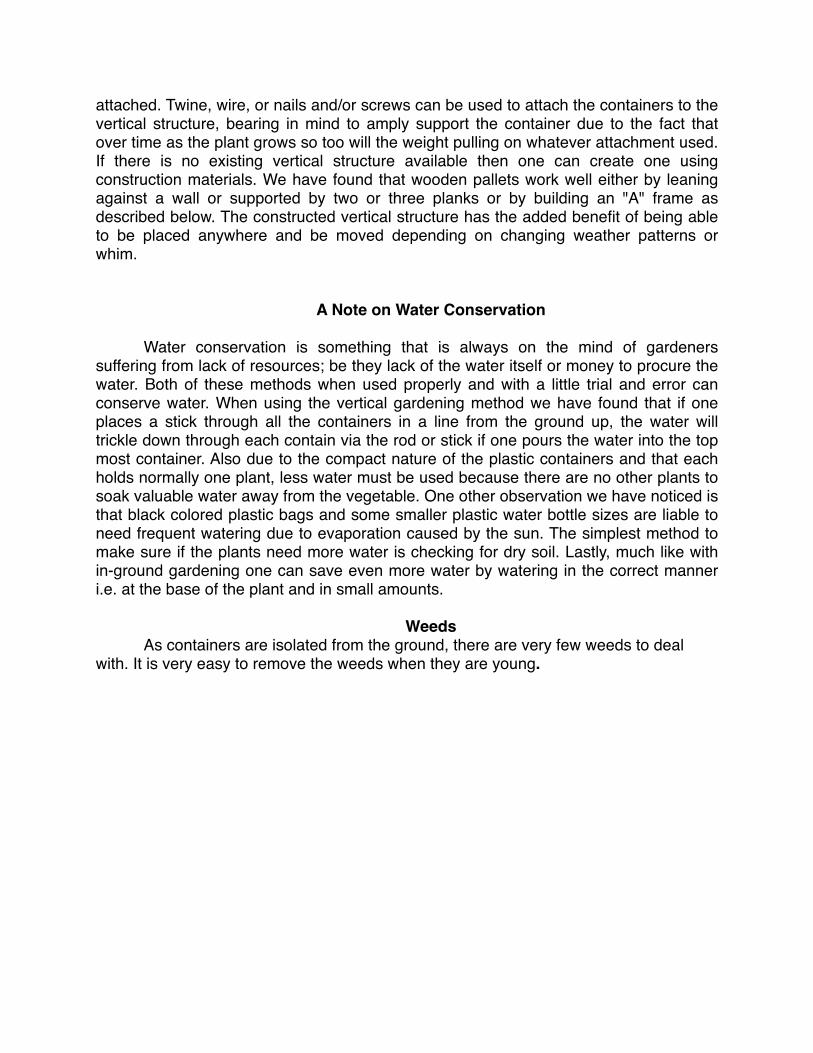
attached. Twine, wire, or nails and/or screws can be used to attach the containers to the vertical structure, bearing in mind to amply support the container due to the fact that over time as the plant grows so too will the weight pulling on whatever attachment used. If there is no existing vertical structure available then one can create one using construction materials. We have found that wooden pallets work well either by leaning against a wall or supported by two or three planks or by building an "A" frame as described below. The constructed vertical structure has the added benefit of being able to be placed anywhere and be moved depending on changing weather patterns or whim.
A Note on Water Conservation
Water conservation is something that is always on the mind of gardeners suffering from lack of resources; be they lack of the water itself or money to procure the water. Both of these methods when used properly and with a little trial and error can conserve water. When using the vertical gardening method we have found that if one places a stick through all the containers in a line from the ground up, the water will trickle down through each contain via the rod or stick if one pours the water into the top most container. Also due to the compact nature of the plastic containers and that each holds normally one plant, less water must be used because there are no other plants to soak valuable water away from the vegetable. One other observation we have noticed is that black colored plastic bags and some smaller plastic water bottle sizes are liable to need frequent watering due to evaporation caused by the sun. The simplest method to make sure if the plants need more water is checking for dry soil. Lastly, much like with in-ground gardening one can save even more water by watering in the correct manner i.e. at the base of the plant and in small amounts.
WeedsAs containers are isolated from the ground, there are very few weeds to deal
with. It is very easy to remove the weeds when they are young.
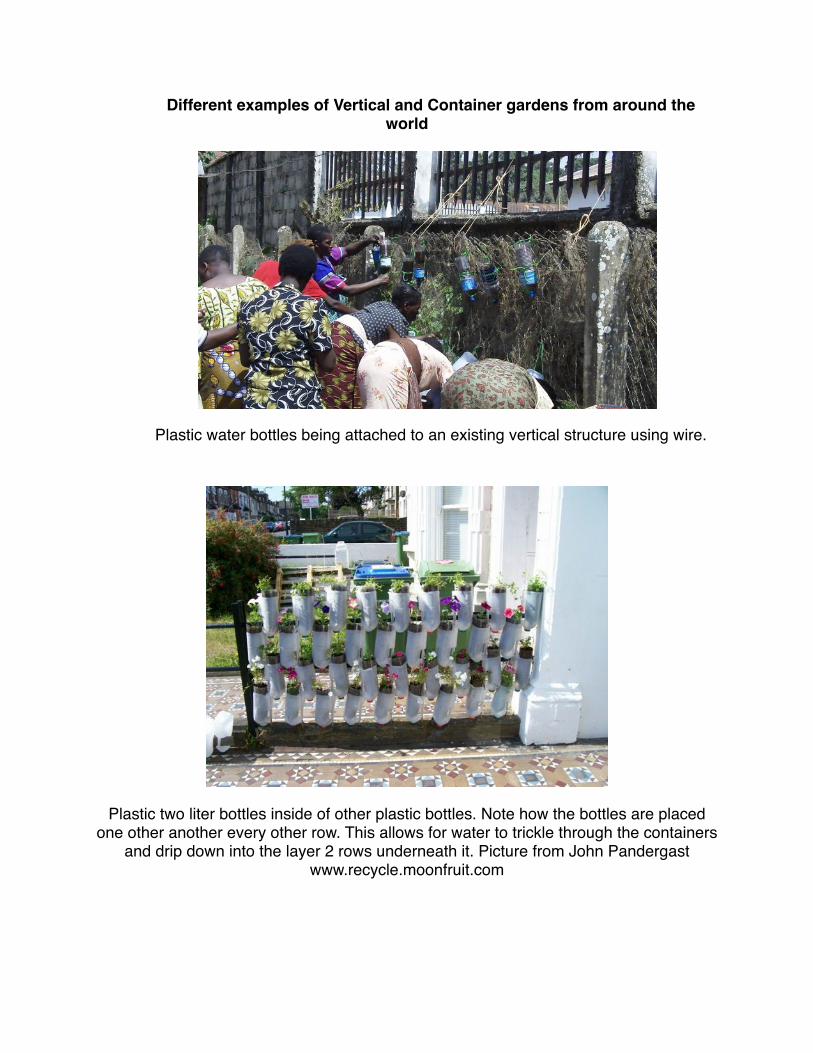
Different examples of Vertical and Container gardens from around the world
Plastic water bottles being attached to an existing vertical structure using wire.
Plastic two liter bottles inside of other plastic bottles. Note how the bottles are placed one other another every other row. This allows for water to trickle through the containers
and drip down into the layer 2 rows underneath it. Picture from John Pandergast www.recycle.moonfruit.com
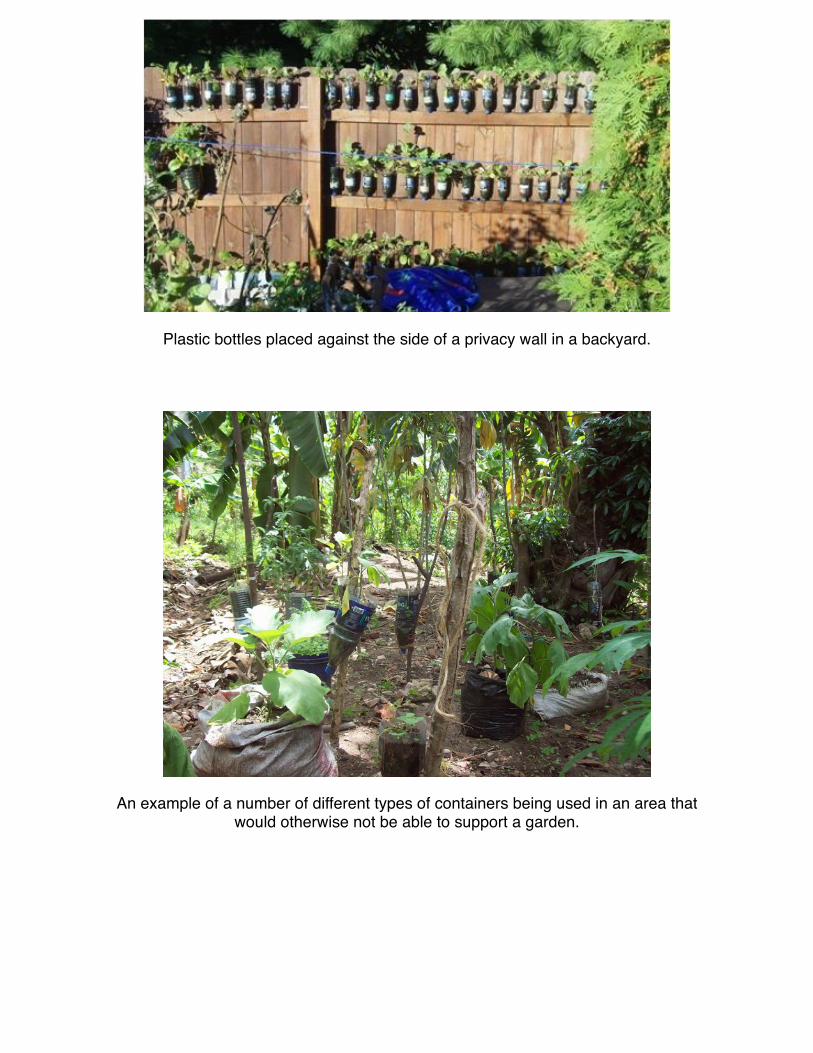
Plastic bottles placed against the side of a privacy wall in a backyard.
An example of a number of different types of containers being used in an area that would otherwise not be able to support a garden.
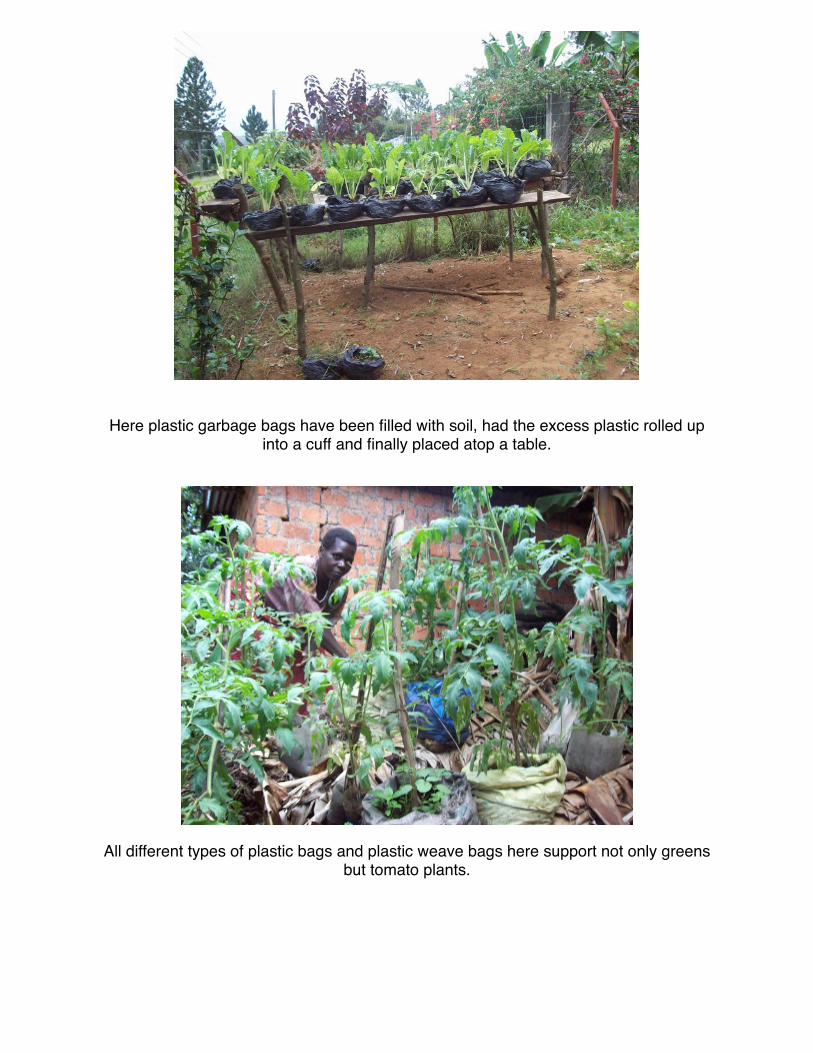
Here plastic garbage bags have been filled with soil, had the excess plastic rolled up into a cuff and finally placed atop a table.
All different types of plastic bags and plastic weave bags here support not only greens but tomato plants.
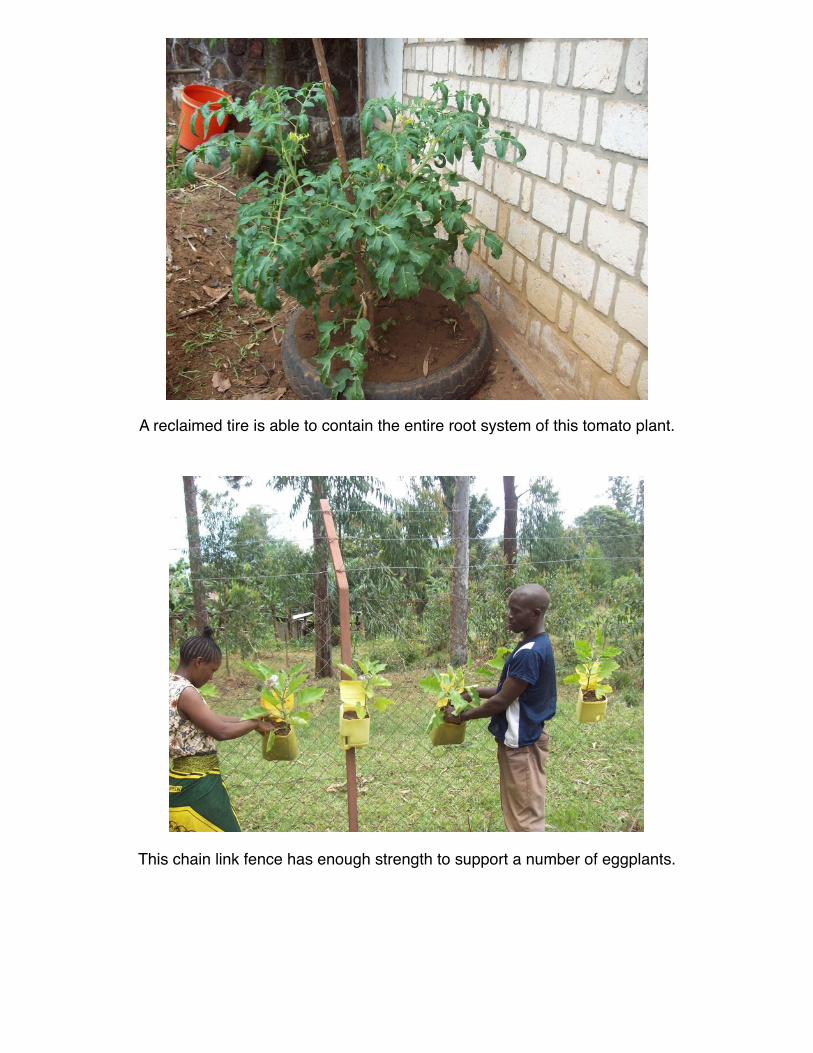
A reclaimed tire is able to contain the entire root system of this tomato plant.
This chain link fence has enough strength to support a number of eggplants.
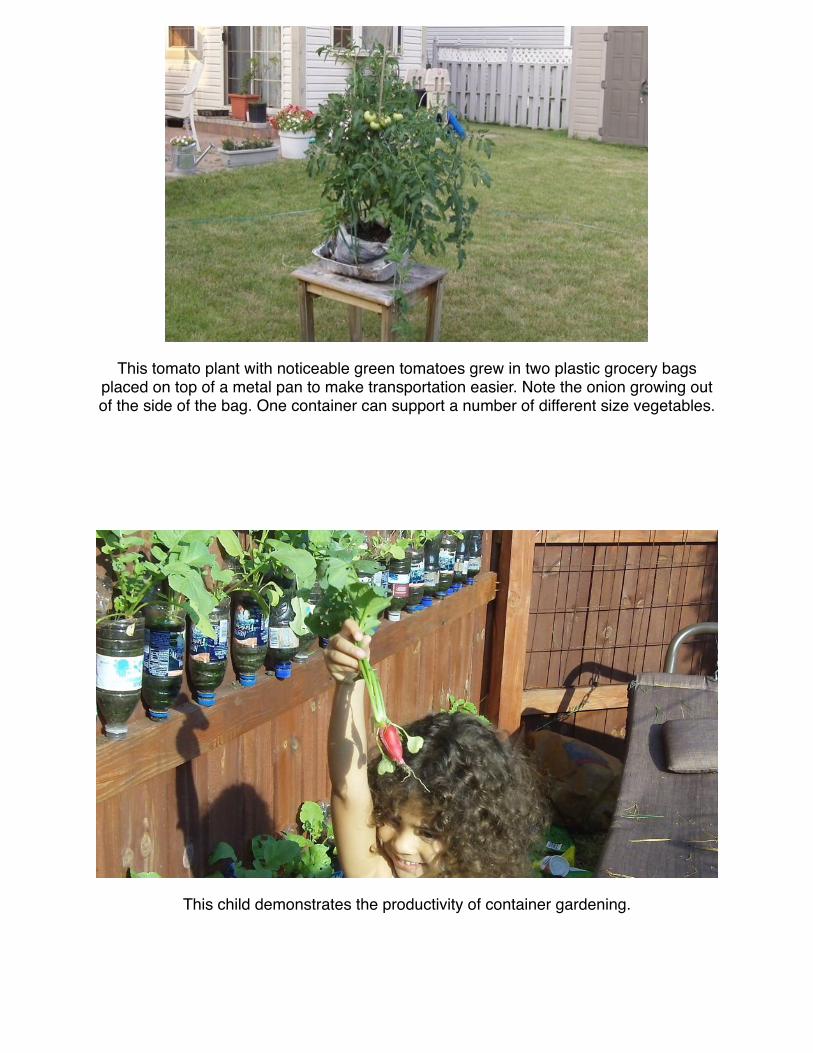
This tomato plant with noticeable green tomatoes grew in two plastic grocery bags placed on top of a metal pan to make transportation easier. Note the onion growing out of the side of the bag. One container can support a number of different size vegetables.
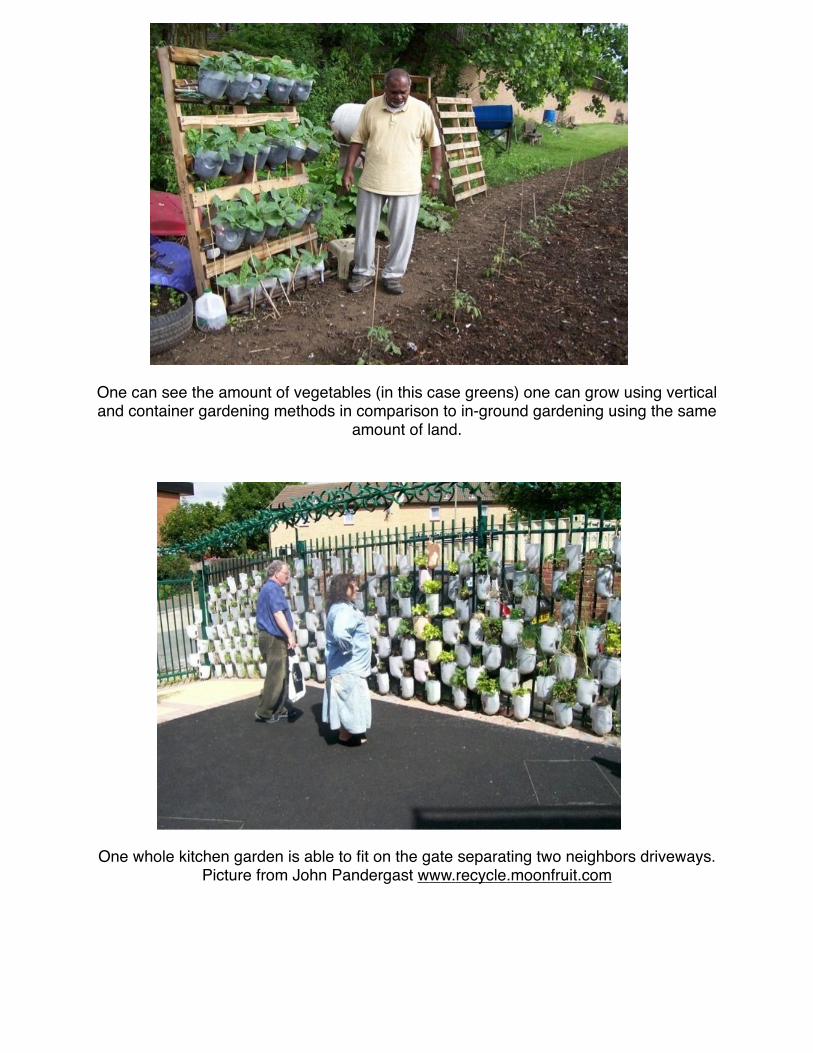
This child demonstrates the productivity of container gardening.
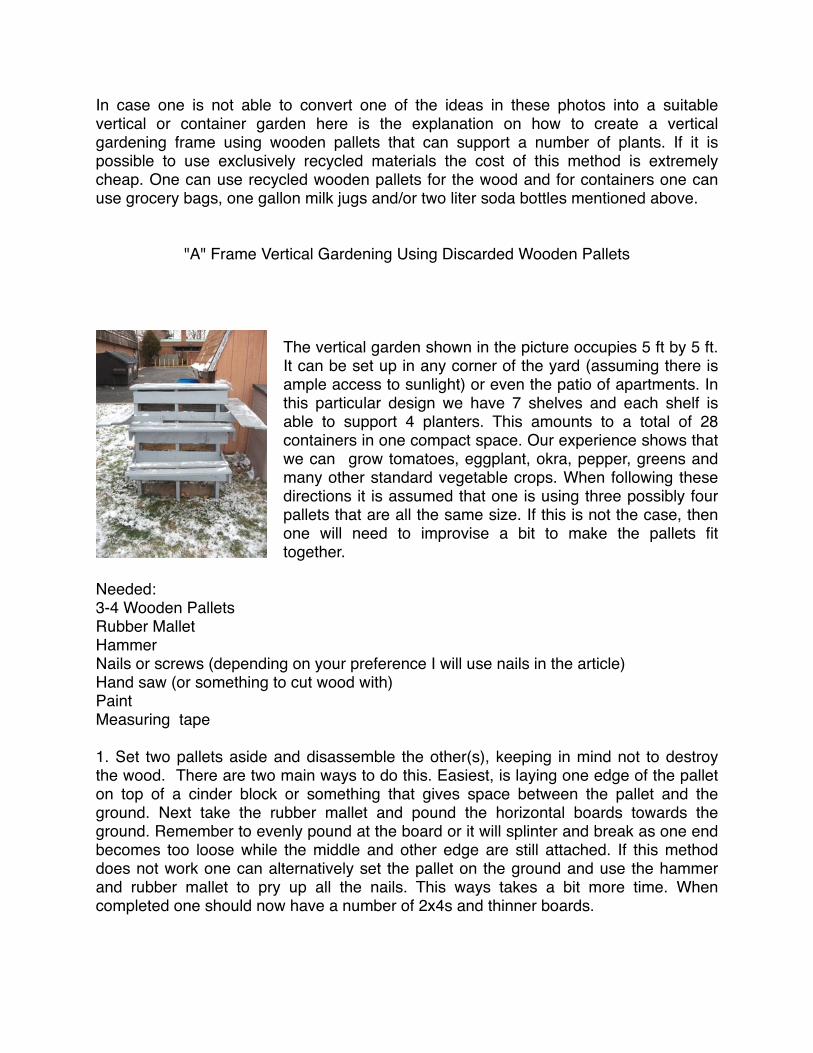
One can see the amount of vegetables (in this case greens) one can grow using vertical and container gardening methods in comparison to in-ground gardening using the same
amount of land.
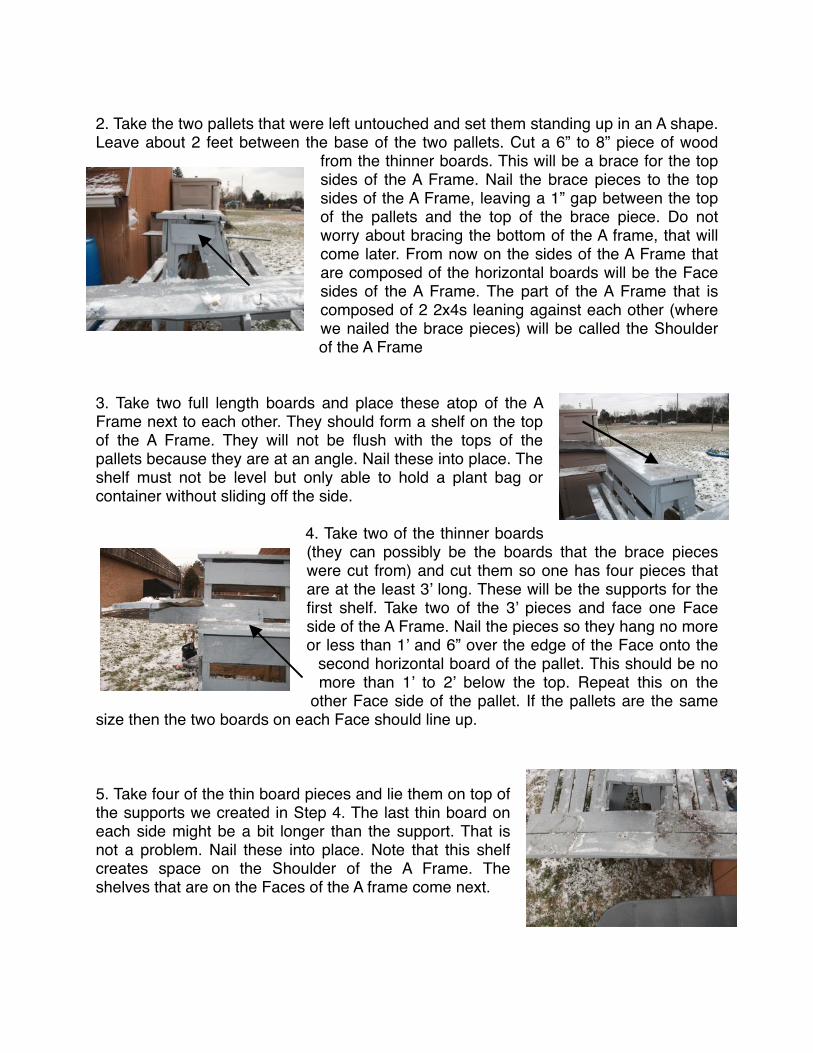
One whole kitchen garden is able to fit on the gate separating two neighbors driveways. Picture from John Pandergast www.recycle.moonfruit.com
In case one is not able to convert one of the ideas in these photos into a suitable vertical or container garden here is the explanation on how to create a vertical gardening frame using wooden pallets that can support a number of plants. If it is possible to use exclusively recycled materials the cost of this method is extremely cheap. One can use recycled wooden pallets for the wood and for containers one can use grocery bags, one gallon milk jugs and/or two liter soda bottles mentioned above.
"A" Frame Vertical Gardening Using Discarded Wooden Pallets
The vertical garden shown in the picture occupies 5 ft by 5 ft. It can be set up in any corner of the yard (assuming there is ample access to sunlight) or even the patio of apartments. In this particular design we have 7 shelves and each shelf is able to support 4 planters. This amounts to a total of 28 containers in one compact space. Our experience shows that we can grow tomatoes, eggplant, okra, pepper, greens and many other standard vegetable crops. When following these directions it is assumed that one is using three possibly four pallets that are all the same size. If this is not the case, then one will need to improvise a bit to make the pallets fit together.
Needed:3-4 Wooden PalletsRubber MalletHammerNails or screws (depending on your preference I will use nails in the article)Hand saw (or something to cut wood with)PaintMeasuring tape
1. Set two pallets aside and disassemble the other(s), keeping in mind not to destroy the wood. There are two main ways to do this. Easiest, is laying one edge of the pallet on top of a cinder block or something that gives space between the pallet and the ground. Next take the rubber mallet and pound the horizontal boards towards the ground. Remember to evenly pound at the board or it will splinter and break as one end becomes too loose while the middle and other edge are still attached. If this method does not work one can alternatively set the pallet on the ground and use the hammer and rubber mallet to pry up all the nails. This ways takes a bit more time. When completed one should now have a number of 2x4s and thinner boards.
2. Take the two pallets that were left untouched and set them standing up in an A shape. Leave about 2 feet between the base of the two pallets. Cut a 6” to 8” piece of wood
from the thinner boards. This will be a brace for the top sides of the A Frame. Nail the brace pieces to the top sides of the A Frame, leaving a 1” gap between the top of the pallets and the top of the brace piece. Do not worry about bracing the bottom of the A frame, that will come later. From now on the sides of the A Frame that are composed of the horizontal boards will be the Face sides of the A Frame. The part of the A Frame that is composed of 2 2x4s leaning against each other (where we nailed the brace pieces) will be called the Shoulder of the A Frame
3. Take two full length boards and place these atop of the A Frame next to each other. They should form a shelf on the top of the A Frame. They will not be flush with the tops of the pallets because they are at an angle. Nail these into place. The shelf must not be level but only able to hold a plant bag or container without sliding off the side.
4. Take two of the thinner boards (they can possibly be the boards that the brace pieces were cut from) and cut them so one has four pieces that are at the least 3’ long. These will be the supports for the first shelf. Take two of the 3’ pieces and face one Face side of the A Frame. Nail the pieces so they hang no more or less than 1’ and 6” over the edge of the Face onto the
second horizontal board of the pallet. This should be no more than 1’ to 2’ below the top. Repeat this on the
other Face side of the pallet. If the pallets are the same size then the two boards on each Face should line up.
5. Take four of the thin board pieces and lie them on top of the supports we created in Step 4. The last thin board on each side might be a bit longer than the support. That is not a problem. Nail these into place. Note that this shelf creates space on the Shoulder of the A Frame. The shelves that are on the Faces of the A frame come next.
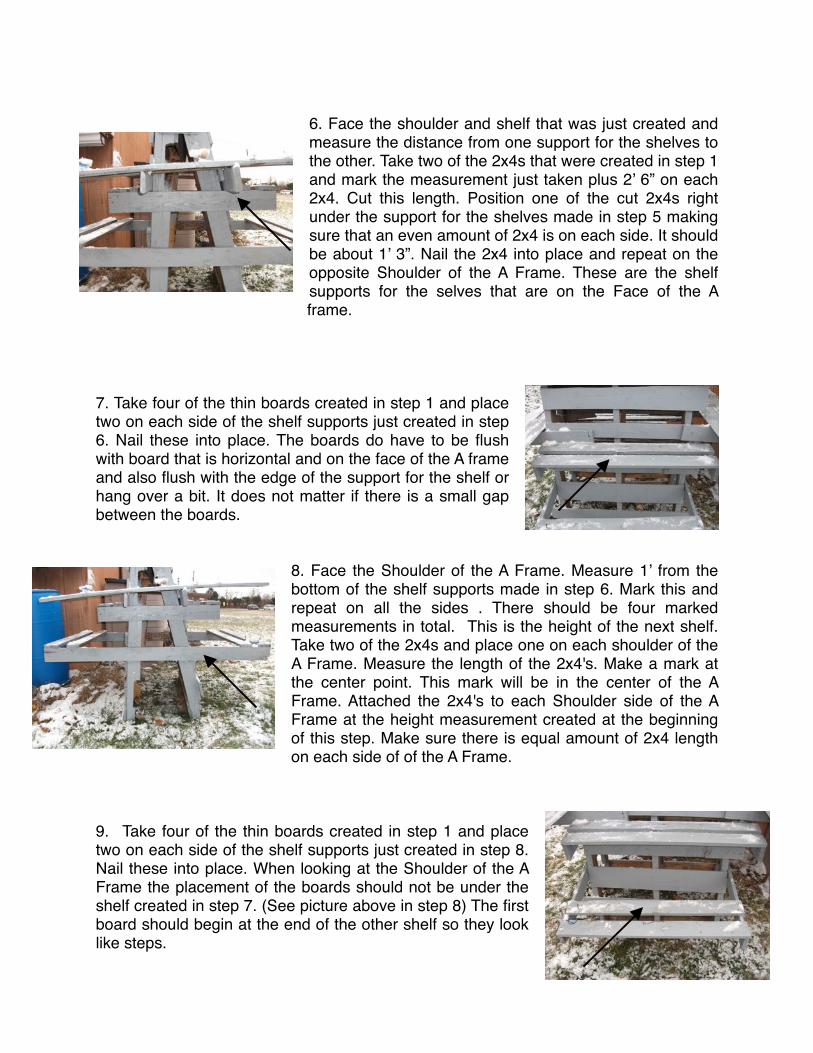
6. Face the shoulder and shelf that was just created and measure the distance from one support for the shelves to the other. Take two of the 2x4s that were created in step 1 and mark the measurement just taken plus 2’ 6” on each 2x4. Cut this length. Position one of the cut 2x4s right under the support for the shelves made in step 5 making sure that an even amount of 2x4 is on each side. It should be about 1’ 3”. Nail the 2x4 into place and repeat on the opposite Shoulder of the A Frame. These are the shelf supports for the selves that are on the Face of the A frame.
7. Take four of the thin boards created in step 1 and place two on each side of the shelf supports just created in step 6. Nail these into place. The boards do have to be flush with board that is horizontal and on the face of the A frame and also flush with the edge of the support for the shelf or hang over a bit. It does not matter if there is a small gap between the boards.
8. Face the Shoulder of the A Frame. Measure 1’ from the bottom of the shelf supports made in step 6. Mark this and repeat on all the sides . There should be four marked measurements in total. This is the height of the next shelf. Take two of the 2x4s and place one on each shoulder of the A Frame. Measure the length of the 2x4's. Make a mark at the center point. This mark will be in the center of the A Frame. Attached the 2x4's to each Shoulder side of the A Frame at the height measurement created at the beginning of this step. Make sure there is equal amount of 2x4 length on each side of of the A Frame.
9. Take four of the thin boards created in step 1 and place two on each side of the shelf supports just created in step 8. Nail these into place. When looking at the Shoulder of the A Frame the placement of the boards should not be under the shelf created in step 7. (See picture above in step 8) The first board should begin at the end of the other shelf so they look like steps.
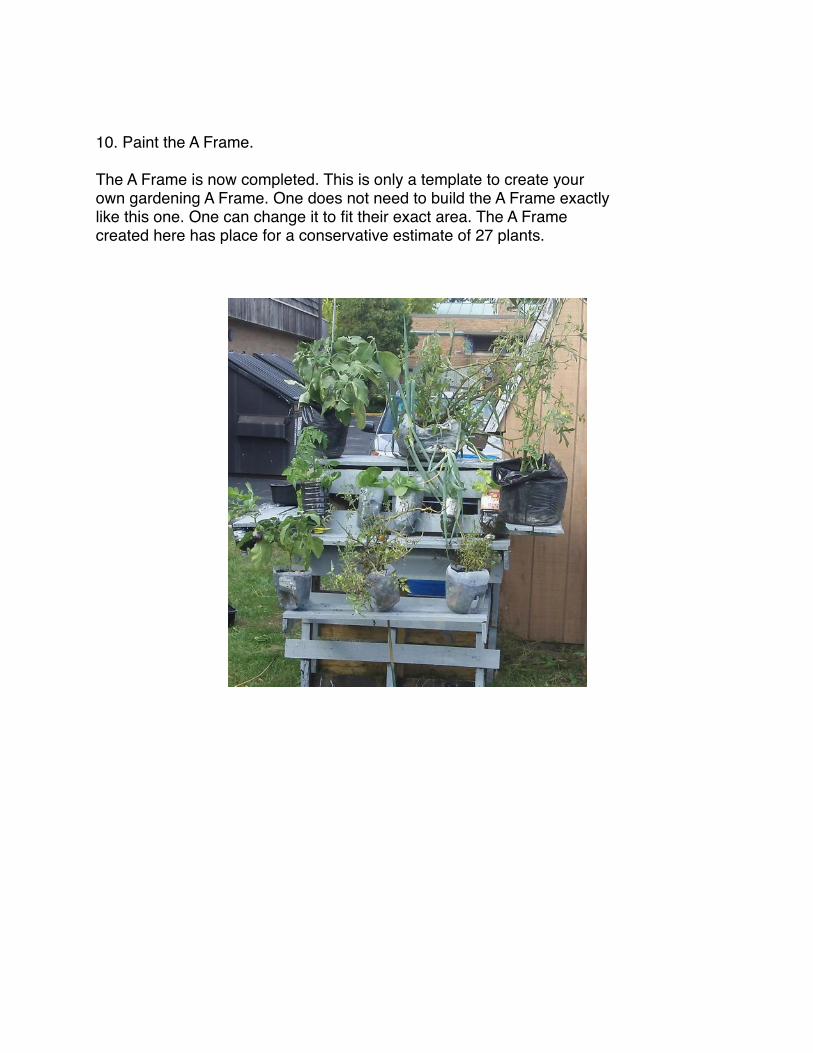
10. Paint the A Frame.
The A Frame is now completed. This is only a template to create yourown gardening A Frame. One does not need to build the A Frame exactlylike this one. One can change it to fit their exact area. The A Framecreated here has place for a conservative estimate of 27 plants.