Embed Size (px)
Citation preview
Information Technology Services
www.odu.edu/its
(757) 683-3192
1504 Webb Center
oduits odu_its
This guide is for ODU faculty and staff who would like to connect to an ODU printer from Mac laptops and other IT devices that are not joined to the ODU domain.
Connect device to campus VPN1. Connect to campus WiFI (odu.edu/ts/access/wireless)
2. Connect to campus VPN (odu.edu/facultystaff/computing/remote)
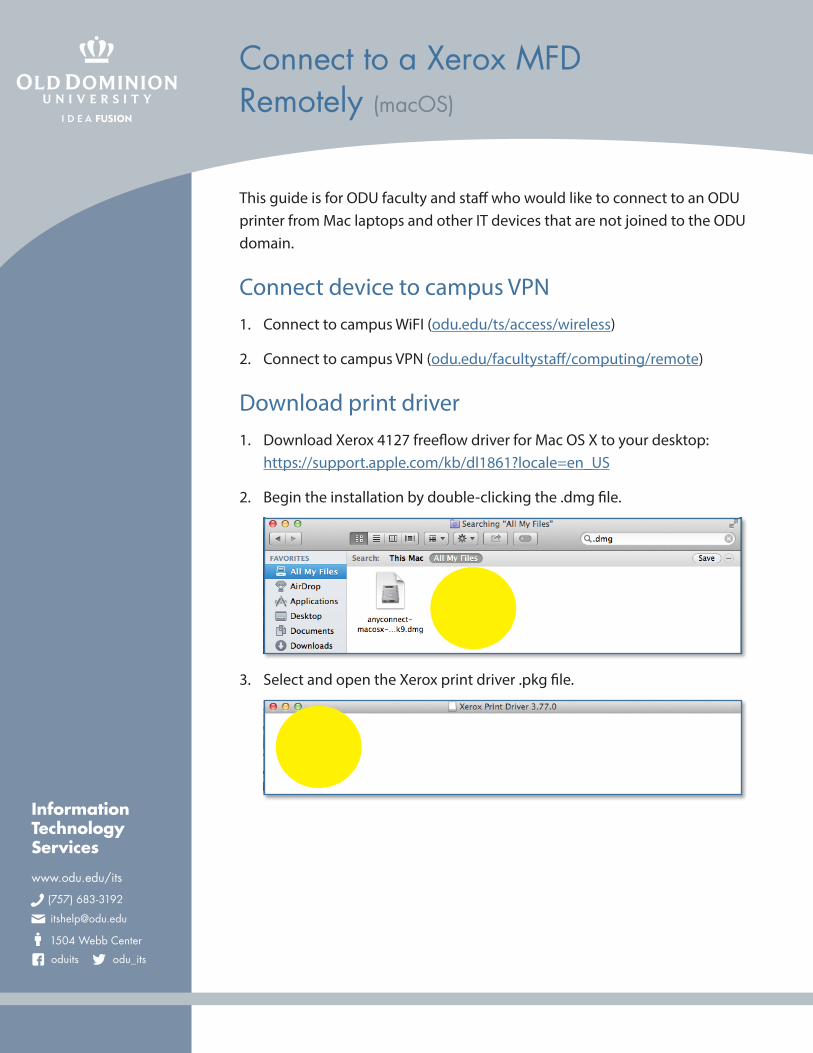
Download print driver1. Download Xerox 4127 freeflow driver for Mac OS X to your desktop:
https://support.apple.com/kb/dl1861?locale=en_US
2. Begin the installation by double-clicking the .dmg file.
3. Select and open the Xerox print driver .pkg file.
Connect to a Xerox MFD Remotely (macOS)
Connect to a Xerox MFD Remotely (macOS)
page 2
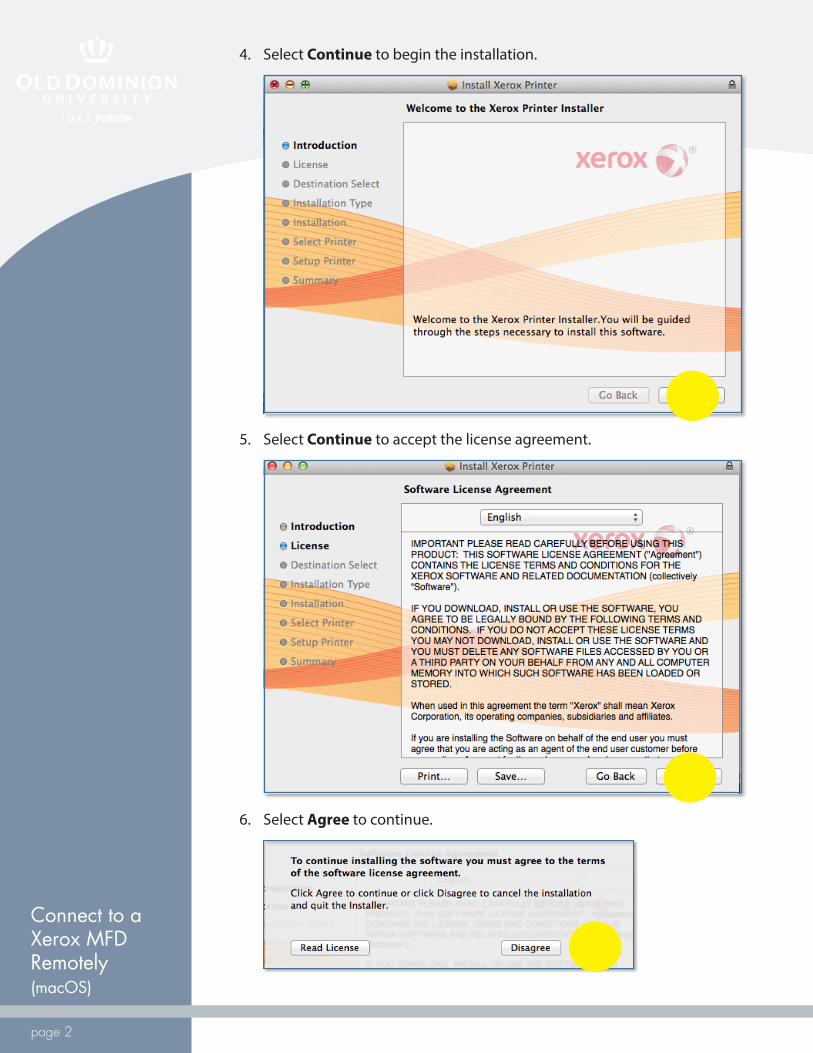
4. Select Continue to begin the installation.
5. Select Continue to accept the license agreement.
6. Select Agree to continue.
Connect to a Xerox MFD Remotely (macOS)
page 3
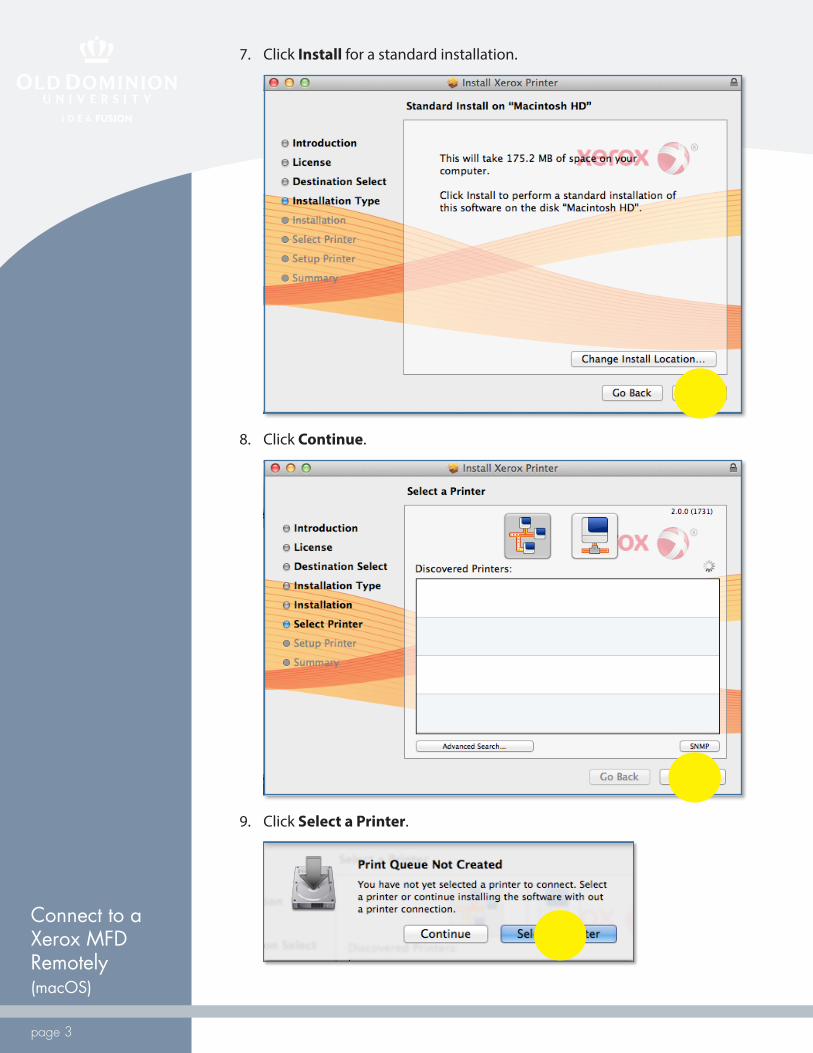
7. Click Install for a standard installation.
8. Click Continue.
9. Click Select a Printer.
Connect to a Xerox MFD Remotely (macOS)
page 4
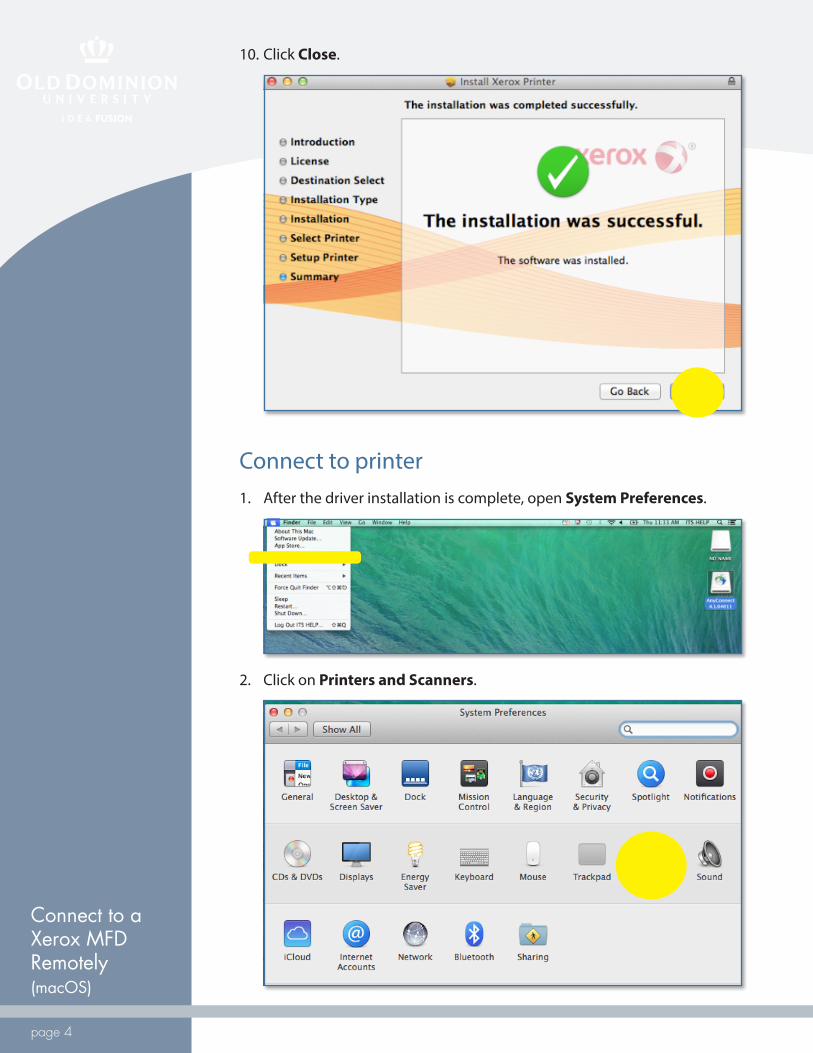
10. Click Close.
Connect to printer1. After the driver installation is complete, open System Preferences.
2. Click on Printers and Scanners.
Connect to a Xerox MFD Remotely (macOS)
page 5
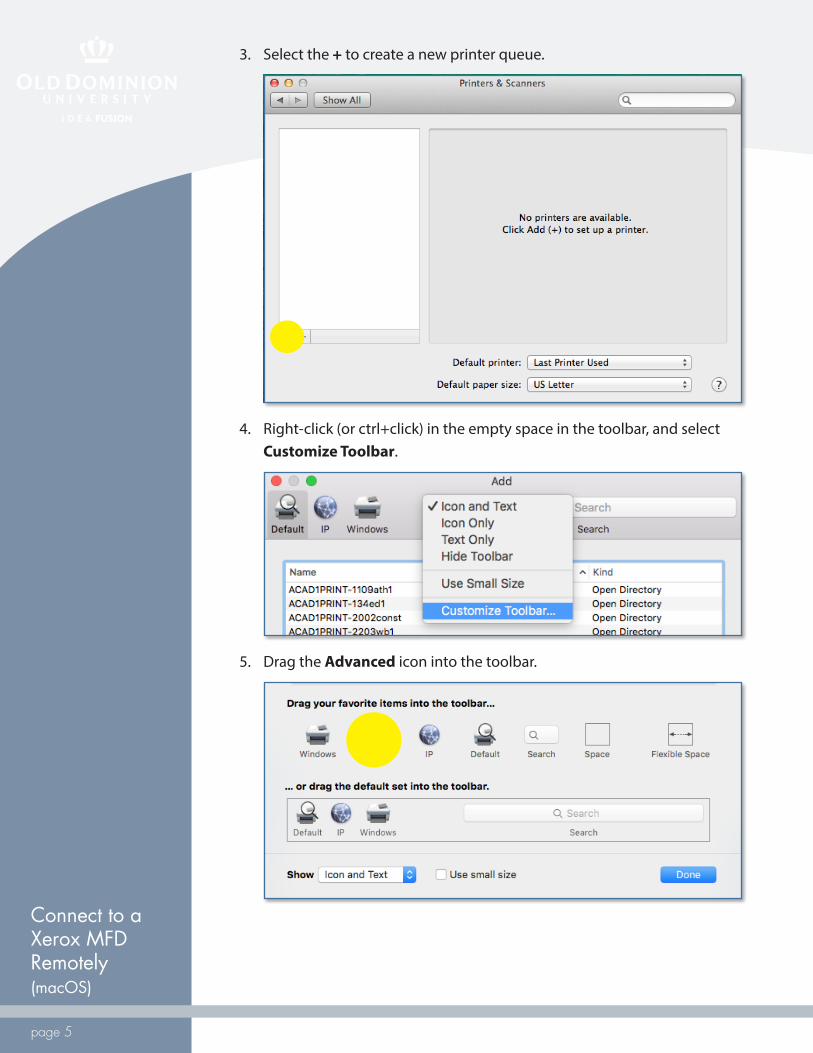
3. Select the + to create a new printer queue.
4. Right-click (or ctrl+click) in the empty space in the toolbar, and select Customize Toolbar.
5. Drag the Advanced icon into the toolbar.
Connect to a Xerox MFD Remotely (macOS)
page 6
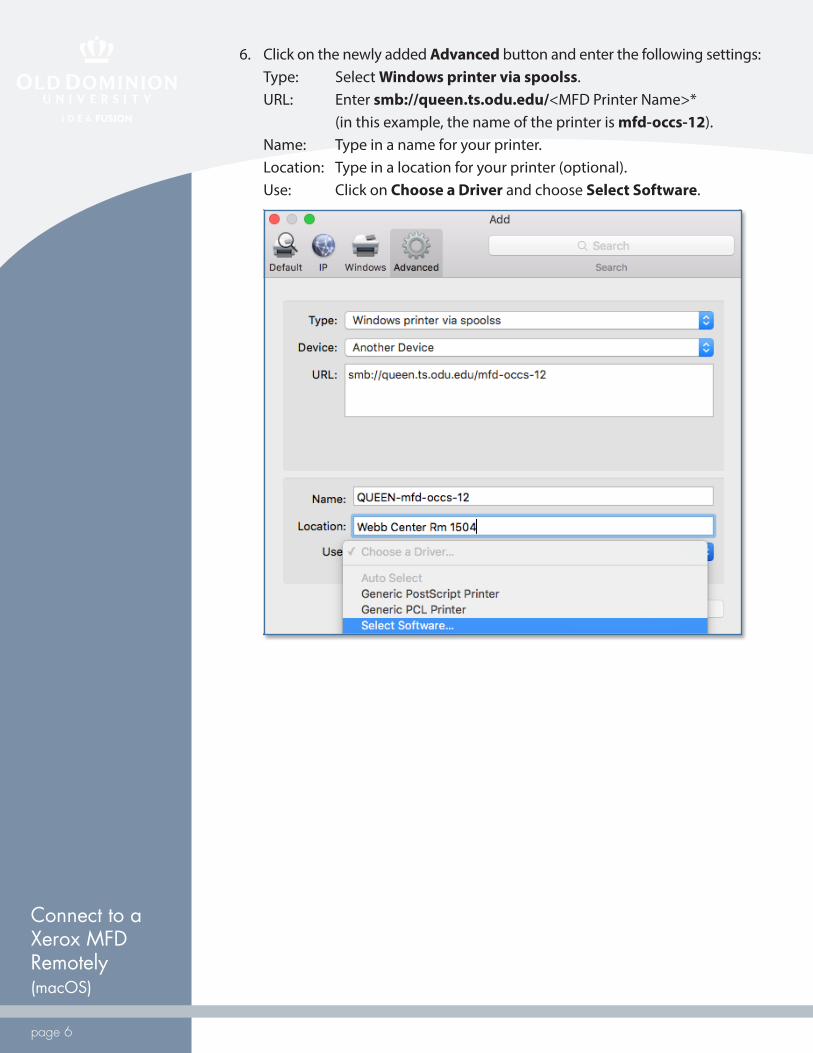
6. Click on the newly added Advanced button and enter the following settings: Type: Select Windows printer via spoolss. URL: Enter smb://queen.ts.odu.edu/<MFD Printer Name>* (in this example, the name of the printer is mfd-occs-12). Name: Type in a name for your printer. Location: Type in a location for your printer (optional). Use: Click on Choose a Driver and choose Select Software.
Connect to a Xerox MFD Remotely (macOS)
page 7
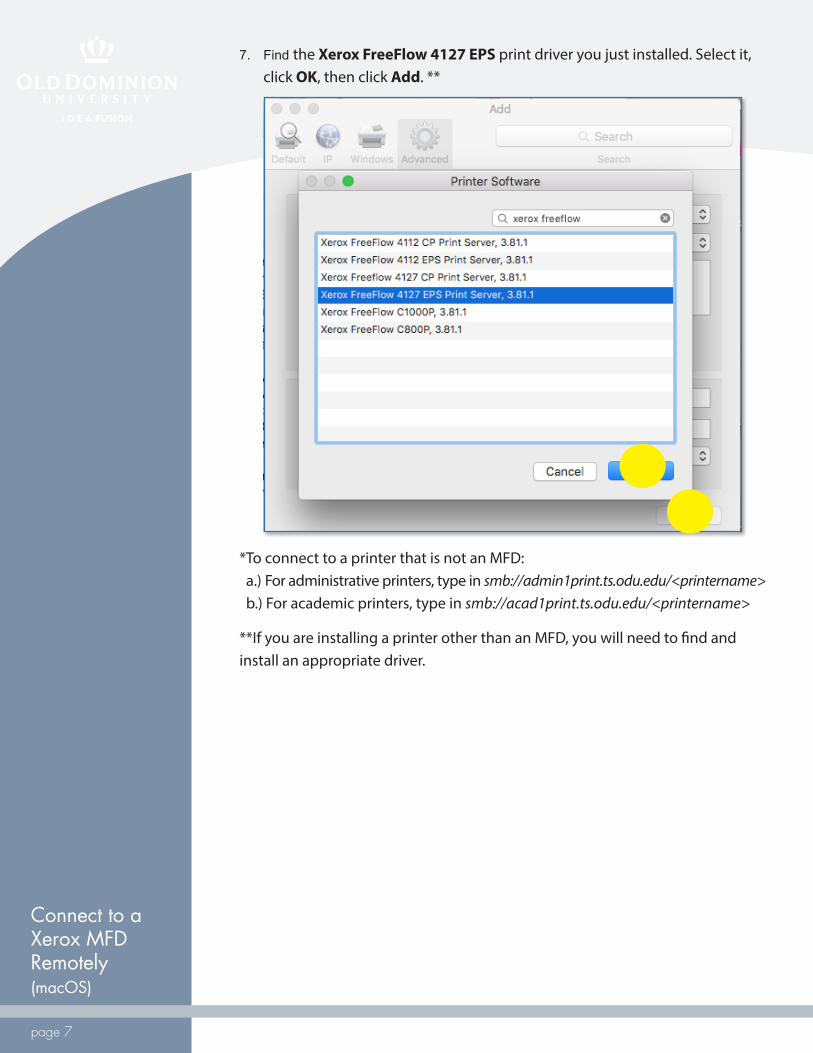
7. Find the Xerox FreeFlow 4127 EPS print driver you just installed. Select it, click OK, then click Add. **
* To connect to a printer that is not an MFD: a.) For administrative printers, type in smb://admin1print.ts.odu.edu/<printername> b.) For academic printers, type in smb://acad1print.ts.odu.edu/<printername>
**If you are installing a printer other than an MFD, you will need to find and install an appropriate driver.
Connect to a Xerox MFD Remotely (macOS)
page 8
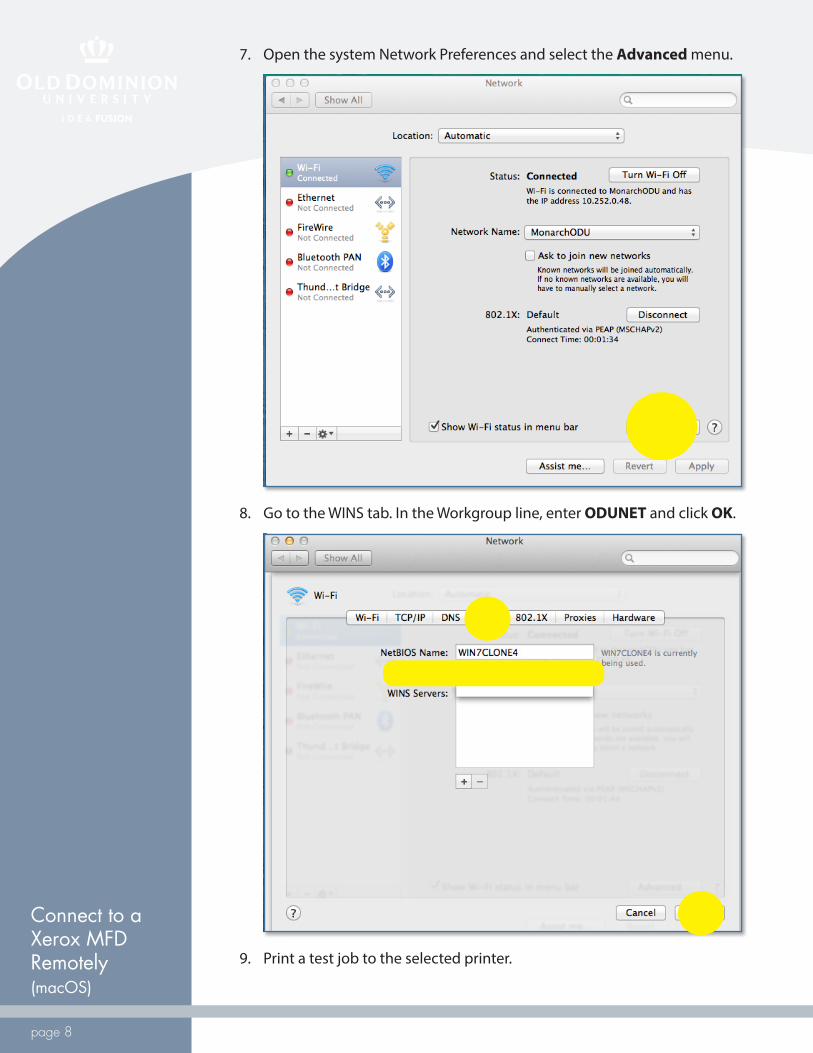
7. Open the system Network Preferences and select the Advanced menu.
8. Go to the WINS tab. In the Workgroup line, enter ODUNET and click OK.
9. Print a test job to the selected printer.