Embed Size (px)
Citation preview
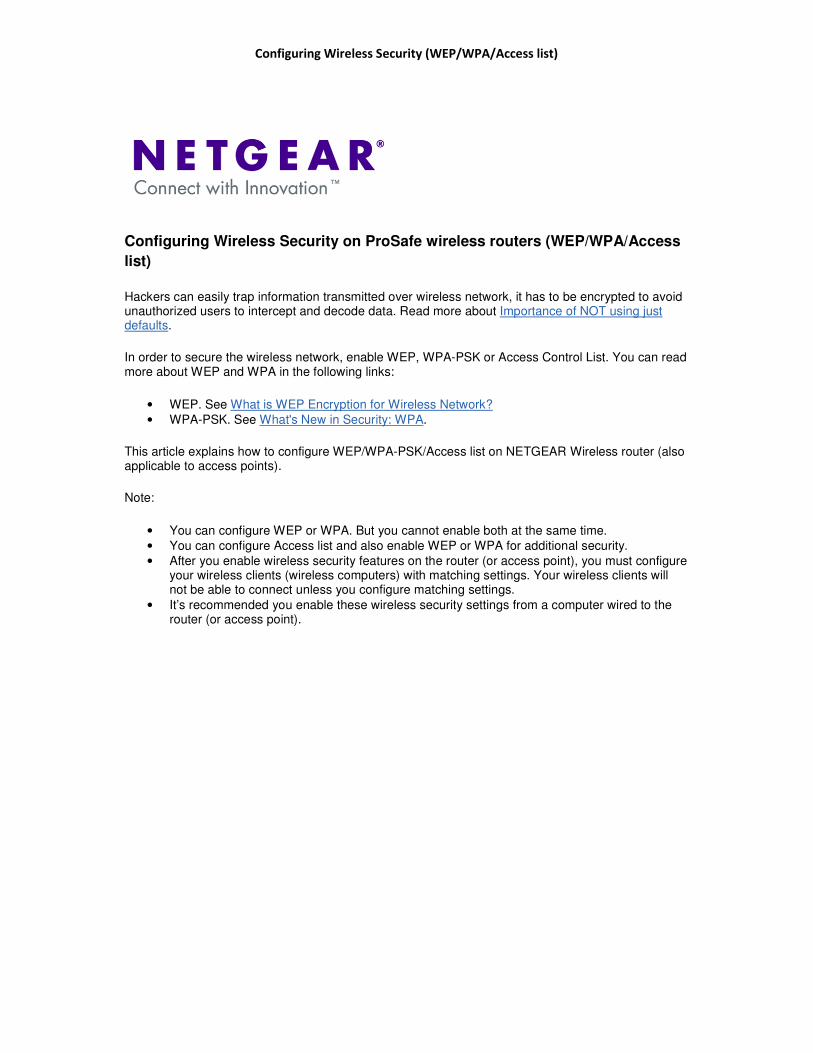
Configuring Wireless Security (WEP/WPA/Access list)
Configuring Wireless Security on ProSafe wireless routers (WEP/WPA/Access
list)
Hackers can easily trap information transmitted over wireless network, it has to be encrypted to avoid unauthorized users to intercept and decode data. Read more about Importance of NOT using just defaults.
In order to secure the wireless network, enable WEP, WPA-PSK or Access Control List. You can read more about WEP and WPA in the following links:
• WEP. See What is WEP Encryption for Wireless Network?
• WPA-PSK. See What's New in Security: WPA.
This article explains how to configure WEP/WPA-PSK/Access list on NETGEAR Wireless router (also applicable to access points).
Note:
• You can configure WEP or WPA. But you cannot enable both at the same time.
• You can configure Access list and also enable WEP or WPA for additional security.
• After you enable wireless security features on the router (or access point), you must configure your wireless clients (wireless computers) with matching settings. Your wireless clients will not be able to connect unless you configure matching settings.
• It’s recommended you enable these wireless security settings from a computer wired to the router (or access point).

Configuring Wireless Security (WEP/WPA/Access list)
Configuring WEP:
1. Connect a computer to any of the LAN ports of the NETGEAR router. 2. Open a web browser and type the router IP address which would be either http://192.168.0.1
or http://192.168.1.1 (by default, refer to your product documentation to determine the default IP address.) in the address bar and press Enter. The Login window will be prompting for a Username and Password. The default Username is admin and the default Password is password
3. Click Network Configuration, then Wireless Settings on the menu. 4. Under Wireless Security Type, Select WEP (Wired Equivalent Privacy) 5. Select Authentication type as Automatic and Encryption Strength as 64-bit (or 128-bit) -
You must later configure your wireless computers with the same setting. 6. Enter a Passphrase and click Generate Key. Please note down the character in Key1 - You
must later configure your wireless computers with the same setting. 7. Click apply
❶ Click Wireless Settings ➋ Select WEP ➌ Select Automatic & 64 bit WEP ➍ Enter Passphrase and click Generate Key to generate Key 1 ➎ Click Apply
❶
➋
➌ ➍
➎
Configuring Wireless Security (WEP/WPA/Access list)
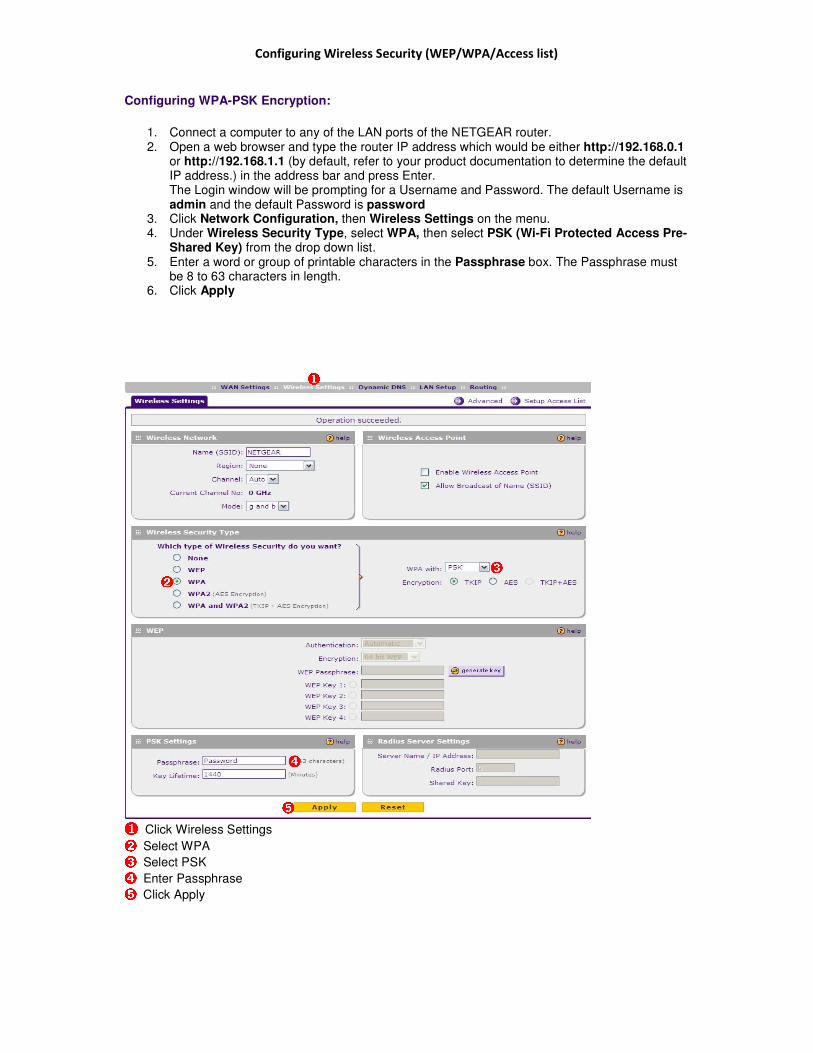
Configuring WPA-PSK Encryption:
1. Connect a computer to any of the LAN ports of the NETGEAR router. 2. Open a web browser and type the router IP address which would be either http://192.168.0.1
or http://192.168.1.1 (by default, refer to your product documentation to determine the default IP address.) in the address bar and press Enter. The Login window will be prompting for a Username and Password. The default Username is admin and the default Password is password
3. Click Network Configuration, then Wireless Settings on the menu. 4. Under Wireless Security Type, select WPA, then select PSK (Wi-Fi Protected Access Pre-
Shared Key) from the drop down list. 5. Enter a word or group of printable characters in the Passphrase box. The Passphrase must
be 8 to 63 characters in length. 6. Click Apply
❶ Click Wireless Settings ➋ Select WPA ➌ Select PSK ➍ Enter Passphrase ➎ Click Apply
❶
➋ ➌
➍ ➎
Configuring Wireless Security (WEP/WPA/Access list)
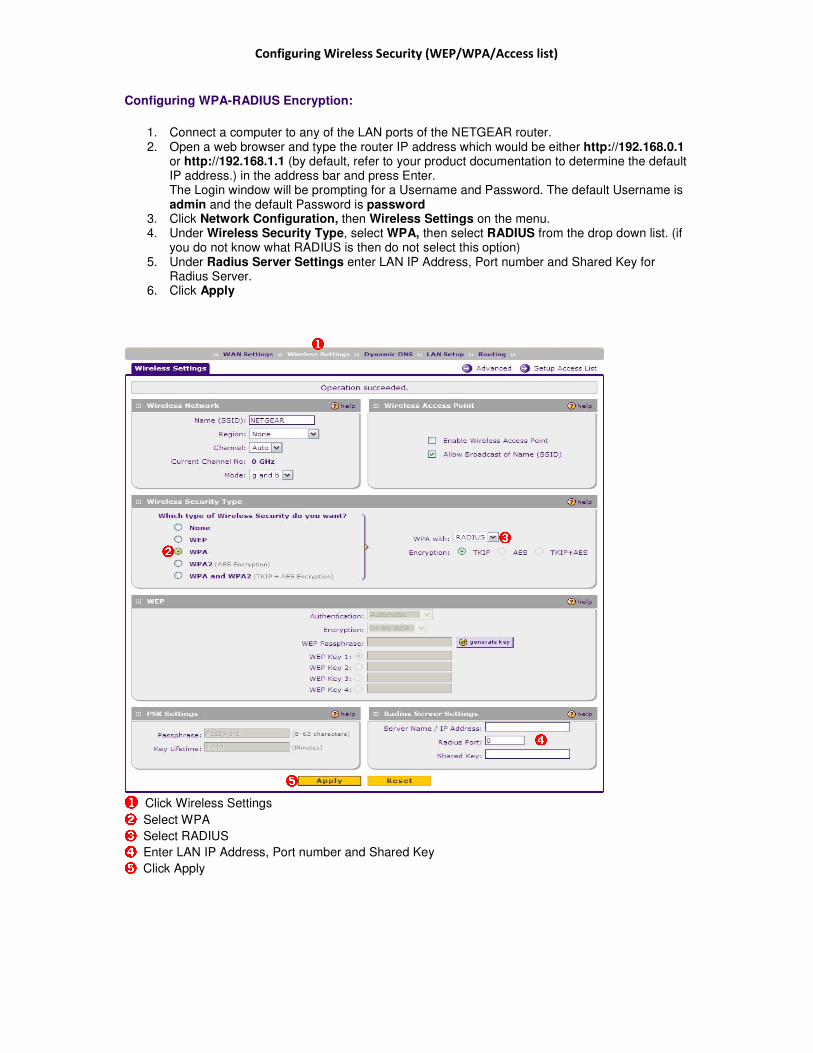
Configuring WPA-RADIUS Encryption:
1. Connect a computer to any of the LAN ports of the NETGEAR router. 2. Open a web browser and type the router IP address which would be either http://192.168.0.1
or http://192.168.1.1 (by default, refer to your product documentation to determine the default IP address.) in the address bar and press Enter. The Login window will be prompting for a Username and Password. The default Username is admin and the default Password is password
3. Click Network Configuration, then Wireless Settings on the menu. 4. Under Wireless Security Type, select WPA, then select RADIUS from the drop down list. (if
you do not know what RADIUS is then do not select this option) 5. Under Radius Server Settings enter LAN IP Address, Port number and Shared Key for
Radius Server. 6. Click Apply
❶ Click Wireless Settings ➋ Select WPA ➌ Select RADIUS ➍ Enter LAN IP Address, Port number and Shared Key ➎ Click Apply
❶
➋ ➌
➍ ➎
Configuring Wireless Security (WEP/WPA/Access list)
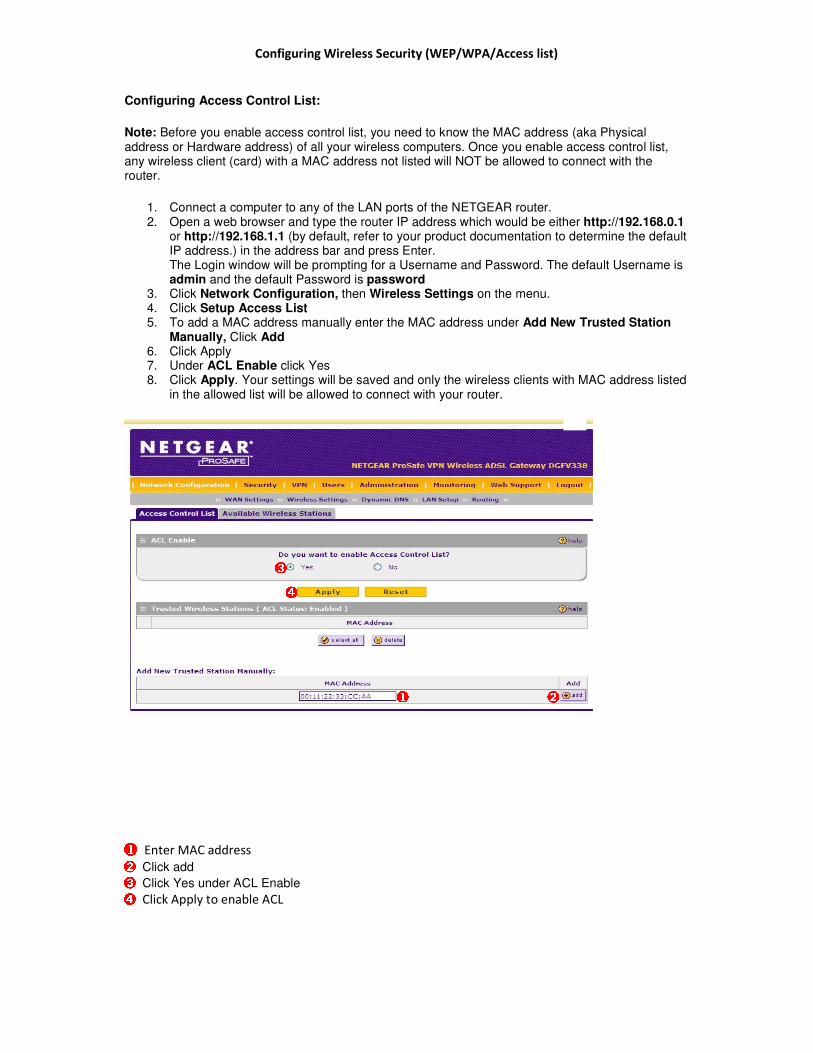
Configuring Access Control List:
Note: Before you enable access control list, you need to know the MAC address (aka Physical address or Hardware address) of all your wireless computers. Once you enable access control list, any wireless client (card) with a MAC address not listed will NOT be allowed to connect with the router.
1. Connect a computer to any of the LAN ports of the NETGEAR router. 2. Open a web browser and type the router IP address which would be either http://192.168.0.1
or http://192.168.1.1 (by default, refer to your product documentation to determine the default IP address.) in the address bar and press Enter. The Login window will be prompting for a Username and Password. The default Username is admin and the default Password is password
3. Click Network Configuration, then Wireless Settings on the menu. 4. Click Setup Access List 5. To add a MAC address manually enter the MAC address under Add New Trusted Station
Manually, Click Add 6. Click Apply 7. Under ACL Enable click Yes 8. Click Apply. Your settings will be saved and only the wireless clients with MAC address listed
in the allowed list will be allowed to connect with your router.
❶ Enter MAC address ➋ Click add ➌ Click Yes under ACL Enable ➍ Click Apply to enable ACL
❶ ➋
➌ ➍

Configuring Wireless Security (WEP/WPA/Access list)