Embed Size (px)
Citation preview

Page 1 of 26
Configuring Maestro for Travel Agency
Commission Processing Quick Reference Guide
Configuring the Rate Type
The field pay Commission determines whether or not the property will pay a commission on this rate regardless of whether or not it was booked by a TA. The Days commission allows the property to specify a number of days that a commission would be paid for. If left blank, it will pay commission for all days of stay.
Configuration in Maestro – General Setup
Page 2 of 26
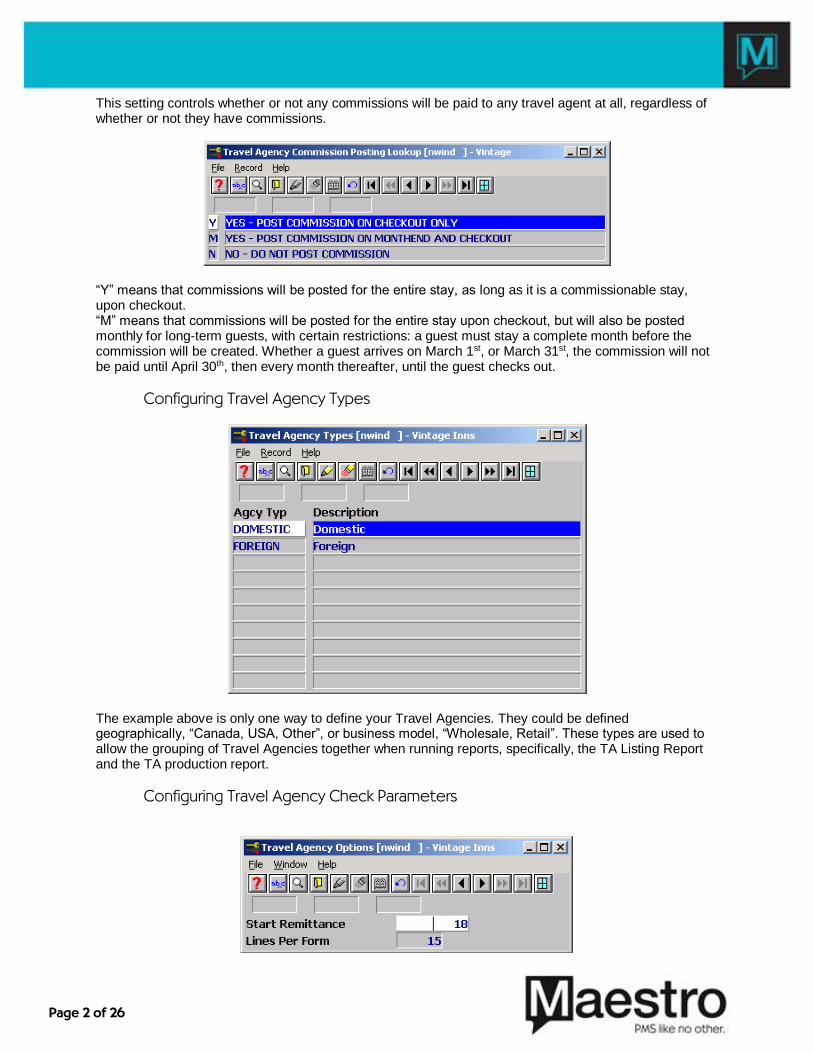
This setting controls whether or not any commissions will be paid to any travel agent at all, regardless of whether or not they have commissions.
“Y” means that commissions will be posted for the entire stay, as long as it is a commissionable stay, upon checkout. “M” means that commissions will be posted for the entire stay upon checkout, but will also be posted monthly for long-term guests, with certain restrictions: a guest must stay a complete month before the commission will be created. Whether a guest arrives on March 1st, or March 31st, the commission will not be paid until April 30th, then every month thereafter, until the guest checks out.
Configuring Travel Agency Types
The example above is only one way to define your Travel Agencies. They could be defined geographically, “Canada, USA, Other”, or business model, “Wholesale, Retail”. These types are used to allow the grouping of Travel Agencies together when running reports, specifically, the TA Listing Report and the TA production report.
Configuring Travel Agency Check Parameters

Page 3 of 26
This screen allows the user to define the next check to be printed, in the field marked Remittance number. Usually, this will be set up during the initial configuration stage. However, should the property change checks or get a new batch, it is possible that the number will need to be adjusted. The number must be higher than the previous number, the computer will not allow the number to be changed to be less than the current number. It is possible, with assistance from Maestro Support, to make the number lower. The “Lines Per Form” field refers specifically to the TA checks and should not be adjusted once it has been configured.
Ensuring Currency Configuration for Multi-Currency Check Processing The next step would be to access Global Maintenance / Setup / Currency Exchange Maintenance.
This step is only necessary if the property pays its commissions in different currency. If that is the case, the currency must be set up in Global Maintenance as its own posting code. It must then be added to the above screen, along with the appropriate exchange parameters. This allows the property to do a check run based upon specific currencies, as those are often withdrawn from separate accounts with separate checks. This completes the configuration necessary for Travel Agencies.
Creating a Travel Agency in Front Desk There are 4 items that are vital to Travel Agency Creation, and 1 that is vital in specific situations.
1. Name 2. Address 3. Commission 4. IATA # 5. Currency (Vital only if using multiple currencies)
Creating a Travel Agency as a Pre-Configured Selection Access Front Desk / Night Audit / Travel Agency…
Page 4 of 26
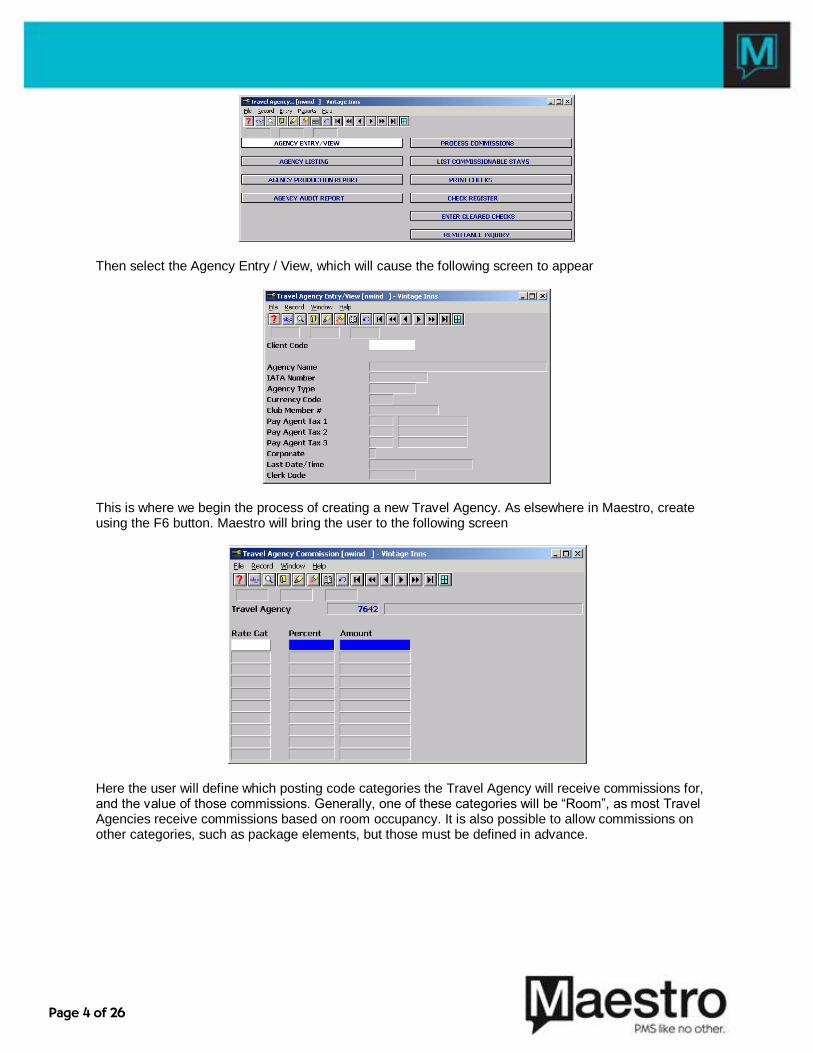
Then select the Agency Entry / View, which will cause the following screen to appear
This is where we begin the process of creating a new Travel Agency. As elsewhere in Maestro, create using the F6 button. Maestro will bring the user to the following screen
Here the user will define which posting code categories the Travel Agency will receive commissions for, and the value of those commissions. Generally, one of these categories will be “Room”, as most Travel Agencies receive commissions based on room occupancy. It is also possible to allow commissions on other categories, such as package elements, but those must be defined in advance.

Page 5 of 26
After entering the information, select F4, which will return the user to the Entry / View screen.
Enter the new Travel Agency’s name

Page 6 of 26
After typing the new name, select enter
The computer may present a list of possible Travel Agencies, depending on whether or not the name typed in is similar to existing agencies. If the name is not on the list (creating a new one) then F4 out of the list.
This is a profile screen, identical to any other profile screen in Maestro. Enter relevant info – address especially for sending checks
Page 7 of 26
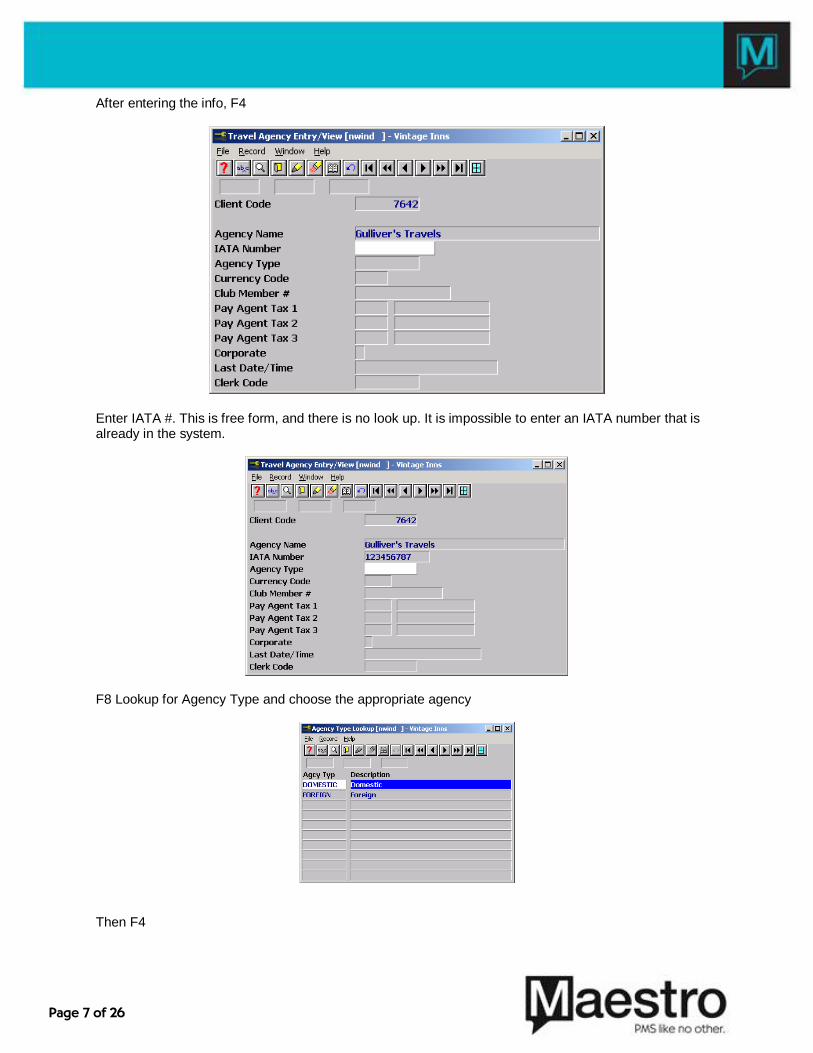
After entering the info, F4
Enter IATA #. This is free form, and there is no look up. It is impossible to enter an IATA number that is already in the system.
F8 Lookup for Agency Type and choose the appropriate agency
Then F4
Page 8 of 26
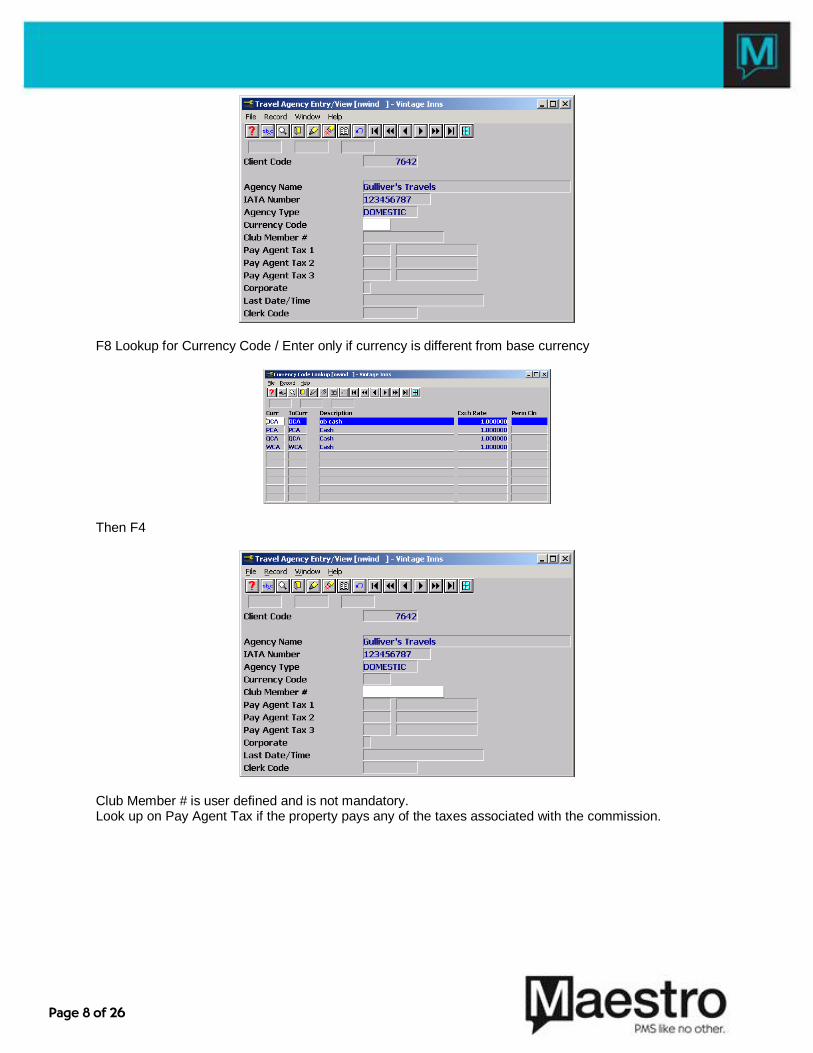
F8 Lookup for Currency Code / Enter only if currency is different from base currency
Then F4
Club Member # is user defined and is not mandatory. Look up on Pay Agent Tax if the property pays any of the taxes associated with the commission.

Page 9 of 26
Then F4
The corporate field is for a specific client and can be ignored
The Travel Agency is now complete, and the user can now add specific agents to the Agency.
Page 10 of 26
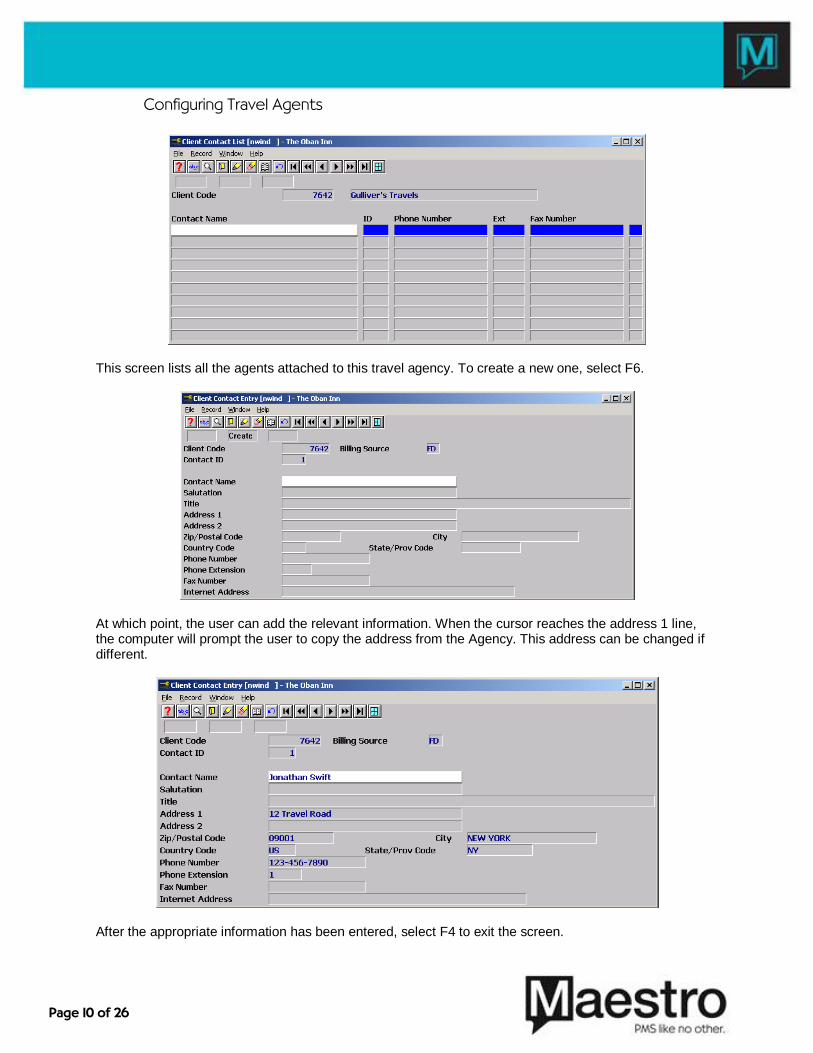
Configuring Travel Agents
This screen lists all the agents attached to this travel agency. To create a new one, select F6.
At which point, the user can add the relevant information. When the cursor reaches the address 1 line, the computer will prompt the user to copy the address from the Agency. This address can be changed if different.
After the appropriate information has been entered, select F4 to exit the screen.
Page 11 of 26
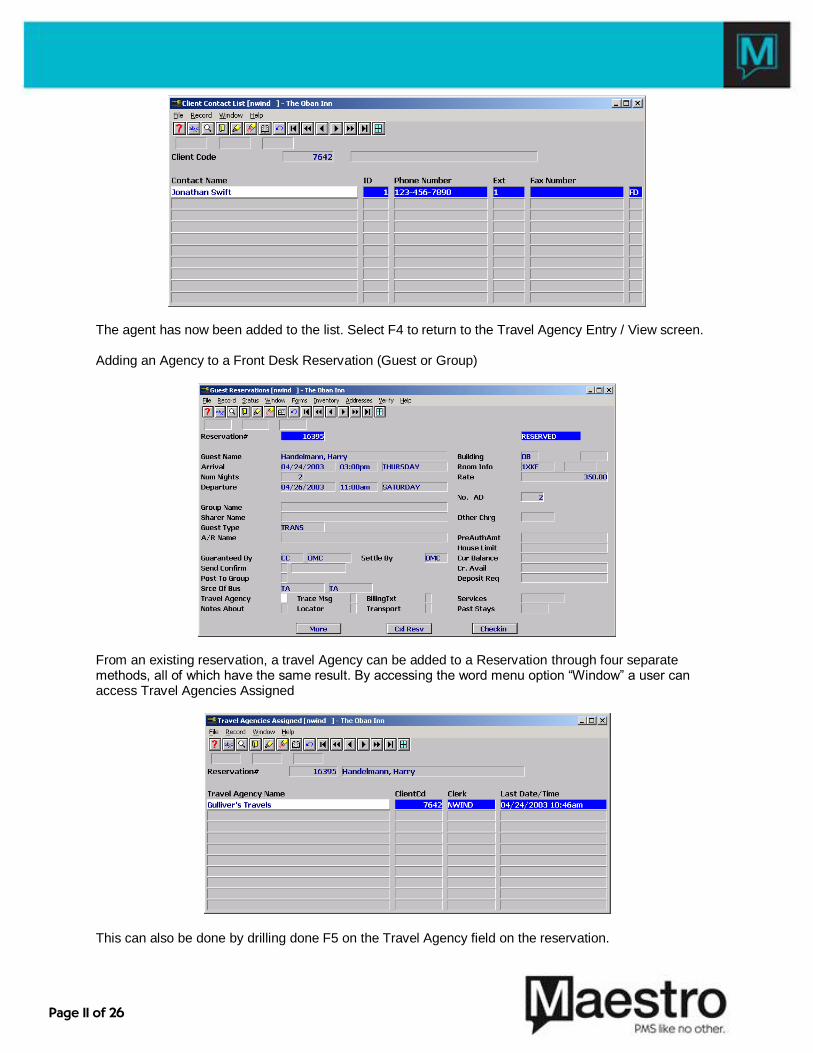
The agent has now been added to the list. Select F4 to return to the Travel Agency Entry / View screen. Adding an Agency to a Front Desk Reservation (Guest or Group)
From an existing reservation, a travel Agency can be added to a Reservation through four separate methods, all of which have the same result. By accessing the word menu option “Window” a user can access Travel Agencies Assigned
This can also be done by drilling done F5 on the Travel Agency field on the reservation.
Page 12 of 26
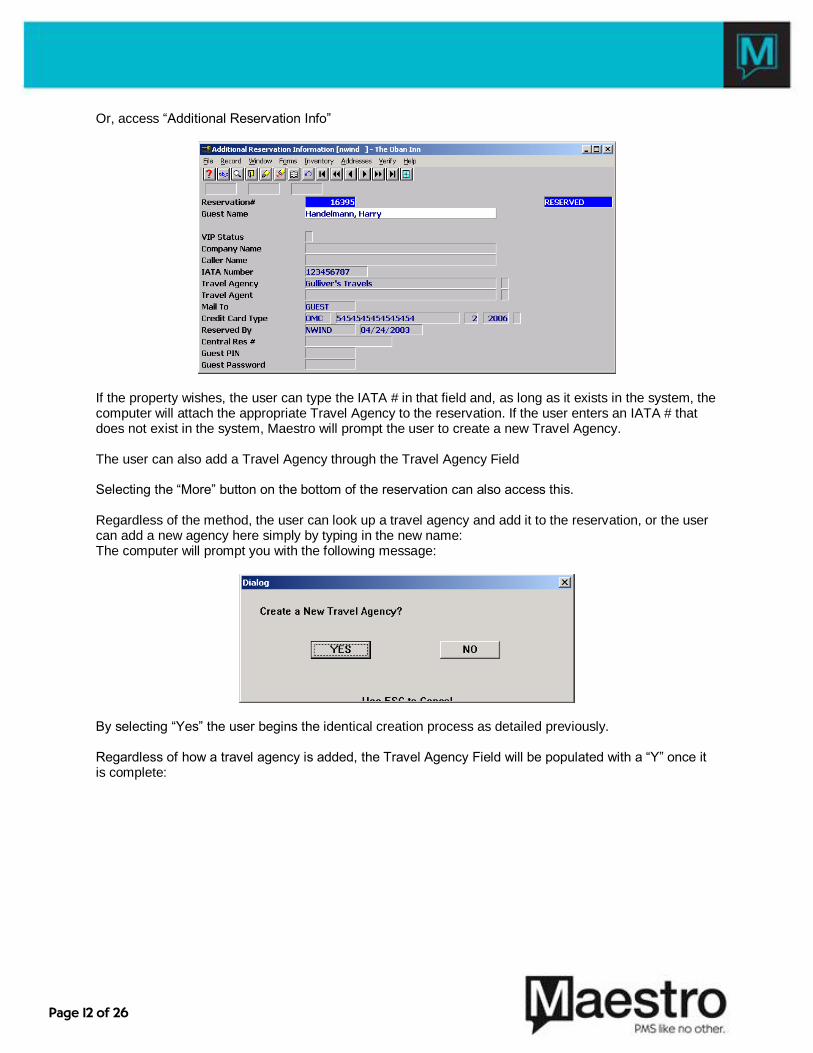
Or, access “Additional Reservation Info”
If the property wishes, the user can type the IATA # in that field and, as long as it exists in the system, the computer will attach the appropriate Travel Agency to the reservation. If the user enters an IATA # that does not exist in the system, Maestro will prompt the user to create a new Travel Agency. The user can also add a Travel Agency through the Travel Agency Field Selecting the “More” button on the bottom of the reservation can also access this. Regardless of the method, the user can look up a travel agency and add it to the reservation, or the user can add a new agency here simply by typing in the new name: The computer will prompt you with the following message:
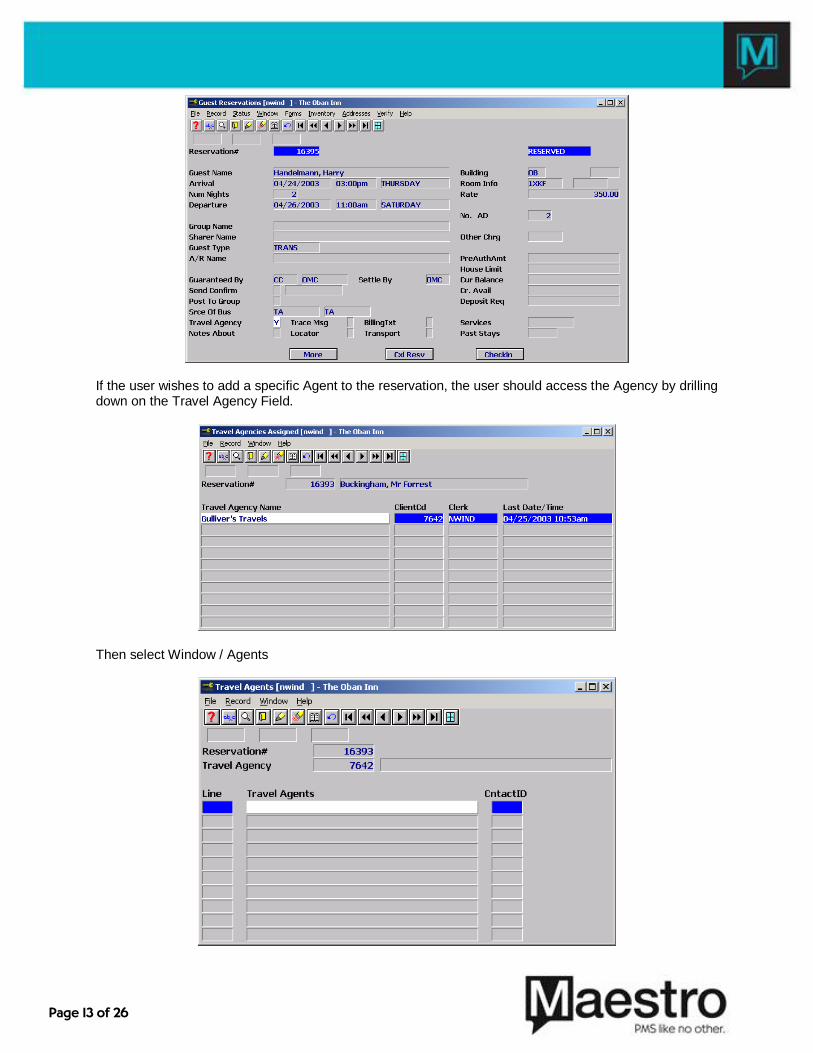
By selecting “Yes” the user begins the identical creation process as detailed previously. Regardless of how a travel agency is added, the Travel Agency Field will be populated with a “Y” once it is complete:
Page 13 of 26
If the user wishes to add a specific Agent to the reservation, the user should access the Agency by drilling down on the Travel Agency Field.
Then select Window / Agents
Page 14 of 26
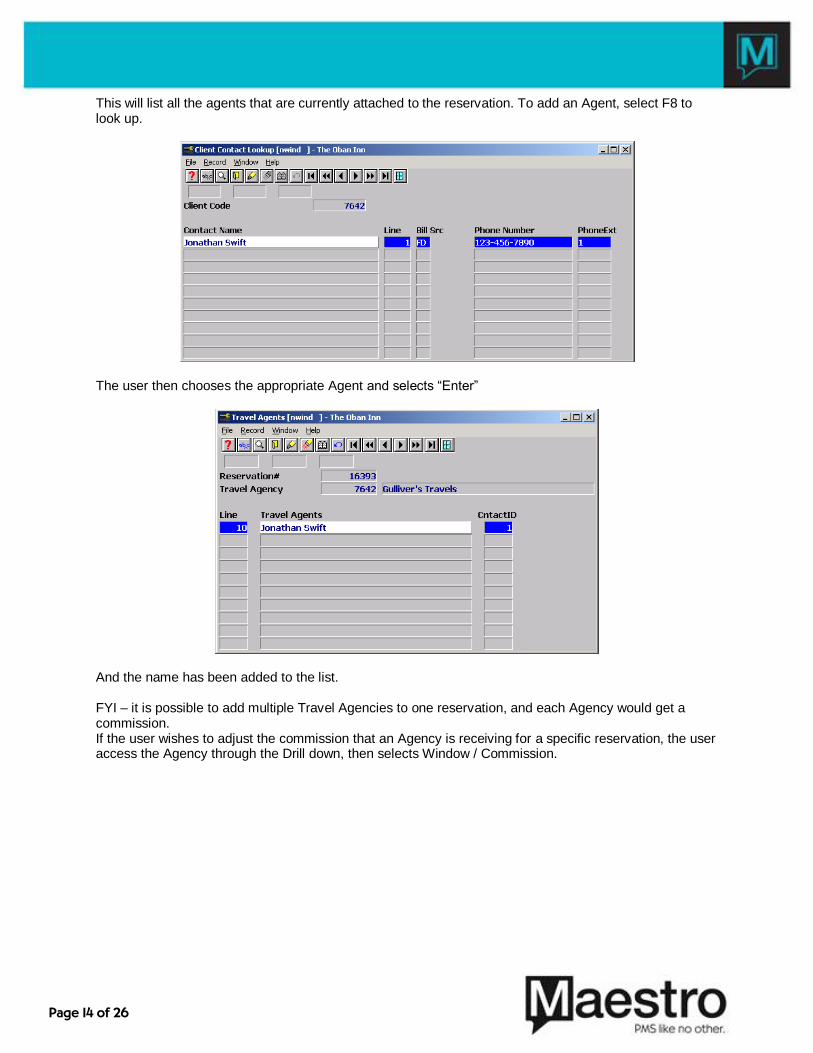
This will list all the agents that are currently attached to the reservation. To add an Agent, select F8 to look up.
The user then chooses the appropriate Agent and selects “Enter”
And the name has been added to the list. FYI – it is possible to add multiple Travel Agencies to one reservation, and each Agency would get a commission. If the user wishes to adjust the commission that an Agency is receiving for a specific reservation, the user access the Agency through the Drill down, then selects Window / Commission.
Page 15 of 26
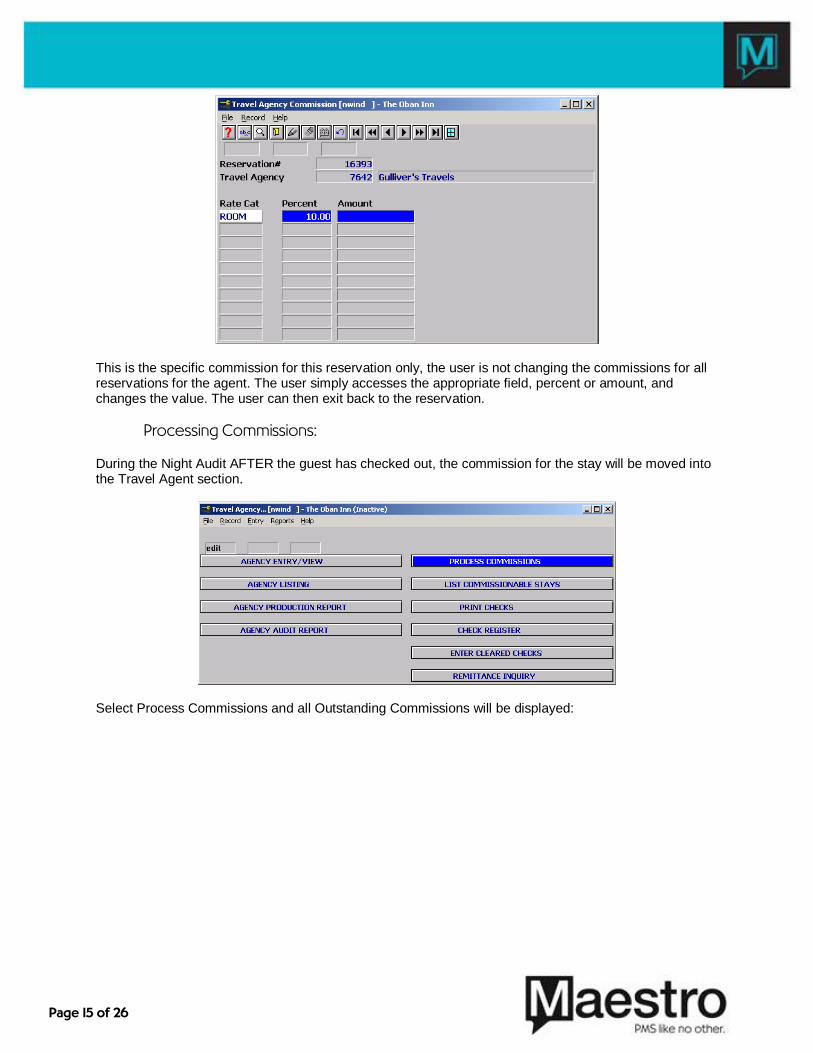
This is the specific commission for this reservation only, the user is not changing the commissions for all reservations for the agent. The user simply accesses the appropriate field, percent or amount, and changes the value. The user can then exit back to the reservation.
Processing Commissions: During the Night Audit AFTER the guest has checked out, the commission for the stay will be moved into the Travel Agent section.
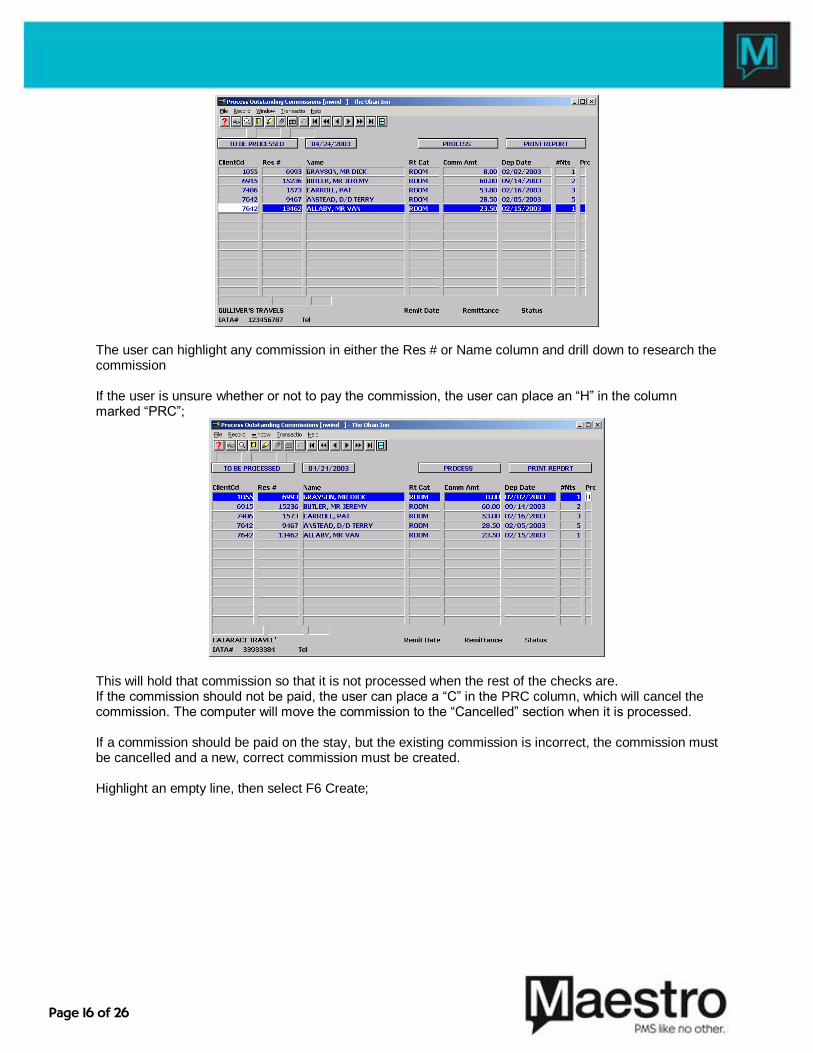
Select Process Commissions and all Outstanding Commissions will be displayed:
Page 16 of 26
The user can highlight any commission in either the Res # or Name column and drill down to research the commission If the user is unsure whether or not to pay the commission, the user can place an “H” in the column marked “PRC”;
This will hold that commission so that it is not processed when the rest of the checks are. If the commission should not be paid, the user can place a “C” in the PRC column, which will cancel the commission. The computer will move the commission to the “Cancelled” section when it is processed. If a commission should be paid on the stay, but the existing commission is incorrect, the commission must be cancelled and a new, correct commission must be created. Highlight an empty line, then select F6 Create;
Page 17 of 26
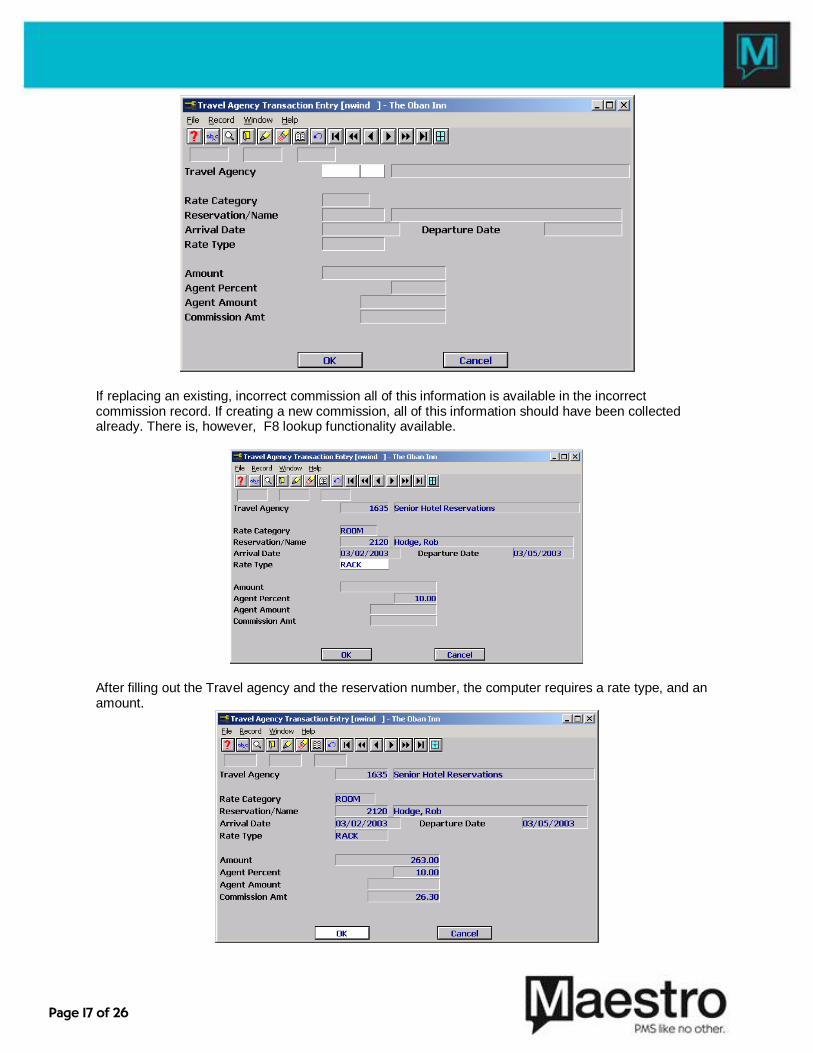
If replacing an existing, incorrect commission all of this information is available in the incorrect commission record. If creating a new commission, all of this information should have been collected already. There is, however, F8 lookup functionality available.
After filling out the Travel agency and the reservation number, the computer requires a rate type, and an amount.
Page 18 of 26
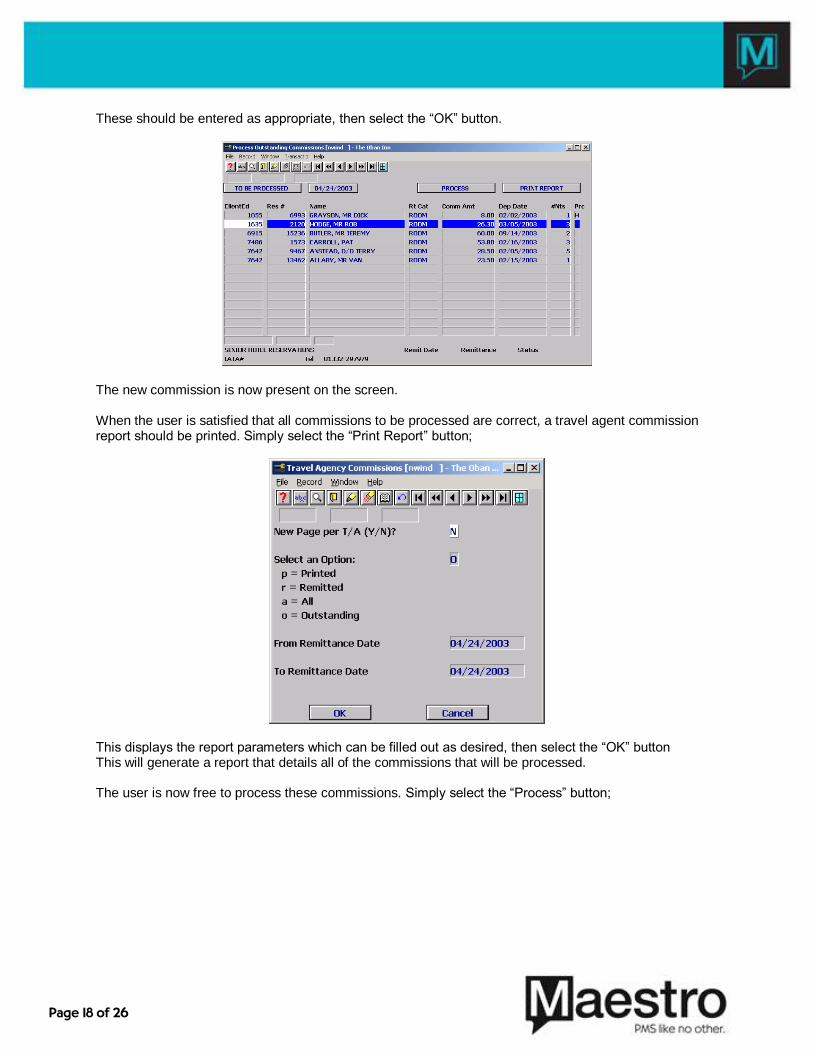
These should be entered as appropriate, then select the “OK” button.
The new commission is now present on the screen. When the user is satisfied that all commissions to be processed are correct, a travel agent commission report should be printed. Simply select the “Print Report” button;
This displays the report parameters which can be filled out as desired, then select the “OK” button This will generate a report that details all of the commissions that will be processed. The user is now free to process these commissions. Simply select the “Process” button;
Page 19 of 26
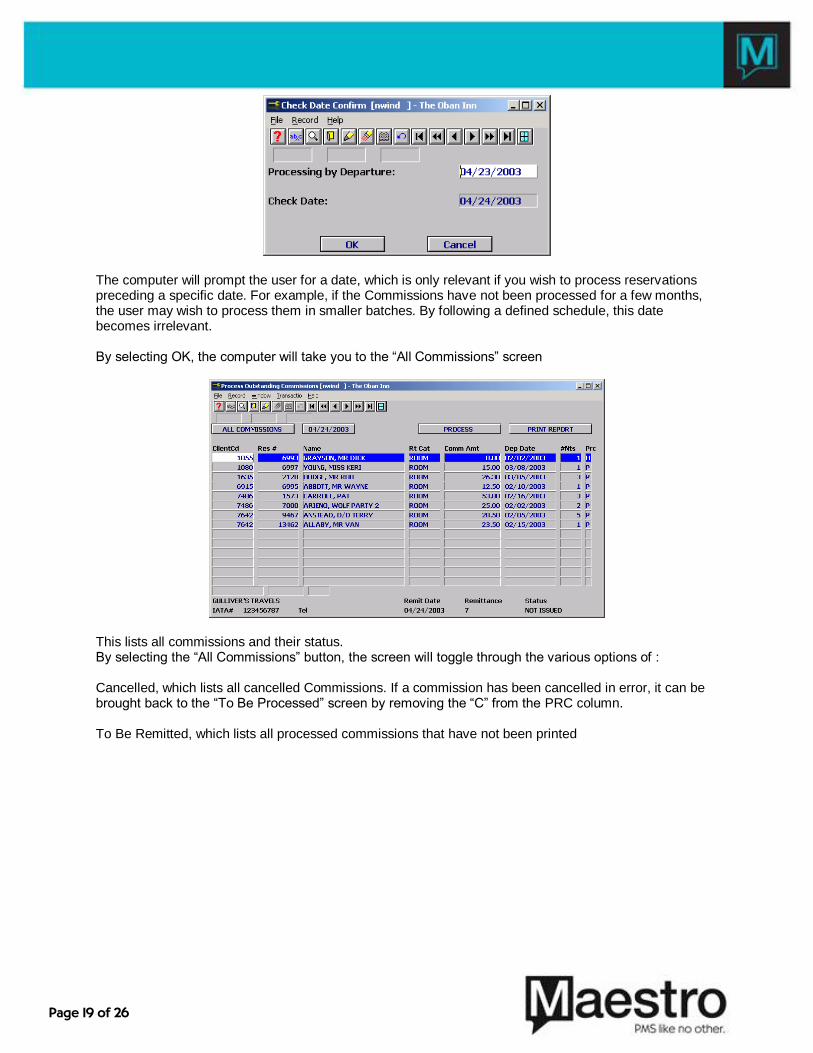
The computer will prompt the user for a date, which is only relevant if you wish to process reservations preceding a specific date. For example, if the Commissions have not been processed for a few months, the user may wish to process them in smaller batches. By following a defined schedule, this date becomes irrelevant. By selecting OK, the computer will take you to the “All Commissions” screen
This lists all commissions and their status. By selecting the “All Commissions” button, the screen will toggle through the various options of : Cancelled, which lists all cancelled Commissions. If a commission has been cancelled in error, it can be brought back to the “To Be Processed” screen by removing the “C” from the PRC column. To Be Remitted, which lists all processed commissions that have not been printed

Page 20 of 26
Then back to “To Be Processed” The “To Bo Processed” window now has only the one reservation that was held.
The commissions have now been processed and the user can return to the Main travel agency screen.
Page 21 of 26
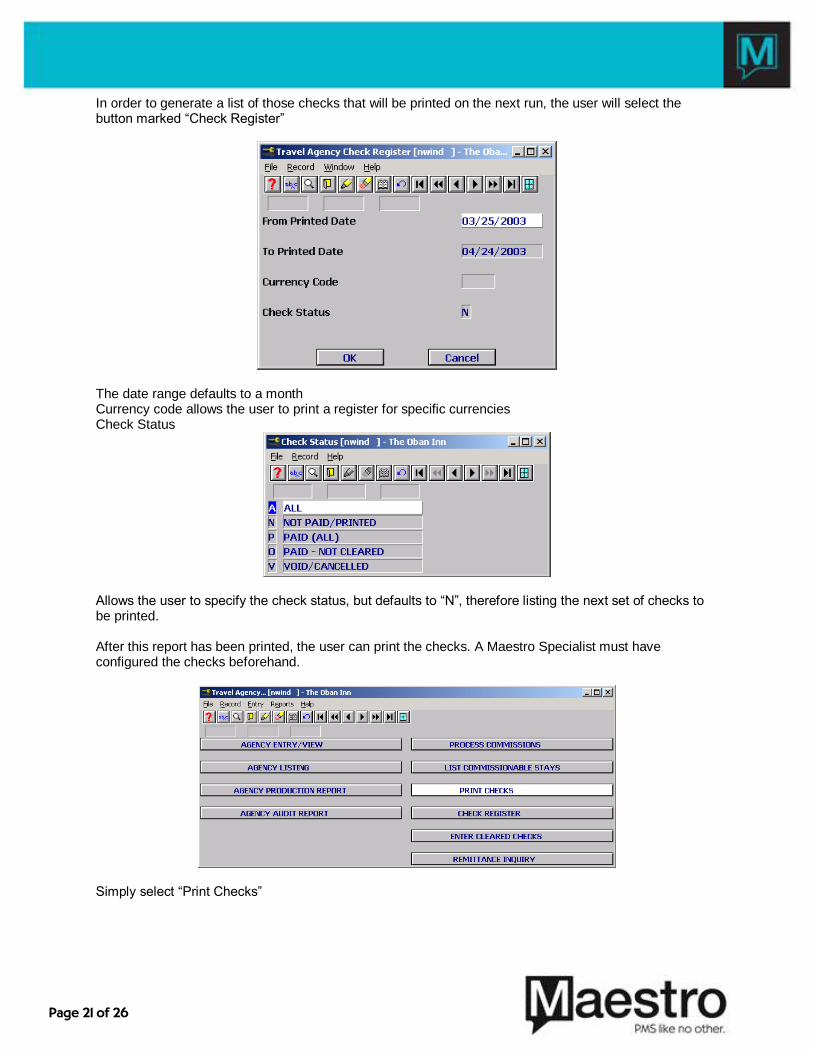
In order to generate a list of those checks that will be printed on the next run, the user will select the button marked “Check Register”
The date range defaults to a month Currency code allows the user to print a register for specific currencies Check Status
Allows the user to specify the check status, but defaults to “N”, therefore listing the next set of checks to be printed. After this report has been printed, the user can print the checks. A Maestro Specialist must have configured the checks beforehand.
Simply select “Print Checks”
Page 22 of 26
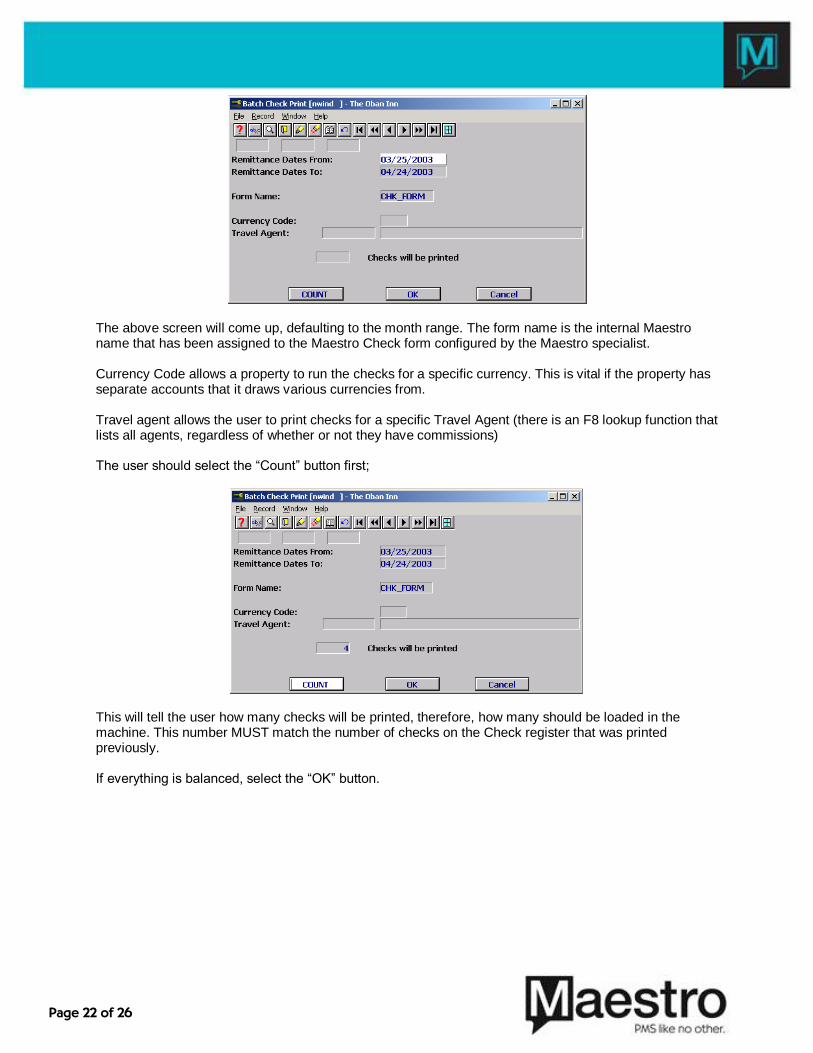
The above screen will come up, defaulting to the month range. The form name is the internal Maestro name that has been assigned to the Maestro Check form configured by the Maestro specialist. Currency Code allows a property to run the checks for a specific currency. This is vital if the property has separate accounts that it draws various currencies from. Travel agent allows the user to print checks for a specific Travel Agent (there is an F8 lookup function that lists all agents, regardless of whether or not they have commissions) The user should select the “Count” button first;
This will tell the user how many checks will be printed, therefore, how many should be loaded in the machine. This number MUST match the number of checks on the Check register that was printed previously. If everything is balanced, select the “OK” button.
Page 23 of 26
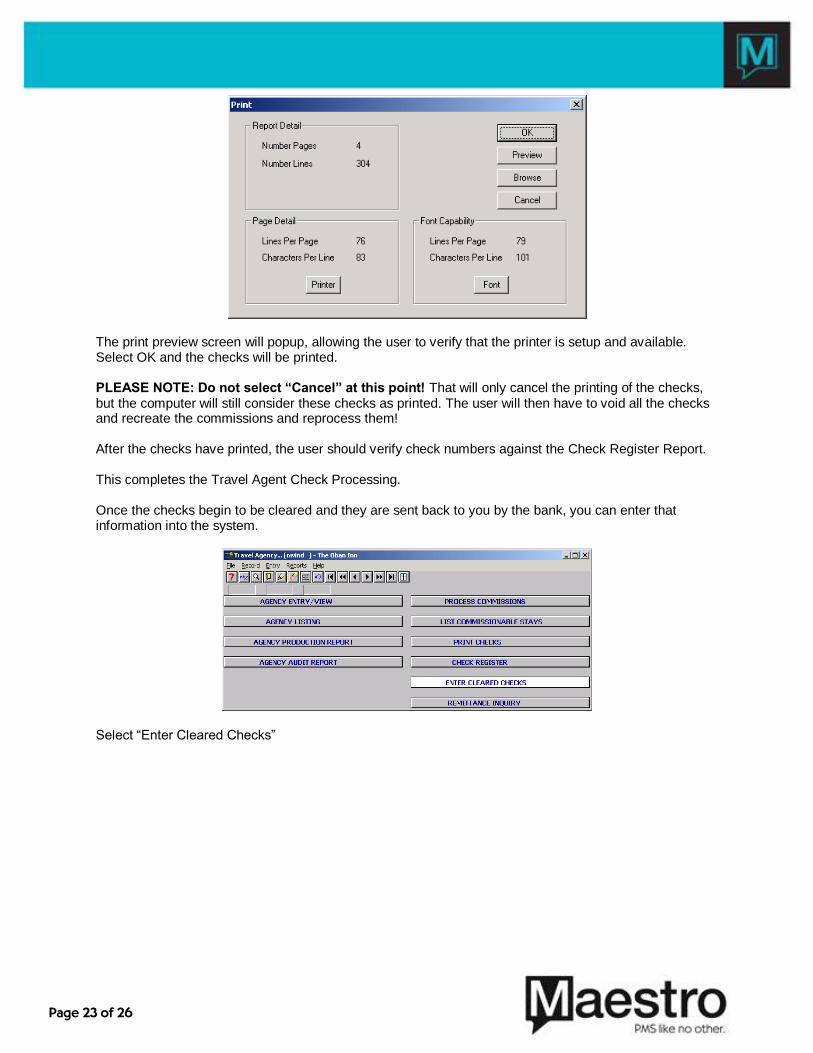
The print preview screen will popup, allowing the user to verify that the printer is setup and available. Select OK and the checks will be printed. PLEASE NOTE: Do not select “Cancel” at this point! That will only cancel the printing of the checks, but the computer will still consider these checks as printed. The user will then have to void all the checks and recreate the commissions and reprocess them! After the checks have printed, the user should verify check numbers against the Check Register Report. This completes the Travel Agent Check Processing. Once the checks begin to be cleared and they are sent back to you by the bank, you can enter that information into the system.
Select “Enter Cleared Checks”
Page 24 of 26
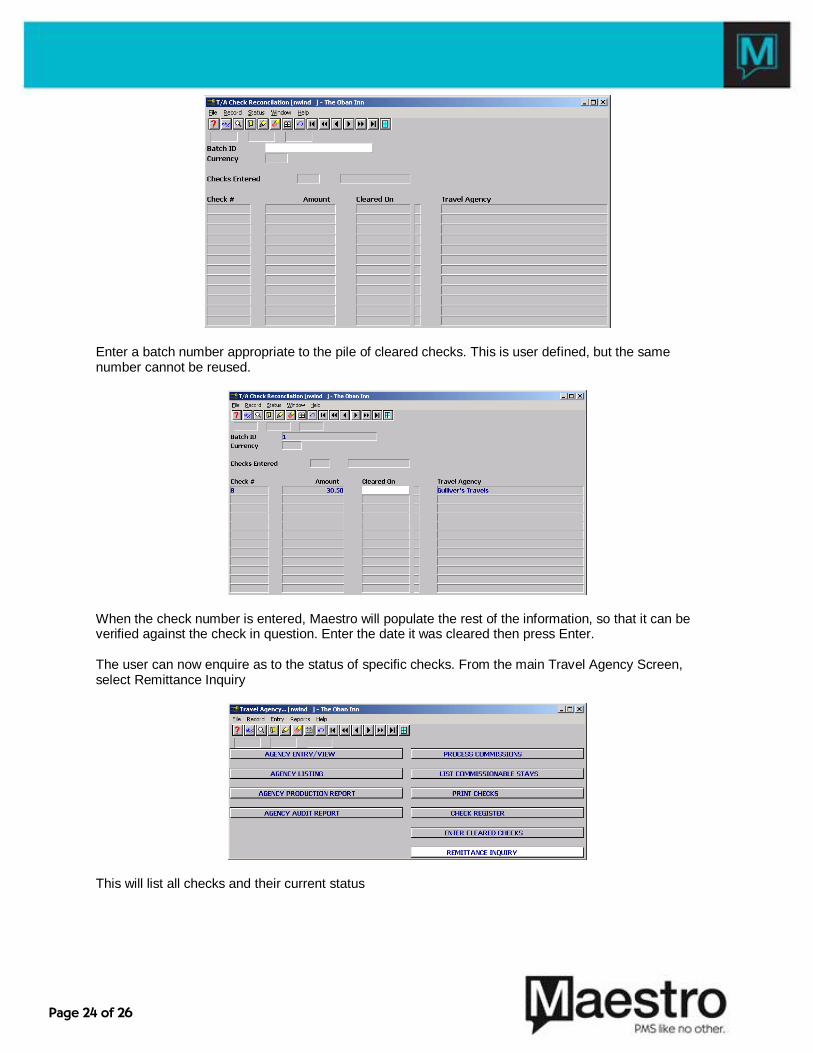
Enter a batch number appropriate to the pile of cleared checks. This is user defined, but the same number cannot be reused.
When the check number is entered, Maestro will populate the rest of the information, so that it can be verified against the check in question. Enter the date it was cleared then press Enter. The user can now enquire as to the status of specific checks. From the main Travel Agency Screen, select Remittance Inquiry
This will list all checks and their current status
Page 25 of 26
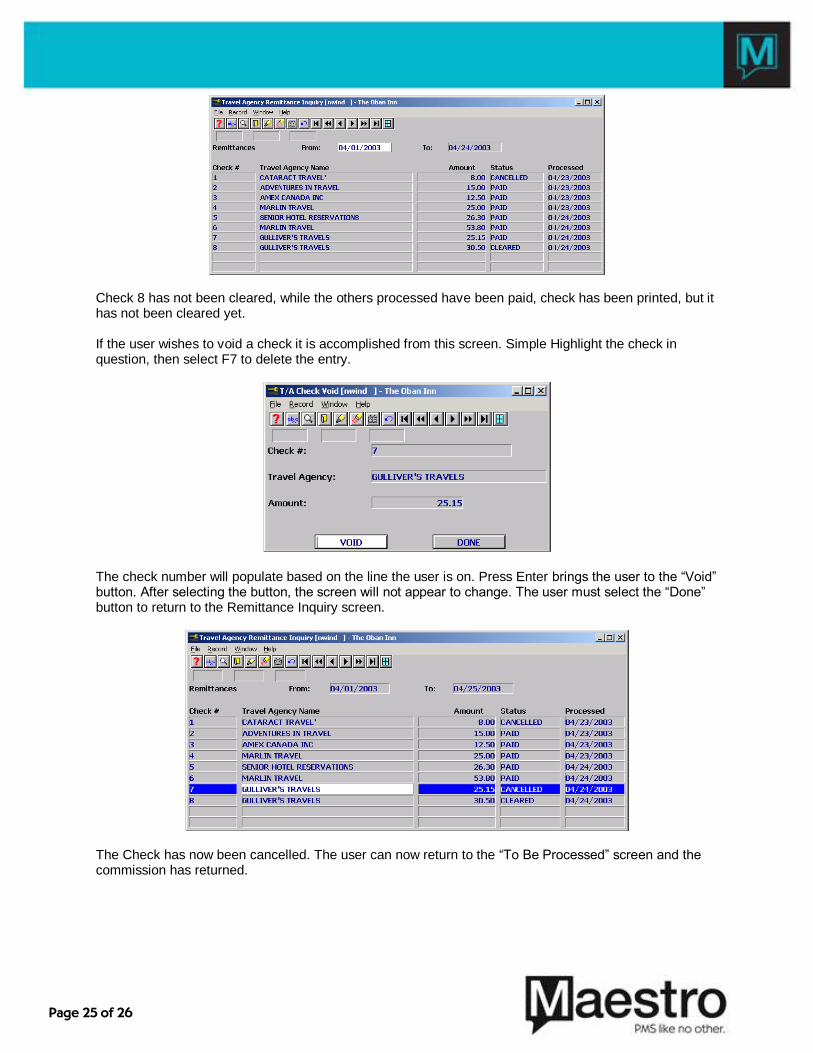
Check 8 has not been cleared, while the others processed have been paid, check has been printed, but it has not been cleared yet. If the user wishes to void a check it is accomplished from this screen. Simple Highlight the check in question, then select F7 to delete the entry.
The check number will populate based on the line the user is on. Press Enter brings the user to the “Void” button. After selecting the button, the screen will not appear to change. The user must select the “Done” button to return to the Remittance Inquiry screen.
The Check has now been cancelled. The user can now return to the “To Be Processed” screen and the commission has returned.
Page 26 of 26
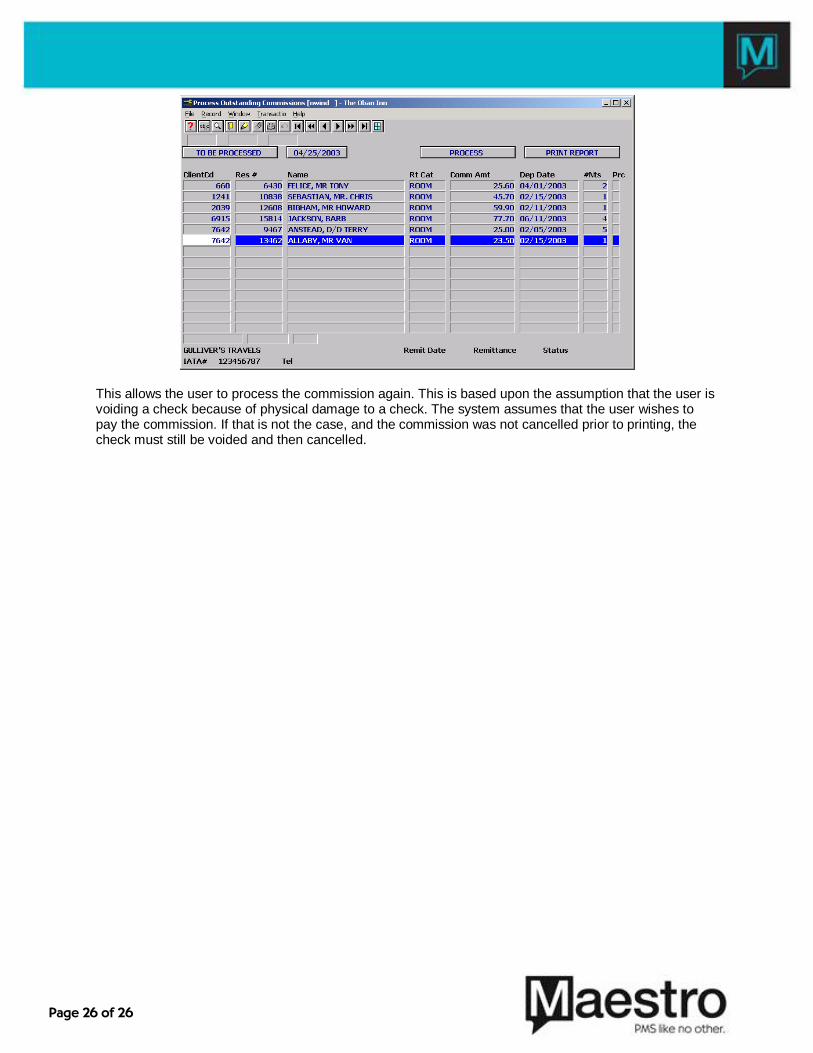
This allows the user to process the commission again. This is based upon the assumption that the user is voiding a check because of physical damage to a check. The system assumes that the user wishes to pay the commission. If that is not the case, and the commission was not cancelled prior to printing, the check must still be voided and then cancelled.