Embed Size (px)
Citation preview
Wireless LAN Client Configuration Guide for Windows 7
1
Configuring 802.1X Authentication Client for Windows 7
1. Click on Windows button to display the main menu. Click on “Control Panel”.
1.1 In the Control Panel window, click on “Network and Internet”.
Wireless LAN Client Configuration Guide for Windows 7
2
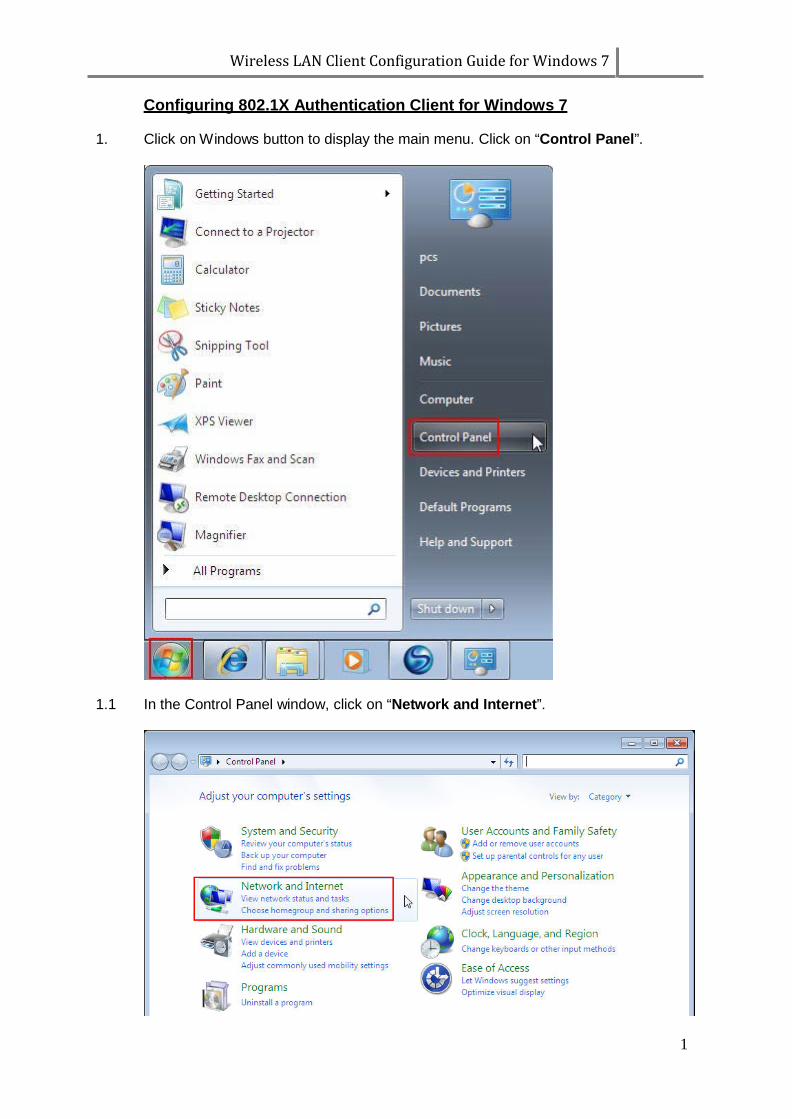
1.2 In the Network and Internet window, click on “Network and Sharing Center”.
1.3 In the Network and Sharing Center window, click on “Manage wireless networks”.
Wireless LAN Client Configuration Guide for Windows 7
3
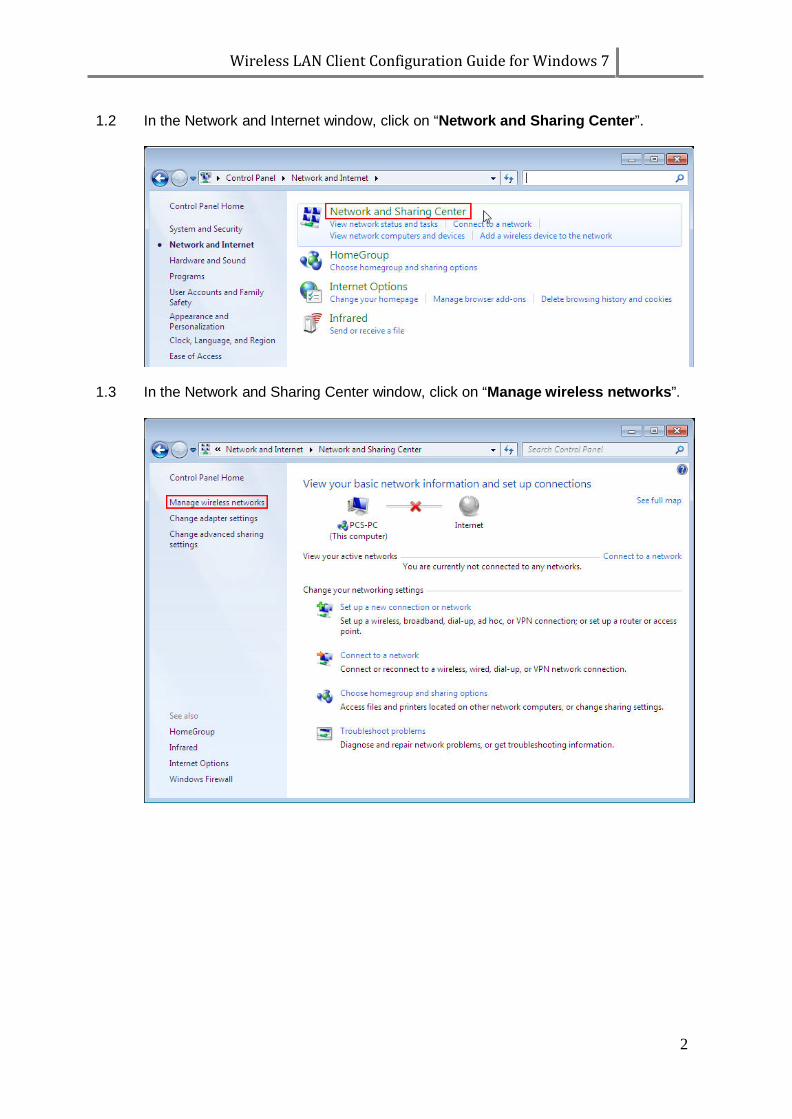
1.4 In the Manage Wireless Networks window, click on “Add”.
1.5 In the next window, click on “Manually create a network profile”.

Wireless LAN Client Configuration Guide for Windows 7
4
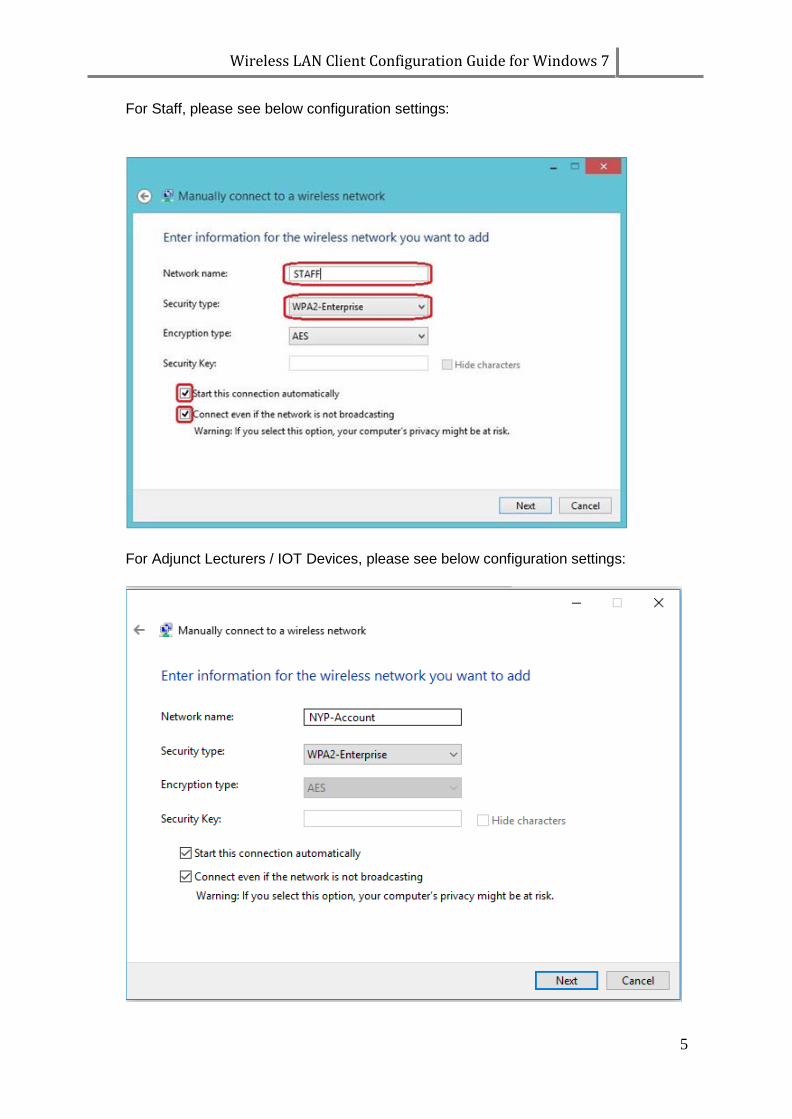
1.6 When prompted to enter the wireless network information:
• Enter the correct Network name/SSID. • Select “WPA2-Enterprise” as the Security type. Encryption type will default to
AES. • Enable the “Start this connection automatically” checkbox. • Enable the “Connect even if the network is not broadcasting” checkbox. • Click the “Next” button
The SSID to be used are as follows: User Group SSID All Students NYP-Student
All Staff STAFF
All Adjunct Lecturers/IOT Devices NYP-Account
Table 1
For Student, please see below configuration settings:
Wireless LAN Client Configuration Guide for Windows 7
5
For Staff, please see below configuration settings:
For Adjunct Lecturers / IOT Devices, please see below configuration settings:
Wireless LAN Client Configuration Guide for Windows 7
6
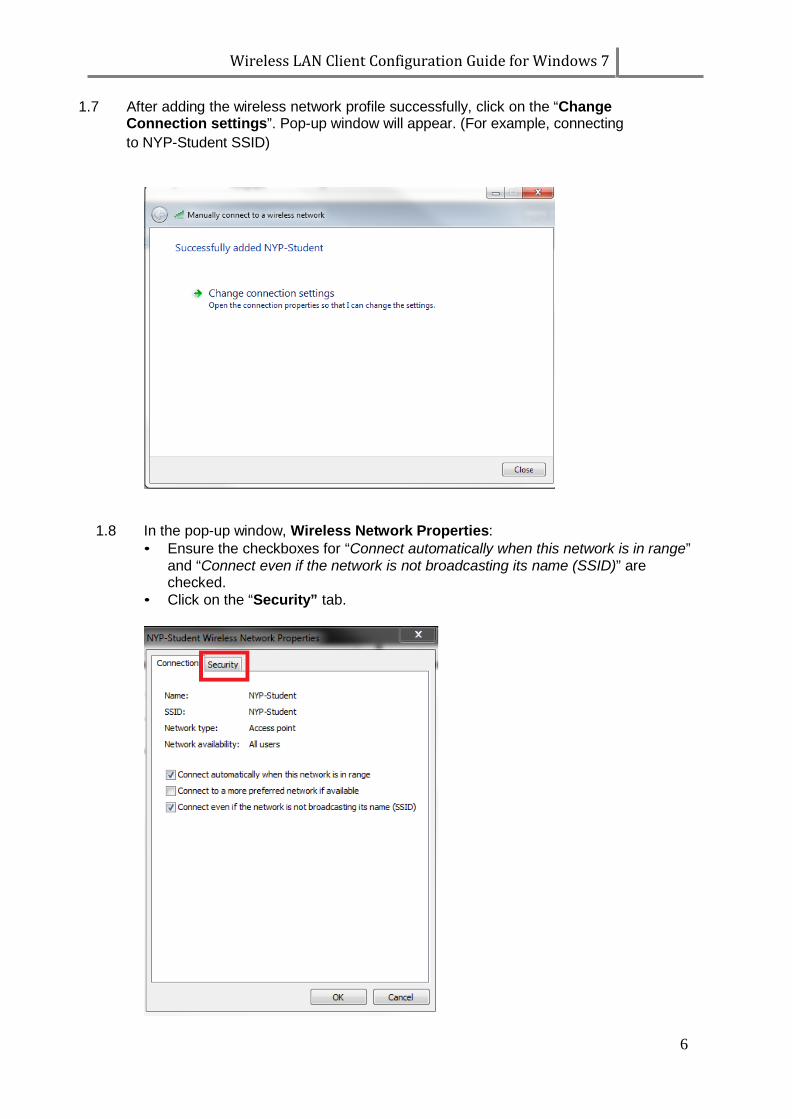
1.7 After adding the wireless network profile successfully, click on the “Change Connection settings”. Pop-up window will appear. (For example, connecting to NYP-Student SSID)
1.8 In the pop-up window, Wireless Network Properties: • Ensure the checkboxes for “Connect automatically when this network is in range”
and “Connect even if the network is not broadcasting its name (SSID)” are checked.
• Click on the “Security” tab.
Wireless LAN Client Configuration Guide for Windows 7
7
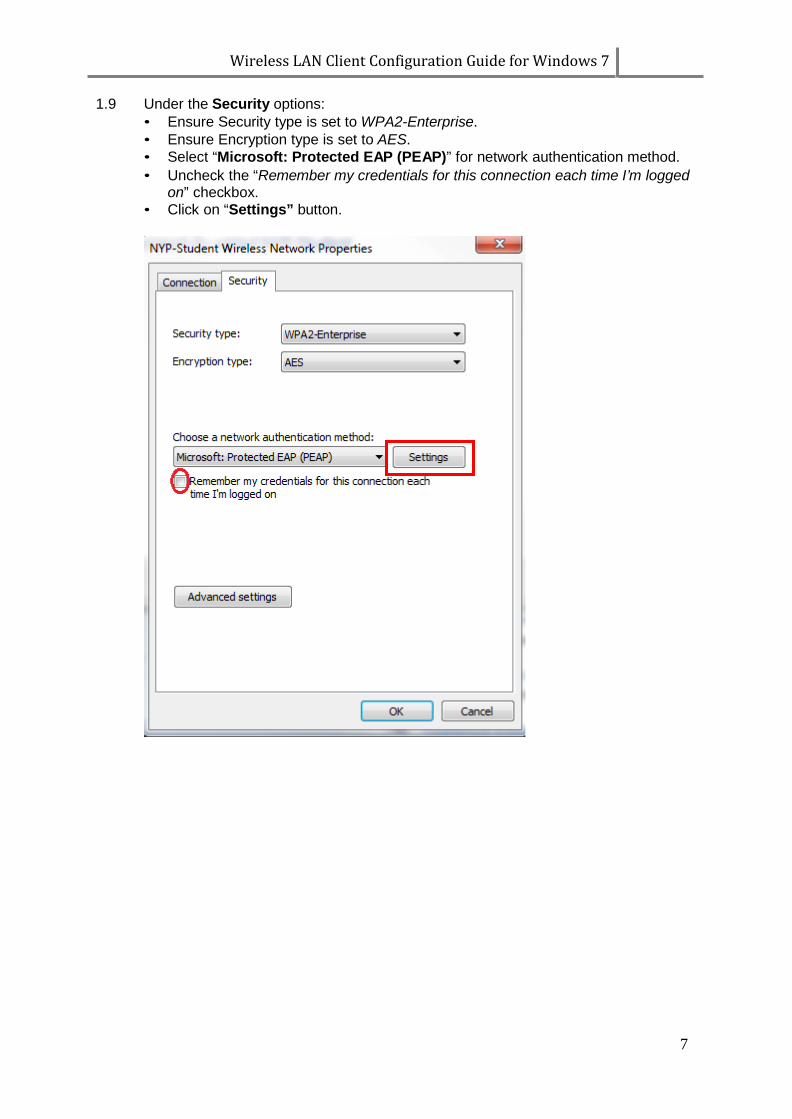
1.9 Under the Security options:
• Ensure Security type is set to WPA2-Enterprise. • Ensure Encryption type is set to AES. • Select “Microsoft: Protected EAP (PEAP)” for network authentication method. • Uncheck the “Remember my credentials for this connection each time I’m logged
on” checkbox. • Click on “Settings” button.

Wireless LAN Client Configuration Guide for Windows 7
8
1.10 In the Protected EAP Properties page:
• Uncheck “Validate server certificate”. • Check “Enable Fast Reconnect”. • Select “Secured password (EAP-MSCHAP v2)” for authentication method • Click on the “Configure…” button.
• Uncheck the “Automatically use my Windows login name and password”. • Click on OK button.
Wireless LAN Client Configuration Guide for Windows 7
9
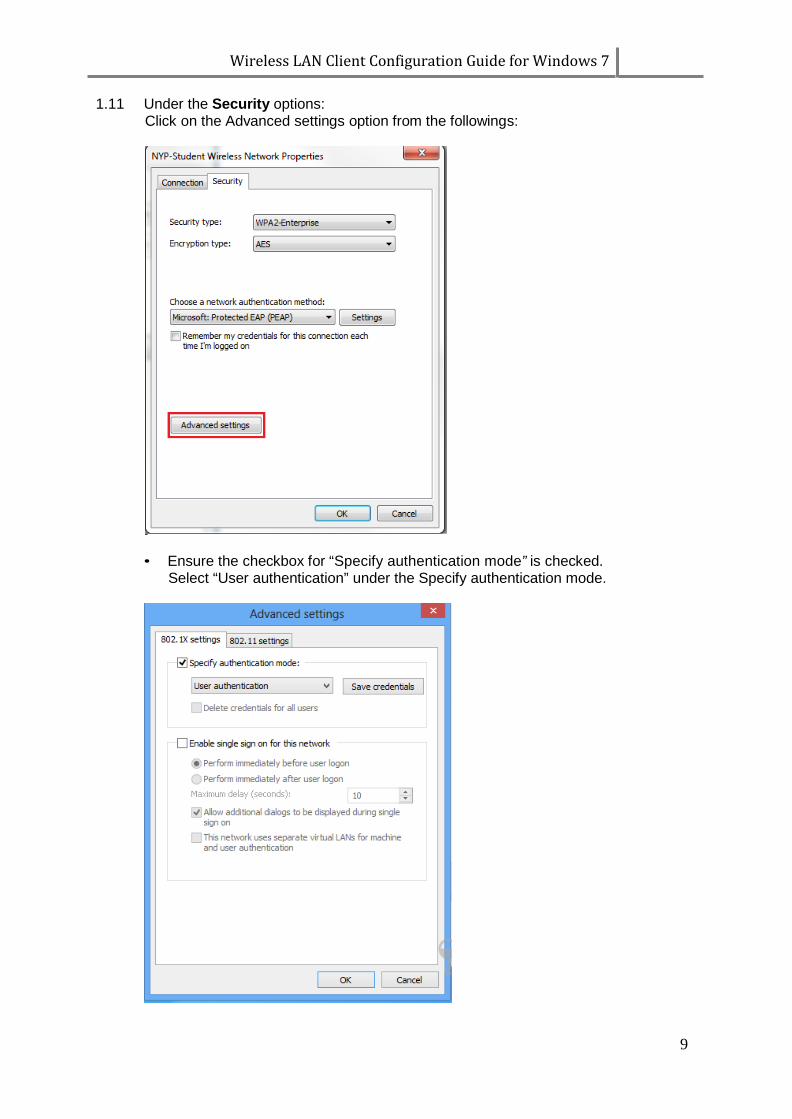
1.11 Under the Security options:
Click on the Advanced settings option from the followings:
• Ensure the checkbox for “Specify authentication mode” is checked. Select “User authentication” under the Specify authentication mode.
Wireless LAN Client Configuration Guide for Windows 7
10
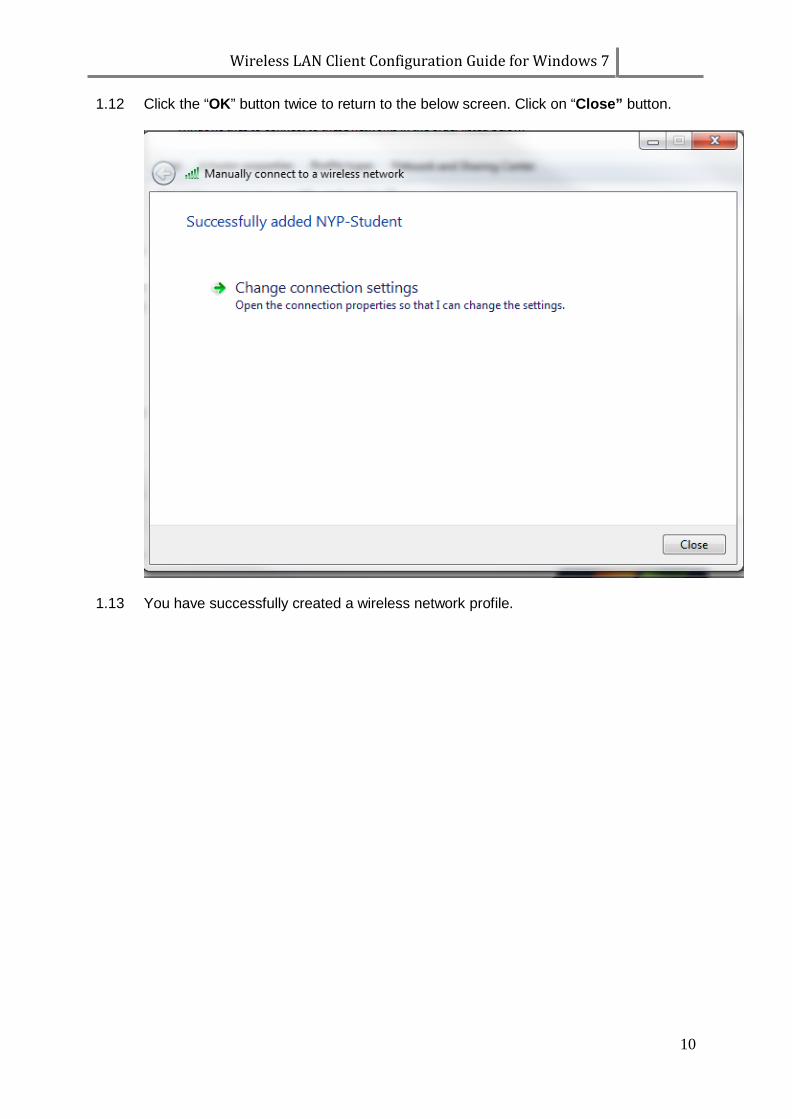
1.12 Click the “OK” button twice to return to the below screen. Click on “Close” button.
1.13 You have successfully created a wireless network profile.

Wireless LAN Client Configuration Guide for Windows 7
11
Connection to NYP wireless LAN
2. When you are within range of the wireless Access Point and your wireless network
radio enabled, Windows will display a pop-up message on your taskbar.
2.1 When you click on the pop-up message, the below screen will appear. Enter your username and password to login to the wireless network.
For Student Wireless Login to “NYP-Student” SSID Use Student Portal username and password For Staff Login to “STAFF” SSID Use Windows Login name and password For adjunct lecturer login to “NYP-Account” SSID Use Office 365 username and password.
Wireless LAN Client Configuration Guide for Windows 7
12
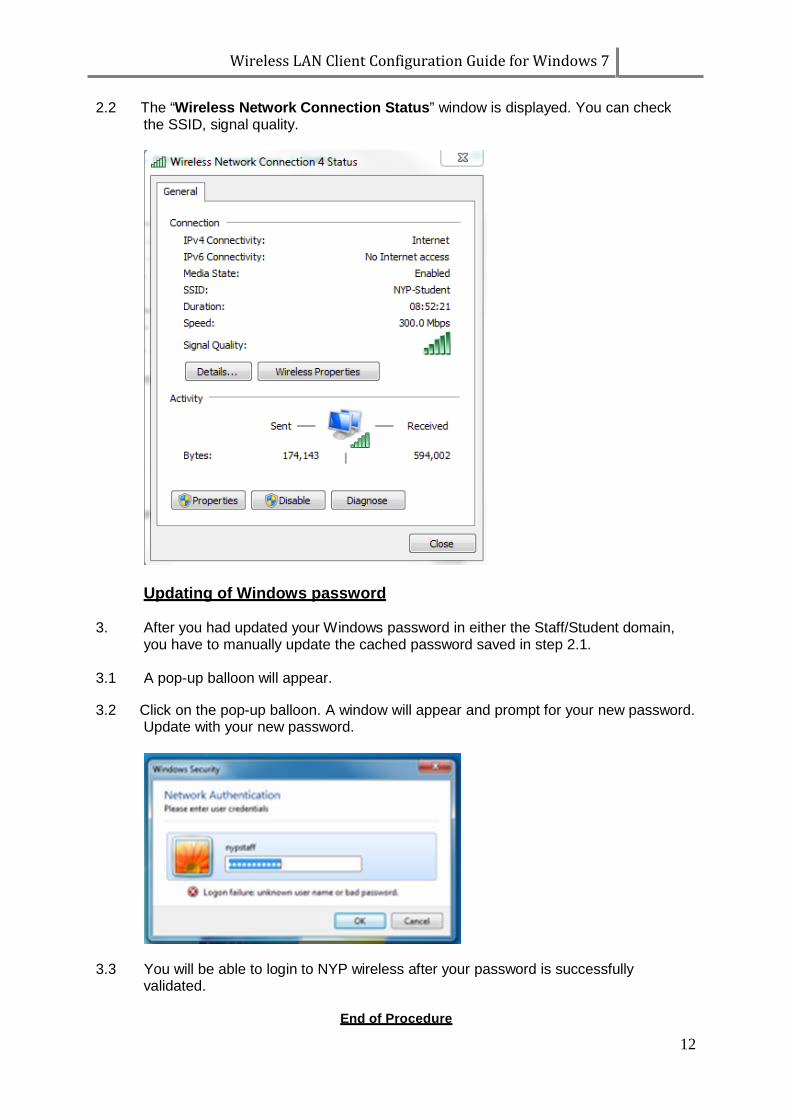
2.2 The “Wireless Network Connection Status” window is displayed. You can check
the SSID, signal quality.
Updating of Windows password
3. After you had updated your Windows password in either the Staff/Student domain,
you have to manually update the cached password saved in step 2.1.
3.1 A pop-up balloon will appear.
3.2 Click on the pop-up balloon. A window will appear and prompt for your new password. Update with your new password.
3.3 You will be able to login to NYP wireless after your password is successfully validated.
End of Procedure