Embed Size (px)
Citation preview

Workspot, Inc. 12/15/2015
Configuration Guide for the Pulse Secure Demo and Training Edition (DTE)

This document contains Workspot proprietary information and is not to be disclosed to unauthorized persons. Version 1.0 pg. 1 of 10
Junos Pulse Secure (formerly Juniper) Demo and Training Edition (DTE) is a fully functional
virtual appliance for up to three concurrent users. However, this version cannot be upgraded to
a production license and technical support is not available from Pulse Secure.
Depending on the VMWare ESX setup, the Pulse VPN appliance can either be configured with
a single internal interface, supporting both internal and external networks through an existing
firewall (option 1), or with both external and internal interfaces (option 2). With an existing
firewall, allow https from the Internet to the Pulse appliance, and from the appliance allow all
protocols to the internal AD, application and data servers.
This document contains Workspot proprietary information and is not to be disclosed to unauthorized persons. Version 1.0 pg. 2 of 10
Steps to setup the Pulse Secure VPN DTE Virtual Appliance Download and unzip the Pulse Secure VPN DTE VA from HERE onto the system where
vSphere or vCenter is accessed.
The zip file contains:
OVF file VMDK file
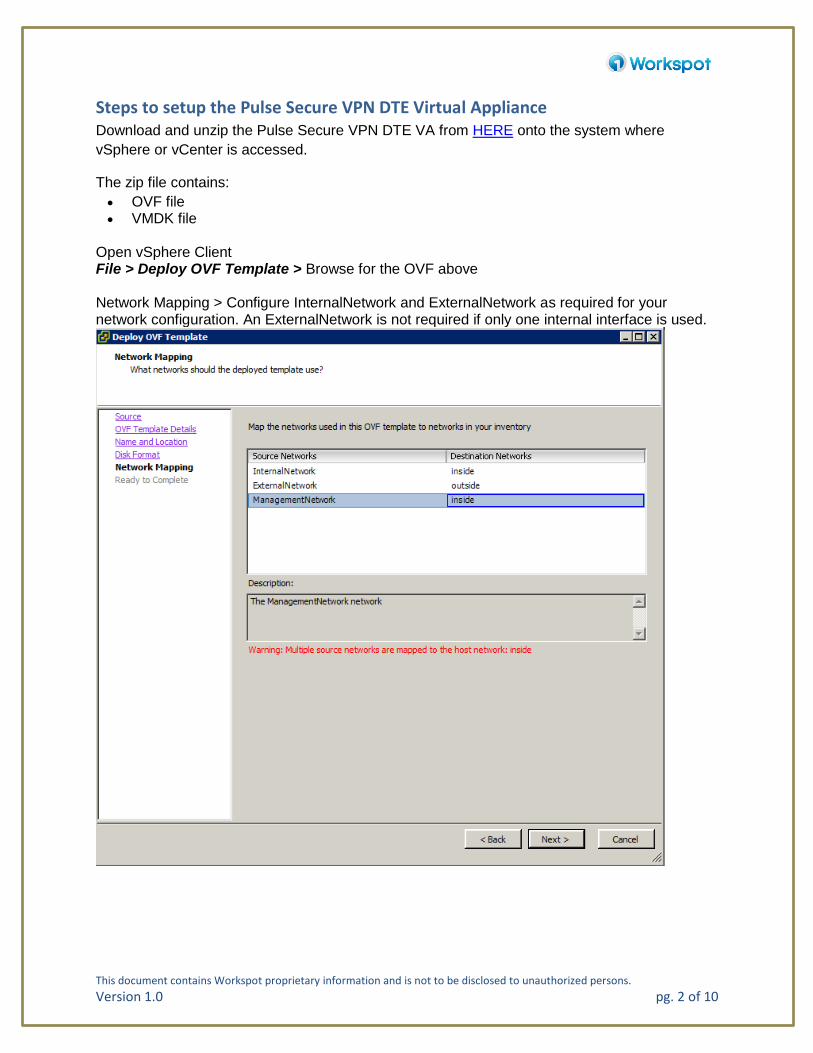
Open vSphere Client File > Deploy OVF Template > Browse for the OVF above Network Mapping > Configure InternalNetwork and ExternalNetwork as required for your network configuration. An ExternalNetwork is not required if only one internal interface is used.
This document contains Workspot proprietary information and is not to be disclosed to unauthorized persons. Version 1.0 pg. 3 of 10
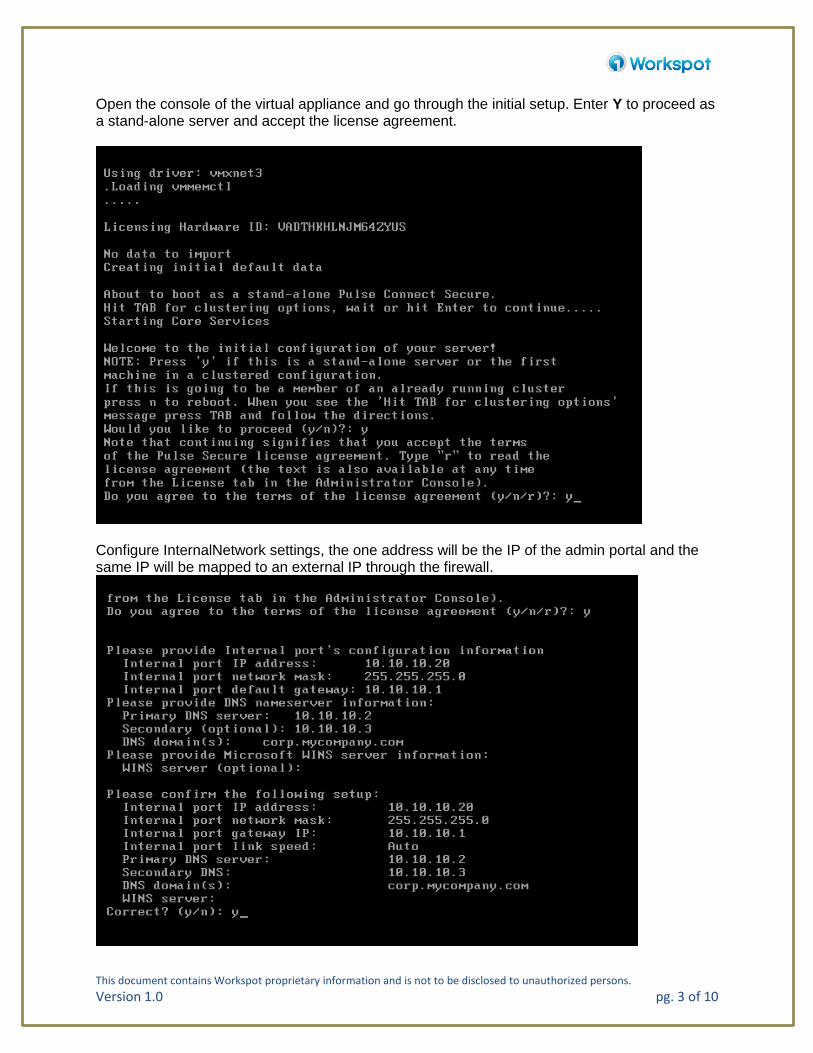
Open the console of the virtual appliance and go through the initial setup. Enter Y to proceed as a stand-alone server and accept the license agreement.
Configure InternalNetwork settings, the one address will be the IP of the admin portal and the same IP will be mapped to an external IP through the firewall.

This document contains Workspot proprietary information and is not to be disclosed to unauthorized persons. Version 1.0 pg. 4 of 10
Create an administrator user and a self-signed certificate for the VA.
Once the initial setup is done, sign-in to the admin portal at https://<IP_Address>/admin using the administrator account created above.

This document contains Workspot proprietary information and is not to be disclosed to unauthorized persons. Version 1.0 pg. 5 of 10
After signing in, time must be set for user authentication to work properly. Click on Edit on System Date & Time and configure for a NTP server common to the domain.
This document contains Workspot proprietary information and is not to be disclosed to unauthorized persons. Version 1.0 pg. 6 of 10
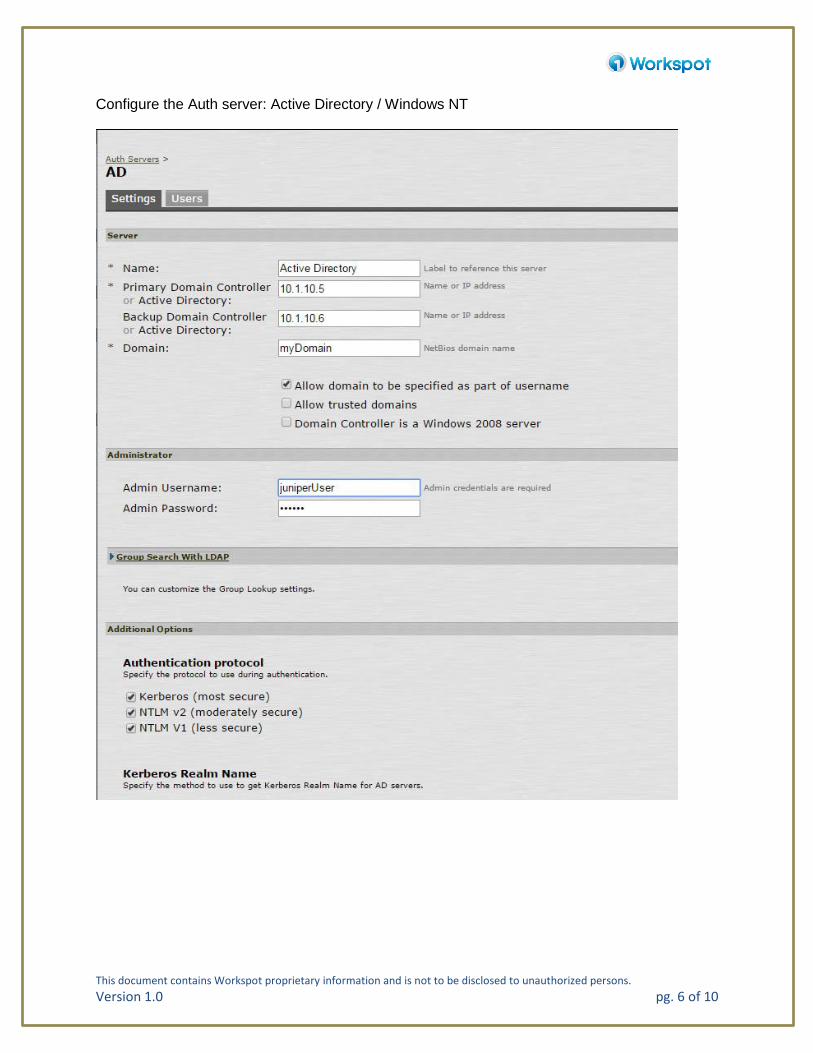
Configure the Auth server: Active Directory / Windows NT

This document contains Workspot proprietary information and is not to be disclosed to unauthorized persons. Version 1.0 pg. 7 of 10
Change the existing User Realm – Users to use the Active Directory authentication.

This document contains Workspot proprietary information and is not to be disclosed to unauthorized persons. Version 1.0 pg. 8 of 10
Edit the User Roles – Users and under Secure Application Manager, select Windows version.
This document contains Workspot proprietary information and is not to be disclosed to unauthorized persons. Version 1.0 pg. 9 of 10
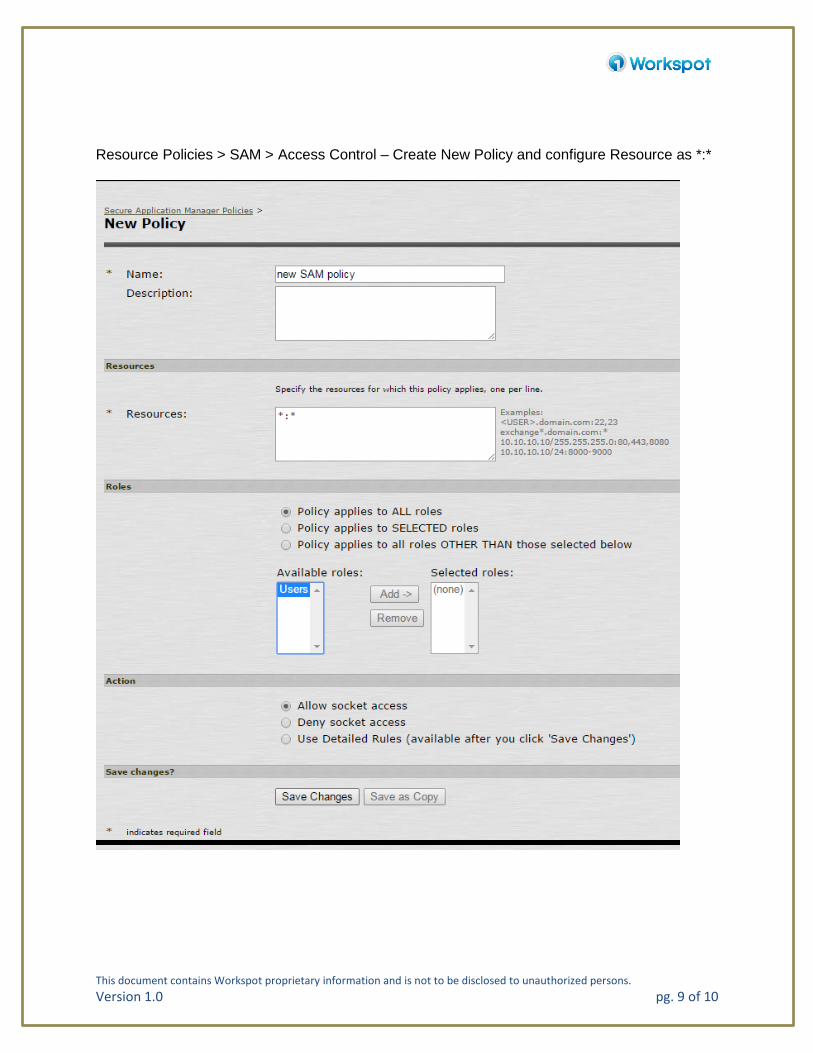
Resource Policies > SAM > Access Control – Create New Policy and configure Resource as *:*
This document contains Workspot proprietary information and is not to be disclosed to unauthorized persons. Version 1.0 pg. 10 of 10
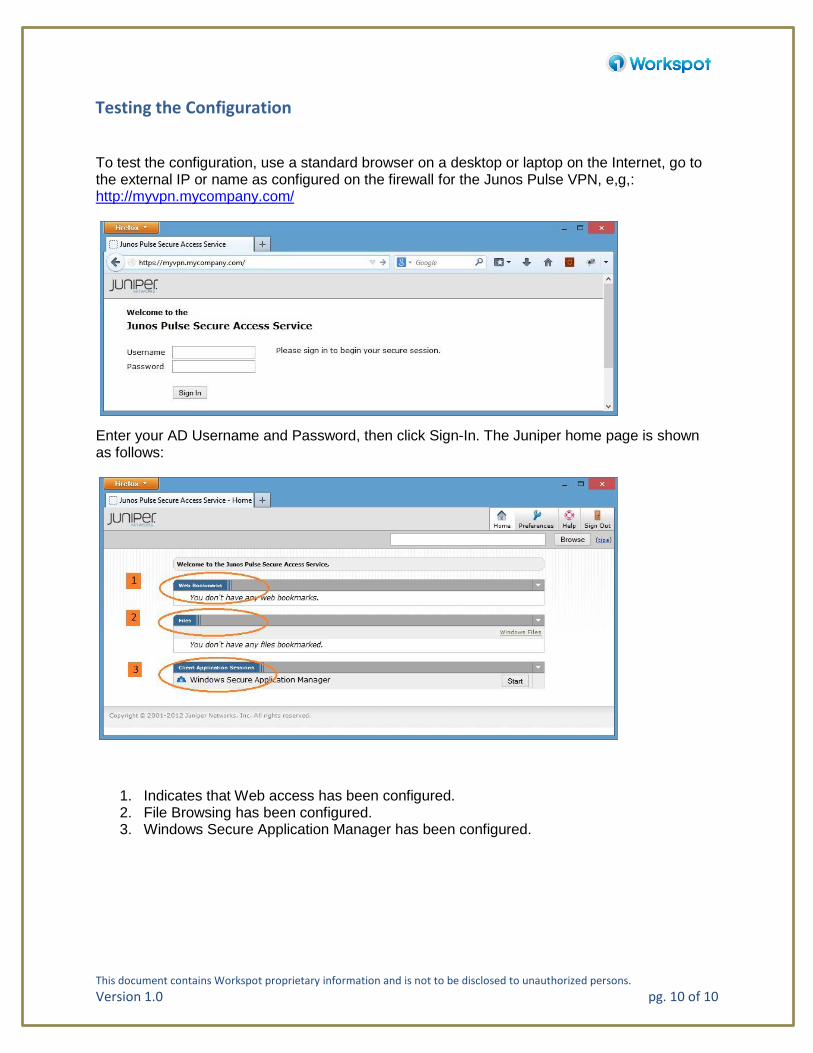
Testing the Configuration
To test the configuration, use a standard browser on a desktop or laptop on the Internet, go to the external IP or name as configured on the firewall for the Junos Pulse VPN, e,g,: http://myvpn.mycompany.com/
Enter your AD Username and Password, then click Sign-In. The Juniper home page is shown as follows:
1. Indicates that Web access has been configured. 2. File Browsing has been configured. 3. Windows Secure Application Manager has been configured.