Embed Size (px)
Citation preview
Computing Starter Introduction
Name
Class Sheet No.
Hello PC freak and fischertechnik fan. Welcome to our "computing world." We at fischertechnik use the term "computing" to mean the programing and control of models using the PC. The computing starter building set is the optimal entry into this subject. Using the assembly instructions, you can build eight different models in a short time and these models range from a handdryer to a bar barrier for entry into parking garages on to a welding robot. Using an interface such as the ROBO interface, item No. 93293, you can connect the models with the PC. Then, you program the models quickly and simply with the graphic programing software, ROBO Pro. The following introduction is intended to help you to quickly find your way around in the computing world. Initially, this shows you how you should start and what you must do step by step. In addition, here you find programing tasks for all models in the building set. Of course, there are tips here for these tasks as well. You are given an exact description as to how you can program the models with the ROBO Pro software. As you will see, this is really great fun. So, let's go.

Computing Starter Introduction
Name
Class Sheet No.
Assembly What do you really find in the building set? First, you will find several fischertechnik building blocks, a motor, lights and sensors as well as colored construction instructions for the building of eight different models. Let's look at this first. When you have unpacked all of the building blocks, you have to assemble some components first such as cables and plugs before you can really get started. The exact ones are described in the construction instructions in the paragraph "Assembly Help and Instructions." It is best to do this first.
Storage The components are sorted in the storage boxes, which are supplied for you as well. Two boxes are needed for each building set. The sorting plans show what components are in each compartment.
Computing Starter Actors and Sensors
Name
Class Sheet No.
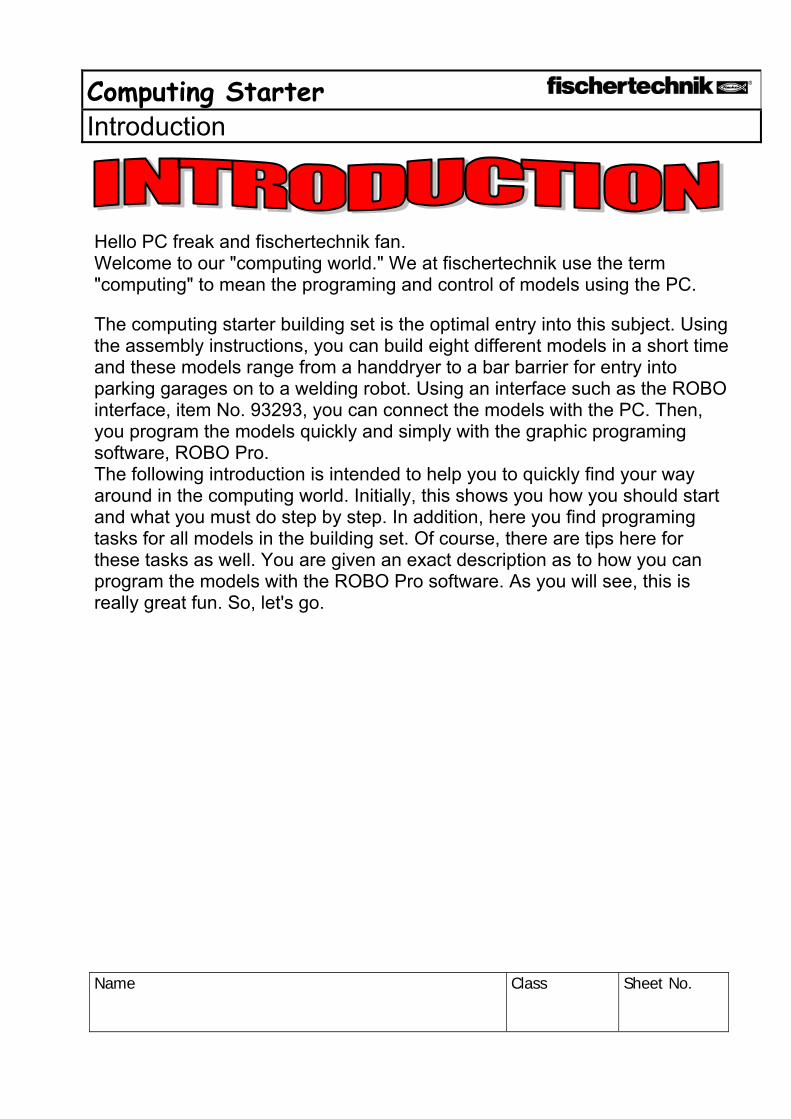
The following actors and sensors are in the building set: Motor This motor drives the fischertechnik models. The motor is operated with a voltage of 9 volts direct current (DC). The maximum output is about 1.1 watt with a speed of 7000 revolutions per minute (RPM). Gear unit: A gear unit is attached to the motor and this unit reduces the RPM. The reduction is, including the motor worm gear and the toothed gear with the output shaft 64, 8:1. Lights The building set contains two different lights. Domed Light This is a normal light bulb for a voltage of 9V DC and a power consumption of about 0.1 ampere (A). Lens Tip Bulb A lens is a part of this light bulb and this focuses the light. It looks very much like the domed light so that you have to watch out and don't mistake these. You need the lens tip bulb to build a light barrier.
Computing Starter Actors and Sensors
Name
Class Sheet No.
Phototransistor You can also call the phototransistor a "brightness sensor." This is a "detector" that reacts to brightness. For a light barrier this is the counterpart to the lens tip bulb. When there is a high degree of brightness, that is when the transistor receives light from the lens tip bulb, it conducts electricity. If the light beam is interrupted, the transistor does not conduct any electricity. Caution: When connecting the phototransistor to the power supply, you must pay special attention to the right pole: red = plus. Sensing Device The sensing device is also called a touch sensor. When you press the red button, this moves a switch mechanically and electricity flows between the contacts 1 (center contact) and 3. At the same, the contact between the connections 1 and 2 is interrupted. So you can use the sensing device in two different ways: As a "closer" Contacts 1 and 3 are connected. When the button is pressed electricity flows. When the button is not pressed, no electricity flows. As a "opener" Contacts 1 and 2 are connected. When the button is pressed no electricity flows. When the button is not pressed, electricity flows.
Computing Starter Actors and Sensors
Name
Class Sheet No.
NTC Resistor
This component is a heat sensor that you can use to to measure temperatures. At 20°C, the resistance is 1.5kΩ (kilo ohms). NTC stands for Negative Temperature Coefficient. This simply means that the resistance value decreases when the temperature increases. The information, which the sensors supply to us such as bright-dark, pressed-not pressed, and temperature value, can be, as you will see later, passed to the PC through the interface and then with the help of the software, for example, you can program a motor to open a door as soon as the light barrier is interrupted.
Computing Starter Interface and Software
Name
Class Sheet No.
Before you start to build models and create programs, you must install the ROBO Pro control software on your PC and connect the interface to your computer. How to do this is described in detail in the ROBO Pro handbook in chapters 1 and 2. Follow these instructions exactly now and you should not have any trouble to get the software and the interface to run. For the interface you need a fischertechnik power supply with a voltage of 9V DC and a current of 1000mA such as the energy set or the battery set. Now, we wish you a lot of success with the installation and the connection of the software and the interface. After this, we will continue here. Note!
For the ROBO interface, item No. 93293, and the ROBO I/O extension, item No. 93294, the digital inputs are identified as I1-I8. The analog resistance inputs are identified as AX and AY. However, for the old intelligent interface, item No. 30402, the digital inputs are identified as E1-E8 and for the analog resistance inputs as EX and EY. The construction instructions and activity booklet for the building set, Computing Starter, still refer to the intelligent interface and the old software, LLWin 3.0. However, the models can be controlled without any problems with the new ROBO interface (USB or serial interface) or the ROBO I/O extension (only through the USB) and the ROBO Pro software that fits with this. When connecting the models to the interface, you just have to pay attention to the changed identification for the inputs. Intelligent Interface ROBO Interface ROBO I/O Extension E1-E8 I1-I8 I1-I8 EX, EY AX, AY AX, -
Computing Starter Interface and Software
Name
Class Sheet No.
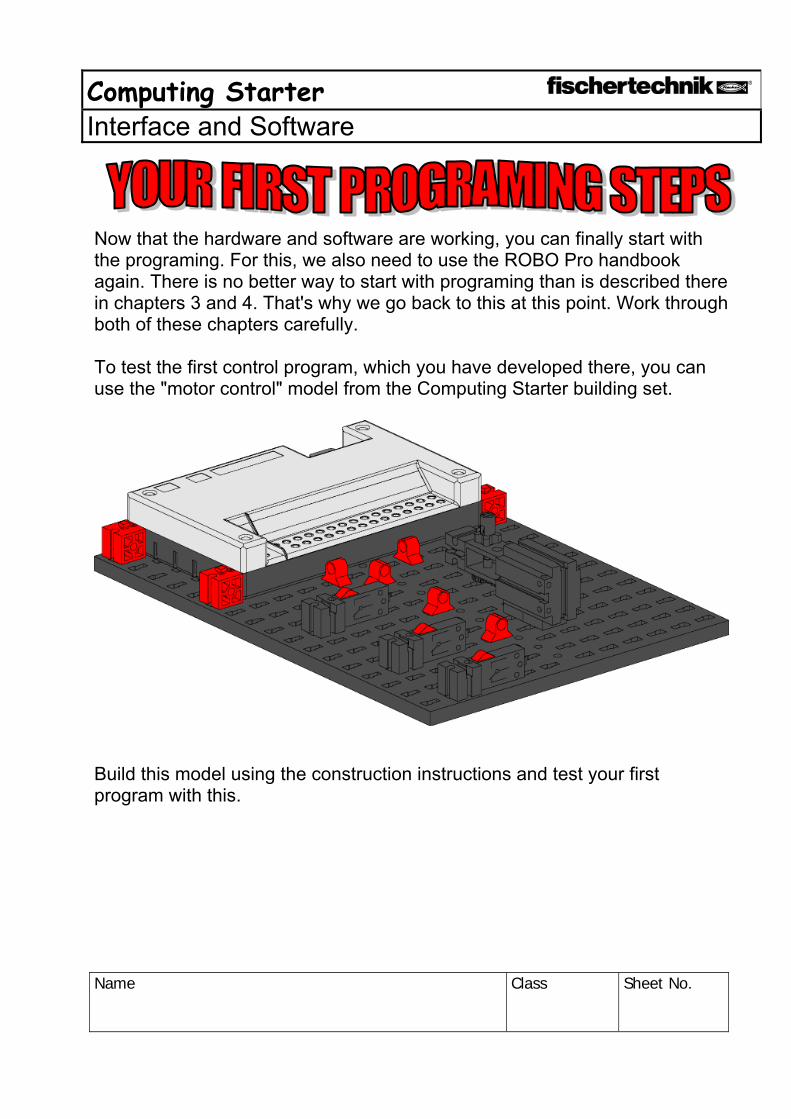
Now that the hardware and software are working, you can finally start with the programing. For this, we also need to use the ROBO Pro handbook again. There is no better way to start with programing than is described there in chapters 3 and 4. That's why we go back to this at this point. Work through both of these chapters carefully. To test the first control program, which you have developed there, you can use the "motor control" model from the Computing Starter building set. Build this model using the construction instructions and test your first program with this.
Computing Starter Programing Tasks Part 1
Name
Class Sheet No.
After you have read through chapters 3 and 4 of the ROBO Pro handbook, you can now program some models from the Computing Starter building set. So, that's why we want to start right away. Every time when you have finished building a model and attached the wiring, you need to conduct a check using the interface test to determine if all outputs and inputs are correctly connected to the interface and the sensors, motors and lights are working properly.
Computing Starter Programing Tasks Part 1
Name
Class Sheet No.
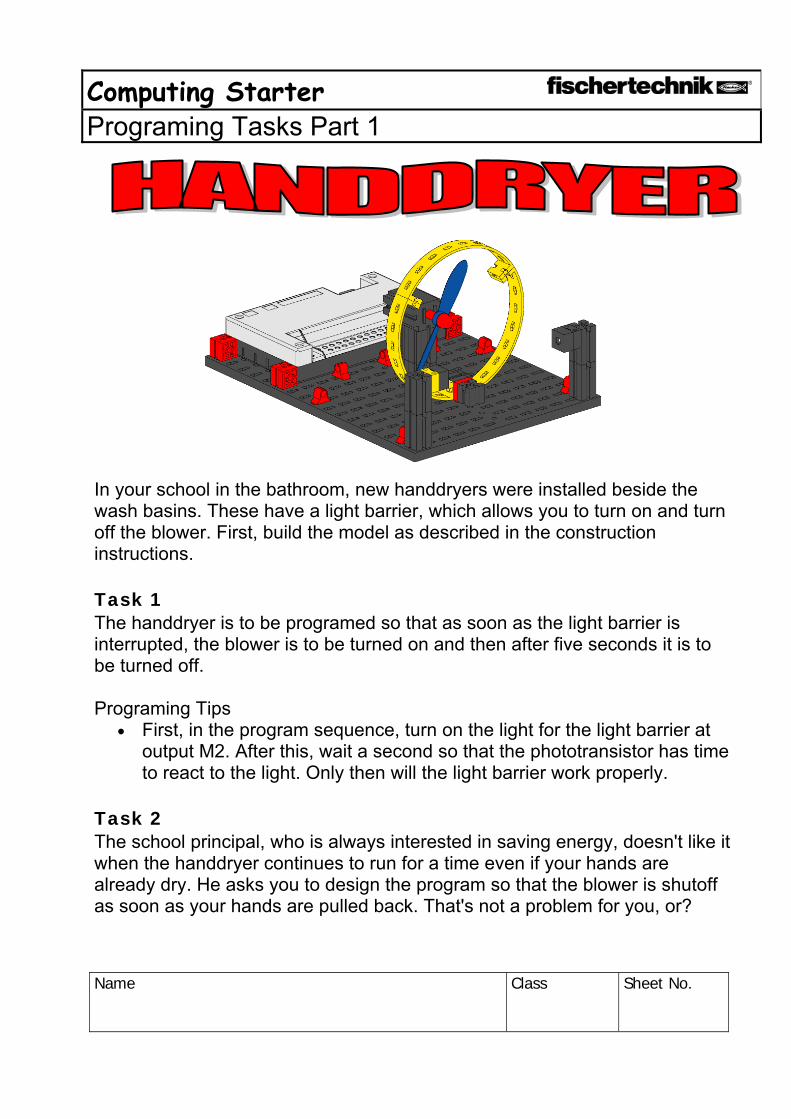
In your school in the bathroom, new handdryers were installed beside the wash basins. These have a light barrier, which allows you to turn on and turn off the blower. First, build the model as described in the construction instructions. Task 1 The handdryer is to be programed so that as soon as the light barrier is interrupted, the blower is to be turned on and then after five seconds it is to be turned off. Programing Tips
• First, in the program sequence, turn on the light for the light barrier at output M2. After this, wait a second so that the phototransistor has time to react to the light. Only then will the light barrier work properly.
Task 2 The school principal, who is always interested in saving energy, doesn't like it when the handdryer continues to run for a time even if your hands are already dry. He asks you to design the program so that the blower is shutoff as soon as your hands are pulled back. That's not a problem for you, or?
Computing Starter Programing Tasks Part 1
Name
Class Sheet No.
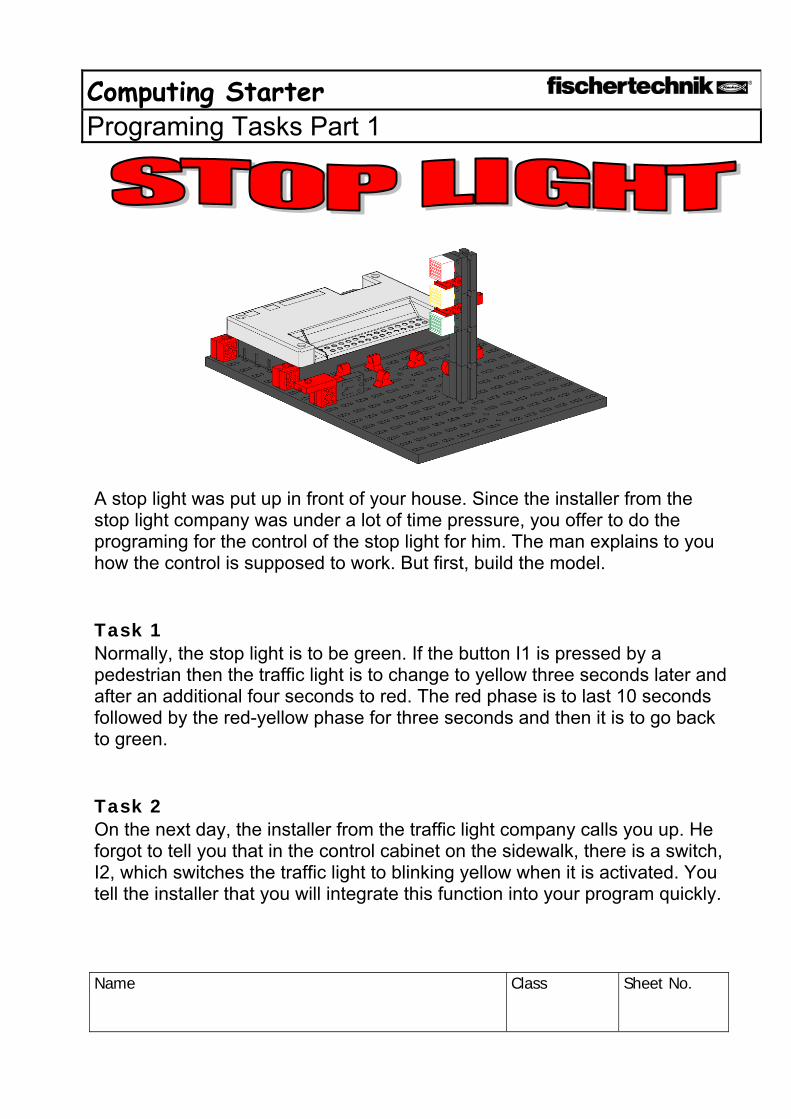
A stop light was put up in front of your house. Since the installer from the stop light company was under a lot of time pressure, you offer to do the programing for the control of the stop light for him. The man explains to you how the control is supposed to work. But first, build the model. Task 1 Normally, the stop light is to be green. If the button I1 is pressed by a pedestrian then the traffic light is to change to yellow three seconds later and after an additional four seconds to red. The red phase is to last 10 seconds followed by the red-yellow phase for three seconds and then it is to go back to green. Task 2 On the next day, the installer from the traffic light company calls you up. He forgot to tell you that in the control cabinet on the sidewalk, there is a switch, I2, which switches the traffic light to blinking yellow when it is activated. You tell the installer that you will integrate this function into your program quickly.
Computing Starter Programing Tasks Part 1
Name
Class Sheet No.
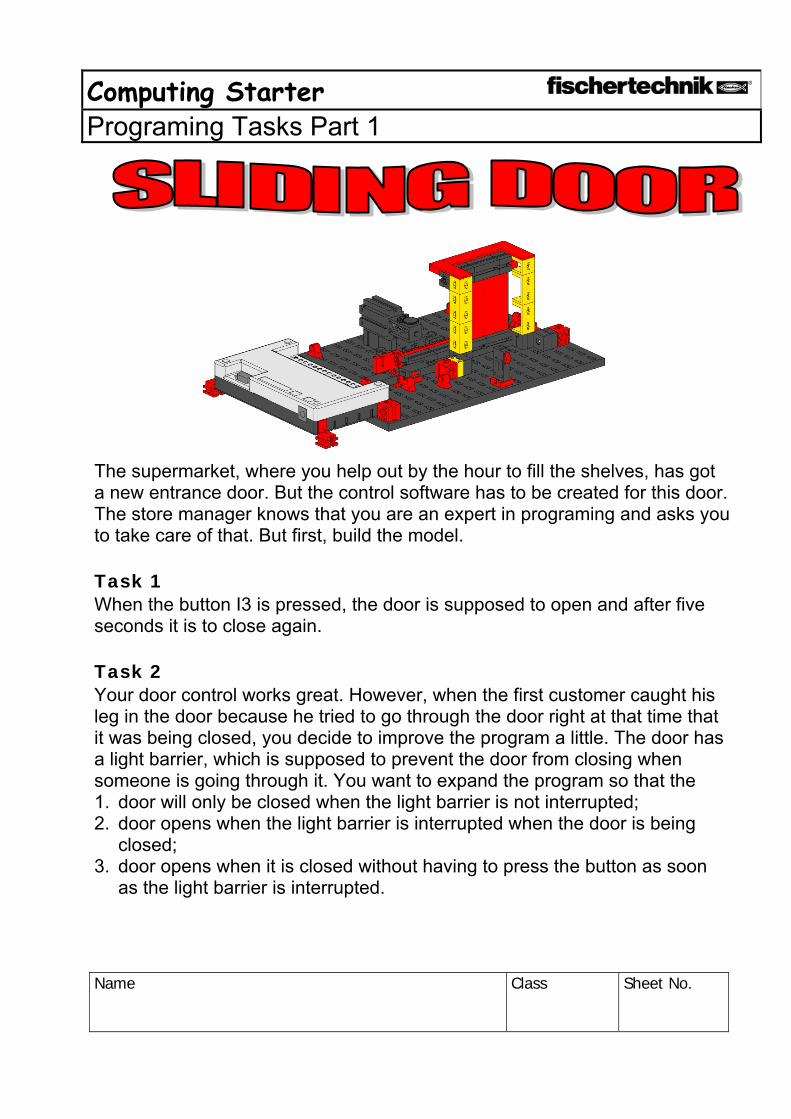
The supermarket, where you help out by the hour to fill the shelves, has got a new entrance door. But the control software has to be created for this door. The store manager knows that you are an expert in programing and asks you to take care of that. But first, build the model. Task 1 When the button I3 is pressed, the door is supposed to open and after five seconds it is to close again. Task 2 Your door control works great. However, when the first customer caught his leg in the door because he tried to go through the door right at that time that it was being closed, you decide to improve the program a little. The door has a light barrier, which is supposed to prevent the door from closing when someone is going through it. You want to expand the program so that the 1. door will only be closed when the light barrier is not interrupted; 2. door opens when the light barrier is interrupted when the door is being
closed; 3. door opens when it is closed without having to press the button as soon
as the light barrier is interrupted.
Computing Starter Programing Tasks Part 1
Name
Class Sheet No.
Programing Tips • First, just as you did before for the handdryer, switch on the light for the
light barrier and wait a second before the sequence goes further. • Wherever it is necessary, query the phototransistor and open the door
when the phototransistor displays the value 0. • Completed project, sliding door2.mdl. Finished! Your boss is proud of you! The door works perfectly and is absolutely safe. He doubles your hourly wage.
Computing Starter Programing Tasks Part 2
Name
Class Sheet No.
Before you move on to the second part of the programing tasks, you should go back to the ROBO Pro handbook. Work through chapter 5 carefully in the handbook. The programing tasks are slowly becoming more demanding. We will use analog inputs, operating elements, operators and variables. However, if you read the ROBO Pro handbook attentively, you will find it easier to use later.
Computing Starter Programing Tasks Part 2
Name
Class Sheet No.
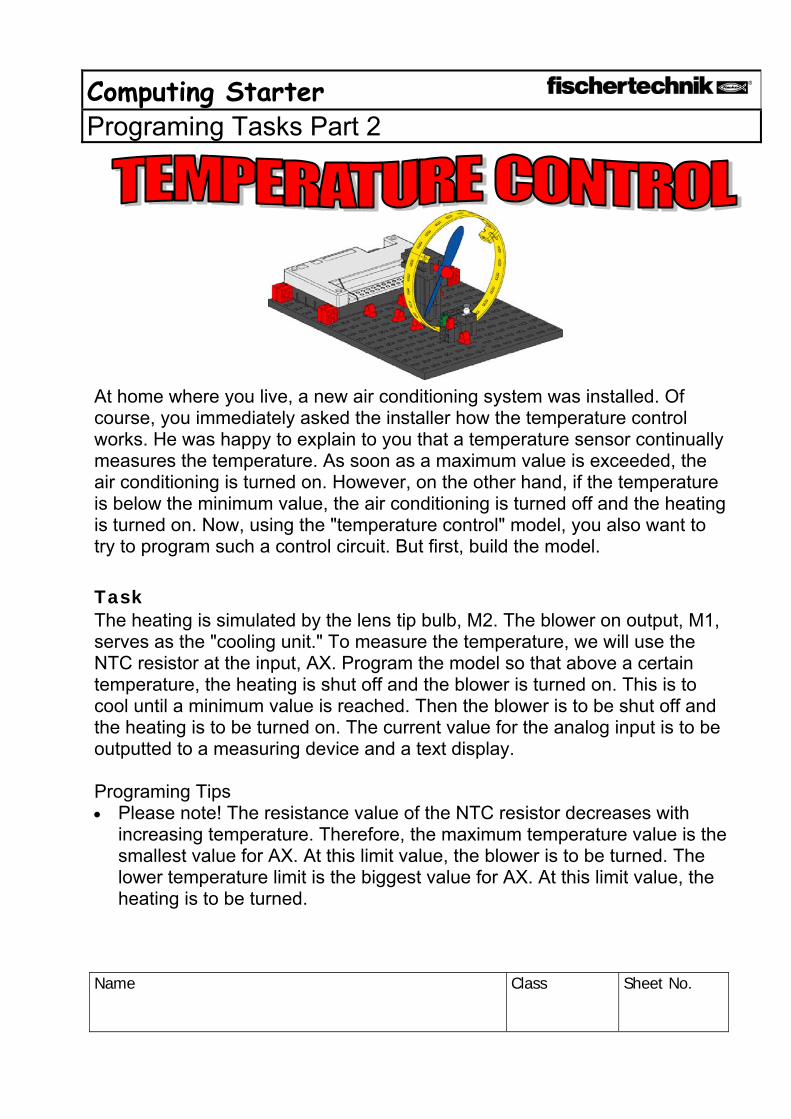
At home where you live, a new air conditioning system was installed. Of course, you immediately asked the installer how the temperature control works. He was happy to explain to you that a temperature sensor continually measures the temperature. As soon as a maximum value is exceeded, the air conditioning is turned on. However, on the other hand, if the temperature is below the minimum value, the air conditioning is turned off and the heating is turned on. Now, using the "temperature control" model, you also want to try to program such a control circuit. But first, build the model. Task The heating is simulated by the lens tip bulb, M2. The blower on output, M1, serves as the "cooling unit." To measure the temperature, we will use the NTC resistor at the input, AX. Program the model so that above a certain temperature, the heating is shut off and the blower is turned on. This is to cool until a minimum value is reached. Then the blower is to be shut off and the heating is to be turned on. The current value for the analog input is to be outputted to a measuring device and a text display. Programing Tips • Please note! The resistance value of the NTC resistor decreases with
increasing temperature. Therefore, the maximum temperature value is the smallest value for AX. At this limit value, the blower is to be turned. The lower temperature limit is the biggest value for AX. At this limit value, the heating is to be turned.
Computing Starter Programing Tasks Part 2
Name
Class Sheet No.
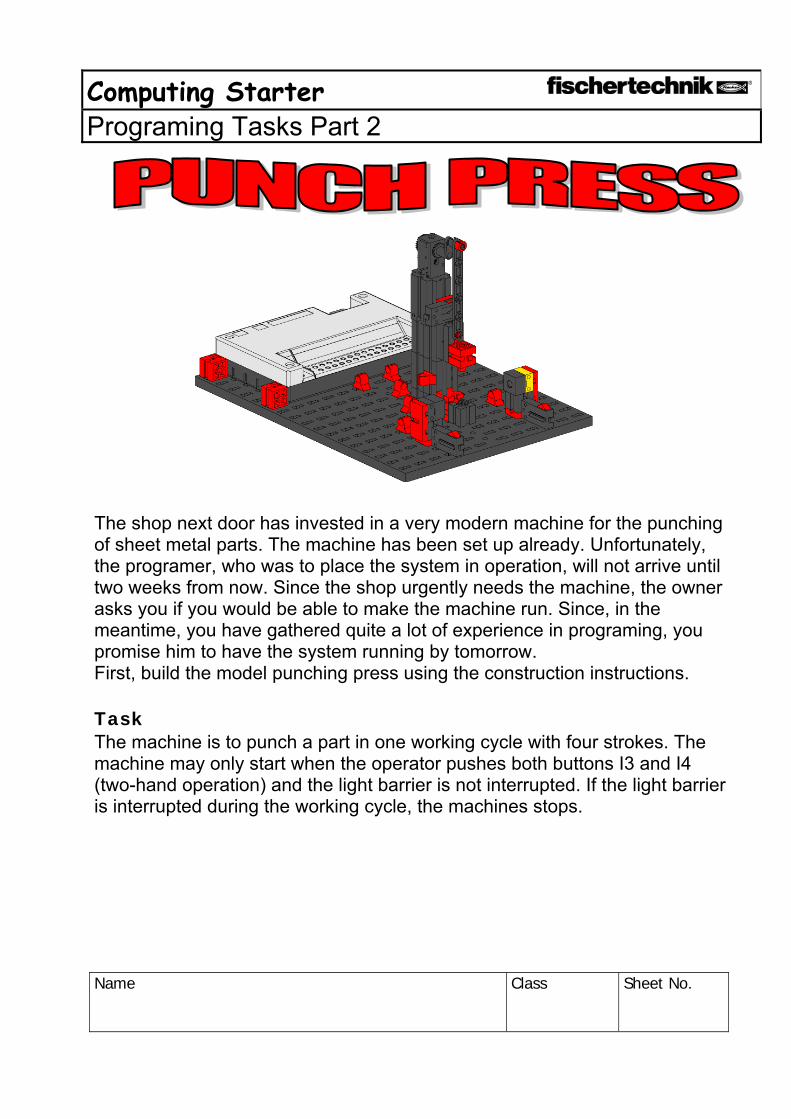
The shop next door has invested in a very modern machine for the punching of sheet metal parts. The machine has been set up already. Unfortunately, the programer, who was to place the system in operation, will not arrive until two weeks from now. Since the shop urgently needs the machine, the owner asks you if you would be able to make the machine run. Since, in the meantime, you have gathered quite a lot of experience in programing, you promise him to have the system running by tomorrow. First, build the model punching press using the construction instructions. Task The machine is to punch a part in one working cycle with four strokes. The machine may only start when the operator pushes both buttons I3 and I4 (two-hand operation) and the light barrier is not interrupted. If the light barrier is interrupted during the working cycle, the machines stops.
Computing Starter Programing Tasks Part 2
Name
Class Sheet No.
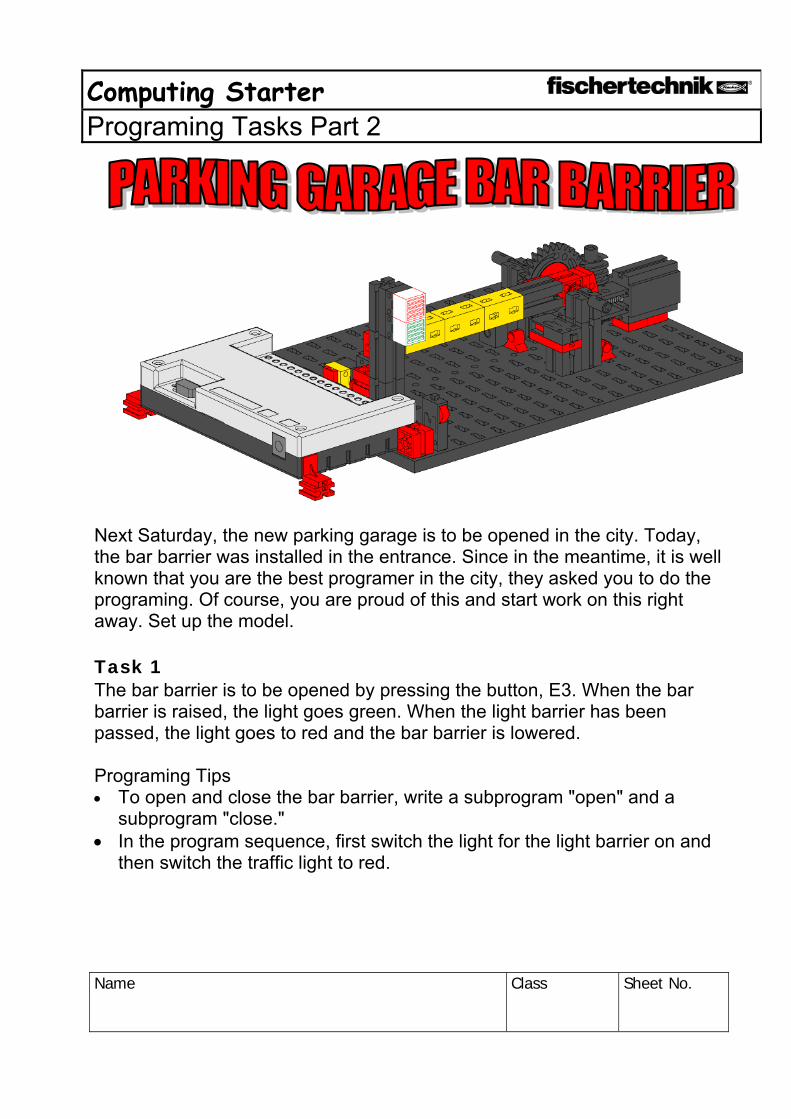
Next Saturday, the new parking garage is to be opened in the city. Today, the bar barrier was installed in the entrance. Since in the meantime, it is well known that you are the best programer in the city, they asked you to do the programing. Of course, you are proud of this and start work on this right away. Set up the model. Task 1 The bar barrier is to be opened by pressing the button, E3. When the bar barrier is raised, the light goes green. When the light barrier has been passed, the light goes to red and the bar barrier is lowered. Programing Tips • To open and close the bar barrier, write a subprogram "open" and a
subprogram "close." • In the program sequence, first switch the light for the light barrier on and
then switch the traffic light to red.
Computing Starter Programing Tasks Part 2
Name
Class Sheet No.
Task 2 On the opening day, the parking garage is to be kept free for prominent guests. For this purpose, those who are to be allowed to park are to receive a secret number combination with three digits. The bar is only to be raised when the correct code is entered. The numbers are to be entered using an operator's console. The numbers 1 to 6 are available for selection. The right code is 352. Programing Tips • It is best to use a separate subprogram for the code lock. • Chapter 5.7 of the ROBO Pro handbook describes some possibilities for
the construction of a code lock. • Using a command, "Text," and a display element you can output a
message to show if the code entered was right or wrong.
Computing Starter Programing Tasks Part 2
Name
Class Sheet No.
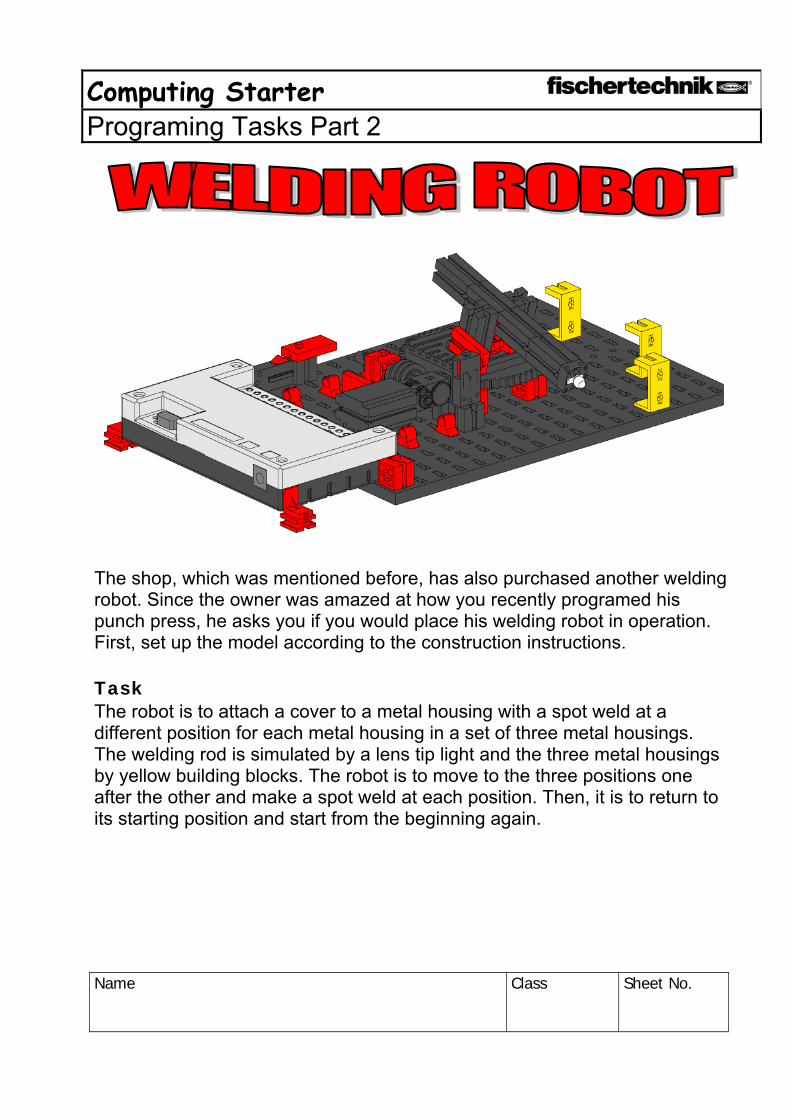
The shop, which was mentioned before, has also purchased another welding robot. Since the owner was amazed at how you recently programed his punch press, he asks you if you would place his welding robot in operation. First, set up the model according to the construction instructions. Task The robot is to attach a cover to a metal housing with a spot weld at a different position for each metal housing in a set of three metal housings. The welding rod is simulated by a lens tip light and the three metal housings by yellow building blocks. The robot is to move to the three positions one after the other and make a spot weld at each position. Then, it is to return to its starting position and start from the beginning again.
Computing Starter Further Developments
Name
Class Sheet No.
With a little bit of fantasy, you can certainly develop additional tasks for the models from the Computing Starter building set and write the programs for these. For example, the welding robot could make a spot weld at a fourth position or the robot could move to these three positions in another sequence several times. With some additional components, you could expand the stop light to cover an entire street intersection with extensive traffic light controls. Just give yourself time to think because there are certainly lots of further possibilities. All program and operating elements are described in chapters 7 and 8 of the ROBO Pro handbook. These chapters are very useful as references. It's worth reading! There are also additional computing building sets from fischertechnik The ROBO Mobile Set contains seven mobile robots and a crawler robot. You can program these so that they can avoid obstacles or do not fall off the table. With the Pneumatic Robots building set, you can control pneumatically operated machines through the interface using electromagnetic valves. You can build grab robots with three axes from the Industry Robots building set and these robots grasp, move and stack objects in three-dimensional space. Of course, models from various building sets can be combined and thus there are new more extensive programing tasks from this and solutions can be developed in groups as well.
![Builders/FTIStrap - fischertechnik Community · any electronics - and everything can be ordered online [4] ... "fischertechnik designer" [5] which was used to model the FTIStrap and](https://img.pdfslide.us/doc/110x75/60610a9ae9437479d463418a/buildersftistrap-fischertechnik-community-any-electronics-and-everything-can.jpg)