Embed Size (px)
Citation preview
Ergonomic Checklist
1/8
This checklist has been provided by the Injury Prevention Team, Safety Services, Capital District Health Authority. It is meant to guide you through properly setting up your chair and computer workstation. First and foremost, always remember to take micro breaks. Get out of your chair once every 10-‐30 minutes (2-‐4 times per hour) and stand up. Please note that there is a variety of chairs in the organization. Take the time to familiarize yourself with the chair you are sitting on and its controls.
Let’s start with the chair. ALWAYS make sure your hips are as far back in the chair as possible before adjusting. Always make sure the chair is properly set up before moving to the desk. This is NOT an example of a good setup. What is wrong?
• Chair tilted backward. • Armrests too low. • Chair too low.
Step 1 – Adjust Tilt of Chair Adjust the chair so that it is between horizontal and slightly leaning forward. Do not go so far as to feel you are falling out of the chair.
Ergonomic Checklist
2/8
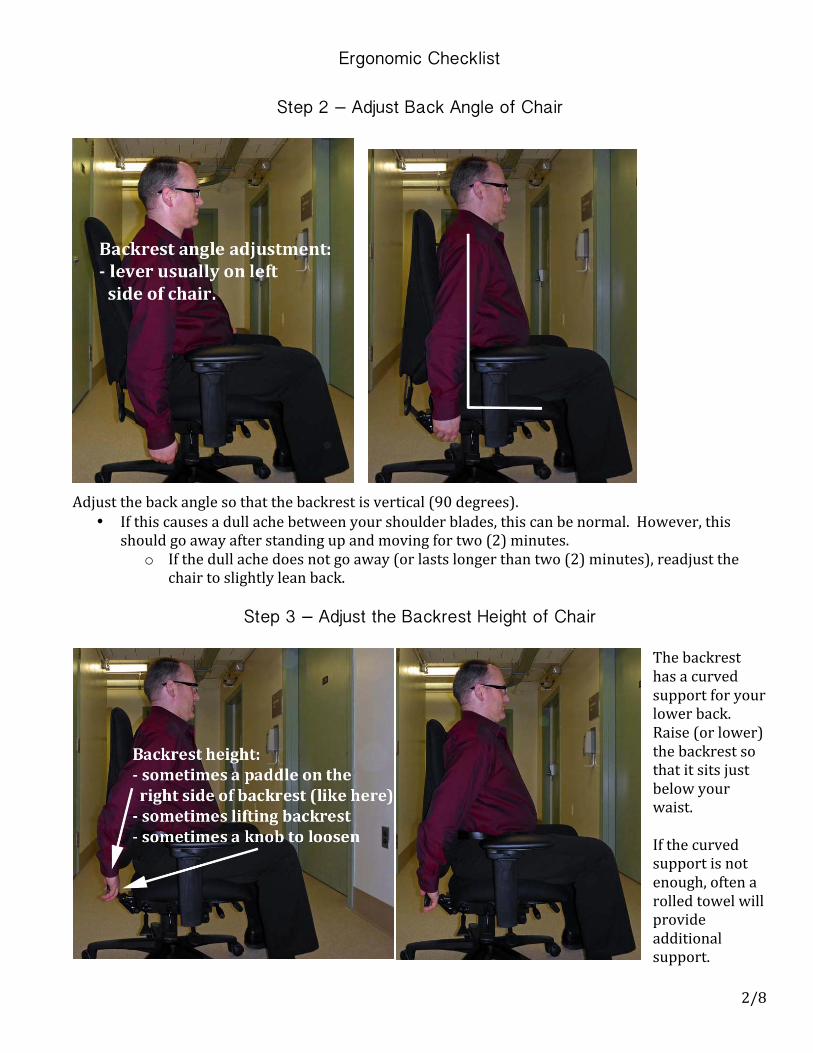
Step 2 – Adjust Back Angle of Chair
Adjust the back angle so that the backrest is vertical (90 degrees).
• If this causes a dull ache between your shoulder blades, this can be normal. However, this should go away after standing up and moving for two (2) minutes.
o If the dull ache does not go away (or lasts longer than two (2) minutes), readjust the chair to slightly lean back.
Step 3 – Adjust the Backrest Height of Chair
The backrest has a curved support for your lower back. Raise (or lower) the backrest so that it sits just below your waist. If the curved support is not enough, often a rolled towel will provide additional support.
Ergonomic Checklist
3/8
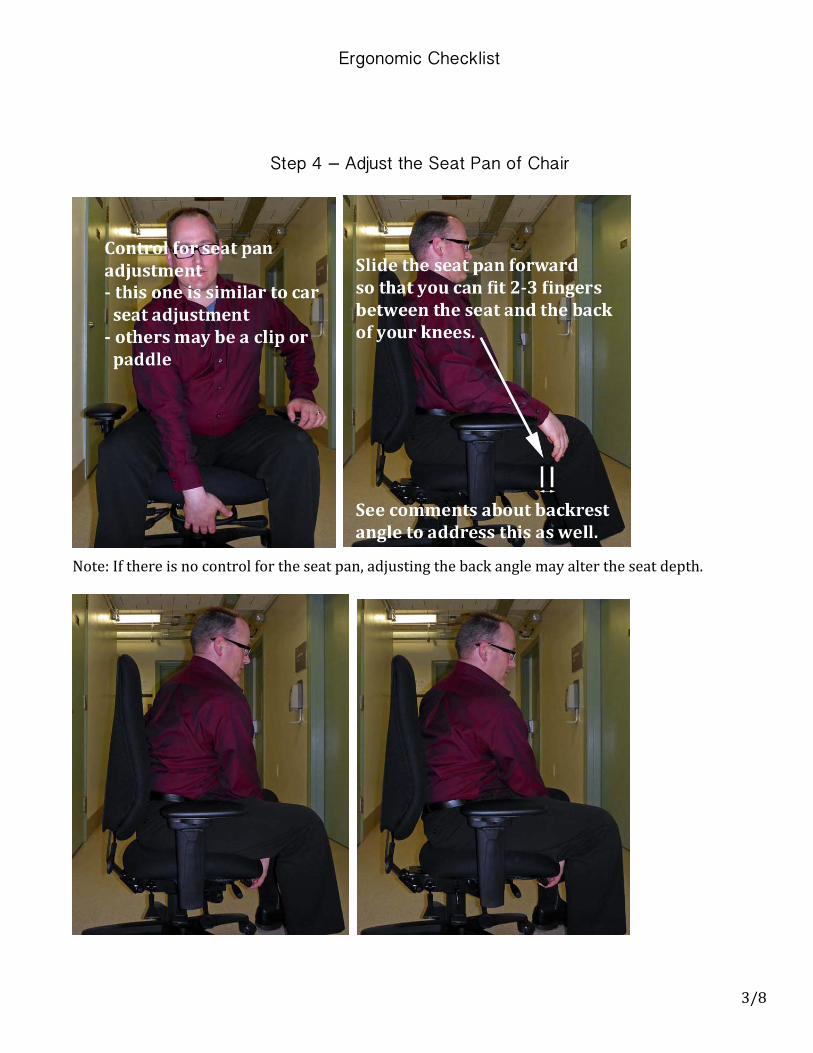
Step 4 – Adjust the Seat Pan of Chair
Note: If there is no control for the seat pan, adjusting the back angle may alter the seat depth.
Ergonomic Checklist
4/8
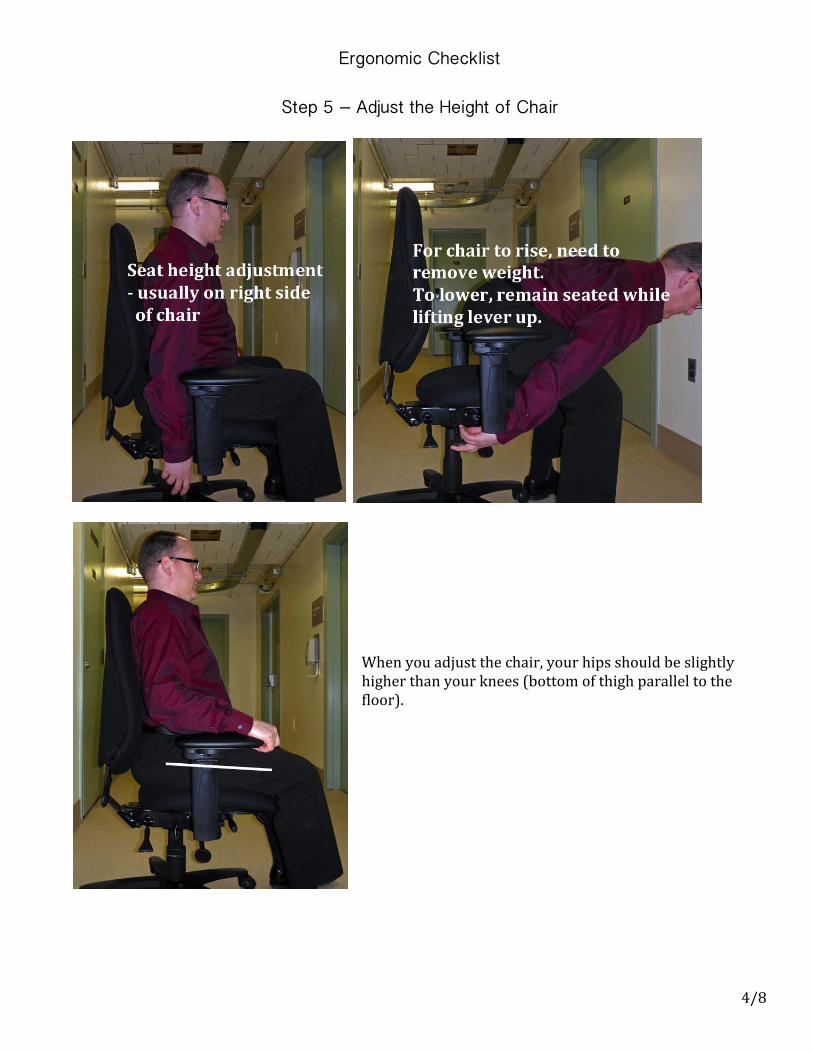
Step 5 – Adjust the Height of Chair
When you adjust the chair, your hips should be slightly higher than your knees (bottom of thigh parallel to the floor).
Ergonomic Checklist
5/8
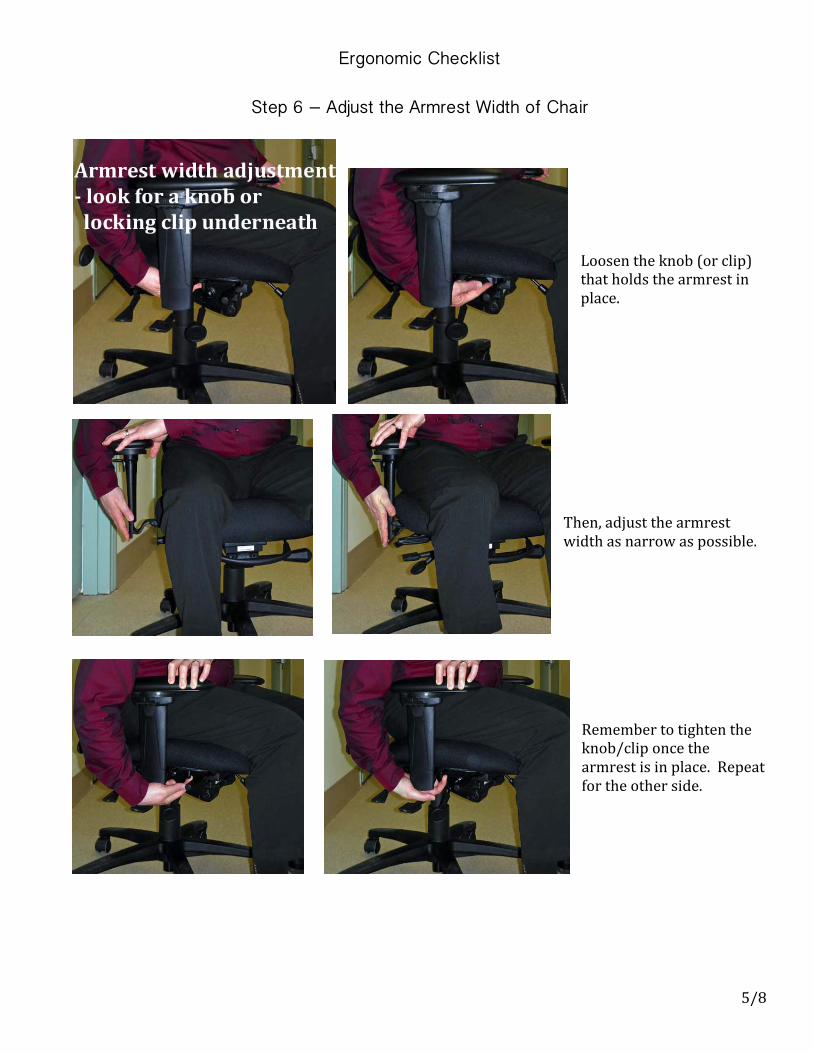
Step 6 – Adjust the Armrest Width of Chair
Loosen the knob (or clip) that holds the armrest in place.
Then, adjust the armrest width as narrow as possible.
Remember to tighten the knob/clip once the armrest is in place. Repeat for the other side.
Ergonomic Checklist
6/8
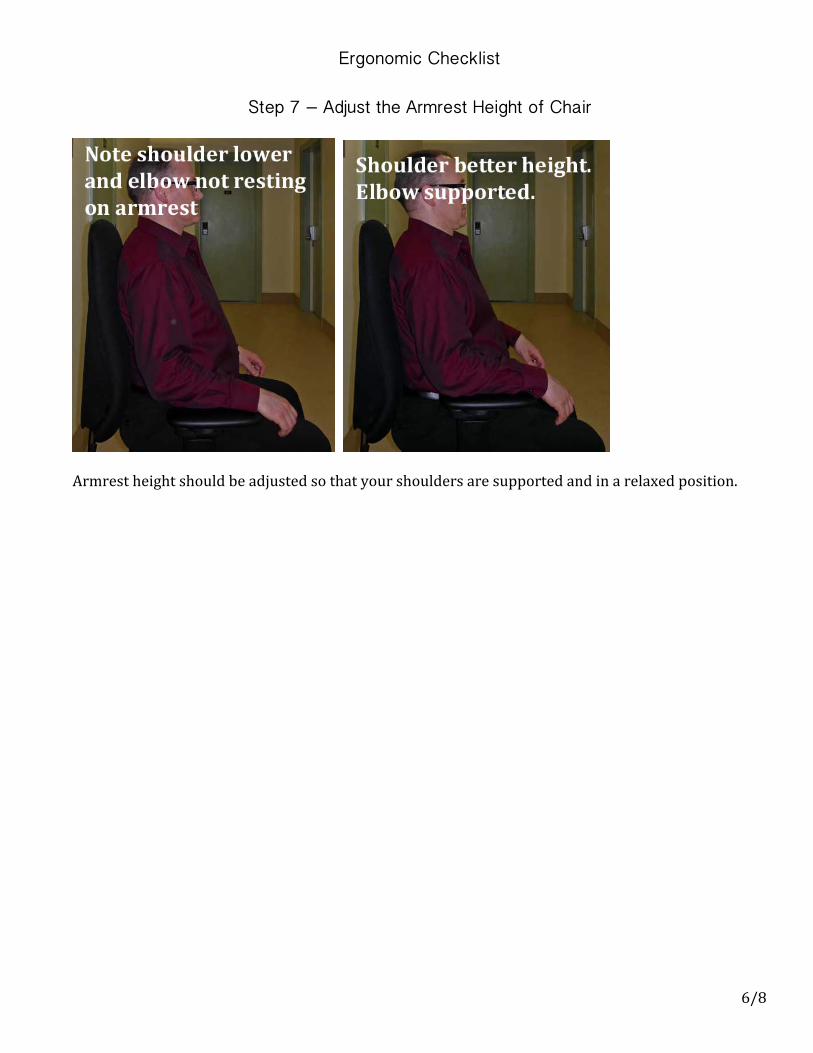
Step 7 – Adjust the Armrest Height of Chair
Armrest height should be adjusted so that your shoulders are supported and in a relaxed position.
Ergonomic Checklist
7/8
Once your chair is set up, it is time to look at the desk.
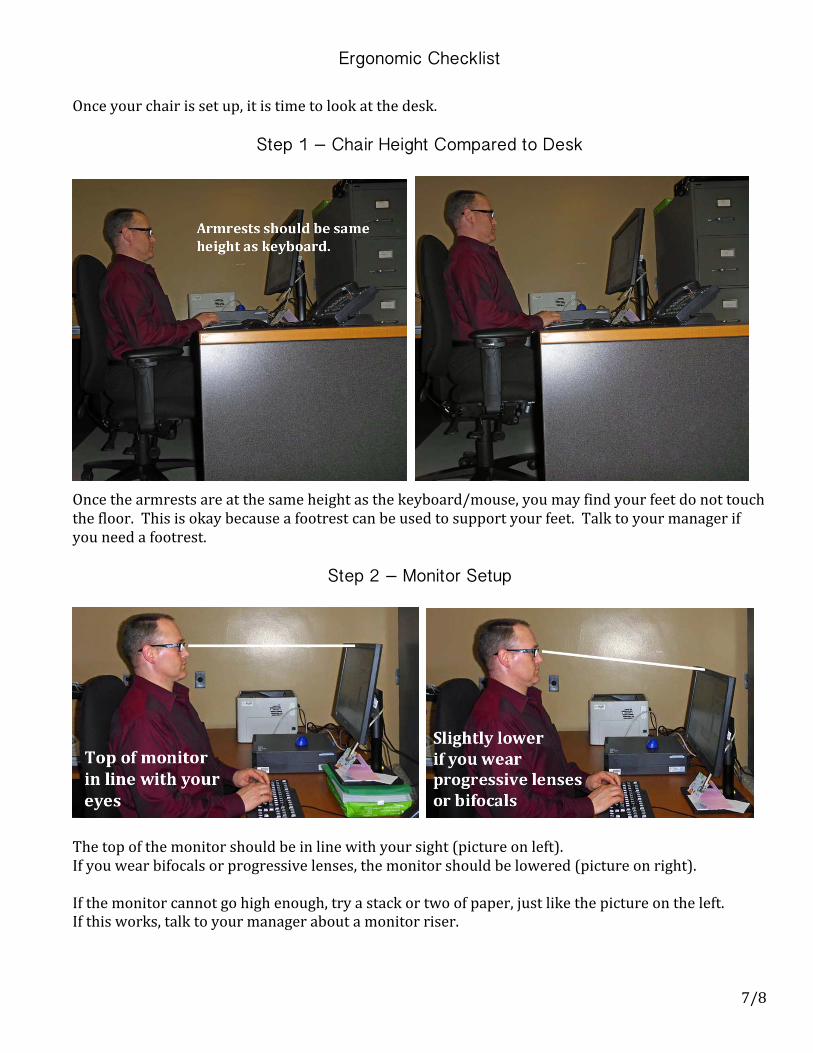
Step 1 – Chair Height Compared to Desk
Once the armrests are at the same height as the keyboard/mouse, you may find your feet do not touch the floor. This is okay because a footrest can be used to support your feet. Talk to your manager if you need a footrest.
Step 2 – Monitor Setup
The top of the monitor should be in line with your sight (picture on left). If you wear bifocals or progressive lenses, the monitor should be lowered (picture on right). If the monitor cannot go high enough, try a stack or two of paper, just like the picture on the left. If this works, talk to your manager about a monitor riser.
Ergonomic Checklist
8/8
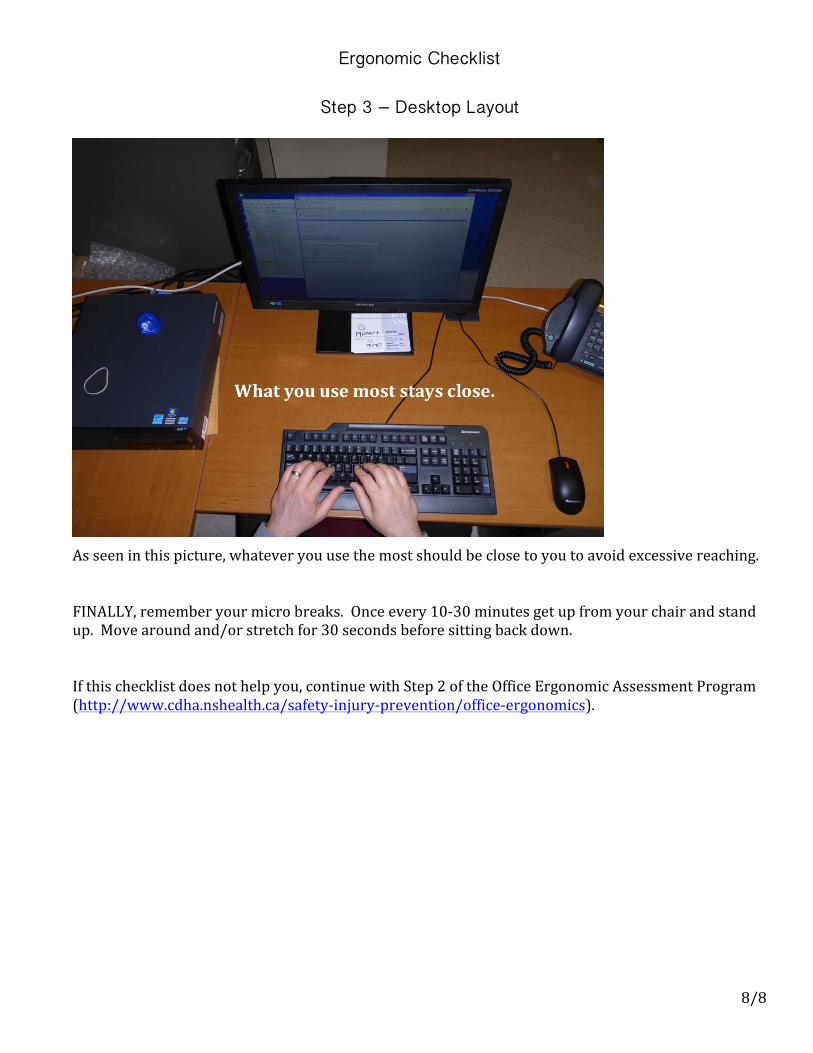
Step 3 – Desktop Layout
As seen in this picture, whatever you use the most should be close to you to avoid excessive reaching. FINALLY, remember your micro breaks. Once every 10-‐30 minutes get up from your chair and stand up. Move around and/or stretch for 30 seconds before sitting back down. If this checklist does not help you, continue with Step 2 of the Office Ergonomic Assessment Program (http://www.cdha.nshealth.ca/safety-‐injury-‐prevention/office-‐ergonomics).


![Workstation Checklist - Healthshare · 2020-05-29 · Workstation Checklist [ 3 ] The Checklist below is suitable for anyone to use to help reduce the risk of these problems at work](https://img.pdfslide.us/doc/110x75/5f91ca089ac77733ff1ecf49/workstation-checklist-healthshare-2020-05-29-workstation-checklist-3-the.jpg)