Embed Size (px)
Citation preview
١
١
Computer Graphics
using openGL
٢
Getting Started
Window - based
Graphics Commands use a coordinate system that is attached to the
window
٢
٣
What Is OpenGL?
• OpenGL is a software interface to graphics
hardware. You can use to specify the objects
and operations needed to produce interactive
three-dimensional applications
• OpenGL is designed as a hardware-independent
interface to be implemented on many different
hardware platforms.
٤
OpenGL (1/3)
• The most popular raster graphics library, providing a powerful but primitive set of rendering commands
• Already supported by every window systems
• OpenGL Utility Library (GLU) : higher-level routines, part of OpenGL implementation
– Setting up matrices for specific viewing orientations and projections
– Performing polygon tessellation and rendering surfaces
• OpenGL Utility Toolkit (GLUT): window-system-independent high-level library. Need to install this library separately.
٣
٥
OpenGL (2/3)
• Install OpenGL Utility Toolkit (GLUT) for MS Windows
– Download GLUT from
http://reality.sgi.com/opengl/glut3/glut3.html
– Unzip the package
– Set “include directory” and “lib directory” in the C
Compiler to include the directory containing glut.h,
glut.lib
– Copy glut32.dll into directory
DRIVE:\WINNT\SYSTEM
• Add #include <glut.h> to the beginning of the program
٦
OpenGL (3/3)
• OpenGL Programming Guide:
– http://www.cs.ucf.edu/dsg/dtran/teaching/cps5
60/openGL/install/theredbook.zip
• Nate Robins’ OpenGL Tutors
–
http://www.cs.utah.edu/~narobins/opengl.html
٤
٧
GLUT
GLUT stands for OpenGL Utility Toolkit.
In order to write a C++ application using GLUT you'll need three files:
1- glut.h - You'll have to include This is the file in your source code. The common place to put this file is in
C:\Program Files\Microsoft Visual Studio\VC98\Include\GL
folder.
2- glut.lib and glut32.lib
This file must be linked to your application so make sure to put it your lib folder.
3- glut32.dll and glut.dll - choose one according to the OpenGL you're using. If using Microsoft's version then you must choose glut32.dll. You should place the dll file in your system folder.
٨
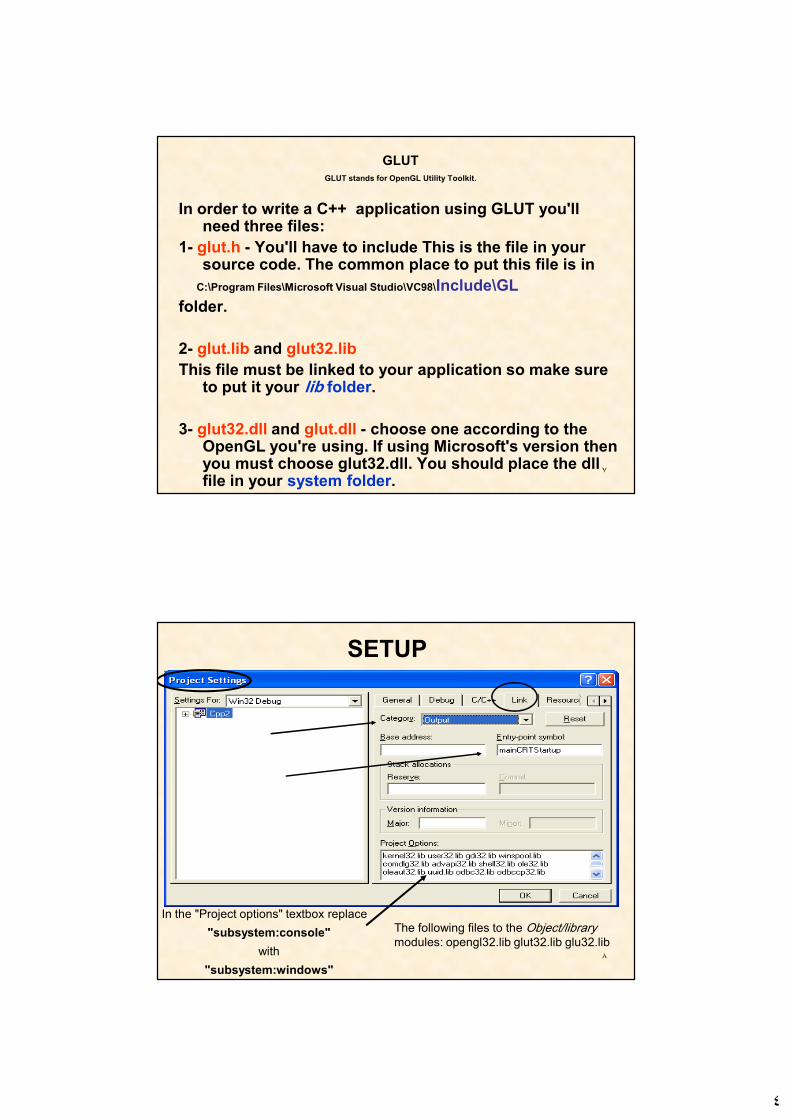
In the "Project options" textbox replace
"subsystem:console"
with
"subsystem:windows"
SETUP
The following files to the Object/librarymodules: opengl32.lib glut32.lib glu32.lib
٥
9 Angel: Interactive Computer
Graphics 5E © Addison-Wesley 2009
Programming with OpenGL
Part 1: Background
10 Angel: Interactive Computer
Graphics 5E © Addison-Wesley 2009
Objectives
• Development of the OpenGL API
• OpenGL Architecture
– OpenGL as a state machine
• Functions
– Types
– Formats
• Simple program
٦
11 Angel: Interactive Computer
Graphics 5E © Addison-Wesley 2009
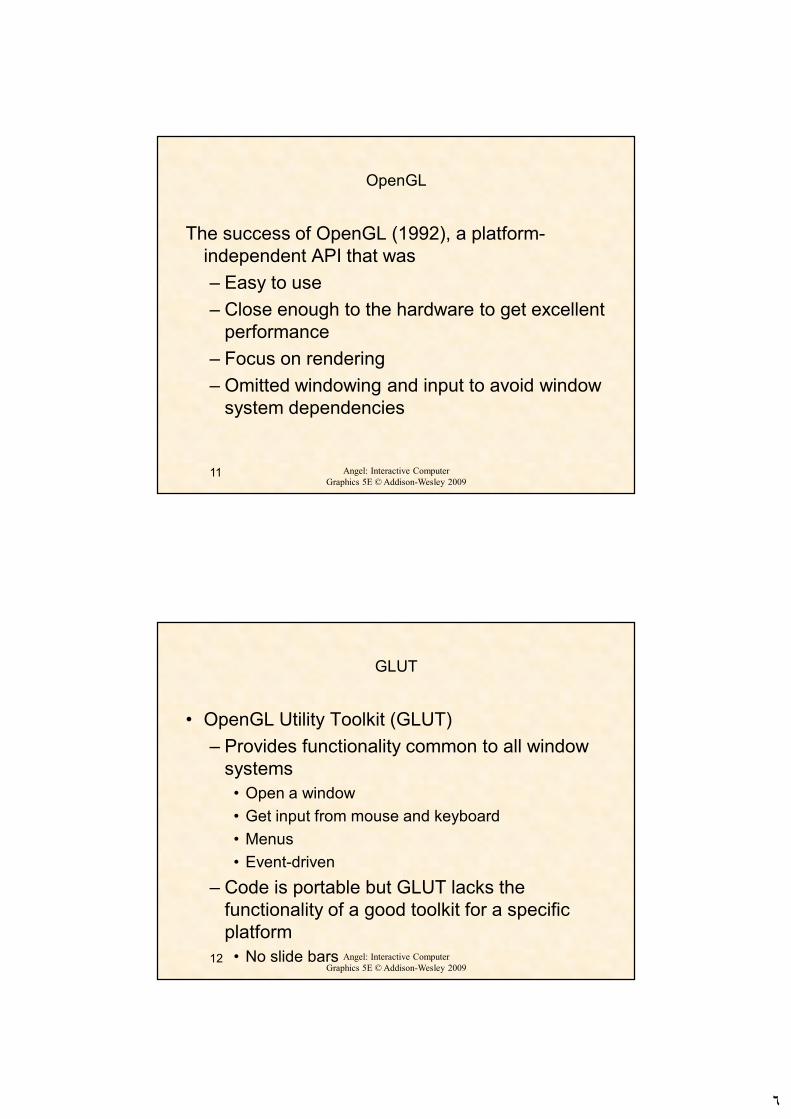
OpenGL
The success of OpenGL (1992), a platform-
independent API that was
– Easy to use
– Close enough to the hardware to get excellent
performance
– Focus on rendering
– Omitted windowing and input to avoid window
system dependencies
12 Angel: Interactive Computer
Graphics 5E © Addison-Wesley 2009
GLUT
• OpenGL Utility Toolkit (GLUT)
– Provides functionality common to all window
systems
• Open a window
• Get input from mouse and keyboard
• Menus
• Event-driven
– Code is portable but GLUT lacks the
functionality of a good toolkit for a specific
platform
• No slide bars
٧
13 Angel: Interactive Computer
Graphics 5E © Addison-Wesley 2009
OpenGL Functions
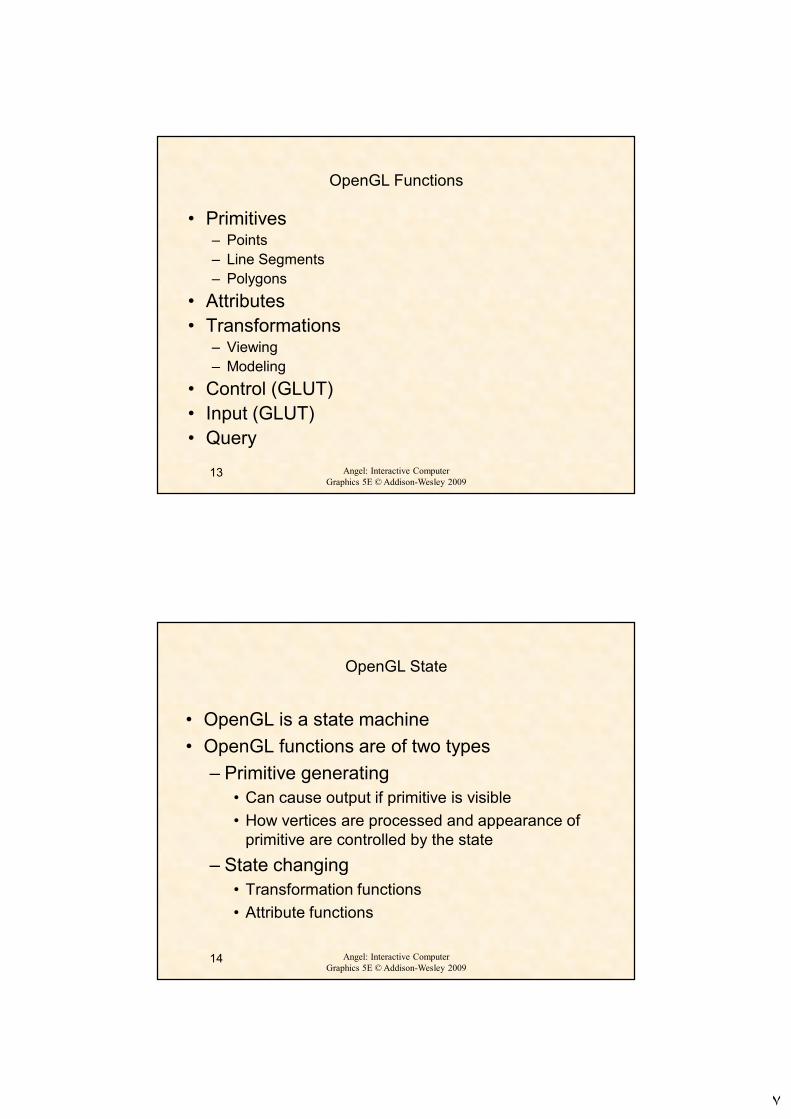
• Primitives– Points
– Line Segments
– Polygons
• Attributes
• Transformations– Viewing
– Modeling
• Control (GLUT)
• Input (GLUT)
• Query
14 Angel: Interactive Computer
Graphics 5E © Addison-Wesley 2009
OpenGL State
• OpenGL is a state machine
• OpenGL functions are of two types
– Primitive generating
• Can cause output if primitive is visible
• How vertices are processed and appearance of
primitive are controlled by the state
– State changing
• Transformation functions
• Attribute functions
٨
15 Angel: Interactive Computer
Graphics 5E © Addison-Wesley 2009
Lack of Object Orientation
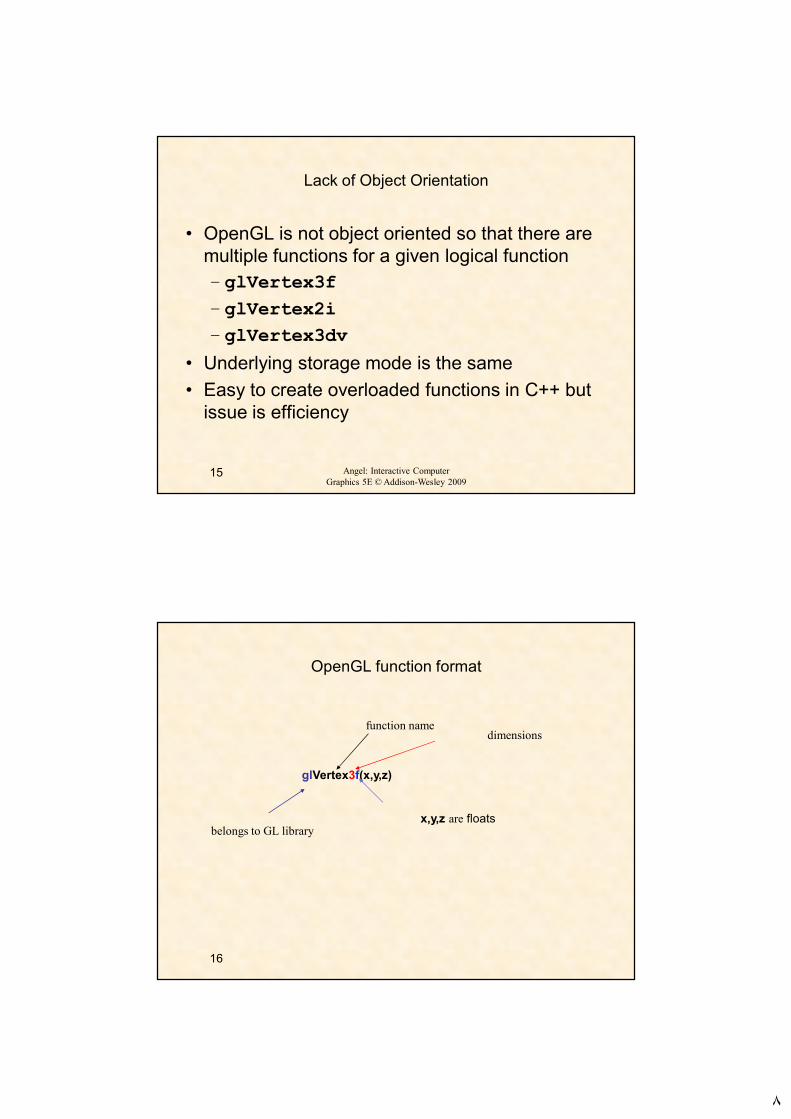
• OpenGL is not object oriented so that there are
multiple functions for a given logical function
– glVertex3f
– glVertex2i
– glVertex3dv
• Underlying storage mode is the same
• Easy to create overloaded functions in C++ but
issue is efficiency
16
OpenGL function format
glVertex3f(x,y,z)
belongs to GL library
function name
x,y,z are floats
dimensions
٩
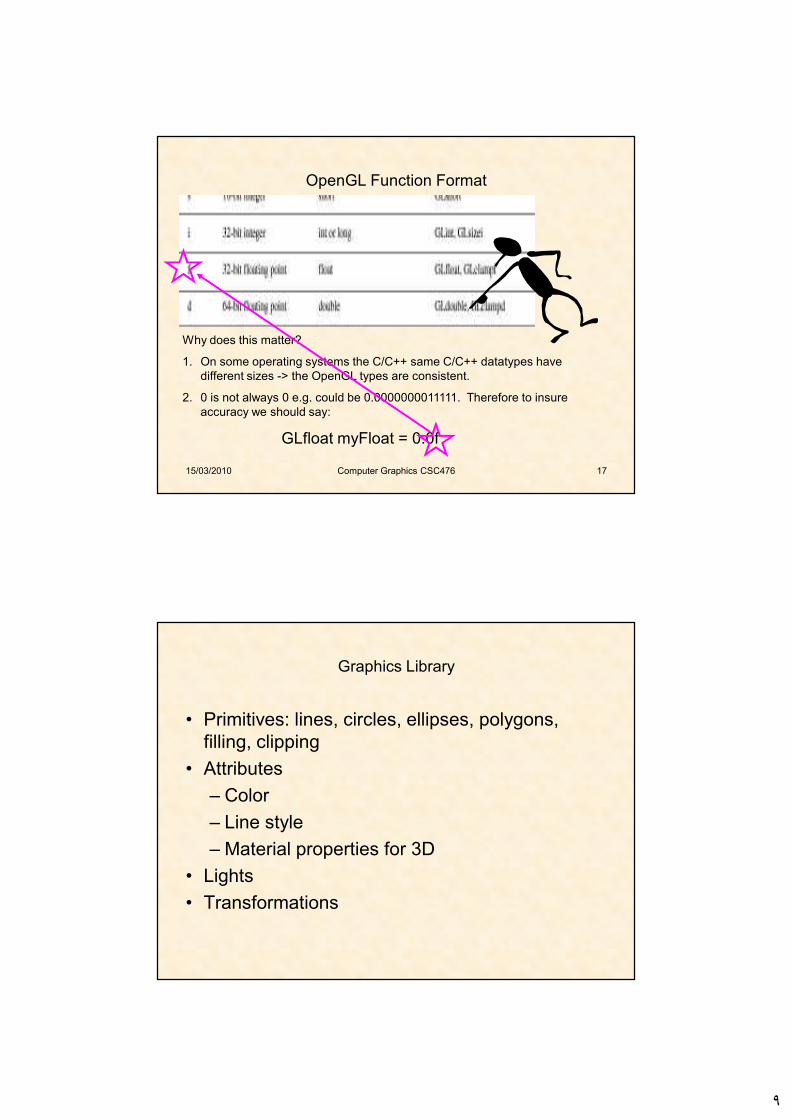
15/03/2010 17
OpenGL Function Format
Why does this matter?
1. On some operating systems the C/C++ same C/C++ datatypes have
different sizes -> the OpenGL types are consistent.
2. 0 is not always 0 e.g. could be 0.0000000011111. Therefore to insure
accuracy we should say:
GLfloat myFloat = 0.0f
Computer Graphics CSC476
Graphics Library
• Primitives: lines, circles, ellipses, polygons,
filling, clipping
• Attributes
– Color
– Line style
– Material properties for 3D
• Lights
• Transformations
١٠
OpenGL
• The most popular raster graphics library, providing a powerful but primitive set of rendering commands
• Already supported by every window systems
• OpenGL Utility Library (GLU) : higher-level routines, part of OpenGL implementation
– Setting up matrices for specific viewing orientations and projections
– Performing polygon tessellation and rendering surfaces
• OpenGL Utility Toolkit (GLUT): window-system-independent high-level library. Need to install this library separately.
OpenGL
• Install OpenGL Utility Toolkit (GLUT) for MS
Windows
– Download GLUT from
http://reality.sgi.com/opengl/glut3/glut3.html
– Unzip the package
– Set “include directory” and “lib directory” in the C
Compiler to include the directory containing glut.h,
glut.lib
– Copy glut32.dll into directory
DRIVE:\WINNT\SYSTEM
• Add #include <glut.h> to the beginning of the
program
١١
OpenGL
• OpenGL Programming Guide:
– http://www.cs.ucf.edu/dsg/dtran/teaching/cps5
60/openGL/install/theredbook.zip
• Nate Robins’ OpenGL Tutors
–
http://www.cs.utah.edu/~narobins/opengl.html
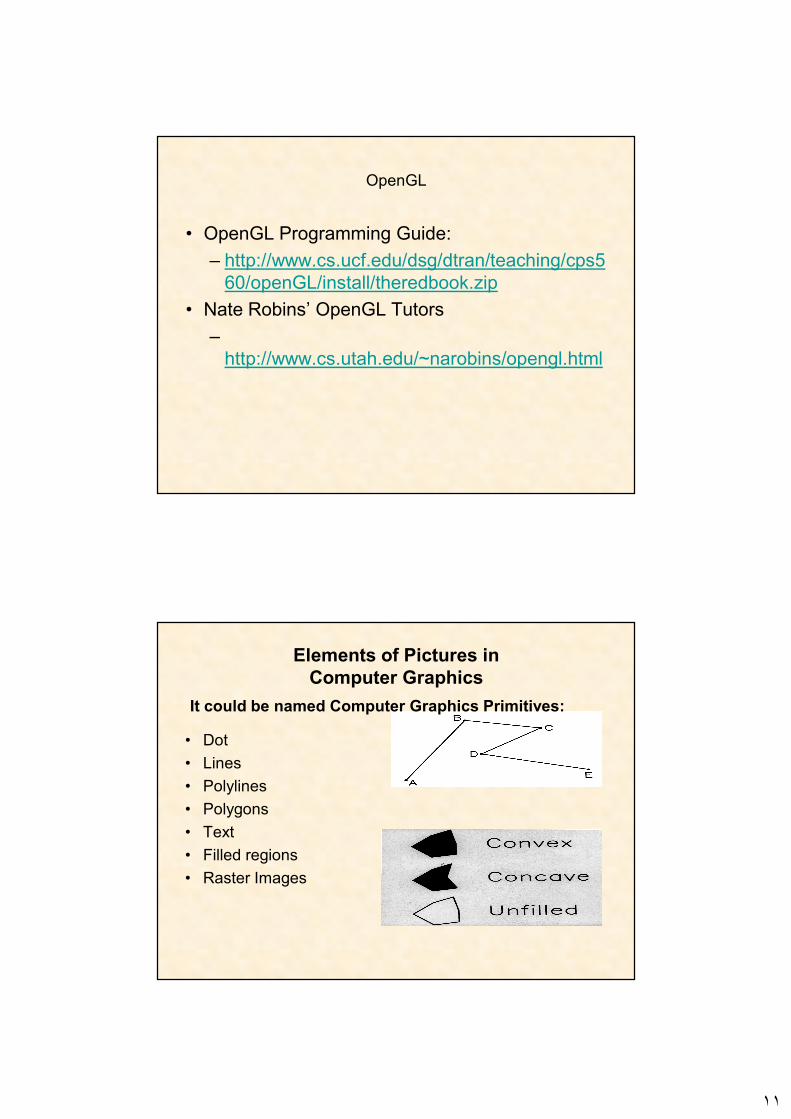
Elements of Pictures in
Computer Graphics
• Dot
• Lines
• Polylines
• Polygons
• Text
• Filled regions
• Raster Images
It could be named Computer Graphics Primitives:
١٢
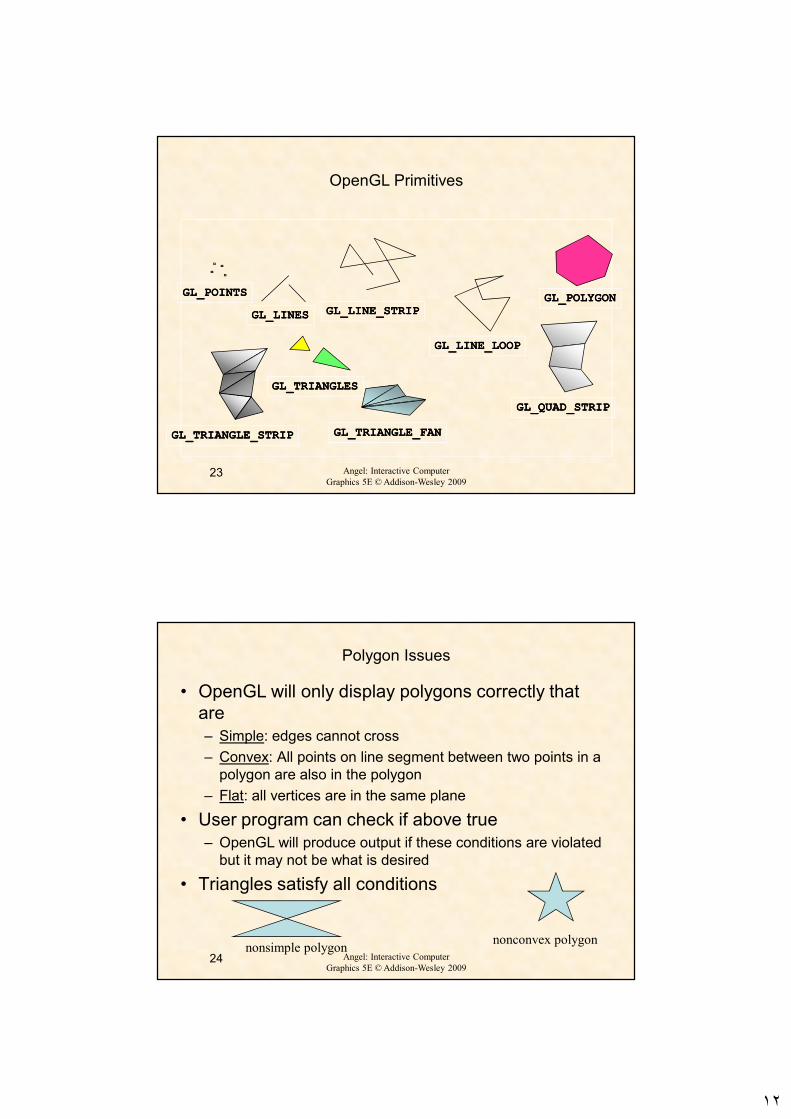
23 Angel: Interactive Computer
Graphics 5E © Addison-Wesley 2009
OpenGL Primitives
GL_QUAD_STRIPGL_QUAD_STRIP
GL_POLYGONGL_POLYGON
GL_TRIANGLE_STRIPGL_TRIANGLE_STRIP GL_TRIANGLE_FANGL_TRIANGLE_FAN
GL_POINTSGL_POINTS
GL_LINESGL_LINES
GL_LINE_LOOPGL_LINE_LOOP
GL_LINE_STRIPGL_LINE_STRIP
GL_TRIANGLESGL_TRIANGLES
24 Angel: Interactive Computer
Graphics 5E © Addison-Wesley 2009
Polygon Issues
• OpenGL will only display polygons correctly that
are
– Simple: edges cannot cross
– Convex: All points on line segment between two points in a
polygon are also in the polygon
– Flat: all vertices are in the same plane
• User program can check if above true
– OpenGL will produce output if these conditions are violated
but it may not be what is desired
• Triangles satisfy all conditions
nonsimple polygonnonconvex polygon
١٣
25 Angel: Interactive Computer
Graphics 5E © Addison-Wesley 2009
Attributes
• Attributes are part of the OpenGL state and
determine the appearance of objects
– Color (points, lines, polygons)
– Size and width (points, lines)
– Stipple pattern (lines, polygons)
– Polygon mode
• Display as filled: solid color or stipple pattern
• Display edges
• Display vertices
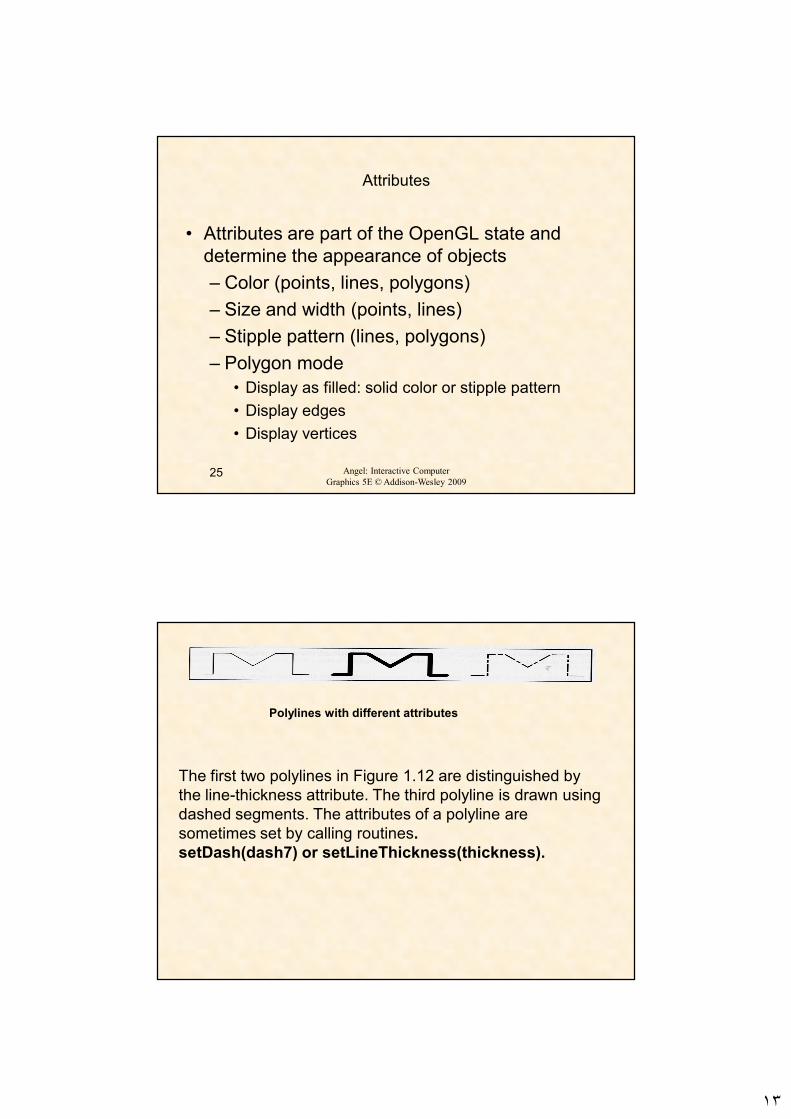
Polylines with different attributes
The first two polylines in Figure 1.12 are distinguished by
the line-thickness attribute. The third polyline is drawn using
dashed segments. The attributes of a polyline are
sometimes set by calling routines.
setDash(dash7) or setLineThickness(thickness).

١٤
• Some graphics devices have two distinct display modes: a text mode and a graphics mode.
• The text mode is used for the simple input and output of characters. Usually, these characters cannot be placed arbitrarily on the display, but rather, can be put only in some row and column of a built-in grid.
• The graphics mode offers a richer set of character shapes than the text mode does, and characters can be placed arbitrarily. Figure 1.14 shows some examples of text drawn graphically.
A routine to draw a character string might look like
drawString(x, y, string);
This routine places the starting point of the string at position (x, y) and
draws the sequence of characters stored in the variable string.
• Text Attributes:
text's font - color – size - spacing - orientation.
• The shape of each character can be defined by a polyline (or more
complicated curves as shown in Figure 1.16a, or by an
arrangement of dots, as shown in Figure 1.16(b).
• Graphics packages come with a set of predefined fonts
١٥
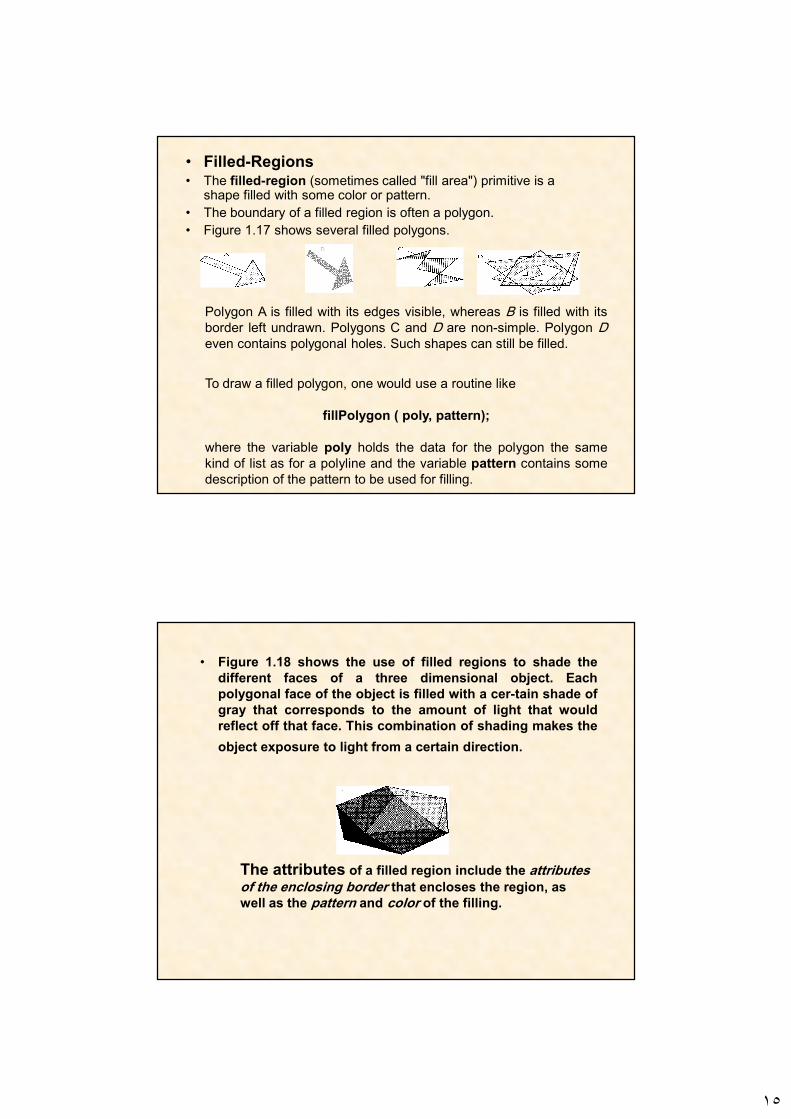
• Filled-Regions• The filled-region (sometimes called "fill area") primitive is a
shape filled with some color or pattern.
• The boundary of a filled region is often a polygon.
• Figure 1.17 shows several filled polygons.
Polygon A is filled with its edges visible, whereas B is filled with its
border left undrawn. Polygons C and D are non-simple. Polygon Deven contains polygonal holes. Such shapes can still be filled.
To draw a filled polygon, one would use a routine like
fillPolygon ( poly, pattern);
where the variable poly holds the data for the polygon the same
kind of list as for a polyline and the variable pattern contains some
description of the pattern to be used for filling.
• Figure 1.18 shows the use of filled regions to shade the
different faces of a three dimensional object. Each
polygonal face of the object is filled with a cer-tain shade of
gray that corresponds to the amount of light that would
reflect off that face. This combination of shading makes the
object exposure to light from a certain direction.
The attributes of a filled region include the attributes
of the enclosing border that encloses the region, as
well as the pattern and color of the filling.
١٦
15/03/2010 31
Colours
• Before you start drawing you will want to set the
colour of the window (background) and the
colour of the drawing (foreground).
• The background and foreground can be
changed at anytime during the program.
Computer Graphics CSC476
15/03/2010 32
Colours
• Colours are specified using a mixture of Red, Green and Blue (RGB).
• Each amount of colour is specified by a float value between 0 and 1.– 0 = none of this colour
– 1 = all of this colour
• A colour is specified as (R,G,B) e.g (1, 0.5, 0.2)
• Can you guess what R, G and B are set to for black and white?
Computer Graphics CSC476
١٧
15/03/2010 33
Colours
• White is:
– (1,1,1)
• Black is:
– (0,0,0);
• Did you think Black would be the addition of all
the colours and hence, (1,1,1) ????
15/03/2010 Computer Graphics CSC476 34
Black is not Black
• Even in art (with paints and stuff) if you mix the primary colours together you will NOT get black!!!
• Mixing pixels of different colours of light is different from mixing paint pigments.
• Adding lights of colour together means adding the light EM waves together.
١٨
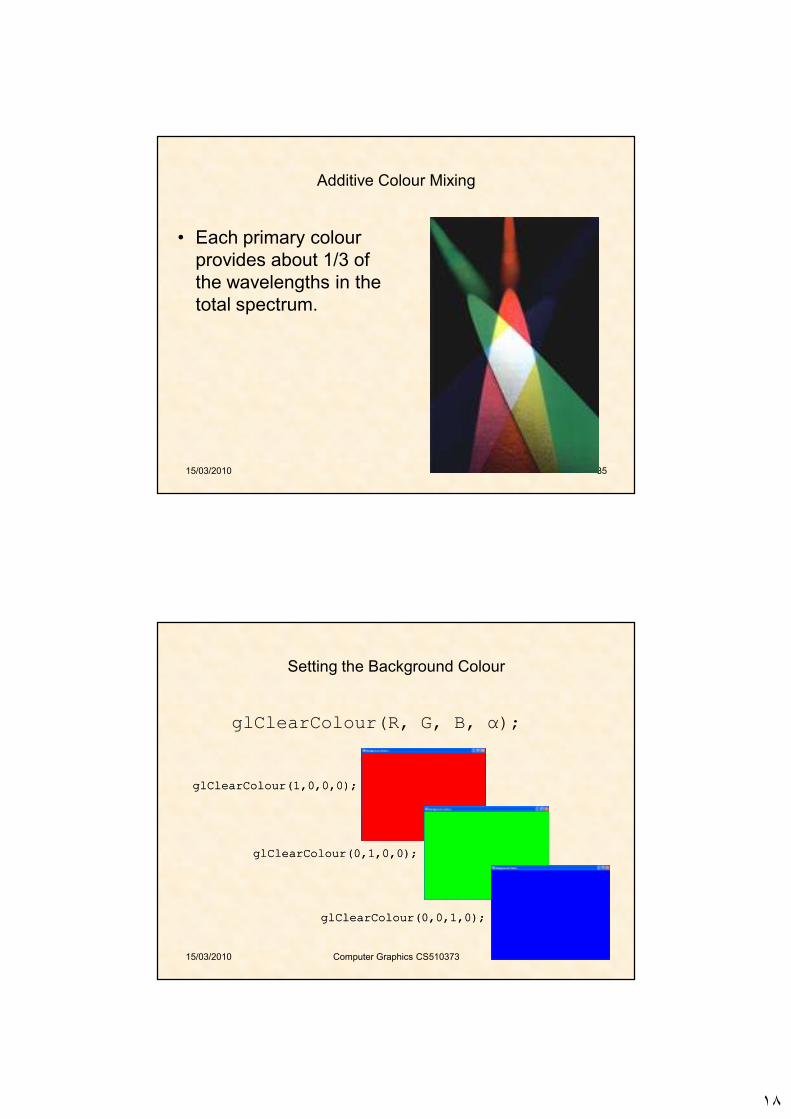
15/03/2010 35
Additive Colour Mixing
• Each primary colour
provides about 1/3 of
the wavelengths in the
total spectrum.
15/03/2010 Computer Graphics CS510373 36
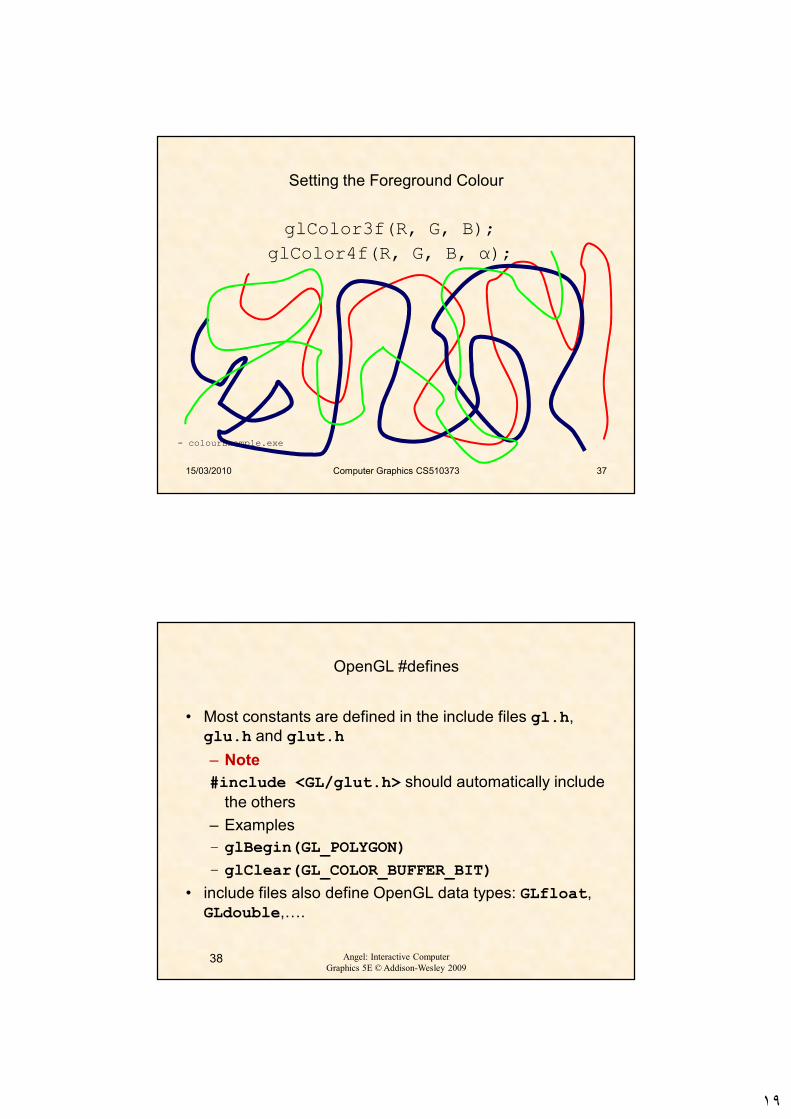
Setting the Background Colour
glClearColour(R, G, B, α);
glClearColour(glClearColour(11,,00,,00,,00););
glClearColour(glClearColour(00,,11,,00,,00););
glClearColour(glClearColour(00,,00,,11,,00););
١٩
15/03/2010 Computer Graphics CS510373 37
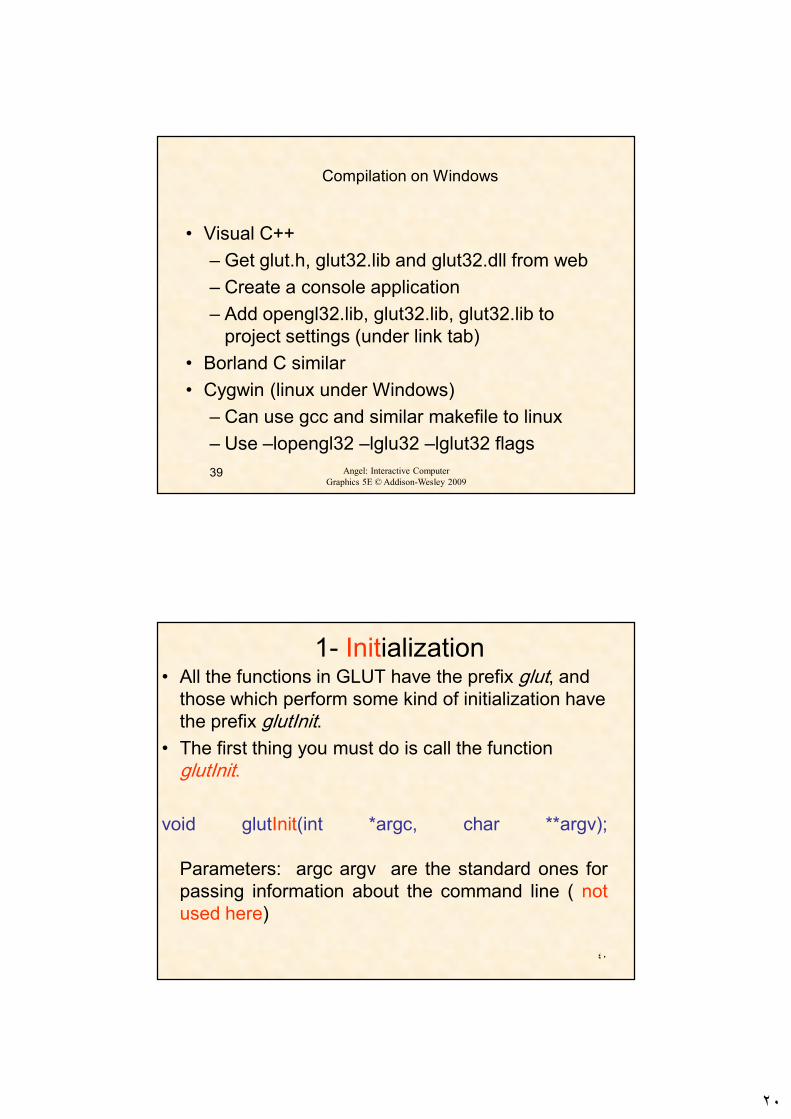
Setting the Foreground Colour
glColor3f(R, G, B);
glColor4f(R, G, B, α);
- colourExample.exe
38 Angel: Interactive Computer
Graphics 5E © Addison-Wesley 2009
OpenGL #defines
• Most constants are defined in the include files gl.h,
glu.h and glut.h
– Note
#include <GL/glut.h> should automatically include
the others
– Examples
– glBegin(GL_POLYGON)
– glClear(GL_COLOR_BUFFER_BIT)
• include files also define OpenGL data types: GLfloat,
GLdouble,….
٢٠
39 Angel: Interactive Computer
Graphics 5E © Addison-Wesley 2009
Compilation on Windows
• Visual C++
– Get glut.h, glut32.lib and glut32.dll from web
– Create a console application
– Add opengl32.lib, glut32.lib, glut32.lib to
project settings (under link tab)
• Borland C similar
• Cygwin (linux under Windows)
– Can use gcc and similar makefile to linux
– Use –lopengl32 –lglu32 –lglut32 flags
٤٠
1- Initialization • All the functions in GLUT have the prefix glut, and
those which perform some kind of initialization have
the prefix glutInit.
• The first thing you must do is call the function
glutInit.
void glutInit(int *argc, char **argv);
Parameters: argc argv are the standard ones for
passing information about the command line ( not
used here)
٢١
٤١
Define our window• After initializing GLUT itself, we're going to define our window.
• First we establish the window's position, i.e. its top left corner.
In order to do this we use the function glutInitWindowPosition.
void glutInitWindowPosition(int x, int y);
glutInitWindowPosition( 100, 150);
Parameters: • x - the number of pixels from the left of the screen. • y - the number of pixels from the top of the screen.
٤٢
Window size• Next we'll choose the window size. In order to do this
we use the function glutInitWindowSize.
void glutInitWindowSize(int width, int height);
glutInitWindowSize(640, 480);
Parameters:
• width - The width of the window
• height - the height of the window
• The values for width and height are only a suggestion, so
avoid choosing negative values.
• When the program is running the user can resize the window
٢٢
٤٣
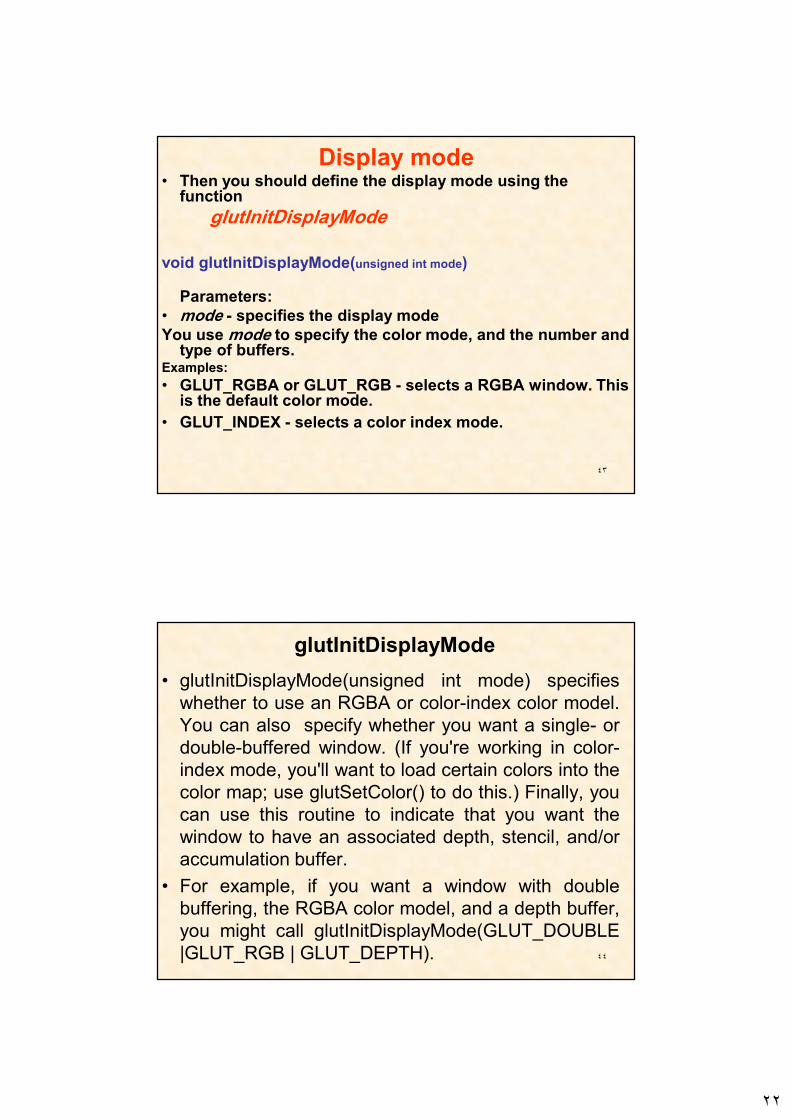
Display mode• Then you should define the display mode using the
function
glutInitDisplayMode
void glutInitDisplayMode(unsigned int mode)
Parameters:
• mode - specifies the display mode
You use mode to specify the color mode, and the number and type of buffers.
Examples:
• GLUT_RGBA or GLUT_RGB - selects a RGBA window. This is the default color mode.
• GLUT_INDEX - selects a color index mode.
glutInitDisplayMode
• glutInitDisplayMode(unsigned int mode) specifies
whether to use an RGBA or color-index color model.
You can also specify whether you want a single- or
double-buffered window. (If you're working in color-
index mode, you'll want to load certain colors into the
color map; use glutSetColor() to do this.) Finally, you
can use this routine to indicate that you want the
window to have an associated depth, stencil, and/or
accumulation buffer.
• For example, if you want a window with double
buffering, the RGBA color model, and a depth buffer,
you might call glutInitDisplayMode(GLUT_DOUBLE
|GLUT_RGB | GLUT_DEPTH). ٤٤
٢٣
٤٥
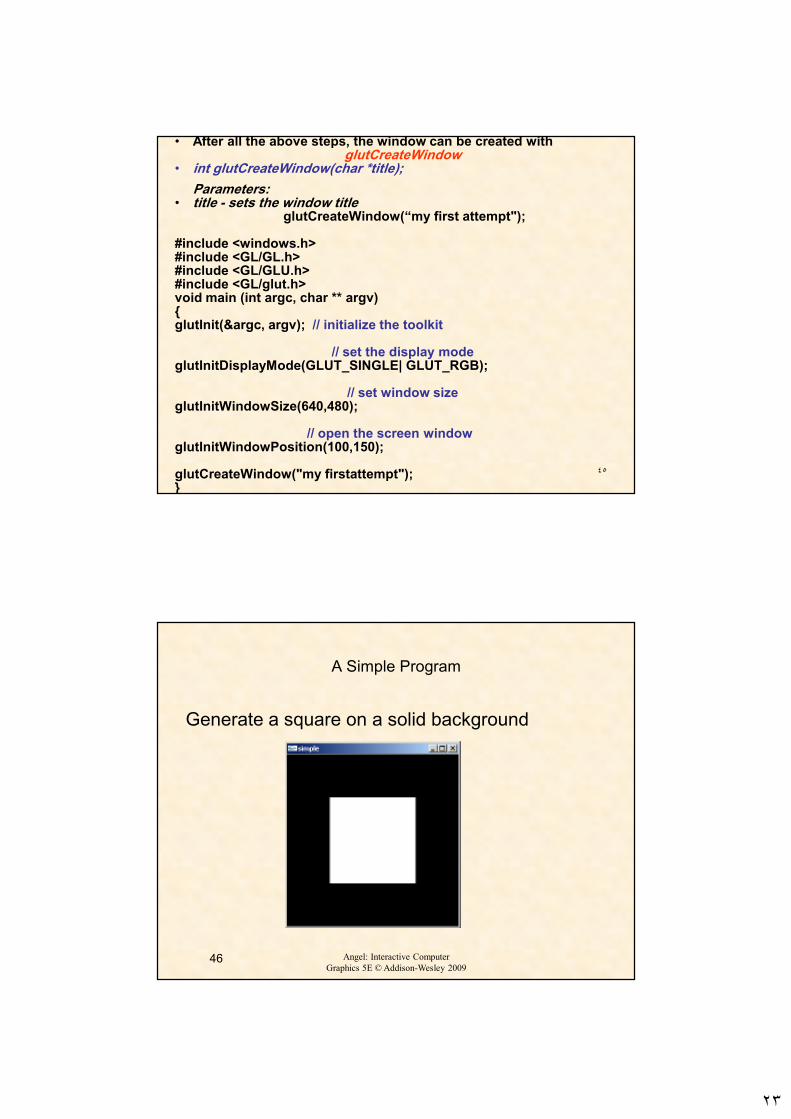
• After all the above steps, the window can be created with glutCreateWindow
• int glutCreateWindow(char *title);
Parameters: • title - sets the window title
glutCreateWindow(“my first attempt");
#include <windows.h>#include <GL/GL.h>#include <GL/GLU.h>#include <GL/glut.h>void main (int argc, char ** argv){glutInit(&argc, argv); // initialize the toolkit
// set the display modeglutInitDisplayMode(GLUT_SINGLE| GLUT_RGB);
// set window sizeglutInitWindowSize(640,480);
// open the screen windowglutInitWindowPosition(100,150);
glutCreateWindow("my firstattempt");}
46 Angel: Interactive Computer
Graphics 5E © Addison-Wesley 2009
A Simple Program
Generate a square on a solid background
٢٤
47 Angel: Interactive Computer
Graphics 5E © Addison-Wesley 2009
simple.c#include <GL/glut.h>
void mydisplay(){
glClear(GL_COLOR_BUFFER_BIT);
glBegin(GL_POLYGON);
glVertex2f(-0.5, -0.5);
glVertex2f(-0.5, 0.5);
glVertex2f(0.5, 0.5);
glVertex2f(0.5, -0.5);
glEnd();
glFlush();
}
int main(int argc, char** argv){
glutCreateWindow("simple");
glutDisplayFunc(mydisplay);
glutMainLoop();
}
48 Angel: Interactive Computer
Graphics 5E © Addison-Wesley 2009
Event Loop
• Note that the program defines a display callbackfunction named mydisplay
– Every glut program must have a display
callback
–– The display callback is executed whenever The display callback is executed whenever
OpenGL decides the display must be OpenGL decides the display must be
refreshedrefreshed, for example when the window is
opened
– The main function ends with the program
entering an event loop
٢٥
٤٩
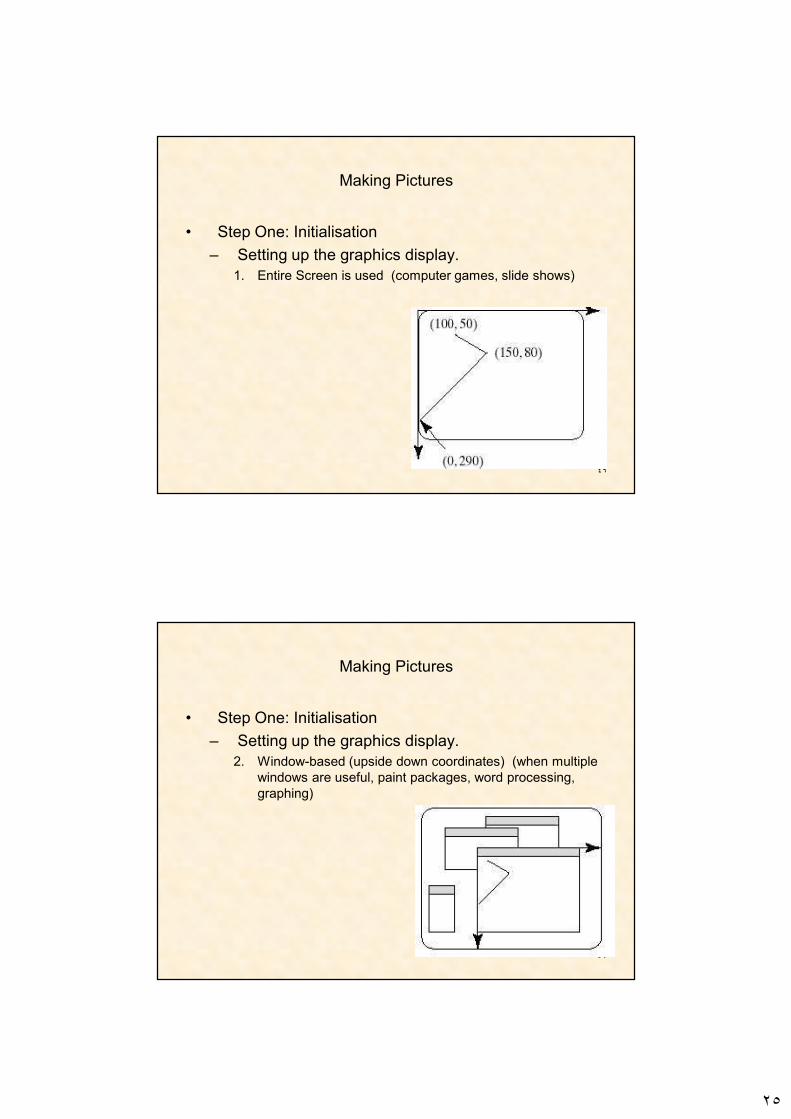
Making Pictures
• Step One: Initialisation
– Setting up the graphics display.
1. Entire Screen is used (computer games, slide shows)
٥٠
Making Pictures
• Step One: Initialisation
– Setting up the graphics display.
2. Window-based (upside down coordinates) (when multiple
windows are useful, paint packages, word processing,
graphing)
٢٦
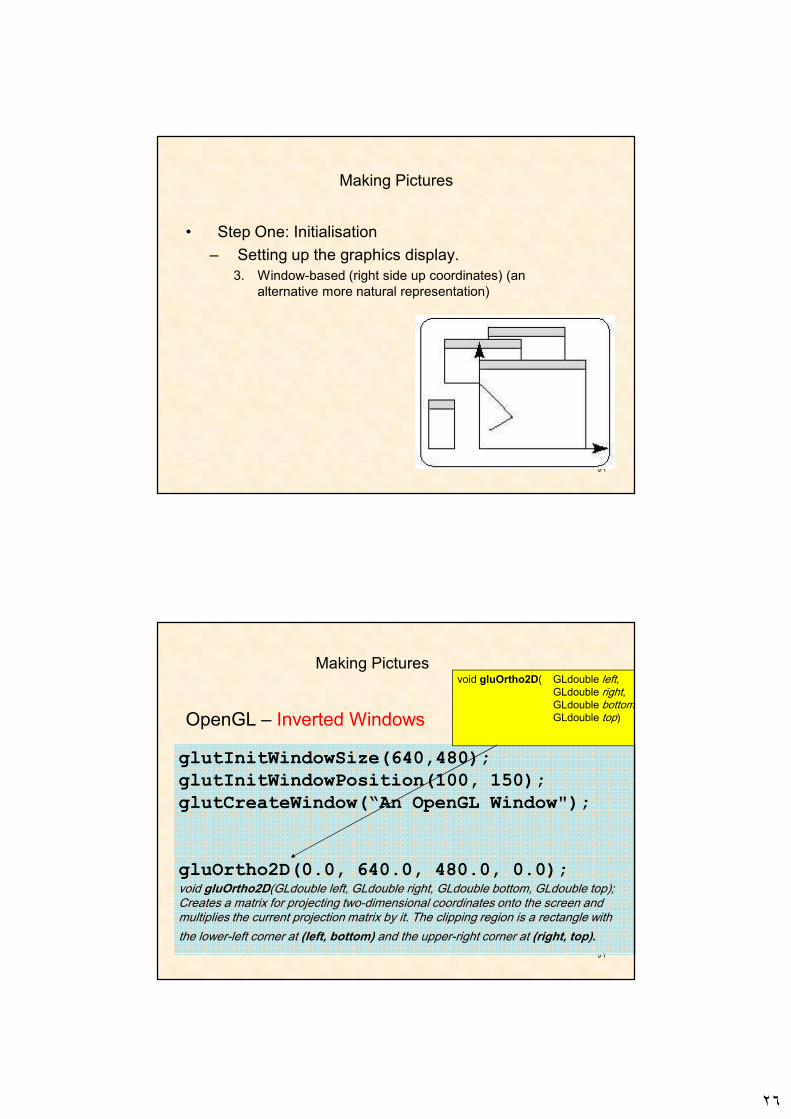
٥١
Making Pictures
• Step One: Initialisation
– Setting up the graphics display.
3. Window-based (right side up coordinates) (an
alternative more natural representation)
٥٢
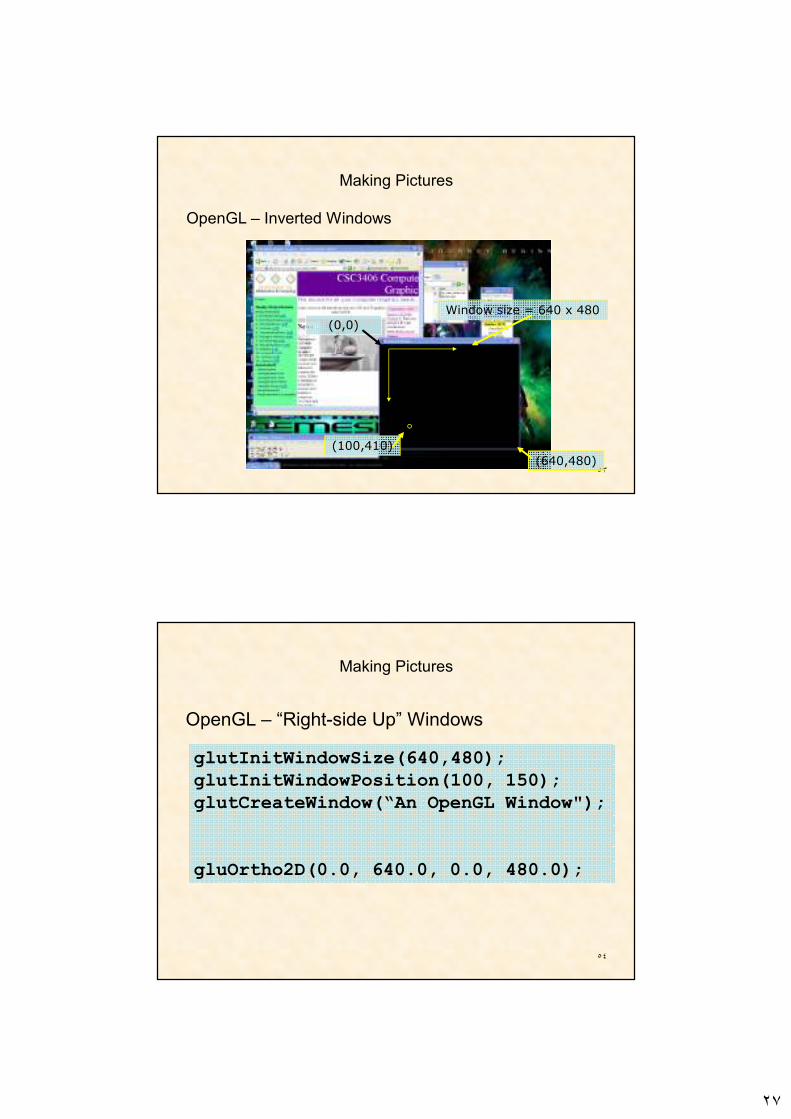
Making Pictures
OpenGL – Inverted Windows
glutInitWindowSize(640,480); glutInitWindowPosition(100, 150); glutCreateWindow(“An OpenGL Window");
gluOrtho2D(0.0, 640.0, 480.0, 0.0);void gluOrtho2D(GLdouble left, GLdouble right, GLdouble bottom, GLdouble top);Creates a matrix for projecting two-dimensional coordinates onto the screen and multiplies the current projection matrix by it. The clipping region is a rectangle with
the lower-left corner at (left, bottom) and the upper-right corner at (right, top).
void gluOrtho2D( GLdouble left,GLdouble right,GLdouble bottom,
GLdouble top)
٢٧
٥٣
Making Pictures
OpenGL – Inverted Windows
Window size = 640 x 480
(640,480)
(0,0)
(100,410)
٥٤
Making Pictures
OpenGL – “Right-side Up” Windows
glutInitWindowSize(640,480); glutInitWindowPosition(100, 150); glutCreateWindow(“An OpenGL Window");
gluOrtho2D(0.0, 640.0, 0.0, 480.0);
٢٨
٥٥
Making Pictures
OpenGL – “Right-side Up” Windows
Window size = 640 x 480
(640,0)
(0,480)
(100,410)
٥٦
#include <windows.h>
#include <GL/GL.h>
#include <GL/GLU.h>
#include <GL/glut.h>
void myInit(void)
{
glClearColor(1.0,1.0,1.0,0.0); // set white background color
glColor3f(0.0f, 0.0f, 0.0f); // set drawing color
glPointSize(8.0);// the dot is 8 by 8 pixels
glMatrixMode(GL_PROJECTION);
glLoadIdentity();
gluOrtho2D(0,640,480,0);
}
void myDisplay(void) // The name is option
{
/* code written here*l
}
Skeleton program
٢٩
٥٧
void main (int argc, char ** argv)
{glutInit(&argc, argv); // initialize the toolkit
// set the display mode
glutInitDisplayMode(GLUT_SINGLE| GLUT_RGB);
// set window size
glutInitWindowSize(640,480);
// open the screen window
glutInitWindowPosition(100,150);
glutCreateWindow("my firstattempt");
myInit(); // additional initializations as necessary
// register callback functionsglutDisplayFunc(myDisplay);
glutMainLoop();
}GLUT provides a function that gets the application in a never ending
loop, always waiting for the next event to process. The GLUT
function is glutMainLoop,
٥٨
If you run this code, you'll obtain an empty black console window. Furthermore after a few seconds the window disappears.
Example 1:
The function presented bellow will clear the color buffer will clear the color buffer and draw 3 points.
void myDisplaymyDisplay(void) // The name of this //function is up to you
{
glClear(GL_COLOR_BUFFER_BIT);
glBegin(GL_POINTS);
glVertex2i(100,50);
glVertex2i(100,130);
glVertex2i(150,130);
glEnd();
glFlush(); // send all output to display
}
The openGL function that will call will call our implemented myDisplay function is
void void glutDisplayFuncglutDisplayFunc(void (*(void (*funcfunc)(void));)(void));
Parameters:
funcfunc - the name of the function to be called when the window needs to be redrawn.
In our example myDisplay
glutDisplayFuncglutDisplayFunc((myDisplaymyDisplay););
٣٠
٥٩
60 Angel: Interactive Computer
Graphics 5E © Addison-Wesley 2009
simple.c revisited
• In this version, we shall see the same output but
we have defined all the relevant state values
through function calls using the default values
• In particular, we set
– Colors
– Viewing conditions
– Window properties
٣١
61 Angel: Interactive Computer
Graphics 5E © Addison-Wesley 2009
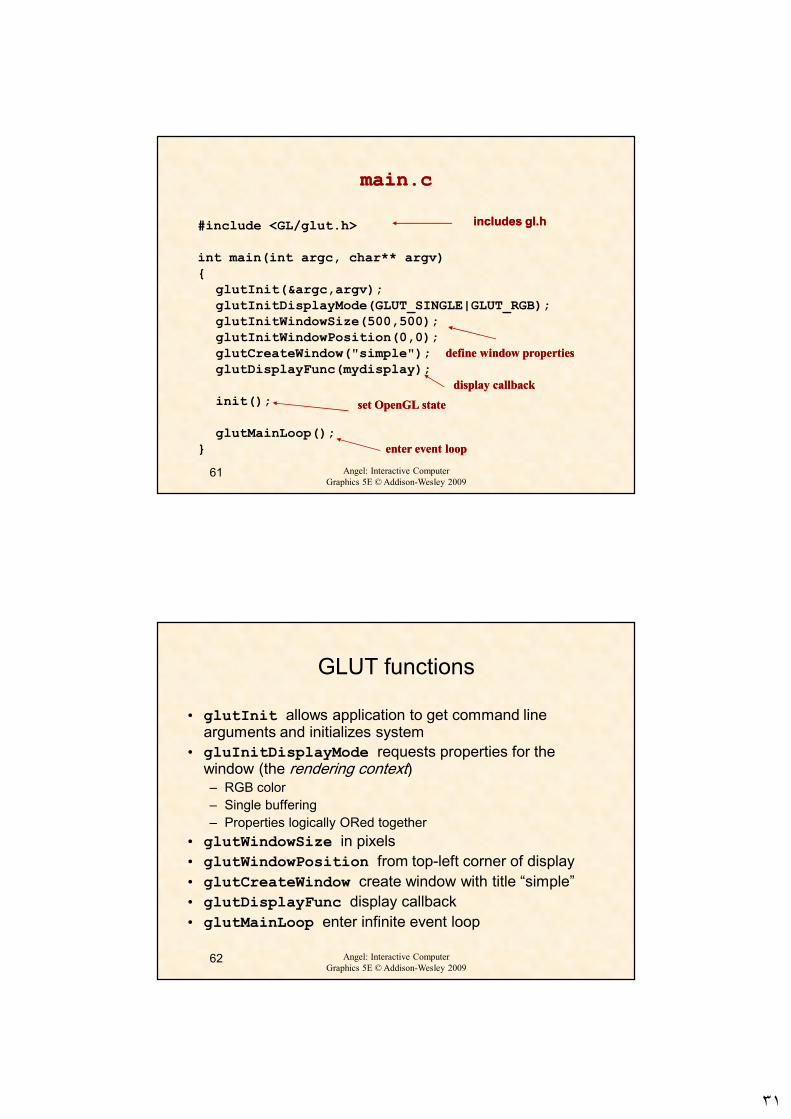
main.cmain.c
#include <GL/glut.h>
int main(int argc, char** argv){
glutInit(&argc,argv); glutInitDisplayMode(GLUT_SINGLE|GLUT_RGB); glutInitWindowSize(500,500); glutInitWindowPosition(0,0); glutCreateWindow("simple"); glutDisplayFunc(mydisplay);
init();
glutMainLoop();}
includes gl.hincludes gl.h
define window propertiesdefine window properties
set OpenGL stateset OpenGL state
enter event loopenter event loop
display callbackdisplay callback
62 Angel: Interactive Computer
Graphics 5E © Addison-Wesley 2009
GLUT functions
• glutInit allows application to get command line arguments and initializes system
• gluInitDisplayMode requests properties for the window (the rendering context)– RGB color
– Single buffering
– Properties logically ORed together
• glutWindowSize in pixels
• glutWindowPosition from top-left corner of display
• glutCreateWindow create window with title “simple”
• glutDisplayFunc display callback
• glutMainLoop enter infinite event loop
٣٢
6363 Angel: Interactive Computer Angel: Interactive Computer
Graphics Graphics 55E © AddisonE © Addison--Wesley Wesley
20092009
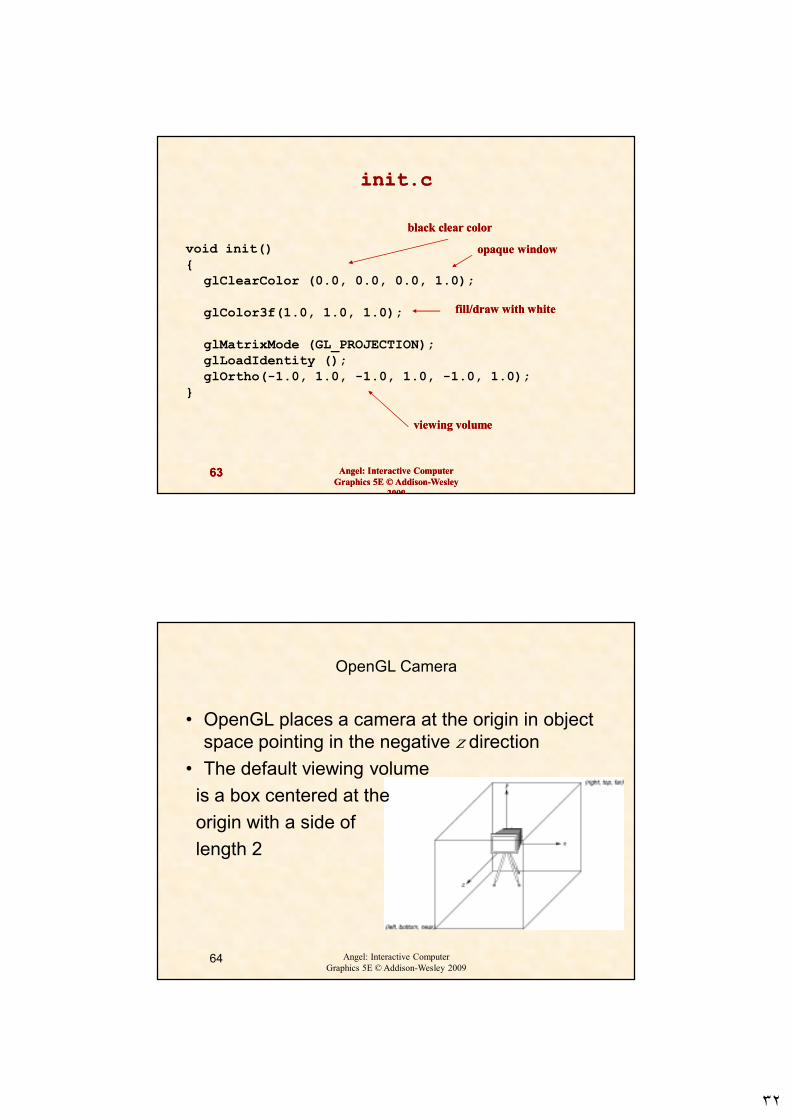
init.cinit.c
void init(){
glClearColor (0.0, 0.0, 0.0, 1.0);
glColor3f(1.0, 1.0, 1.0);
glMatrixMode (GL_PROJECTION); glLoadIdentity (); glOrtho(-1.0, 1.0, -1.0, 1.0, -1.0, 1.0);
}
black clear colorblack clear color
opaque windowopaque window
fill/draw with whitefill/draw with white
viewing volumeviewing volume
64 Angel: Interactive Computer
Graphics 5E © Addison-Wesley 2009
OpenGL Camera
• OpenGL places a camera at the origin in object
space pointing in the negative z direction
• The default viewing volume
is a box centered at the
origin with a side of
length 2
٣٣
65 Angel: Interactive Computer
Graphics 5E © Addison-Wesley 2009
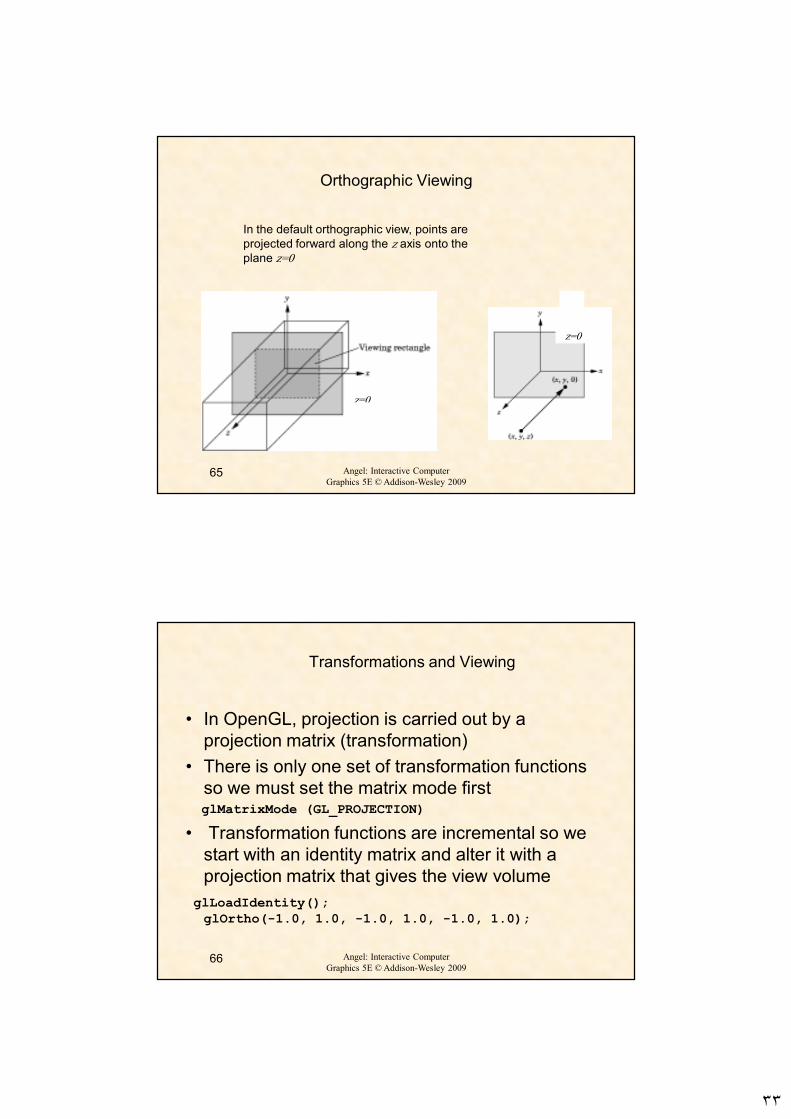
Orthographic Viewing
z=0
z=0
In the default orthographic view, points are
projected forward along the z axis onto the
plane z=0
66 Angel: Interactive Computer
Graphics 5E © Addison-Wesley 2009
Transformations and Viewing
• In OpenGL, projection is carried out by a
projection matrix (transformation)
• There is only one set of transformation functions
so we must set the matrix mode first glMatrixMode (GL_PROJECTION)
• Transformation functions are incremental so we
start with an identity matrix and alter it with a
projection matrix that gives the view volume
glLoadIdentity(); glOrtho(-1.0, 1.0, -1.0, 1.0, -1.0, 1.0);
٣٤
67 Angel: Interactive Computer
Graphics 5E © Addison-Wesley 2009
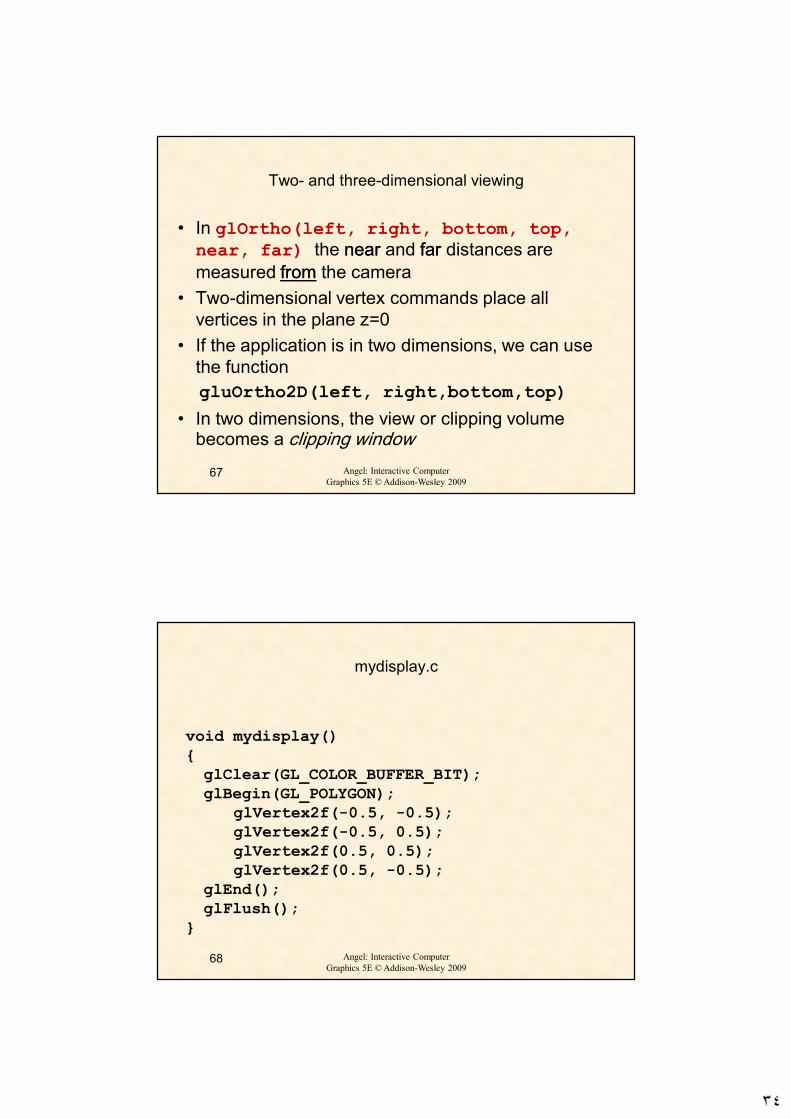
Two- and three-dimensional viewing
• In glOrtho(left, right, bottom, top, near, far) the nearnear and farfar distances are
measured fromfrom the camera
• Two-dimensional vertex commands place all
vertices in the plane z=0
• If the application is in two dimensions, we can use
the function
gluOrtho2D(left, right,bottom,top)
• In two dimensions, the view or clipping volume becomes a clipping window
68 Angel: Interactive Computer
Graphics 5E © Addison-Wesley 2009
mydisplay.c
void mydisplay(){glClear(GL_COLOR_BUFFER_BIT); glBegin(GL_POLYGON);
glVertex2f(-0.5, -0.5); glVertex2f(-0.5, 0.5); glVertex2f(0.5, 0.5); glVertex2f(0.5, -0.5);
glEnd();glFlush();
}
٣٥
٦٩
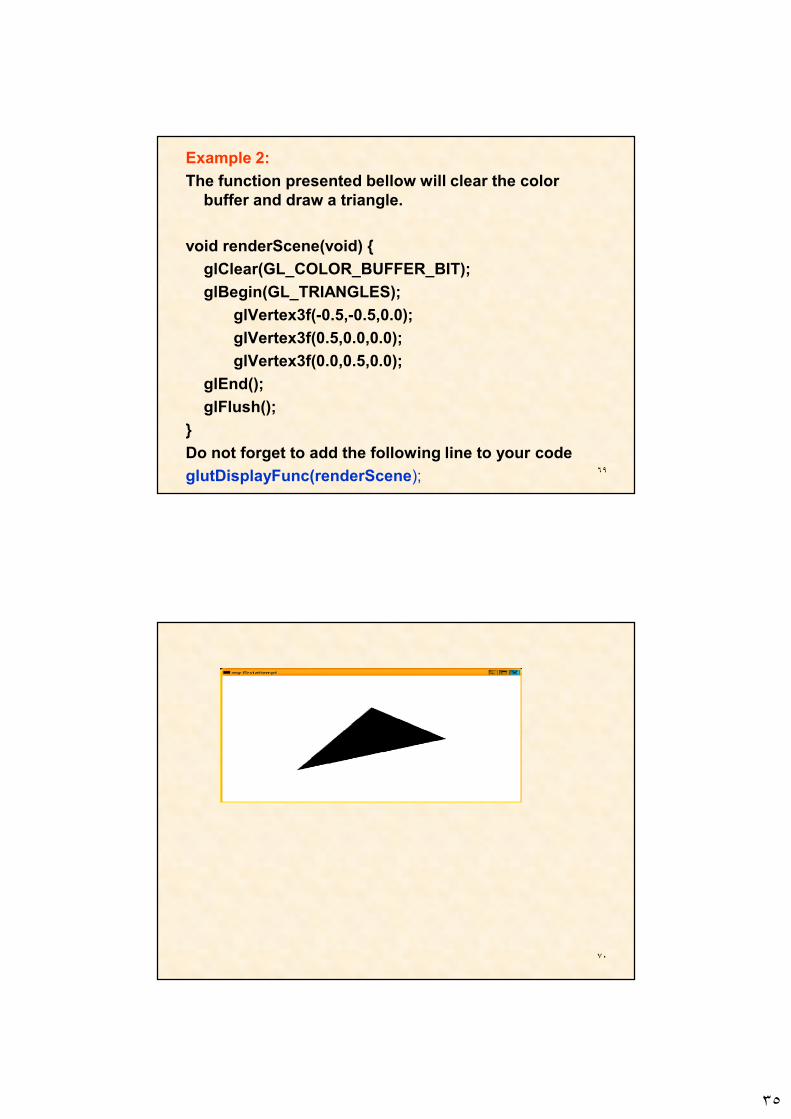
Example 2:
The function presented bellow will clear the color
buffer and draw a triangle.
void renderScene(void) {
glClear(GL_COLOR_BUFFER_BIT);
glBegin(GL_TRIANGLES);
glVertex3f(-0.5,-0.5,0.0);
glVertex3f(0.5,0.0,0.0);
glVertex3f(0.0,0.5,0.0);
glEnd();
glFlush();
}
Do not forget to add the following line to your code
glutDisplayFunc(renderScene);
٧٠
٣٦
٧١
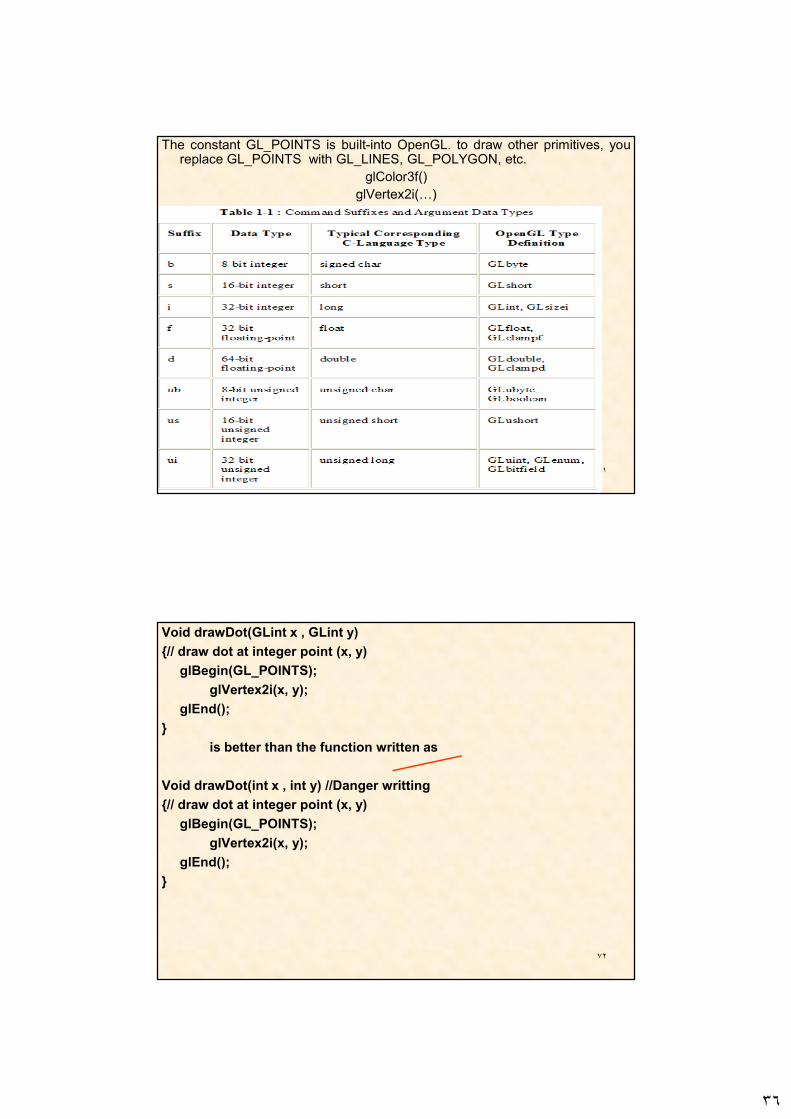
The constant GL_POINTS is built-into OpenGL. to draw other primitives, youreplace GL_POINTS with GL_LINES, GL_POLYGON, etc.
glColor3f()
glVertex2i(…)
٧٢
Void drawDot(GLint x , GLint y)
{// draw dot at integer point (x, y)
glBegin(GL_POINTS);
glVertex2i(x, y);
glEnd();
}
is better than the function written as
Void drawDot(int x , int y) //Danger writting
{// draw dot at integer point (x, y)
glBegin(GL_POINTS);
glVertex2i(x, y);
glEnd();
}
٣٧
٧٣
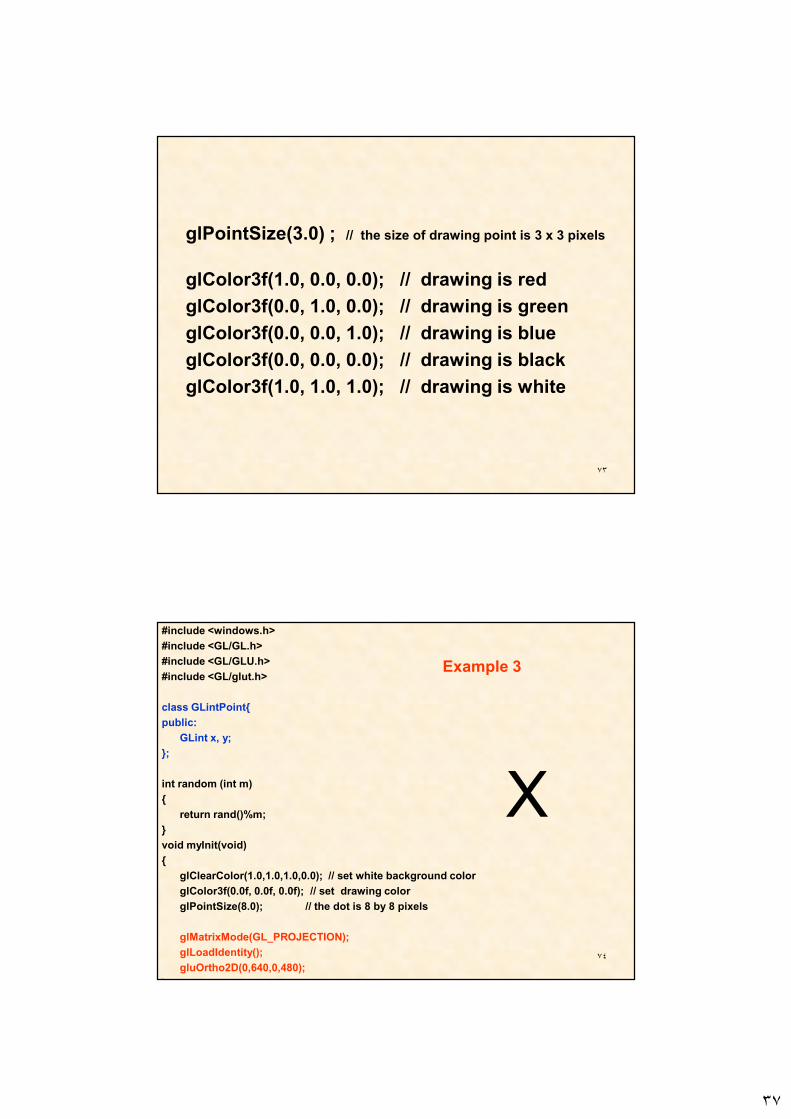
glPointSize(3.0) ; // the size of drawing point is 3 x 3 pixels
glColor3f(1.0, 0.0, 0.0); // drawing is red
glColor3f(0.0, 1.0, 0.0); // drawing is green
glColor3f(0.0, 0.0, 1.0); // drawing is blue
glColor3f(0.0, 0.0, 0.0); // drawing is black
glColor3f(1.0, 1.0, 1.0); // drawing is white
٧٤
#include <windows.h>
#include <GL/GL.h>
#include <GL/GLU.h>
#include <GL/glut.h>
class GLintPoint{
public:
GLint x, y;
};
int random (int m)
{
return rand()%m;
}
void myInit(void)
{
glClearColor(1.0,1.0,1.0,0.0); // set white background color
glColor3f(0.0f, 0.0f, 0.0f); // set drawing color
glPointSize(8.0); // the dot is 8 by 8 pixels
glMatrixMode(GL_PROJECTION);
glLoadIdentity();
gluOrtho2D(0,640,0,480);
}
Example 3
X
٣٨
٧٥
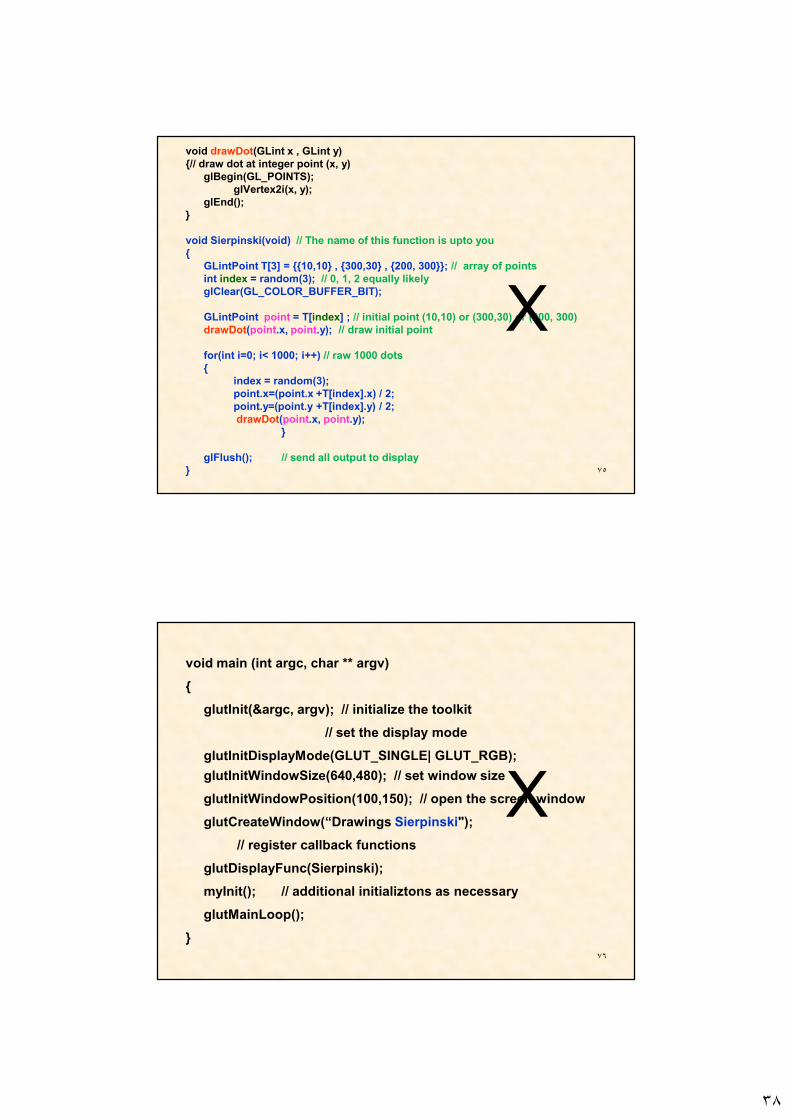
void drawDot(GLint x , GLint y)
{// draw dot at integer point (x, y)
glBegin(GL_POINTS);
glVertex2i(x, y);
glEnd();
}
void Sierpinski(void) // The name of this function is upto you
{
GLintPoint T[3] = {{10,10} , {300,30} , {200, 300}}; // array of points
int index = random(3); // 0, 1, 2 equally likely
glClear(GL_COLOR_BUFFER_BIT);
GLintPoint point = T[index] ; // initial point (10,10) or (300,30) or (200, 300)
drawDot(point.x, point.y); // draw initial point
for(int i=0; i< 1000; i++) // raw 1000 dots
{
index = random(3);
point.x=(point.x +T[index].x) / 2;
point.y=(point.y +T[index].y) / 2;
drawDot(point.x, point.y);
}
glFlush(); // send all output to display
}
X
٧٦
void main (int argc, char ** argv)
{
glutInit(&argc, argv); // initialize the toolkit
// set the display mode
glutInitDisplayMode(GLUT_SINGLE| GLUT_RGB);
glutInitWindowSize(640,480); // set window size
glutInitWindowPosition(100,150); // open the screen window
glutCreateWindow(“Drawings Sierpinski");
// register callback functions
glutDisplayFunc(Sierpinski);
myInit(); // additional initializtons as necessary
glutMainLoop();
}
X
٣٩
٧٧
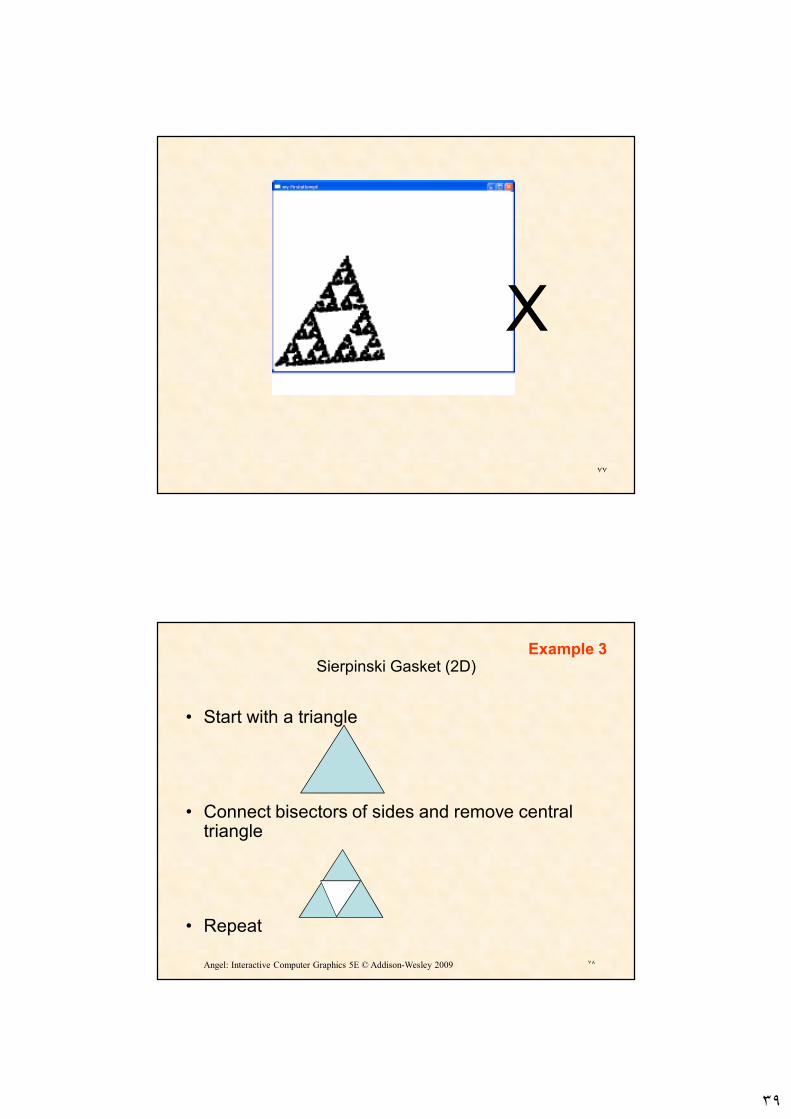
X
٧٨Angel: Interactive Computer Graphics 5E © Addison-Wesley 2009
Sierpinski Gasket (2D)
• Start with a triangle
• Connect bisectors of sides and remove central triangle
• Repeat
Example 3

٤٠
٧٩Angel: Interactive Computer Graphics 5E © Addison-Wesley 2009
Example
• Five subdivisions
٨٠Angel: Interactive Computer Graphics 5E © Addison-Wesley 2009
The gasket as a fractal
• Consider the filled area (black) and the
perimeter (the length of all the lines around the
filled triangles)
• As we continue subdividing
– the area goes to zero
– but the perimeter goes to infinity
• This is not an ordinary geometric object
– It is neither two- nor three-dimensional
• It is a fractal (fractional dimension) object
٤١
٨١Angel: Interactive Computer Graphics 5E © Addison-Wesley 2009
Gasket Program
#include <GL/glut.h>
/* initial triangle */
GLfloat v[3][2]={{-1.0, -0.58}, {1.0, -0.58}, {0.0, 1.15}};
int n; /* number of recursive steps */
٨٢Angel: Interactive Computer Graphics 5E © Addison-Wesley 2009
Draw one triangle
void triangle( GLfloat *a, GLfloat *b, GLfloat *c)
/* display one triangle */{
glVertex2fv(a); glVertex2fv(b); glVertex2fv(c);
}
٤٢
٨٣Angel: Interactive Computer Graphics 5E © Addison-Wesley 2009
Triangle Subdivision
void divide_triangle(GLfloat *a, GLfloat *b, GLfloat *c, int m)
{/* triangle subdivision using vertex numbers */
point2 v0, v1, v2;int j;if(m>0){
for(j=0; j<2; j++) v0[j]=(a[j]+b[j])/2;for(j=0; j<2; j++) v1[j]=(a[j]+c[j])/2;for(j=0; j<2; j++) v2[j]=(b[j]+c[j])/2;divide_triangle(a, v0, v1, m-1);divide_triangle(c, v1, v2, m-1);divide_triangle(b, v2, v0, m-1);
}else(triangle(a,b,c));
/* draw triangle at end of recursion */}
٨٤Angel: Interactive Computer Graphics 5E © Addison-Wesley 2009
display and init Functions
void display(){
glClear(GL_COLOR_BUFFER_BIT);
glBegin(GL_TRIANGLES);divide_triangle(v[0], v[1], v[2], n);
glEnd();
glFlush();}
void myinit(){
glMatrixMode(GL_PROJECTION);glLoadIdentity();gluOrtho2D(-2.0, 2.0, -2.0, 2.0);glMatrixMode(GL_MODELVIEW);glClearColor (1.0, 1.0, 1.0,1.0)glColor3f(0.0,0.0,0.0);
}
٤٣
٨٥Angel: Interactive Computer Graphics 5E © Addison-Wesley 2009
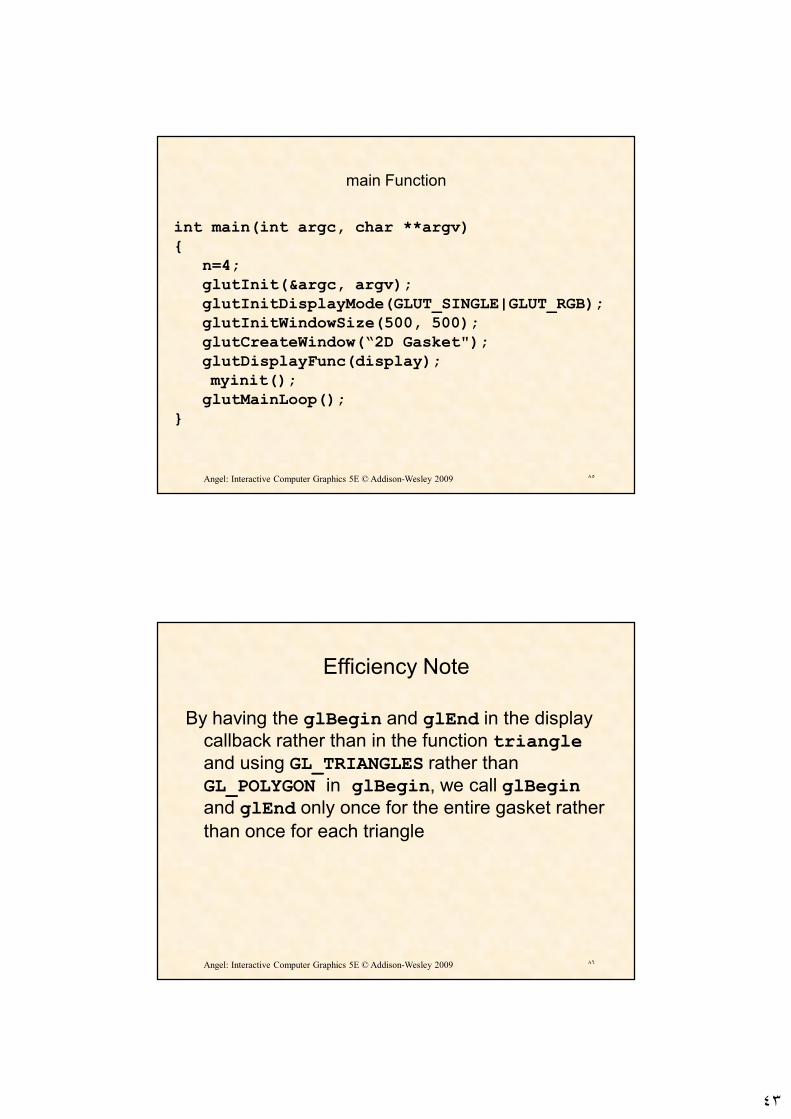
main Function
int main(int argc, char **argv){
n=4;glutInit(&argc, argv);glutInitDisplayMode(GLUT_SINGLE|GLUT_RGB);glutInitWindowSize(500, 500);glutCreateWindow(“2D Gasket");glutDisplayFunc(display);myinit();glutMainLoop();
}
٨٦Angel: Interactive Computer Graphics 5E © Addison-Wesley 2009
Efficiency Note
By having the glBegin and glEnd in the display
callback rather than in the function triangleand using GL_TRIANGLES rather than
GL_POLYGON in glBegin, we call glBeginand glEnd only once for the entire gasket rather
than once for each triangle
٤٤
15/03/2010 87
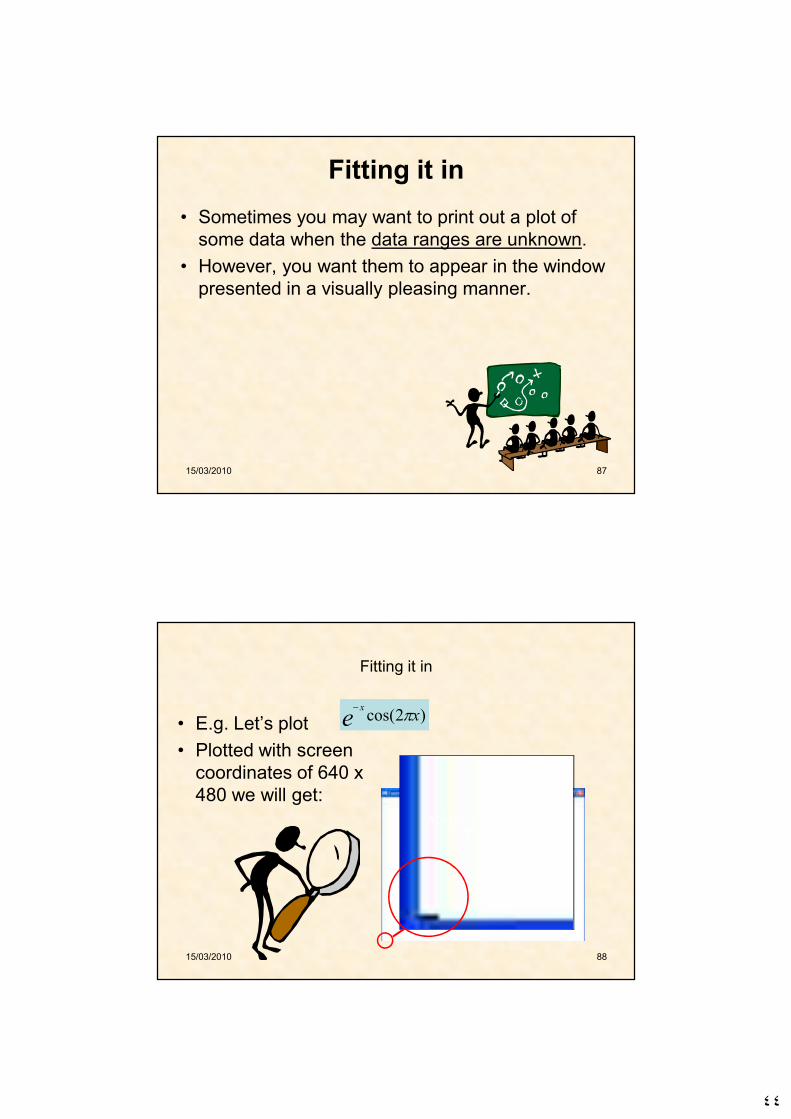
Fitting it in
• Sometimes you may want to print out a plot of
some data when the data ranges are unknown.
• However, you want them to appear in the window
presented in a visually pleasing manner.
15/03/2010 88
Fitting it in
• E.g. Let’s plot
• Plotted with screen
coordinates of 640 x
480 we will get:
)2cos( xex
π−
A data plot is no good if we can’t see it!!
٤٥
15/03/2010 89
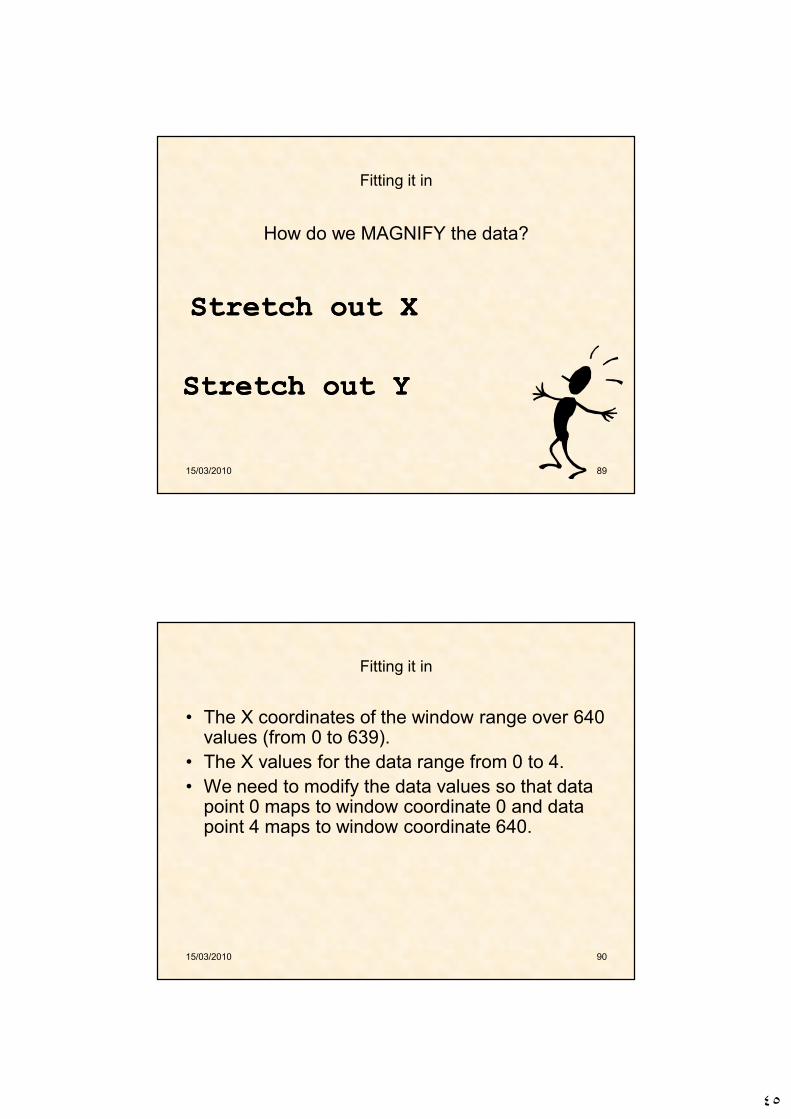
Fitting it in
How do we MAGNIFY the data?
Stretch out XStretch out X
Stretch out YStretch out Y
15/03/2010 90
Fitting it in
• The X coordinates of the window range over 640 values (from 0 to 639).
• The X values for the data range from 0 to 4.
• We need to modify the data values so that data point 0 maps to window coordinate 0 and data point 4 maps to window coordinate 640.
٤٦
15/03/2010 91
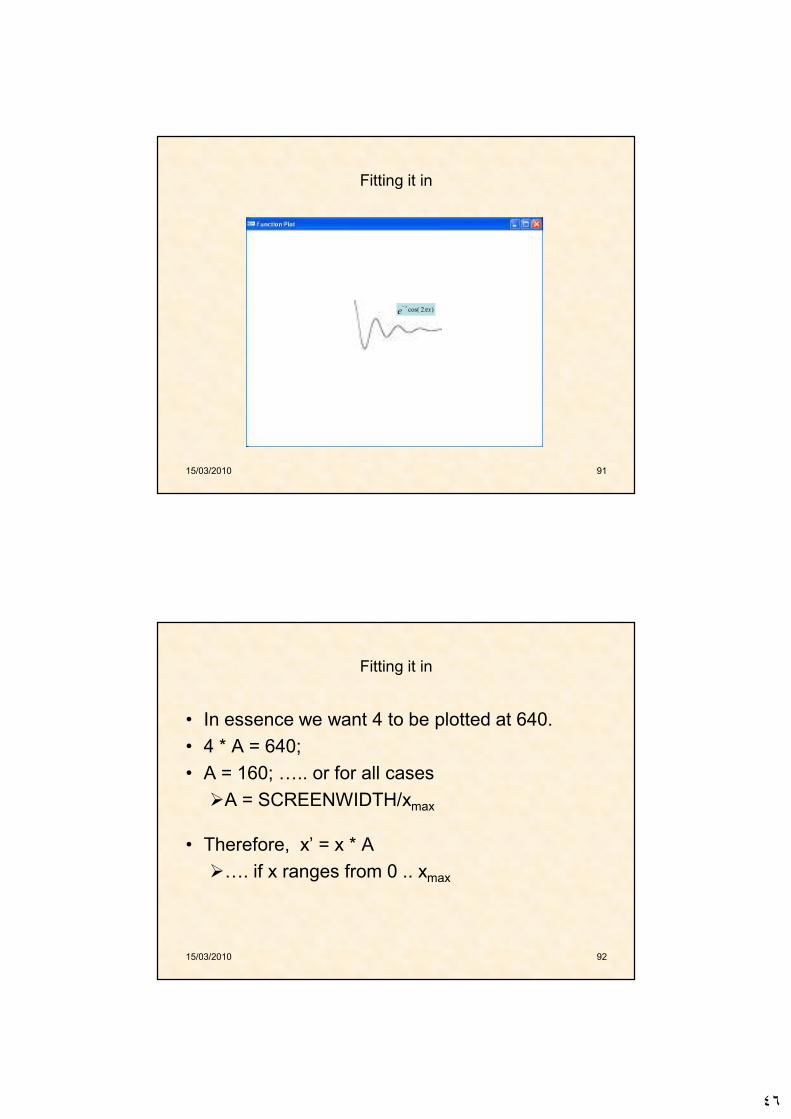
Fitting it in
00 44
)2cos( xex
π−
15/03/2010 92
Fitting it in
• In essence we want 4 to be plotted at 640.
• 4 * A = 640;
• A = 160; ….. or for all cases
�A = SCREENWIDTH/xmax
• Therefore, x’ = x * A
�…. if x ranges from 0 .. xmax
٤٧
15/03/2010 93
Fitting it in
• If x ranges from say 1 to 4 then we will want to
stretch a range of 3 out instead of 4, therefore:
�A = SCREENWIDTH/(xmax – xmin)
• The same applies for the y coordinates:
�B = SCREENHEIGHT /(ymax-ymin)
15/03/2010 94
Fitting it in
• But what is ymin and ymax ??
• We know x because it is the range we set… but
y is not known unless you calculate y for each x
and record the minimum and maximum values.
٤٨
15/03/2010 95
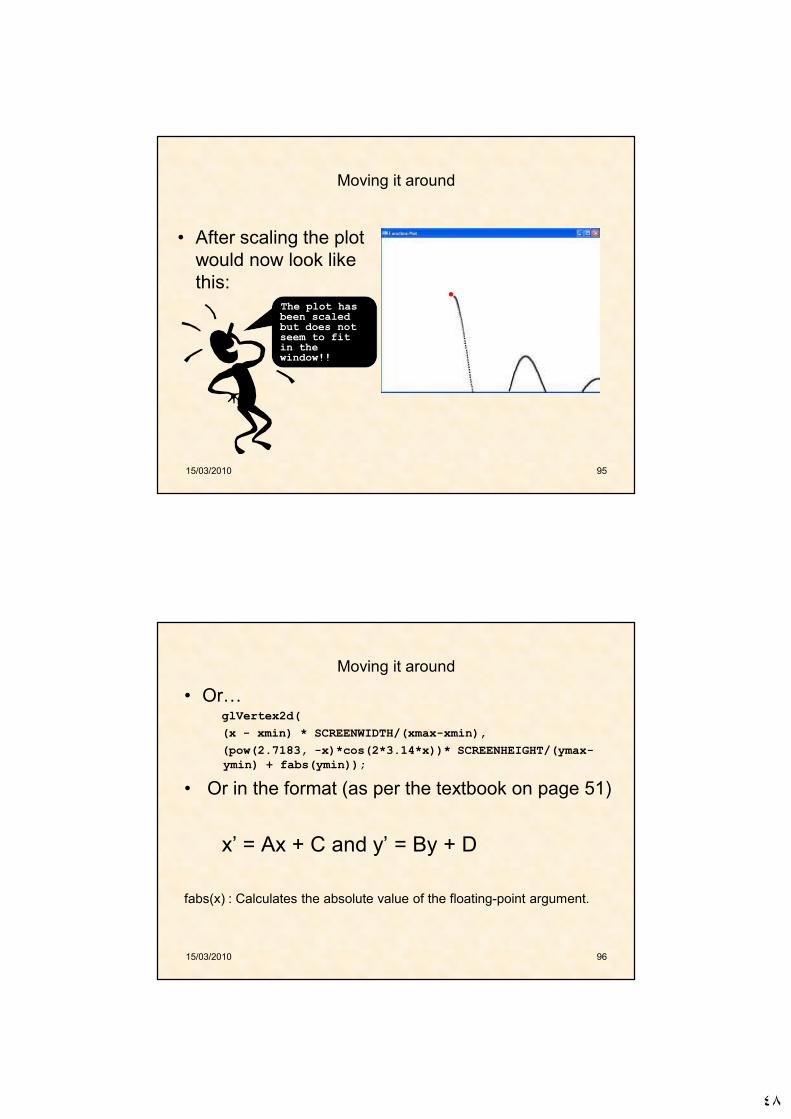
Moving it around
• After scaling the plot
would now look like
this:The plot has been scaled but does not seem to fit in the window!!
15/03/2010 96
Moving it around
• Or…glVertex2d(
(x - xmin) * SCREENWIDTH/(xmax-xmin),
(pow(2.7183, -x)*cos(2*3.14*x))* SCREENHEIGHT/(ymax-ymin) + fabs(ymin));
• Or in the format (as per the textbook on page 51)
x’ = Ax + C and y’ = By + D
fabs(x) : Calculates the absolute value of the floating-point argument.
٤٩
15/03/2010 97
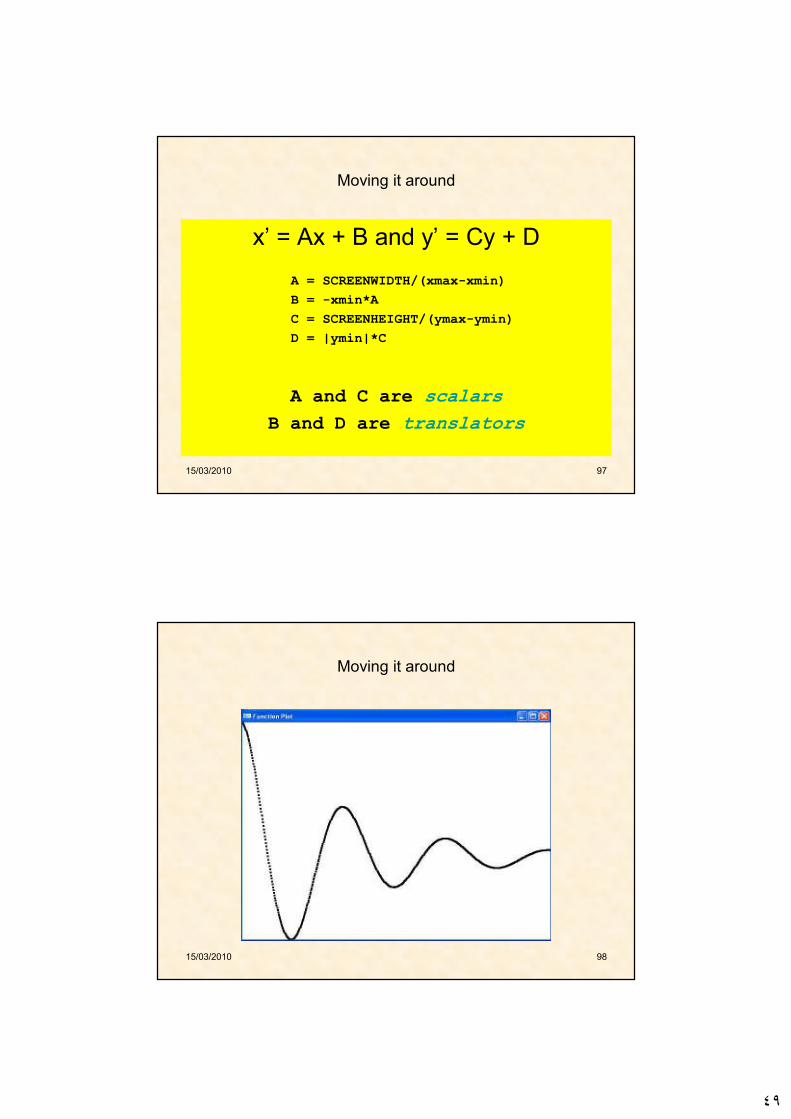
Moving it around
x’ = Ax + B and y’ = Cy + D
A = SCREENWIDTH/(xmax-xmin)
B = -xmin*A
C = SCREENHEIGHT/(ymax-ymin)
D = |ymin|*C
A and C are scalars
B and D are translators
15/03/2010 98
Moving it around

٥٠
٩٩
A dot plot of function
#include <windows.h>
#include <math.h>
#include <GL/GL.h>
#include <GL/GLU.h>
#include <GL/glut.h>
const int screenWidth = 640;
const int screenHeight = 480;
GLdouble A,B,C,D;
void myInit(void)
{
glClearColor(1.0,1.0,1.0,0.0); // set white background color
glColor3f(0.0f, 0.0f, 0.0f); // set drawing color
glPointSize(4.0); // the dot is 4 by 4 pixels
glMatrixMode(GL_PROJECTION);
glLoadIdentity();
gluOrtho2D(0.0,(GLdouble) screenWidth,0.0, (GLdouble) screenHeight);
A = screenWidth / 4.0 ;
B = 0.0;
C = D = screenHeight /2.0;
}
Example 4
A = screenWidth / 4.0 ; // x 0 …4
B = 0.0; // shift = 0
C = D = screenHeight /2.0;
// C ���� y 1… -1
// D ���� shift = screenHeight /2.0
١٠٠
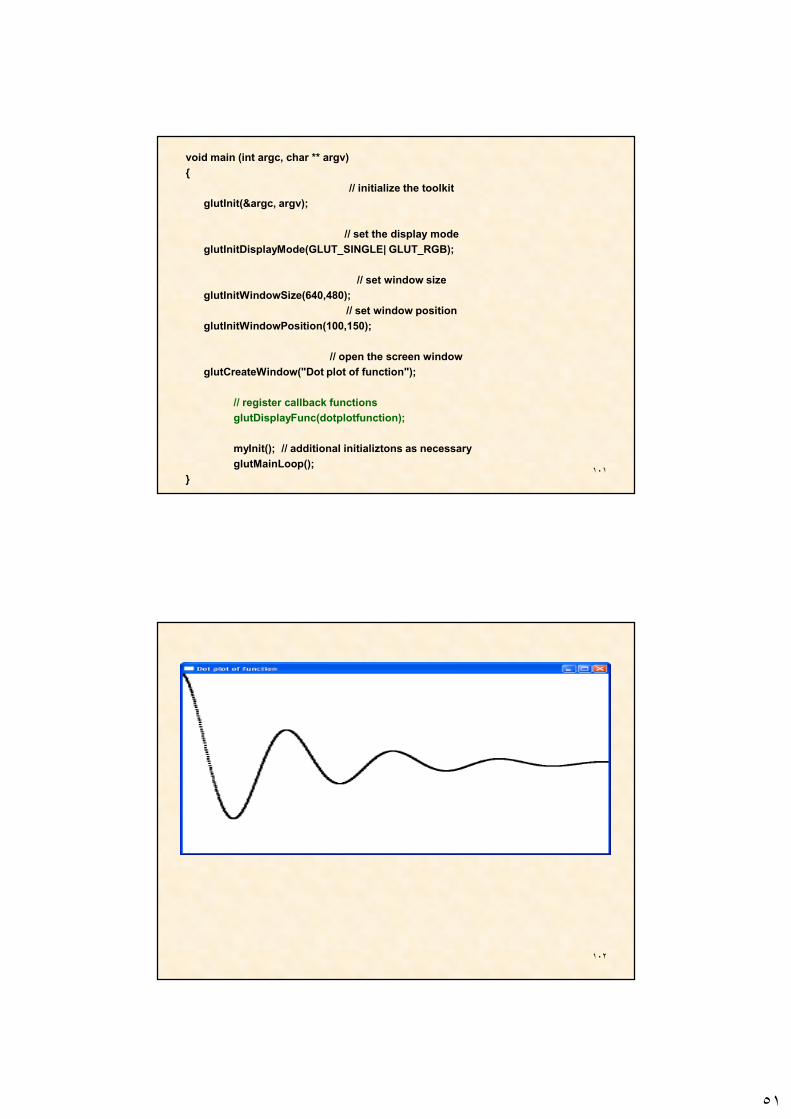
void dotplotfunction(void) // The name of this function is upto you
{
glClear(GL_COLOR_BUFFER_BIT);
glBegin(GL_POINTS);
for (GLdouble x = 0; x< 4.0; x+=0.005)
{
GLdouble func = exp(-x) * cos(2*3.14159265 * x);
glVertex2d(A * x + B , C * func + D);
}
glEnd();
glFlush();
}d double
A = screenWidth / 4.0 ; // x 0 …4
B = 0.0; // shift = 0
C = D = screenHeight /2.0;// C ���� y 1… -1
// D ���� shift = screenHeight /2.0
٥١
١٠١
void main (int argc, char ** argv)
{
// initialize the toolkit
glutInit(&argc, argv);
// set the display mode
glutInitDisplayMode(GLUT_SINGLE| GLUT_RGB);
// set window size
glutInitWindowSize(640,480);
// set window position
glutInitWindowPosition(100,150);
// open the screen window
glutCreateWindow("Dot plot of function");
// register callback functions
glutDisplayFunc(dotplotfunction);
myInit(); // additional initializtons as necessary
glutMainLoop();
}
١٠٢
٥٢
١٠٣
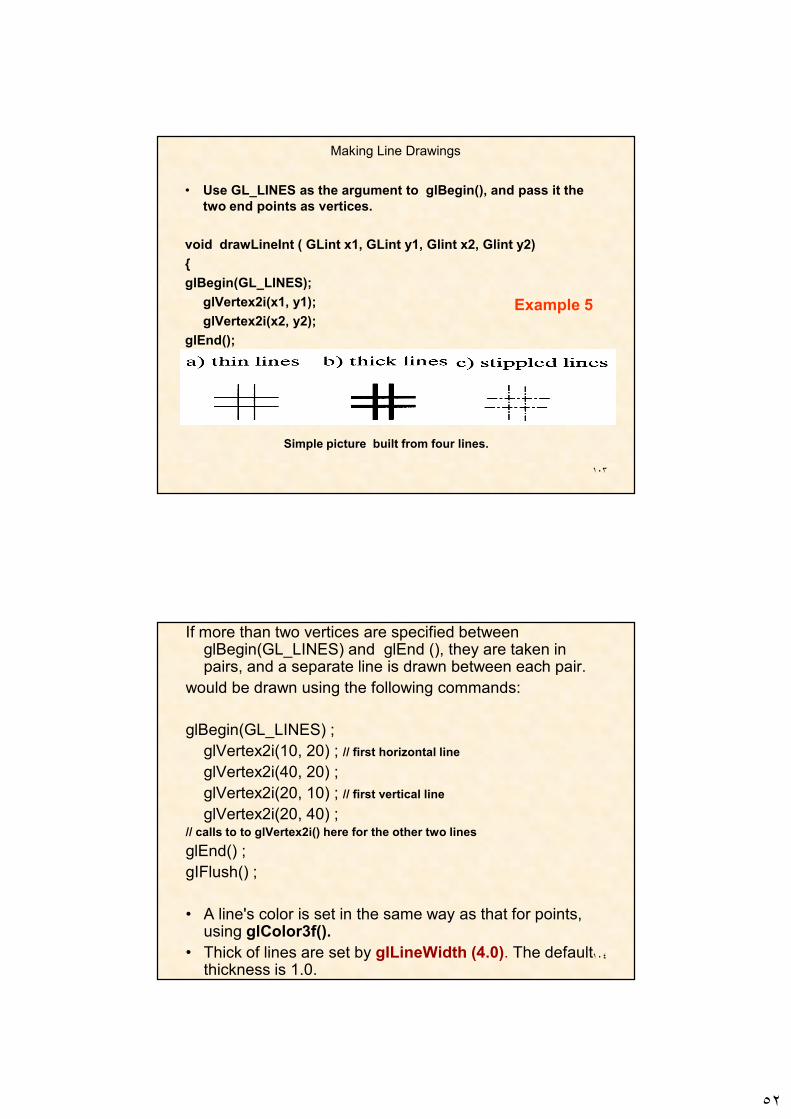
Making Line Drawings
• Use GL_LINES as the argument to glBegin(), and pass it the
two end points as vertices.
void drawLineInt ( GLint x1, GLint y1, Glint x2, Glint y2)
{
glBegin(GL_LINES);
glVertex2i(x1, y1);
glVertex2i(x2, y2);
glEnd();
}
Simple picture built from four lines.
Example 5
١٠٤
If more than two vertices are specified between glBegin(GL_LINES) and glEnd (), they are taken in pairs, and a separate line is drawn between each pair.
would be drawn using the following commands:
glBegin(GL_LINES) ;
glVertex2i(10, 20) ; // first horizontal line
glVertex2i(40, 20) ;
glVertex2i(20, 10) ; // first vertical line
glVertex2i(20, 40) ;// calls to to glVertex2i() here for the other two lines
glEnd() ;
gIFlush() ;
• A line's color is set in the same way as that for points, using glColor3f().
• Thick of lines are set by gILineWidth (4.0). The default thickness is 1.0.

٥٣
١٠٥
١٠٦
#include <windows.h>
#include <math.h>
#include <GL/GL.h>
#include <GL/GLU.h>
#include <GL/glut.h>
const int screenWidth = 640;
const int screenHeight = 480;
GLdouble A,B,C,D;
void myInit(void)
{
// set white background color
glClearColor(1.0,1.0,1.0,0.0);
// set drawing color
glColor3f(0.0f, 0.0f, 0.0f);
// the line width is 4 pixels
glLineWidth(4.0);
glMatrixMode(GL_PROJECTION);
glLoadIdentity();
gluOrtho2D(0.0,(GLdouble) screenWidth, 0.0, (GLdouble) screenHeight);
}
٥٤
١٠٧
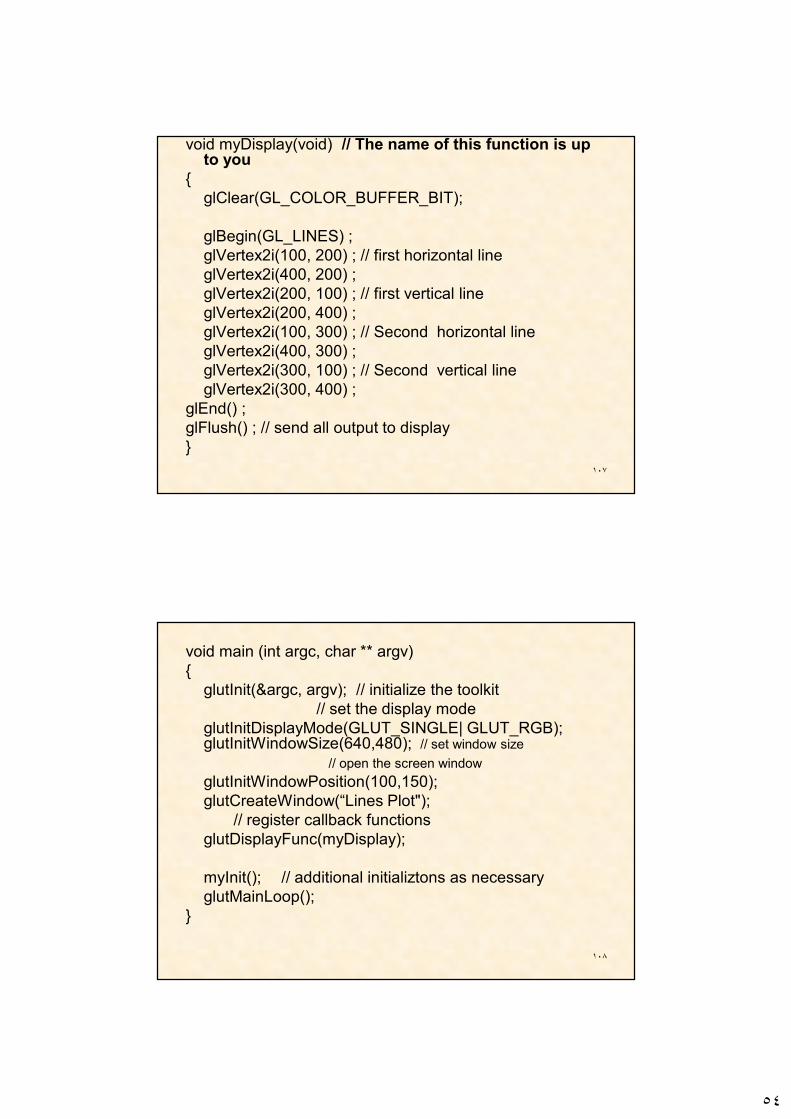
void myDisplay(void) // The name of this function is up to you
{
glClear(GL_COLOR_BUFFER_BIT);
glBegin(GL_LINES) ;
glVertex2i(100, 200) ; // first horizontal line
glVertex2i(400, 200) ;
glVertex2i(200, 100) ; // first vertical line
glVertex2i(200, 400) ;
glVertex2i(100, 300) ; // Second horizontal line
glVertex2i(400, 300) ;
glVertex2i(300, 100) ; // Second vertical line
glVertex2i(300, 400) ;
glEnd() ;
glFlush() ; // send all output to display
}
١٠٨
void main (int argc, char ** argv)
{
glutInit(&argc, argv); // initialize the toolkit
// set the display mode
glutInitDisplayMode(GLUT_SINGLE| GLUT_RGB); glutInitWindowSize(640,480); // set window size
// open the screen window
glutInitWindowPosition(100,150);
glutCreateWindow(“Lines Plot");
// register callback functions
glutDisplayFunc(myDisplay);
myInit(); // additional initializtons as necessary
glutMainLoop();
}
٥٥
١٠٩
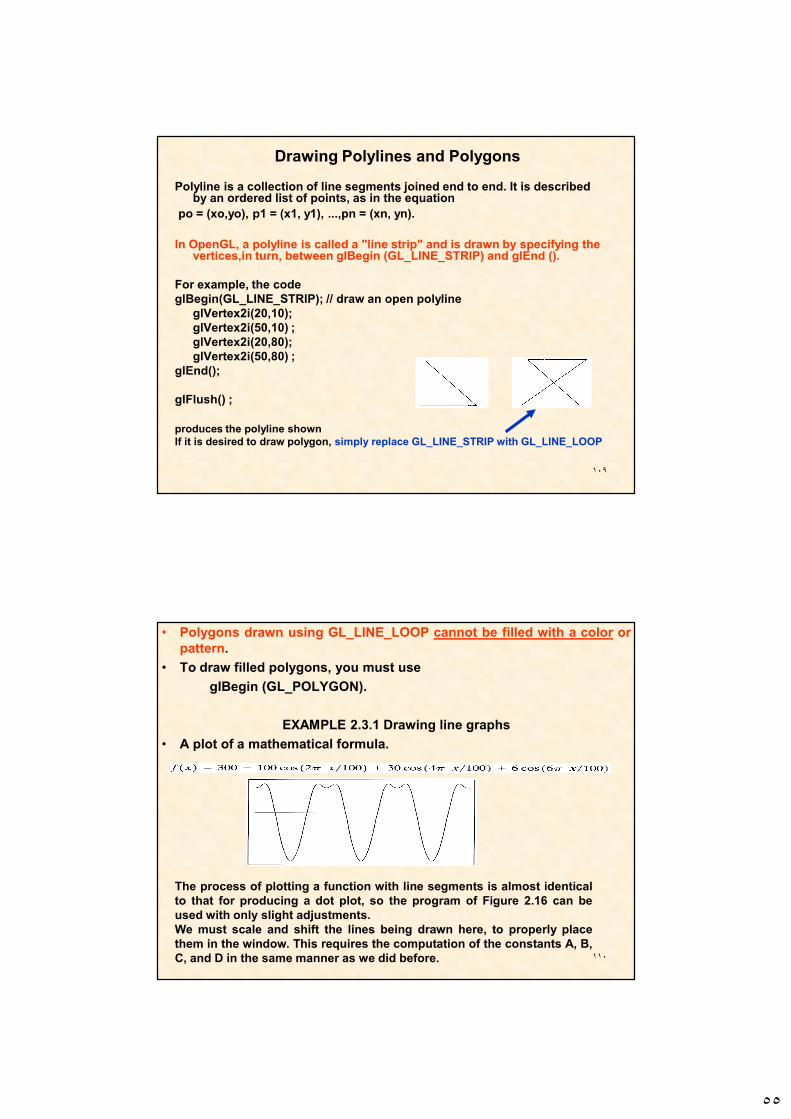
Drawing Polylines and Polygons
Polyline is a collection of line segments joined end to end. It is described by an ordered list of points, as in the equation
po = (xo,yo), p1 = (x1, y1), ...,pn = (xn, yn).
In OpenGL, a polyline is called a "line strip" and is drawn by specifying the vertices,in turn, between gIBegin (GL_LINE_STRIP) and glEnd ().
For example, the code
glBegin(GL_LINE_STRIP); // draw an open polyline
glVertex2i(20,10);
glVertex2i(50,10) ;
glVertex2i(20,80);
glVertex2i(50,80) ;
glEnd();
gIFlush() ;
produces the polyline shown
If it is desired to draw polygon, simply replace GL_LINE_STRIP with GL_LINE_LOOP
١١٠
• Polygons drawn using GL_LINE_LOOP cannot be filled with a color or
pattern.
• To draw filled polygons, you must use
gIBegin (GL_POLYGON).
EXAMPLE 2.3.1 Drawing line graphs
• A plot of a mathematical formula.
The process of plotting a function with line segments is almost identical
to that for producing a dot plot, so the program of Figure 2.16 can be
used with only slight adjustments.
We must scale and shift the lines being drawn here, to properly place
them in the window. This requires the computation of the constants A, B,
C, and D in the same manner as we did before.
٥٦
١١١
١١٢
Most interesting pictures made up of polylines contain a
rather large number of lines segments. It is convenient to
store a description of polylines in a file, so that the
picture can be redrawn at will.
٥٧
١١٣
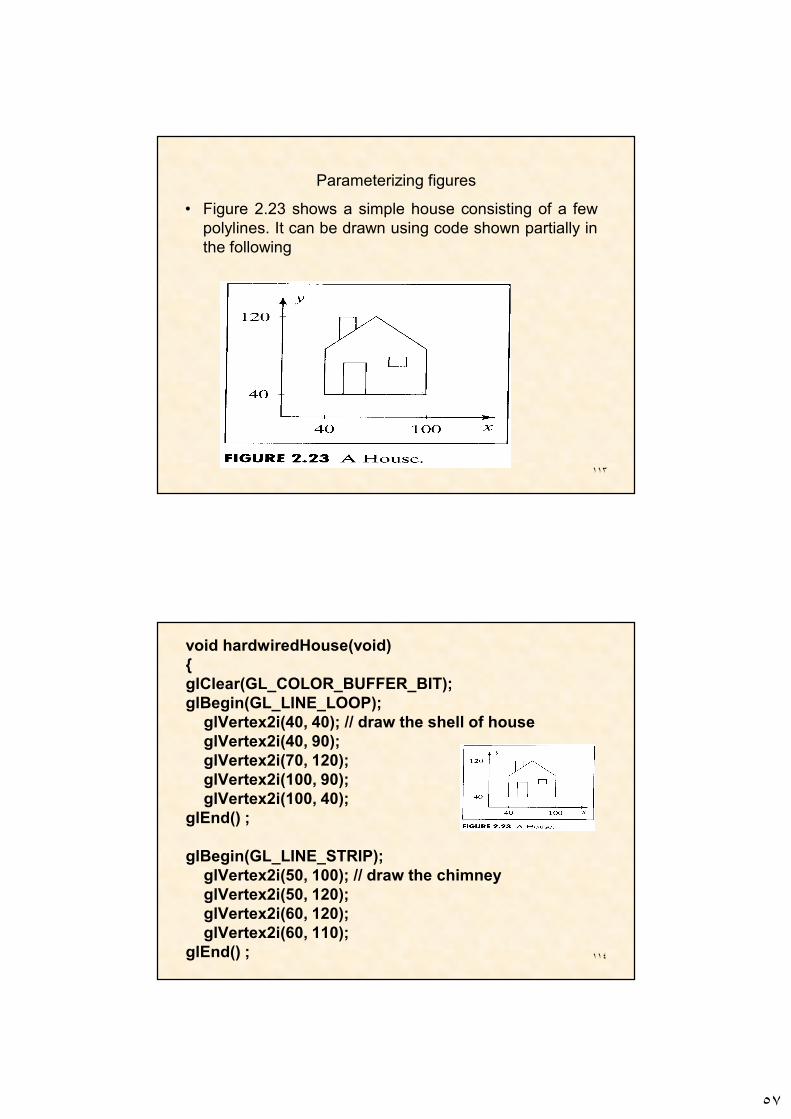
Parameterizing figures
• Figure 2.23 shows a simple house consisting of a few
polylines. It can be drawn using code shown partially in
the following
١١٤
void hardwiredHouse(void)
{
glClear(GL_COLOR_BUFFER_BIT);
glBegin(GL_LINE_LOOP);
glVertex2i(40, 40); // draw the shell of house
glVertex2i(40, 90);
glVertex2i(70, 120);
glVertex2i(100, 90);
glVertex2i(100, 40);
glEnd() ;
glBegin(GL_LINE_STRIP);
glVertex2i(50, 100); // draw the chimney
glVertex2i(50, 120);
glVertex2i(60, 120);
glVertex2i(60, 110);
glEnd() ;
٥٨
١١٥
glBegin(GL_LINE_STRIP);
glVertex2i(55, 40); // draw the door
glVertex2i(55, 80);
glVertex2i(70, 80);
glVertex2i(70, 40);
glEnd() ;
glBegin(GL_LINE_LOOP);
glVertex2i(80, 75); // draw the window
glVertex2i(80, 85);
glVertex2i(90, 85);
glVertex2i(90, 75);
glEnd() ;
}
١١٦
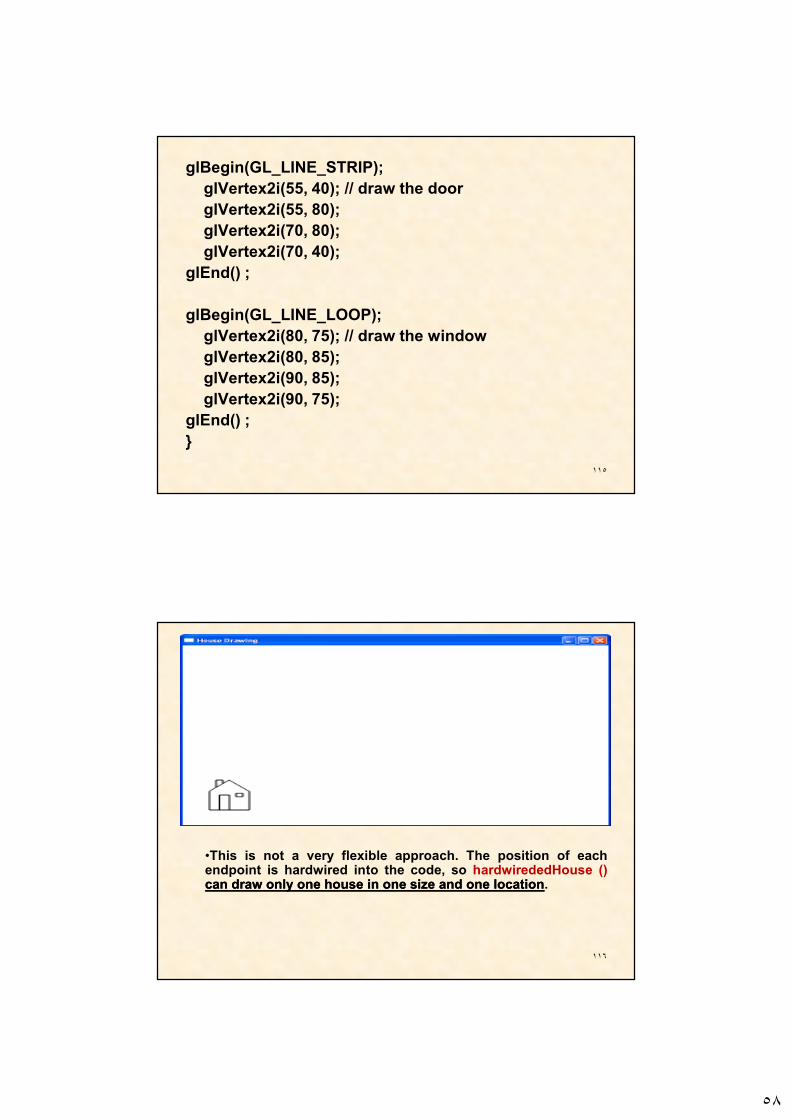
•This is not a very flexible approach. The position of eachendpoint is hardwired into the code, so hardwirededHouse ()cancan drawdraw onlyonly oneone househouse inin oneone sizesize andand oneone locationlocation.
٥٩
١١٧
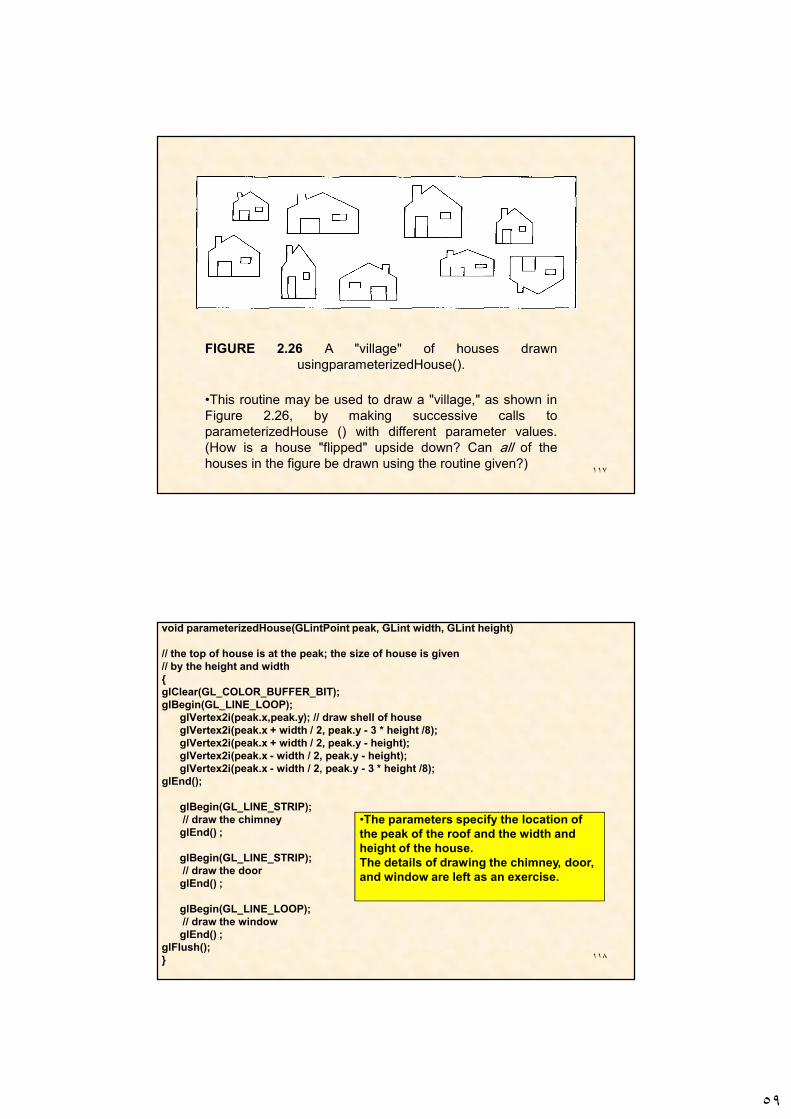
FIGURE 2.26 A "village" of houses drawn
usingparameterizedHouse().
•This routine may be used to draw a "village," as shown in
Figure 2.26, by making successive calls to
parameterizedHouse () with different parameter values.
(How is a house "flipped" upside down? Can all of the
houses in the figure be drawn using the routine given?)
١١٨
void parameterizedHouse(GLintPoint peak, GLint width, GLint height)
// the top of house is at the peak; the size of house is given
// by the height and width
{
glClear(GL_COLOR_BUFFER_BIT);
glBegin(GL_LINE_LOOP);
glVertex2i(peak.x,peak.y); // draw shell of house
glVertex2i(peak.x + width / 2, peak.y - 3 * height /8);
glVertex2i(peak.x + width / 2, peak.y - height);
glVertex2i(peak.x - width / 2, peak.y - height);
glVertex2i(peak.x - width / 2, peak.y - 3 * height /8);
glEnd();
glBegin(GL_LINE_STRIP);
// draw the chimney
glEnd() ;
glBegin(GL_LINE_STRIP);
// draw the door
glEnd() ;
glBegin(GL_LINE_LOOP);
// draw the window
glEnd() ;
glFlush();
}
•The parameters specify the location of
the peak of the roof and the width and
height of the house.
The details of drawing the chimney, door,
and window are left as an exercise.
٦٠
١١٩
#include <windows.h>
#include <math.h>
#include <GL/GL.h>
#include <GL/GLU.h>
#include <GL/glut.h>
int random (int m)
{
return rand()%m;
}
class GLintPoint{
public:
GLint x, y;
};
const int screenWidth = 640;
const int screenHeight = 480;
١٢٠
//<<<<<<<<<<<<<<<<<<<< myInit >>>>>>>>>>>>>>>>>>
void myInit(void)
{
glClearColor(1.0,1.0,1.0,0.0); // set white background color
glColor3f(0.0f, 0.0f, 0.0f); // set drawing color
glLineWidth(1.0); // the line width is 4 pixels
glMatrixMode(GL_PROJECTION);
glLoadIdentity();
gluOrtho2D(0.0,(GLdouble) screenWidth,0.0, (GLdouble) screenHeight);
}
٦١
١٢١
//<<<<< parameterizedHouse >>>>>>>>>>>>>>
void parameterizedHouse(GLintPoint peak, GLint width, GLint height) // the top of house is at the peak; the size of house is given
// by the height and width
{
// the code written here
}
//<<<<<<<<<< myDisplay >>>>>>>>
void myDisplay(void)
{
GLintPoint point;
int width, height;
// make successive calls to parameterizedHouse
}
//<<<<<<< main >>>>>>>>>
void main (int argc, char ** argv)
{
// code written here
}
١٢٢
EXAMPLE 2.3.4 Building a polyline drawer
• Some applications compute and store the vertices of a
polyline in a list. We have to add to our growing toolbox
of routines a function that accepts the list as a parameter
and draws the corresponding polyline.
• The list might be in the form of an array or a linked list.
• Here we use the array form and define the class to hold
it in
class GLintPointArray
{
const int MAX_NUM = 100;
public:
int num = 100;
GLintPoint pt [MAX_NUM];
}
pt is an array of GLintPoint
num is the actual number of elements in the array
٦٢
١٢٣
void drawPolyLine ( GLintPointArray poly, int closed)
{
gIBegin ( closed ? GL_LINE_LOOP : GL_LINE_STRIP);
for(int i = 0; i < poly. num; i++)
glVertex2i(poly.pt[i].x, poly.pt[i].y);
glEnd();
gIFlush() ;
}
// pt is an array of GLintPoint
// num is the actual number of elements in the array
• The routine also takes a parameter closed:
If closed is nonzero, the GL_LINE_LOOP passed to OpenGL
• The routine simply sends each vertex of the polyline to OpenGL
١٢٤
Line Drawing using moveto () and lineto()
• We can summarize the effects of the two functions as
follows:
• moveto (x, y): set CP to (x, y)
CP is the current position
• lineto (x, y): draw a line from CP to (x, y), and then
update CP to (x, y)
A line from (x1, y1) to (x2, y2) is therefore drawn using the
two calls moveto (x1, y1) and lineto (x2 , y2).
A polyline based on the list of points, so it is easily drawn
using the following code:
moveto(x[0], y [0]);
for ( int i =1; i < n; i++)
lineto ( x[i], y[i]);
٦٣
١٢٥
GLintPoint CP; // global current position
//«««««« moveto »»»»»»»
void moveto(GLint x, GLint y)
{
CP.x = x; CP.y = y; // update the CP )
}
//«««««« lineTo >»»»»»»»»
void lineto(GLint x, GLint y)
{
glBegin(GL_LINES); // draw the line
glVertex2i(CP.x, CP.y);
glVertex2i(x, y);
glEnd();
gIFlush() ;
CP.x = x; CP.y = y; // update the CP
}
moveto() and lineto()
in OpenGL.
15/03/2010 126
Rectangles
• A special type of polygon with four sides and
with aligned with the coordinate axis is called an
aligned rectangle.
٦٤
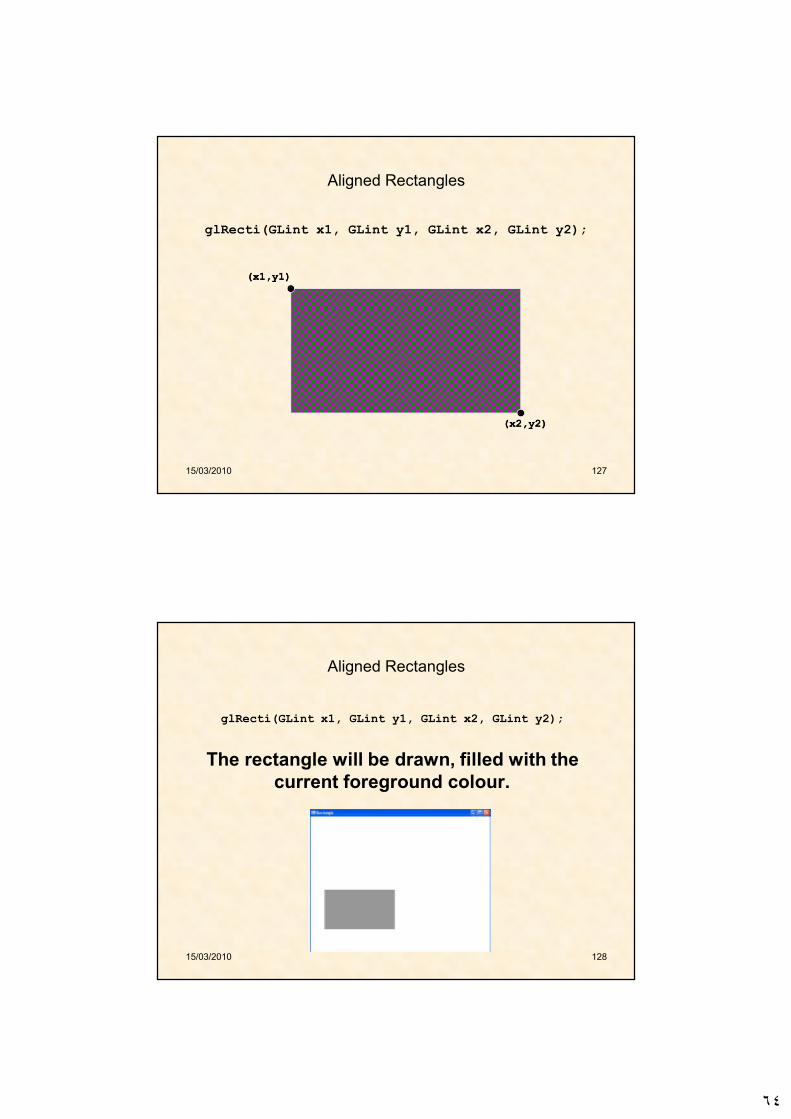
15/03/2010 127
Aligned Rectangles
glRecti(GLint x1, GLint y1, GLint x2, GLint y2);
(x(x11,y,y11))
(x(x22,y,y22))
15/03/2010 128
Aligned Rectangles
glRecti(GLint x1, GLint y1, GLint x2, GLint y2);
The rectangle will be drawn, filled with the
current foreground colour.
٦٥
١٢٩
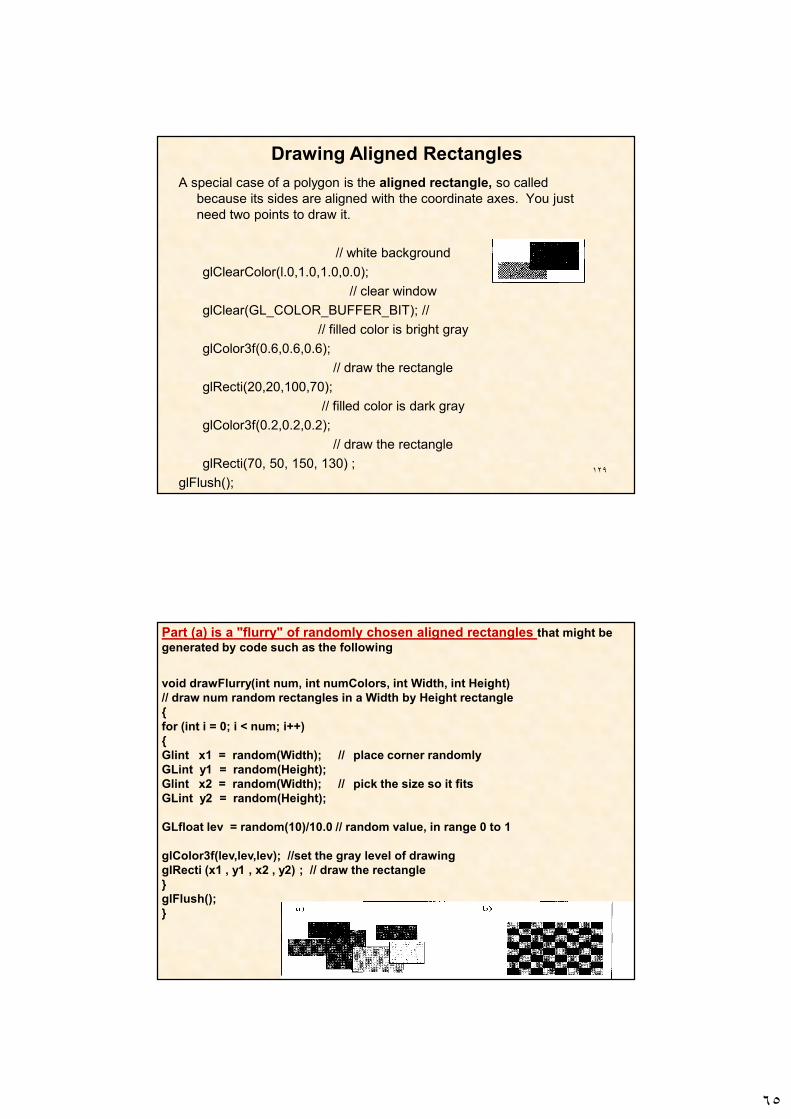
Drawing Aligned Rectangles
A special case of a polygon is the aligned rectangle, so called
because its sides are aligned with the coordinate axes. You just
need two points to draw it.
// white background
glClearColor(l.0,1.0,1.0,0.0);
// clear window
glClear(GL_COLOR_BUFFER_BIT); //
// filled color is bright gray
glColor3f(0.6,0.6,0.6);
// draw the rectangle
glRecti(20,20,100,70);
// filled color is dark gray
glColor3f(0.2,0.2,0.2);
// draw the rectangle
glRecti(70, 50, 150, 130) ;
glFlush();
١٣٠
Part (a) is a "flurry" of randomly chosen aligned rectangles that might be
generated by code such as the following
void drawFlurry(int num, int numColors, int Width, int Height)
// draw num random rectangles in a Width by Height rectangle
{
for (int i = 0; i < num; i++)
{
Glint x1 = random(Width); // place corner randomly
GLint y1 = random(Height);
Glint x2 = random(Width); // pick the size so it fits
GLint y2 = random(Height);
GLfloat lev = random(10)/10.0 // random value, in range 0 to 1
glColor3f(lev,lev,lev); //set the gray level of drawing
gIRecti (x1 , y1 , x2 , y2) ; // draw the rectangle
}
glFlush();
}

٦٦
١٣١
void drawChessBoard(int size)
// draw num random rectangles in a Width by Height rectangle
{
GLfloat lev1 = random(10)/10.0; //value, in range 0 to 1
GLfloat lev2 = random(10)/10.0; // value, in range 0 to 1
for (int i = 0; i < 8; i++)
for (int j = 0; j < 8; j++)
{
GLint x1 = i * size ; // place 1st corner
GLint y1 = j * size ;
GLint x2 = i * size + size; // place 2nd corner
GLint y2 = j * size + size;
if ((i+j) % 2 == 0) // if i+j is even
glColor3f(lev1,lev1,lev1);
else
glColor3f(lev2,lev2,lev2);
glRecti (x1 , y1 , x2 , y2) ; // draw the rectangle
}
glFlush();
}
١٣٢
٦٧
١٣٣
//<<<<<<<<<<<<<<< DrawDiamond >>>>>>>>>>>>>>>>>>>>>>>>>>
void DrawDiamond(GLintPoint center, int d)
// draw num random rectangles in a Width by Height rectangle
{
int x0 = center.x ; // calculate center
int y0 = center.y ;
glBegin(GL_LINE_LOOP);
glVertex2i(x0-d,y0);
glVertex2i(x0,y0-d);
glVertex2i(x0+d,y0);
glVertex2i(x0,y0+d);
glEnd();
glFlush();
}
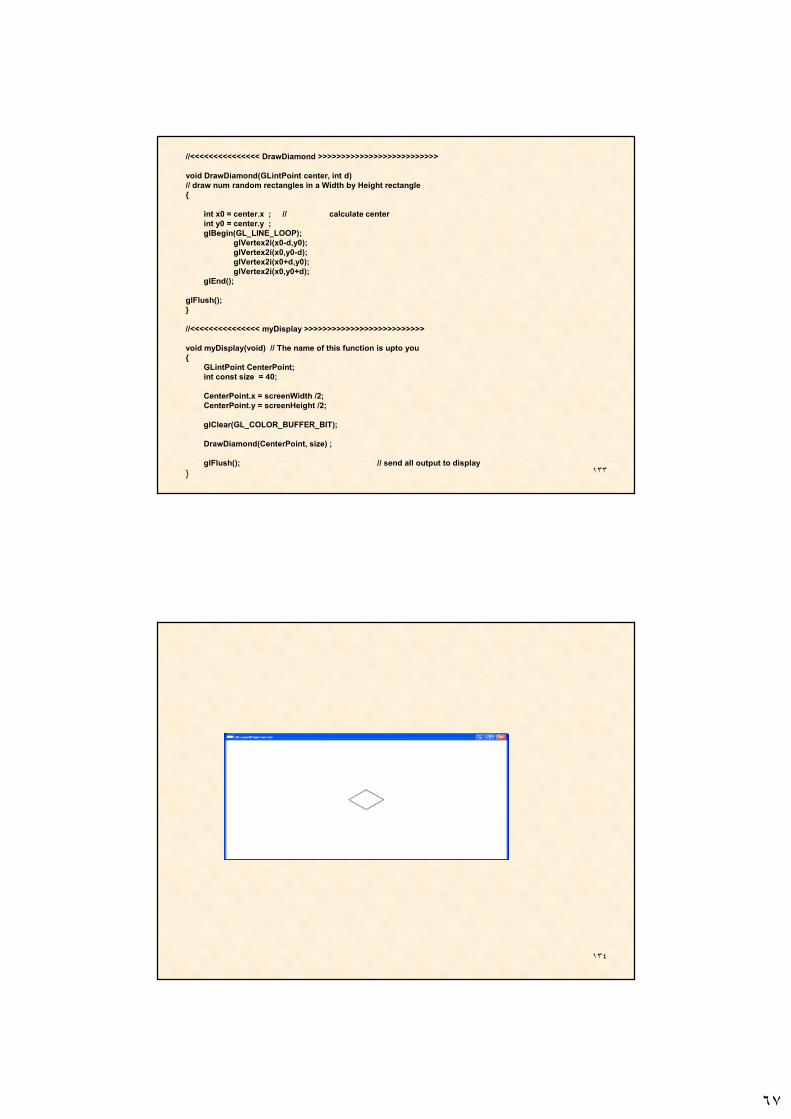
//<<<<<<<<<<<<<<< myDisplay >>>>>>>>>>>>>>>>>>>>>>>>>>
void myDisplay(void) // The name of this function is upto you
{
GLintPoint CenterPoint;
int const size = 40;
CenterPoint.x = screenWidth /2;
CenterPoint.y = screenHeight /2;
glClear(GL_COLOR_BUFFER_BIT);
DrawDiamond(CenterPoint, size) ;
glFlush(); // send all output to display
}
١٣٤
٦٨
١٣٥
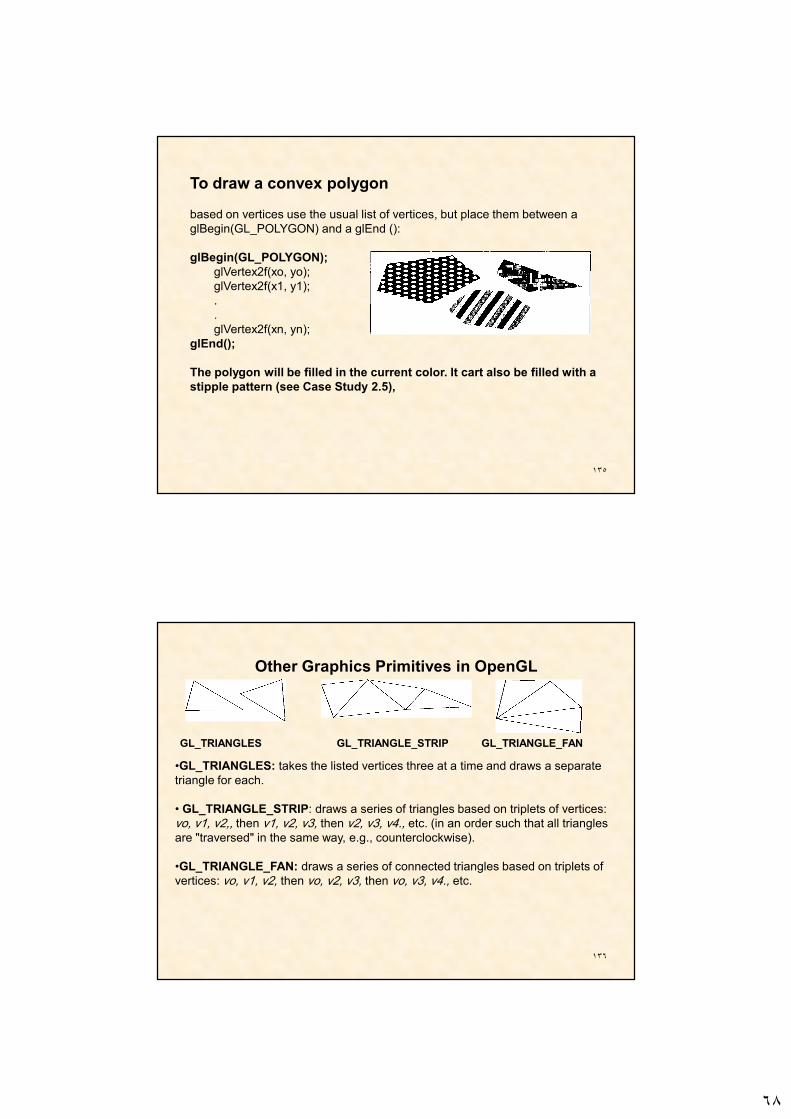
To draw a convex polygon
based on vertices use the usual list of vertices, but place them between a
glBegin(GL_POLYGON) and a glEnd ():
glBegin(GL_POLYGON);
glVertex2f(xo, yo);
glVertex2f(x1, y1);
.
.
glVertex2f(xn, yn);
glEnd();
The polygon will be filled in the current color. It cart also be filled with a
stipple pattern (see Case Study 2.5),
١٣٦
Other Graphics Primitives in OpenGL
GL_TRIANGLES GL_TRIANGLE_STRIP GL_TRIANGLE_FAN
•GL_TRIANGLES: takes the listed vertices three at a time and draws a separate
triangle for each.
• GL_TRIANGLE_STRIP: draws a series of triangles based on triplets of vertices:
vo, v1, v2,, then v1, v2, v3, then v2, v3, v4., etc. (in an order such that all triangles
are "traversed" in the same way, e.g., counterclockwise).
•GL_TRIANGLE_FAN: draws a series of connected triangles based on triplets of
vertices: vo, v1, v2, then vo, v2, v3, then vo, v3, v4., etc.

٦٩
١٣٧
• GL_QUADS: takes the vertices four at a time and draws a separate
quadrilateral for each.
• GL_QUAD_STRIP: draws a series of quadrilaterals based on
foursomes of vertices: first vo, v1, v2,v3, then v2, v3 , v4, v5, then
v4, v5, v6, v7, .,etc. (in an order such that all quadrilaterals are
"traversed" in the same way, e.g., counterclockwise).
GL_QUADS GL_QUAD_STRIP
15/03/2010 Computer Graphics CS510373 138
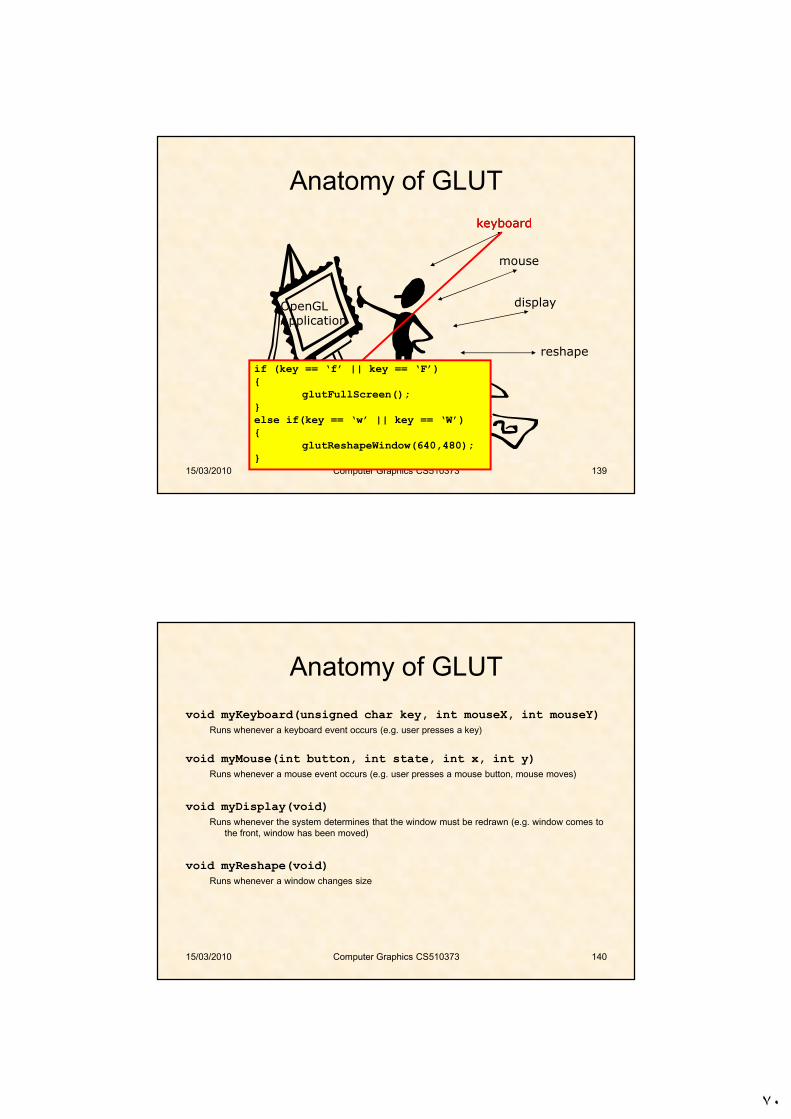
Anatomy of GLUT
OpenGL
Application
keyboard
mouse
display
reshape
٧٠
15/03/2010 Computer Graphics CS510373 139
Anatomy of GLUT
OpenGL
Application
keyboard
mouse
display
reshape
keyboard
if (key == ‘f’ || key == ‘F’){
glutFullScreen();}else if(key == ‘w’ || key == ‘W’){
glutReshapeWindow(640,480);}
15/03/2010 Computer Graphics CS510373 140
Anatomy of GLUT
void myKeyboard(unsigned char key, int mouseX, int mouseY)Runs whenever a keyboard event occurs (e.g. user presses a key)
void myMouse(int button, int state, int x, int y)Runs whenever a mouse event occurs (e.g. user presses a mouse button, mouse moves)
void myDisplay(void)Runs whenever the system determines that the window must be redrawn (e.g. window comes to
the front, window has been moved)
void myReshape(void)Runs whenever a window changes size


![Adaptive Cube Tessellation for Topologically Correct ... · Adaptive Cube Tessellation for Topologically Correct Isosurfaces ... [PT90]. This method is ... Tessellation for Topologically](https://img.pdfslide.us/doc/110x75/5adfba127f8b9a5a668ca39b/adaptive-cube-tessellation-for-topologically-correct-cube-tessellation-for-topologically.jpg)