Embed Size (px)
Citation preview
American & Efird, Inc. 2002. All International Rights Reserved. Technical Bulletin
10/10/02 Page 1
Common Seam Quality Defects Restitched Seams / Broken Stitches
Excessive Restitched Seams
DESCRIPTION: Where a "splice" occurs on the stitch line. If this occurs on Topstitching, then the seam does not appear to be 1st quality merchandise. Caused by 1) thread breaks or thread run-out during sewing; or 2) cut or broken stitches during a subsequent treatment of the finished product (i.e., stone washing).
MINIMIZING THREAD BREAKAGE: 1) Use a better quality sewing thread. This may include going to a higher performance thread designed to minimize sewing interruptions. (See the Thread Selection Guide and/or Minimizing Thread Breakage & Skipped Stitches); 2) Insure proper machine maintenance and sewing machine adjustments; 3) Make sure sewing machines are properly maintained and adjusted for the fabric and sewing operation. (See Machine Maintenance Checklist.); 4) Observe sewing operators for correct material handling techniques.
Skipped Stitches
401 Chainstitch
503 Overedge
301 Lockstitch - Skipped Stitches
401 Skipped Stitch
DESCRIPTION: Where the stitch length is inconsistent, possibly appearing as double the normal stitch length; or where you can see that the threads in the stitch are not properly connected together. Caused by the stitch forming device in the sewing machine missing the thread loop during stitch formation causing a defective stitch. On looper type stitches, this will allow the stitch to unravel causing seam failure.
MINIMIZING SKIPPED STITCHES: 1) Use a better quality sewing thread. This may include going to a higher performance thread designed to minimize sewing interruptions. (See the Thread Selection Guide and/or Minimizing Thread Breakage & Skipped Stitches); 2) Insure proper machine maintenance and sewing machine adjustments; 3) Make sure sewing machines are properly maintained and adjusted for the fabric and sewing operation. (See Machine Maintenance Checklist); 4) Observe sewing operators for correct material handling techniques.
American & Efird, Inc. 2002. All International Rights Reserved. Technical Bulletin
10/10/02 Page 2
Open Seam - Seam Failure - Stitch
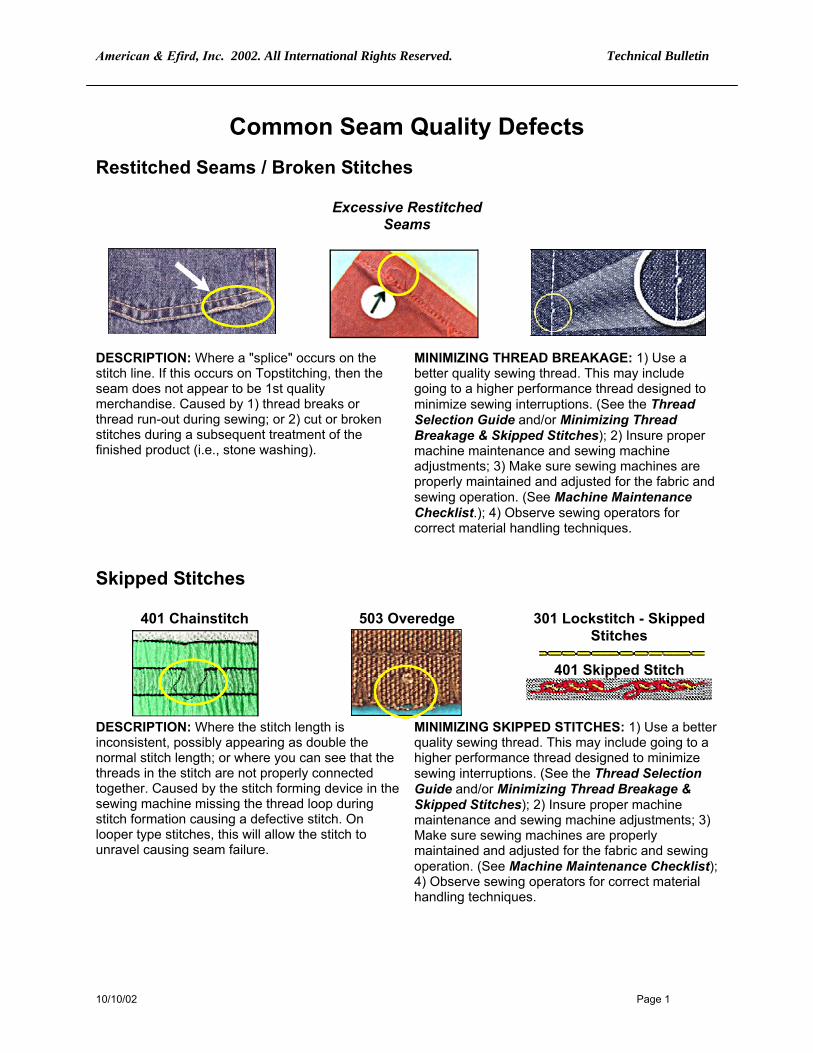
Seam Failure on Stretch Knit Fabric
DESCRIPTION: Where the threads in the seam have ruptured leaving a hole in the stitchline. Caused by 1) Improper stitch for application; 2) Inadequate thread strength for seam; 3) Not enough stitches per inch.
MINIMIZING SEAM FAILURES - STITCH: 1) Use a better quality sewing thread. This may include going to a higher performance thread designed to give greater seam performance. (See the Thread Selection Guide.); 2) Use the proper size thread for the application; 3) For knit fabrics, check for "Stitch Cracking". Stitch Cracking can be caused by any of the following: not enough stitches per inch; improper seam width or needle spacing for application; improper stitch balance; and improper thread selection.
Open Seam - Seam Failure - Fabric
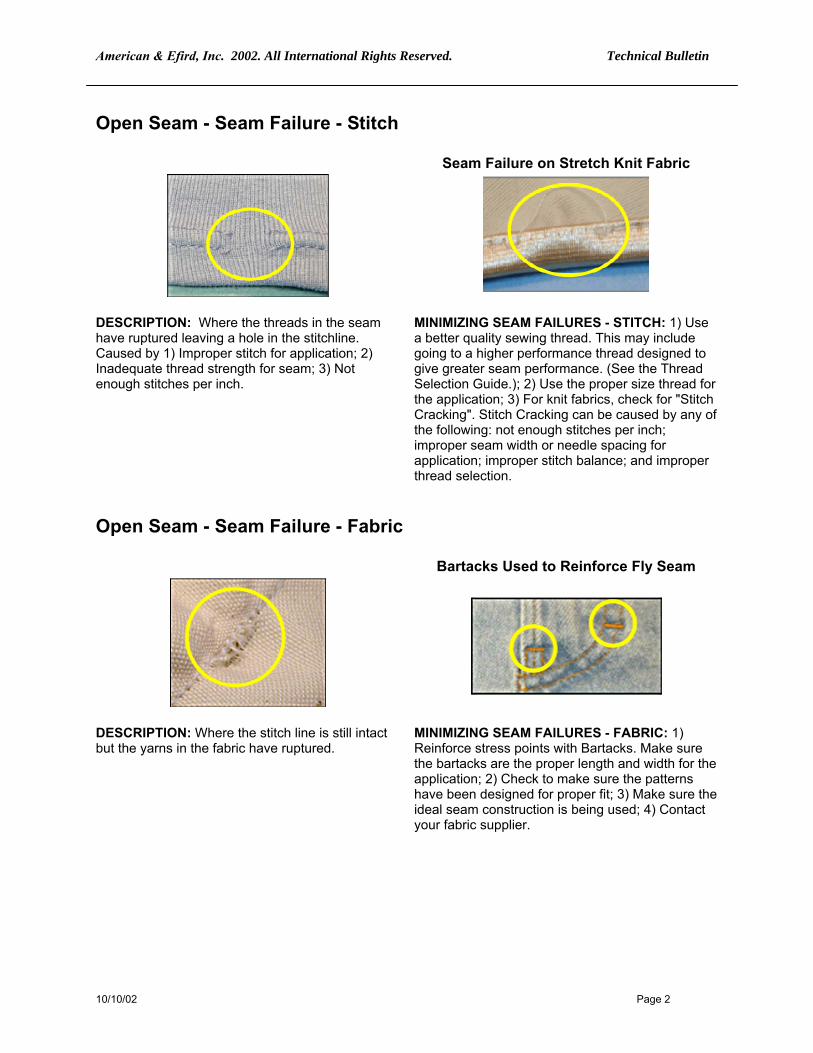
Bartacks Used to Reinforce Fly Seam
DESCRIPTION: Where the stitch line is still intact but the yarns in the fabric have ruptured.
MINIMIZING SEAM FAILURES - FABRIC: 1) Reinforce stress points with Bartacks. Make sure the bartacks are the proper length and width for the application; 2) Check to make sure the patterns have been designed for proper fit; 3) Make sure the ideal seam construction is being used; 4) Contact your fabric supplier.
American & Efird, Inc. 2002. All International Rights Reserved. Technical Bulletin
10/10/02 Page 3
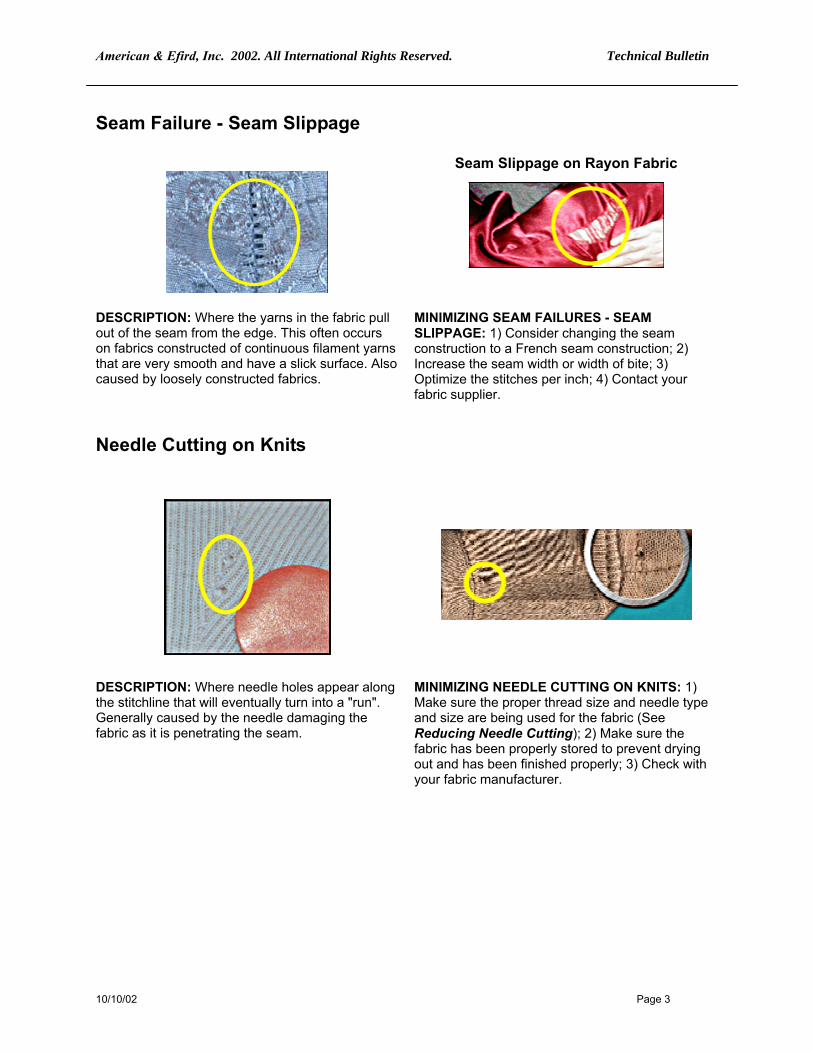
Seam Failure - Seam Slippage
Seam Slippage on Rayon Fabric
DESCRIPTION: Where the yarns in the fabric pull out of the seam from the edge. This often occurs on fabrics constructed of continuous filament yarns that are very smooth and have a slick surface. Also caused by loosely constructed fabrics.
MINIMIZING SEAM FAILURES - SEAM SLIPPAGE: 1) Consider changing the seam construction to a French seam construction; 2) Increase the seam width or width of bite; 3) Optimize the stitches per inch; 4) Contact your fabric supplier.
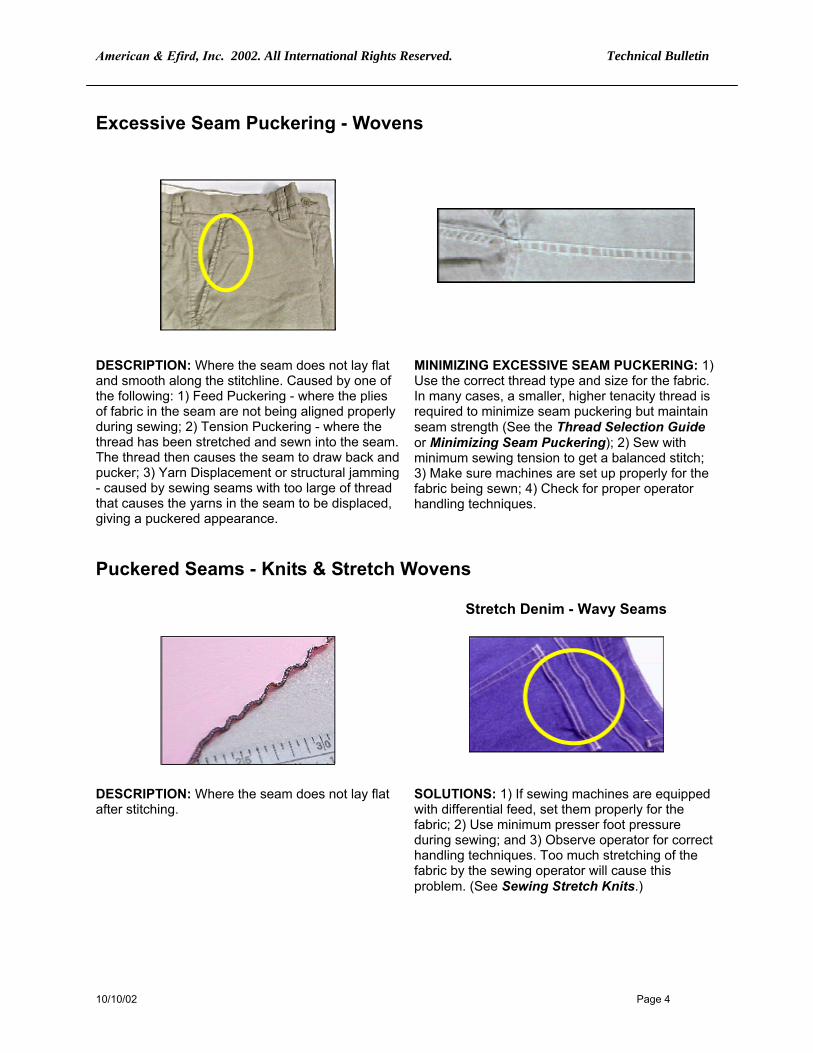
Needle Cutting on Knits
DESCRIPTION: Where needle holes appear along the stitchline that will eventually turn into a "run". Generally caused by the needle damaging the fabric as it is penetrating the seam.
MINIMIZING NEEDLE CUTTING ON KNITS: 1) Make sure the proper thread size and needle type and size are being used for the fabric (See Reducing Needle Cutting); 2) Make sure the fabric has been properly stored to prevent drying out and has been finished properly; 3) Check with your fabric manufacturer.
American & Efird, Inc. 2002. All International Rights Reserved. Technical Bulletin
10/10/02 Page 4
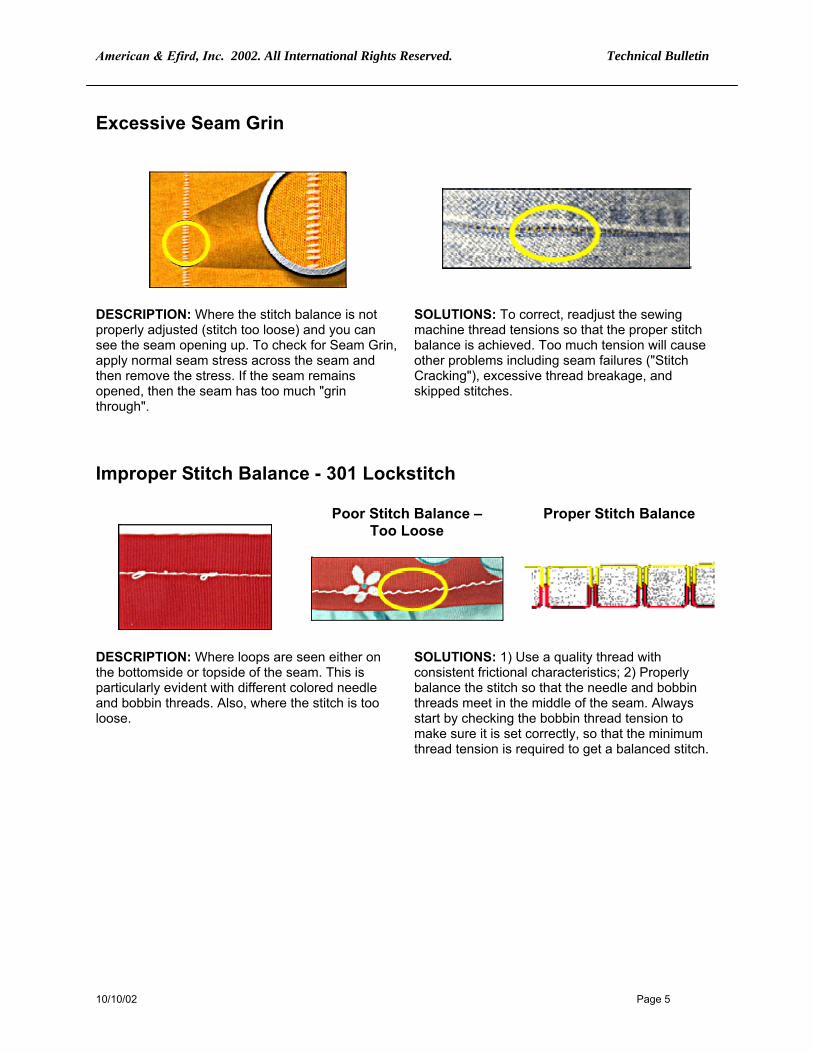
Excessive Seam Puckering - Wovens
DESCRIPTION: Where the seam does not lay flat and smooth along the stitchline. Caused by one of the following: 1) Feed Puckering - where the plies of fabric in the seam are not being aligned properly during sewing; 2) Tension Puckering - where the thread has been stretched and sewn into the seam. The thread then causes the seam to draw back and pucker; 3) Yarn Displacement or structural jamming - caused by sewing seams with too large of thread that causes the yarns in the seam to be displaced, giving a puckered appearance.
MINIMIZING EXCESSIVE SEAM PUCKERING: 1) Use the correct thread type and size for the fabric. In many cases, a smaller, higher tenacity thread is required to minimize seam puckering but maintain seam strength (See the Thread Selection Guide or Minimizing Seam Puckering); 2) Sew with minimum sewing tension to get a balanced stitch; 3) Make sure machines are set up properly for the fabric being sewn; 4) Check for proper operator handling techniques.
Puckered Seams - Knits & Stretch Wovens
Stretch Denim - Wavy Seams
DESCRIPTION: Where the seam does not lay flat after stitching.
SOLUTIONS: 1) If sewing machines are equipped with differential feed, set them properly for the fabric; 2) Use minimum presser foot pressure during sewing; and 3) Observe operator for correct handling techniques. Too much stretching of the fabric by the sewing operator will cause this problem. (See Sewing Stretch Knits.)
American & Efird, Inc. 2002. All International Rights Reserved. Technical Bulletin
10/10/02 Page 5
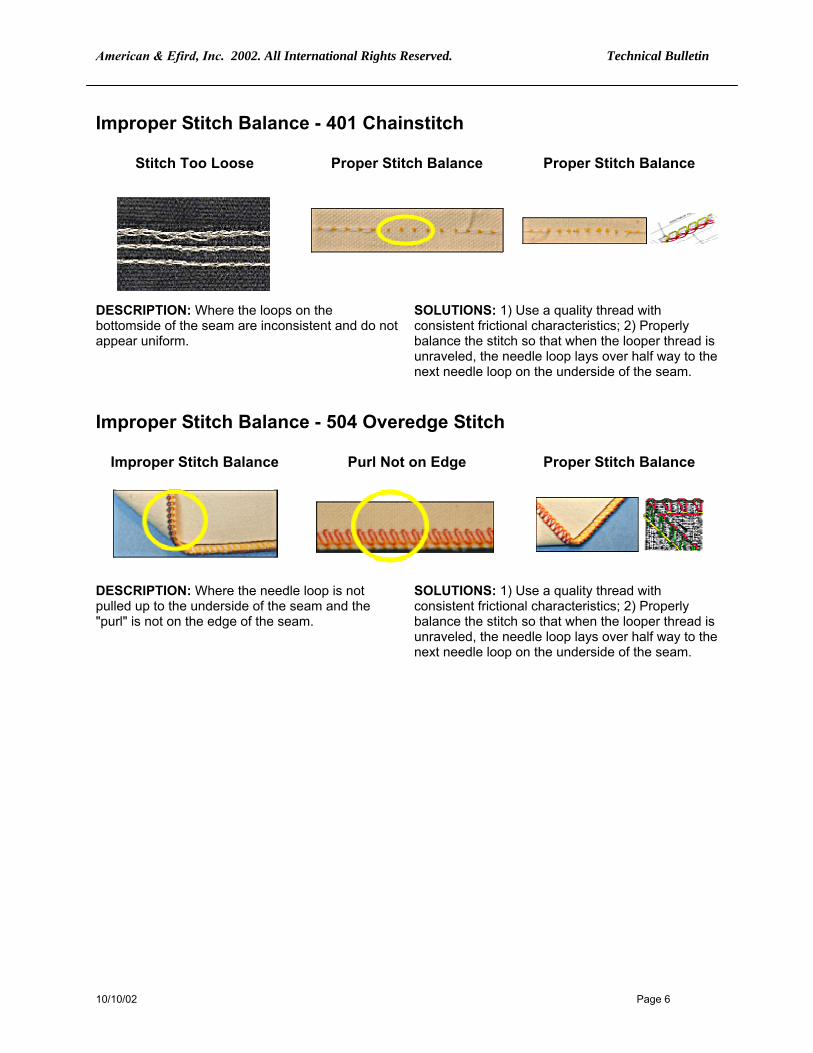
Excessive Seam Grin
DESCRIPTION: Where the stitch balance is not properly adjusted (stitch too loose) and you can see the seam opening up. To check for Seam Grin, apply normal seam stress across the seam and then remove the stress. If the seam remains opened, then the seam has too much "grin through".
SOLUTIONS: To correct, readjust the sewing machine thread tensions so that the proper stitch balance is achieved. Too much tension will cause other problems including seam failures ("Stitch Cracking"), excessive thread breakage, and skipped stitches.
Improper Stitch Balance - 301 Lockstitch
Poor Stitch Balance – Too Loose
Proper Stitch Balance
DESCRIPTION: Where loops are seen either on the bottomside or topside of the seam. This is particularly evident with different colored needle and bobbin threads. Also, where the stitch is too loose.
SOLUTIONS: 1) Use a quality thread with consistent frictional characteristics; 2) Properly balance the stitch so that the needle and bobbin threads meet in the middle of the seam. Always start by checking the bobbin thread tension to make sure it is set correctly, so that the minimum thread tension is required to get a balanced stitch.
American & Efird, Inc. 2002. All International Rights Reserved. Technical Bulletin
10/10/02 Page 6
Improper Stitch Balance - 401 Chainstitch
Stitch Too Loose
Proper Stitch Balance
Proper Stitch Balance
DESCRIPTION: Where the loops on the bottomside of the seam are inconsistent and do not appear uniform.
SOLUTIONS: 1) Use a quality thread with consistent frictional characteristics; 2) Properly balance the stitch so that when the looper thread is unraveled, the needle loop lays over half way to the next needle loop on the underside of the seam.
Improper Stitch Balance - 504 Overedge Stitch
Improper Stitch Balance
Purl Not on Edge
Proper Stitch Balance
DESCRIPTION: Where the needle loop is not pulled up to the underside of the seam and the "purl" is not on the edge of the seam.
SOLUTIONS: 1) Use a quality thread with consistent frictional characteristics; 2) Properly balance the stitch so that when the looper thread is unraveled, the needle loop lays over half way to the next needle loop on the underside of the seam.
American & Efird, Inc. 2002. All International Rights Reserved. Technical Bulletin
10/10/02 Page 7
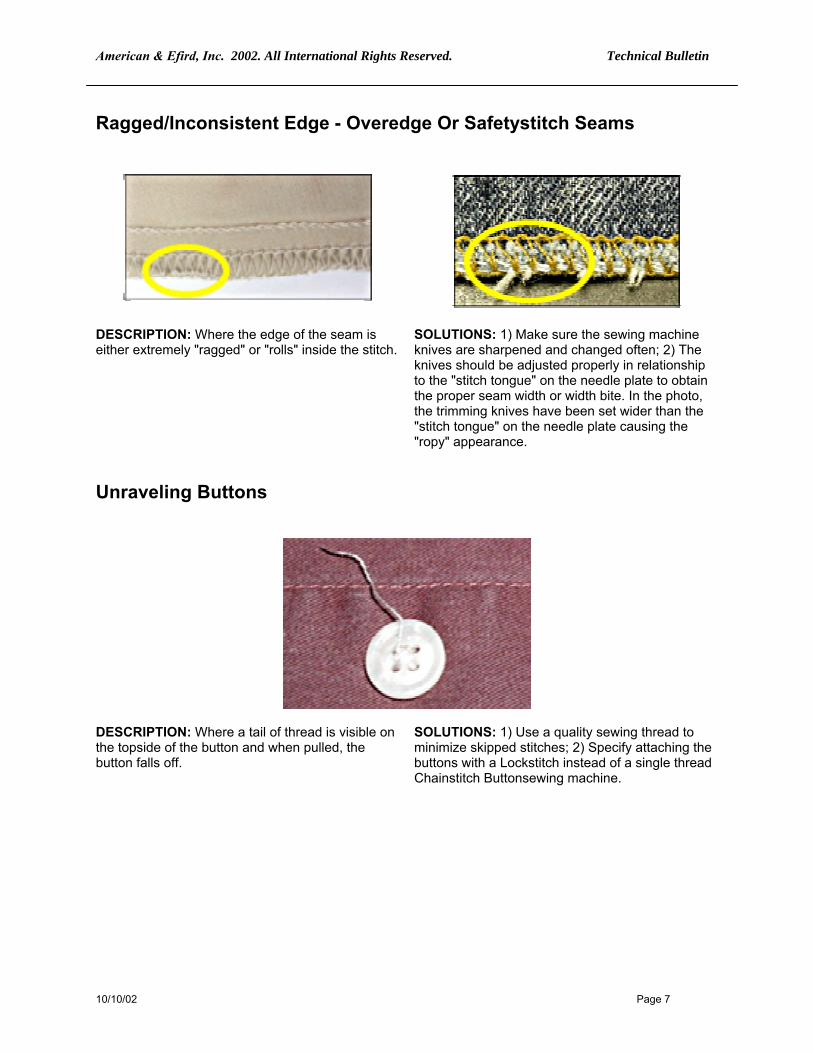
Ragged/Inconsistent Edge - Overedge Or Safetystitch Seams
DESCRIPTION: Where the edge of the seam is either extremely "ragged" or "rolls" inside the stitch.
SOLUTIONS: 1) Make sure the sewing machine knives are sharpened and changed often; 2) The knives should be adjusted properly in relationship to the "stitch tongue" on the needle plate to obtain the proper seam width or width bite. In the photo, the trimming knives have been set wider than the "stitch tongue" on the needle plate causing the "ropy" appearance.
Unraveling Buttons
DESCRIPTION: Where a tail of thread is visible on the topside of the button and when pulled, the button falls off.
SOLUTIONS: 1) Use a quality sewing thread to minimize skipped stitches; 2) Specify attaching the buttons with a Lockstitch instead of a single thread Chainstitch Buttonsewing machine.


![Iftikhar et al., Textile Sci Eng 2018, 8:3 e 10.4172/2165 ... · are four classes of seams such as; superimposed seam, lapped seam, bound seam and flat seam [9]. Durability of clothing](https://img.pdfslide.us/doc/110x75/5e98baf098727a3607054248/iftikhar-et-al-textile-sci-eng-2018-83-e-1041722165-are-four-classes-of.jpg)