Embed Size (px)
Citation preview

Common API User’s Manual Version 3.0
Copyright HBM GmbH 2015
HBM Common API A4174-2.0 HBM public 2
Hottinger Baldwin Messtechnik GmbH
Im Tiefen See 45
D-64239 Darmstadt
Tel. +49 6151 803-0
Fax +49 6151 803-9100
Email: [email protected]
Internet: www.hbm.com
DVS: A4174-2.0
HBM public
11.2015
Hottinger Baldwin Messtechnik GmbH. Subject to modifications. All product descriptions are for general information only. They are not to be understood as a guarantee of quality or durability
HBM Common API A4174-2.0 HBM public 3
Contents 1 General .................................................................................................................................................................. 4
1.1 About this document ....................................................................................................................................... 4 1.2 .NET Framework ............................................................................................................................................. 4 1.3 Installation ....................................................................................................................................................... 4
2 Developing with the Common API ..................................................................................................................... 5 2.1 Description ...................................................................................................................................................... 5 2.2 Device families ................................................................................................................................................ 5 2.3 Components .................................................................................................................................................... 5 2.4 Thread safety .................................................................................................................................................. 7 2.5 Object model ................................................................................................................................................... 7 2.6 Message system ............................................................................................................................................. 9 2.7 Use with Visual Studio .................................................................................................................................... 9
2.7.1 References .............................................................................................................................................. 9 2.7.2 Intellisense ............................................................................................................................................ 10
2.8 Main workflows and concepts ....................................................................................................................... 11 2.8.1 Scan ...................................................................................................................................................... 11 2.8.2 Measuring ............................................................................................................................................. 12 2.8.3 Exceptions, Errors and Warnings ......................................................................................................... 13 2.8.4 Device parameterization ....................................................................................................................... 14 2.8.5 Additional Features ............................................................................................................................... 15
2.9 Sensor database API .................................................................................................................................... 16 2.9.1 The sensor object model....................................................................................................................... 16 2.9.2 The SensorDBManager ........................................................................................................................ 18
2.10 Logging ......................................................................................................................................................... 20 3 Feature Overview ............................................................................................................................................... 21
3.1 New features of Common API V3.0 .............................................................................................................. 22 4 Limitations .......................................................................................................................................................... 24
4.1 General ......................................................................................................................................................... 24 4.2 QuantumX ..................................................................................................................................................... 24 4.3 PMX .............................................................................................................................................................. 24 4.4 MGCplus ....................................................................................................................................................... 25
5 How To’s ............................................................................................................................................................. 26 5.1 Scan .............................................................................................................................................................. 26 5.2 Connect ......................................................................................................................................................... 26 5.3 Assign sensor ............................................................................................................................................... 27 5.4 Retrieve snapshot ......................................................................................................................................... 28 5.5 Continuous measurement ............................................................................................................................. 28 5.6 Special device function ................................................................................................................................. 31 5.7 Sensor database access .............................................................................................................................. 32 5.8 Logging ......................................................................................................................................................... 34
6 Troubleshooting Tips ........................................................................................................................................ 35
General
HBM Common API A4174-2.0 HBM public 4
1 General
1.1 About this document
This document is a brief User’s Manual, quick introduction to HBM Common API.
It describes key features and main workflows.
For a detailed description of all functions and properties, see the CHM-format help file that is provided together with this API.
For code examples and a quick demonstration of the API take a look at the provided Demo Project.
All code examples in this document are written in C#. They are for demonstration purposes only without warranty of any kind.
1.2 .NET Framework
The HBM Common API is written in C# and requires .NET Framework 4.0.
1.3 Installation
The HBM Common API is shipped as a single setup package.
This setup might be run by any user, though when run with administrator privileges it will also setup the Windows Firewall for the HBM Device Scan to work (see also below in this section).
By default the setup copies all files into a sub-directory “HBM\HBM Common API” within the public documents directory (i.e. for all local users) and makes it accessible via the Start Menu (XP up to Windows 7) or the Windows 8.x / Windows 10 Tiles Screen (All Apps section, group HBM). Notice that write-access is necessary for the demo-project to be buildable.
Here you’ll find documentation, the API binaries (notice that some DLLs are dedicated to x86 or x64) and a C# demo project (could be built as x86 or Any CPU).
In the binaries directory there is a batch file to setup the Windows Firewall to allow the arrival of messages for the HBM Device Scan. On the developer PC these ports are opened when the setup is run with administrator privileges, otherwise this batch file needs to be run once with administrator privileges before the scan would work.
On systems using a different Firewall the ports need to be opened as done in the batch file.
Building the demo project with MS Visual Studio™ will copy all necessary DLLs into the bin directory using the Post-build event (x64 DLLs when using Any CPU configuration on a 64-bit Windows, otherwise x86 DLLs). The API Assemblies are all built in architecture Any CPU.

Developing with the Common API
HBM Common API A4174-2.0 HBM public 5
2 Developing with the Common API
2.1 Description
The Common API is a modular DAQ framework providing measurement functionalities for different device families in a unified, scalable and fast manner. It also includes a sensor API to work with custom sensors or with sensors from the HBM sensor database.
The Common API hides device family differences behind a common homogeneous interface and therefore reduces your need to rewrite code when switching from one hardware platform to another. You can reuse the same codebase.
2.2 Device families
The actual version of the Common API supports three different HBM device families:
Device Family name Description
QuantumX Universal data acquisition system
PMX Industrial measuring amplifier system for testing and automation.
MGCplus System for structural tests, durability testing and lab measurements.
2.3 Components
The API consist of a common part, which contains common functionalities shared across all devices, and device specific parts which are so unique to certain device families that they are implemented in the specialized device family driver.
All device family drivers are implemented as Plugins to the Common API. Therefore the Common API can easily be extended by additional HBM device family drivers or even by 3rd party device family drivers.
The main assemblies of the API are:
Component Description
Hbm.Api.Common Main entry point for customer applications. Common functions, Object model, Base classes.
Hbm.Api.Scan Contains the HBM device scan mechanism to detect devices within your network. Only used internally, should not be used directly by customer applications.
Hbm.Api.Utils Utilities and helper functions.
Hbm.Api.SensorDB Sensor database API
Hbm.Api.Logging Logging API
Hbm.Api.QuantumX QuantumX device family implementation.
Hbm.Api.Pmx PMX device family implementation.
Hbm.Api.Mgc MGC device family implementation.
From a high level perspective the Common API is built in 3 different layers as shown in Figure 1, whereby yellow represents HBM Common API components and blue parts are Non-HBM

Developing with the Common API
HBM Common API A4174-2.0 HBM public 6
components like your Application on top of the API. Please keep in mind the Sensor database is no element of the actual version of the Common API.
Figure 1 : High Level System Architecture
Assembly Hbm.Api.Common contains the most important classes DaqEnvironment and DaqMeasurement as well as the general object model in namespace Hbm.Api.Common.Entities.
Class Description
DaqEnvironment Represents the entire system with all contained devices.
Implemented as Singleton, thereby you need to call DaqEnvironment.GetInstance() to obtain an object reference. The first time an instance is created all available concrete device family implementations are enumerated (Plugins) and a scan is initiated.
Call DaqEnvironment.GetInstance() as early as possible in your application to ensure that you get a filled result list when calling Scan().
Allows the following tasks:
Scan network for devices
Connect to devices
Disconnect from devices

Developing with the Common API
HBM Common API A4174-2.0 HBM public 7
Class Description
DaqMeasurement Manages and represents data acquisition sessions.
Use this class to execute and run a continuous measurement.
Allows the following tasks:
Register signals for a measurement session
Remove signals from a measurement session
Start DAQ session
Stop DAQ session
Distribute measurement values to registered signals
2.4 Thread safety
All components of the API are designed for parallel access and therefore all functions where thread safety is needed are secured against simultaneous access from different threads.
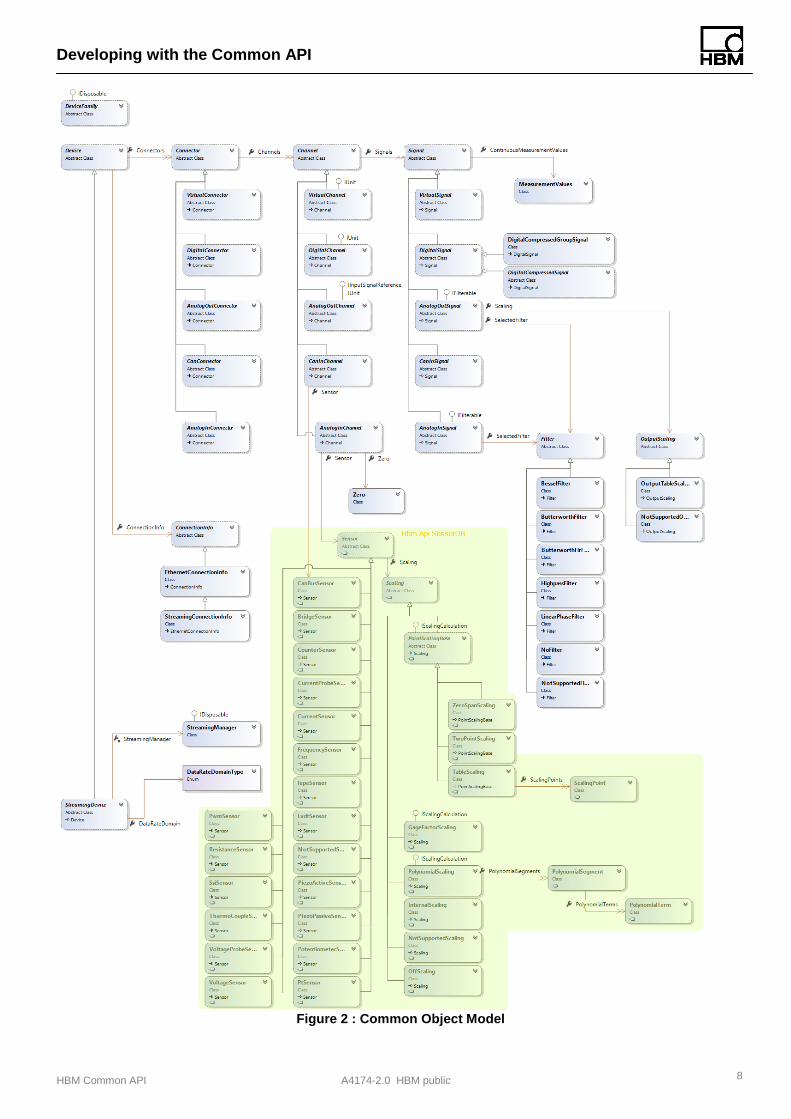
2.5 Object model
The object model in assembly Hbm.Api.Common supports normal devices as well as streaming devices. Concrete implementations of a device, such as QuantumX, MGC or PMX, implements and fulfils this object model. Each Plugin device driver can also extend this model, but as a minimum this model is shared among all devices.
In most cases it’s sufficient to operate on functions and properties of the general class Device. Only if you need to use special device family specific functions, you need to cast to this concrete device implementation and then use these additional features.
The properties of a device are filled with actual values during the connect process. That means that after a successful connect to a device you can explore all properties of that device.
Developing with the Common API
HBM Common API A4174-2.0 HBM public 8
Figure 2 : Common Object Model
Developing with the Common API
HBM Common API A4174-2.0 HBM public 9
2.6 Message system
The Common API contains a central messaging system. This system is mainly based on a static central reachable message broker that contains all available events (see Figure 1).
Register event handlers for every event you’re interested in at class MessageBroker.
It can be found in namespace Hbm.Api.Common.Messaging and is used for internal as well as external communications.
Example: //MessageBroker handles all events of the common API. MessageBroker.DeviceConnected += MessageBroker_DeviceConnected;
void MessageBroker_DeviceConnected( object sender, DeviceEventArgs e ) { // Handle event here }
The message system raises all events asynchronously, meaning that each event handler is called on a separate thread. Take this fact into account when you want to reflect events on your GUI. You then have to marshal to the GUI thread first.
2.7 Use with Visual Studio
To work with the Common API you need a development environment such like Visual Studio and the .NET Framework 4.0 installed.
We recommend using Microsoft Visual Studio 2012 or higher to work with, but every other IDE supporting .NET 4 should work fine.
2.7.1 References
In your project open up the Reference Manager and browse to the folder where you previously installed the Common API assemblies (32-/64-Bit). As a minimum you need references to Hbm.Api.Common.dll and Hbm.Api.SensorDB.dll.

Developing with the Common API
HBM Common API A4174-2.0 HBM public 10
Figure 3 : API References
As long as you don’t work with special features of a certain device that is all you need.
In case you want to use properties and functions unique to a certain device and therefore not accessible through the common part, you also need references to those assemblies, e.g. Hbm.Api.QuantumX.dll.
Under normal circumstances you never need references to Hbm.Api.Scan.dll and Hbm.Api.Utils.dll.
Info:
Be aware that you always need ALL DLL files and also the DeviceDriver.plugins file in the same location as your main EXE file, no matter what references you need in your project.
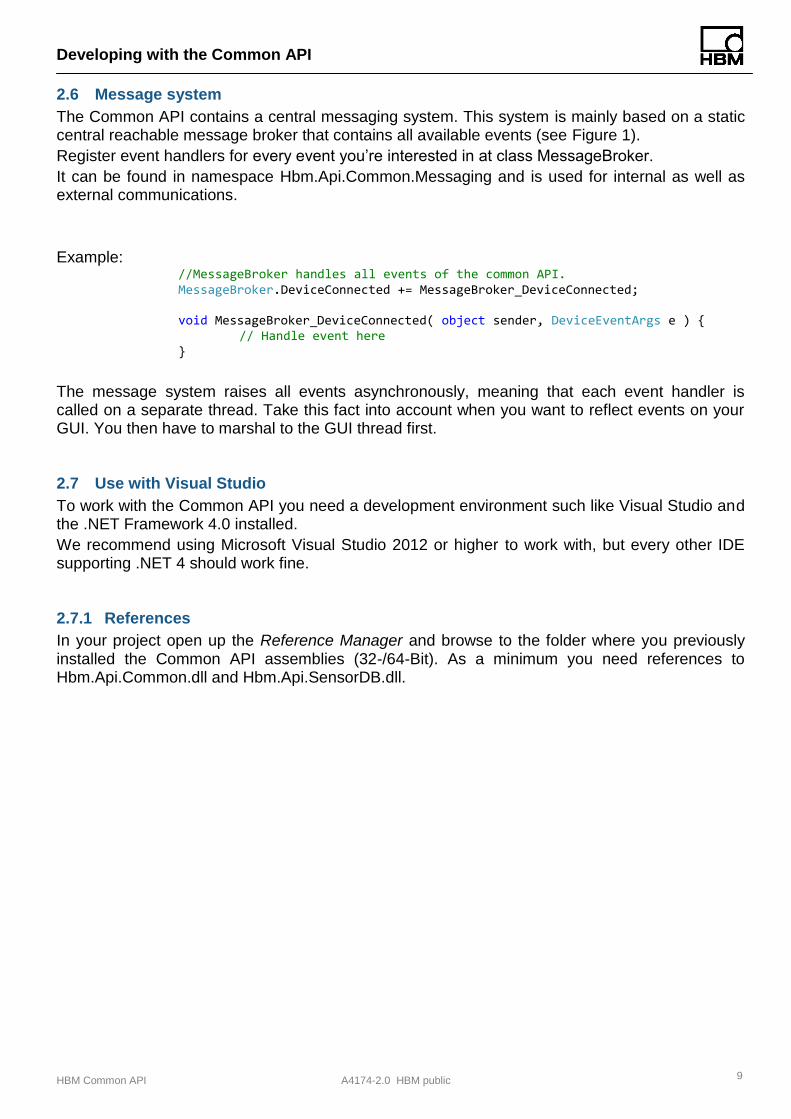
2.7.2 Intellisense
For full convenience during development with the Common API the help of Intellisense is essential. To make Intellisense work properly you must ensure that the xml files (see Figure 4), containing the Intellisense help, are placed in the same directory as the referenced assemblies.
You find these files already placed in the correct folders right after you installed the API. So, Intellisense should work right out of the box.
Developing with the Common API
HBM Common API A4174-2.0 HBM public 11
Figure 4 : Intellisense files
2.8 Main workflows and concepts
2.8.1 Scan
To find devices within the current network some device families implement the HBM scan protocol. To check whether a device family supports scanning you can examine the property IsScanSupported of class DeviceFamily.
Example: MgcDeviceFamily mgcFamily = new MgcDeviceFamily(); bool hasScan = mgcFamily.IsScanSupported;
To execute a scan for all devices in the network you have to use one of the Scan() methods in DaqEnvironment. The scan mechanism searches for all device families which are found as plugins during initialization but of course only for those supporting the scan mechanism.
Example:

Developing with the Common API
HBM Common API A4174-2.0 HBM public 12
// Init (all families are enumerated, scan is initialized) DaqEnvironment env = DaqEnvironment.GetInstance(); // Scan for all available devices List<Device> foundDevices = env.Scan();
During the scan some properties of the device such as ConnectionInfo, SerialNo, Model, Name and FirmwareVersion are filled and can be examined afterwards.
Due to the nature of the scan mechanism – device sends multicast message only every couple seconds - it can happen that after the call to Scan() not all devices are already gathered. So, to be sure you’ll find all devices you have to wait some time (max. 5 seconds) after the first call to GetInstance() or periodically rescan.
2.8.2 Measuring
The API provides two ways of retrieving measurement values. One way is to retrieve just a single snapshot value and the second way is to setup a complete continuous measurement session.
To setup a continuous measurement session follow these steps:
1. Choose your devices you want to measure with.
2. Connect to these chosen devices. You can either select devices from the scan result or connect devices manually. See 5.2 for more information on how to manually connect to a device.
3. Parameterize all devices, e.g. assign and setup sensors. At least set sample rate on each signal you want to measure with and assign signal back to device.
4. Create a new DaqMeasurement session
5. Add signals you want to measure with to the measurement session
6. Prepare DAQ session
7. Start DAQ session
8. Periodically transfer measurement values from circular buffers to measurement values buffer in each signal.
9. Stop DAQ session
The prepare action in step 6 is necessary to initialize buffers, threads and how timestamps are handled. By default equidistant signals contain just one single timestamp per fetch interval. For non-equidistant signals you always get a timestamp for each value, no matter what you specified in step 6. Normally you don’t need to fiddle around with the above mentioned parameters, just use the parameterless method PrepareDaq() and everything is setup with default values. In some rare cases it might be necessary to influence the parameters, timestamps, number of fetching threads, fetching interval and so on to best suit your needs. But be careful in altering the default values, please check carefully the code documentation (CHM file) on function PrepareDaq()!
Info:
Timestamps are always provided as double precision values in seconds since the start of
the measurement (see DaqMeasuremnet.MeasurementStartTime,
MeasurementStartUTCTime and MeasurmentStartSystemTime).
To transfer the data in step 8 you have to call DaqMeasurement.FillMeasurementValues in some kind of a timer controlled loop within a suitable interval. The interval length depends on how fast
Developing with the Common API
HBM Common API A4174-2.0 HBM public 13
the sample rate is, how much memory is available and how you want to process the measurement data.
If the fetch interval is chosen too slowly, the underlying circular buffers will overflow and the oldest values will be overwritten. Therefore you should always check the flags Signal.MeasurementValues.BufferOverrunOccurred as well as Signal.IsExcludedFromDaq for all signals that are involved in a running measurement.
The internal API data fetching interval to retrieve data from the participating devices is set to 50ms by default. This interval determines how often data is transferred from the device into the circular buffers. Therefore it doesn’t make sense to set your data fetching timer interval to less than that value. If you need a faster data fetching interval you first need to alter the internal API data fetching interval by giving a lower value to the constructor of class DaqMeasurement (Step 4).
For a complete example see 5.5 or check the supplied Demo project.
2.8.3 Exceptions, Errors and Warnings
The Common API supports three different levels to report that something went wrong.
Classical Exceptions to indicate fatal code errors, Warnings and Errors.
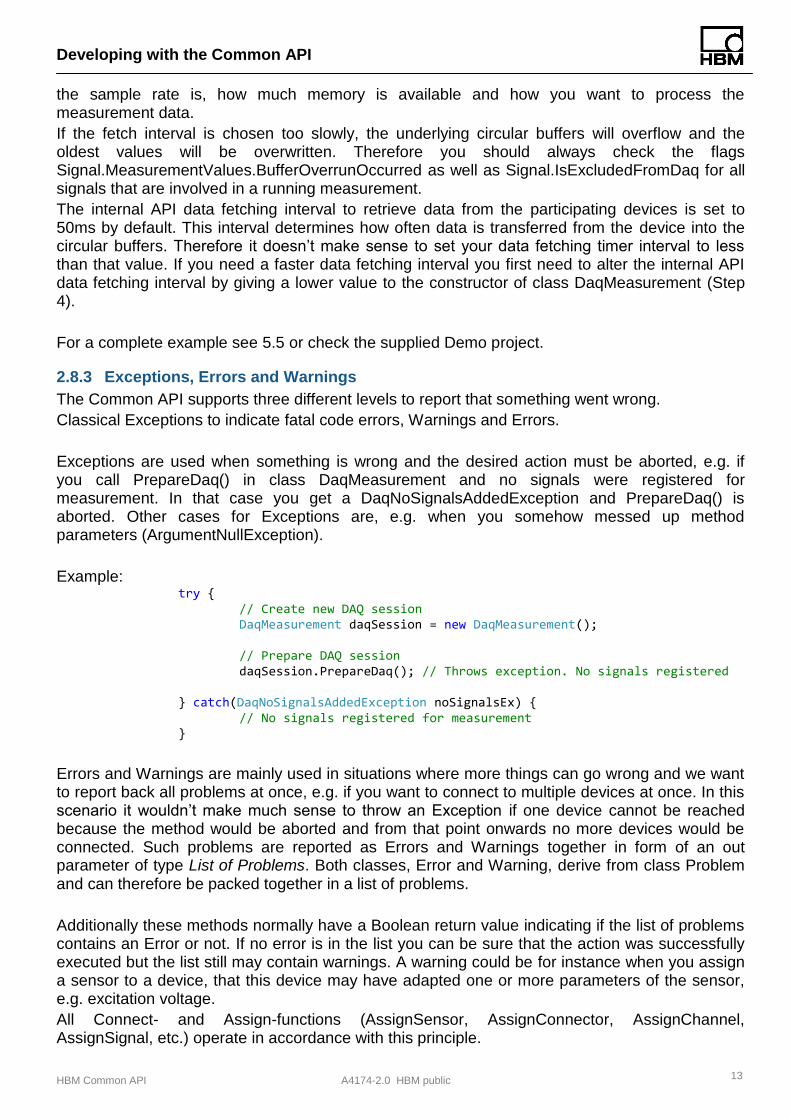
Exceptions are used when something is wrong and the desired action must be aborted, e.g. if you call PrepareDaq() in class DaqMeasurement and no signals were registered for measurement. In that case you get a DaqNoSignalsAddedException and PrepareDaq() is aborted. Other cases for Exceptions are, e.g. when you somehow messed up method parameters (ArgumentNullException).
Example: try { // Create new DAQ session DaqMeasurement daqSession = new DaqMeasurement(); // Prepare DAQ session daqSession.PrepareDaq(); // Throws exception. No signals registered } catch(DaqNoSignalsAddedException noSignalsEx) { // No signals registered for measurement }
Errors and Warnings are mainly used in situations where more things can go wrong and we want to report back all problems at once, e.g. if you want to connect to multiple devices at once. In this scenario it wouldn’t make much sense to throw an Exception if one device cannot be reached because the method would be aborted and from that point onwards no more devices would be connected. Such problems are reported as Errors and Warnings together in form of an out parameter of type List of Problems. Both classes, Error and Warning, derive from class Problem and can therefore be packed together in a list of problems.
Additionally these methods normally have a Boolean return value indicating if the list of problems contains an Error or not. If no error is in the list you can be sure that the action was successfully executed but the list still may contain warnings. A warning could be for instance when you assign a sensor to a device, that this device may have adapted one or more parameters of the sensor, e.g. excitation voltage.
All Connect- and Assign-functions (AssignSensor, AssignConnector, AssignChannel, AssignSignal, etc.) operate in accordance with this principle.
Developing with the Common API
HBM Common API A4174-2.0 HBM public 14
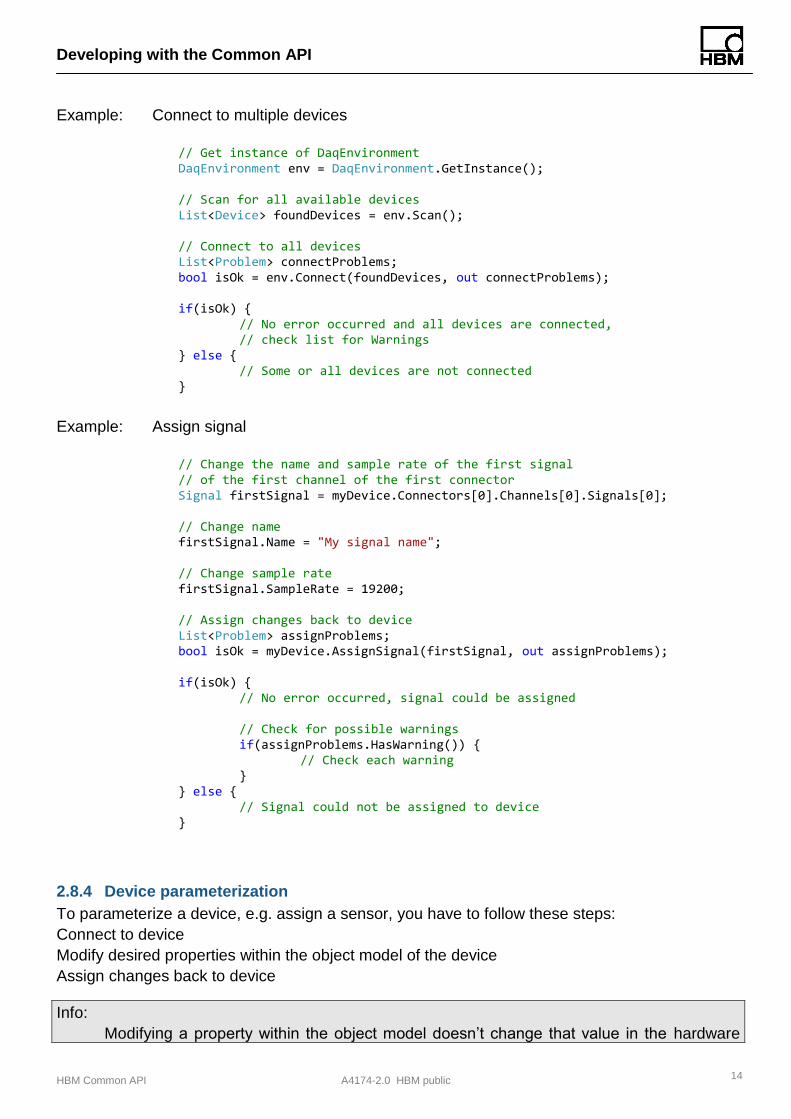
Example: Connect to multiple devices
// Get instance of DaqEnvironment DaqEnvironment env = DaqEnvironment.GetInstance(); // Scan for all available devices List<Device> foundDevices = env.Scan(); // Connect to all devices List<Problem> connectProblems; bool isOk = env.Connect(foundDevices, out connectProblems); if(isOk) { // No error occurred and all devices are connected, // check list for Warnings } else { // Some or all devices are not connected }
Example: Assign signal
// Change the name and sample rate of the first signal // of the first channel of the first connector Signal firstSignal = myDevice.Connectors[0].Channels[0].Signals[0]; // Change name firstSignal.Name = "My signal name"; // Change sample rate firstSignal.SampleRate = 19200; // Assign changes back to device List<Problem> assignProblems; bool isOk = myDevice.AssignSignal(firstSignal, out assignProblems); if(isOk) { // No error occurred, signal could be assigned // Check for possible warnings if(assignProblems.HasWarning()) { // Check each warning } } else { // Signal could not be assigned to device }
2.8.4 Device parameterization
To parameterize a device, e.g. assign a sensor, you have to follow these steps:
Connect to device
Modify desired properties within the object model of the device
Assign changes back to device
Info:
Modifying a property within the object model doesn’t change that value in the hardware
Developing with the Common API
HBM Common API A4174-2.0 HBM public 15
device! Changes require a call to the corresponding AssignXYZ function to take effect.
Example:
// Change the name and sample rate of the first signal of the first channel of the // first connector
Signal firstSignal = myDevice.Connectors[0].Channels[0].Signals[0]; // Change name firstSignal.Name = "My signal name"; // Change sample rate firstSignal.SampleRate = 19200; // Assign changes back to device List<Problem> problemsDuringAssign; myDevice.AssignSignal(firstSignal, out problemsDuringAssign);
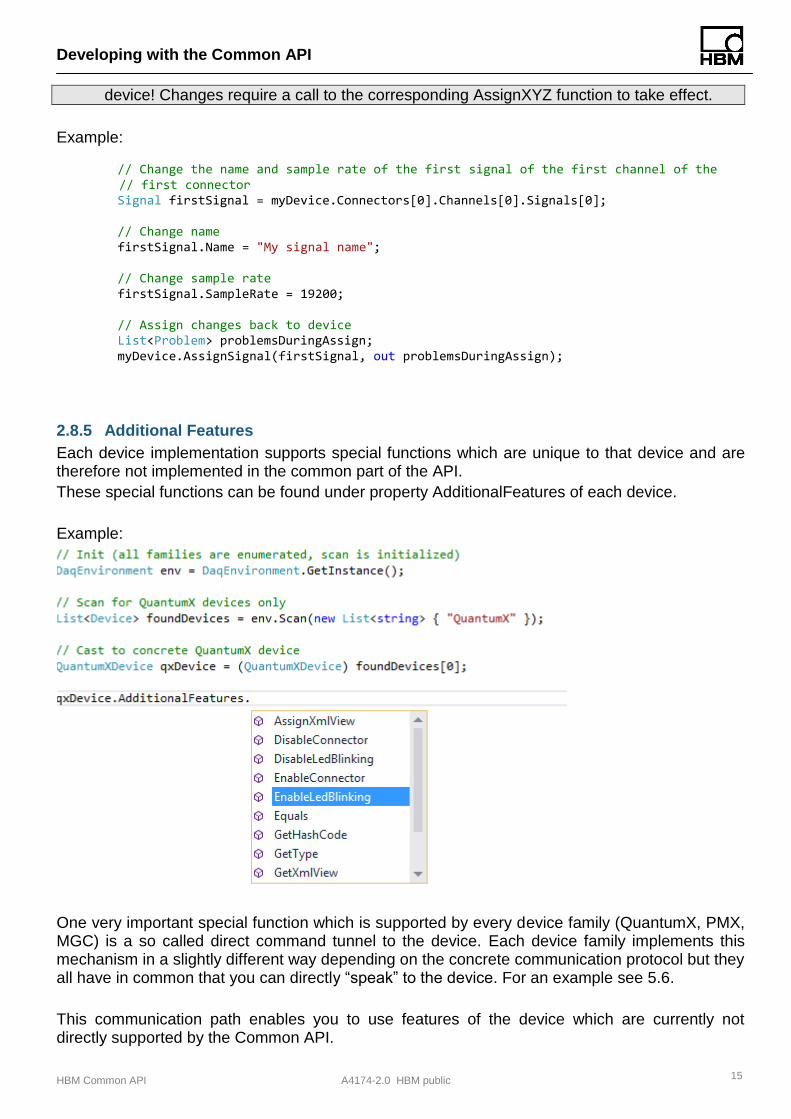
2.8.5 Additional Features
Each device implementation supports special functions which are unique to that device and are therefore not implemented in the common part of the API.
These special functions can be found under property AdditionalFeatures of each device.
Example:
One very important special function which is supported by every device family (QuantumX, PMX, MGC) is a so called direct command tunnel to the device. Each device family implements this mechanism in a slightly different way depending on the concrete communication protocol but they all have in common that you can directly “speak” to the device. For an example see 5.6.
This communication path enables you to use features of the device which are currently not directly supported by the Common API.

Developing with the Common API
HBM Common API A4174-2.0 HBM public 16
Info:
You need to know exactly the communication protocol of a certain device when using this function. So, be very careful when making use of this functionality.
2.9 Sensor database API
The Common API comes with a “readonly” HBM sensor database (which contains most HBM sensors) and an empty template of a user sensor database which can be used to manage your own sensors.
To create and parameterize your own sensors, the API provides a sensor object model that defines all useable sensor types and their properties. Using the SensorDBManager, the API allows you to manage sensors of existing sensor databases.
2.9.1 The sensor object model
The sensor model is represented by the entity classes found in namespace Hbm.Api.SensorDB.Entities.
Figure 5 : Sensor object model
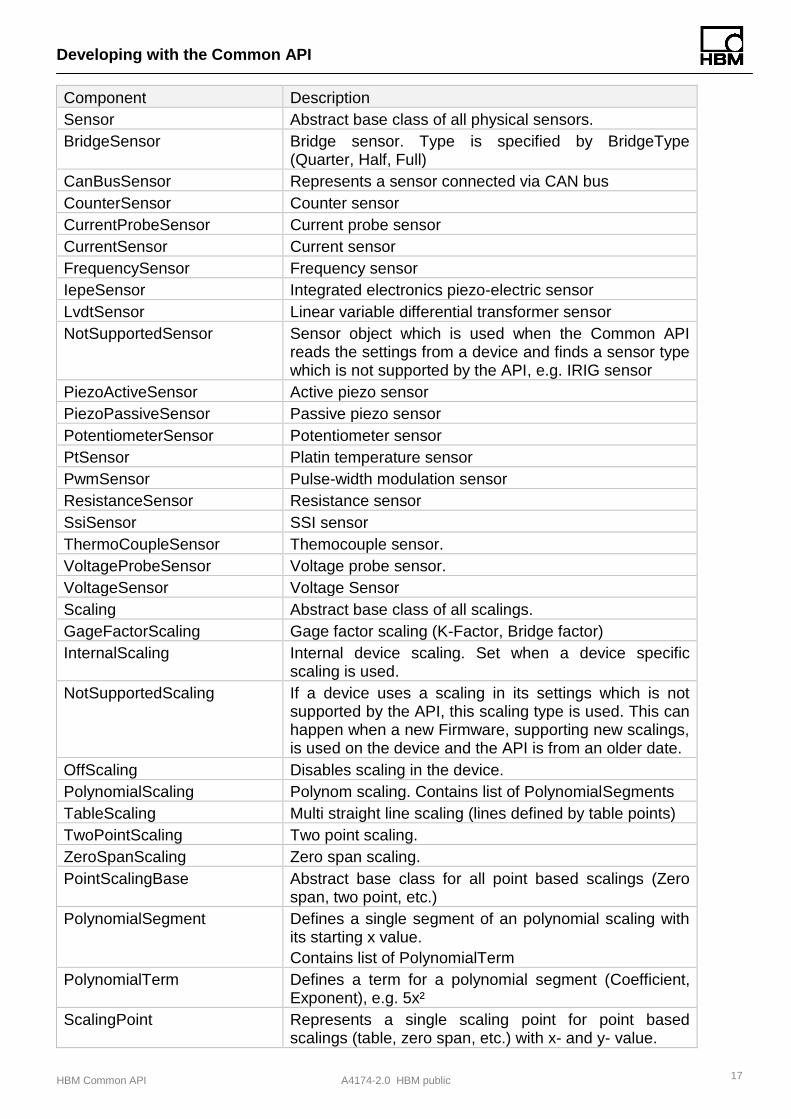
The sensor object model mainly consists of the following classes:
Component Description
Developing with the Common API
HBM Common API A4174-2.0 HBM public 17
Component Description
Sensor Abstract base class of all physical sensors.
BridgeSensor Bridge sensor. Type is specified by BridgeType (Quarter, Half, Full)
CanBusSensor Represents a sensor connected via CAN bus
CounterSensor Counter sensor
CurrentProbeSensor Current probe sensor
CurrentSensor Current sensor
FrequencySensor Frequency sensor
IepeSensor Integrated electronics piezo-electric sensor
LvdtSensor Linear variable differential transformer sensor
NotSupportedSensor Sensor object which is used when the Common API reads the settings from a device and finds a sensor type which is not supported by the API, e.g. IRIG sensor
PiezoActiveSensor Active piezo sensor
PiezoPassiveSensor Passive piezo sensor
PotentiometerSensor Potentiometer sensor
PtSensor Platin temperature sensor
PwmSensor Pulse-width modulation sensor
ResistanceSensor Resistance sensor
SsiSensor SSI sensor
ThermoCoupleSensor Themocouple sensor.
VoltageProbeSensor Voltage probe sensor.
VoltageSensor Voltage Sensor
Scaling Abstract base class of all scalings.
GageFactorScaling Gage factor scaling (K-Factor, Bridge factor)
InternalScaling Internal device scaling. Set when a device specific scaling is used.
NotSupportedScaling If a device uses a scaling in its settings which is not supported by the API, this scaling type is used. This can happen when a new Firmware, supporting new scalings, is used on the device and the API is from an older date.
OffScaling Disables scaling in the device.
PolynomialScaling Polynom scaling. Contains list of PolynomialSegments
TableScaling Multi straight line scaling (lines defined by table points)
TwoPointScaling Two point scaling.
ZeroSpanScaling Zero span scaling.
PointScalingBase Abstract base class for all point based scalings (Zero span, two point, etc.)
PolynomialSegment Defines a single segment of an polynomial scaling with its starting x value.
Contains list of PolynomialTerm
PolynomialTerm Defines a term for a polynomial segment (Coefficient, Exponent), e.g. 5x²
ScalingPoint Represents a single scaling point for point based scalings (table, zero span, etc.) with x- and y- value.

Developing with the Common API
HBM Common API A4174-2.0 HBM public 18
Component Description
Descriptor Represents a descriptor of the sensor, e.g. the data sheet or a photo, etc.
Example: Creating a sensor object with 2 point scaling // Create new sensor object BridgeSensor newSensor = new BridgeSensor(); newSensor.UniqueName = "Sensor 200"; newSensor.Wiring = BridgeSensorWiring.SixWire; newSensor.MinExcitationVoltage = 0.1M; newSensor.MaxExcitationVoltage = 15; newSensor.PreferredExcitationVoltage = 5; // 5 Volt newSensor.Impedance = 350; // 350 Ohm // Create 2 point scaling TwoPointScaling scaling2P = new TwoPointScaling(); scaling2P.EngineeringUnit = "kg"; scaling2P.MaxEngineeringRange = 200; scaling2P.MinEngineeringRange = -200; scaling2P.ElectricalP1 = 0; // x1 scaling2P.EngineeringP1 = 0; // y1 scaling2P.ElectricalP2 = 2; // x2 scaling2P.EngineeringP2 = 200; // y2 // Add scaling to sensor newSensor.Scaling = scaling2P;
2.9.2 The SensorDBManager
The SensorDBManger (which implements the ISensorDB interface) provides functions to get, insert, update and delete sensors as well as functions to manage hierarchical groups (categories) of sensors within sensor databases in various languages.
To get a complete object representation of all categories and sensors of an existing sensor database you can call ISensorDB.GetHierarchicalCategories. See Figure 6 to get an idea of the relationship of the involved objects.
Examples that show how to access sensor databases can be found in chapter 5 (“How To’s”).

Developing with the Common API
HBM Common API A4174-2.0 HBM public 19
Figure 6 : Relationship of HierarchicalCategory, Category and Sensor
Please consider following hints when using the SensorDBManager:
Every sensor must have a category assigned to. The category must be stored before the sensor can be inserted.
Every sensor must have a scaling assigned to. If no concrete scaling information is available, the ScalingType should be set to “Internal”.
If a new language is inserted, it’s required to create new translation records for the new language for every existing translation. The API uses the translations of the fallback language to create the translation records for the new language.
Developing with the Common API
HBM Common API A4174-2.0 HBM public 20
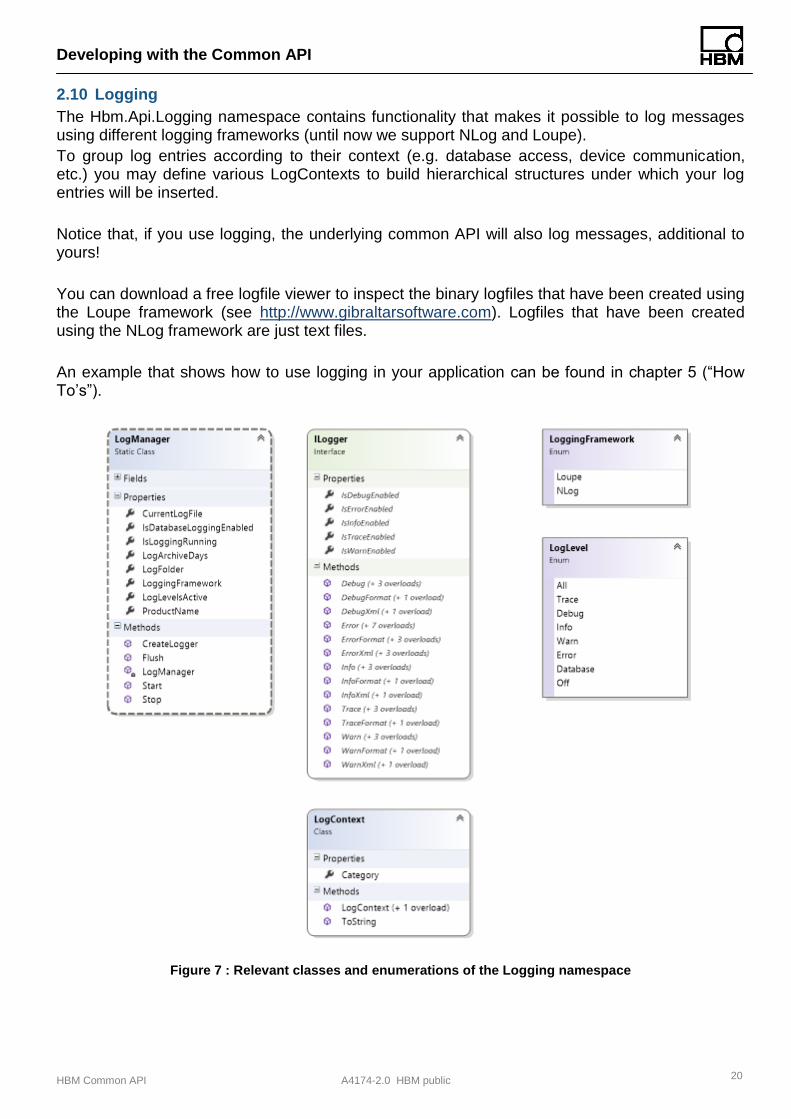
2.10 Logging
The Hbm.Api.Logging namespace contains functionality that makes it possible to log messages using different logging frameworks (until now we support NLog and Loupe).
To group log entries according to their context (e.g. database access, device communication, etc.) you may define various LogContexts to build hierarchical structures under which your log entries will be inserted.
Notice that, if you use logging, the underlying common API will also log messages, additional to yours!
You can download a free logfile viewer to inspect the binary logfiles that have been created using the Loupe framework (see http://www.gibraltarsoftware.com). Logfiles that have been created using the NLog framework are just text files.
An example that shows how to use logging in your application can be found in chapter 5 (“How To’s”).
Figure 7 : Relevant classes and enumerations of the Logging namespace

Feature Overview
HBM Common API A4174-2.0 HBM public 21
3 Feature Overview The following table shows an overview of the various features related to the version of the Common API.
Feature QuantumX PMX MGCplus
Device scan
Not possible
Measurement configuration
Sensor configuration
Bridge
CanBus Not possible
Counter Not yet supported
Current
CurrentProbe Not possible Not possible Not possible
Frequency
IEPE Not possible Not yet supported
LVDT Not yet supported
PiezoActive Not possible Not possible
PiezoPassive Not possible Not possible
Potentiometer Not yet supported
Pt Not possible Not yet supported
PWM Not yet supported
Resistance Not possible Not yet supported
SSI Not yet supported
ThermoCouple Not possible
Voltage
VoltageProbe Not possible Not possible Not possible
Analog In DAQ
Analog Out (direct setting)
Analog Out (channel routing)
Digital In DAQ
Digital Out DAQ
Digital Out (direct setting)
CAN DAQ
( via CODESYS /calc. channels )
Supported in Common API version 2.0
Supported from Common API version 3.0 onward

Feature Overview
HBM Common API A4174-2.0 HBM public 22
3.1 New features of Common API V3.0
New functions
Acquisition of CAN signals
CAN Sensor configuration (CanConnector, CanInChannel, CanInSignal) has been added for QuantumX and MGCplus devices
Channel configuration using sensor database
o Access to sensor database
o Assign sensor to channel
o Create, edit or delete sensors in database
o Manage hierarchical groups of sensors
The API includes an HBM Sensor Database containing HBM sensors and an empty template for a user database. The Hbm.Api.DemoProject shows how to access these databases.
Logging
o Logging of the underlying API, e.g. the communication with the devices
o Add further log-entries, relevant for your application
Improved device handling
o Reset device to factory settings
o Flash LEDs of a device
o Activate/Deactivate AutoCalibration
o Activate/Deactivate Shunt
o Get DeviceStatus and DeviceErrorStatus
o Use of a common Overflow value (instead of device dependent overview values)
o Detect lost signals during a measurement. The measurement is no longer aborted when losing one or more signals/devices. The Signal class has some new properties ExcludeFromDaqTimeout, IdleTime and IsExcludedFromDaq
Get API version information
Improvements and bug fixes
The scan now supports multiple addresses per adapter and different subnet masks
SetZeroBalance considers Zero.Target and Zero.IsZeroBalancingInhibited now to calculate new Zero.Offset
DigitalCompressedSignal updates its MeasurementValues.BufferOverrunOccurred flag now during a measurement
MeasurementValues.UpdatedValueCount property will be reset now when a new measurement will be prepared
Device.SetUnit and Device.GetUnit added to set/get the physical unit of a channel that has no sensor (e.g. virtual or digital channels)
Other Changes
MeasurementValues.CanRead property has been removed
Zero.IsZeroBalancingInhibited added
Signal.ExcludeFromDaqTimeout, Signal.IdleTime and Signal.IsExcludedFromDaq added
PotentiometerSensor, IepeSensor, PiezoActiveSensor: Properties ActiveSupplyType and ActiveSupplyValue removed

Feature Overview
HBM Common API A4174-2.0 HBM public 23
PotentiometerSensor: Property PreferredExcitationVoltage added
CurrentSensor: Property ActiveSupplyType and ActiveSupplyValue added
SsiSensor: Property GlitchFilter removed, ActiveSupplyType and ActiveSupplyValue added
PwmSensor: Property IsInductive removed
CanBusSensor: Property ActiveSupplyVoltage added

Limitations
HBM Common API A4174-2.0 HBM public 24
4 Limitations
4.1 General
The Common API in version 3.0 doesn’t support every feature. The following table gives you an overview of what is currently not supported:
Feature Description
TEDS You can still use your TEDS, but the API doesn’t recognize/read TEDS nor is it possible to edit TEDS.
Hybrid Systems The Common API currently doesn’t support software synchronized measuring across different device families.
PTP, NTP No support for time sources
4.2 QuantumX
The following table lists several features which are currently not supported by the API:
Feature Description
IRIG, NTP, PTP, EtherCat, Time service config
Not supported.
Test signals Not supported.
Drift compensation If you assign a sensor, drift compensation is then always set to “Default”
Virtual Channels Virtual channels like calculated math channels are not supported
Firmware Supported from 4.2.56 onwards.
Info:
Unsupported Modules: MX590, CX22, CX27
(You are able to measure connected devices through a CX27 device)
4.3 PMX
The following table lists several features which are currently not supported by the PMX API:
Feature Description
Virtual Channels Virtual channels/signals cannot be parameterized.
Firmware Supported from 2.04 onwards.
Info:
Unsupported fieldbus boards: PX01EC, PX01PN, PX01EP
Limitations
HBM Common API A4174-2.0 HBM public 25
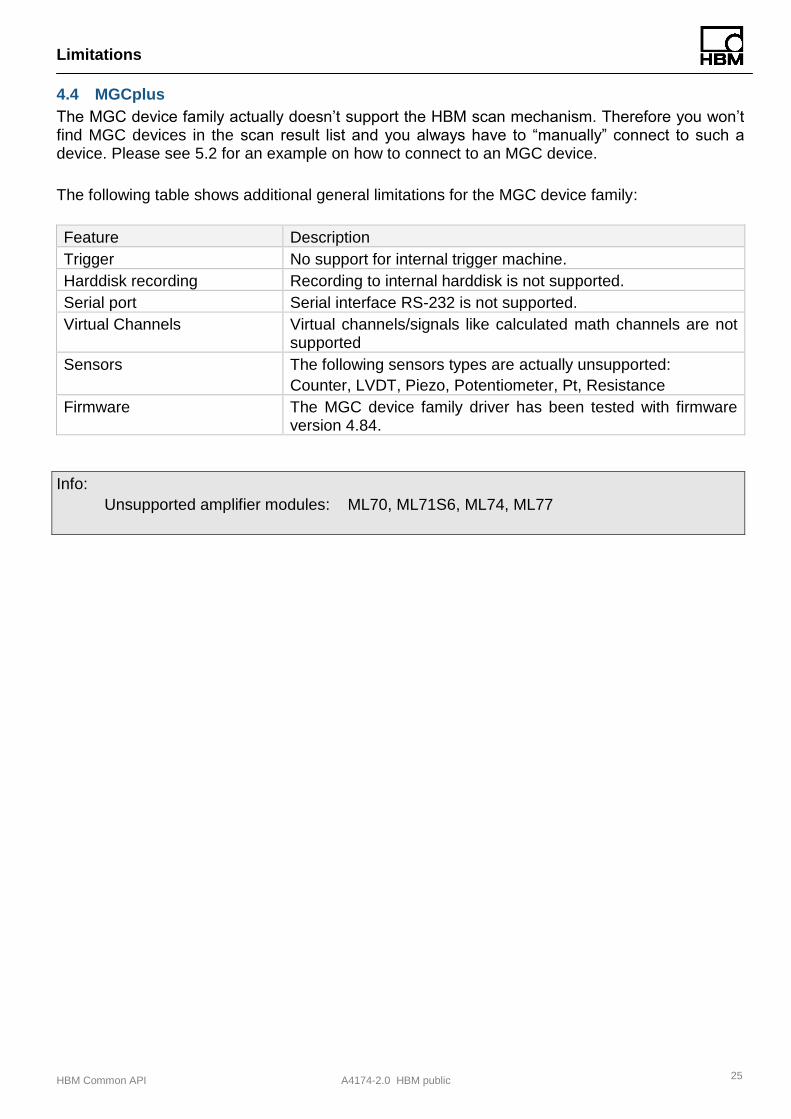
4.4 MGCplus
The MGC device family actually doesn’t support the HBM scan mechanism. Therefore you won’t find MGC devices in the scan result list and you always have to “manually” connect to such a device. Please see 5.2 for an example on how to connect to an MGC device.
The following table shows additional general limitations for the MGC device family:
Feature Description
Trigger No support for internal trigger machine.
Harddisk recording Recording to internal harddisk is not supported.
Serial port Serial interface RS-232 is not supported.
Virtual Channels Virtual channels/signals like calculated math channels are not supported
Sensors The following sensors types are actually unsupported:
Counter, LVDT, Piezo, Potentiometer, Pt, Resistance
Firmware The MGC device family driver has been tested with firmware version 4.84.
Info:
Unsupported amplifier modules: ML70, ML71S6, ML74, ML77

How To’s
HBM Common API A4174-2.0 HBM public 26
5 How To’s
5.1 Scan
Please note, between the initialization of the scan, which is done through the first call to DaqEnvironment.GetInstance(), and the actual execution of the scan should be some time to gather all devices (max. 5 seconds).
Example: Execute scan. // Init (all device family PLugins are enumerated, scan is initialized) DaqEnvironment env = DaqEnvironment.GetInstance(); // This is only for demonstration purposes Thread.Sleep(5000); // --- Scan for all available devices List<Device> allDevices = env.Scan();
In case you only want to scan for certain device families use the following line: // --- Scan for QuantumX and PMX devices only List<Device> someDevices = env.Scan(new List<string> { "QuantumX", "PMX" });
5.2 Connect
There are two possibilities to connect to a device. You can first execute a scan and use one of the devices from the result list or you already know the connection details of a certain device and connect manually with that device. The latter is also the only way if a device family doesn’t provide a scan.
If you connect to multiple devices at once this could take some time. Therefore, the Connect() method connects all devices asynchronously.
Example: Connect with device from scan // --- Execute scan // .. see above // Connect to first found device List<Problem> connectProblems; bool isOk = env.Connect(allDevices[0], out connectProblems); // Check for any problems if(isOk) { // No error occured and the device is connected if(connectProblems.HasWarning()) { // Check possible warnings } } else { // Device could not be connected }
Example: Connect with MGC device manually // Create connection info MgcDevice mgc = new MgcDevice("1.2.3.4", 7); // Connect to device directly without scan DaqEnvironment env = DaqEnvironment.GetInstance();

How To’s
HBM Common API A4174-2.0 HBM public 27
List<Problem> connectProblems; bool isOk = env.Connect(mgc, out connectProblems); // Check for any problems if(isOk) { // No error occured and the device is connected if(connectProblems.HasWarning()) { // Check possible warnings } } else { // Device could not be connected }
Example: Connect with multiple devices at once, get notified when device is connected // Get instance of DaqEnvironment DaqEnvironment env = DaqEnvironment.GetInstance(); // Thread.Sleep (3000); // Scan for all available devices List<Device> foundDevices = env.Scan(); // Register event handler for Connected-Event MessageBroker.DeviceConnected += MessageBroker_DeviceConnected; // Connect to all devices asynchronously List<Problem> connectProblems; bool isOk = env.Connect(foundDevices, out connectProblems);
void MessageBroker_DeviceConnected( object sender, DeviceEventArgs e ) { Console.WriteLine("Device {0} connected", e.UniqueDeviceID); }
5.3 Assign sensor
Assigning sensors can be completely done on the common layer, no need to cast to concrete device implementations. To assign a sensor you only need two things, a connected device and of course a sensor.
Example: Assign resistance sensor with 2-Point scaling
// Scan DaqEnvironment env = DaqEnvironment.GetInstance(); List<Device> foundDevices = env.Scan(); // Use first found device Device device = foundDevices[0]; // Connect to device --> fills object model List<Problem> connectProblems; bool isConnected = env.Connect(device, out connectProblems); if(isConnected) { // Only analog in channels have a sensor AnalogInChannel ch = device.Connectors[0].Channels[0] as AnalogInChannel; // Was it really an analog in channel if(ch != null) { // Create sensor object, add to device
How To’s
HBM Common API A4174-2.0 HBM public 28
ResistanceSensor resSensor = new ResistanceSensor(); resSensor.NominalResistance = 500; //Ohm resSensor.UniqueName = "My Resistance 500 Ohm"; TwoPointScaling scaling = new TwoPointScaling(); scaling.MinEngineeringRange = -500; scaling.MaxEngineeringRange = 500; scaling.EngineeringUnit = "Ohm"; scaling.ElectricalP1 = 0; scaling.EngineeringP1 = 0; scaling.ElectricalP2 = 500; scaling.EngineeringP2 = 500; // Set scaling resSensor.Scaling = scaling; // Set sensor ch.Sensor = resSensor; // --- Assign sensor to device ----------------------- List<Problem> assignProblems; bool isOk = device.AssignSensor(ch, out assignProblems); // Check list of problems for errors and warning // ...... } }
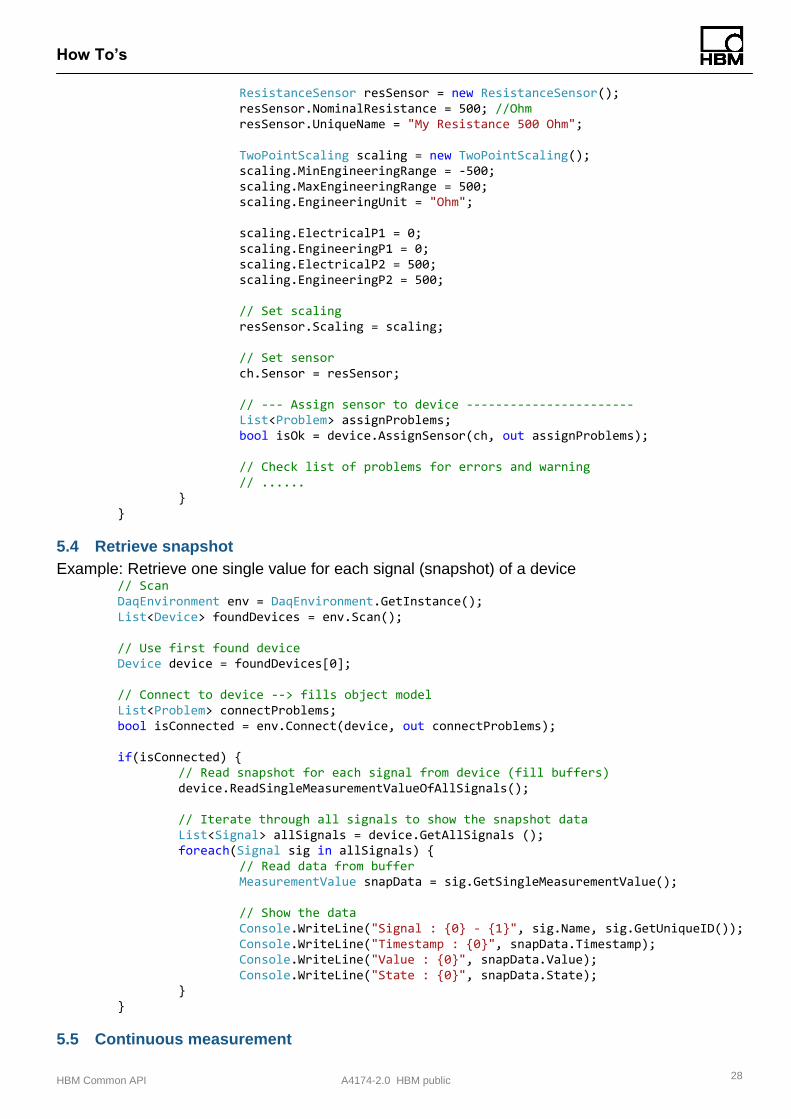
5.4 Retrieve snapshot
Example: Retrieve one single value for each signal (snapshot) of a device // Scan DaqEnvironment env = DaqEnvironment.GetInstance(); List<Device> foundDevices = env.Scan(); // Use first found device Device device = foundDevices[0]; // Connect to device --> fills object model List<Problem> connectProblems; bool isConnected = env.Connect(device, out connectProblems); if(isConnected) { // Read snapshot for each signal from device (fill buffers) device.ReadSingleMeasurementValueOfAllSignals(); // Iterate through all signals to show the snapshot data List<Signal> allSignals = device.GetAllSignals (); foreach(Signal sig in allSignals) { // Read data from buffer MeasurementValue snapData = sig.GetSingleMeasurementValue(); // Show the data Console.WriteLine("Signal : {0} - {1}", sig.Name, sig.GetUniqueID()); Console.WriteLine("Timestamp : {0}", snapData.Timestamp); Console.WriteLine("Value : {0}", snapData.Value); Console.WriteLine("State : {0}", snapData.State); } }
5.5 Continuous measurement
How To’s
HBM Common API A4174-2.0 HBM public 29
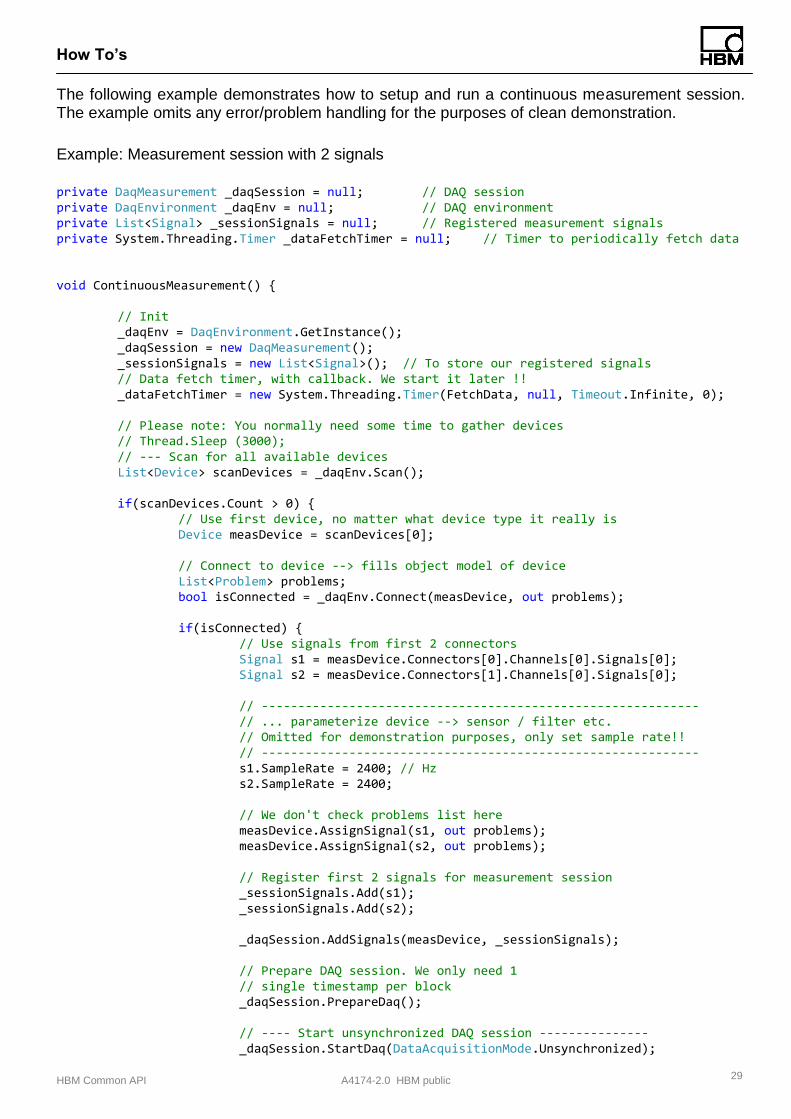
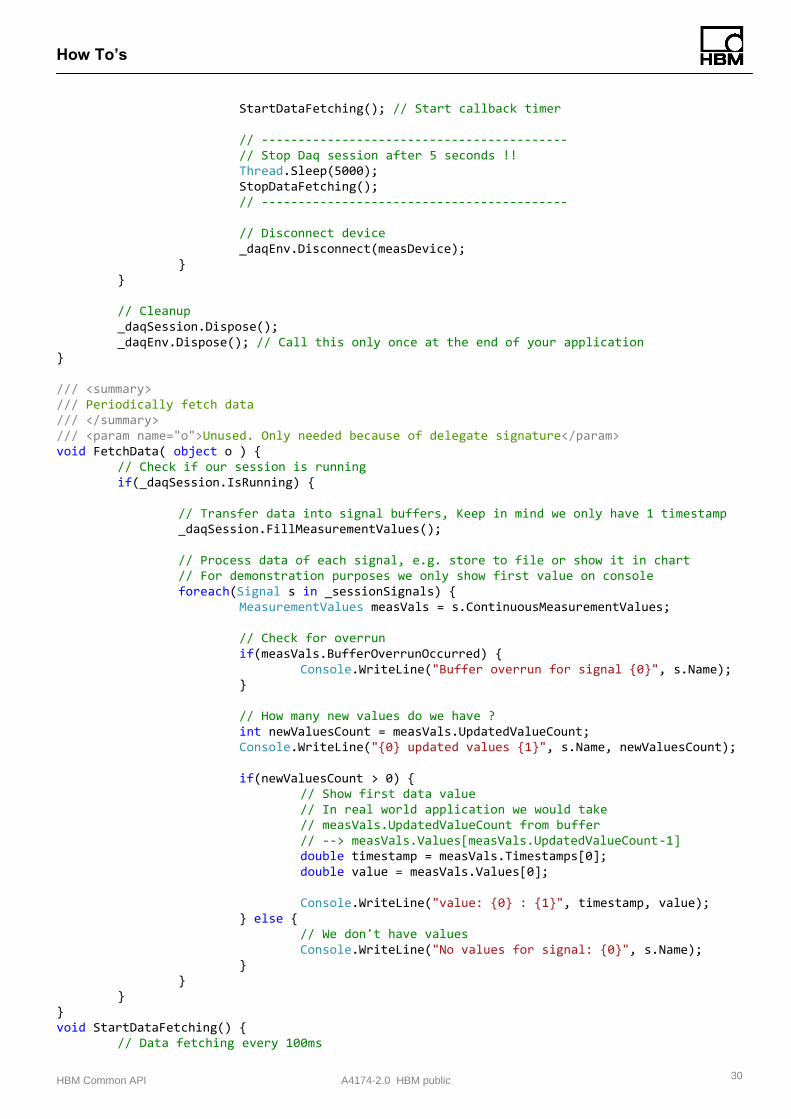
The following example demonstrates how to setup and run a continuous measurement session. The example omits any error/problem handling for the purposes of clean demonstration.
Example: Measurement session with 2 signals
private DaqMeasurement _daqSession = null; // DAQ session private DaqEnvironment _daqEnv = null; // DAQ environment private List<Signal> _sessionSignals = null; // Registered measurement signals private System.Threading.Timer _dataFetchTimer = null; // Timer to periodically fetch data void ContinuousMeasurement() { // Init _daqEnv = DaqEnvironment.GetInstance(); _daqSession = new DaqMeasurement(); _sessionSignals = new List<Signal>(); // To store our registered signals // Data fetch timer, with callback. We start it later !! _dataFetchTimer = new System.Threading.Timer(FetchData, null, Timeout.Infinite, 0); // Please note: You normally need some time to gather devices // Thread.Sleep (3000); // --- Scan for all available devices List<Device> scanDevices = _daqEnv.Scan(); if(scanDevices.Count > 0) { // Use first device, no matter what device type it really is Device measDevice = scanDevices[0]; // Connect to device --> fills object model of device List<Problem> problems; bool isConnected = _daqEnv.Connect(measDevice, out problems); if(isConnected) { // Use signals from first 2 connectors Signal s1 = measDevice.Connectors[0].Channels[0].Signals[0]; Signal s2 = measDevice.Connectors[1].Channels[0].Signals[0]; // ------------------------------------------------------------ // ... parameterize device --> sensor / filter etc. // Omitted for demonstration purposes, only set sample rate!! // ------------------------------------------------------------ s1.SampleRate = 2400; // Hz s2.SampleRate = 2400; // We don't check problems list here measDevice.AssignSignal(s1, out problems); measDevice.AssignSignal(s2, out problems); // Register first 2 signals for measurement session _sessionSignals.Add(s1); _sessionSignals.Add(s2); _daqSession.AddSignals(measDevice, _sessionSignals); // Prepare DAQ session. We only need 1 // single timestamp per block _daqSession.PrepareDaq(); // ---- Start unsynchronized DAQ session --------------- _daqSession.StartDaq(DataAcquisitionMode.Unsynchronized);
How To’s
HBM Common API A4174-2.0 HBM public 30
StartDataFetching(); // Start callback timer // ------------------------------------------ // Stop Daq session after 5 seconds !! Thread.Sleep(5000); StopDataFetching(); // ------------------------------------------ // Disconnect device _daqEnv.Disconnect(measDevice); } } // Cleanup _daqSession.Dispose(); _daqEnv.Dispose(); // Call this only once at the end of your application } /// <summary> /// Periodically fetch data /// </summary> /// <param name="o">Unused. Only needed because of delegate signature</param> void FetchData( object o ) { // Check if our session is running if(_daqSession.IsRunning) { // Transfer data into signal buffers, Keep in mind we only have 1 timestamp _daqSession.FillMeasurementValues(); // Process data of each signal, e.g. store to file or show it in chart // For demonstration purposes we only show first value on console foreach(Signal s in _sessionSignals) { MeasurementValues measVals = s.ContinuousMeasurementValues; // Check for overrun if(measVals.BufferOverrunOccurred) { Console.WriteLine("Buffer overrun for signal {0}", s.Name); } // How many new values do we have ? int newValuesCount = measVals.UpdatedValueCount; Console.WriteLine("{0} updated values {1}", s.Name, newValuesCount); if(newValuesCount > 0) { // Show first data value // In real world application we would take // measVals.UpdatedValueCount from buffer // --> measVals.Values[measVals.UpdatedValueCount-1] double timestamp = measVals.Timestamps[0]; double value = measVals.Values[0]; Console.WriteLine("value: {0} : {1}", timestamp, value); } else { // We don't have values Console.WriteLine("No values for signal: {0}", s.Name); } } } } void StartDataFetching() { // Data fetching every 100ms
How To’s
HBM Common API A4174-2.0 HBM public 31
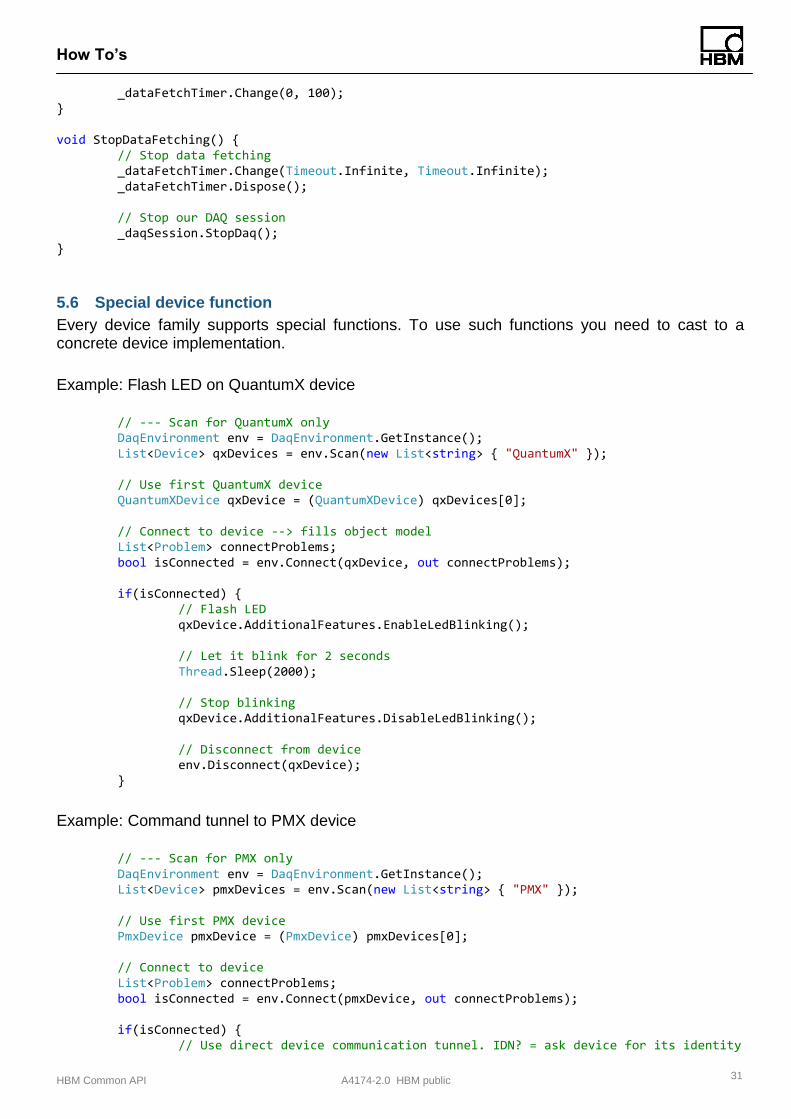
_dataFetchTimer.Change(0, 100); } void StopDataFetching() { // Stop data fetching _dataFetchTimer.Change(Timeout.Infinite, Timeout.Infinite); _dataFetchTimer.Dispose(); // Stop our DAQ session _daqSession.StopDaq(); }
5.6 Special device function
Every device family supports special functions. To use such functions you need to cast to a concrete device implementation.
Example: Flash LED on QuantumX device
// --- Scan for QuantumX only DaqEnvironment env = DaqEnvironment.GetInstance(); List<Device> qxDevices = env.Scan(new List<string> { "QuantumX" }); // Use first QuantumX device QuantumXDevice qxDevice = (QuantumXDevice) qxDevices[0]; // Connect to device --> fills object model List<Problem> connectProblems; bool isConnected = env.Connect(qxDevice, out connectProblems); if(isConnected) { // Flash LED qxDevice.AdditionalFeatures.EnableLedBlinking(); // Let it blink for 2 seconds Thread.Sleep(2000); // Stop blinking qxDevice.AdditionalFeatures.DisableLedBlinking(); // Disconnect from device env.Disconnect(qxDevice); }
Example: Command tunnel to PMX device
// --- Scan for PMX only DaqEnvironment env = DaqEnvironment.GetInstance(); List<Device> pmxDevices = env.Scan(new List<string> { "PMX" }); // Use first PMX device PmxDevice pmxDevice = (PmxDevice) pmxDevices[0]; // Connect to device List<Problem> connectProblems; bool isConnected = env.Connect(pmxDevice, out connectProblems); if(isConnected) { // Use direct device communication tunnel. IDN? = ask device for its identity
How To’s
HBM Common API A4174-2.0 HBM public 32
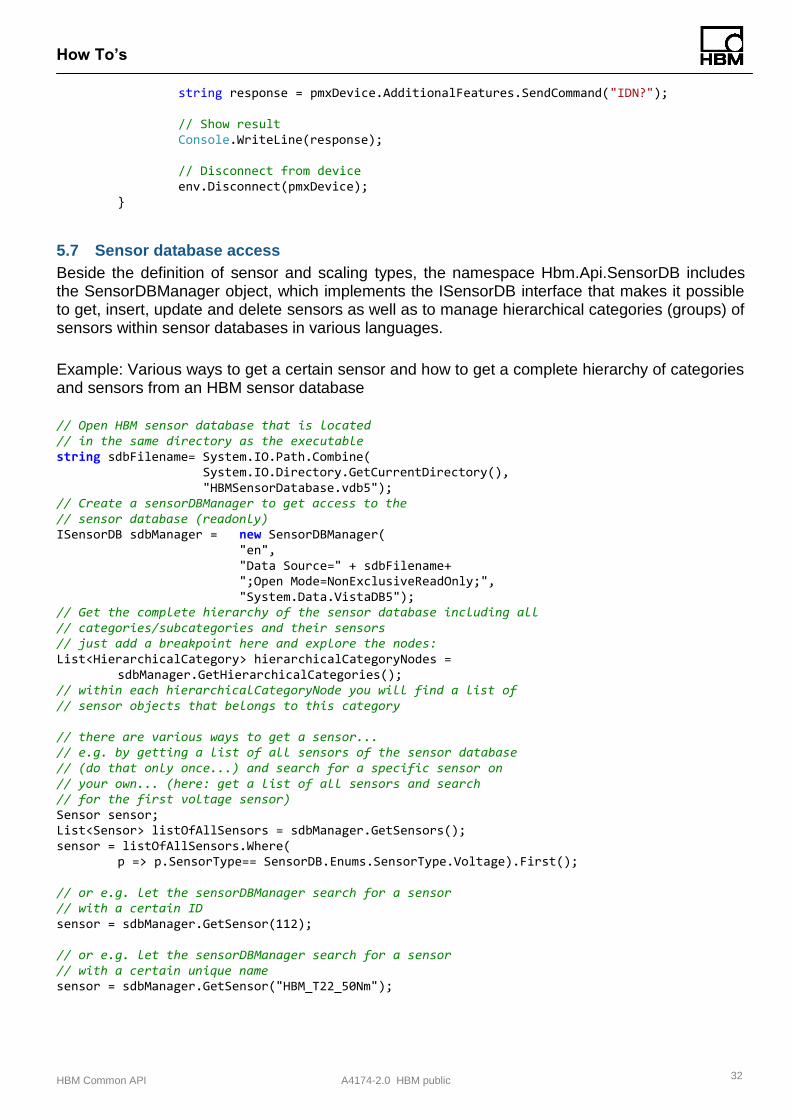
string response = pmxDevice.AdditionalFeatures.SendCommand("IDN?"); // Show result Console.WriteLine(response); // Disconnect from device env.Disconnect(pmxDevice); }
5.7 Sensor database access
Beside the definition of sensor and scaling types, the namespace Hbm.Api.SensorDB includes the SensorDBManager object, which implements the ISensorDB interface that makes it possible to get, insert, update and delete sensors as well as to manage hierarchical categories (groups) of sensors within sensor databases in various languages.
Example: Various ways to get a certain sensor and how to get a complete hierarchy of categories and sensors from an HBM sensor database
// Open HBM sensor database that is located // in the same directory as the executable string sdbFilename= System.IO.Path.Combine( System.IO.Directory.GetCurrentDirectory(), "HBMSensorDatabase.vdb5"); // Create a sensorDBManager to get access to the // sensor database (readonly) ISensorDB sdbManager = new SensorDBManager( "en", "Data Source=" + sdbFilename+ ";Open Mode=NonExclusiveReadOnly;", "System.Data.VistaDB5"); // Get the complete hierarchy of the sensor database including all // categories/subcategories and their sensors // just add a breakpoint here and explore the nodes: List<HierarchicalCategory> hierarchicalCategoryNodes = sdbManager.GetHierarchicalCategories(); // within each hierarchicalCategoryNode you will find a list of // sensor objects that belongs to this category // there are various ways to get a sensor... // e.g. by getting a list of all sensors of the sensor database // (do that only once...) and search for a specific sensor on // your own... (here: get a list of all sensors and search // for the first voltage sensor) Sensor sensor; List<Sensor> listOfAllSensors = sdbManager.GetSensors(); sensor = listOfAllSensors.Where( p => p.SensorType== SensorDB.Enums.SensorType.Voltage).First(); // or e.g. let the sensorDBManager search for a sensor // with a certain ID sensor = sdbManager.GetSensor(112); // or e.g. let the sensorDBManager search for a sensor // with a certain unique name sensor = sdbManager.GetSensor("HBM_T22_50Nm");

How To’s
HBM Common API A4174-2.0 HBM public 33
Example: Various ways to deal with a user sensor database (connect, get hierarchy of categories and sensors, insert, update and delete a sensor)
// Open user sensor database that is located // in the same directory as the executable string sdbFilename = System.IO.Path.Combine( System.IO.Directory.GetCurrentDirectory(), "UserSensorDatabase.vdb5"); // Create a sensorDBManager to get access to the // sensor database (read/write access) ISensorDB sdbManager = new SensorDBManager( "en", "Data Source=" + sdbFilename + ";Open Mode=ExclusiveReadWrite;", "System.Data.VistaDB5"); // Get the complete hierarchy of the sensor database // including all categories/subcategories and their sensors // just add a breakpoint here and explore the nodes: List<HierarchicalCategory> nodes = sdbManager.GetHierarchicalCategories(); // Insert a sensor into a certain category of the database // Therefore we have to do 2 things here: // 1. Create a sensor object (we use the SensorFactory here // to get a certain sensortype with default scaling...) VoltageSensor myVoltageSensor = SensorFactory.CreateSensor( SensorDB.Enums.SensorType.Voltage) as VoltageSensor; // set the name of the sensor and further properties if you like myVoltageSensor.Description = "my voltage sensor"; // 2. To insert a sensor into a sensor database, we have to // choose an existing category (group) of the sensor database into // which the sensor should be inserted. // Here we insert the sensor into the "Imported" category of the // database (this category exists in each user sensor database). Category categoryIntoWhichToInsertTheSensor = sdbManager.GetCategories(). Where(c => c.Description == "Imported").First(); // Set the Category property of the sensor we want to insert myVoltageSensor.Category = categoryIntoWhichToInsertTheSensor; // Insert the sensor into the user database sdbManager.InsertSensor(myVoltageSensor); // ATTENTION! After successfully inserting the sensor, some // properties of the sensor have been changed!!! // Take a look at following sensor properties: // SensorID, UniqueName, IsUserDefined, LastModifiedDate... // To update the sensor, we just change its description here myVoltageSensor.Description = "my updated voltage sensor"; // and update the (now) already existing sensor in the // sensor database... (Description AND LastModifiedDate will be changed!) sdbManager.UpdateSensor(myVoltageSensor); // To delete the sensor we just call sdbManager.DeleteSensor(myVoltageSensor.SensorID);

How To’s
HBM Common API A4174-2.0 HBM public 34
5.8 Logging
The Hbm.Api.Logging namespace contains functionality that makes it possible to log messages using different logging frameworks (until now NLog and Loupe are supported).
Example: How to use logging within your application
// Start logging with a certain LoggingFramework (Loupe or NLog) // and a combination of "ORed" LogLevels: LogManager.Start (LoggingFramework.NLog, LogLevel.Error | LogLevel.Warn | LogLevel.Info); // Create a logger object that has to be used to log messages ILogger logger = LogManager.CreateLogger("ApiDemo"); // We want to group our log entries into different parts. // Logging uses LogContext objects to define these groups. // Notice: The Hbm.CommonAPI will also log messages // additional to the messages that will be logged here! // E.g.: One group to collect entries concerning measurement tasks: LogContext logContextMeasuring = new LogContext("ApiDemo.Measurement"); // E.g.: One group to collect entries concerning problems: LogContext logContextProblems = new LogContext("ApiDemo.Problems"); // The resulting hierarchy into which the entries can be logged (using Loupe) is now: // Categories // - ApiDemo // - Measurement // - Error: This is an error type log entry! // - Problems // - Info: This is an info type log entry! // ... // using Nlog, these hierarchy infos are included in the line // that will be appended to the logfile // e.g.: 2015-09-10 09:37:25.1234 [10] ERROR | // ApiDemo.Measurement| ApiDemo: Error: This is an error type log entry! // Generate some log entries (under Measurement) // this entry will be logged because we started logging with “LogLevel.Error“ logger.Error(logContextMeasuring, "Error: This is an error type log entry!”); // Following entry will *** N O T *** be logged because we // started logging without “LogLevel.Debug” logger.Debug(logContextMeasuring, "Debug: This is a debug type log entry!”); // Generate log entry (under Problems) logger.Info(logContextProblems, "Info: This is an info type log entry!”); // End logging. LogManager.Stop(); // You can find the directory and the created logfile under Debug.Print("Directory of the logfile: "+LogManager.LogFolder); Debug.Print("Fullt path to the logfile: "+ LogManager.CurrentLogFile);

Troubleshooting Tips
HBM Common API A4174-2.0 HBM public 35
6 Troubleshooting Tips
Following solutions for common errors could help you to solve your problem.
In general: To troubleshoot problems it is suggested to activate logging (e.g. by adding “LogManager.Start(LoggingFramework.NLog, LogLevel.All)”) before using API functionality and to check the logfile, which is produced during the execution of your application. Don’t forget to deactivate or reduce loglevel in your production code.
Problem: Scan does not find any devices.
Solution: Check your firewall settings. The incoming UDP ports 31416 and 31417 need to be opened for the application.
Assert that there is no router between your device and your PC. Routers drop the multicast messages (sent from the scannable devices) that will normally be received by your PC. Also some managed switches drop these messages.
When your device is directly connected to your PC you have to assert that scan is called AFTER the device has been physically connected to your PC – otherwise the scan will ignore the network adapter to which your device is plugged in.
Also doublecheck that the file DeviceDriver.plugins is in the same directory as your executable.
Problem: Measurement does not start (“Not enough time to start (a synchronized) measure-ment”).
Solution: Especially when using very low measurement rates (e.g. 0.1 Hz) the default synchronization timeout (5000ms) may be too low to start a synchronized measurement. Please increase the timeout in that case. This error could also occur, if the devices are not synchronized against each other (e.g. not using the same NTP-server).
Problem: Suddenly (during a running, synchronized measurement) some signals do not get new measurement values any longer.
Solution: Most likely the connection to the device, to which the signal belongs, is lost. Since version 3.0 of the Common API the flag Signal.IsExcludedFromDaq will be set to true if there were no new measurement values received for a certain time, depending on the measurement rate of the signal (Signal.ExcludeFromDaqTimeout). Please check the network connection.
Problem: The ContinuousMeasurementValues contain only one new timestamp and one new status but multiple new measurement values.
Solution: Please use another overloading of the DaqMeasurement.PrepareDaq function to get a timestamp and status for each measurement value. Default is only one timestamp/status due to performance reasons.
Problem: ContinuousMeasurementValues contains unrealistic measurement values or time-stamps from the past.
Solution: After updating the measurement values via „DaqMeasurement.FillMeasurement-Values“ you have to use ContinuousMeasurementValues.UpdatedValueCount to determine the number of new measurement values. Do NOT use ContinuousMeasurementValues.Length!
Problem: Sensor delivers strange measurement values or scaling does not fit to the measure-ment values.

Troubleshooting Tips
HBM Common API A4174-2.0 HBM public 36
Solution: Assert that you called the according assign function (e.g. AssignSignal or Assign-Sensor or AssignConnector) after you changed anything within the object representation of the device.
Problem: You want to start a hardware synchronized measurement of a device compound of the same family.
Solution: For QuantumX devices you have to wire all devices via FireWire and start a “TimeStampSynchronized” measurement.
For MGCplus devices you have to plug the sync cable to each device, configure one MGCplus as master and all others as slaves and start a “HardwareSynchronized” measurement.
For PMX devices a hardware synchronized measurement is not yet possible. Please use the same NTP timeserver for each device and start a software synchronized measurement instead.
Problem: Your program won’t start (Wrong Assembly error).
Solution: You probably use the wrong version of HBM_Scan.dll or HBM_QX_Framework.dll or HBM_Streaming.dll. Assert that the version fits to your machine/project settings x86 or x64.

Troubleshooting Tips
A4174-2.0 HBM public