Embed Size (px)
Citation preview
COMMERCIAL UNIT
INSTALLATION INSTRUCTIONS for PVC PIPES
IMPORTANT
All the illustrations on this instruction sheet show typical plumbing methods. Actual installations must be adapted to individual requirements and regional codes. The author has made every effort to insure accuracy and reliability of the information and instructions. However, neither the author nor the manufacturer will accept responsibility for misinterpretation of the directions or human error. The end user assumes complete and total responsibility for installation errors. Know where the main water shut off is located before starting. Installation by a licensed plumber is recommended but not required. IMPORTANT NOTES ABOUT YOUR UNIT
1. The unit may be installed easily on a PVC water pipeline using the units attached fittings.
2. The unit can be mounted in any position, with
the water entering in from either side.
3. Avoid installing this unit where the device will be exposed for extended time periods to hot water above 140 degrees.
4. Avoid leaving this unit in freezing temperatures with residual water inside, as impaired function may result.
5. Dropping unit may impair function.
6. This unit will become brittle and may become weakened or impaired if left exposed to the sun for an extended period of time.
INSTALLATION TOOLS
1. PVC Pipe Cutter 2. Gorilla Glue 3. Measuring Tape 4. Marker
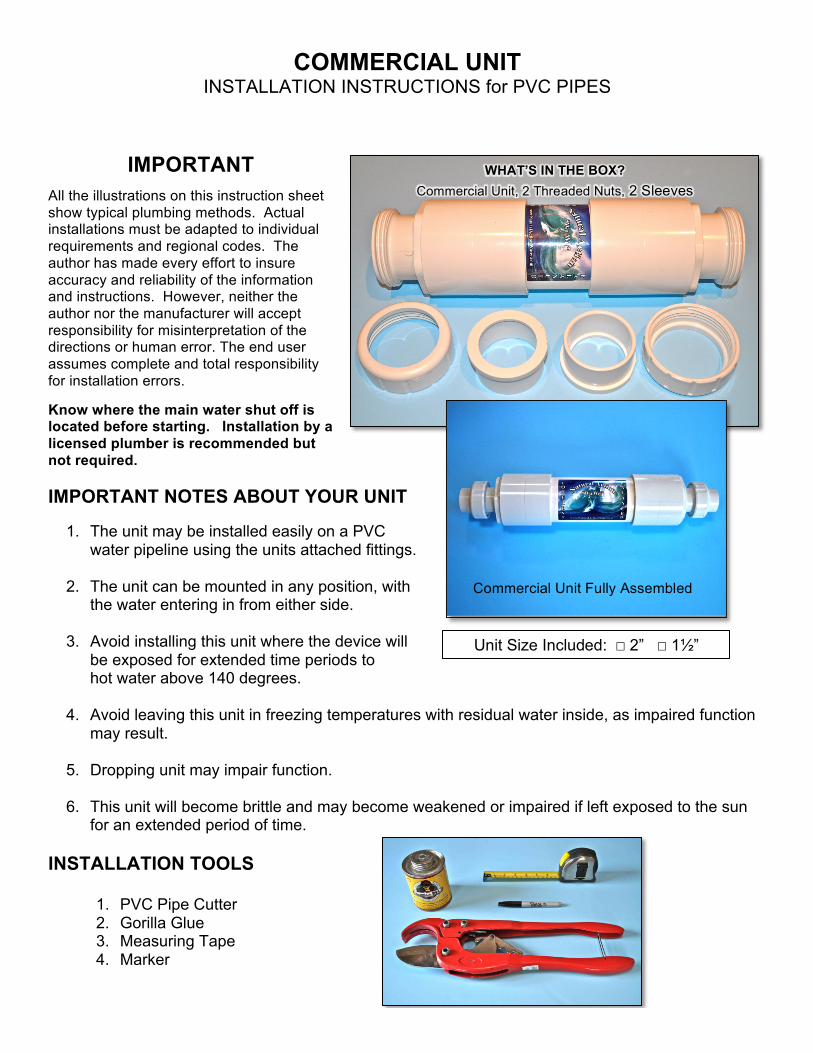
Unit Size Included: ☐ 2” ☐ 1½”
Commercial Unit Fully Assembled
WHAT’S IN THE BOX? Commercial Unit, 2 Threaded Nuts, 2 Sleeves
INSTALLATION INSTRUCTIONS
1. Locate the valve that turns off the water source.
2. Turn it OFF.
3. Open a nearby cold water faucet. (Cold water faucets are generally on the right side of the faucet unit.) Leave open until water stops flowing to insure water is completely turned off and to relieve pressure. Then shut off the faucet. Turning off the faucet prevents excess air from entering water lines.
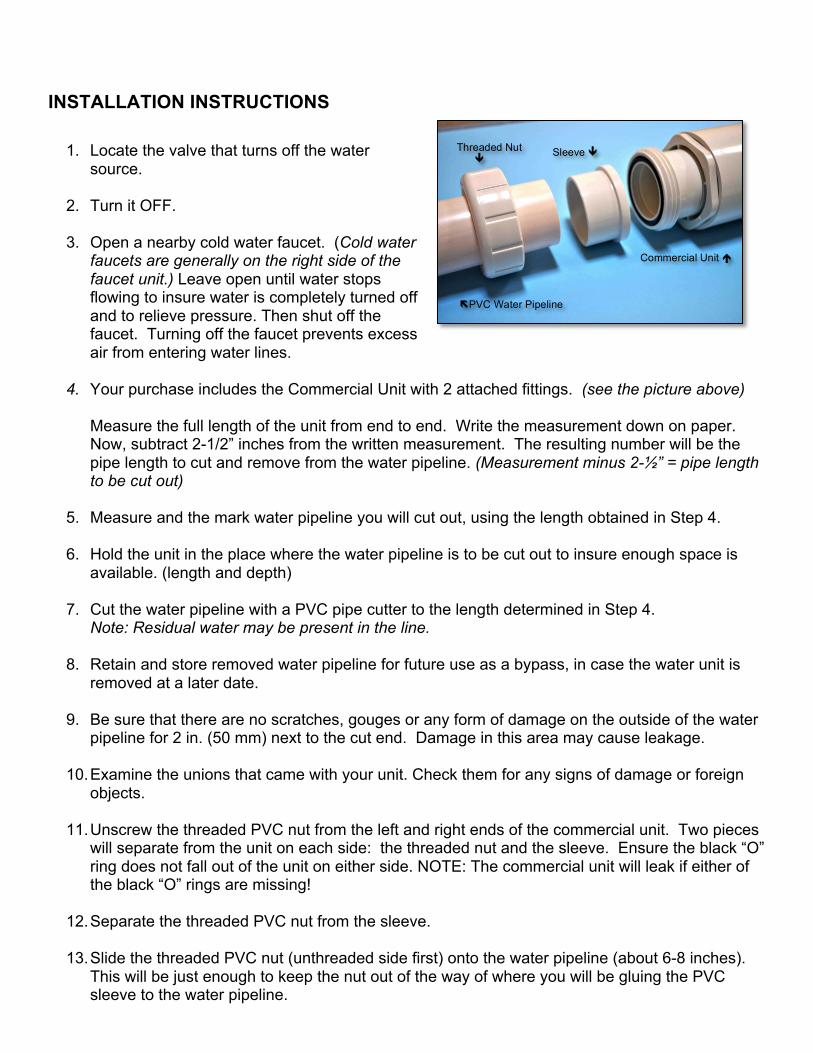
4. Your purchase includes the Commercial Unit with 2 attached fittings. (see the picture above)
Measure the full length of the unit from end to end. Write the measurement down on paper. Now, subtract 2-1/2” inches from the written measurement. The resulting number will be the pipe length to cut and remove from the water pipeline. (Measurement minus 2-½” = pipe length to be cut out)
5. Measure and the mark water pipeline you will cut out, using the length obtained in Step 4.
6. Hold the unit in the place where the water pipeline is to be cut out to insure enough space is available. (length and depth)
7. Cut the water pipeline with a PVC pipe cutter to the length determined in Step 4.
Note: Residual water may be present in the line.
8. Retain and store removed water pipeline for future use as a bypass, in case the water unit is removed at a later date.
9. Be sure that there are no scratches, gouges or any form of damage on the outside of the water pipeline for 2 in. (50 mm) next to the cut end. Damage in this area may cause leakage.
10. Examine the unions that came with your unit. Check them for any signs of damage or foreign objects.
11. Unscrew the threaded PVC nut from the left and right ends of the commercial unit. Two pieces
will separate from the unit on each side: the threaded nut and the sleeve. Ensure the black “O” ring does not fall out of the unit on either side. NOTE: The commercial unit will leak if either of the black “O” rings are missing!
12. Separate the threaded PVC nut from the sleeve.
13. Slide the threaded PVC nut (unthreaded side first) onto the water pipeline (about 6-8 inches).
This will be just enough to keep the nut out of the way of where you will be gluing the PVC sleeve to the water pipeline.
Commercial Unit é
Sleeve ê
ëPVC Water Pipeline
Threaded Nut ê
14. Apply PVC glue (Gorilla Glue from Ace Hardware is the one we like) to the outside of your
water pipeline (approx. 1-1/2 inches). Use 2 revolutions of glue around the pipe with the glue applicator to be sure the glue spreads evenly.
15. Next, apply PVC glue to the inside of the union sleeve. Use 2 revolutions of the glue around
the inside of the sleeve with the applicator to be sure the glue spreads evenly.
16. Push the union sleeve onto the PVC pipe, using a rotating motion. Be sure the sleeve is pushed all the way onto the pipe, holding it in place a few seconds to prevent pushback. Glue should be dry in 1 minute.
17. Repeat steps 12 -16 to prepare the other side of the PVC pipeline and union sleeve to receive
the unit.
18. Place the commercial unit between the freshly glued union sleeves.
19. Now, slid the PVC nuts up to the unit and hand-tighten the threaded nuts of the unions onto the threaded ends of the commercial unit one side at a time. Tighten firmly. Congratulations! The installation is now complete. That was easy!
20. Turn on the water supply line.
21. Check for leaks in the system.
22. Then turn on a nearby water
faucet to purge air out of water line until the water runs smoothly and all the burping has stopped.
IMPORTANT ADDTIONAL NOTES
1. Structured water will clean all calcium and aggregate deposits in your water pipes, and appliances that use water. So, all existing deposits need to be flushed as much as possible. Your water may be milky or discolored until the deposits have been flushed out completely, especially in older homes.
2. You may wish to contact an experienced plumber to drain the sediment in the bottom of your water heater. If your water heater has not been drained periodically the drain valve at the bottom may be corroded and may need to be replaced. The water heater may need to be drained weekly until all loosened deposits are flushed out.
For questions call 928-592-5334 or e-mail us at [email protected] www.naturalactionwater.com
Congratulations!
You have just installed a Natural Action Technologies Structured Water Unit. Thanks for helping maintain a green earth environment.
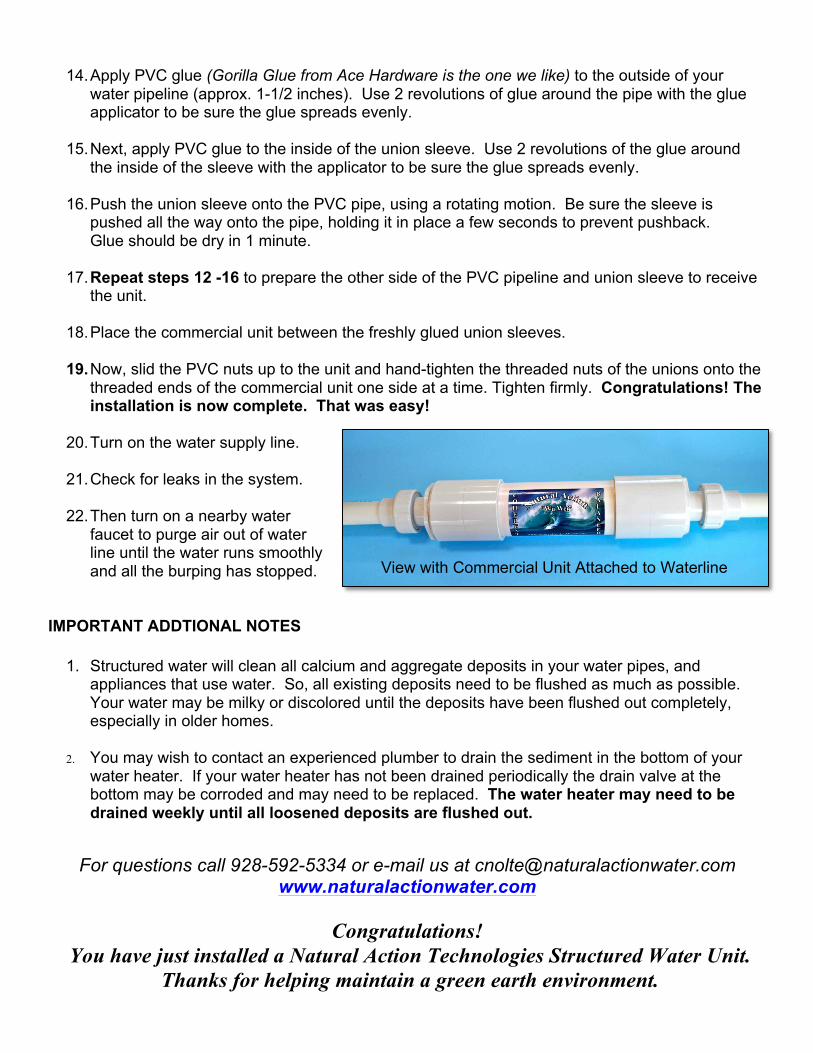
View with Commercial Unit Attached to Waterline