Embed Size (px)
Citation preview
PRIMARY STUDENTS
Color these things that are made from petroleum.
Coloring Page
PetroPete
PRIMARY STUDENTS
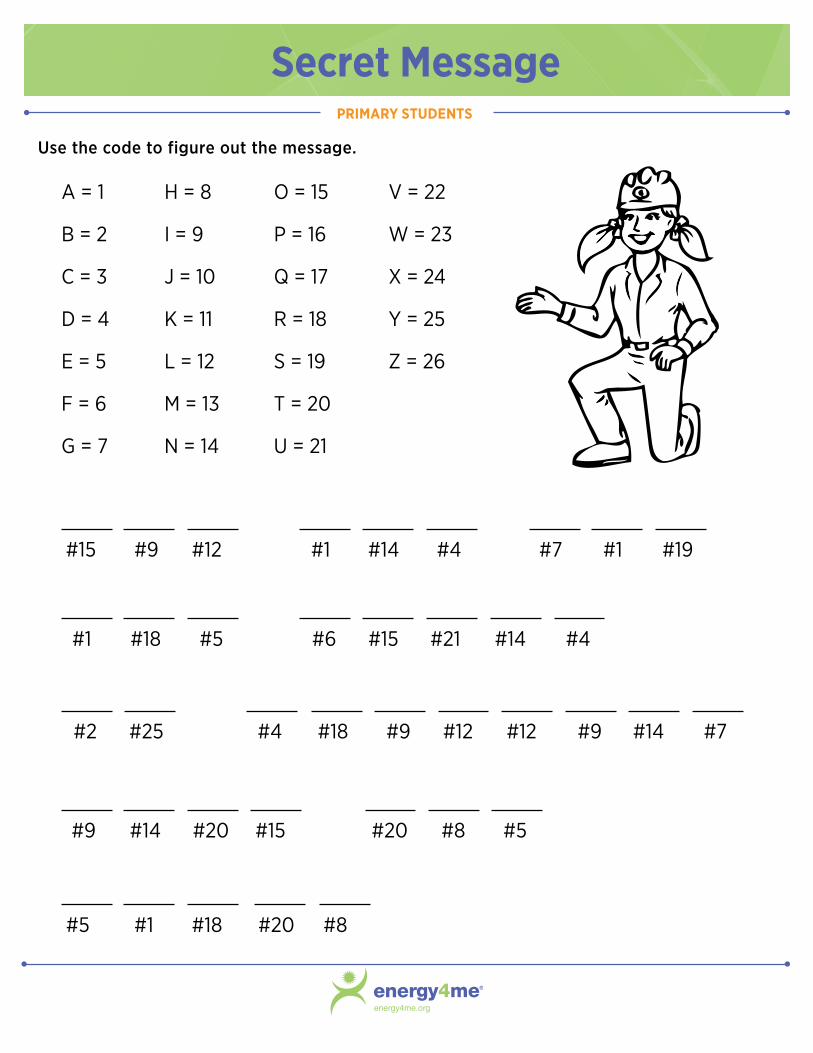
Use the code to figure out the message.
Secret Message
A = 1 H = 8 O = 15 V = 22
B = 2 I = 9 P = 16 W = 23
C = 3 J = 10 Q = 17 X = 24
D = 4 K = 11 R = 18 Y = 25
E = 5 L = 12 S = 19 Z = 26
F = 6 M = 13 T = 20
G = 7 N = 14 U = 21
#15 #9 #12 #1 #14 #4 #7 #1 #19
#1 #18 #5
#2 #25 #4
#9 #14 #20
#5 #1 #18
#6 #15 #21 #14 #4
#18 #9 #12 #12 #9 #14 #7
#15 #20 #8 #5
#20 #8
PRIMARY STUDENTS
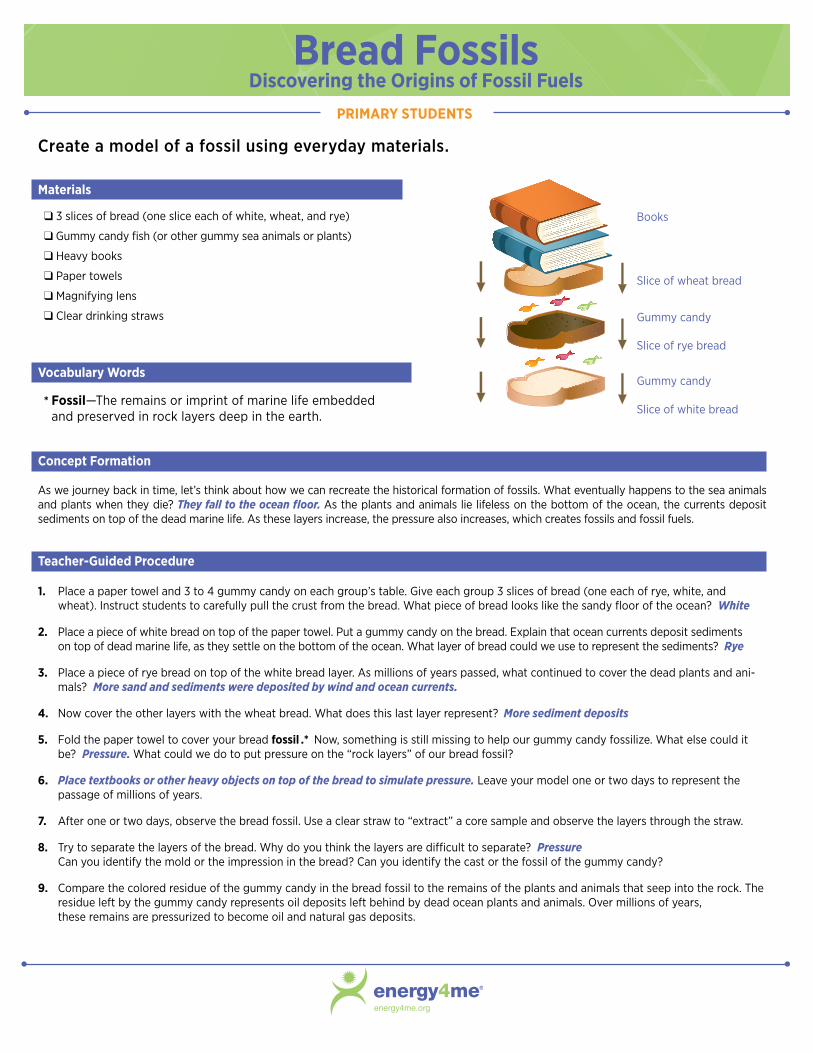
Create a model of a fossil using everyday materials.
Bread Fossils Discovering the Origins of Fossil Fuels
Materials
q 3 slices of bread (one slice each of white, wheat, and rye)
q Gummy candy fish (or other gummy sea animals or plants)
q Heavy books
q Paper towels
q Magnifying lens
q Clear drinking straws
Books
Slice of wheat bread
Gummy candy
Slice of rye bread
Slice of white bread
Gummy candyVocabulary Words
* Fossil—The remains or imprint of marine life embedded and preserved in rock layers deep in the earth.
Teacher-Guided Procedure
1. Place a paper towel and 3 to 4 gummy candy on each group’s table. Give each group 3 slices of bread (one each of rye, white, and wheat). Instruct students to carefully pull the crust from the bread. What piece of bread looks like the sandy floor of the ocean? White
2. Place a piece of white bread on top of the paper towel. Put a gummy candy on the bread. Explain that ocean currents deposit sediments on top of dead marine life, as they settle on the bottom of the ocean. What layer of bread could we use to represent the sediments? Rye
3. Place a piece of rye bread on top of the white bread layer. As millions of years passed, what continued to cover the dead plants and ani-mals? More sand and sediments were deposited by wind and ocean currents.
4. Now cover the other layers with the wheat bread. What does this last layer represent? More sediment deposits
5. Fold the paper towel to cover your bread fossil .* Now, something is still missing to help our gummy candy fossilize. What else could it be? Pressure. What could we do to put pressure on the “rock layers” of our bread fossil?
6. Place textbooks or other heavy objects on top of the bread to simulate pressure. Leave your model one or two days to represent the passage of millions of years.
7. After one or two days, observe the bread fossil. Use a clear straw to “extract” a core sample and observe the layers through the straw.
8. Try to separate the layers of the bread. Why do you think the layers are difficult to separate? Pressure Can you identify the mold or the impression in the bread? Can you identify the cast or the fossil of the gummy candy?
9. Compare the colored residue of the gummy candy in the bread fossil to the remains of the plants and animals that seep into the rock. The residue left by the gummy candy represents oil deposits left behind by dead ocean plants and animals. Over millions of years, these remains are pressurized to become oil and natural gas deposits.
Concept Formation
As we journey back in time, let’s think about how we can recreate the historical formation of fossils. What eventually happens to the sea animals and plants when they die? They fall to the ocean floor. As the plants and animals lie lifeless on the bottom of the ocean, the currents deposit sediments on top of the dead marine life. As these layers increase, the pressure also increases, which creates fossils and fossil fuels.
PRIMARY STUDENTS
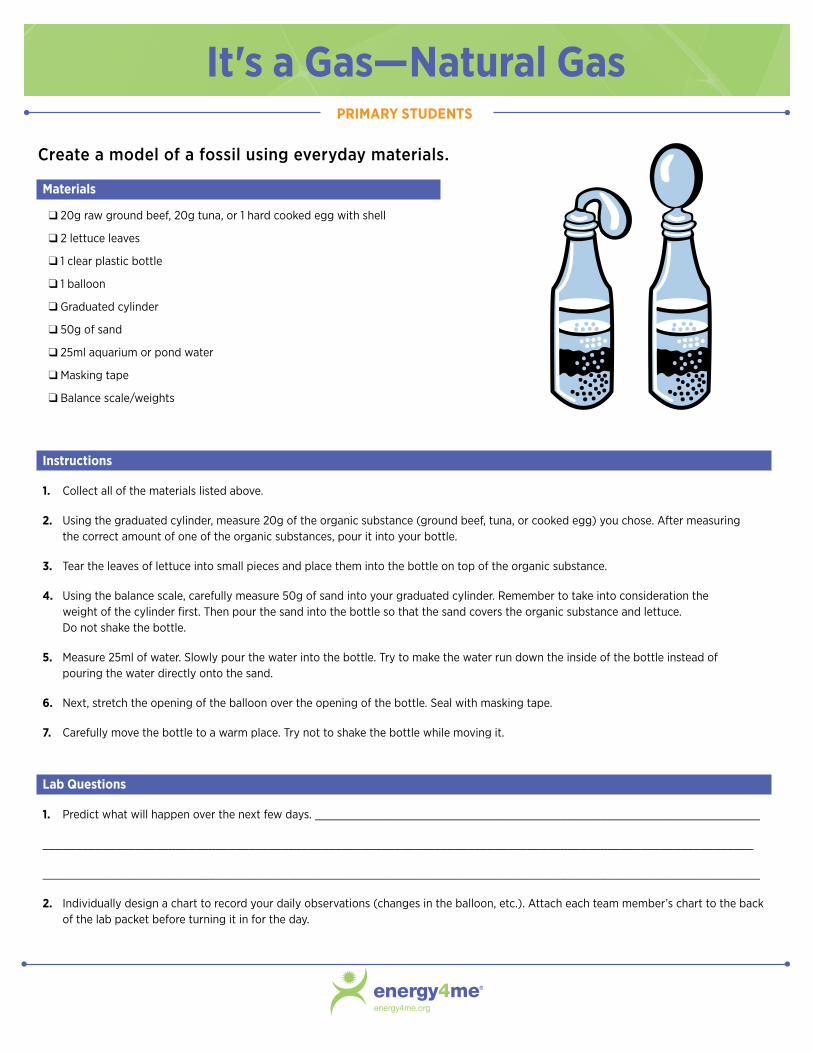
Create a model of a fossil using everyday materials.
It's a Gas—Natural Gas
Materials
q 20g raw ground beef, 20g tuna, or 1 hard cooked egg with shell
q 2 lettuce leaves
q 1 clear plastic bottle
q 1 balloon
q Graduated cylinder
q 50g of sand
q 25ml aquarium or pond water
q Masking tape
q Balance scale/weights
Instructions
1. Collect all of the materials listed above.
2. Using the graduated cylinder, measure 20g of the organic substance (ground beef, tuna, or cooked egg) you chose. After measuring the correct amount of one of the organic substances, pour it into your bottle.
3. Tear the leaves of lettuce into small pieces and place them into the bottle on top of the organic substance.
4. Using the balance scale, carefully measure 50g of sand into your graduated cylinder. Remember to take into consideration the weight of the cylinder first. Then pour the sand into the bottle so that the sand covers the organic substance and lettuce. Do not shake the bottle.
5. Measure 25ml of water. Slowly pour the water into the bottle. Try to make the water run down the inside of the bottle instead of pouring the water directly onto the sand.
6. Next, stretch the opening of the balloon over the opening of the bottle. Seal with masking tape.
7. Carefully move the bottle to a warm place. Try not to shake the bottle while moving it.
Lab Questions
1. Predict what will happen over the next few days. ___________________________________________________________________
___________________________________________________________________________________________________________
____________________________________________________________________________________________________________
2. Individually design a chart to record your daily observations (changes in the balloon, etc.). Attach each team member’s chart to the back of the lab packet before turning it in for the day.

INTERMEDIATE STUDENTS
Procedure
1. In a small box or opaque container, set up a model similar to the one shown in the illustration. Place a small balloon containing colored water (to represent oil) into the layers. Then place the small rock samples in the box around the water balloon. Think carefully about where to place your oil reserves in the model. Putting it in the middle might be too obvious, and putting it against the side of the box might be too confusing!
Mark the sides of the box “North,” “South,” “East,” and “West.” Make a map of your model to show the location of the water-balloon “oil reserve.”
Place a lid securely on the box and fasten it with masking tape. Exchange your model with another group.
2. With the other group’s box, you will model the method used by exploration geologists in the field. You may not move the box, and you may not look inside it. Attach graph paper to the lid of the box. Tap on the box and listen for an area that sounds different. Use the graph paper to record the locations of areas that sound different and seem like good candidates for oil exploration.
3. Probe the box to search for “oil” (the water balloon) in the places you identified. Mark off divisions of one centimeter on a bamboo skewer, beginning at the bottom. Use the bamboo skewer to penetrate the box lid at the location where you think the oil may be located.
Probe gently through the sand. Look at the skewer for evidence of “oil.” This models the drilling process. Remember: Every centimeter of depth that you drill costs 150,000 (in US dollars*). In addition, each time you move to a new spot to drill, it costs 75,000 (in US dollars*).
Keep a record of how many centimeters you drill and how many times you move the skewer to a new spot, so you can calculate the total cost of your exploration. Continue drilling until you find “oil.”
4. What was the total cost of your exploration? If you were to start over, how would you change your exploration procedure to save money? Compare your results with the group that constructed the model. Look at their map. Was your oil deposit where they said it should be?
Products derived from oil, such as motor gasoline, jet fuel, diesel fuel, and heating oil, supply nearly 40 percent of the energy consumed by households, businesses, and manufacturers worldwide. Oil and natural gas are forms of petroleum, a word that literally means “oily rock.” Petroleum is called a fossil fuel because it is geologically very old and is found in the ground, like fossils.
Abundant oil and natural gas form only where conditions in the Earth are just right. Doing this investigation will help you understand how geoscientists identify and explore petroleum-rich reserves.
Materials
q A cardboard box or other opaque container with cardboard lid
q Sand
q Marker pens
q Clear plastic drinking straws
q Graph paper
q Small rock samples
q Balloon with water
q Food coloring
q Masking tape
q Bamboo kebab skewer
* If this is not your country’s currency, you can covert these numbers into the currency you use.
Modeling an Oil Reserve
INTERMEDIATE STUDENTS
Energy Internet Scavenger Hunt
1. What are fossil fuels?
2. What are renewable energy sources?
3. What percent of the world’s electricity is supplied by coal?
4. What types of gases make up natural gas?
5. What materials are used on solar panels to allow them to produce electricity?
6. What is nuclear energy?
7. Who is considered the entrepreneur of the oil industry?
8. Do electronics use energy when they’re off?
9. By what percentage is the use of wind power growing worldwide each year?
10. How did oil and natural gas form?
Use the Internet to search for the answers to these questions on www.energy4me.org. You may also find answers in library books, such as “Oil and Natural Gas.”
SECONDARY STUDENTS
Sound Waves
Materials
q 1 metal slinky spring
q 1 large styrofoam cup
q 1 small styrofoam cup
Procedure
1. Place the slinky on the floor so the coils are all together, facing up. Place the large styrofoam cup inside of the slinky coils and press in gently.
2. Lift the cup straight up. The end coils should come up around the center of the cup.
3. Place your hand around the few coils in the cup’s middle to hold the slinky in place at the cup’s middle.
4. Bounce your hand up and down to create longitudinal waves and observe the sound vibrations echoing from the cup.
5. Repeat your hand motions at different heights–low and high–to hear the different sound vibrations and see the longitudinal waves produced.
6. Remove the large cup and repeat the investigation with the small cup.
7. Compare and contrast the results of the sound waves produced in the large and small cups.
Lab Questions
1. What was the difference in the two sounds you heard from the two different cups?
____________________________________________________________________________________________________________
____________________________________________________________________________________________________________
2. Was there a difference in longitudinal waves produced from the trials? Describe.
____________________________________________________________________________________________________________
____________________________________________________________________________________________________________
3. Explain how seismic technology uses sound to locate specific geologic formations underground.
____________________________________________________________________________________________________________
____________________________________________________________________________________________________________
SECONDARY STUDENTS
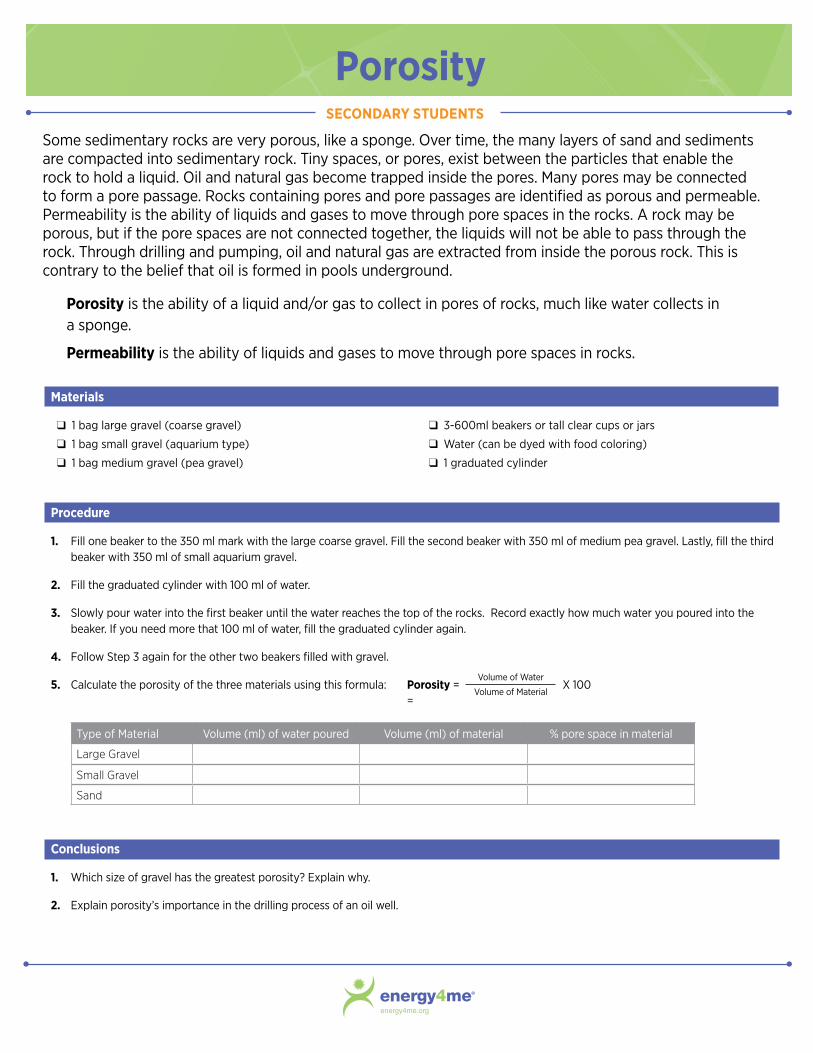
Porosity
Procedure
1. Fill one beaker to the 350 ml mark with the large coarse gravel. Fill the second beaker with 350 ml of medium pea gravel. Lastly, fill the third beaker with 350 ml of small aquarium gravel.
2. Fill the graduated cylinder with 100 ml of water.
3. Slowly pour water into the first beaker until the water reaches the top of the rocks. Record exactly how much water you poured into the beaker. If you need more that 100 ml of water, fill the graduated cylinder again.
4. Follow Step 3 again for the other two beakers filled with gravel.
5. Calculate the porosity of the three materials using this formula:
Some sedimentary rocks are very porous, like a sponge. Over time, the many layers of sand and sediments are compacted into sedimentary rock. Tiny spaces, or pores, exist between the particles that enable the rock to hold a liquid. Oil and natural gas become trapped inside the pores. Many pores may be connected to form a pore passage. Rocks containing pores and pore passages are identified as porous and permeable. Permeability is the ability of liquids and gases to move through pore spaces in the rocks. A rock may be porous, but if the pore spaces are not connected together, the liquids will not be able to pass through the rock. Through drilling and pumping, oil and natural gas are extracted from inside the porous rock. This is contrary to the belief that oil is formed in pools underground.
Porosity is the ability of a liquid and/or gas to collect in pores of rocks, much like water collects in a sponge.
Permeability is the ability of liquids and gases to move through pore spaces in rocks.
Materials
q 1 bag large gravel (coarse gravel)
q 1 bag small gravel (aquarium type)
q 1 bag medium gravel (pea gravel)
q 3-600ml beakers or tall clear cups or jars
q Water (can be dyed with food coloring)
q 1 graduated cylinder
Conclusions
1. Which size of gravel has the greatest porosity? Explain why.
2. Explain porosity’s importance in the drilling process of an oil well.
Type of Material Volume (ml) of water poured Volume (ml) of material % pore space in material
Large Gravel
Small Gravel
Sand
Porosity = X 100 =
Volume of Water
Volume of Material
PRIMARY STUDENTS
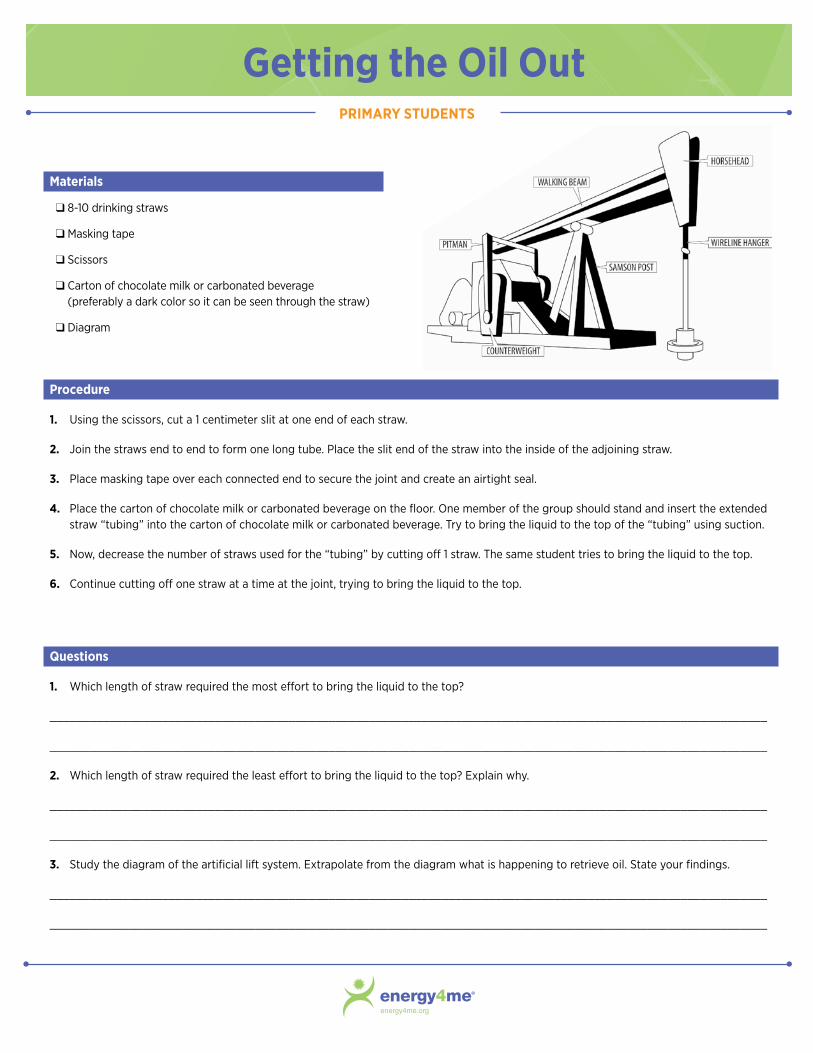
Getting the Oil Out
Materials
q 8-10 drinking straws
q Masking tape
q Scissors
q Carton of chocolate milk or carbonated beverage (preferably a dark color so it can be seen through the straw)
q Diagram
Procedure
1. Using the scissors, cut a 1 centimeter slit at one end of each straw.
2. Join the straws end to end to form one long tube. Place the slit end of the straw into the inside of the adjoining straw.
3. Place masking tape over each connected end to secure the joint and create an airtight seal.
4. Place the carton of chocolate milk or carbonated beverage on the floor. One member of the group should stand and insert the extended straw “tubing” into the carton of chocolate milk or carbonated beverage. Try to bring the liquid to the top of the “tubing” using suction.
5. Now, decrease the number of straws used for the “tubing” by cutting off 1 straw. The same student tries to bring the liquid to the top.
6. Continue cutting off one straw at a time at the joint, trying to bring the liquid to the top.
Questions
1. Which length of straw required the most effort to bring the liquid to the top?
____________________________________________________________________________________________________________
____________________________________________________________________________________________________________
2. Which length of straw required the least effort to bring the liquid to the top? Explain why.
____________________________________________________________________________________________________________
____________________________________________________________________________________________________________
3. Study the diagram of the artificial lift system. Extrapolate from the diagram what is happening to retrieve oil. State your findings.
____________________________________________________________________________________________________________
____________________________________________________________________________________________________________
SECONDARY STUDENTS
Distillation
Materials
q Glue stick (1 per group)
q Markers (1 per group)
q Tape
q Ball of string
q Construction paper (6 different colors)
q Teacher Guide (lab packet)
q 22 paper clips (for each group)
q Chamber rungs (lab packet)
q Story (lab packet)
q Distillation chamber chart (lab packet)
q Pictures of products for construction paper project (1 per group, lab packet)
q Envelopes
Preparation
1. Connect 22 paper clips by making a chain for each pair of students,
and place the chain in an envelope.
2. Copy the distillation chamber chart for each pair of students.
3. Print the rungs for the distillation chamber.
4. Print out pictures of products for construction paper project.
5. Print and cut apart pictures of products students will become.
6. Write on the board the color of construction paper that represents the temperature of the chambers.
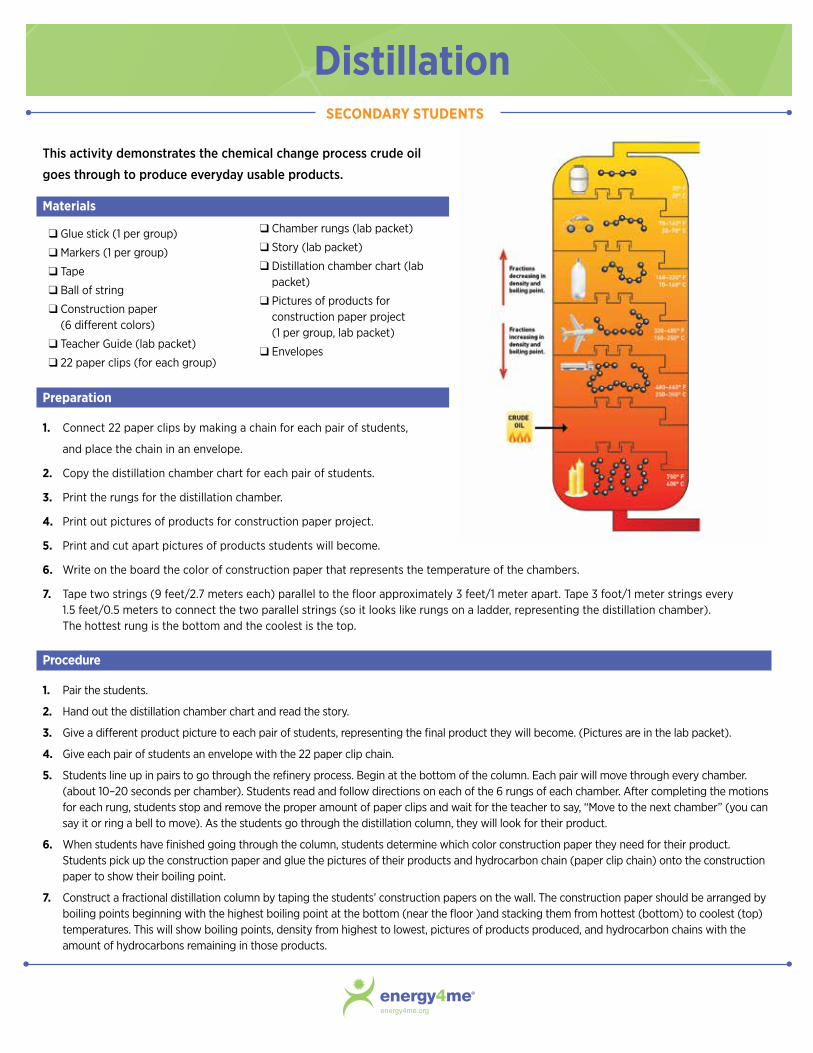
7. Tape two strings (9 feet/2.7 meters each) parallel to the floor approximately 3 feet/1 meter apart. Tape 3 foot/1 meter strings every 1.5 feet/0.5 meters to connect the two parallel strings (so it looks like rungs on a ladder, representing the distillation chamber). The hottest rung is the bottom and the coolest is the top.
Procedure
1. Pair the students.
2. Hand out the distillation chamber chart and read the story.
3. Give a different product picture to each pair of students, representing the final product they will become. (Pictures are in the lab packet).
4. Give each pair of students an envelope with the 22 paper clip chain.
5. Students line up in pairs to go through the refinery process. Begin at the bottom of the column. Each pair will move through every chamber. (about 10–20 seconds per chamber). Students read and follow directions on each of the 6 rungs of each chamber. After completing the motions for each rung, students stop and remove the proper amount of paper clips and wait for the teacher to say, “Move to the next chamber” (you can say it or ring a bell to move). As the students go through the distillation column, they will look for their product.
6. When students have finished going through the column, students determine which color construction paper they need for their product. Students pick up the construction paper and glue the pictures of their products and hydrocarbon chain (paper clip chain) onto the construction paper to show their boiling point.
7. Construct a fractional distillation column by taping the students’ construction papers on the wall. The construction paper should be arranged by boiling points beginning with the highest boiling point at the bottom (near the floor )and stacking them from hottest (bottom) to coolest (top) temperatures. This will show boiling points, density from highest to lowest, pictures of products produced, and hydrocarbon chains with the amount of hydrocarbons remaining in those products.
This activity demonstrates the chemical change process crude oil
goes through to produce everyday usable products.
SECONDARY STUDENTS
Refining Process
Materials
q 400 ml 2% milk
q 100 ml vinegar
q Saucepan
q Spoon
q Hot plate
q Pot holder
q Petroleum products
Procedure
1. Display at the front of the room a number of products made from petroleum (i.e., petroleum jelly, gasoline, motor oil, plastic items, cosmetics, synthetic rubber, asphalt, nylon, tennis shoes).
2. In this activity, we are going to use milk as a model for crude oil. Explain the definition of crude oil (Crude Oil – unrefined oil or petroleum).
3. Ask students to name some of the products we can make from milk. What are some of the things we must do to milk to get these products?
4. Turn on the hot plate. Stir together milk and vinegar in the saucepan over heat. Continue stirring until the substances have separated into curds and whey (1-3 minutes).
5. Ask students what was done to the milk and vinegar mixture to separate it.
6. Explain how this experiment is similar to the separation of crude oil into usable parts. Crude oil is similar to the mixture in that it must first be heated to separate into different substances before it can be made into products.
7. Read the “explanation” from the Oil and Natural Gas book, pages 46-49.
In this activity, we are going to use milk as a model for crude and demonstrate how crude oil is separated into usable parts.
Vocabulary
Crude Oil– unrefined oil or petroleum.
SECONDARY STUDENTS
Materials
q Paper
q Pencil or pen
q Petroleum products (i.e., petroleum jelly, gasoline, motor oil, plastic items, cosmetics, synthetic rubber, asphalt, nylon, tennis shoes)
Procedure: Part 1
1. Display at the front of the room a number of products made from petroleum. (i.e., petroleum jelly, gasoline, motor oil, plastic items, cosmetics, synthetic rubber, asphalt, nylon, tennis shoes).
2. Each student should work with a partner to generate lists of all the petroleum-based products, appliances, or conveniences their family uses on a daily basis.
3. Separate the list into two groups of products: necessities and luxuries.
4. Sort the list into the top 10 most important products.
5. Present the lists of the 10 most important products to the group and give supporting reasons for those choices.
6. Have the class/group come to a consensus on one list of the 10 most important products. Write this list of important products on the board.
Questions
1. Why is it important to conserve use of oil and natural gas?
2. Why are the replacement ideas not readily used?
3. Why are better conservation practices not observed on a regular basis?
4. Summarize the environmental issues we need to address when producing and using such products.
5. Develop a class definition of what it means to act responsibly when using oil and natural gas.
Tower of Power
Procedure: Part 2
1. Work in partners again. Assign each group one of the 10 products.
2. Identify better conservation practices in using the product.
3. Identify what could be used to replace that product, and the cost, effort, and time needed to replace the original product with the new product.
4. Identify environmental safety issues (safe use of the product).
5. Share findings with the class.


![S]TUDENT [N]URSING [O]RGANIZATION](https://img.pdfslide.us/doc/110x75/61a58cc8a996447b9e324b1b/student-nursing-organization.jpg)