Embed Size (px)
DESCRIPTION
Gateway To Space ASEN 1400 / ASTR 2500 Class #13. T-53. Colorado Space Grant Consortium. Today:. Announcements Next Time One Minute Report Questions Arduino Part 3: Sensors and SD Cards. Announcements:. Everyone bring HW #4 and #5 hardware? USB cables? Arduino Unos ? Laptop?. - PowerPoint PPT Presentation
Citation preview

Colorado Space Grant Consortium
Gateway To SpaceASEN 1400 / ASTR 2500
Class #13
T-53
- Announcements
- Next Time
- One Minute Report Questions
- Arduino Part 3: Sensors and SD Cards
Today:
- Everyone bring HW #4 and #5 hardware?- USB cables?- Arduino Unos?- Laptop?
Announcements:
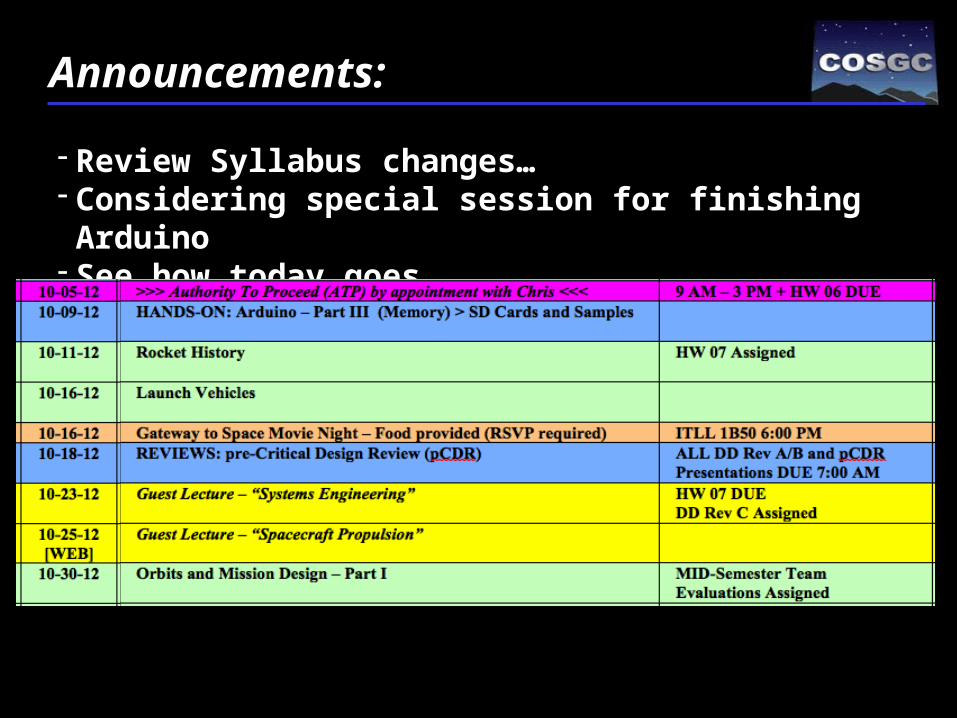
- Review Syllabus changes…- Considering special session for finishing Arduino- See how today goes
Announcements:

- Where is the Arduino Cheat Sheet?- Do we just program to keep the sensors on the entire flight?- Do you know any good websites with Arduino tutorials?- Can we go over what the code means? int, map, etc?- How many commands are there?- What programming languages does the Arduino
understand?- Would we be able to hook a speaker to the Uno so it plays a
beep every second?- What sort of boards do other satellites have?- How is a potentiometer be relevant to our mission?
One Minute Reports:
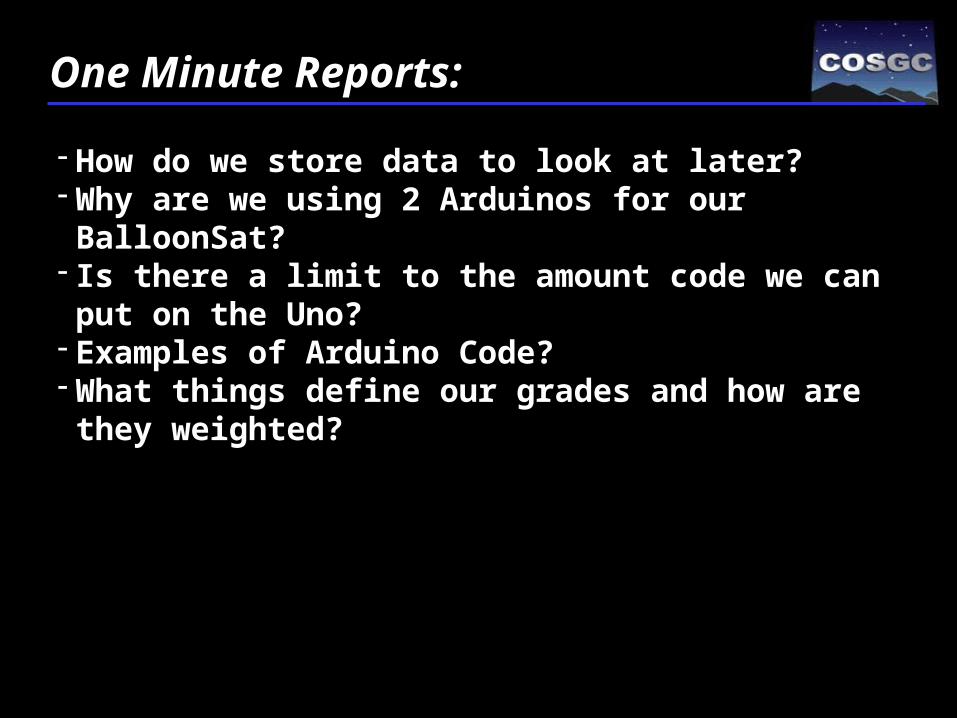
- How do we store data to look at later?- Why are we using 2 Arduinos for our BalloonSat?- Is there a limit to the amount code we can put on the Uno?- Examples of Arduino Code?- What things define our grades and how are they weighted?
One Minute Reports:

Next Time…Rocket History
Colorado Space Grant Consortium
8
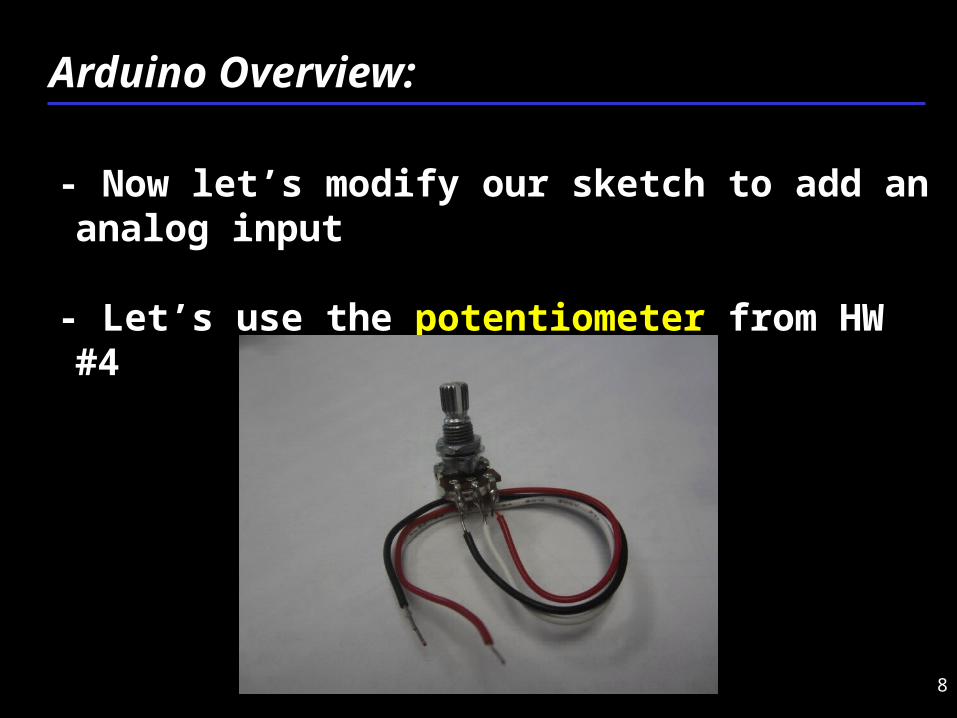
- Now let’s modify our sketch to add an analog input
- Let’s use the potentiometer from HW #4
Arduino Overview:
9
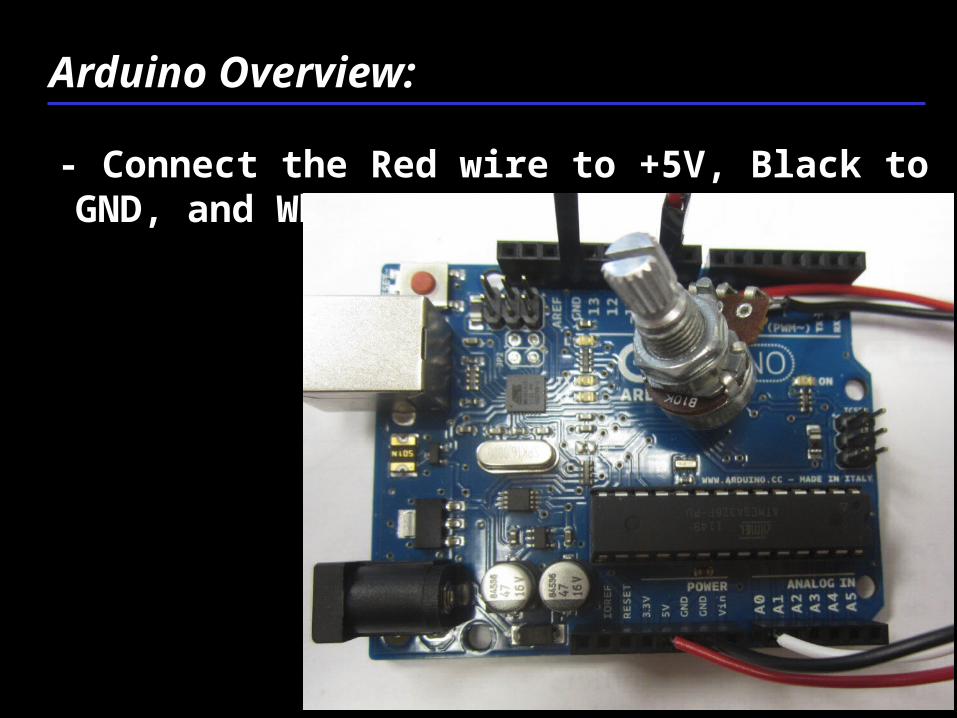
- Connect the Red wire to +5V, Black to GND, and White to A0
Arduino Overview:
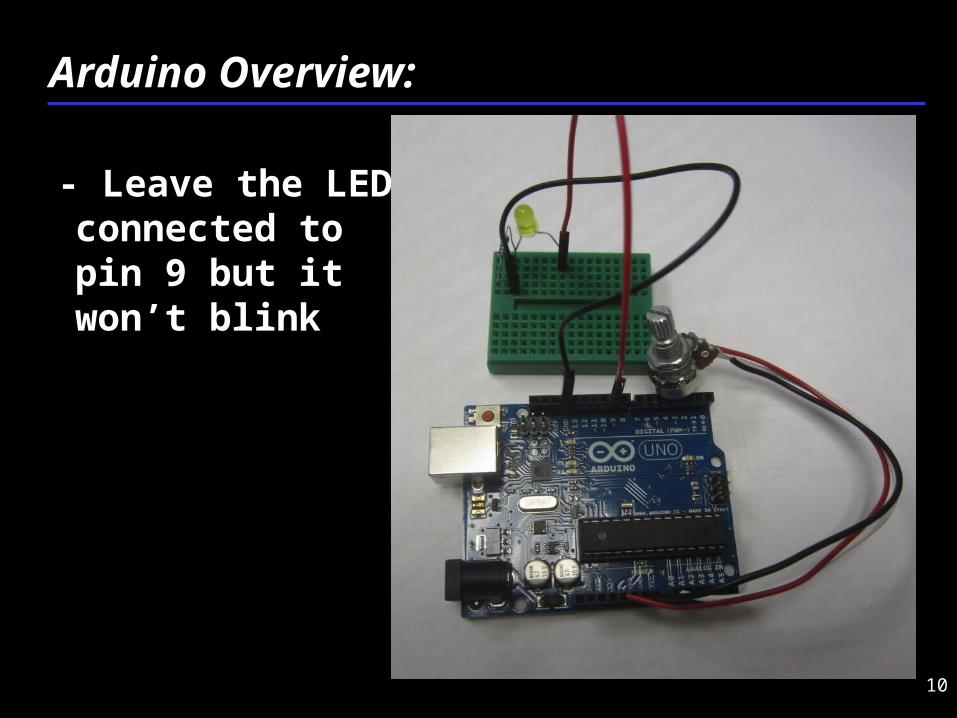
10
- Leave the LED connected to pin 9 but it won’t blink
Arduino Overview:
11
- Potentiometer is acting like an analog sensor
- We can now hook up any analog sensor and see its value (at least through serial)
- What other sensors can we hook up?
- Let’s add some…
- But first let’s add the Protoshield
Arduino Overview:

12
- Take out the Protoshield your team built in HW#4
Arduino Overview:
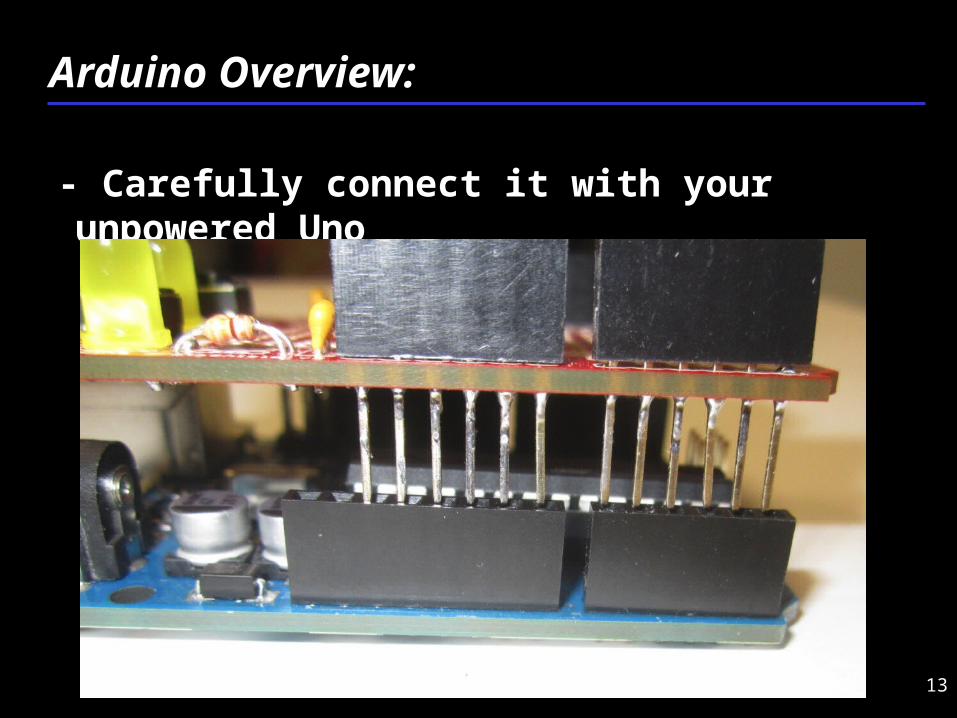
13
- Carefully connect it with your unpowered Uno
Arduino Overview:
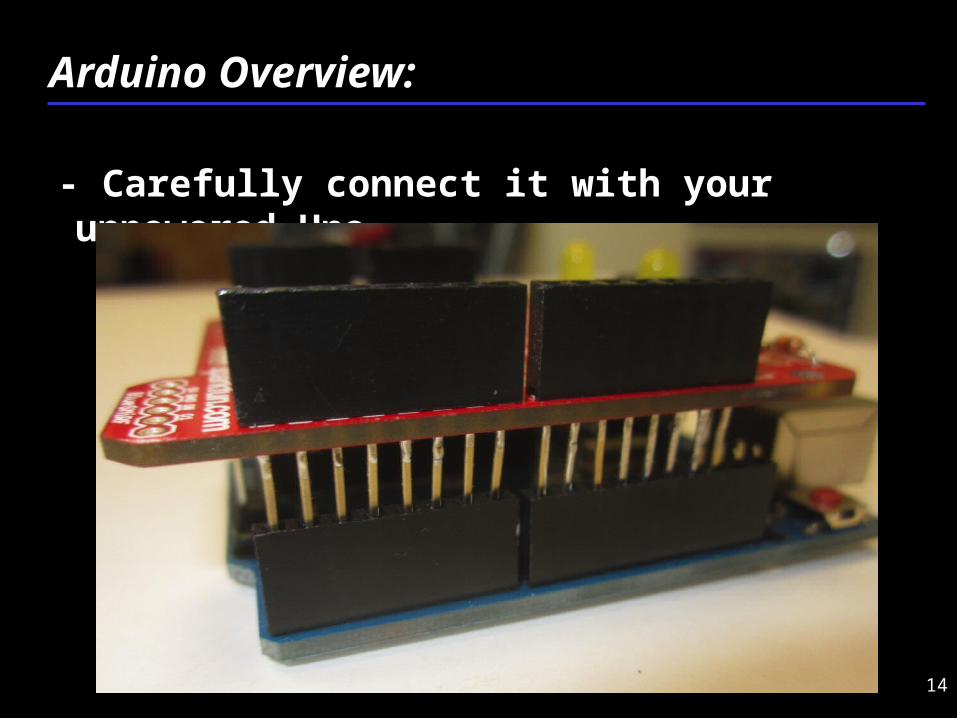
14
- Carefully connect it with your unpowered Uno
Arduino Overview:

15
- Carefully connect it with your unpowered Uno
Arduino Overview:
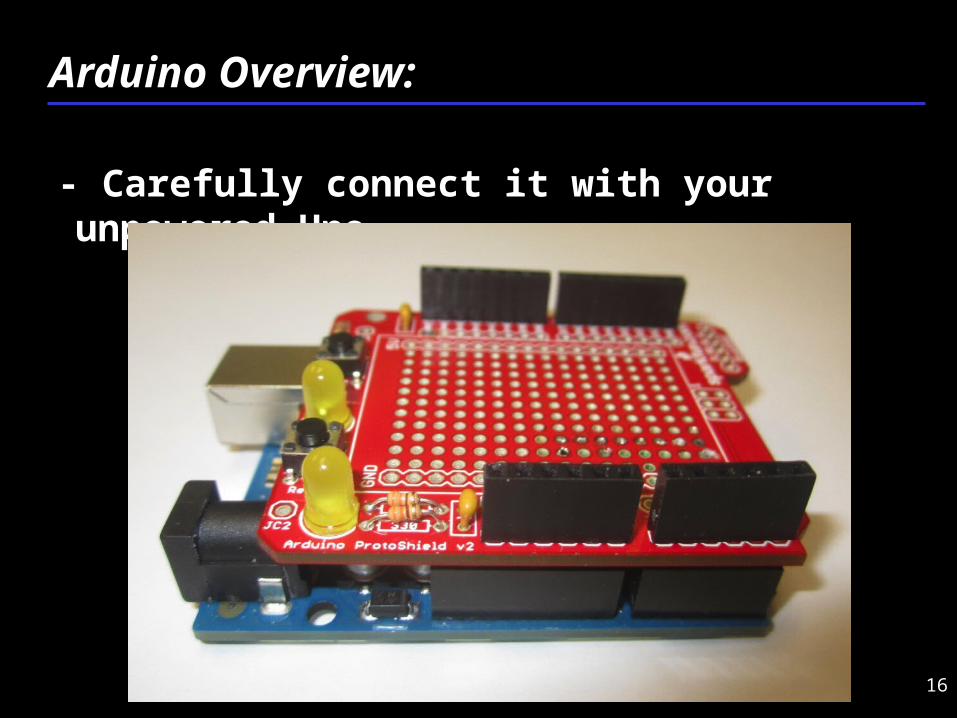
16
- Carefully connect it with your unpowered Uno
Arduino Overview:
17
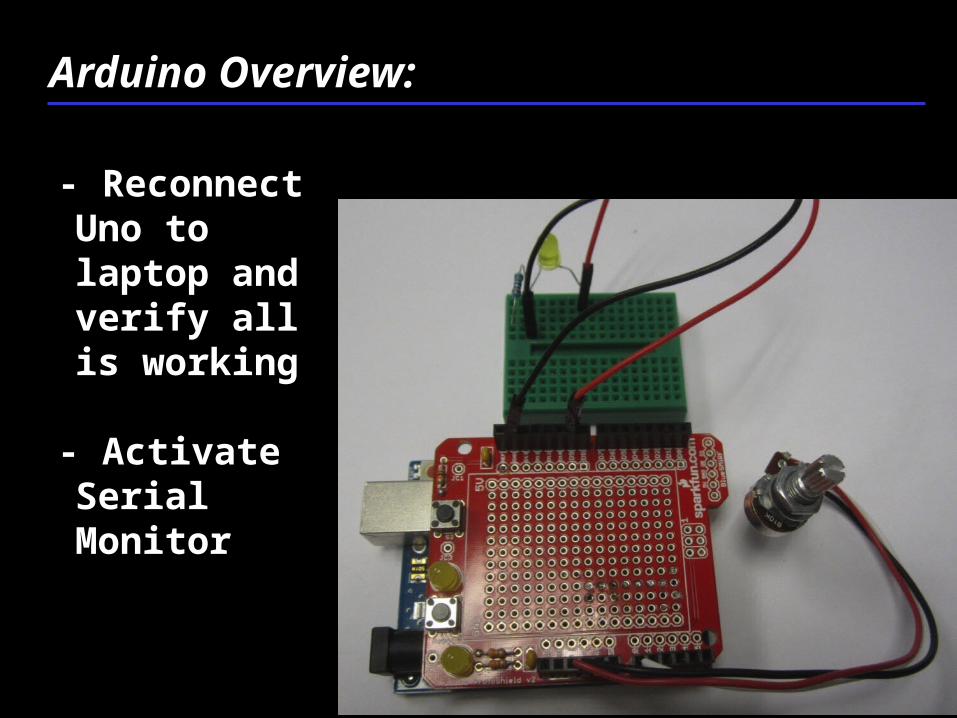
- Reconnect Uno to laptop and verify all is working
- Activate Serial Monitor
Arduino Overview:
18
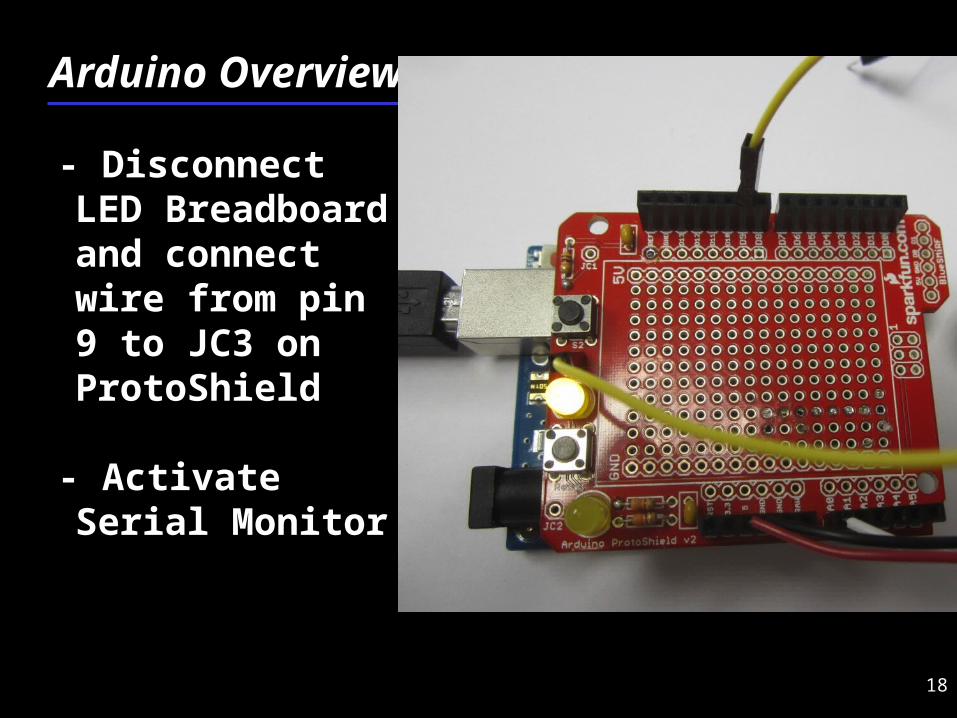
- Disconnect LED Breadboard and connect wire from pin 9 to JC3 on ProtoShield
- Activate Serial Monitor
Arduino Overview:
19
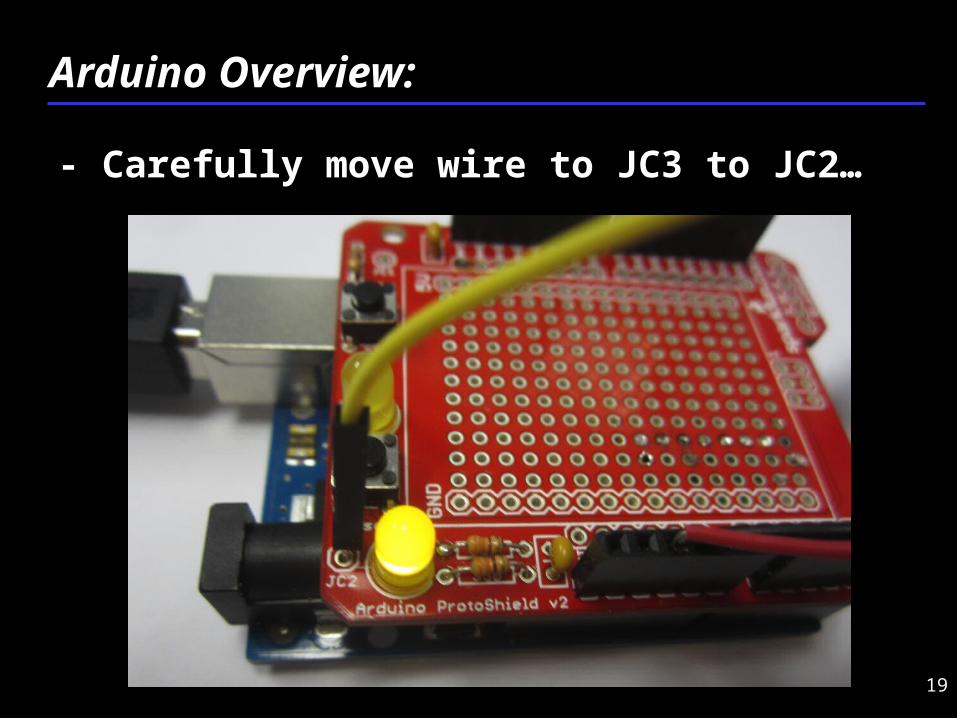
- Carefully move wire to JC3 to JC2…
Arduino Overview:
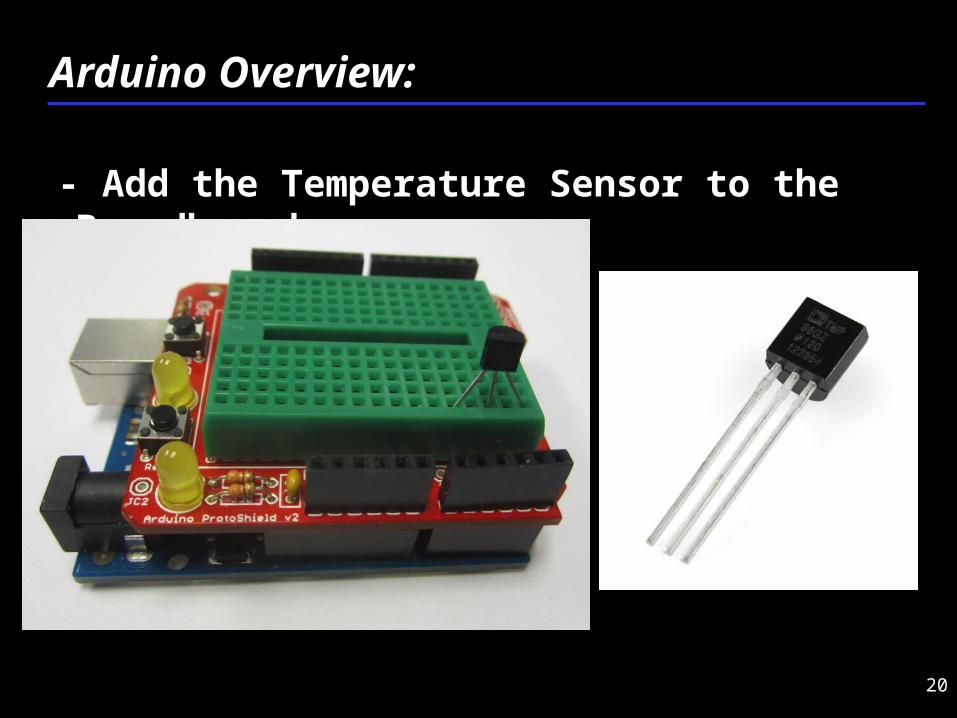
20
- Add the Temperature Sensor to the Breadboard
Arduino Overview:
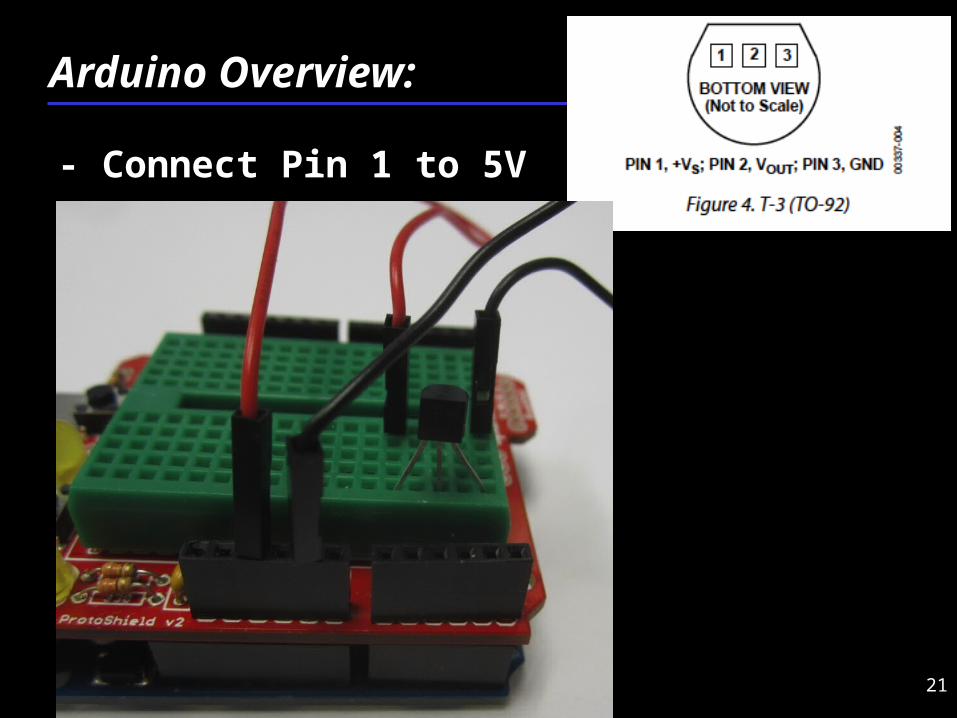
21
- Connect Pin 1 to 5V
Arduino Overview:
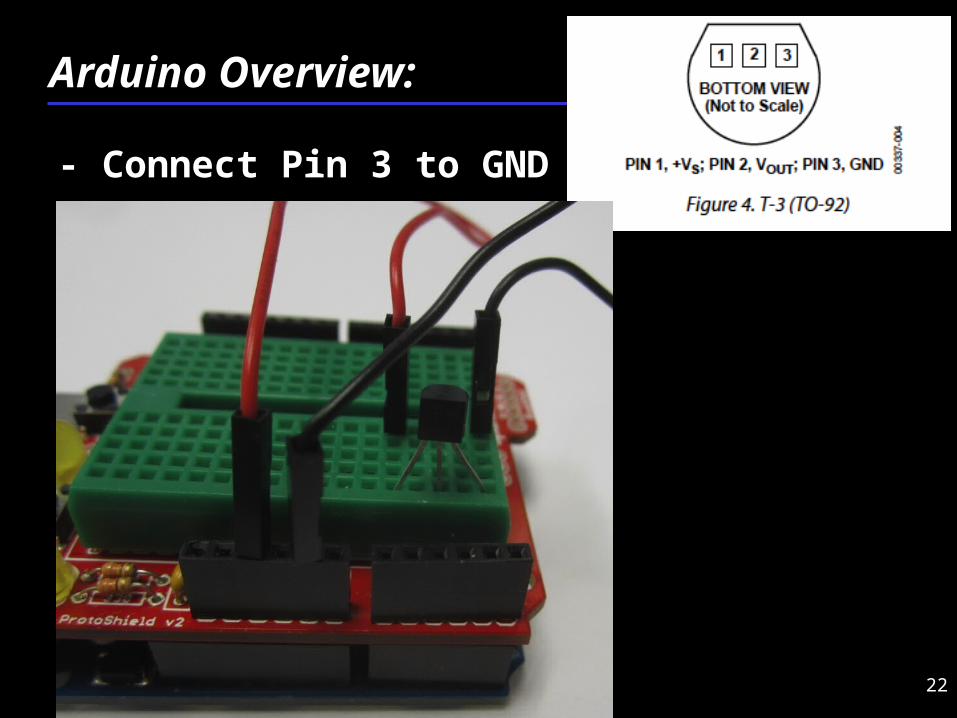
22
- Connect Pin 3 to GND
Arduino Overview:
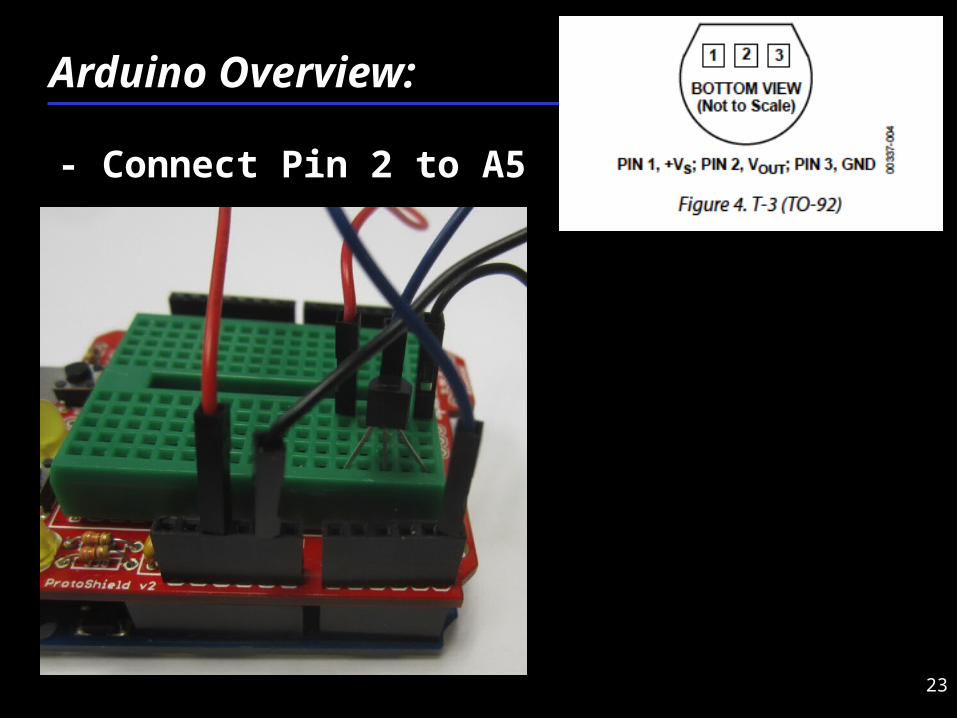
23
- Connect Pin 2 to A5
Arduino Overview:
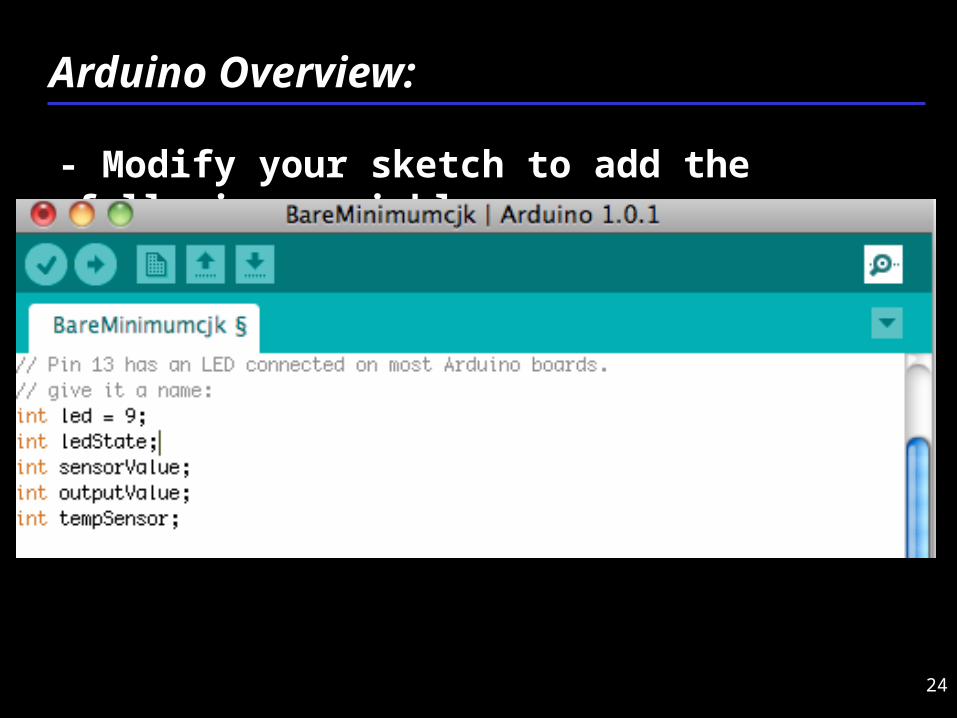
24
- Modify your sketch to add the following variable
Arduino Overview:
25
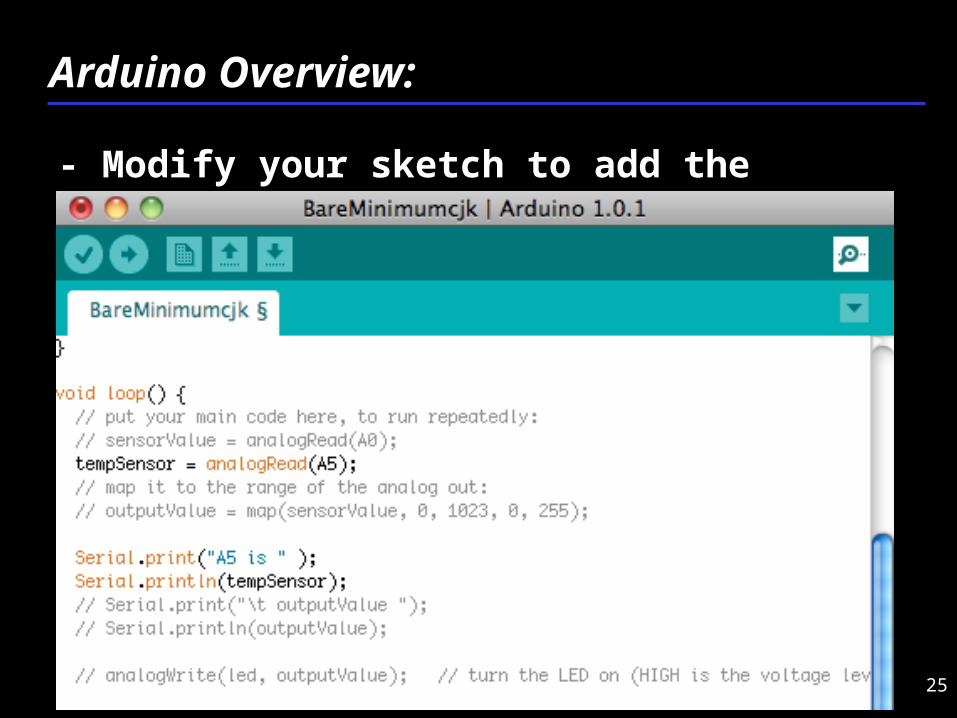
- Modify your sketch to add the following lines in loop
Arduino Overview:
26
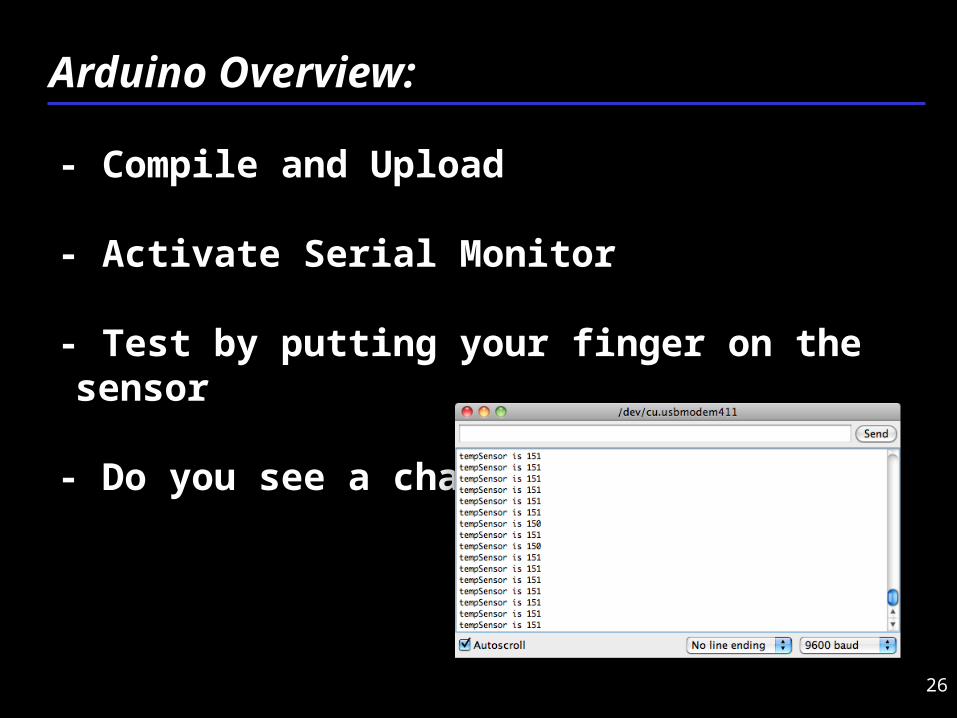
- Compile and Upload
- Activate Serial Monitor
- Test by putting your finger on the sensor
- Do you see a change?
Arduino Overview:

27
- Convert to Voltage and display on Serial Monitor
Arduino Overview:

28
- Should see this…
Arduino Overview:
29
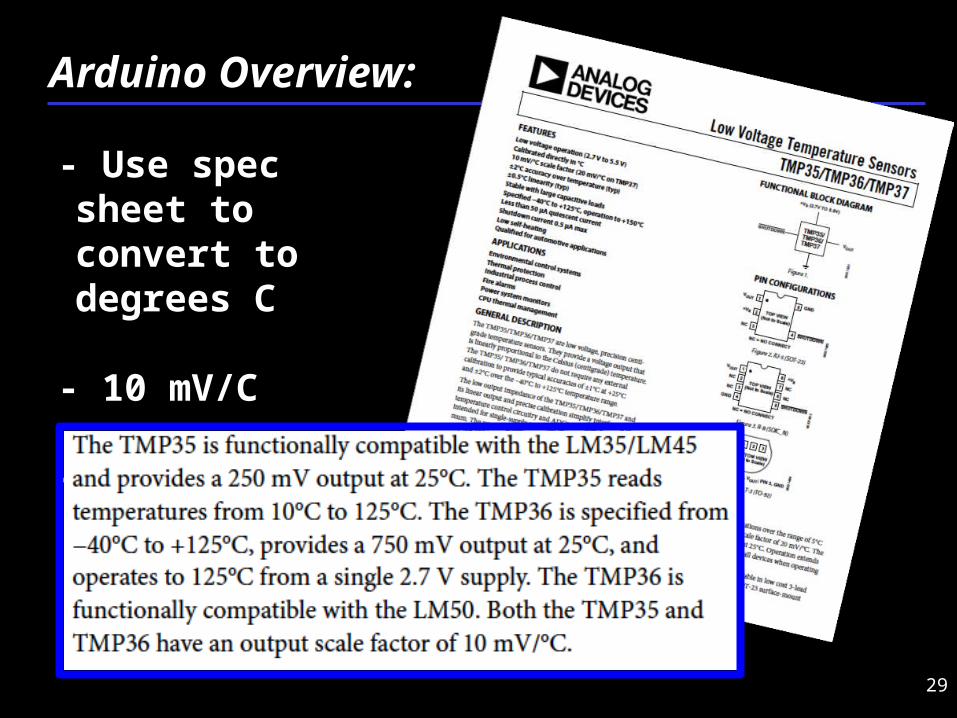
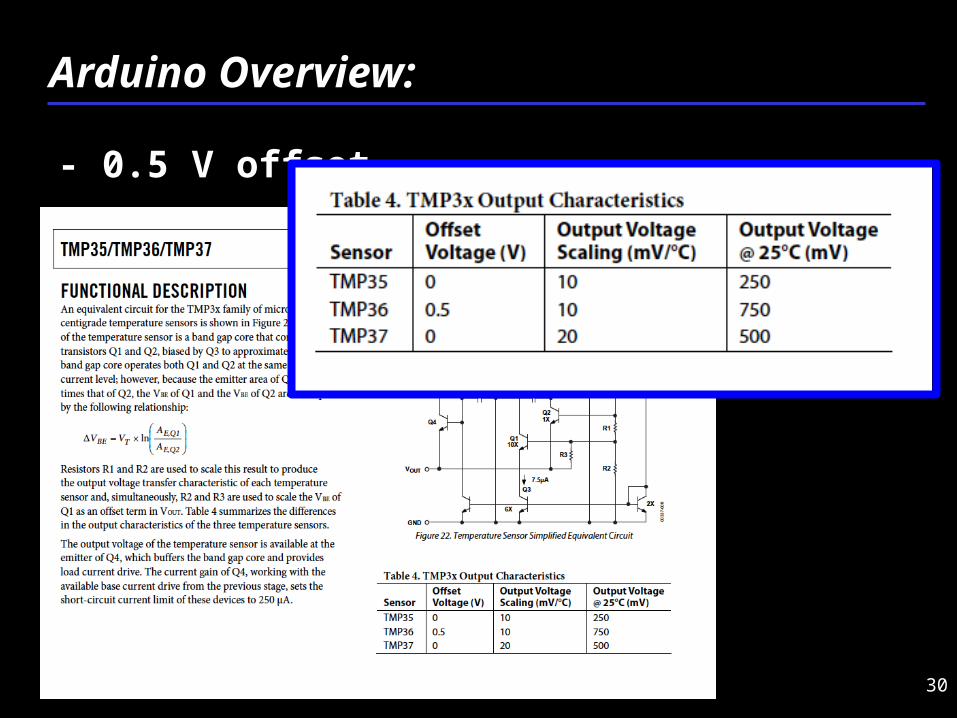
- Use spec sheet to convert to degrees C
- 10 mV/C
- Look for offset
Arduino Overview:
30
- 0.5 V offset
Arduino Overview:
31
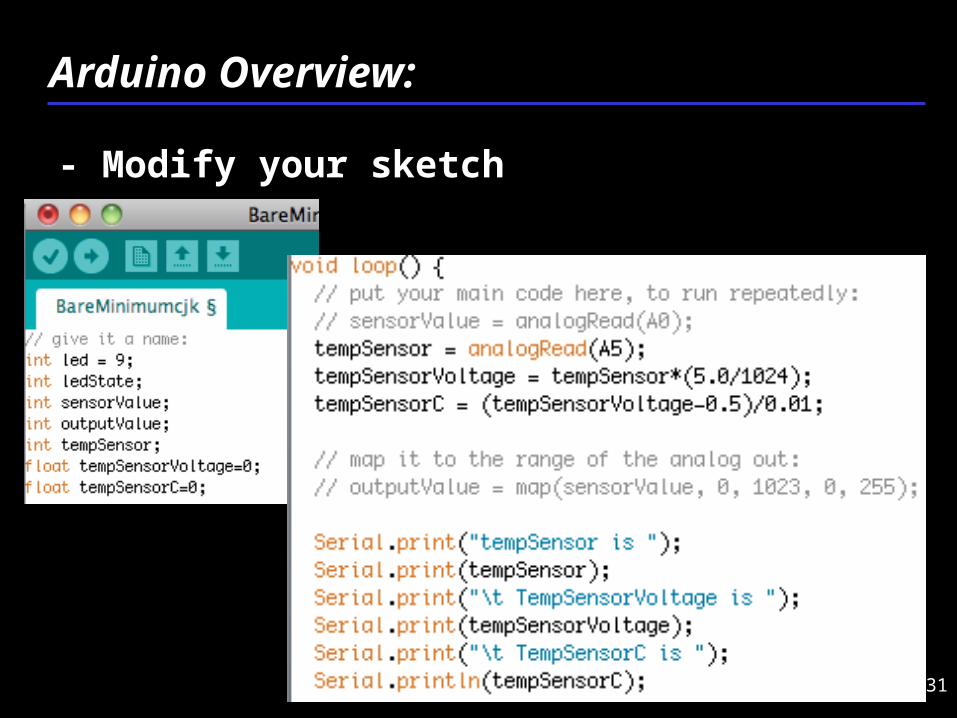
- Modify your sketch
Arduino Overview:
32
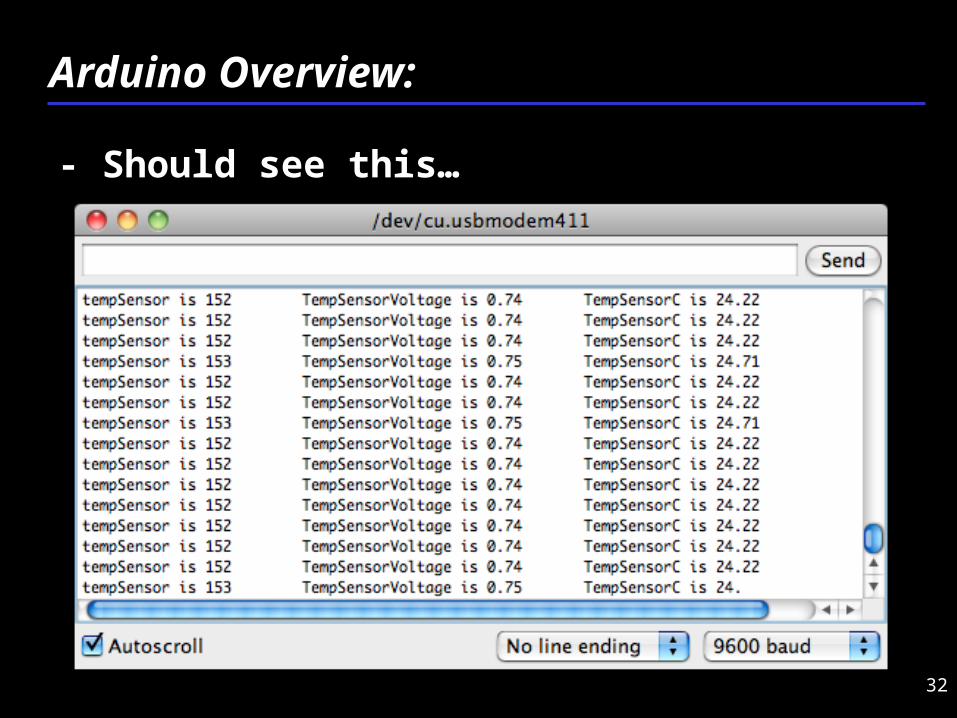
- Should see this…
Arduino Overview:

33
- Data make sense?
- How would you calibrate this sensor?
Arduino Overview:
34
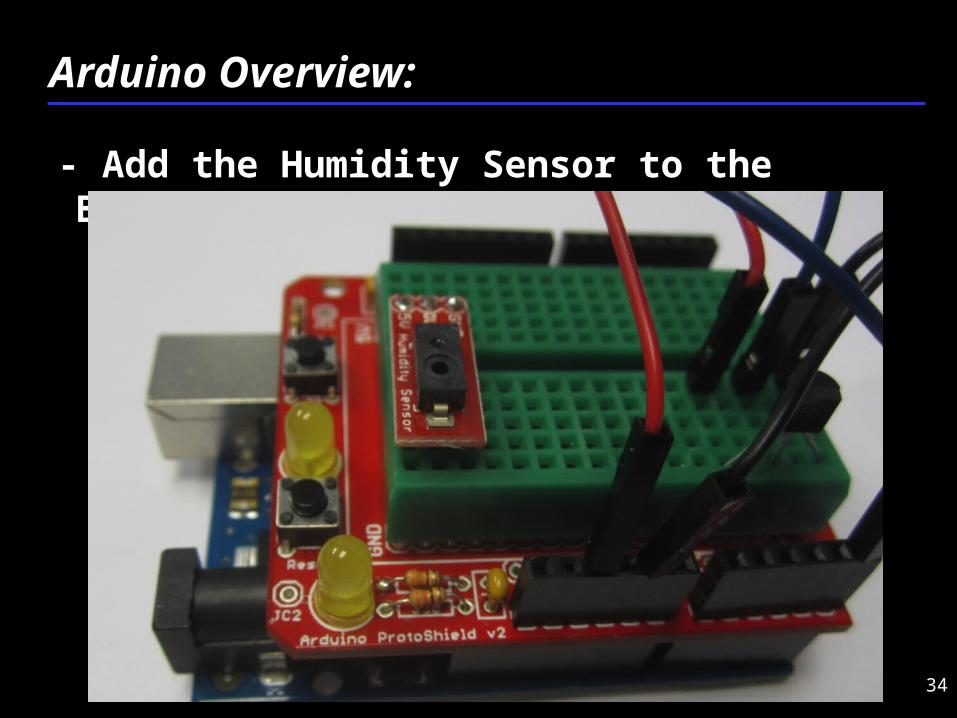
- Add the Humidity Sensor to the Breadboard
Arduino Overview:
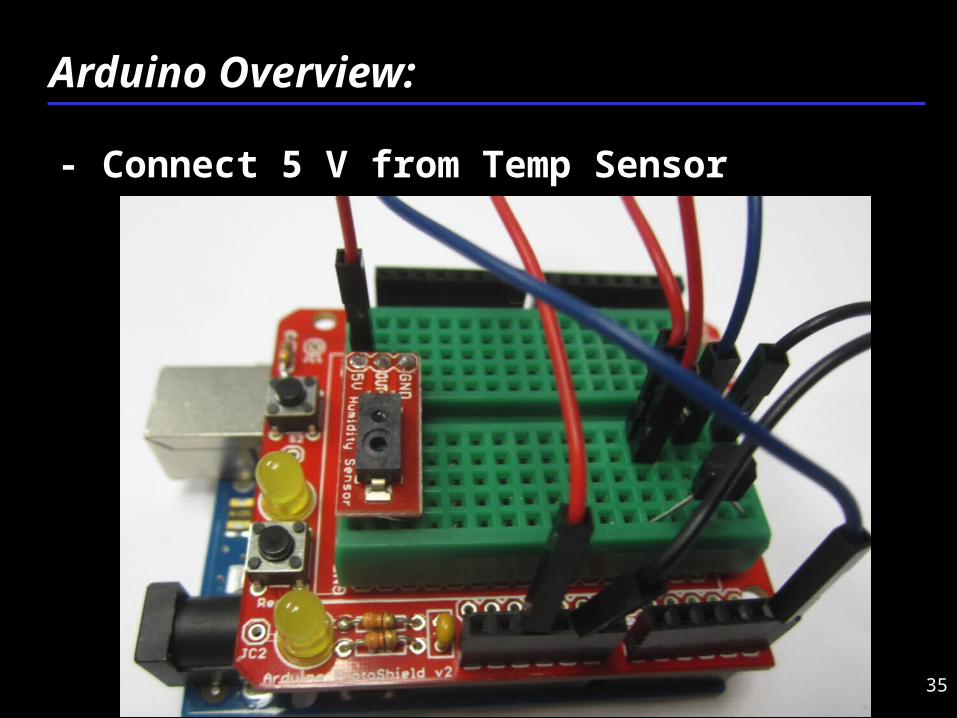
35
- Connect 5 V from Temp Sensor
Arduino Overview:
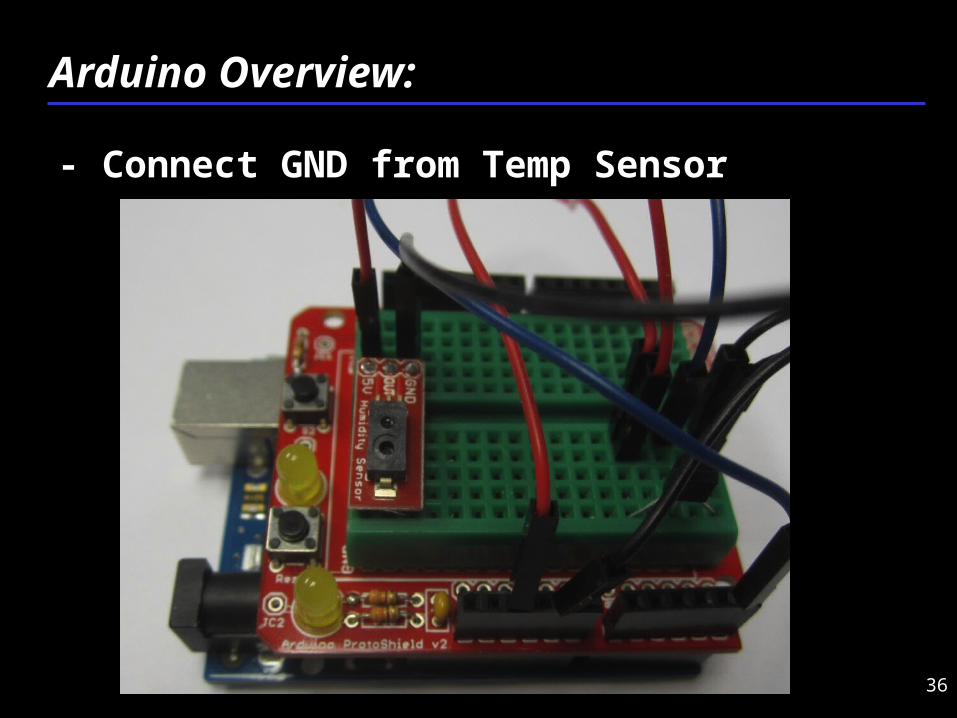
36
- Connect GND from Temp Sensor
Arduino Overview:
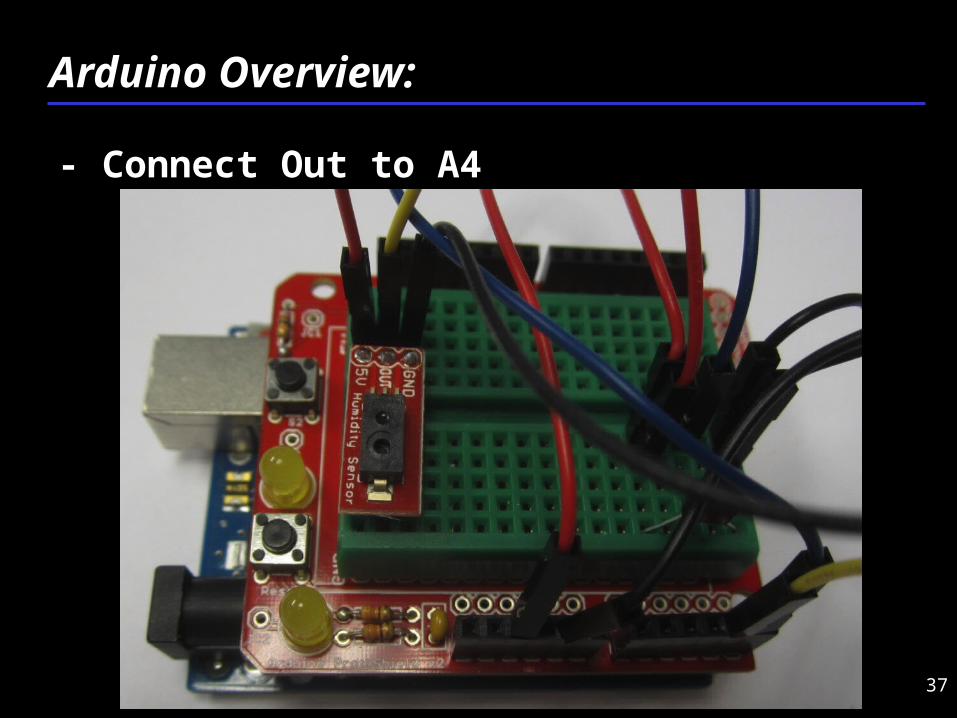
37
- Connect Out to A4
Arduino Overview:
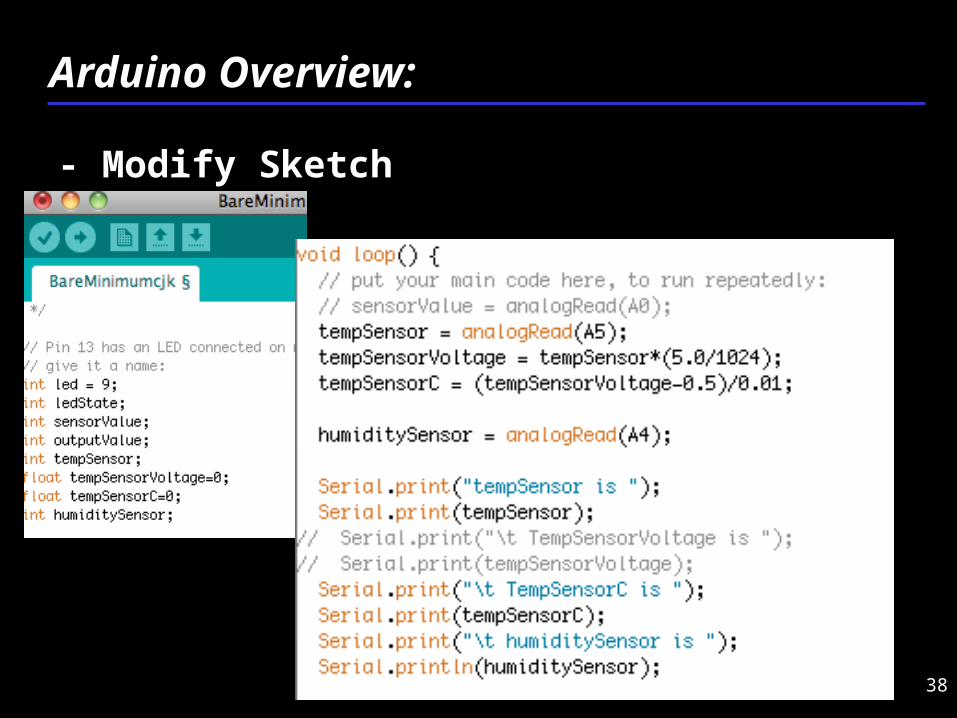
38
- Modify Sketch
Arduino Overview:
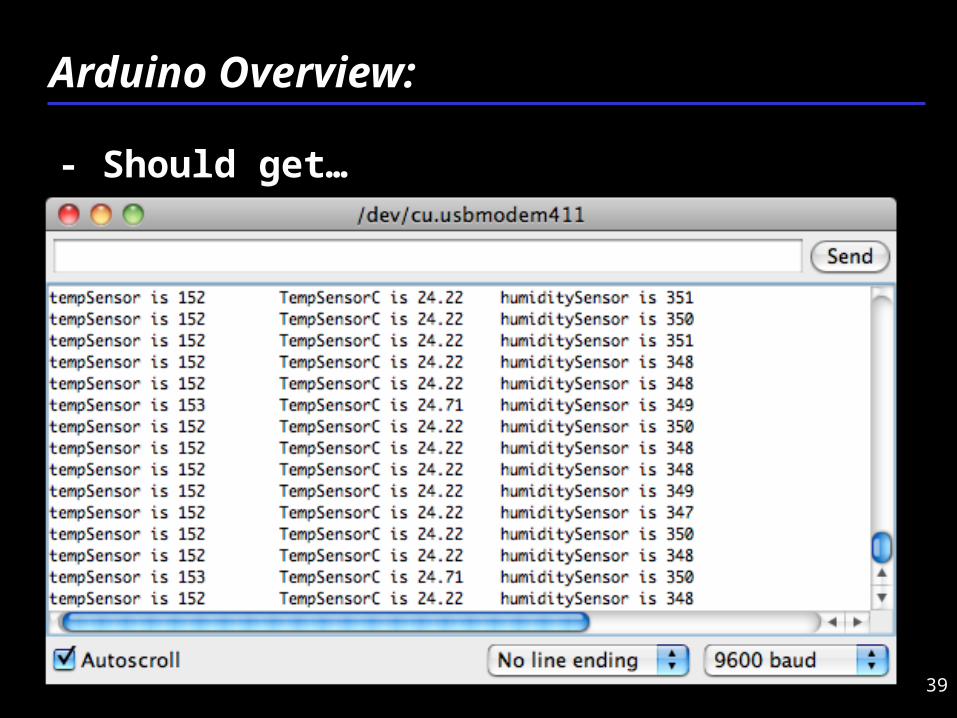
39
- Should get…
Arduino Overview:
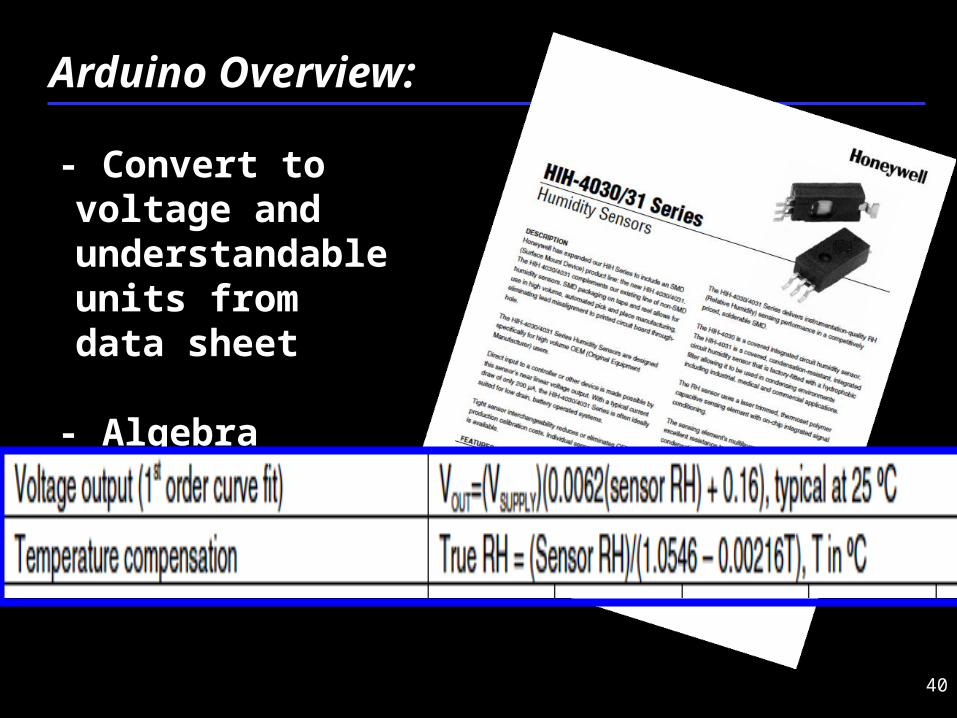
40
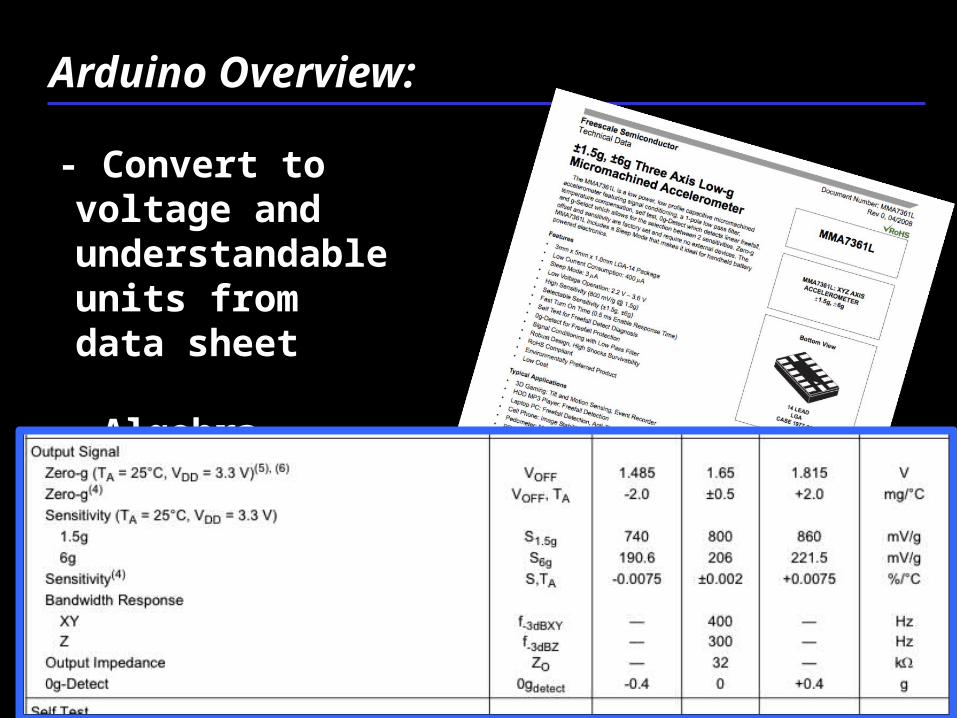
- Convert to voltage and understandable units from data sheet
- Algebra
Arduino Overview:
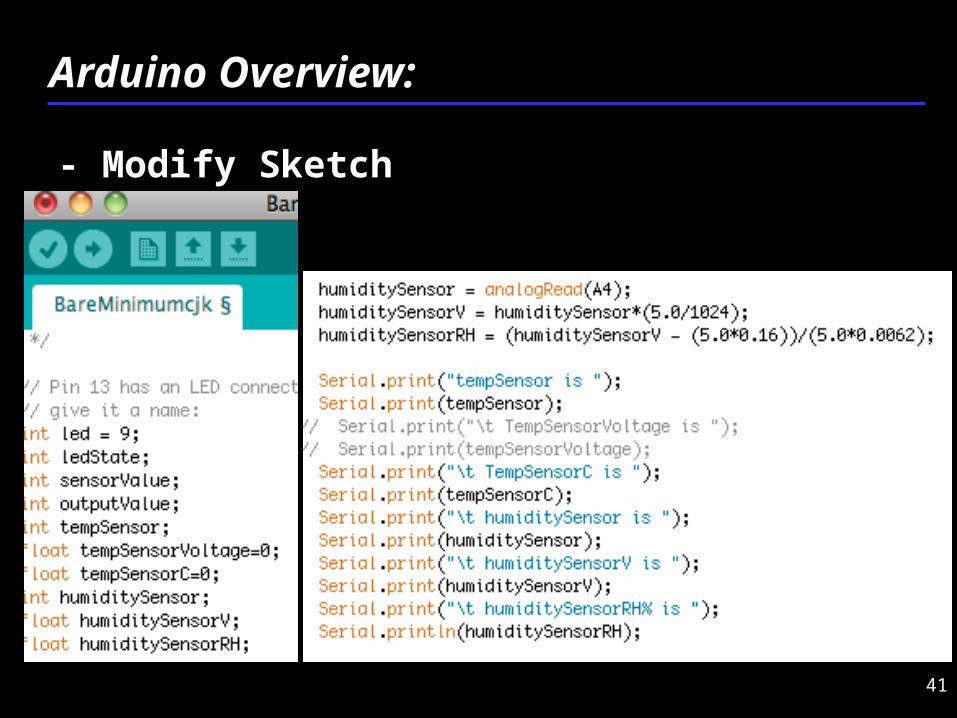
41
- Modify Sketch
Arduino Overview:
42
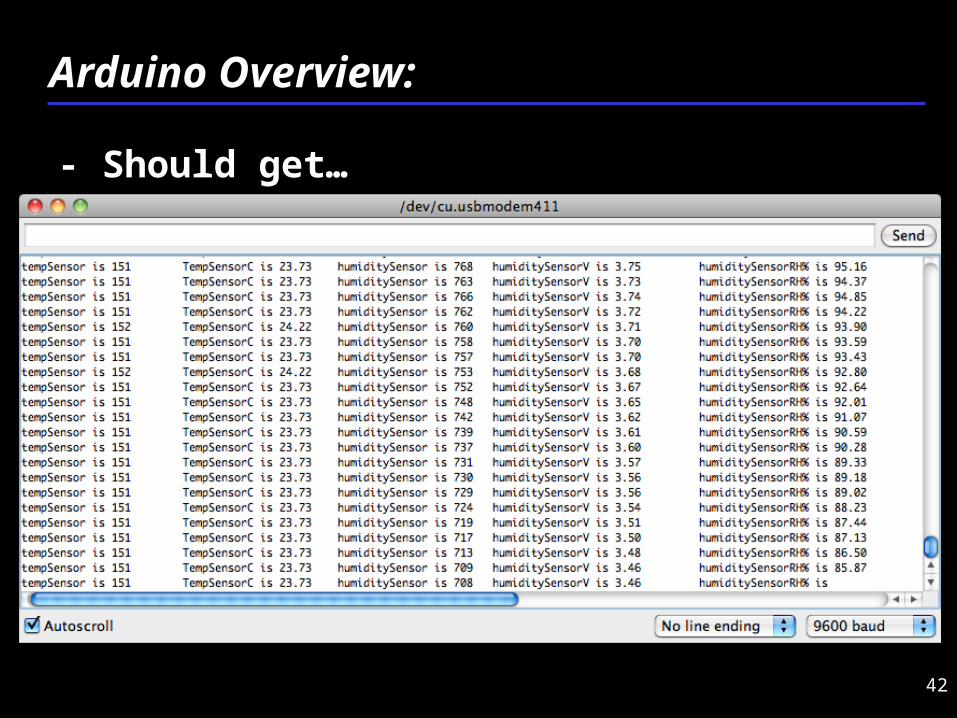
- Should get…
Arduino Overview:
43
- Data make sense?
- How would you calibrate this sensor?
Arduino Overview:
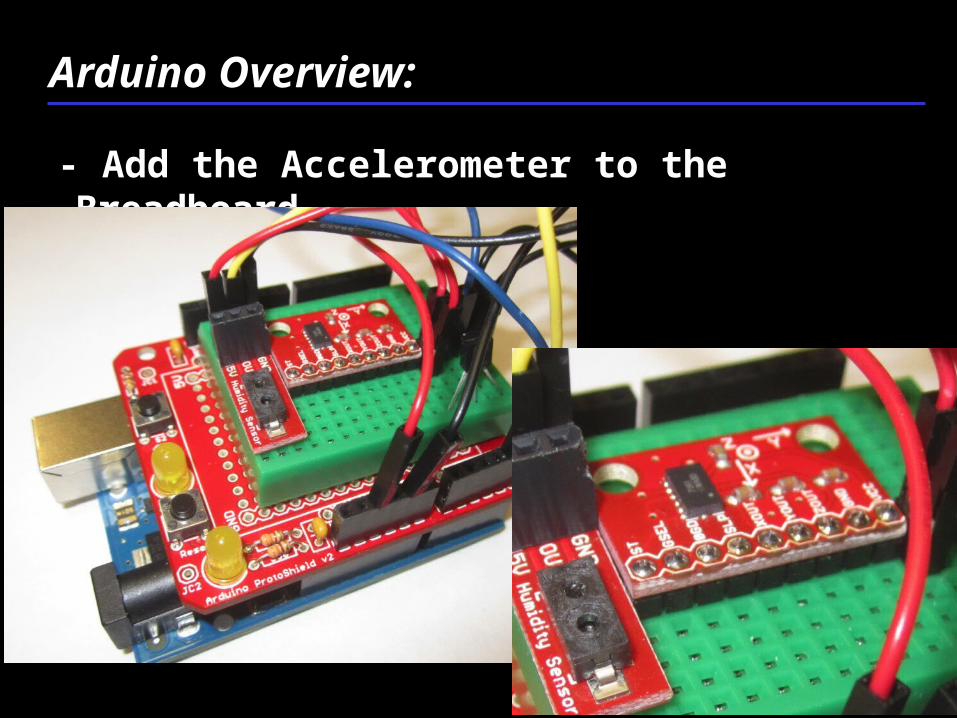
44
- Add the Accelerometer to the Breadboard
Arduino Overview:
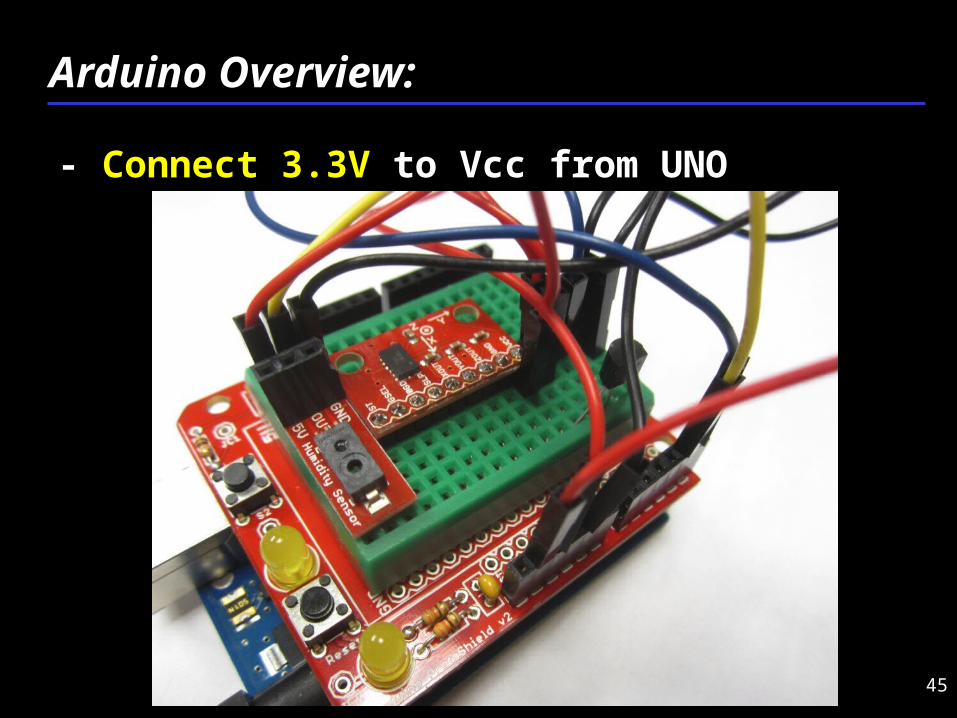
45
- Connect 3.3V to Vcc from UNO
Arduino Overview:
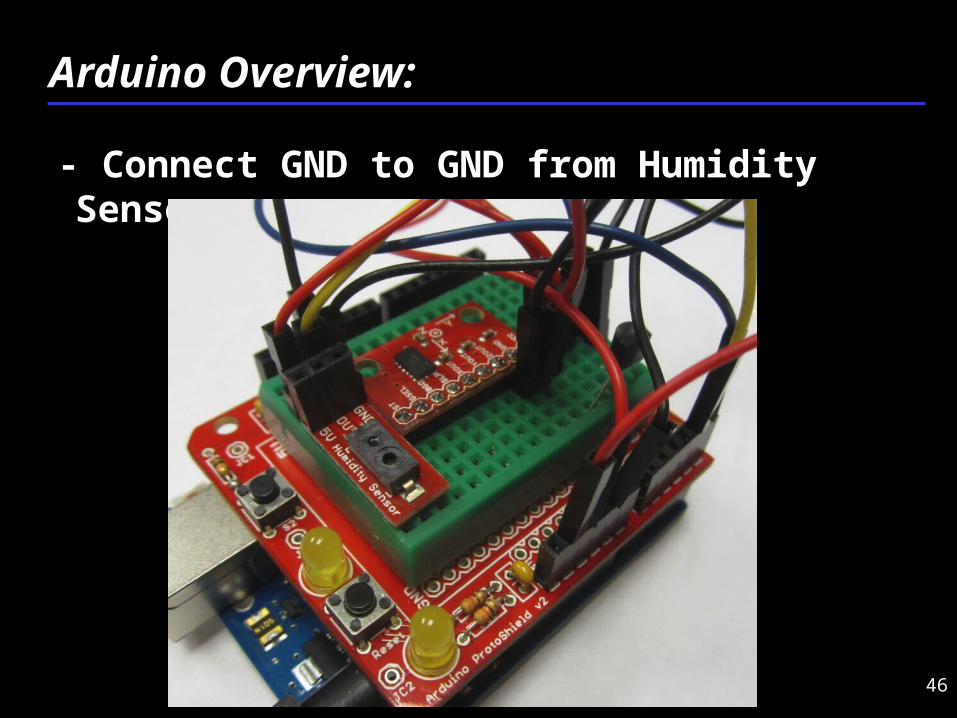
46
- Connect GND to GND from Humidity Sensor
Arduino Overview:
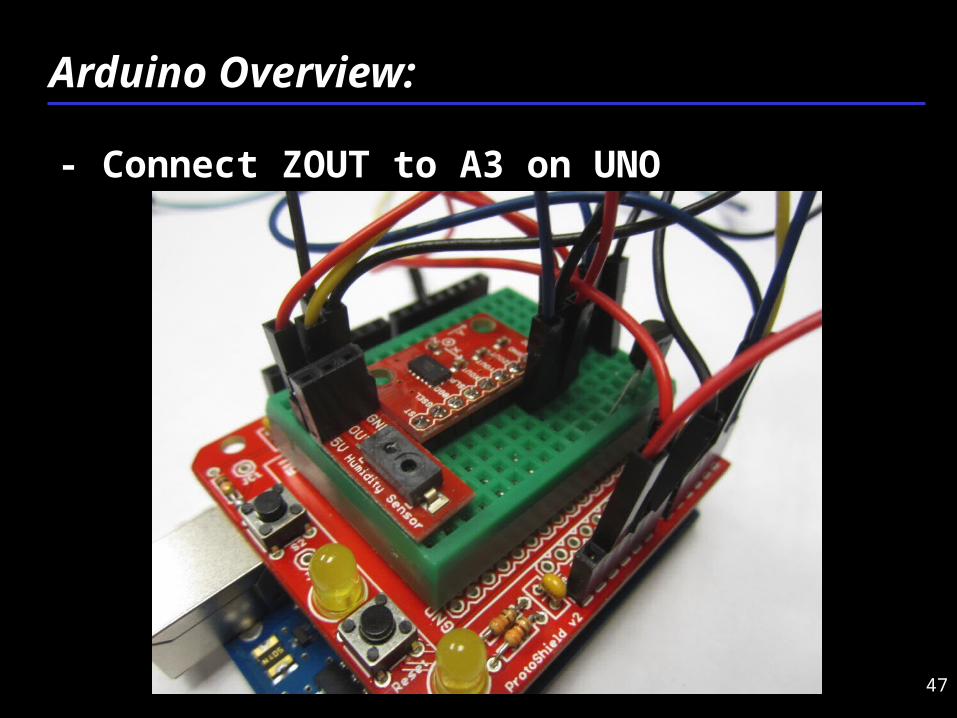
47
- Connect ZOUT to A3 on UNO
Arduino Overview:
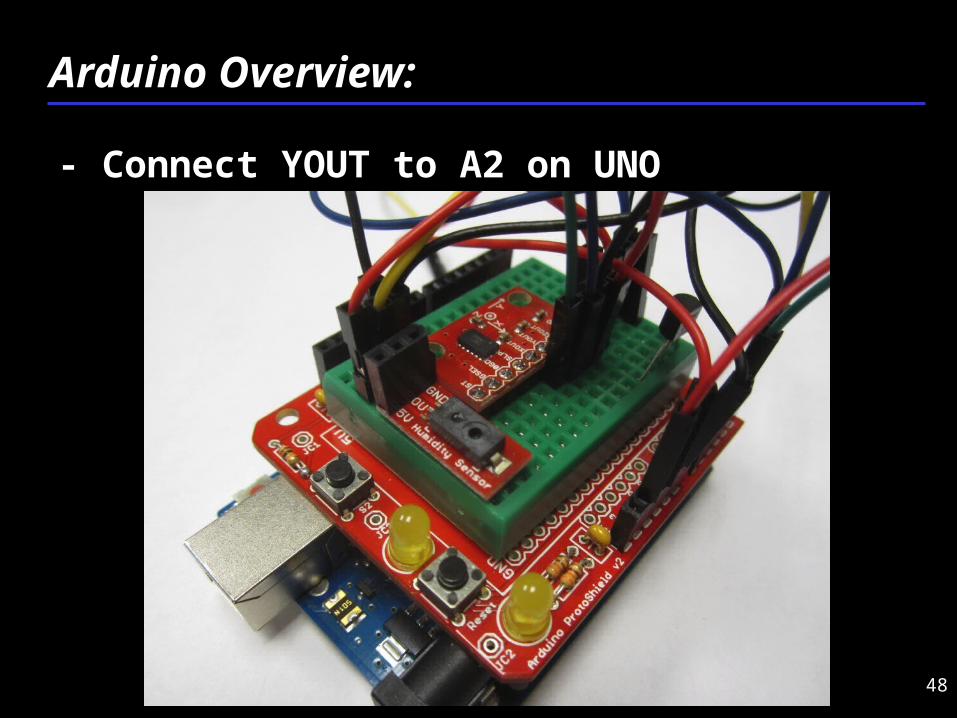
48
- Connect YOUT to A2 on UNO
Arduino Overview:
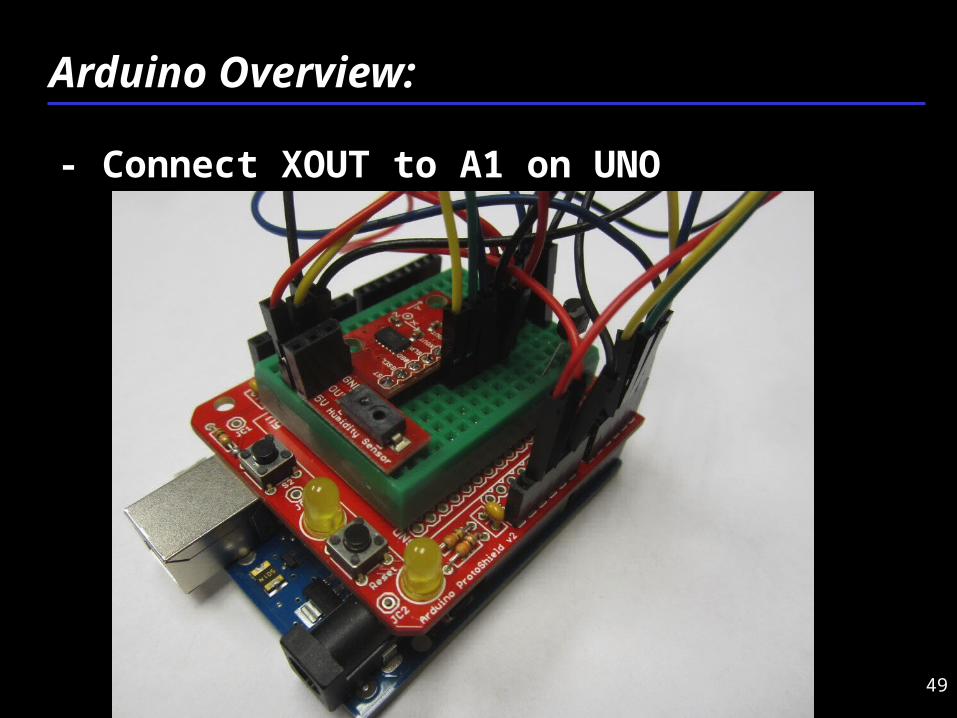
49
- Connect XOUT to A1 on UNO
Arduino Overview:
50
- Accelerometer has a few other settings we need address from the Data Sheet
Arduino Overview:
51
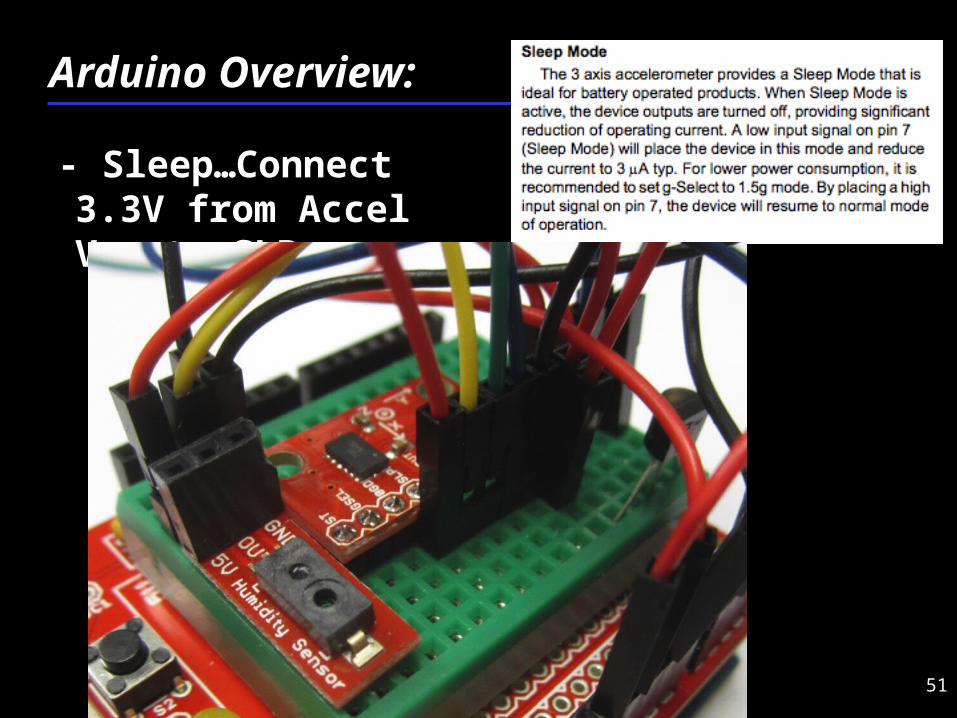
- Sleep…Connect 3.3V from Accel Vcc to SLP
Arduino Overview:
52
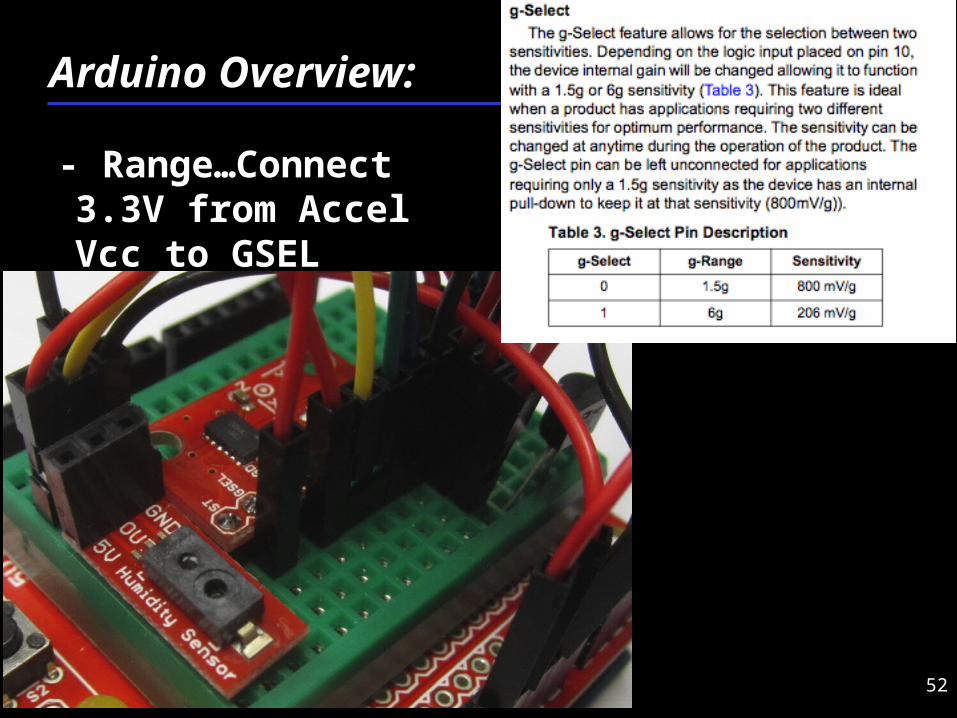
- Range…Connect 3.3V from Accel Vcc to GSEL
Arduino Overview:
53
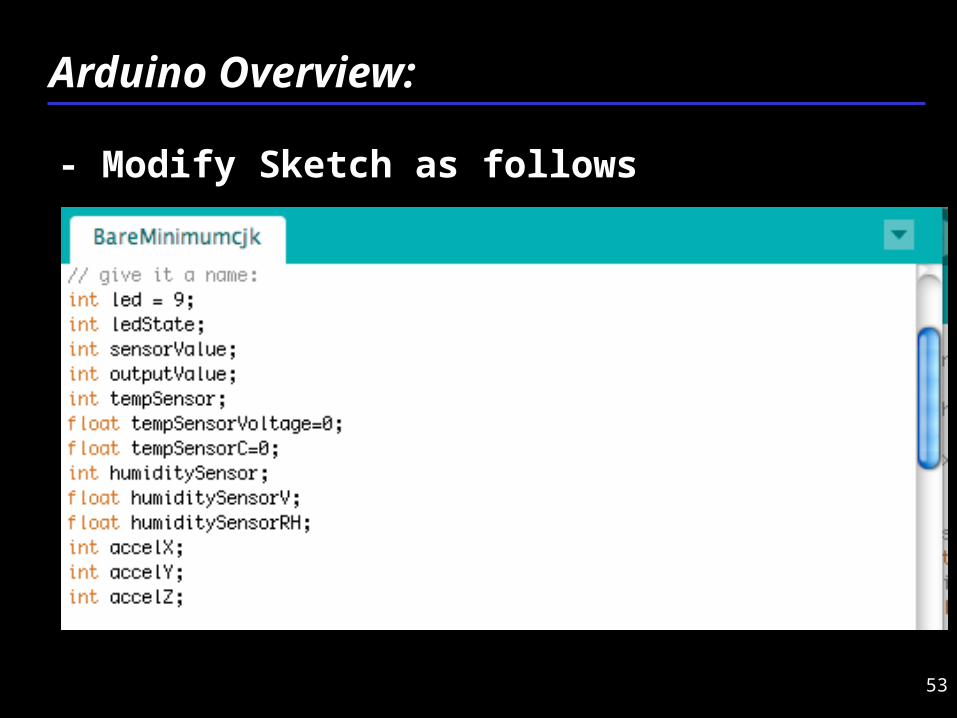
- Modify Sketch as follows
Arduino Overview:
54
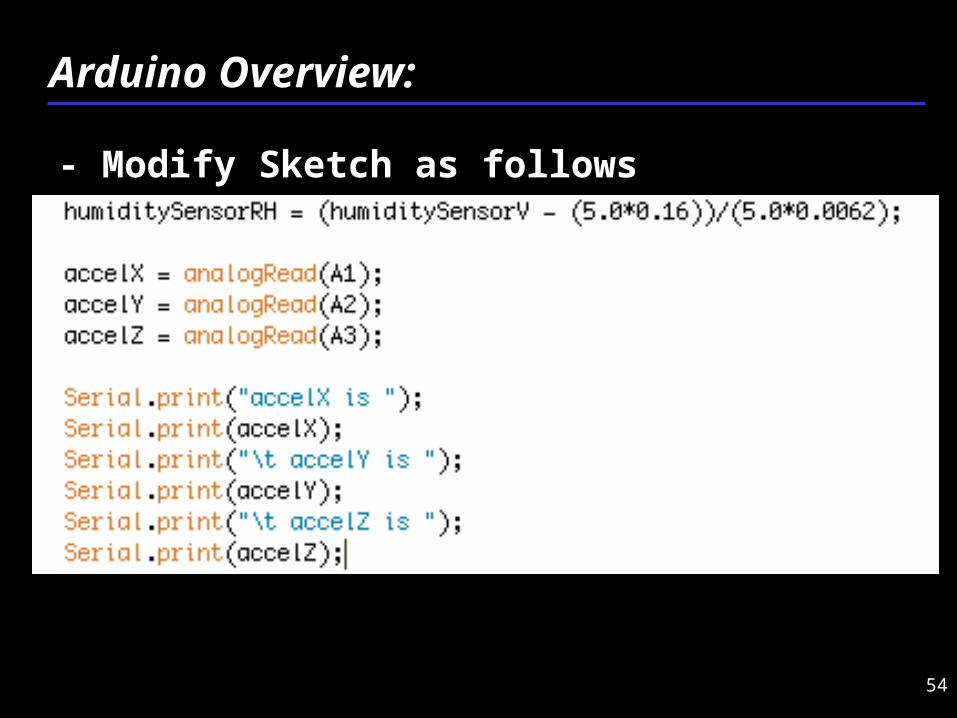
- Modify Sketch as follows
Arduino Overview:
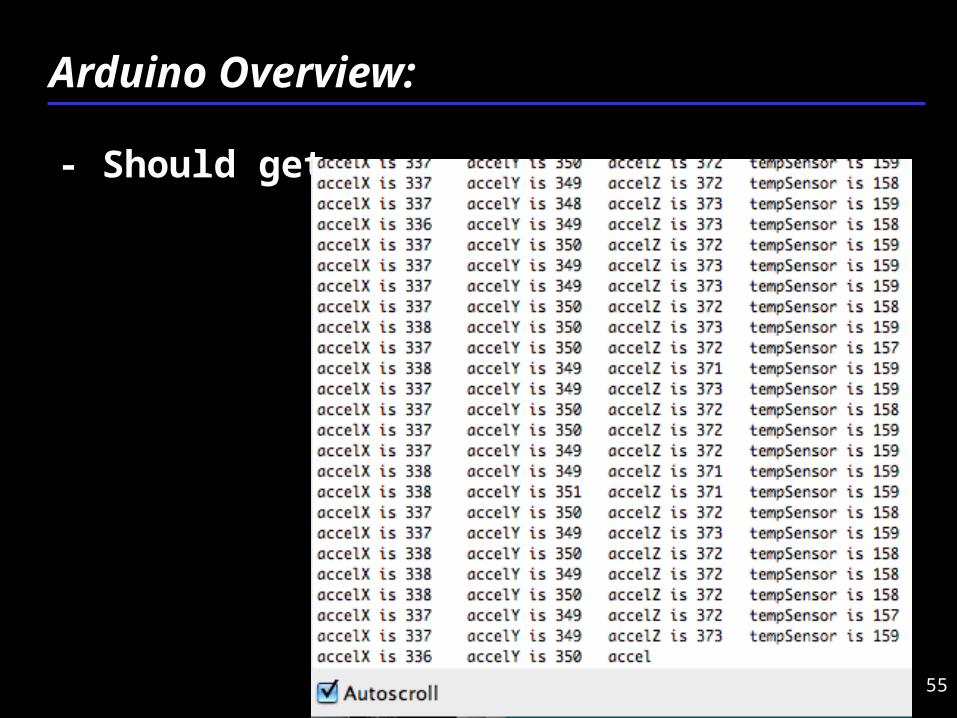
55
- Should get…
Arduino Overview:
56
- Convert to voltage and understandable units from data sheet
- Algebra
Arduino Overview:
57
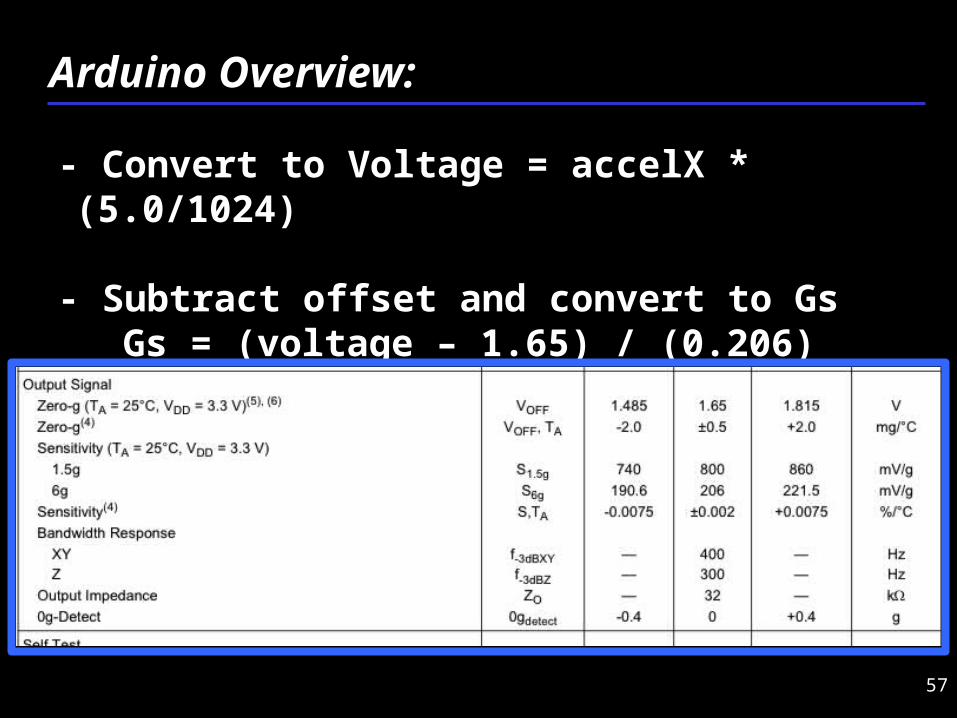
- Convert to Voltage = accelX * (5.0/1024)
- Subtract offset and convert to GsGs = (voltage – 1.65) / (0.206)
Arduino Overview:
58
Arduino Overview:
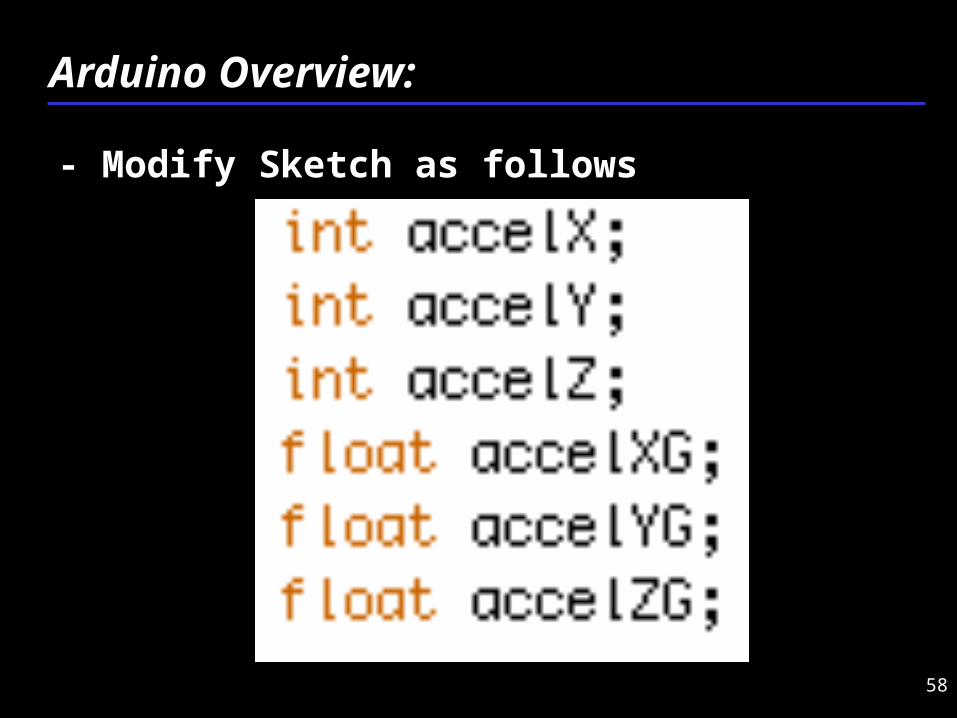
- Modify Sketch as follows
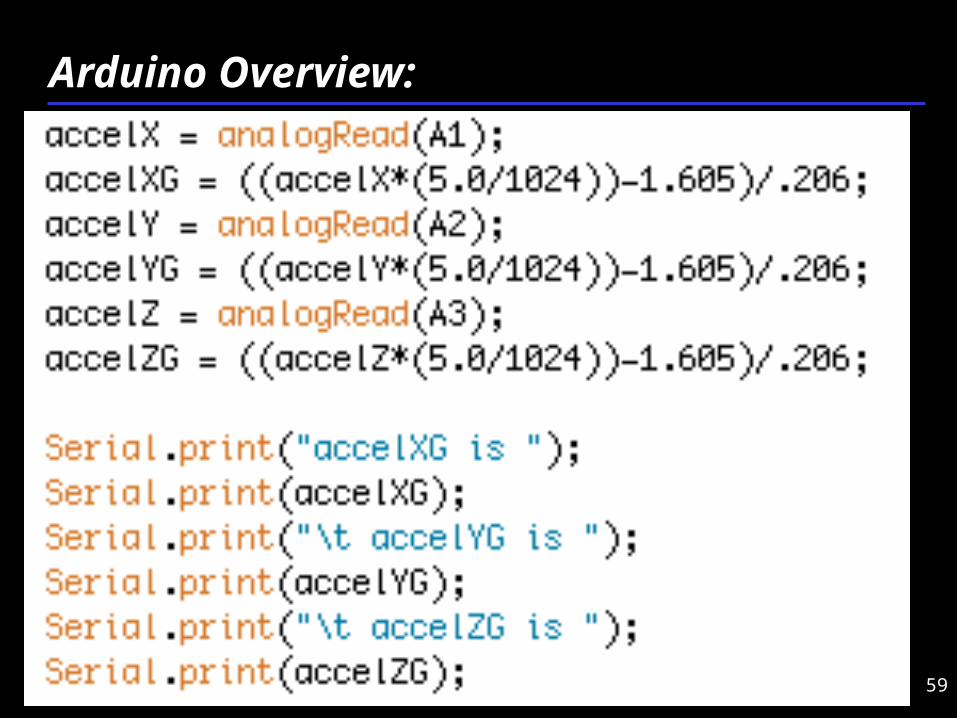
59
Arduino Overview:
- Modify Sketch as follows
60
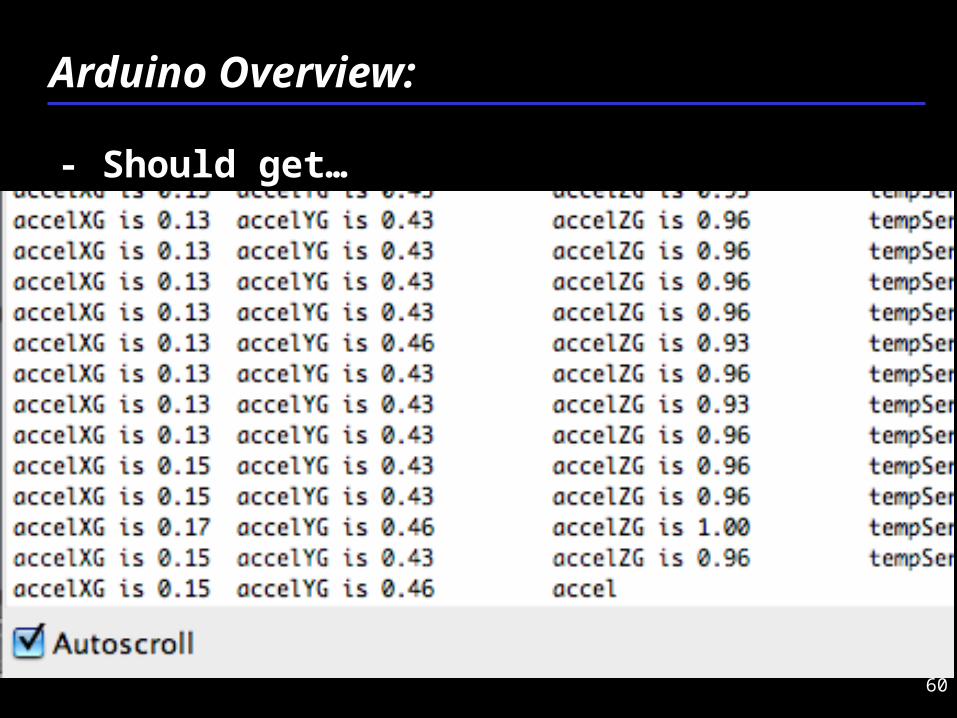
Arduino Overview:
- Should get…
61
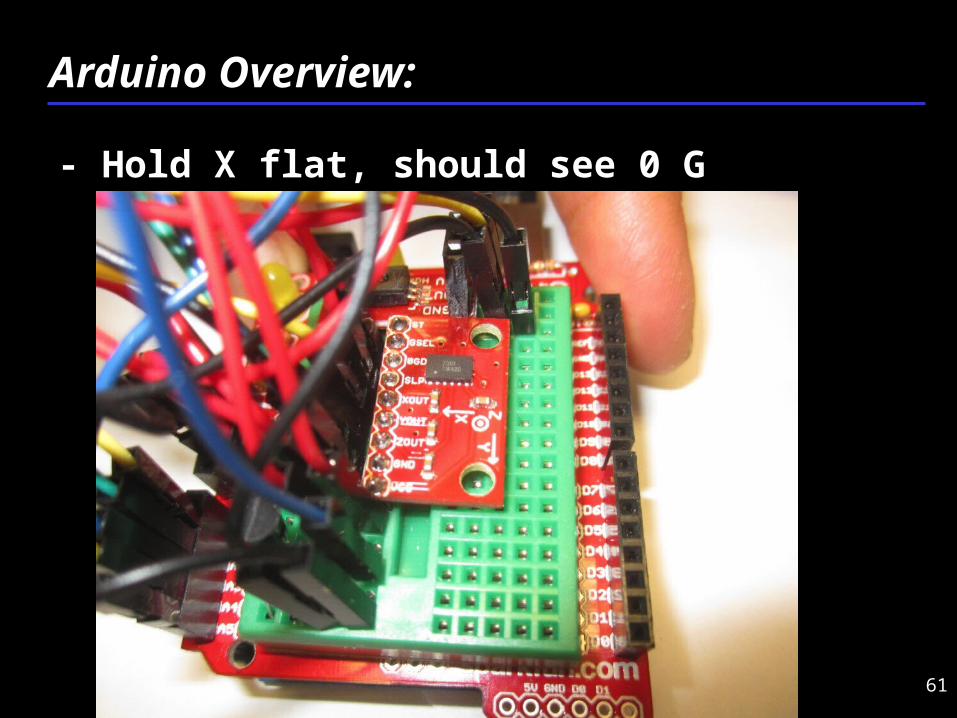
Arduino Overview:
- Hold X flat, should see 0 G
62
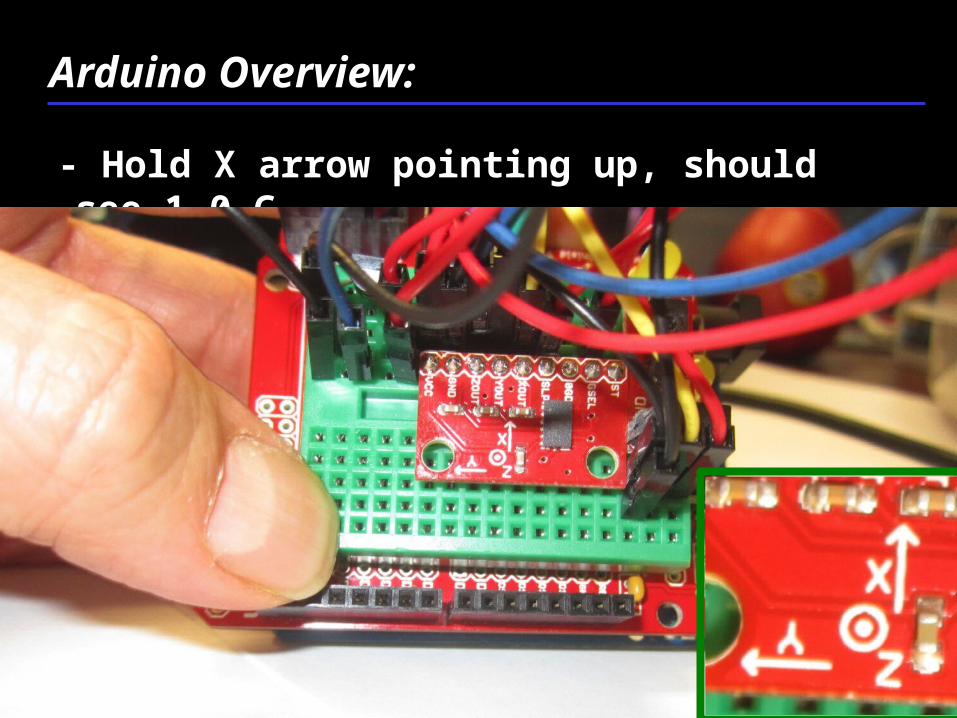
Arduino Overview:
- Hold X arrow pointing up, should see 1.0 G
63
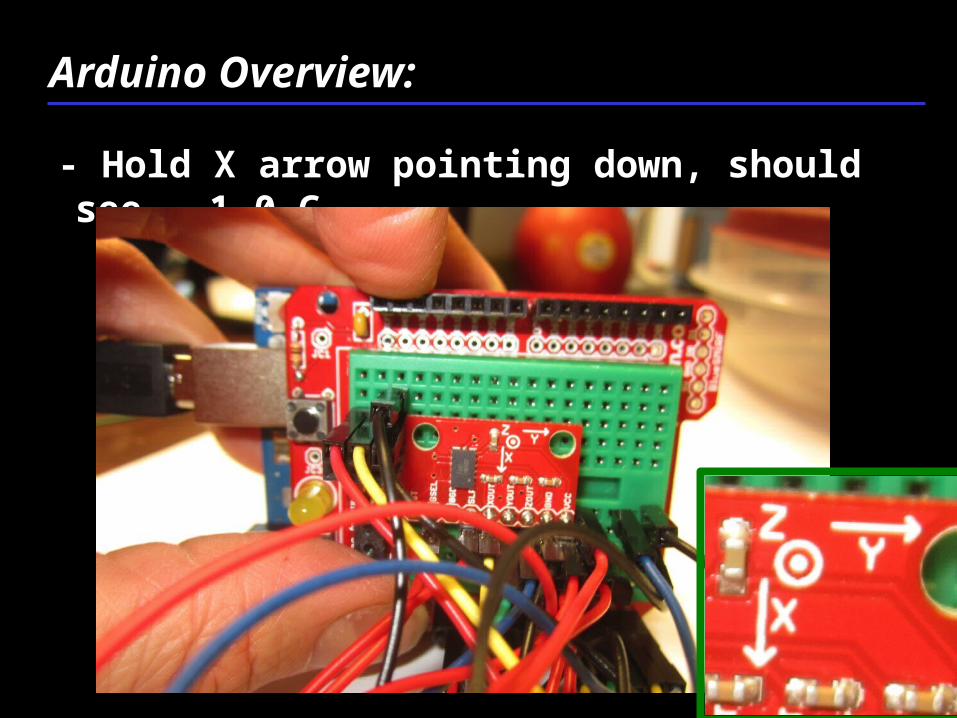
Arduino Overview:
- Hold X arrow pointing down, should see - 1.0 G
64
Arduino Overview:
- Repeat with Y and Z axes
- May need to tape breadboard down
- Do you need to Calibrate?
- How would you do it?
65
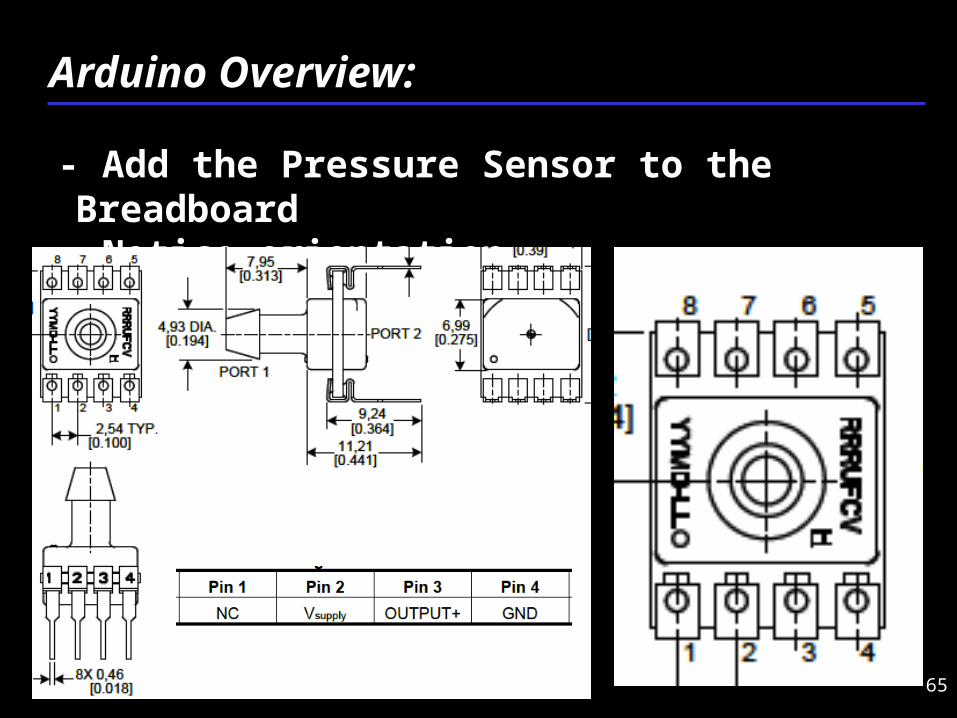
- Add the Pressure Sensor to the Breadboard- Notice orientation
Arduino Overview:
66
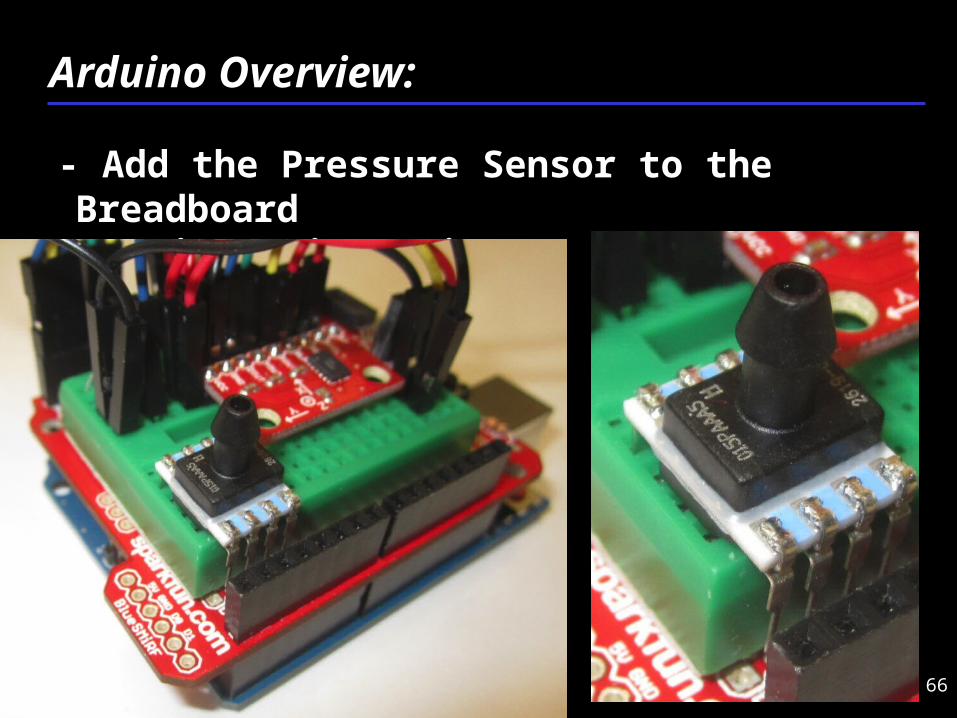
- Add the Pressure Sensor to the Breadboard- Notice orientation
Arduino Overview:
67
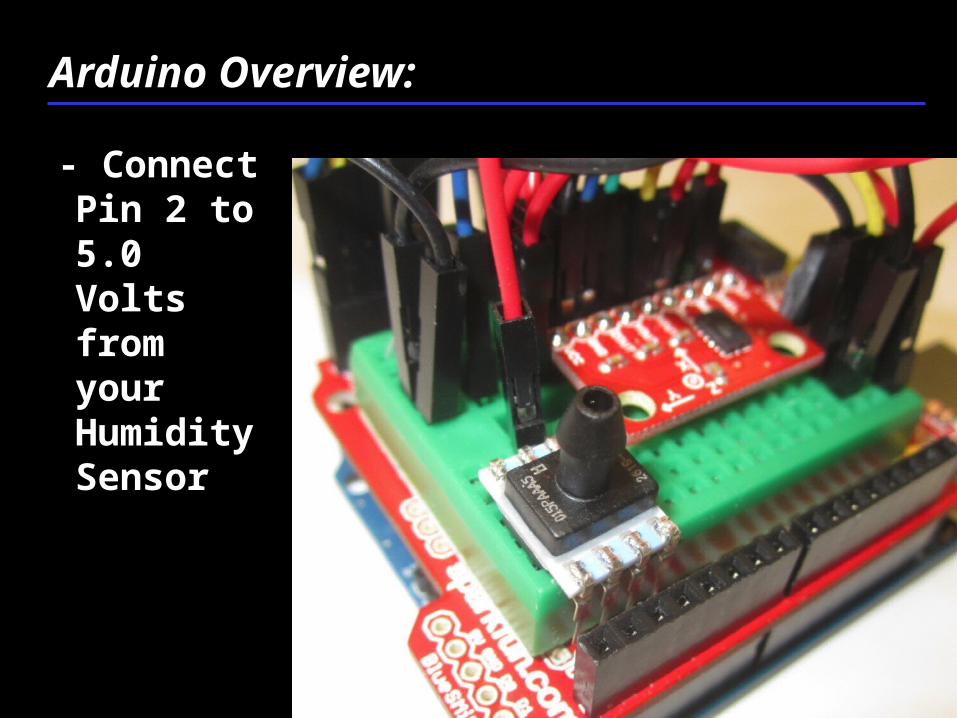
- Connect Pin 2 to 5.0 Volts from your Humidity Sensor
Arduino Overview:
68
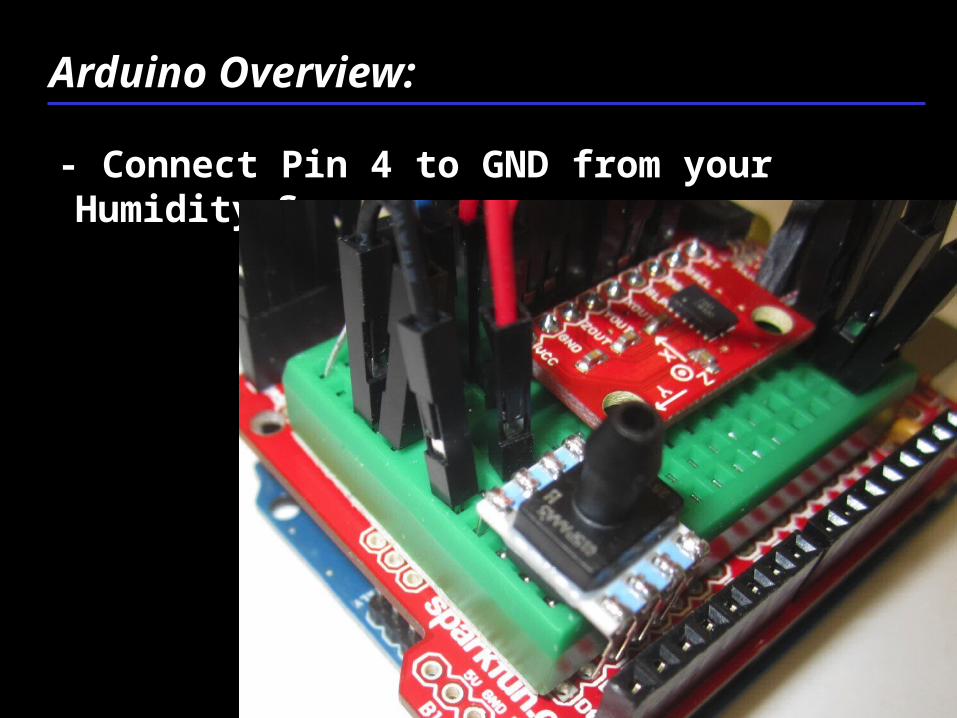
- Connect Pin 4 to GND from your Humidity Sensor
Arduino Overview:
69
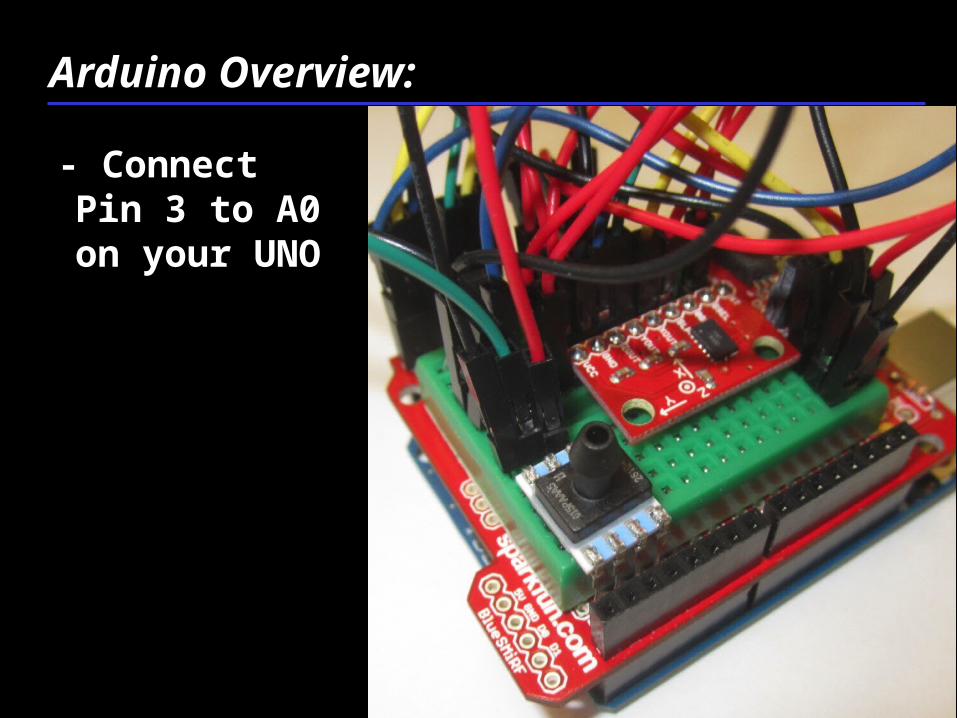
- Connect Pin 3 to A0 on your UNO
Arduino Overview:
70
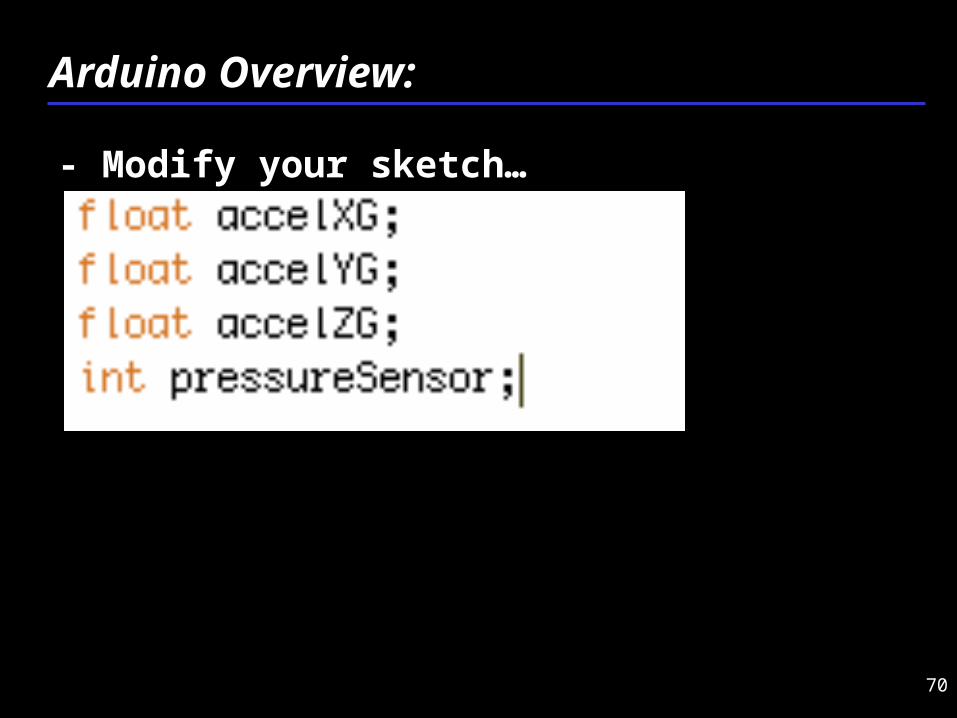
- Modify your sketch…
Arduino Overview:
71
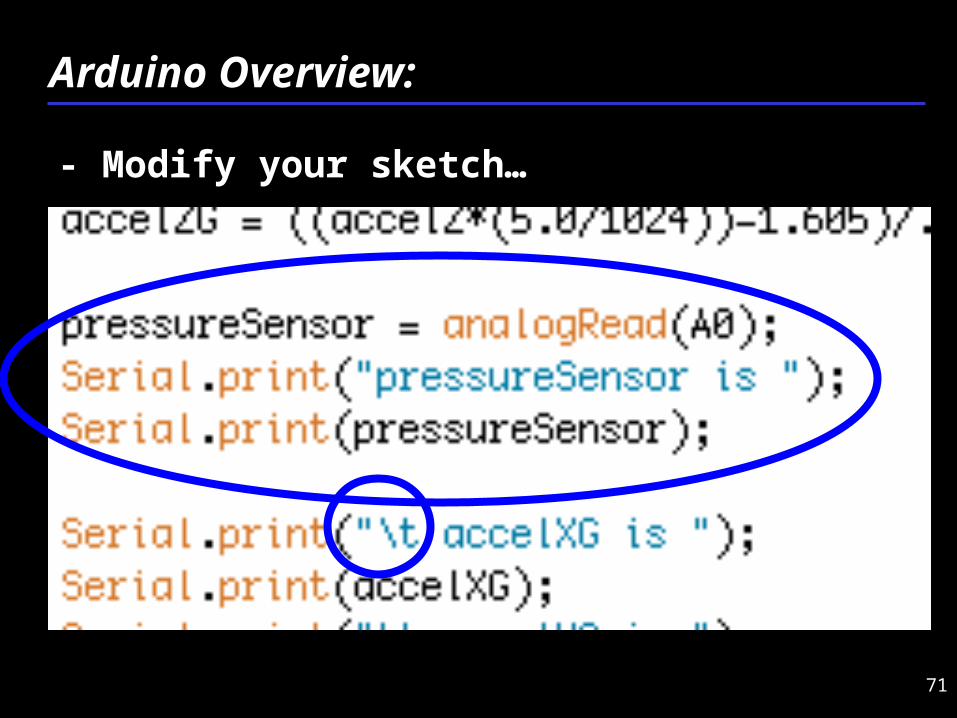
- Modify your sketch…
Arduino Overview:
72
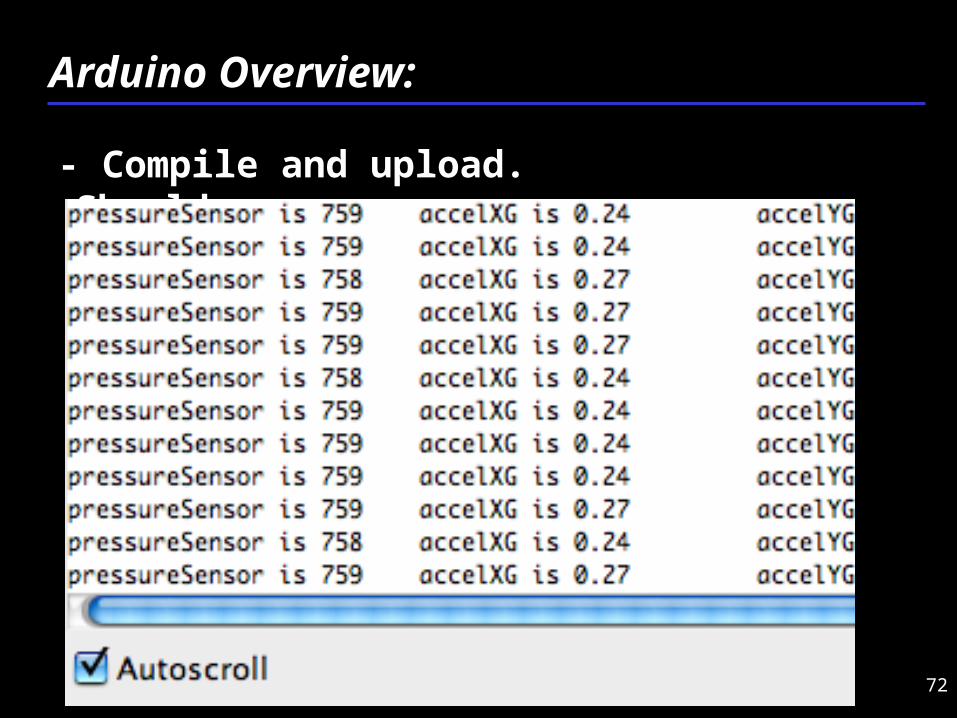
- Compile and upload. Should see…
Arduino Overview:
73
- Use ¼ sprinkler tubing to suck on pressure sensor
- Do not blow as limit of this sensor is 15 psi
Arduino Overview:
74
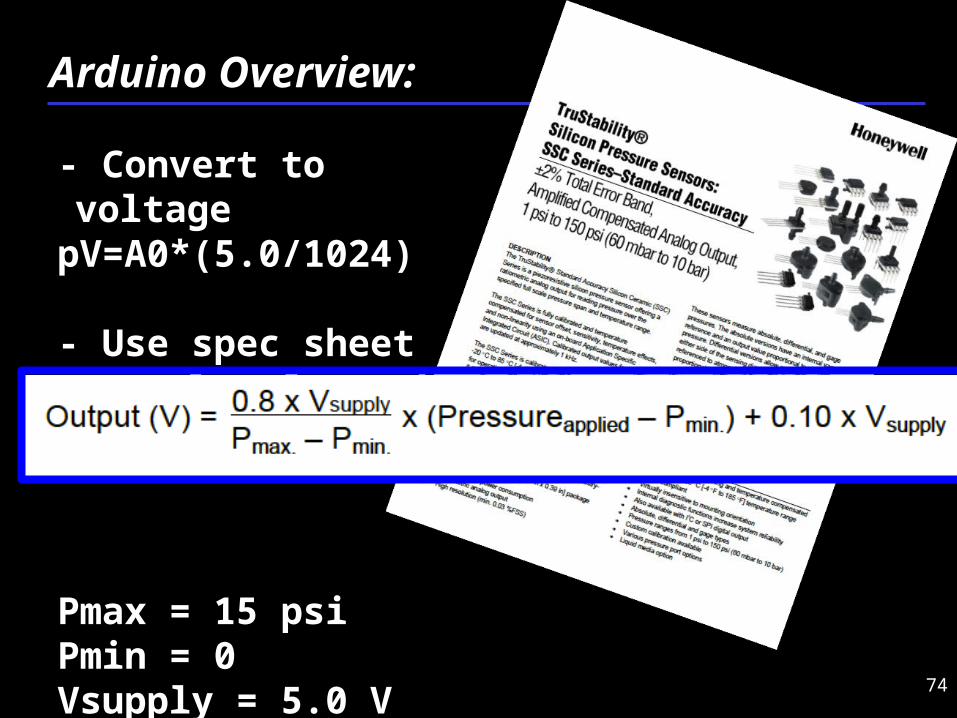
- Convert to voltagepV=A0*(5.0/1024)
- Use spec sheet to solve for psi (Algebra)
Pmax = 15 psiPmin = 0Vsupply = 5.0 VOutput(V) = pV
Arduino Overview:
75
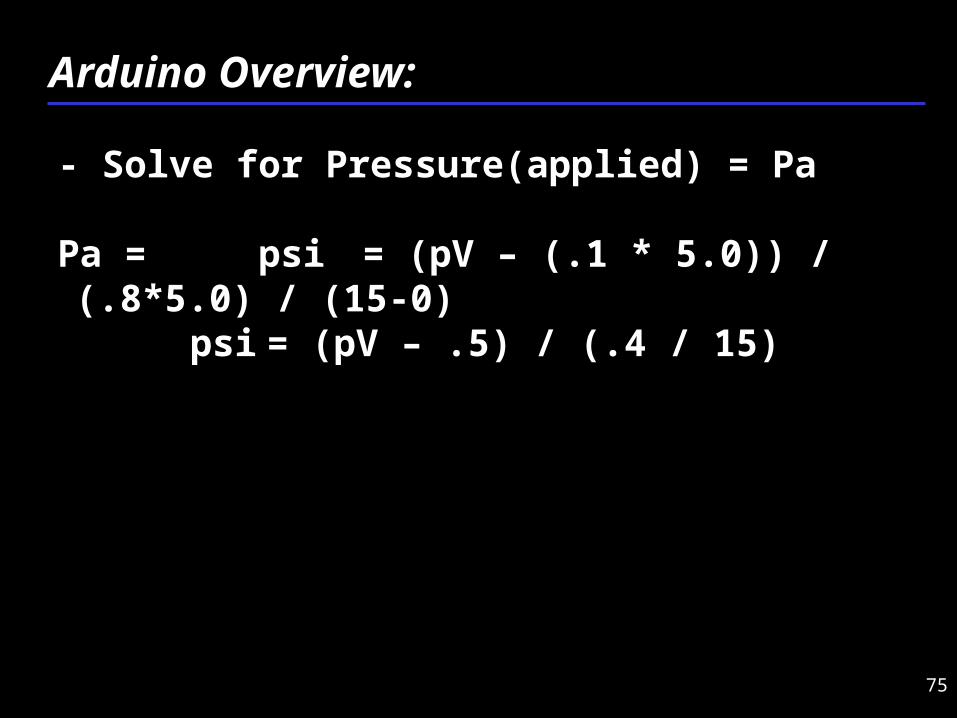
- Solve for Pressure(applied) = Pa
Pa = psi = (pV – (.1 * 5.0)) / (.8*5.0) / (15-0) psi = (pV – .5) / (.4 / 15)
Arduino Overview:
76
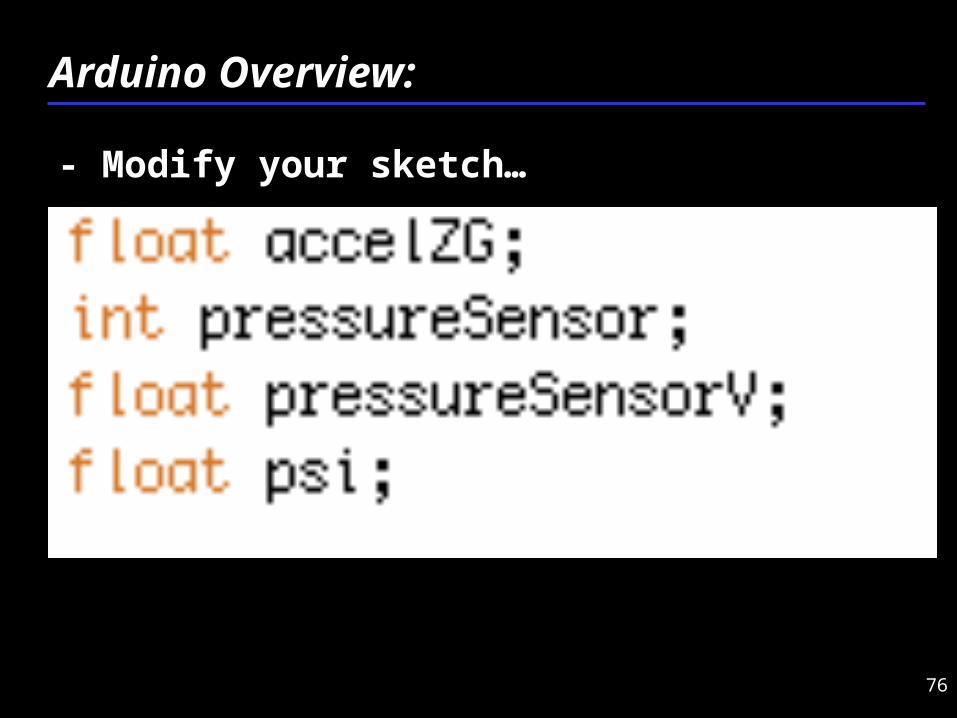
- Modify your sketch…
Arduino Overview:
77
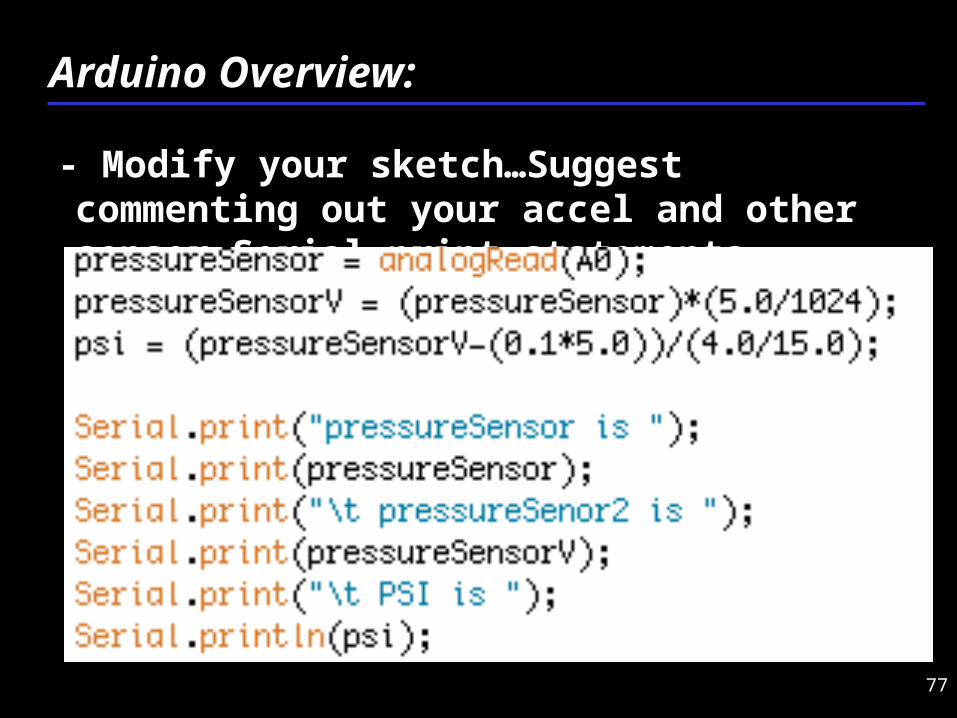
- Modify your sketch…Suggest commenting out your accel and other sensor Serial.print statements
Arduino Overview:
78
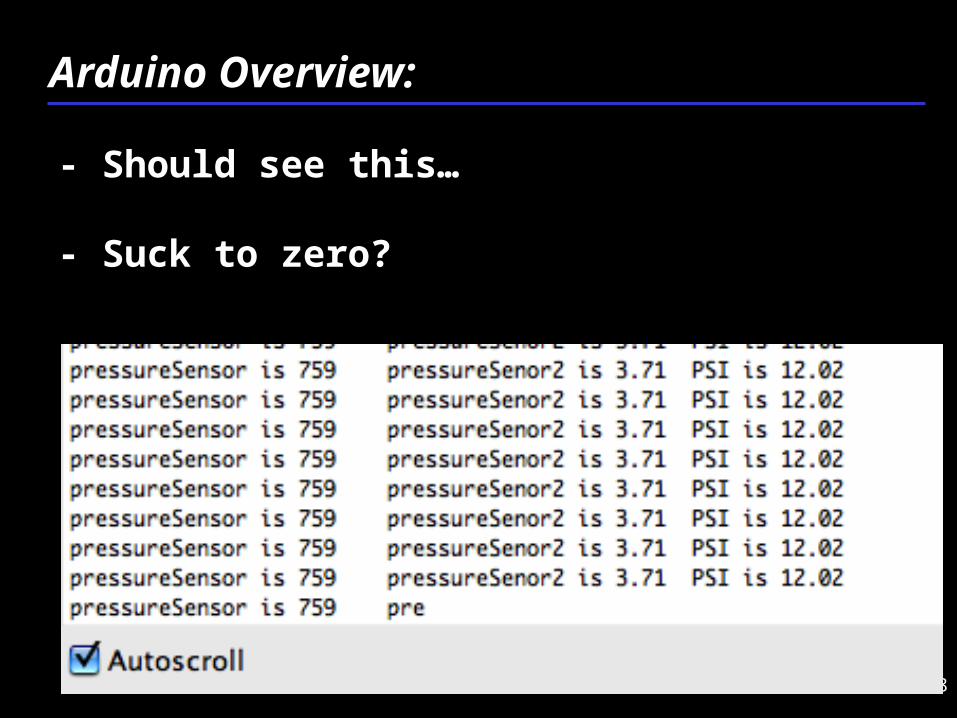
- Should see this…
- Suck to zero?
Arduino Overview: