Embed Size (px)
Citation preview
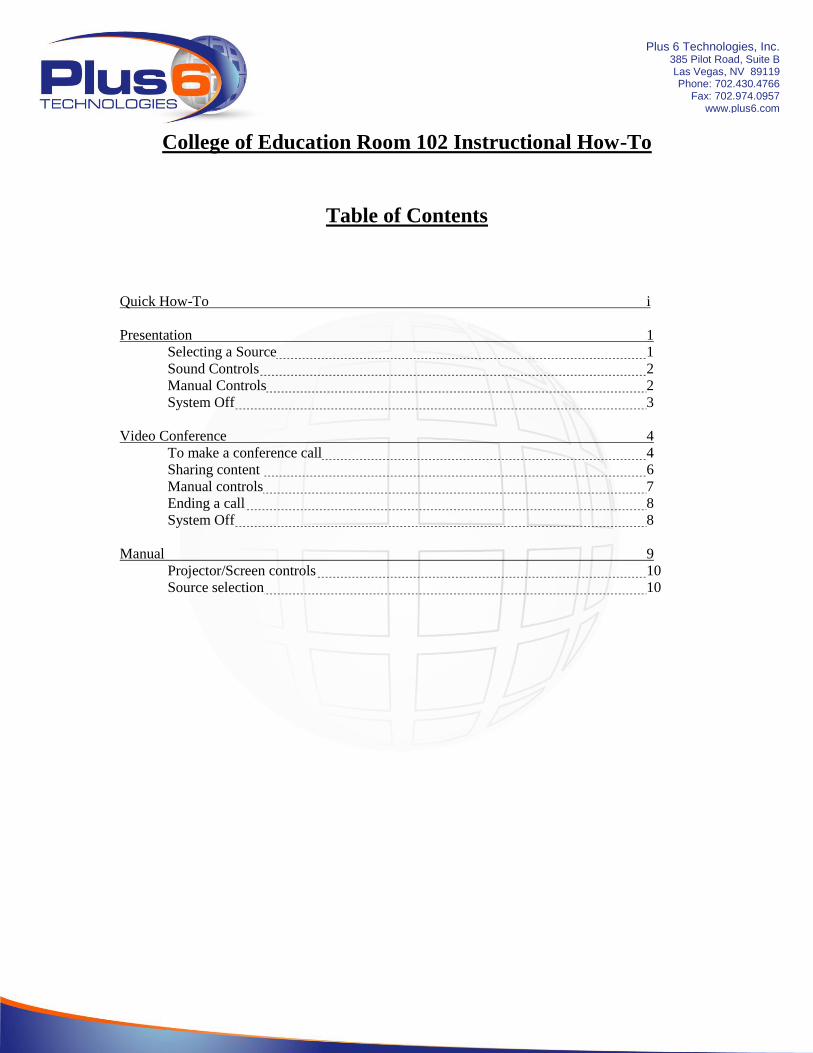
College of Education Room 102 Instructional How-To
Table of Contents
Quick How-To i
Presentation 1
Selecting a Source 1
Sound Controls 2
Manual Controls 2
System Off 3
Video Conference 4
To make a conference call 4
Sharing content 6
Manual controls 7
Ending a call 8
System Off 8
Manual 9
Projector/Screen controls 10
Source selection 10
Plus 6 Technologies, Inc. 385 Pilot Road, Suite B Las Vegas, NV 89119 Phone: 702.430.4766
Fax: 702.974.0957 www.plus6.com
i
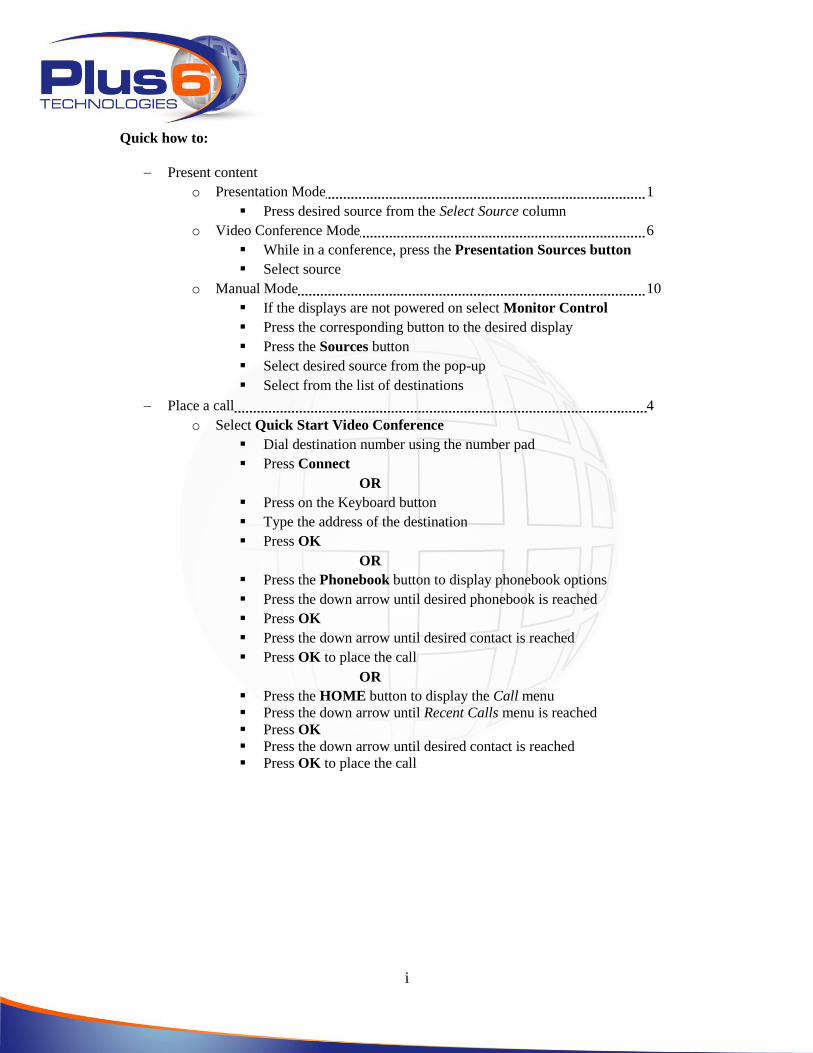
Quick how to:
Present content
o Presentation Mode 1
Press desired source from the Select Source column
o Video Conference Mode 6
While in a conference, press the Presentation Sources button
Select source
o Manual Mode 10
If the displays are not powered on select Monitor Control
Press the corresponding button to the desired display
Press the Sources button
Select desired source from the pop-up
Select from the list of destinations
Place a call 4
o Select Quick Start Video Conference
Dial destination number using the number pad
Press Connect
OR
Press on the Keyboard button
Type the address of the destination
Press OK
OR
Press the Phonebook button to display phonebook options
Press the down arrow until desired phonebook is reached
Press OK
Press the down arrow until desired contact is reached
Press OK to place the call
OR
Press the HOME button to display the Call menu
Press the down arrow until Recent Calls menu is reached
Press OK
Press the down arrow until desired contact is reached
Press OK to place the call
1
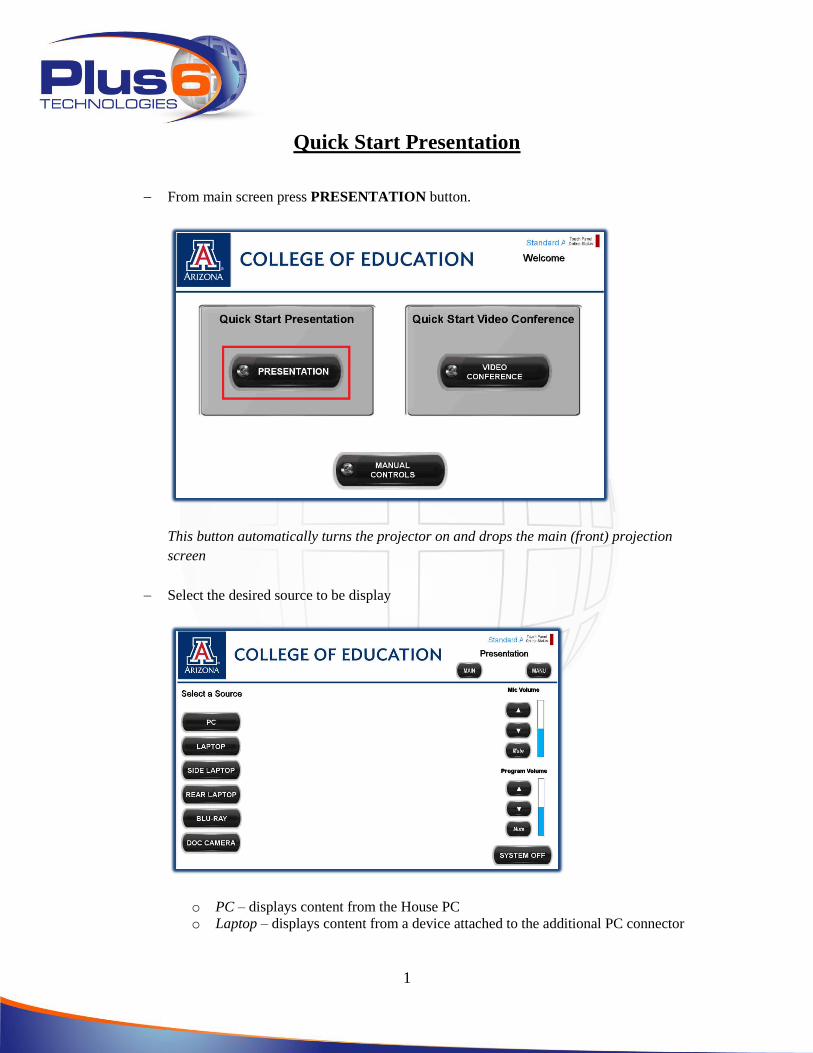
Quick Start Presentation
From main screen press PRESENTATION button.
This button automatically turns the projector on and drops the main (front) projection
screen
Select the desired source to be display
o PC – displays content from the House PC
o Laptop – displays content from a device attached to the additional PC connector
2
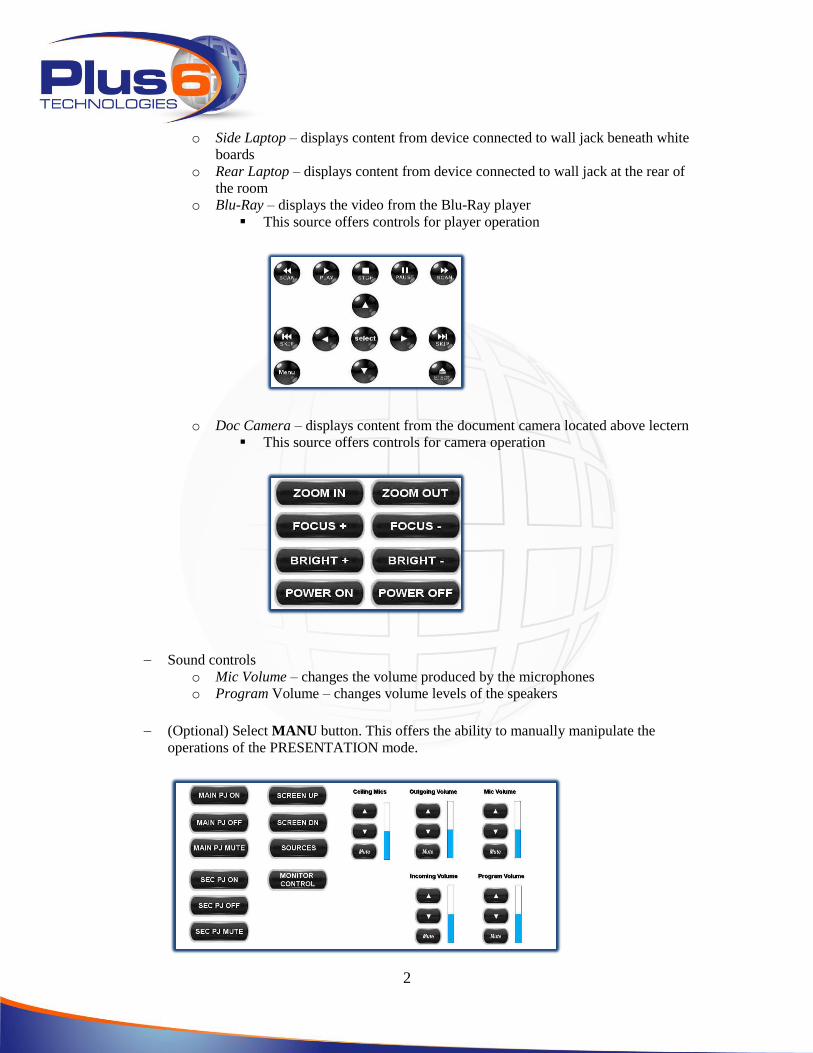
o Side Laptop – displays content from device connected to wall jack beneath white
boards
o Rear Laptop – displays content from device connected to wall jack at the rear of
the room
o Blu-Ray – displays the video from the Blu-Ray player
This source offers controls for player operation
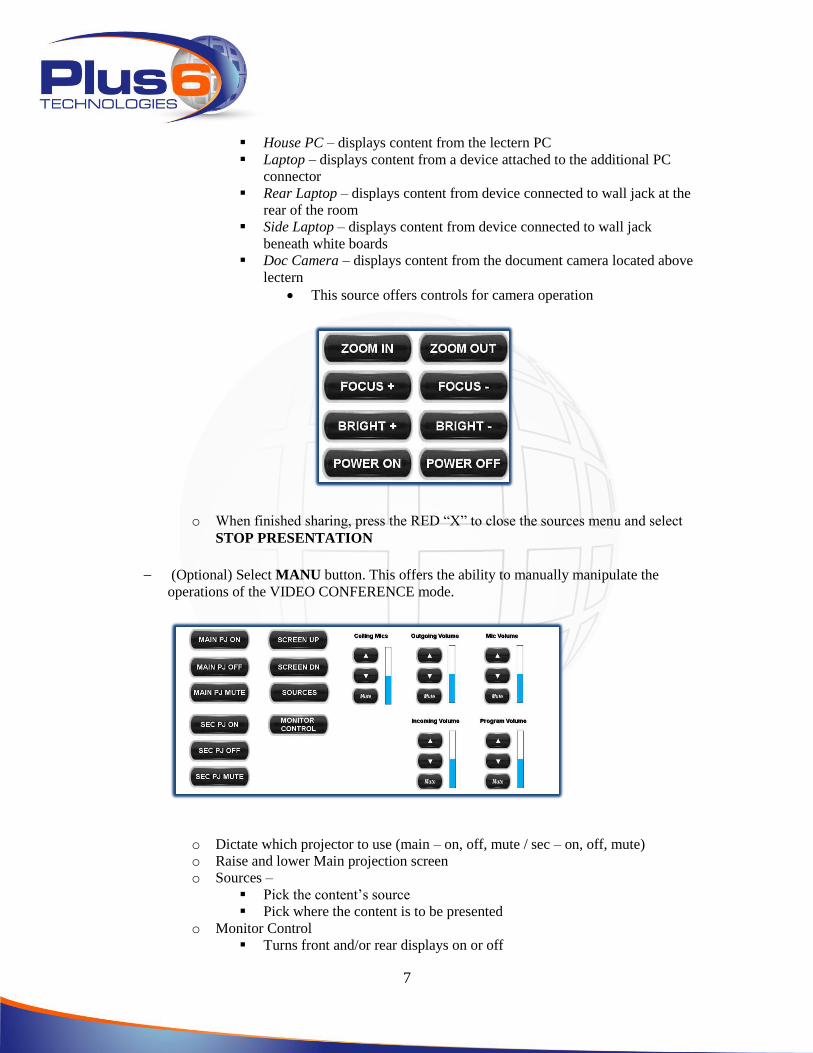
o Doc Camera – displays content from the document camera located above lectern
This source offers controls for camera operation
Sound controls
o Mic Volume – changes the volume produced by the microphones
o Program Volume – changes volume levels of the speakers
(Optional) Select MANU button. This offers the ability to manually manipulate the
operations of the PRESENTATION mode.
3
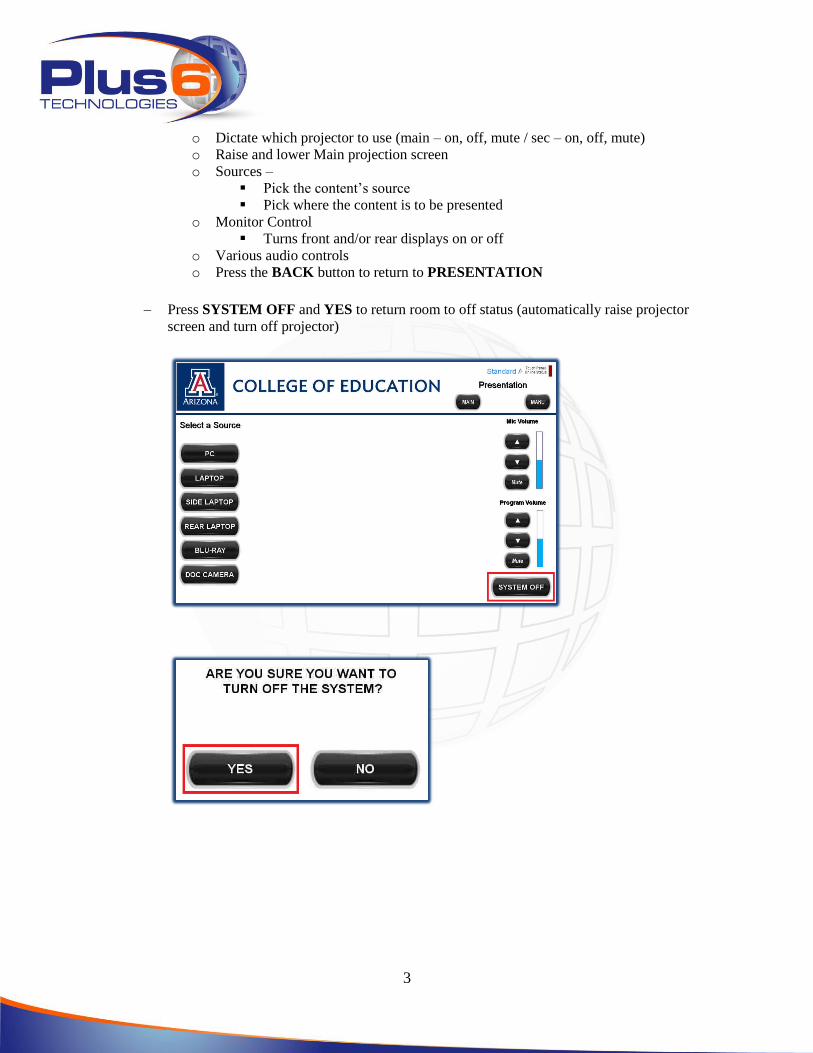
o Dictate which projector to use (main – on, off, mute / sec – on, off, mute)
o Raise and lower Main projection screen
o Sources –
Pick the content’s source
Pick where the content is to be presented
o Monitor Control
Turns front and/or rear displays on or off
o Various audio controls
o Press the BACK button to return to PRESENTATION
Press SYSTEM OFF and YES to return room to off status (automatically raise projector
screen and turn off projector)
4
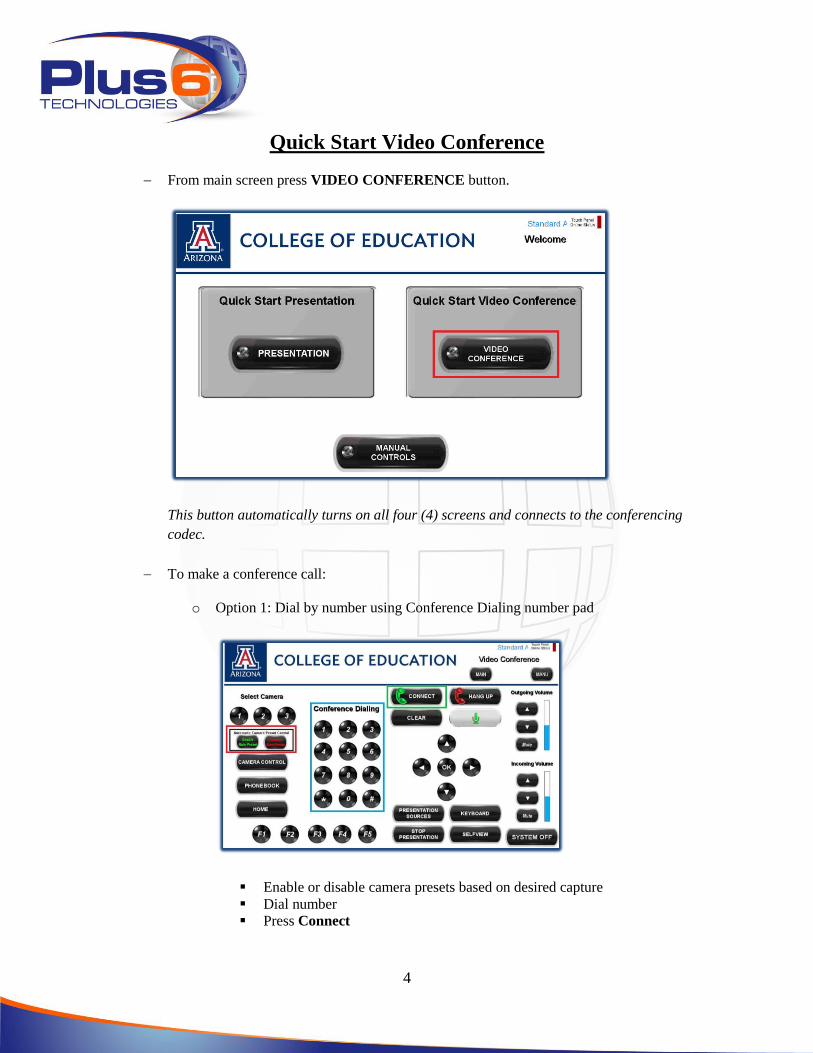
Quick Start Video Conference
From main screen press VIDEO CONFERENCE button.
This button automatically turns on all four (4) screens and connects to the conferencing
codec.
To make a conference call:
o Option 1: Dial by number using Conference Dialing number pad
Enable or disable camera presets based on desired capture
Dial number
Press Connect
5
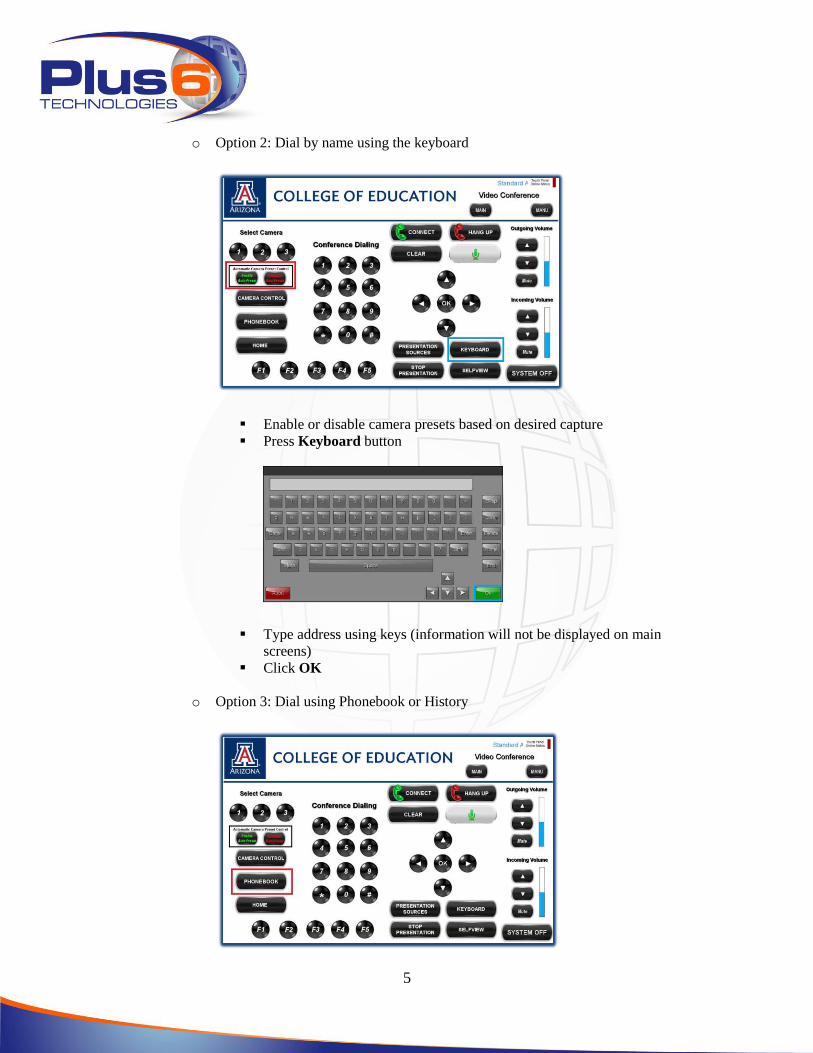
o Option 2: Dial by name using the keyboard
Enable or disable camera presets based on desired capture
Press Keyboard button
Type address using keys (information will not be displayed on main
screens)
Click OK
o Option 3: Dial using Phonebook or History
6
Phonebook
Press the PHONEBOOK button
Press the down arrow until desired phonebook is reached and
press OK
Press the down arrow until desired contact is reached and press
OK to place the call
History
Press the HOME button
Press OK to enter the Call menu
Press the down arrow until Recent Calls menu is reached and
press OK
Press the down arrow until desired contact is reached and press
OK to place the call
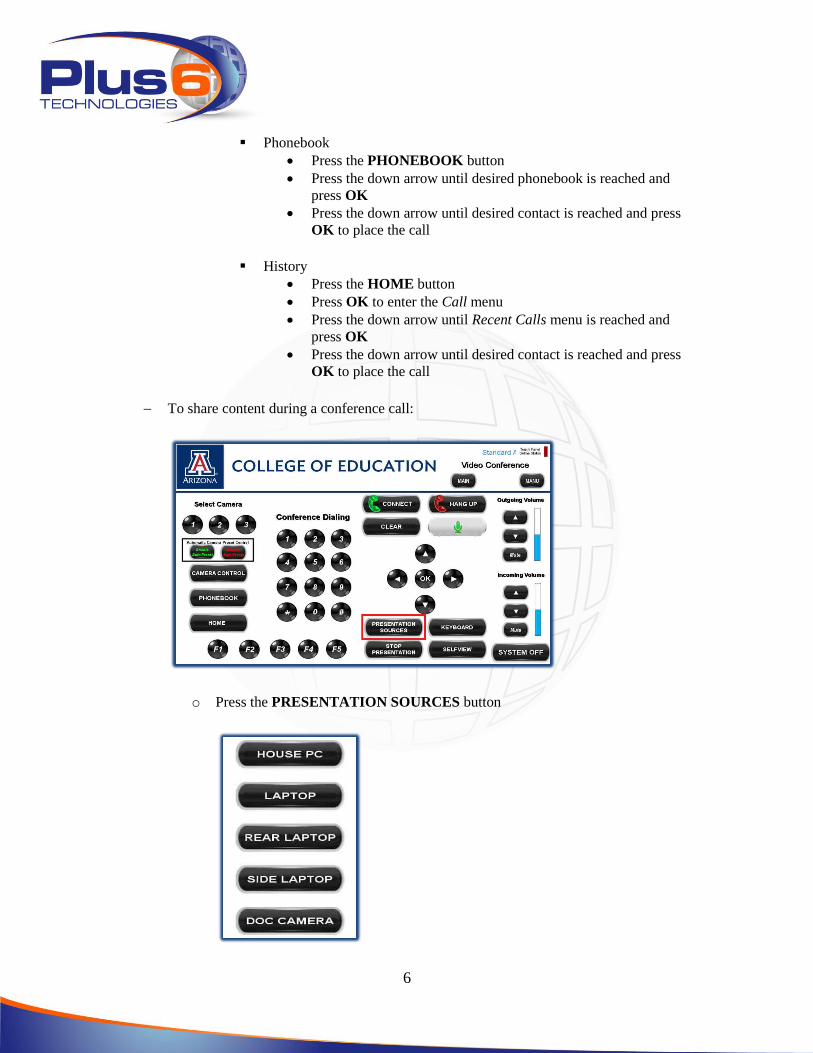
To share content during a conference call:
o Press the PRESENTATION SOURCES button
7
House PC – displays content from the lectern PC
Laptop – displays content from a device attached to the additional PC
connector
Rear Laptop – displays content from device connected to wall jack at the
rear of the room
Side Laptop – displays content from device connected to wall jack
beneath white boards
Doc Camera – displays content from the document camera located above
lectern
This source offers controls for camera operation
o When finished sharing, press the RED “X” to close the sources menu and select
STOP PRESENTATION
(Optional) Select MANU button. This offers the ability to manually manipulate the
operations of the VIDEO CONFERENCE mode.
o Dictate which projector to use (main – on, off, mute / sec – on, off, mute)
o Raise and lower Main projection screen
o Sources –
Pick the content’s source
Pick where the content is to be presented
o Monitor Control
Turns front and/or rear displays on or off
8
o Various audio controls
o Press the BACK button to return to VIDEO CONFERENCE
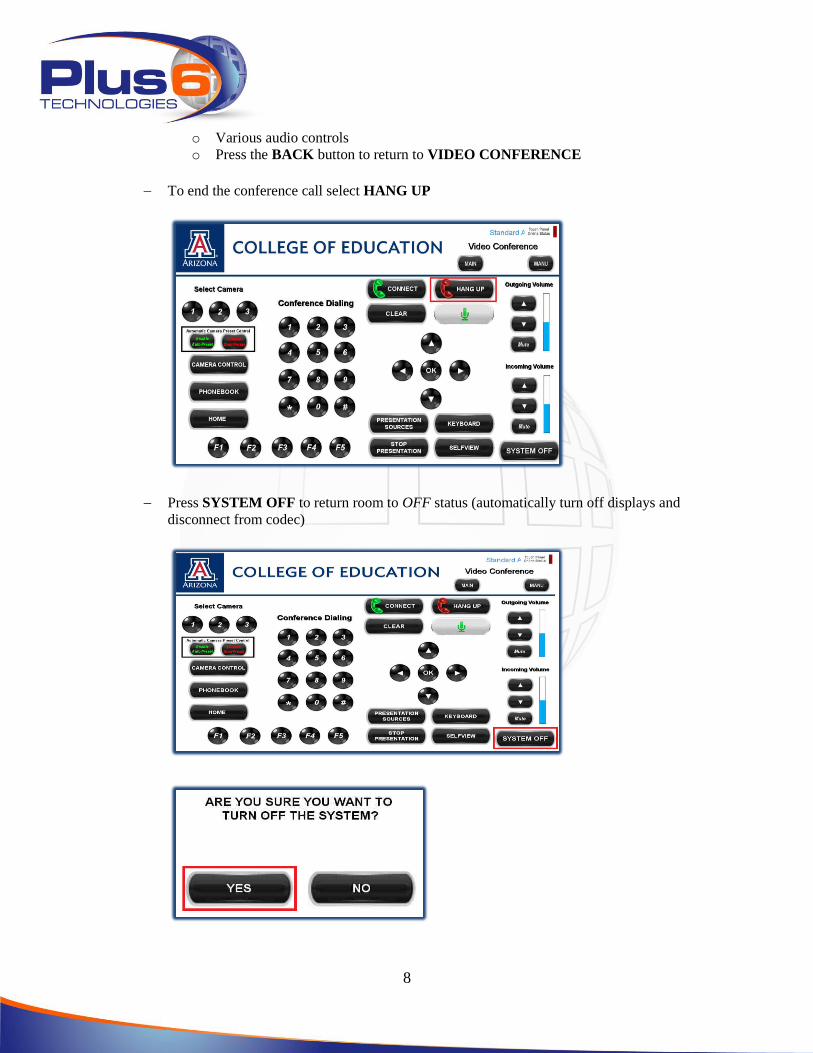
To end the conference call select HANG UP
Press SYSTEM OFF to return room to OFF status (automatically turn off displays and
disconnect from codec)
9
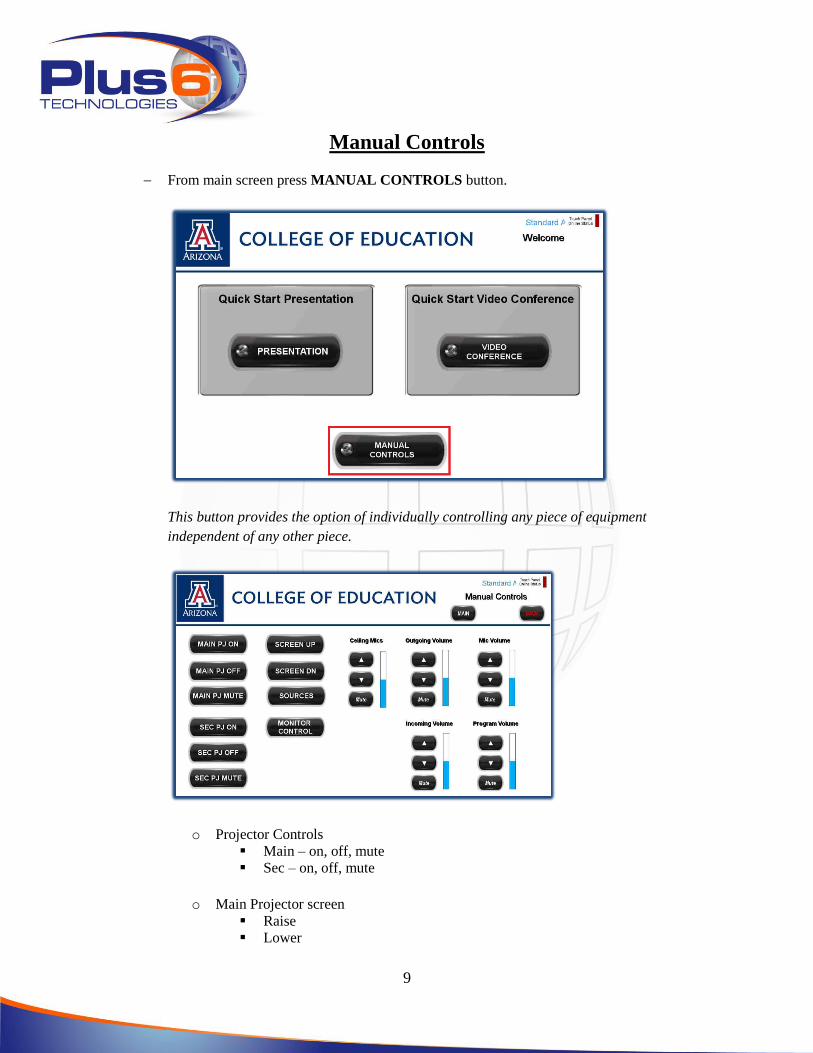
Manual Controls
From main screen press MANUAL CONTROLS button.
This button provides the option of individually controlling any piece of equipment
independent of any other piece.
o Projector Controls
Main – on, off, mute
Sec – on, off, mute
o Main Projector screen
Raise
Lower
10
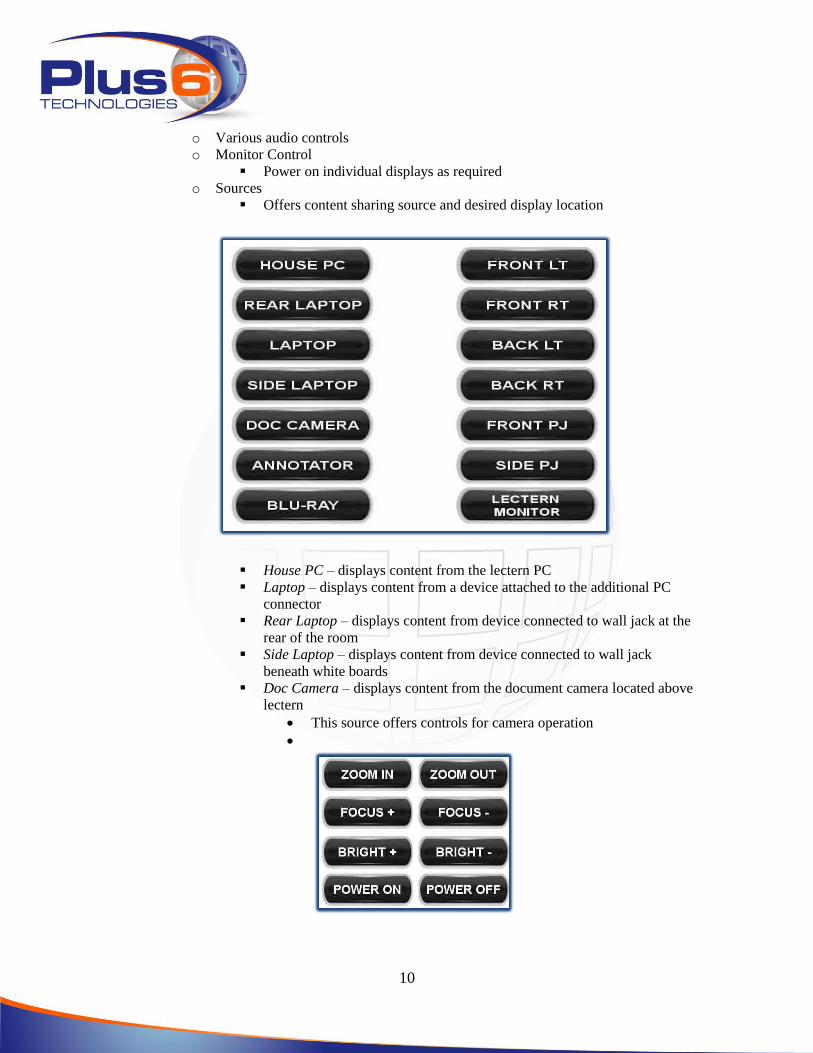
o Various audio controls
o Monitor Control
Power on individual displays as required
o Sources
Offers content sharing source and desired display location
House PC – displays content from the lectern PC
Laptop – displays content from a device attached to the additional PC
connector
Rear Laptop – displays content from device connected to wall jack at the
rear of the room
Side Laptop – displays content from device connected to wall jack
beneath white boards
Doc Camera – displays content from the document camera located above
lectern
This source offers controls for camera operation