Embed Size (px)
Citation preview
C U M U L U S
SUOM
I / EN
GLISH
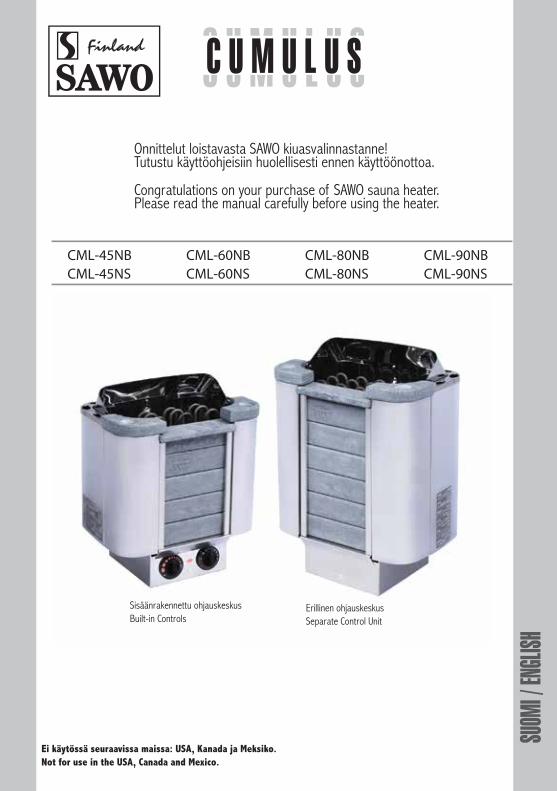
Congratulations on your purchase of SAWO sauna heater.Please read the manual carefully before using the heater.
Onnittelut loistavasta SAWO kiuasvalinnastanne!Tutustu käyttöohjeisiin huolellisesti ennen käyttöönottoa.
CML-45NBCML-45NS
CML-60NBCML-60NS
CML-80NBCML-80NS
CML-90NBCML-90NS
Ei käytössä seuraavissa maissa: USA, Kanada ja Meksiko.Not for use in the USA, Canada and Mexico.
CM
L_M
L_3P
-1P(
FiEn
V05
15)
Erillinen ohjauskeskusSeparate Control Unit
Sisäänrakennettu ohjauskeskusBuilt-in Controls
SUOMI
2
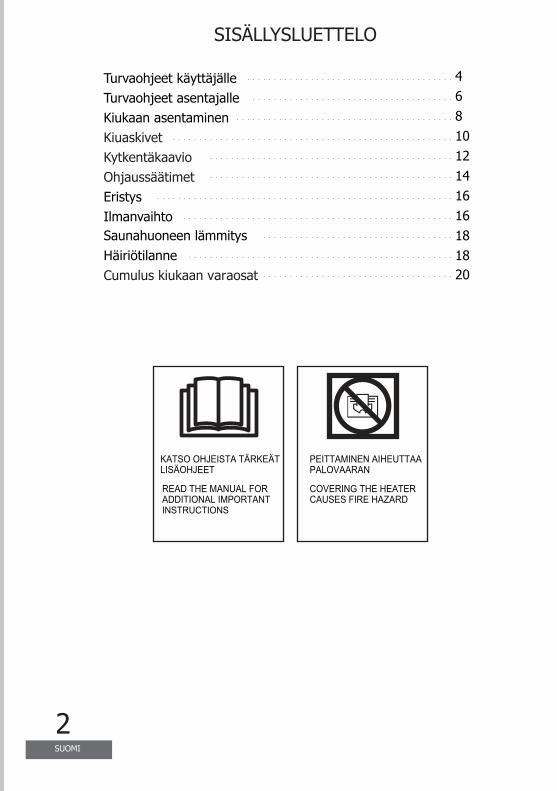
SISÄLLYSLUETTELO
Turvaohjeet käyttäjälleTurvaohjeet asentajalleKiukaan asentaminenKiuaskivetKytkentäkaavioOhjaussäätimetEristysIlmanvaihto
HäiriötilanneSaunahuoneen lämmitys
46810121416161818
Cumulus kiukaan varaosat 20
READ THE MANUAL FOR ADDITIONAL IMPORTANTINSTRUCTIONS
COVERING THE HEATERCAUSES FIRE HAZARD
PEITTAMINEN AIHEUTTAAPALOVAARAN
KATSO OHJEISTA TÄRKEÄTLISÄOHJEET
3ENGLISH
975
13
17
111213
17
15
191920
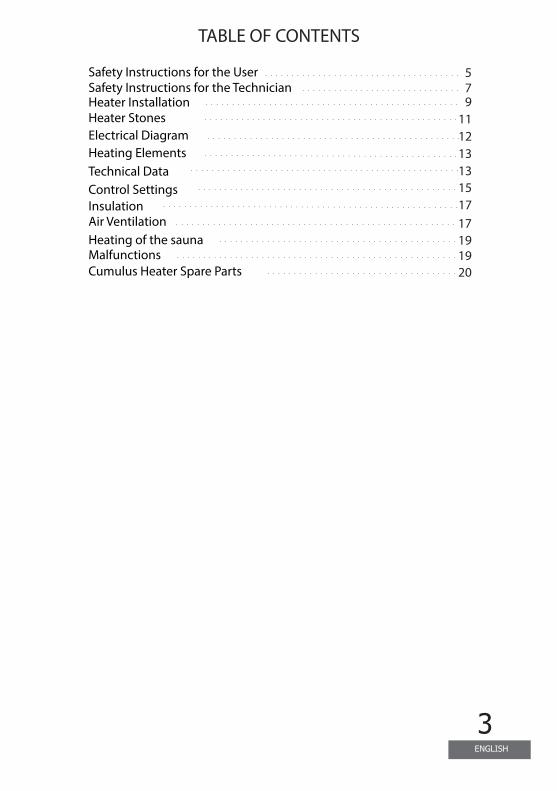
Heater InstallationHeater StonesElectrical DiagramHeating ElementsTechnical DataControl SettingsInsulationAir VentilationHeating of the saunaMalfunctionsCumulus Heater Spare Parts
Safety Instructions for the UserSafety Instructions for the Technician
TABLE OF CONTENTS
4
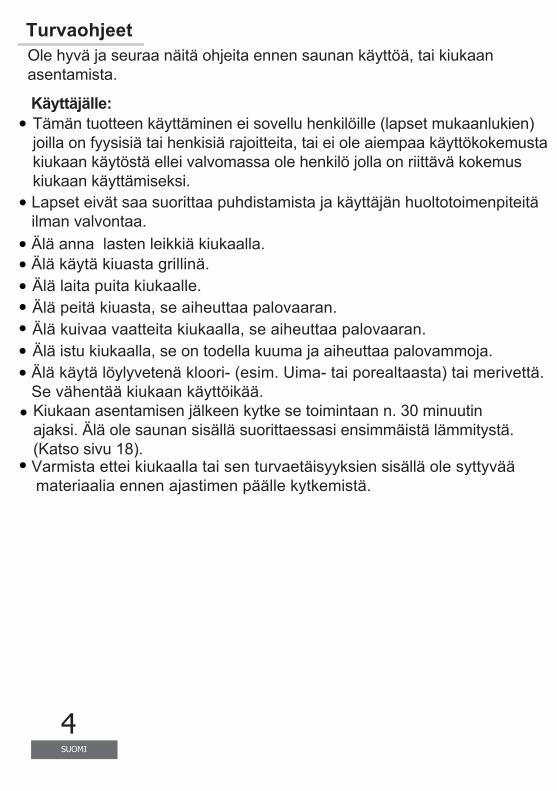
TurvaohjeetOle hyvä ja seuraa näitä ohjeita ennen saunan käyttöä, tai kiukaan asentamista.
Käyttäjälle:
SUOMI
Älä anna lasten leikkiä kiukaalla.Älä käytä kiuasta grillinä.Älä laita puita kiukaalle.Älä peitä kiuasta, se aiheuttaa palovaaran.Älä kuivaa vaatteita kiukaalla, se aiheuttaa palovaaran.Älä istu kiukaalla, se on todella kuuma ja aiheuttaa palovammoja.
Tämän tuotteen käyttäminen ei sovellu henkilöille (lapset mukaanlukien) joilla on fyysisiä tai henkisiä rajoitteita, tai ei ole aiempaa käyttökokemusta kiukaan käytöstä ellei valvomassa ole henkilö jolla on riittävä kokemus kiukaan käyttämiseksi.
Älä käytä löylyvetenä kloori- (esim. Uima- tai porealtaasta) tai merivettä. Se vähentää kiukaan käyttöikää.Kiukaan asentamisen jälkeen kytke se toimintaan n. 30 minuutin ajaksi. Älä ole saunan sisällä suorittaessasi ensimmäistä lämmitystä.(Katso sivu 18). Varmista ettei kiukaalla tai sen turvaetäisyyksien sisällä ole syttyvää materiaalia ennen ajastimen päälle kytkemistä.
Lapset eivät saa suorittaa puhdistamista ja käyttäjän huoltotoimenpiteitä ilman valvontaa.
5ENGLISH
Safety Instructions
Under no circumstances should children be allowed to play with thedevice. Do not use the heater as a grill.Do not put wood of any kind on the electric heater.Do not cover the heater. It may cause a fire.Do not use the heater as clothes dryer. It may cause fire.Never sit on the heater. It is really hot and can cause serious burns.
Please take note of these safety precautions before using the saunaor when installing the heater.For user:This product is not designed to be used by persons (including children)with limited physical or mental abilities and limited experience and knowledge except under close supervision by a responsible personwith knowledge and experience or having been advised by such person.
Do not use chlorinated water (e.g. From the swimming pool or jacuzzi) or seawater. It can destroy the heater.When installing a new heater, switch the heater on for 30mins. Do not stay inside the sauna room while performing the operation. See page 19. Make sure that no flammable objects have been placed on the heater before activating the preset time function or the stand-by mode for the remote operation.
Cleaning and user maintenance shall not be made by children without supervision.
6
This product is not designed to be used by persons (including children)with limited physical or mental abilities and limited experience and knowledge except under close supervision by a responsible personwith knowledge and experience or having been advised by such person.
SUOMI
Kiukaan kytkennän ja korjaamisen saa suorittaa vain valtuutettu sähköasentaja
Asentajalle:
Asentaessasi kiuasta, tarkista vaadittavat suojaetäisyydet valmistajan käyttöohjeesta (Kuva 1)Elektroniset tunnistimet ja muut sensorit tulee asentaa siten, että saunaan tuleva raitisilma ei vaikuta niiden toimintaan. Käyttäessä erillistä ohjausta, tulee ohjauskeskus ja ohjauspaneeli asentaa saunan ulkopuolelle.Jos kiuas on julkisessa käytössä ja siinä on viikkoajastin, tai jos sen voi kytkeä päälle kauko-ohjaimella, on saunan oveen asennettava erillinen ovitunnistin, joka kytkee pois päältä kaikki esiajastustoiminnot kun kiuas on valmiustilassa ja saunan ovi avataan.Ennen kiukaan asennusta, tarkista valmistajan ilmoittamat saunan maximi ja minimi koot (Kuva 8)Varmista, että saunan ilman vaihto on riitävä ja asianmukainen (Kuva 9)
7ENGLISH
For Technicians:
When positioning the sauna heater, observe the minimum safetydistances (see Fig. 1).
Observe the specifications on volumes of the sauna cabin (see Fig. 8). Observe the specifications on ventilation of the sauna cabin (see Fig. 9).
If this sauna heater is used for public saunas or saunas that maybe switched on by a separate remote-control system/ the door of thesauna room must be fitted with an interlock such that the stand-by modesetting for remote operation is disabled if the sauna door is opened when the stand-by mode setting for remote operation is set.
The electronic and electric system should be mounted in a way sothat incoming air will not interfere with it. The control must be mountedoutside the sauna cabin.
Wiring and repairs must be done by a certified electrician.Follow the Minimum Safety Distances when mounting the heater(see Fig. 1).
8SUOMI
Kiukaan asentaminen
Kuva 1Fig. 1
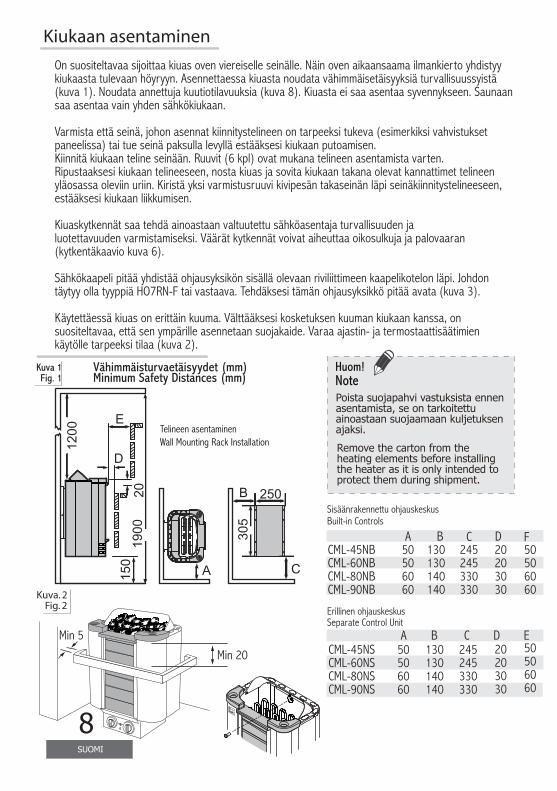
On suositeltavaa sijoittaa kiuas oven viereiselle seinälle. Näin oven aikaansaama ilmankierto yhdistyykiukaasta tulevaan höyryyn. Asennettaessa kiuasta noudata vähimmäisetäisyyksiä turvallisuussyistä(kuva 1). Noudata annettuja kuutiotilavuuksia (kuva 8). Kiuasta ei saa asentaa syvennykseen. Saunaansaa asentaa vain yhden sähkökiukaan.
Varmista että seinä, johon asennat kiinnitystelineen on tarpeeksi tukeva (esimerkiksi vahvistuksetpaneelissa) tai tue seinä paksulla levyllä estääksesi kiukaan putoamisen.Kiinnitä kiukaan teline seinään. Ruuvit (6 kpl) ovat mukana telineen asentamista varten.Ripustaaksesi kiukaan telineeseen, nosta kiuas ja sovita kiukaan takana olevat kannattimet telineenyläosassa oleviin uriin. Kiristä yksi varmistusruuvi kivipesän takaseinän läpi seinäkiinnitystelineeseen,estääksesi kiukaan liikkumisen.
Kiuaskytkennät saa tehdä ainoastaan valtuutettu sähköasentaja turvallisuuden jaluotettavuuden varmistamiseksi. Väärät kytkennät voivat aiheuttaa oikosulkuja ja palovaaran(kytkentäkaavio kuva 6).
Sähkökaapeli pitää yhdistää ohjausyksikön sisällä olevaan riviliittimeen kaapelikotelon läpi. Johdontäytyy olla tyyppiä HO7RN-F tai vastaava. Tehdäksesi tämän ohjausyksikkö pitää avata (kuva 3).
Käytettäessä kiuas on erittäin kuuma. Välttääksesi kosketuksen kuuman kiukaan kanssa, onsuositeltavaa, että sen ympärille asennetaan suojakaide. Varaa ajastin- ja termostaattisäätimienkäytölle tarpeeksi tilaa (kuva 2).
Vähimmäisturvaetäisyydet (mm)Minimum Safety Distances (mm)
Telineen asentaminenWall Mounting Rack Installation12
00
1900
150
E
D
20
A C
305
B 250
CML-45NBCML-60NBCML-80NBCML-90NB
50506060
130130140140
245245330330
20203030
50506060
A B C D F
Sisäänrakennettu ohjauskeskusBuilt-in Controls
CML-45NSCML-60NSCML-80NSCML-90NS
50506060
130130140140
245245330330
A B C D ESeparate Control UnitErillinen ohjauskeskus
20203030
50506060
Min 5
Min 20
ened when
Remove the carton from the heating elements before installing the heater as it is only intended to protect them during shipment.
Poista suojapahvi vastuksista ennen asentamista, se on tarkoitettu ainoastaan suojaamaan kuljetuksen ajaksi.
Huom!Note
Kuva. 2Fig. 2
9ENGLISH
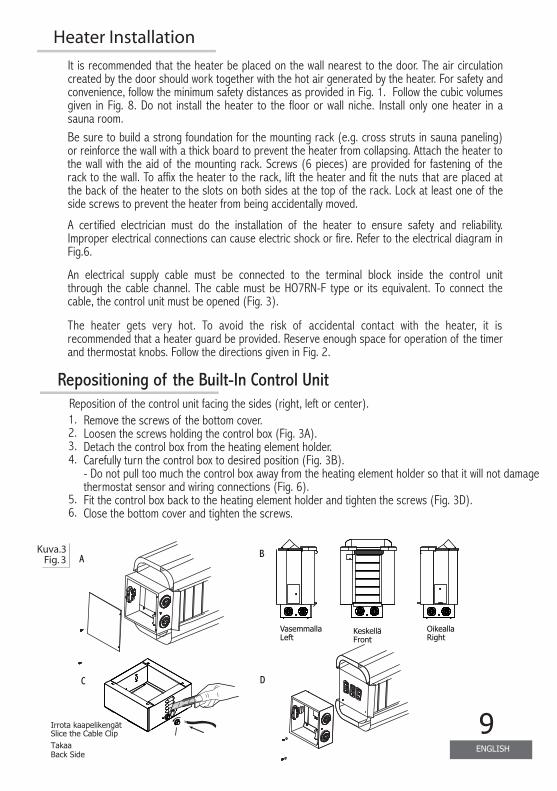
Heater Installation
It is recommended that the heater be placed on the wall nearest to the door. The air circulation created by the door should work together with the hot air generated by the heater. For safety and convenience, follow the minimum safety distances as provided in Fig. 1. Follow the cubic volumes given in Fig. 8. Do not install the heater to the floor or wall niche. Install only one heater in a sauna room. Be sure to build a strong foundation for the mounting rack (e.g. cross struts in sauna paneling) or reinforce the wall with a thick board to prevent the heater from collapsing. Attach the heater to the wall with the aid of the mounting rack. Screws (6 pieces) are provided for fastening of the rack to the wall. To affix the heater to the rack, lift the heater and fit the nuts that are placed at the back of the heater to the slots on both sides at the top of the rack. Lock at least one of the side screws to prevent the heater from being accidentally moved.
A certified electrician must do the installation of the heater to ensure safety and reliability. Improper electrical connections can cause electric shock or fire. Refer to the electrical diagram in Fig.6.
An electrical supply cable must be connected to the terminal block inside the control unit through the cable channel. The cable must be HO7RN-F type or its equivalent. To connect the cable, the control unit must be opened (Fig. 3).
The heater gets very hot. To avoid the risk of accidental contact with the heater, it is recommended that a heater guard be provided. Reserve enough space for operation of the timer and thermostat knobs. Follow the directions given in Fig. 2.
A
DC
Kuva. 3Fig. 3
B
Left Front RightVasemmalla Keskellä Oikealla
Repositioning of the Built-In Control UnitReposition of the control unit facing the sides (right, left or center).
Remove the screws of the bottom cover.Loosen the screws holding the control box (Fig. 3A).Detach the control box from the heating element holder.Carefully turn the control box to desired position (Fig. 3B).- Do not pull too much the control box away from the heating element holder so that it will not damage thermostat sensor and wiring connections (Fig. 6).Fit the control box back to the heating element holder and tighten the screws (Fig. 3D).Close the bottom cover and tighten the screws.
1.2.3.4.
5.6.
Takaa
Irrota kaapelikengät
Back Side
Slice the Cable Clip

10SUOMI
Kiuaskivet
Kivien latominen kiukaaseen
Älä koskaan käytä kiuasta ilman kiviä koska tämä voi aiheuttaa kiukaan vaurioitumisen ja palovaaran. Käytä SAWO-kiukaassa vain valmistajan suosittelemia SAWO kiuaskiviä tai muita raskaita ja kiinteitä erityisesti kiuaskiviksitarkoitettuj a kiviä. Riittävän ilman kierron varmistamiseks i ja lämmityselementtie n ylikuumenemise n sekä mekaanisen vaurion välttämiseksi , älä käytä SAWO-kiukaissa teollisesti valmistettuja säännöllisen muotoisia keraamisia kiuaskiviä. Älä myöskään käytä huokoisia ja/tai pehmeitä tai murenevia luonnonkivilajeja kuten vuolukiveä.
HUOMIO!
Takuu ei korvaa kiukaan lämmityselementtien rikkoutumisia jotka johtuvat väärän kivilajin käytön tai virheellisen ladonnan aiheuttamasta ylikuumenemisesta tai niiden aiheuttamista mekaanisista vaurioista.
HUOMIO!
Ennen kivien latomista on suositeltavaa pestä ne mahdollisen lian ja pölyn poistamiseksi. Kivien latomisessa kiukaaseen on huomioitava, että kiukaan läpi virtaavan ilman kiertoa ei estetä koska tämä johtaa lämmityselementtien ylikuumenemiseen ja niiden käyttöiän merkittävään lyhenemiseen. Kivien latomisen periaatteen a on suurikokoisimpie n kivien laittaminen kiukaan pohjaosaan ja pienemmät kivet aivan yläosaan niin että ylimmät kivet ovat hieman lämmityselementtien yläpuolella. Isokokoisia kiviä ei saa milloinkaan työntää väkisin lämmityselementtien väliin vaan tälläiset kivet on poistettava. Halkaisijaltaan alle 35 mm kokoisia pieniä kiviä tai kiven paloja ei saa laittaa kiukaaseen koska ne vaarantavat ilman kierron ja voivat aiheuttaa lämmityselementtien ylikuumenemisen.
Kivien tarkoitus kiukaassa on varastoida lämpöenergiaa löylyveden tehokkaan höyrystämisen takaamiseksi. Kiukaan oikean toiminnan varmistamiseksi on kivet poistettava kiukaasta vähintäin kerran vuodessa tai n. 500 käyttötunnin välein. Kiukaan kivitila puhdistetaan murentuneista kivistä jauudet kivet ladotaan ohjeen mukaisesti.Tarvittava kivien määrä on ilmoitettu kiukaan teknisissä tiedoissa (kuva 4).
Vuolukivien latominen kiukaaseenLado vuolukivet kiukaaseen kuvan 5 näyttämällä tavalla. Ylimmissä kulmakivissä on hajustekupit.Voit laittaa sinne nestemäistä hajustetta, joka antaa saunaan miellyttävän tuoksun.
Vältä kaatamasta niitä silloin kun kiuas on päällä, koska se voi aiheuttaa vakavia palovammoja.Harjaa ja huuhtele hajustekupit vedellä aromien käytön jälkeen.
Ohjauskeskuksen kääntäminenOhjauskeskuksen kääntäminen(Oikealle,vasemmalle ja keskelle).
Irroita pohjalevyn ruuvit ja poista pohjalevyIrroita ohjauskeskuksen ruuvit vastusten kiinnityslevystä(kuva 3A).Irroita ohjauskeskus vastusten kiinnityslevystä.Varovasti käännä ohjauskeskus halutulle puolelle(kuva 3B).- Älä nosta ohjauskeskusta liian kauaksi vastusten kiinnityslevystä jotta termostaatin sensorit ja sähkökiinnitykset eivät vaurioidu(kuva 6).Sovita ohjauskeskus takaisin vastusten kiinnityslevyyn ja kiristä ruuvit (kuva 3D).Laita pohjalevy paikalleen ja kiristä ruuvit.
Remove the screws of the bottom cover.Loosen the screws holding the control box (Fig. 3A).Detach the control box from the heating element holder.Carefully turn the control box to desired position (Fig. 3B).- Do not pull too much the control box away from the heating element holder so that it will not damage thermostat sensor and wiring connections (Fig. 6).Fit the control box back to the heating element holder and tighten the screws (Fig. 3D).Close the bottom cover and tighten the screws.
1.2.3.4.
5.6.
11ENGLISH
NO CERAMIC STONESKEINE KERAMIKSTEINE
Heater Stones
Loading stones into the heater
Never use the heater without stones as it may cause fire. Use only manufacturer recommended SaWo-stones. Using unsuitable stones may lead to heating element damage and will void the warranty. Never use ceramic stones or other artificial stones of any type!
NOTE:
Heating element damage due to overheating caused by wrong kind of stones or stones which were wrongly loaded into the heater is not covered by the factory warranty.
NOTE:
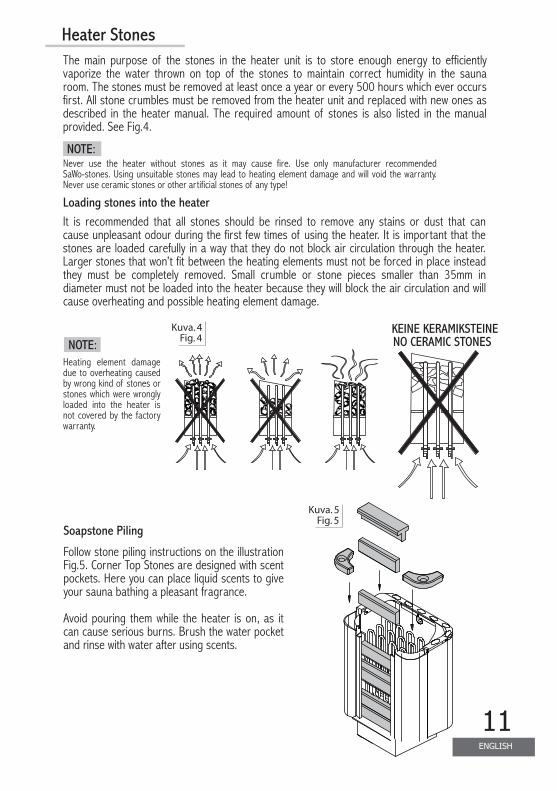
The main purpose of the stones in the heater unit is to store enough energy to efficiently vaporize the water thrown on top of the stones to maintain correct humidity in the sauna room. The stones must be removed at least once a year or every 500 hours which ever occurs first. All stone crumbles must be removed from the heater unit and replaced with new ones as described in the heater manual. The required amount of stones is also listed in the manual provided. See Fig.4.
It is recommended that all stones should be rinsed to remove any stains or dust that can cause unpleasant odour during the first few times of using the heater. It is important that the stones are loaded carefully in a way that they do not block air circulation through the heater. Larger stones that won’t fit between the heating elements must not be forced in place instead they must be completely removed. Small crumble or stone pieces smaller than 35mm in diameter must not be loaded into the heater because they will block the air circulation and will cause overheating and possible heating element damage.
Soapstone Piling
Follow stone piling instructions on the illustration Fig.5. Corner Top Stones are designed with scent pockets. Here you can place liquid scents to give your sauna bathing a pleasant fragrance.
Avoid pouring them while the heater is on, as it can cause serious burns. Brush the water pocket and rinse with water after using scents.
Kuva. 4Fig. 4
Kuva. 5Fig. 5
12SUOMI
Kuva 6Fig. 6
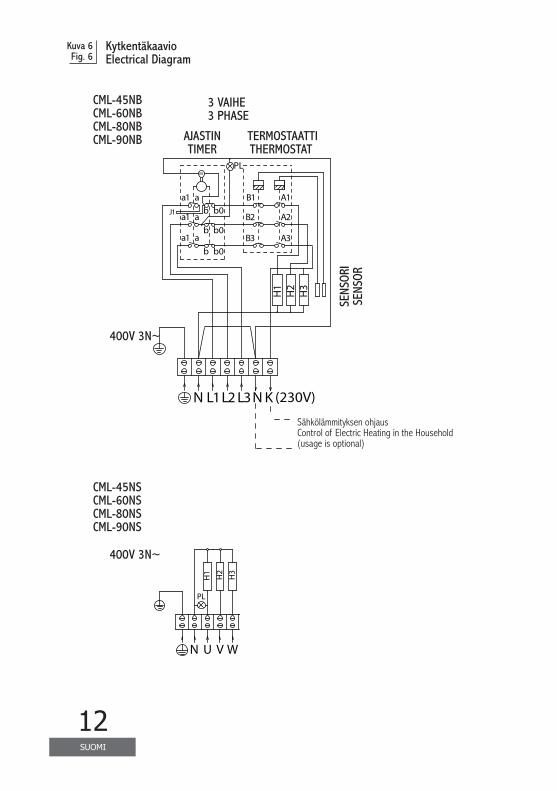
Kytkentäkaavio Electrical Diagram
3 VAIHE3 PHASE
AJASTIN TIMER
TERMOSTAATTI THERMOSTAT
Sähkölämmityksen ohjausControl of Electric Heating in the Household (usage is optional)
SENS
ORI
SENS
OR
CML-45NBCML-60NBCML-80NBCML-90NB
CML-45NSCML-60NSCML-80NSCML-90NS
400V 3N~
N U V W
H1
PL
H2
H3
N L1L2 L3
400V 3N~
M
a1 a A1
A2
A3
B1
B2
B3
ba1 a
ba1 a
b
b0
b0
b0
H1
H2
H3
N K
PL
(230V)
J1
13ENGLISH
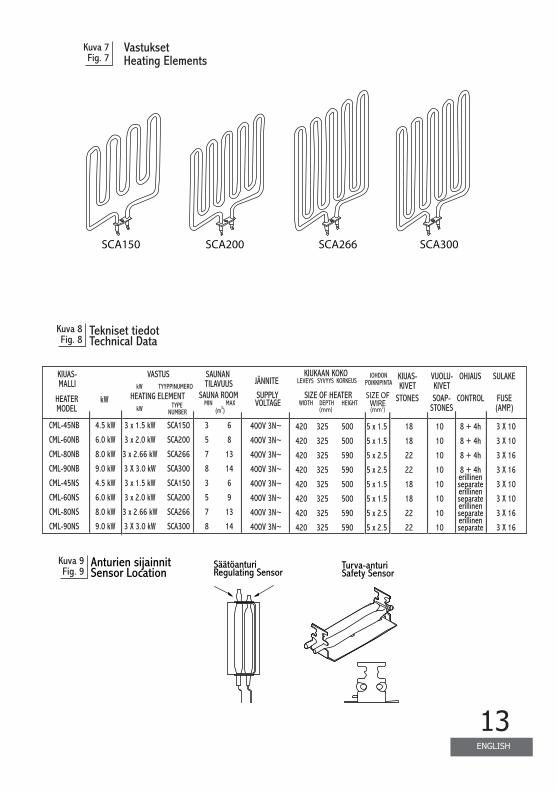
SCA150 SCA200 SCA266 SCA300
Kuva 7Fig. 7
VastuksetHeating Elements
Kuva 8Fig. 8
Kuva 9Fig. 9
Tekniset tiedotTechnical Data
Anturien sijainnitSensor Location
SäätöanturiRegulating Sensor
Turva-anturiSafety Sensor
kWkW
SAUNA ROOM SUPPLY STONES CONTROLSIZE OF HEATER SIZE OFWIREDEPTH HEIGHTWIDTHVOLTAGE
HEATING ELEMENTMIN MAXTYPE
NUMBER (m3) (mm2)(mm)
kW
KIUAS-MALLI
HEATERMODEL
SAUNAN TILAVUUS JÄNNITE KIUAS-
KIVETSOAP-
STONES
VUOLU-KIVET
OHJAUS
FUSE(AMP.)
SULAKEKIUKAAN KOKOKORKEUSLEVEYS SYVYYS
VASTUSTYYPPINUMERO
JOHDONPOIKKIPINTA
CML-45NB
CML-60NB
CML-80NB
CML-90NB
CML-45NS
CML-60NS
CML-80NS
CML-90NS
4.5 kW
6.0 kW
8.0 kW
9.0 kW
4.5 kW
6.0 kW
8.0 kW
9.0 kW
3 x 1.5 kW
3 x 2.0 kW
3 x 2.66 kW
3 X 3.0 kW
3 x 1.5 kW
3 x 2.0 kW
3 x 2.66 kW
3 X 3.0 kW
SCA150
SCA200
SCA266
SCA300
SCA150
SCA200
SCA266
SCA300
3
5
7
8
3
5
7
8
6
8
13
14
6
9
13
14
5 x 1.5
5 x 1.5
5 x 2.5
5 x 2.5
5 x 1.5
5 x 1.5
5 x 2.5
5 x 2.5
18
18
22
22
18
18
22
22
10
10
10
10
10
10
10
10
8 + 4h
8 + 4h
8 + 4h
8 + 4herillinenseparateerillinenseparateerillinenseparateerillinenseparate
3 X 10
3 X 10
3 X 16
3 X 16
3 X 10
3 X 10
3 X 16
3 X 16
400V 3N~
400V 3N~
400V 3N~
400V 3N~
400V 3N~
400V 3N~
400V 3N~
400V 3N~
325
325
325
325
325
325
325
325
500
500
590
590
500
500
590
590
420
420
420
420
420
420
420
420
14SUOMI
Ohjaussäätimet
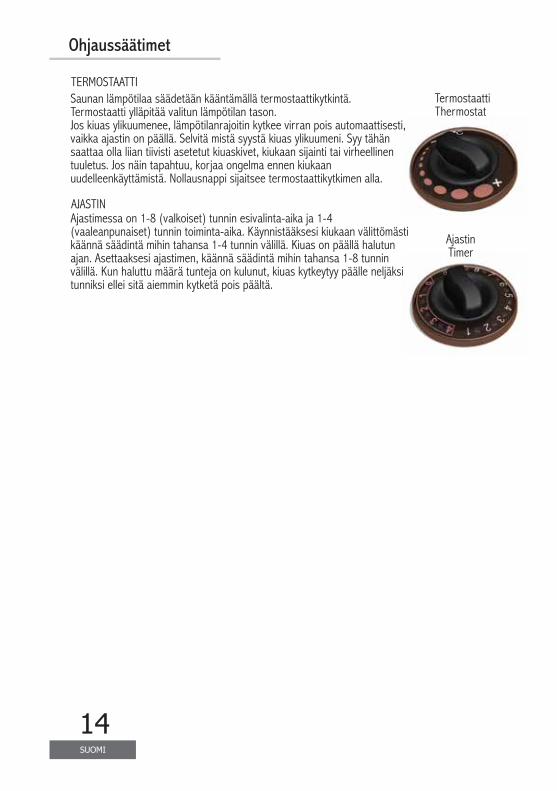
TermostaattiThermostat
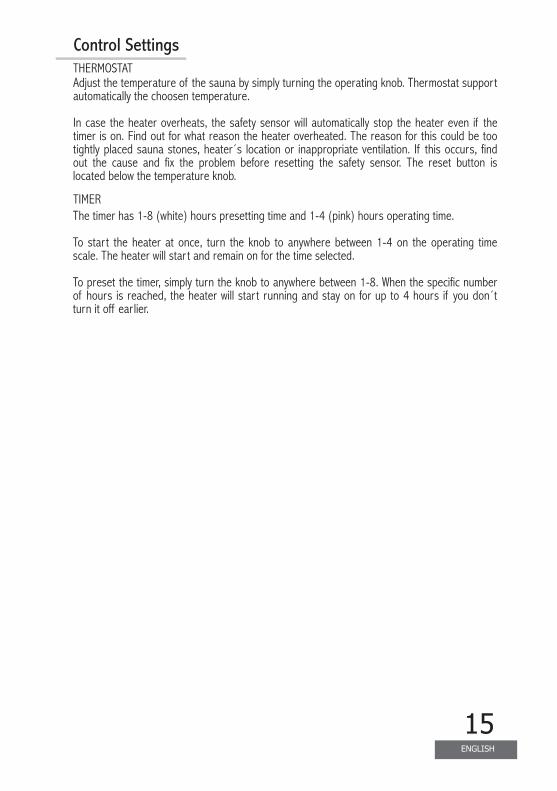
AjastinTimer
AJASTIN
Saunan lämpötilaa säädetään kääntämällä termostaattikytkintä.Termostaatti ylläpitää valitun lämpötilan tason.Jos kiuas ylikuumenee, lämpötilanrajoitin kytkee virran pois automaattisesti,vaikka ajastin on päällä. Selvitä mistä syystä kiuas ylikuumeni. Syy tähänsaattaa olla liian tiivisti asetetut kiuaskivet, kiukaan sijainti tai virheellinentuuletus. Jos näin tapahtuu, korjaa ongelma ennen kiukaanuudelleenkäyttämistä. Nollausnappi sijaitsee termostaattikytkimen alla.
Ajastimessa on 1-8 (valkoiset) tunnin esivalinta-aika ja 1-4(vaaleanpunaiset) tunnin toiminta-aika. Käynnistääksesi kiukaan välittömästikäännä säädintä mihin tahansa 1-4 tunnin välillä. Kiuas on päällä halutunajan. Asettaaksesi ajastimen, käännä säädintä mihin tahansa 1-8 tunninvälillä. Kun haluttu määrä tunteja on kulunut, kiuas kytkeytyy päälle neljäksitunniksi ellei sitä aiemmin kytketä pois päältä.
TERMOSTAATTI
15ENGLISH
Control Settings
TIMER
Adjust the temperature of the sauna by simply turning the operating knob. Thermostat support automatically the choosen temperature.
In case the heater overheats, the safety sensor will automatically stop the heater even if the timer is on. Find out for what reason the heater overheated. The reason for this could be too tightly placed sauna stones, heater´s location or inappropriate ventilation. If this occurs, find out the cause and fix the problem before resetting the safety sensor. The reset button is located below the temperature knob.
The timer has 1-8 (white) hours presetting time and 1-4 (pink) hours operating time.
To start the heater at once, turn the knob to anywhere between 1-4 on the operating time scale. The heater will start and remain on for the time selected.
To preset the timer, simply turn the knob to anywhere between 1-8. When the specific number of hours is reached, the heater will start running and stay on for up to 4 hours if you don´t turn it off earlier.
THERMOSTAT
16SUOMI
Ilmanvaihto
Saadaksesi miellyttävän ilmatilan saunaan siellä pitäisi olla kuumaa ja raikasta ilmaa sopivassa suhteessa. Ilmanvaihdon tarkoitus on kierrättää kiukaan ympärillä oleva ilma saunan kaukaisimpaankin nurkkaan. Tulo- ja poistoilmaventtiilien sijainnit vaihtelevat saunan mallista sekä omistajan mieltymyksistä riippuen.
Tuloilmaventtiili voidaan asentaa seinälle suoraan kiukaan alle (kuva 9A). Koneellista ilmastointia käytettäessä tuloilmaventtiili voidaan asentaa vähintään 60 cm:n korkeuteen kiukaan yläpuolelle (kuva 9B) tai kattoon kiukaan yläpuolelle (kuva 9C). Näin asennettuna, ulkoa tuleva raskas kylmä ilma sekoittuu kevyeen kuumaan kiukaasta tulevaan ilmaan, tuoden raikasta ilmaa saunojille. Suositeltava tuloilmaventtiilin koko on 10cm.
Poistoilmaventtiili pitäisi sijoittaa diagonaalisesti tuloilmaventtiiliä vastapäätä, mieluiten lauteiden alle mahdollisimman kauas raitisilma-aukosta. Se voidaan asentaa lähelle lattiaa, johtaa putkea pitkin katolla sijaitsevaan poistoilmaventtiiliin tai johtaa oven alitse kylpyhuoneessa olevaan poistoventtiiliin. Tällöin saunan kynnysraon on oltava vähintään 5 cm ja kylpyhuoneessa olisi suotavaa olla koneellinen ilmastointi. Poistoilmaventtiilin pitää olla kaksi kertaa suurempi kuin tuloilmaventtiilin.
EristysSaunassa pitää olla asianmukaiset eristykset seinissä, katossa ja ovessa. Oikean tehoista kiuasta valittaessa on huomioitava: Jos saunassa on yksi neliömetri (m²) eristämätöntä seinäpintaa (esim. lasiovi, tiili- tai kaakeliseinä), on saunan tilavuuteen laskettava lisää suunnilleen 1,2 kuutiometriä (m³) (kuva 8).
Kosteuseristyksen pitää olla saunassa hyvä, koska sen tarkoitus on estää saunan kosteuden leviäminen muihin huoneisiin ja seinärakenteisiin. Kosteuseristys täytyy sijoittaa lämpöeristyksen ja paneelien väliin. Saunan seinät ja katto on suositeltavaa paneloida kuusella.
Lämpö- ja kosteuseristys asennetaan seuraavan järjestyksen mukaisesti ulkoa sisälle:
Lämpöeristyksen suositeltava minimipaksuus seinissä on 50 mm ja katossa 100 mm.Höyrysulkuna voi käyttää pahvi- tai alumiinifoliolaminaattia, joka kiinnitetään eristyksen päälle alumiinifolio sisäänpäin. Jätä vähintään 20 mm ilmarako höyrysulun ja sisäpaneelin väliin.Estääksesi kosteuden kerääntymisen paneelin taakse jätä seinäpaneelin ja katon väliin rako.
1.
2.
3.4.
ENGLISH
17
To have a soothing sauna, there should be a proper mixing of hot and cold air inside the sauna room. Another reason for ventilation is to draw air around the heater and move the heat to the farthest part of the sauna. The positioning of the inlet and outlet vents may vary depending on the design of the sauna room or preference of the owner.
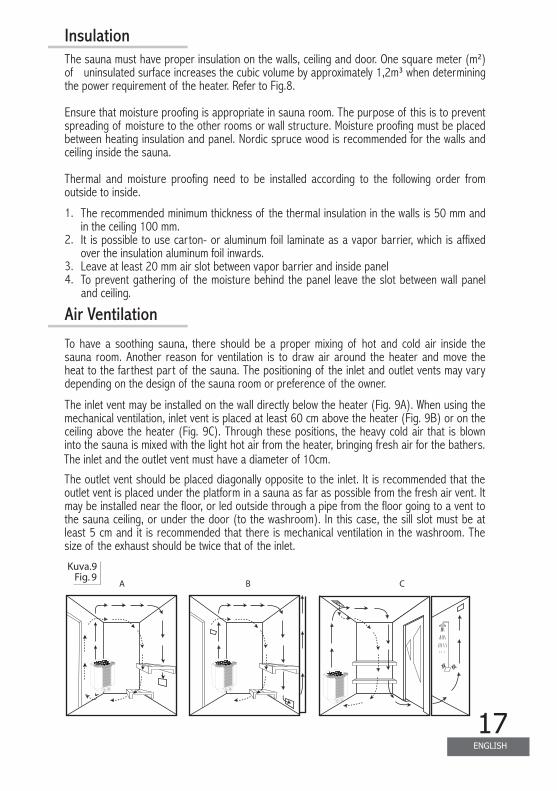
The inlet vent may be installed on the wall directly below the heater (Fig. 9A). When using the mechanical ventilation, inlet vent is placed at least 60 cm above the heater (Fig. 9B) or on the ceiling above the heater (Fig. 9C). Through these positions, the heavy cold air that is blown into the sauna is mixed with the light hot air from the heater, bringing fresh air for the bathers. The inlet and the outlet vent must have a diameter of 10cm.
The outlet vent should be placed diagonally opposite to the inlet. It is recommended that the outlet vent is placed under the platform in a sauna as far as possible from the fresh air vent. It may be installed near the floor, or led outside through a pipe from the floor going to a vent to the sauna ceiling, or under the door (to the washroom). In this case, the sill slot must be at least 5 cm and it is recommended that there is mechanical ventilation in the washroom. The size of the exhaust should be twice that of the inlet.
Kuva. 9Fig. 9
Air Ventilation
A B C
InsulationThe sauna must have proper insulation on the walls, ceiling and door. One square meter (m²) of uninsulated surface increases the cubic volume by approximately 1,2m³ when determining the power requirement of the heater. Refer to Fig.8.
Ensure that moisture proofing is appropriate in sauna room. The purpose of this is to prevent spreading of moisture to the other rooms or wall structure. Moisture proofing must be placed between heating insulation and panel. Nordic spruce wood is recommended for the walls and ceiling inside the sauna.
Thermal and moisture proofing need to be installed according to the following order from outside to inside.
The recommended minimum thickness of the thermal insulation in the walls is 50 mm and in the ceiling 100 mm.It is possible to use carton- or aluminum foil laminate as a vapor barrier, which is affixed over the insulation aluminum foil inwards.Leave at least 20 mm air slot between vapor barrier and inside panelTo prevent gathering of the moisture behind the panel leave the slot between wall panel and ceiling.
1.
2.
3.4.
Tämän tuotteen käyttäminen ei sovellu henkilöille (lapset mukaanlukien) joilla on fyysisiä tai henkisiä rajoitteita, tai ei ole aiempaa käyttökokemusta kiukaan käytöstä ellei valvomassa ole henkilö jolla on riittävä kokemus kiukaan käyttämiseksi.
18
SUOMI
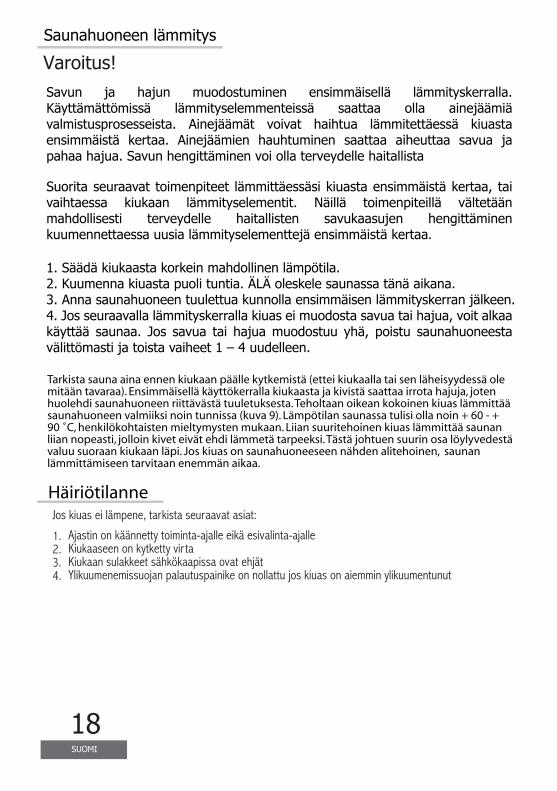
Varoitus!Saunahuoneen lämmitys
Häiriötilanne
Tarkista sauna aina ennen kiukaan päälle kytkemistä (ettei kiukaalla tai sen läheisyydessä ole mitään tavaraa). Ensimmäisellä käyttökerralla kiukaasta ja kivistä saattaa irrota hajuja, jotenhuolehdi saunahuoneen riittävästä tuuletuksesta.Teholtaan oikean kokoinen kiuas lämmittääsaunahuoneen valmiiksi noin tunnissa (kuva 9). Lämpötilan saunassa tulisi olla noin + 60 - + 90 C, henkilökohtaisten mieltymysten mukaan. Liian suuritehoinen kiuas lämmittää saunan liian nopeasti, jolloin kivet eivät ehdi lämmetä tarpeeksi.Tästä johtuen suurin osa löylyvedestävaluu suoraan kiukaan läpi. Jos kiuas on saunahuoneeseen nähden alitehoinen, saunan lämmittämiseen tarvitaan enemmän aikaa.
Jos kiuas ei lämpene, tarkista seuraavat asiat:
Ajastin on käännetty toiminta-ajalle eikä esivalinta-ajalleKiukaaseen on kytketty virtaKiukaan sulakkeet sähkökaapissa ovat ehjätYlikuumenemissuojan palautuspainike on nollattu jos kiuas on aiemmin ylikuumentunut
1.2.3.4.
19ENGLISH
Heating of the sauna
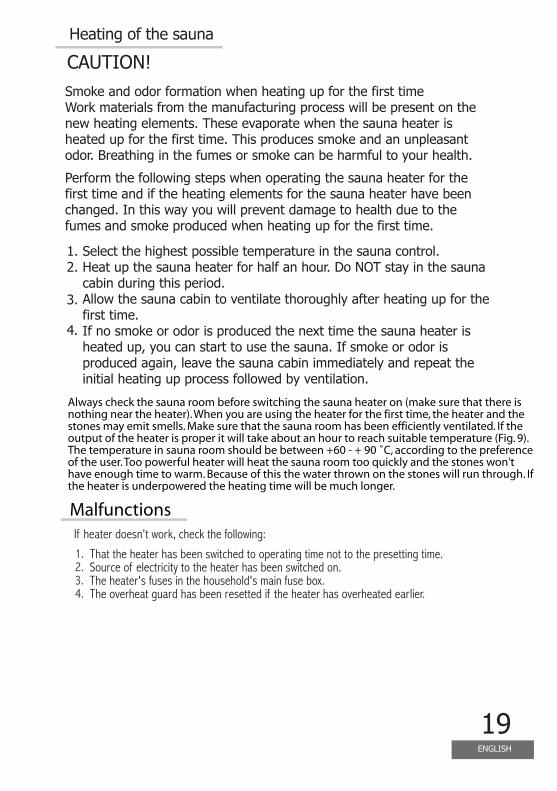
CAUTION!Smoke and odor formation when heating up for the first timeWork materials from the manufacturing process will be present on the new heating elements. These evaporate when the sauna heater is heated up for the first time. This produces smoke and an unpleasant odor. Breathing in the fumes or smoke can be harmful to your health.
Perform the following steps when operating the sauna heater for the first time and if the heating elements for the sauna heater have been changed. In this way you will prevent damage to health due to the fumes and smoke produced when heating up for the first time.
1.2.
3.
4.
Select the highest possible temperature in the sauna control.Heat up the sauna heater for half an hour. Do NOT stay in the sauna cabin during this period.Allow the sauna cabin to ventilate thoroughly after heating up for the first time.If no smoke or odor is produced the next time the sauna heater is heated up, you can start to use the sauna. If smoke or odor is produced again, leave the sauna cabin immediately and repeat the initial heating up process followed by ventilation.
Malfunctions
Always check the sauna room before switching the sauna heater on (make sure that there is nothing near the heater).When you are using the heater for the first time, the heater and the stones may emit smells. Make sure that the sauna room has been efficiently ventilated. If the output of the heater is proper it will take about an hour to reach suitable temperature (Fig. 9).The temperature in sauna room should be between +60 - + 90 C, according to the preferenceof the user.Too powerful heater will heat the sauna room too quickly and the stones won'thave enough time to warm. Because of this the water thrown on the stones will run through. Ifthe heater is underpowered the heating time will be much longer.
If heater doesn't work, check the following:
That the heater has been switched to operating time not to the presetting time. Source of electricity to the heater has been switched on.The heater's fuses in the household's main fuse box.The overheat guard has been resetted if the heater has overheated earlier.
1.2.3.4.
CM
L_M
L_3P
-1P(
FiEn
V05
15)
OhjausyksikköBuilt-in Control Unit
7
11
4
1
2
3
8 13
1415
16
17
18
19
20
22
21
9
10
Pidätämme oikeuden muutoksiin.Subject to change without notice.
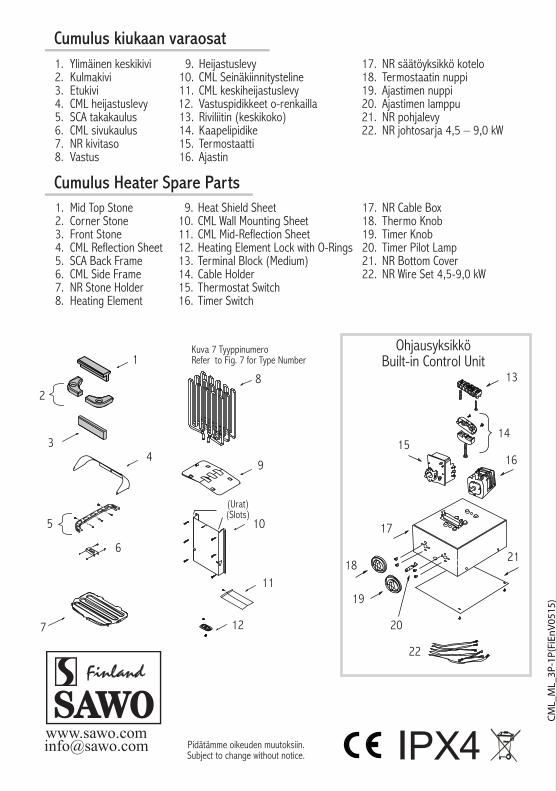
Cumulus kiukaan varaosatHeijastuslevyCML SeinäkiinnitystelineCML keskiheijastuslevyVastuspidikkeet o-renkaillaRiviliitin (keskikoko)KaapelipidikeTermostaattiAjastin
9.10.11.12.13.14.15.16.
Ylimäinen keskikiviKulmakiviEtukiviCML heijastuslevySCA takakaulusCML sivukaulusNR kivitasoVastus
1.2.3.4.5.6.7.8.
NR säätöyksikkö koteloTermostaatin nuppiAjastimen nuppiAjastimen lamppuNR pohjalevyNR johtosarja 4,5 – 9,0 kW
17.18.19.20.21.22.
Cumulus Heater Spare PartsMid Top StoneCorner StoneFront StoneCML Reflection SheetSCA Back FrameCML Side FrameNR Stone HolderHeating Element
1.2.3.4.
5.6.7.8.
Heat Shield SheetCML Wall Mounting SheetCML Mid-Reflection SheetHeating Element Lock with O-RingsTerminal Block (Medium)Cable HolderThermostat SwitchTimer Switch
9.10.11.12.13.14.15.16.
NR Cable BoxThermo KnobTimer KnobTimer Pilot LampNR Bottom CoverNR Wire Set 4,5-9,0 kW
17.18.19.20.21.22.
5
6
12
(Urat)(Slots)
Kuva 7 TyyppinumeroRefer to Fig. 7 for Type Number