Embed Size (px)
Citation preview

IBM Corporation May 10, 2018 1 | P a g e
Cluster File Systems: A Look at Implementing GlusterFS
Supporting Dockerized Db2®, MongoDB, and PostgreSQL
Ryan Bertsche Philip Chan
Dulce Smith

IBM Corporation May 10, 2018 2 | P a g e
Table of Contents 1. Introduction .......................................................................................................................................... 4
Disclaimer .................................................................................................................................................. 4
2. Environment.......................................................................................................................................... 4
Environment Description .......................................................................................................................... 4
Docker System Resources ......................................................................................................................... 6
3. Server Configuration ............................................................................................................................. 6
System Resources ..................................................................................................................................... 6
4. GlusterFS Overview ............................................................................................................................. 10
GlusterFS Installation Dependencies ...................................................................................................... 10
GlusterFS Download, Configure and Build GlusterFS.............................................................................. 11
GlusterFS Configuration .......................................................................................................................... 14
5. Deploying Db2 Running on a Docker Container ................................................................................. 19
Db2 Installation Pre-requisites ................................................................................................................ 19
Db2 Installation and Configuration ......................................................................................................... 19
Deployment on RHEL .............................................................................................................................. 19
Deployment on SLES ............................................................................................................................... 21
Deployment on Ubuntu .......................................................................................................................... 22
Workload Setup ...................................................................................................................................... 23
6. Deploying MongoDB Running on a Docker Container ........................................................................ 23
Introduction ............................................................................................................................................ 23
MongoDB Installation and Configuration ............................................................................................... 23
Workload Setup ...................................................................................................................................... 24
7. PostgreSQL Installation and Configuration ......................................................................................... 25
PostgreSQL Installation and Configuration ............................................................................................. 25
Workload Setup ...................................................................................................................................... 25
8. Relocation Tests .................................................................................................................................. 27
Db2 Relocation Test ................................................................................................................................ 27
MongoDB Relocation Test ...................................................................................................................... 32
MongoDB Test Procedure ....................................................................................................................... 32

IBM Corporation May 10, 2018 3 | P a g e
MongoDB Results .................................................................................................................................... 33
PostgreSQL Relocation Test .................................................................................................................... 36
PostgreSQL Test Procedure ..................................................................................................................... 36
9. Recovery Test ...................................................................................................................................... 44
Db2 BLU Recovery Test ........................................................................................................................... 44
Db2 BLU Test Procedure ......................................................................................................................... 44
Db2 BLU Results ...................................................................................................................................... 44
MongoDB Recovery Test ......................................................................................................................... 47
MongoDB Test Procedure ....................................................................................................................... 48
MongoDB Results .................................................................................................................................... 49
PostgreSQL Recovery Test ...................................................................................................................... 51
PostgreSQL Test Procedure ..................................................................................................................... 51
PostgreSQL Recovery Verification ........................................................................................................... 53
10. Conclusion ....................................................................................................................................... 55

IBM Corporation May 10, 2018 4 | P a g e
1. Introduction
The amount of data a business stores is rapidly growing. At the same time, the business value of that
data is also increasing, creating a demand for accessible and available storage. To fulfill this demand,
businesses can utilize clustered file systems that are capable of supporting complex and growing
infrastructures. This white paper will demonstrate the use of a cluster file system in a Linux on System z/
Linux One environment, implemented over a variety of Linux distributions and virtualization
environments. Specifically, this paper will focus on GlusterFS, a popular, capable and proven cluster file
system. The configuration and setup of GlusterFS will be documented, followed by a series of validation
tests.
The validation will be completed by doing relocation and recovery tests of databases running on
different nodes in the same cluster file system. For optimal test coverage, three different databases will
be used: IBM Db2®, MongoDB, and PostgreSQL. In each case, the database will reside in a Docker
container for maximum flexibility, portability and test coverage. Each database will be driven by a
workload, and then that database will be shutdown and brought back up, on a different Docker host,
attached to the same GlusterFS volume. The database will then run through a series of validation tests,
and the workload restarted. This will be repeated across multiple Linux distributions on our
Environment. For full validation of the data replication used by GlusterFS, recovery tests will also be
performed, where databases and GlusterFS cluster members are unsafely shutdown, to simulate an
unexpected system crash.
The setup and validation of GlusterFS is one part of a series of white papers, each focusing on a different
clustered file system. In a previous paper, IBM® Spectrum Scale™ was the target cluster file system, and
in a future paper, CephFS will be examined. This series of cluster file system papers is meant to lay a
broad foundation so the solution that best fits the business need can be applied.
Disclaimer
a. This is not a load or performance test of the various databases. b. This is not a disaster recovery test. We perform a graceful shutdown of the database resource,
then start a new instance of the database resource on a new host system. c. Resources were not sized for optimal performance.
2. Environment Environment Description Our GlusterFS cluster is composed of three Linux on System z servers: 1. GLTRLX01 runs RHEL 7.3, 2. GLTRLX02 runs SLES 12.3, and 3. GLTRLX03 runs Ubuntu 16.4. We used different operating system flavors to: 1) inject a pinch of complexity to our environment, 2) be able to test resilience and, 3) be able to operate under a hybrid environment (depicted on Figure 1). Additionally, we ran each database under Docker containers to provide, again, a greater level of complexity to our environment. Within each container, our operating system-to-database combinations

IBM Corporation May 10, 2018 5 | P a g e
were the following: IBM Db2 on RHEL, PostgreSQL on SLES, and MongoDB on Ubuntu. Furthermore, we tested each operating system-to-database configuration using relocation, which consisted of: 1) properly shutting down the database and, 2) successfully starting the database on another host without compromising the data. Also, we implemented and tested GlusterFS with replicated volumes. GlusterFS volumes get replicated across all three servers. As for storage, the Linux on System z operating system resided on ECKD DASD and the GlusterFS cluster file system resided on SCSI DASD. Furthermore, the servers communicate with each other via a public network while the GlusterFS data was accessed via a private network (depicted on Figure 2). In the next sections, we will cover each environment component more in detail Figure 1: GlusterFS Cluster File System – Our Test Environment

IBM Corporation May 10, 2018 6 | P a g e
Docker System Resources Each of the hosts have Docker Enterprise Edition for IBM System z (s390x) installed. There are specific install instructions for each of the Linux Platforms: RHEL, SLES and Ubuntu. Further details can be found here: https://docs.docker.com/engine/installation/ Why run a database inside a container? Docker makes it easy to move your database between hosts. Packaging, testing, distributing and upgrading your database can be automated with Docker which fits the CI/CD model. You can run database containers in development and test environments rapidly and in isolation. Your existing production database can continue to run while you test Docker images to deploy updates to production. For our testing, we have chosen two relational databases (IBM Db2 and PostgreSQL) and one NoSQL database (MongoDB). While broadly comparable, we wanted to have a good database product coverage using both open source and proprietary software. The table below depicts the Docker versions we used on each host environment:
Hostname Linux OS Docker EE version
gltrlx01 RHEL 7.4 17.06.1-ee-2
gltrlx02 SLES 12.3 17.06.2-ee-4
gltrlx03 Ubuntu 16.04.3 LTS 17.06.2-ee-3
3. Server Configuration System Resources Operating Systems – each of the three servers ran a different Linux operating system under z/VM. On gltrlx01, we ran RHEL 7.3, on gltrlx02, we ran SLES 12.3 and, on gltrlx03, we ran Ubuntu 16.4. We ensured that each operating system was upgraded with the latest fixes.
[root@gltrlx01 ~]# uname –r
3.10.0-693.2.2.el7.s390x
gltrlx02:~ # uname -r
4.4.103-92.53-default
root@gltrlx03:~# uname -r
4.4.0-31-generic
Network – we used two 10.x sub-domains: a public network for OS communication and a private network for data communication. Figure 2: This picture depicts our network test environment.

IBM Corporation May 10, 2018 7 | P a g e
In addition, we disabled SELinux on all three servers.
[root@gltrlx01 ~]# getenforce
Disabled
gltrlx02:~ # getenforce
Disabled
root@gltrlx03:~# getenforce
Disabled
Memory – since we were running Linux on z/VM, the memory resources were virtualized. For this project, we decided to run our hosts at 64G of memory to support all the databases that we were testing. The best way to do this is to assign the required, documented, memory to your hosts, and then increase or decrease it based on what works best for your test environment.
[root@gltrlx01 ssh]# vmcp q v stor
STORAGE = 64G

IBM Corporation May 10, 2018 8 | P a g e
CPU – since we are running Linux on z/VM, the CPU resources are virtualized. For this project, we decided to run our hosts with 32 CPUs to support all the databases that we were testing. The best way to do this is to assign the required, documented, number of CPU to your hosts, and then increase or decrease them based on what works best for your test environment.
[root@gltrlx01 ~]# vmcp q v cpus
CPU 19 ID FF028B3728278000 IFL CPUAFF ON
CPU 1A ID FF028B3728278000 IFL CPUAFF ON
CPU 1B ID FF028B3728278000 IFL CPUAFF ON
CPU 1C ID FF028B3728278000 IFL CPUAFF ON
CPU 1D ID FF028B3728278000 IFL CPUAFF ON
CPU 1E ID FF028B3728278000 IFL CPUAFF ON
CPU 1F ID FF028B3728278000 IFL CPUAFF ON
CPU 00 ID FF028B3728278000 (BASE) IFL CPUAFF ON
CPU 01 ID FF028B3728278000 IFL CPUAFF ON
CPU 02 ID FF028B3728278000 IFL CPUAFF ON
CPU 03 ID FF028B3728278000 IFL CPUAFF ON
CPU 04 ID FF028B3728278000 IFL CPUAFF ON
CPU 05 ID FF028B3728278000 IFL CPUAFF ON
CPU 06 ID FF028B3728278000 IFL CPUAFF ON
CPU 07 ID FF028B3728278000 IFL CPUAFF ON
CPU 08 ID FF028B3728278000 IFL CPUAFF ON
CPU 09 ID FF028B3728278000 IFL CPUAFF ON
CPU 0A ID FF028B3728278000 IFL CPUAFF ON
CPU 0B ID FF028B3728278000 IFL CPUAFF ON
CPU 0C ID FF028B3728278000 IFL CPUAFF ON
CPU 0D ID FF028B3728278000 IFL CPUAFF ON
CPU 0E ID FF028B3728278000 IFL CPUAFF ON
CPU 0F ID FF028B3728278000 IFL CPUAFF ON
CPU 10 ID FF028B3728278000 IFL CPUAFF ON
CPU 11 ID FF028B3728278000 IFL CPUAFF ON
CPU 12 ID FF028B3728278000 IFL CPUAFF ON
CPU 13 ID FF028B3728278000 IFL CPUAFF ON
CPU 14 ID FF028B3728278000 IFL CPUAFF ON
CPU 15 ID FF028B3728278000 IFL CPUAFF ON
CPU 16 ID FF028B3728278000 IFL CPUAFF ON
CPU 17 ID FF028B3728278000 IFL CPUAFF ON
CPU 18 ID FF028B3728278000 IFL CPUAFF ON
Storage – we used ECKD for the operating system and SCSI for the databases. We configured 2 500G LUNs for each of the servers used in this project. In addition, multipath was enabled on each of the SCSI LUNs. ECKD DASD assigned to the operating systems:
[root@gltrlx01 ~]# lsdasd
Bus-ID Status Name Device Type BlkSz Size Blocks
============================================================================
0.0.0200 active dasde 94:16 FBA 512 1000MB 2048000
0.0.0201 active dasda 94:0 ECKD 4096 7042MB 1802880
0.0.0202 active dasdb 94:4 ECKD 4096 7042MB 1802880
0.0.0203 active dasdc 94:8 ECKD 4096 14085MB 3605760
0.0.0204 active dasdd 94:12 ECKD 4096 21127MB 5408640

IBM Corporation May 10, 2018 9 | P a g e
SCSI DASD assigned to the GlusterFS cluster file system (data):
[root@gltrlx01 ~]# multipath –l
mpathl (3600507680280835a0800000000000264) dm-18 IBM ,2145
size=500G features='1 queue_if_no_path' hwhandler='0' wp=rw
|-+- policy='service-time 0' prio=0 status=active
| |- 3:0:1:1 sdab 65:176 active undef unknown
| `- 2:0:1:1 sdaf 65:240 active undef unknown
`-+- policy='service-time 0' prio=0 status=enabled
|- 3:0:0:1 sdz 65:144 active undef unknown
`- 2:0:0:1 sdad 65:208 active undef unknown
mpathk (3600507680280835a0800000000000263) dm-17 IBM ,2145
size=500G features='1 queue_if_no_path' hwhandler='0' wp=rw
|-+- policy='service-time 0' prio=0 status=active
| |- 3:0:0:0 sdy 65:128 active undef unknown
| `- 2:0:0:0 sdac 65:192 active undef unknown
`-+- policy='service-time 0' prio=0 status=enabled
|- 3:0:1:0 sdaa 65:160 active undef unknown
`- 2:0:1:0 sdae 65:224 active undef unknown
gltrlx02:~ # multipath -l
mpathl (3600507680280835a0800000000000266) dm-8 IBM,2145
size=500G features='2 queue_if_no_path retain_attached_hw_handler'
hwhandler='1
alua' wp=rw
|-+- policy='service-time 0' prio=0 status=active
| |- 2:0:1:1 sdab 65:176 active undef unknown
| `- 3:0:1:1 sdaf 65:240 active undef unknown
`-+- policy='service-time 0' prio=0 status=enabled
|- 2:0:0:1 sdz 65:144 active undef unknown
`- 3:0:0:1 sdad 65:208 active undef unknown
mpathk (3600507680280835a0800000000000265) dm-7 IBM,2145
size=500G features='2 queue_if_no_path retain_attached_hw_handler'
hwhandler='1
alua' wp=rw
|-+- policy='service-time 0' prio=0 status=active
| |- 2:0:0:0 sdy 65:128 active undef unknown
| `- 3:0:0:0 sdac 65:192 active undef unknown
`-+- policy='service-time 0' prio=0 status=enabled
|- 2:0:1:0 sdaa 65:160 active undef unknown
`- 3:0:1:0 sdae 65:224 active undef unknown
root@gltrlx03:~# multipath -l
mpathl (3600507680280835a0800000000000268) dm-1 IBM,2145
size=500G features='1 queue_if_no_path' hwhandler='0' wp=rw
|-+- policy='round-robin 0' prio=0 status=active
| |- 1:0:1:1 sdi 8:128 active undef running
| `- 3:0:1:1 sdx 65:112 active undef running
`-+- policy='round-robin 0' prio=0 status=enabled
|- 1:0:0:1 sdb 8:16 active undef running
`- 3:0:0:1 sds 65:32 active undef running
mpathk (3600507680280835a0800000000000267) dm-0 IBM,2145
size=500G features='1 queue_if_no_path' hwhandler='0' wp=rw
|-+- policy='round-robin 0' prio=0 status=active
| |- 1:0:0:0 sda 8:0 active undef running
| `- 3:0:0:0 sdn 8:208 active undef running

IBM Corporation May 10, 2018 10 | P a g e
`-+- policy='round-robin 0' prio=0 status=enabled
|- 1:0:1:0 sdf 8:80 active un def running
`- 3:0:1:0 sdu 65:64 active undef running
4. GlusterFS Overview According to Gluster.org, GlusterFS is a scalable, distributed file system that aggregates disk storage resources from multiple servers into a single global namespace. This is an open-source, POSIX compatible, technology that provides replication, quotas, geo-replication, snapshots, and allows optimization for different workloads. In addition, GlusterFS is scalable, handles thousands of clients, and can use any ondisk filesystem that supports extended attributes. In the next steps, we will show you how we installed and configured GlusterFS. At the time of our test, the only Linux distribution to offer GlusterFS through their respective distribution was Ubuntu 16.04 and 17.10. For the RHEL and SLES platforms on Linux for IBM z, they needed to be built. We decided to build GlusterFS version 3.12.3 on all three platforms.
[root@gltrlx01 ~]# glusterfs --version
glusterfs 3.12.3
Repository revision: git://git.gluster.org/glusterfs.git
Copyright (c) 2006-2016 Red Hat, Inc. <https://www.gluster.org/>
GlusterFS comes with ABSOLUTELY NO WARRANTY.
It is licensed to you under your choice of the GNU Lesser
General Public License, version 3 or any later version (LGPLv3
or later), or the GNU General Public License, version 2 (GPLv2),
in all cases as published by the Free Software Foundation.
gltrlx02:~ # glusterfs --version
glusterfs 3.12.3
…
root@gltrlx03:~# glusterfs --version
glusterfs 3.12.3
…
For further details on building GlusterFS on Linux for IBM z – https://github.com/linux-on-ibm-z/docs/wiki/Building-GlusterFS
GlusterFS Installation Dependencies Create a directory called /root/ GlusterFS_3.12.3 so that it can be the <source_root> for below. RHEL 7.4
[root@gltrlx01 ~]# ./ibm-yum.sh install wget git make gcc-c++ libaio-devel
boost-devel expat-devel autoconf autoheader automake libtool flex bison
openssl-devel libacl-devel sqlite-devel libxml2-devel python-devel python
attr yajl nfs-utils xfsprogs popt-static sysvinit-tools psmisc bc
IBM Corporation May 10, 2018 11 | P a g e
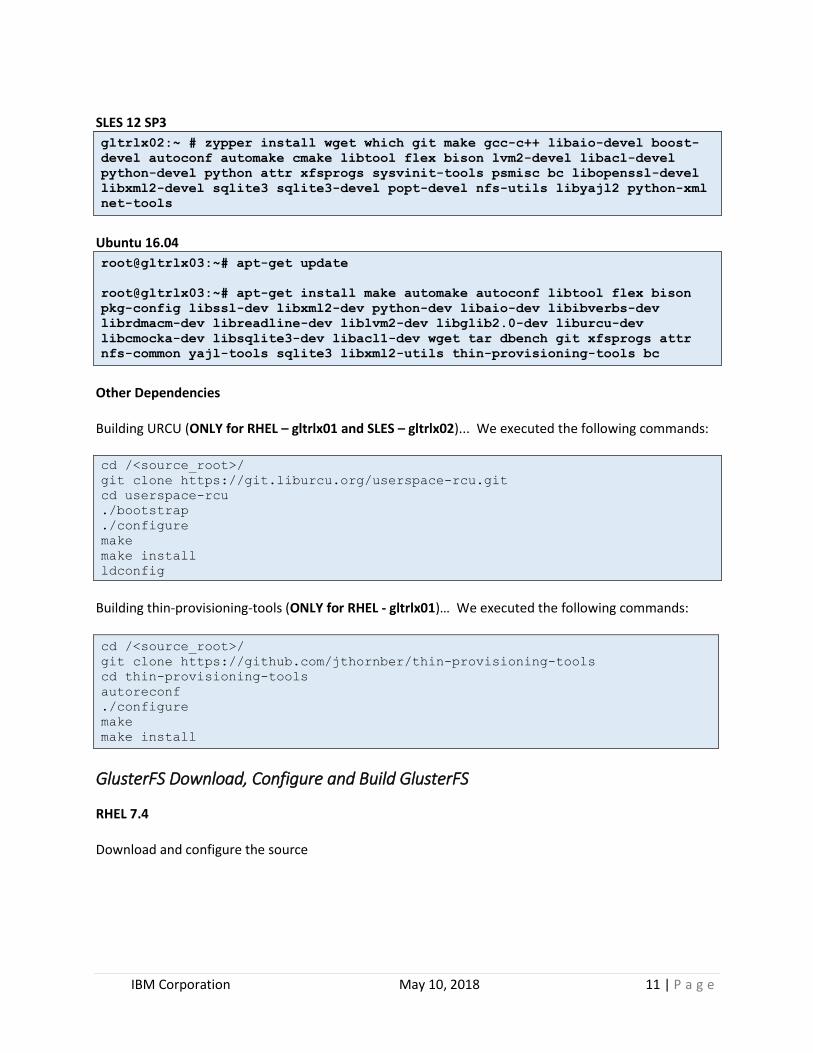
SLES 12 SP3
gltrlx02:~ # zypper install wget which git make gcc-c++ libaio-devel boost-
devel autoconf automake cmake libtool flex bison lvm2-devel libacl-devel
python-devel python attr xfsprogs sysvinit-tools psmisc bc libopenssl-devel
libxml2-devel sqlite3 sqlite3-devel popt-devel nfs-utils libyajl2 python-xml
net-tools
Ubuntu 16.04
root@gltrlx03:~# apt-get update
root@gltrlx03:~# apt-get install make automake autoconf libtool flex bison
pkg-config libssl-dev libxml2-dev python-dev libaio-dev libibverbs-dev
librdmacm-dev libreadline-dev liblvm2-dev libglib2.0-dev liburcu-dev
libcmocka-dev libsqlite3-dev libacl1-dev wget tar dbench git xfsprogs attr
nfs-common yajl-tools sqlite3 libxml2-utils thin-provisioning-tools bc
Other Dependencies Building URCU (ONLY for RHEL – gltrlx01 and SLES – gltrlx02)... We executed the following commands: cd /<source_root>/
git clone https://git.liburcu.org/userspace-rcu.git
cd userspace-rcu
./bootstrap
./configure
make
make install
ldconfig
Building thin-provisioning-tools (ONLY for RHEL - gltrlx01)… We executed the following commands:
cd /<source_root>/
git clone https://github.com/jthornber/thin-provisioning-tools
cd thin-provisioning-tools
autoreconf
./configure
make
make install
GlusterFS Download, Configure and Build GlusterFS
RHEL 7.4 Download and configure the source

IBM Corporation May 10, 2018 12 | P a g e
[root@gltrlx01 ~]# cd GlusterFS_3.12.3
[root@gltrlx01 GlusterFS_3.12.6]# git clone https://github.com/gluster/glusterfs
[root@gltrlx01 GlusterFS_3.12.6]# cd glusterfs/
[root@gltrlx01 glusterfs]# git checkout v3.12.3
[root@gltrlx01 glusterfs]# ./autogen.sh
[root@gltrlx01 glusterfs]# ./configure --enable-gnfs
Update rculist-extra.h (Only for RHEL)
[root@gltrlx01 glusterfs]# rm contrib/userspace-rcu/rculist-extra.h
rm: remove regular file ‘contrib/userspace-rcu/rculist-extra.h’? y
[root@gltrlx01 glusterfs]# cp /usr/local/include/urcu/rculist.h
contrib/userspace-rcu/rculist-extra.h
Build and Install
[root@gltrlx01 glusterfs]# make
[root@gltrlx01 glusterfs]# make install
Set environment variables
[root@gltrlx01 glusterfs]# export
LD_LIBRARY_PATH=/usr/local/lib:$LD_LIBRARY_PATH
[root@gltrlx01 glusterfs]# ldconfig
SLES 12 SP3 Download and configure the source
gltrlx02:~ # cd GlusterFS_3.12.3/
gltrlx02:~/GlusterFS_3.12.3 # git clone https://github.com/gluster/glusterfs
gltrlx02:~/GlusterFS_3.12.3 # cd glusterfs
gltrlx02:~/GlusterFS_3.12.3 # git checkout v3.12.3
gltrlx02:~/GlusterFS_3.12.3 # ./autogen.sh
gltrlx02:~/GlusterFS_3.12.3 # ./configure --enable-gnfs --disable-events

IBM Corporation May 10, 2018 13 | P a g e
Build and install
gltrlx02:~/GlusterFS_3.12.3 # make
gltrlx02:~/GlusterFS_3.12.3 # make install
Set environment variables
gltrlx02:~/GlusterFS_3.12.3 # export
LD_LIBRARY_PATH=/usr/local/lib:$LD_LIBRARY_PATH
gltrlx02:~/GlusterFS_3.12.3 # ldconfig
Ubuntu 16.04 Download and configure the source
root@gltrlx03:~# cd GlusterFS_3.12.3/
root@gltrlx03:~# git clone https://github.com/gluster/glusterfs
root@gltrlx03:~/GlusterFS_3.12.3# cd glusterfs/
root@gltrlx03:~/GlusterFS_3.12.3/glusterfs# git checkout v3.12.3
root@gltrlx03:~/GlusterFS_3.12.3/glusterfs# ./autogen.sh
root@gltrlx03:~/GlusterFS_3.12.3/glusterfs# ./configure --enable-gnfs
Build and install root@gltrlx03:~/GlusterFS_3.12.3/glusterfs# make
root@gltrlx03:~/GlusterFS_3.12.3/glusterfs# make install
Set environment variables
root@gltrlx03:~/GlusterFS_3.12.3/glusterfs# export
LD_LIBRARY_PATH=/usr/local/lib:$LD_LIBRARY_PATH
root@gltrlx03:~/GlusterFS_3.12.3/glusterfs# ldconfig
We can now run the command to display the gluster version that is installed on each host.
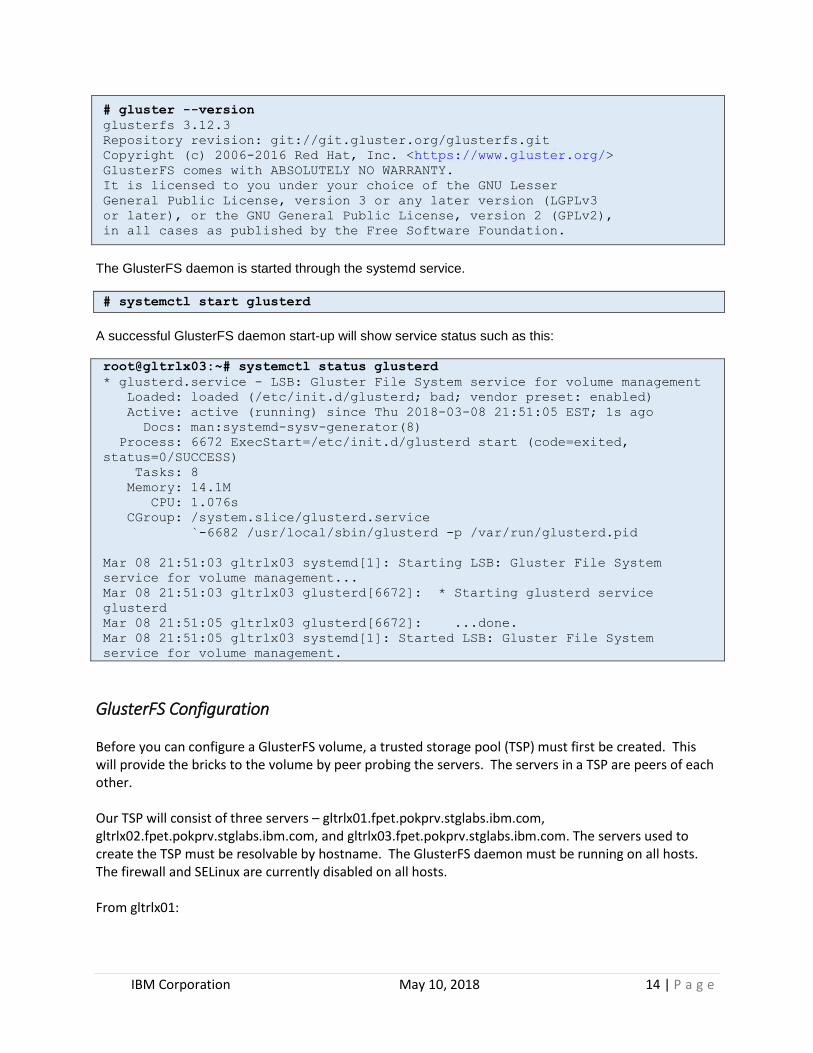
IBM Corporation May 10, 2018 14 | P a g e
# gluster --version
glusterfs 3.12.3
Repository revision: git://git.gluster.org/glusterfs.git
Copyright (c) 2006-2016 Red Hat, Inc. <https://www.gluster.org/>
GlusterFS comes with ABSOLUTELY NO WARRANTY.
It is licensed to you under your choice of the GNU Lesser
General Public License, version 3 or any later version (LGPLv3
or later), or the GNU General Public License, version 2 (GPLv2),
in all cases as published by the Free Software Foundation.
The GlusterFS daemon is started through the systemd service.
# systemctl start glusterd
A successful GlusterFS daemon start-up will show service status such as this: root@gltrlx03:~# systemctl status glusterd
* glusterd.service - LSB: Gluster File System service for volume management
Loaded: loaded (/etc/init.d/glusterd; bad; vendor preset: enabled)
Active: active (running) since Thu 2018-03-08 21:51:05 EST; 1s ago
Docs: man:systemd-sysv-generator(8)
Process: 6672 ExecStart=/etc/init.d/glusterd start (code=exited,
status=0/SUCCESS)
Tasks: 8
Memory: 14.1M
CPU: 1.076s
CGroup: /system.slice/glusterd.service
`-6682 /usr/local/sbin/glusterd -p /var/run/glusterd.pid
Mar 08 21:51:03 gltrlx03 systemd[1]: Starting LSB: Gluster File System
service for volume management...
Mar 08 21:51:03 gltrlx03 glusterd[6672]: * Starting glusterd service
glusterd
Mar 08 21:51:05 gltrlx03 glusterd[6672]: ...done.
Mar 08 21:51:05 gltrlx03 systemd[1]: Started LSB: Gluster File System
service for volume management.
GlusterFS Configuration Before you can configure a GlusterFS volume, a trusted storage pool (TSP) must first be created. This will provide the bricks to the volume by peer probing the servers. The servers in a TSP are peers of each other. Our TSP will consist of three servers – gltrlx01.fpet.pokprv.stglabs.ibm.com, gltrlx02.fpet.pokprv.stglabs.ibm.com, and gltrlx03.fpet.pokprv.stglabs.ibm.com. The servers used to create the TSP must be resolvable by hostname. The GlusterFS daemon must be running on all hosts. The firewall and SELinux are currently disabled on all hosts. From gltrlx01:

IBM Corporation May 10, 2018 15 | P a g e
[root@gltrlx01 ~]# gluster peer probe gltrlx02.fpet.pokprv.stglabs.ibm.com
peer probe: success.
[root@gltrlx01 ~]# gluster peer probe gltrlx03.fpet.pokprv.stglabs.ibm.com
peer probe: success.
From gltrlx02:
gltrlx02:/gluster/test # gluster peer probe gltrlx01
peer probe: success.
[root@gltrlx01 ~]# gluster peer probe gltrlx02
peer probe: success.
We can now view the peer status from any of the hosts and verify it is in the desired “Connected” state.
[root@gltrlx01 ~]# gluster peer status
Number of Peers: 2
Hostname: gltrlx02.fpet.pokprv.stglabs.ibm.com
Uuid: 5818306b-ffaf-419e-9b42-c7030d906294
State: Peer in Cluster (Connected)
Hostname: gltrlx03.fpet.pokprv.stglabs.ibm.com
Uuid: 8214d264-5972-40f6-94e9-954e53105693
State: Peer Rejected (Connected)
gltrlx02:~ # gluster peer status
Number of Peers: 2
Hostname: gltrlx01.fpet.pokprv.stglabs.ibm.com
Uuid: 80f5f062-d57d-4dd7-973f-f6d51e665a5b
State: Peer in Cluster (Connected)
Hostname: gltrlx03.fpet.pokprv.stglabs.ibm.com
Uuid: 8214d264-5972-40f6-94e9-954e53105693
State: Peer Rejected (Connected)
root@gltrlx03:~# gluster peer status
Number of Peers: 2
Hostname: gltrlx02.fpet.pokprv.stglabs.ibm.com
Uuid: 5818306b-ffaf-419e-9b42-c7030d906294
State: Peer Rejected (Connected)
Hostname: gltrlx01.fpet.pokprv.stglabs.ibm.com
Uuid: 80f5f062-d57d-4dd7-973f-f6d51e665a5b
State: Peer Rejected (Connected)
With the TSP established, we can proceed to setting up the storage. The volume is a logical collection of bricks where each brick is an export directory on the server in the TSP. Before we can create the volume, we needed to set up the bricks that will form the volume. As mentioned in the section above

IBM Corporation May 10, 2018 16 | P a g e
under System Resources - Storage - SCSI DASD, we had two LUNs attached to each host. The following steps were performed. 1) We created a physical volume (PV) from the two disks.
# pvcreate /dev/mapper/mpathk /dev/mapper/mpathl
Physical volume "/dev/mapper/mpathk" successfully created
Physical volume "/dev/mapper/mpathl" successfully created
2) We created a volume group (VG) from the PV.
# vgcreate gluster_vg /dev/mapper/mpathk /dev/mapper/mpathl
Volume group "gluster_vg" successfully created
3) We created a logical volume (LV) from the VG.
# lvcreate -L 500G -n gluster_lv gluster_vg
Logical volume "gluster_lv" created.
4) We formatted the volume using a supported file system such as ext4. # mkfs.ext4 -b 4096 /dev/mapper/gluster_vg-gluster_lv
mke2fs 1.42.9 (28-Dec-2013)
Filesystem label=
OS type: Linux
Block size=4096 (log=2)
Fragment size=4096 (log=2)
Stride=8 blocks, Stripe width=8 blocks
32768000 inodes, 131072000 blocks
6553600 blocks (5.00%) reserved for the super user
First data block=0
Maximum filesystem blocks=2279604224
4000 block groups
32768 blocks per group, 32768 fragments per group
8192 inodes per group
Superblock backups stored on blocks:
32768, 98304, 163840, 229376, 294912, 819200, 884736, 1605632,
2654208,
4096000, 7962624, 11239424, 20480000, 23887872, 71663616, 78675968,
102400000
Allocating group tables: done
Writing inode tables: done
Creating journal (32768 blocks): done
Writing superblocks and filesystem accounting information: done
5) These formatted bricks needed to be mounted. We created a mount point (/data/brick1) and made the mount permanent by adding to /etc/fstab.

IBM Corporation May 10, 2018 17 | P a g e
# mkdir -p /data/brick1
# echo '/dev/mapper/gluster_vg-gluster_lv /data/brick1 ext4 defaults 1 2' >>
/etc/fstab
# mount -a && mount
The brick should now be seen mounted on /data/brick1.
# df -h
Filesystem Size Used Avail Use% Mounted on
udev 6.8G 0 6.8G 0% /dev
tmpfs 1.4G 8.8M 1.4G 1% /run
/dev/mapper/ubuntu_vg-root 17G 15G 2.2G 87% /
tmpfs 6.8G 0 6.8G 0% /dev/shm
tmpfs 5.0M 0 5.0M 0% /run/lock
tmpfs 6.8G 0 6.8G 0% /sys/fs/cgroup
/dev/dasda1 473M 20M 429M 5% /boot
tmpfs 1.4G 0 1.4G 0% /run/user/0
gpfs1 3.0T 1.5T 1.6T 49% /gpfs
/dev/mapper/gluster_vg-gluster_lv 493G 70M 467G 1% /data/brick1
We can now create the GlusterFS volume. The GlusterFS storage environment offers various types of volumes. We chose the Replicated Volume which creates copies of files across multiple bricks in the volume. This can be done from any of the hosts.
# gluster volume create gv1 replica 3
gltrlx01.fpet.pokprv.stglabs.ibm.com:/data/brick1/gv1
gltrlx02.fpet.pokprv.stglabs.ibm.com:/data/brick1/gv1
gltrlx03.fpet.pokprv.stglabs.ibm.com:/data/brick1/gv1
volume create: gv1: success: please start the volume to access data
We started the GlusterFS volume and confirmed that the volume status shows ‘Started.’ # gluster volume start gv1
volume start: gv1: success
# gluster volume info
Volume Name: gv1
Type: Replicate
Volume ID: 4e741a75-da94-41bb-a615-04784bf930f7
Status: Started
Snapshot Count: 0
Number of Bricks: 1 x 3 = 3
Transport-type: tcp
Bricks:
Brick1: gltrlx01.fpet.pokprv.stglabs.ibm.com:/data/brick1/gv1
Brick2: gltrlx02.fpet.pokprv.stglabs.ibm.com:/data/brick1/gv1
Brick3: gltrlx03.fpet.pokprv.stglabs.ibm.com:/data/brick1/gv1
Lastly, the GlusterFS volume were mounted under our intended test directory (/glusterfs) on each host.

IBM Corporation May 10, 2018 18 | P a g e
[root@gltrlx01 ~]# mount -t glusterfs -o volume-name=replicate
gltrlx01.fpet.pokprv.stglabs.ibm.com:/gv1 /glusterfs/
[root@gltrlx01 ~]# df -h
Filesystem Size Used Avail Use% Mounted on
/dev/dasda1 3.9G 711M 3.3G 18% /
devtmpfs 32G 0 32G 0% /dev
tmpfs 32G 0 32G 0% /dev/shm
tmpfs 32G 8.6M 32G 1% /run
tmpfs 32G 0 32G 0%
/sys/fs/cgroup
/dev/mapper/rhel7_system-usr 3.0G 2.2G 763M 75% /usr
/dev/mapper/gluster_vg-gluster_lv 493G 73M 467G 1%
/data/brick1
/dev/mapper/rhel7_system-home 122M 6.7M 116M 6% /home
/dev/mapper/rhel7_system-opt 122M 6.7M 116M 6% /opt
/dev/mapper/rhel7_system-tmp 122M 6.7M 116M 6% /tmp
/dev/mapper/rhel7_system-var 17G 12G 5.0G 70% /var
tmpfs 6.3G 0 6.3G 0% /run/user/0
gpfs1 3.0T 1.5T 1.6T 49% /gpfs
gltrlx03.fpet.pokprv.stglabs.ibm.com:/gv1 493G 73M 467G 1% /glusterfs
gltrlx02:~ # mount -t glusterfs -o volume-name=replicate
gltrlx02.fpet.pokprv.stglabs.ibm.com:/gv1 /glusterfs/
gltrlx02:~ # df -h
Filesystem Size Used Avail Use% Mounted on
devtmpfs 6.9G 0 6.9G 0% /dev
tmpfs 6.9G 0 6.9G 0% /dev/shm
tmpfs 6.9G 9.9M 6.9G 1% /run
tmpfs 6.9G 0 6.9G 0%
/sys/fs/cgroup
/dev/mapper/system-root 27G 6.4G 19G 26% /
/dev/dasdb1 6.9G 3.3G 3.3G 50%
/var/lib/docker
/dev/mapper/gluster_vg-gluster_lv 493G 70M 467G 1%
/data/brick1
/dev/dasda1 194M 49M 136M 27% /boot/zipl
tmpfs 1.4G 0 1.4G 0% /run/user/0
gpfs1 3.0T 1.5T 1.6T 49% /gpfs
gltrlx03.fpet.pokprv.stglabs.ibm.com:/gv1 493G 73M 467G 1% /glusterfs
root@gltrlx03:~# mount -t glusterfs -o volume-name=replicate
gltrlx03.fpet.pokprv.stglabs.ibm.com:/gv1 /glusterfs/
root@gltrlx03:~# df -h
Filesystem Size Used Avail Use% Mounted on
udev 6.8G 0 6.8G 0% /dev
tmpfs 1.4G 8.8M 1.4G 1% /run
/dev/mapper/ubuntu_vg-root 17G 15G 2.2G 87% /
tmpfs 6.8G 0 6.8G 0% /dev/shm
tmpfs 5.0M 0 5.0M 0% /run/lock
tmpfs 6.8G 0 6.8G 0%
/sys/fs/cgroup
/dev/dasda1 473M 20M 429M 5% /boot
tmpfs 1.4G 0 1.4G 0% /run/user/0
gpfs1 3.0T 1.5T 1.6T 49% /gpfs

IBM Corporation May 10, 2018 19 | P a g e
/dev/mapper/gluster_vg-gluster_lv 493G 70M 467G 1%
/data/brick1
gltrlx03.fpet.pokprv.stglabs.ibm.com:/gv1 493G 73M 467G 1% /glusterfs
5. Deploying Db2 Running on a Docker Container
Db2 Installation Pre-requisites Db2 pre-reqs to build base image running on RHEL: Within the Docker container, we first set the library path. Next, we installed packages as well as setup softlinks as listed below.
export LD_LIBRARY_PATH=/opt/ibm/lib64:/usr/lib64:/opt/ibm/lib:/usr/lib
yum install /db2/images/rhel/rpms/libxlc-1.2.0.0-151119a.s390x.rpm -y
yum install /db2/compat-libstdc++-33-3.2.3-71.el7.s390x.rpm -y
yum install libaio* -y
ln -s /opt/ibm/lib64/libibmc++.so.1 /usr/lib64/libibmc++.so.1
ln -s /opt/ibm/lib64/libibmc++.so.1 /usr/lib/libibm
Db2 Installation and Configuration Since at the time, there was no official Db2 Docker image, our team built it from scratch. Our Docker image contained Db2 running on RHEL, and it was the same image we used to test on all three servers. There is no particular reason why we chose RHEL. To begin, we created a basic Docker image, and then we applied the Db2 pre-requisites, which are shown on the previous section, to the base image. Once we had an image with the corresponding Db2 pre-requisites, we then installed Db2 and the BDI workload, which we used to load data into the database. Once all our components were installed and configured, we saved our final image and used it to create Db2 Docker containers that were utilized for our tests. Note: an official Docker Db2 image for Linux on System z was released on February 5, 2018. You can download it from: https://store.docker.com/images/db2-developer-c-edition. We didn’t include it in this document as it wasn’t available when we started this project. Feel free to use that image or create your own image.
Deployment on RHEL
After we created a final Docker Db2 image, we were able to deploy our Db2 image anytime we needed to test. And, we called this image, the rhel-db2-loaded. To run and access the container, we executed the following commands:
[root@gltrlx01 ~]# docker run -it --privileged=true -d -v /glusterfs:/db2 --
name gltrlx01 rhel-db2-loaded:version1
cfd43f6d20ad97799f0fc2091b7f4743d72ab84be7fe6426bfe40beca5891e69
[root@gltrlx01 ~]# docker ps
IBM Corporation May 10, 2018 20 | P a g e
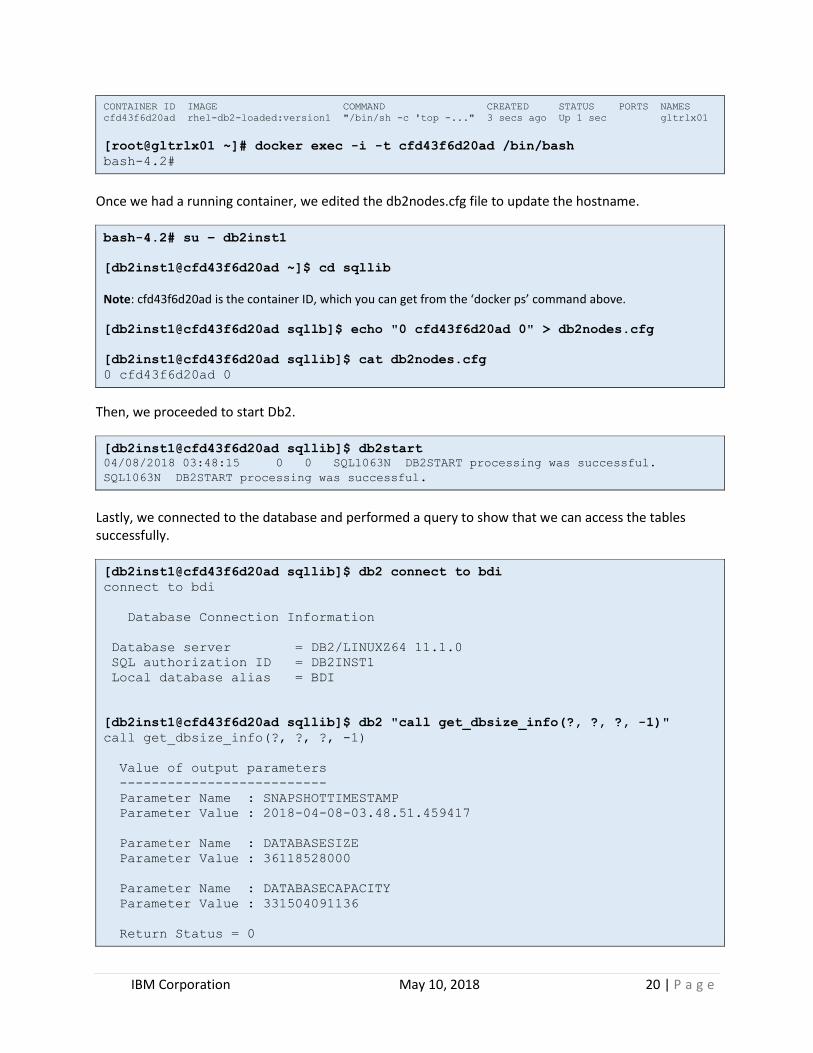
CONTAINER ID IMAGE COMMAND CREATED STATUS PORTS NAMES
cfd43f6d20ad rhel-db2-loaded:version1 "/bin/sh -c 'top -..." 3 secs ago Up 1 sec gltrlx01
[root@gltrlx01 ~]# docker exec -i -t cfd43f6d20ad /bin/bash
bash-4.2#
Once we had a running container, we edited the db2nodes.cfg file to update the hostname.
bash-4.2# su – db2inst1
[db2inst1@cfd43f6d20ad ~]$ cd sqllib
Note: cfd43f6d20ad is the container ID, which you can get from the ‘docker ps’ command above.
[db2inst1@cfd43f6d20ad sqllb]$ echo "0 cfd43f6d20ad 0" > db2nodes.cfg
[db2inst1@cfd43f6d20ad sqllib]$ cat db2nodes.cfg
0 cfd43f6d20ad 0
Then, we proceeded to start Db2.
[db2inst1@cfd43f6d20ad sqllib]$ db2start
04/08/2018 03:48:15 0 0 SQL1063N DB2START processing was successful.
SQL1063N DB2START processing was successful.
Lastly, we connected to the database and performed a query to show that we can access the tables successfully.
[db2inst1@cfd43f6d20ad sqllib]$ db2 connect to bdi
connect to bdi
Database Connection Information
Database server = DB2/LINUXZ64 11.1.0
SQL authorization ID = DB2INST1
Local database alias = BDI
[db2inst1@cfd43f6d20ad sqllib]$ db2 "call get_dbsize_info(?, ?, ?, -1)"
call get_dbsize_info(?, ?, ?, -1)
Value of output parameters
--------------------------
Parameter Name : SNAPSHOTTIMESTAMP
Parameter Value : 2018-04-08-03.48.51.459417
Parameter Name : DATABASESIZE
Parameter Value : 36118528000
Parameter Name : DATABASECAPACITY
Parameter Value : 331504091136
Return Status = 0

IBM Corporation May 10, 2018 21 | P a g e
Deployment on SLES To run and access the container, we executed the following commands:
gltrlx02:~ # docker run -it --privileged=true -d -v /glusterfs:/db2 --name
gltrlx02 rhel-db2-loaded:version1
76ff54e4caff8f2f4abc7a17dc85be1fe0927685315867777f07182129dab462
gltrlx02:~ # docker ps CONTAINER ID IMAGE COMMAND CREATED STATUS PORTS NAMES
76ff54e4caff rhel-db2-loaded:version1 "/bin/sh -c 'top -..." 9 secs ago Up 8 secs gltrlx02
gltrlx02:~ # docker exec -i -t 76ff54e4caff /bin/bash
bash-4.2#
Once we had a running container, we edited the db2nodes.cfg file to update the hostname.
bash-4.2# su - db2inst1
[db2inst1@76ff54e4caff ~]$ cd /home/db2inst1/sqllib/
Note: 76ff54e4caff is the container ID, which you can get from the ‘docker ps’ command above.
[db2inst1@76ff54e4caff sqllib]$ echo "0 76ff54e4caff 0" > db2nodes.cfg
[db2inst1@76ff54e4caff sqllib]$ cat db2nodes.cfg
0 76ff54e4caff 0
Then, we proceeded to start Db2.
[db2inst1@76ff54e4caff sqllib]$ db2start
04/08/2018 03:53:02 0 0 SQL1063N DB2START processing was successful.
SQL1063N DB2START processing was successful.
Lastly, we connected to the database and performed a query to ensure that the database was accessible successfully.
[db2inst1@76ff54e4caff sqllib]$ db2 connect to
connect to bdi
Database Connection Information
Database server = DB2/LINUXZ64 11.1.0
SQL authorization ID = DB2INST1
Local database alias = BDI
[db2inst1@76ff54e4caff sqllib]$ db2 "call get_dbsize_info(?, ?, ?, -1)"
call get_dbsize_info(?, ?, ?, -1)

IBM Corporation May 10, 2018 22 | P a g e
Value of output parameters
--------------------------
Parameter Name : SNAPSHOTTIMESTAMP
Parameter Value : 2018-04-08-03.53.50.673414
Parameter Name : DATABASESIZE
Parameter Value : 36118528000
Parameter Name : DATABASECAPACITY
Parameter Value : 331504091136
Return Status = 0
Deployment on Ubuntu To run and access the container, we executed the following commands:
root@gltrlx03:~# docker run -it --privileged=true -d -v /glusterfs:/db2 --
name gltrlx03 rhel-db2-loaded:version1
210d8edc4d6bca54357e4c5d1f3a144f8dc5e76fbaf594693dba8caaae2b7676
root@gltrlx03:~# docker ps CONTAINER ID IMAGE COMMAND CREATED STATUS PORTS NAMES
210d8edc4d6b rhel-db2-loaded:version1 "/bin/sh -c 'top -b'" 6 secs ago Up 6 secs gltrlx03
root@gltrlx03:~# docker exec -i -t 210d8edc4d6b /bin/bash
bash-4.2#
Once we had a running container, we edited the db2nodes.cfg file to update the hostname.
bash-4.2# su - db2inst1
[db2inst1@210d8edc4d6b ~]$ cd /home/db2inst1/sqllib/
Note: 210d8edc4d6b is the container ID, which you can get from the ‘docker ps’ command above. [db2inst1@210d8edc4d6b sqllib]$ echo "0 210d8edc4d6b 0" > db2nodes.cfg
[db2inst1@210d8edc4d6b sqllib]$ cat db2nodes.cfg
0 210d8edc4d6b 0
Then, we proceeded to start Db2.
[db2inst1@210d8edc4d6b sqllib]$ db2start
04/08/2018 03:57:57 0 0 SQL1063N DB2START processing was successful.
SQL1063N DB2START processing was successful.
Lastly, we connected to the database and performed a query to ensure that the database was accessible successfully.
[db2inst1@210d8edc4d6b sqllib]$ db2 connect to bdi
connect to bdi

IBM Corporation May 10, 2018 23 | P a g e
Database Connection Information
Database server = DB2/LINUXZ64 11.1.0
SQL authorization ID = DB2INST1
Local database alias = BDI
[db2inst1@210d8edc4d6b sqllib]$ db2 "call get_dbsize_info(?, ?, ?, -1)"
call get_dbsize_info(?, ?, ?, -1)
Value of output parameters
--------------------------
Parameter Name : SNAPSHOTTIMESTAMP
Parameter Value : 2018-04-08-03.58.06.617954
Parameter Name : DATABASESIZE
Parameter Value : 36118528000
Parameter Name : DATABASECAPACITY
Parameter Value : 331504091136
Return Status = 0
Workload Setup For Db2, we used an internal tool called BDI to load about 1TB of data into the LUNs.
6. Deploying MongoDB Running on a Docker Container
Introduction MongoDB is an open source NoSQL database, which has quickly become one of the most popular and widely used databases. MongoDB is considered a developer friendly database that has native drivers in nearly every programming language and provides highly flexible data schemas. These factors have made it a very popular data store for new workloads, particularly for web and mobile applications. Testing MongoDB as one of the databases proves the Docker database use case works beyond the standard SQL setup.
MongoDB Installation and Configuration Getting MongoDB running on Docker in s390x is a simple process. There is a pre-built Docker image for MongoDB available on the public Docker hub: https://hub.docker.com/r/sinenomine/mongodb-s390x/. The image is maintained by Sine Nomine Associates, an IT research company leading the development of new Docker containers for the Linux on System z platform. There is also a Dockerfile for the official MongoDB image that could be adapted for an s390x and used in a production deployment. For the scope of this paper, the default MongoDB configuration was used. For a full production MongoDB implementation, additional parameters and configurations would need to be applied.

IBM Corporation May 10, 2018 24 | P a g e
To preserve the data across Docker hosts, GlusterFS is used as the clustered storage system. Each time a MongoDB instance is brought up on a different Docker host, the same GlusterFS volume is attached as the MongoDB data container. In addition to the data volume, GlusterFS was used to provide a consistent copy of the MongoDB configuration file. This configuration file is the way to change the settings and optimize the MongoDB cluster. It makes sense setting to share this same configuration across all the MongoDB hosts so this is included as part of the shared cluster. The mongo.conf file used in this example is given below. The only parameter that needed to be set for this use case was ‘dbPath’. This configuration parameter defines the location where MongoDB will store the database information. The disk volume that is mounted to the docker container will be mounted to the root of the ‘dbPath.’ Mongo.conf Below is what our mongo.conf looked like:
# Mongo.conf
# where to write logging data.
systemLog:
destination: file
logAppend: true
path: /mongodb/data/mongodb.log
storage:
dbPath: /mongodb/data
journal:
enabled: true
wiredTiger:
engineConfig:
cacheSizeGB: 25.0
# how the process runs
processManagement:
fork: false # fork and run in background
# network interfaces
net:
port: 27017
Workload Setup The purpose of these tests is to confirm that MongoDB can run and relocate as a Docker container with GlusterFS providing the network attached data volumes. This requires that the Docker MongoDB container can be relocated to different Docker hosts without losing data. In order to test this and properly demonstrate the results, 2 different workloads will be run. The primary workload that will be run is YCSB (Yahoo Cloud Serving Benchmark). This is an industry standard benchmark for NoSQL databases and provides a stable high scale data driver for MongoDB. YCSB will be used to load approximately 100GB of data into a MongoDB database and then run update/read operations on that data. The second workload that will be used is a simple, home-grown MongoDB data insertion tool. This tool was created specifically to validate insertions and insertion order into a MongoDB database. This workload will be considered the ‘validation workload’ for the rest of the MongoDB testing. The validation workload uses the PyMongo driver to insert an instance of a JSON dataset once every

IBM Corporation May 10, 2018 25 | P a g e
predetermined amount of time. In this test, the data set is a list of JEOPARDY! questions and answers, and a new instance is added every .25 seconds. In addition, a data field for current date and time is added to each record on insertion. This simple tool makes it easy to validate the last item inserted before transfer is present when the database is brought back up on the new Docker Host.
7. PostgreSQL Installation and Configuration PostgreSQL Installation and Configuration The PostgreSQL image used by our test was pulled from Docker Hub - s390x/postgres. Details can be found from the web page https://hub.docker.com/r/s390x/postgres/. The default PostgreSQL port 5432 was exposed and used in our testing. We continued to use the default user named ‘postgres’ which is granted superuser authority. Instead of using the default database name ‘postgres’, we created our own database called ‘glusterdb’. The PostgreSQL container instance will use a GlusterFS volume mounted under each host as the data directory. This is achieved by starting the container with the bind-mount flag (-v) which in our case consists of two fields – the path to the GlusterFS mounted directory and the path where the directory is mounted in the container. As an example, the PostgreSQL container is started like so:
# docker run --name glusterfs-postgres --volume-driver glusterfs -e
POSTGRES_PASSWORD=mysecretpassword -d -v
/glusterfs/postgres:/var/lib/postgresql/data -p 5432:5432 s390x/postgres
The path /glusterfs/postgres is our host mounted directory. The path /var/lib/postgresql/data is the continaer mounted directory.
Workload Setup We used an in-house Scala-based data generation tool with a Web front-end called Big File Generator. This writes data into PostgreSQL with the PostgreSQL JDBC driver. For this round of testing with GlusterFS, we populated the database ‘glusterdb’ across three tables named glustertable, glustertable2, and glustertable3:
glusterdb=# \dt
List of relations
Schema | Name | Type | Owner
--------+---------------+-------+----------
public | glustertable | table | postgres
public | glustertable2 | table | postgres
public | glustertable3 | table | postgres
public | mytable | table | postgres
(4 rows)
In each of the tables, we have three columns defined as birthday, first, and last. When we first attempted to populate the tables using the BFG tool, we encountered a number of exceptions such as the following:

IBM Corporation May 10, 2018 26 | P a g e
ERROR : org.postgresql.util.PSQLException: ERROR: unexpected data beyond EOF
in block 1460 of relation base/12993/16387
Hint: This has been seen to occur with buggy kernels; consider updating
your system.
This prevented us from bulk loading a large amount of records into the tables. After investigating, we found that if the following volume options are turned off, the BFG tool will run to completion without any errors: performance.write-behind: off
performance.open-behind: off
To turn off these gluster volume options on gv1:
1) Stop the GlusterFS volume
# gluster volume stop gv1
2) Set the GlusterFS volume options
# gluster volume set gv1 performance.open-behind off
volume set: success
# gluster volume set gv1 performance.write-behind off
volume set: success
3) View the GlusterFS volume info

IBM Corporation May 10, 2018 27 | P a g e
# gluster volume info
Volume Name: gv0
Type: Replicate
Volume ID: 28d53969-9d94-491b-82ac-cc2d42a070e3
Status: Stopped
Snapshot Count: 0
Number of Bricks: 1 x 3 = 3
Transport-type: tcp
Bricks:
Brick1: gltrlx01.fpet.pokprv.stglabs.ibm.com:/data/brick1/gv0
Brick2: gltrlx02.fpet.pokprv.stglabs.ibm.com:/data/brick1/gv0
Brick3: gltrlx03.fpet.pokprv.stglabs.ibm.com:/data/brick1/gv0
Volume Name: gv1
Type: Replicate
Volume ID: 4e741a75-da94-41bb-a615-04784bf930f7
Status: Stopped
Snapshot Count: 0
Number of Bricks: 1 x 3 = 3
Transport-type: tcp,rdma
Bricks:
Brick1: gltrlx01.fpet.pokprv.stglabs.ibm.com:/data/brick1/gv1
Brick2: gltrlx02.fpet.pokprv.stglabs.ibm.com:/data/brick1/gv1
Brick3: gltrlx03.fpet.pokprv.stglabs.ibm.com:/data/brick1/gv1
Options Reconfigured:
performance.write-behind: off
performance.open-behind: off
4) Start the GlusterFS volume
# gluster volume start gv1
Now that the new volume options are defined, we successfully loaded the database ‘glusterdb’ with approximately 124 GB worth of data at the start of our testing.
glusterdb=# SELECT pg_size_pretty(pg_database_size('glusterdb')) As
fulldbsize;
fulldbsize
------------
124 GB
(1 row)
8. Relocation Tests
Db2 Relocation Test In this test, we deployed a Docker container with Db2 on GLTRLX01 - RHEL. Then, we made sure that the database was operational. Later, we shut down the database and stopped the container. Next, we deployed a Docker container on GLTRLX02 – SLES - and verified that the database was operational.

IBM Corporation May 10, 2018 28 | P a g e
Lastly, we deployed a Docker container on GLTRLX03 – Ubuntu - and verified that the database was operational. RHEL Deployment and Verification To begin our test, we started by deploying a Db2 Docker container, which we called rhel73_reloc.
[root@gltrlx01 ~]# docker run -it --privileged=true -d -v /glusterfs:/db2 --
name gltrlx01 rhel-db2-loaded:version1
cfd43f6d20ad97799f0fc2091b7f4743d72ab84be7fe6426bfe40beca5891e69
Next, we checked that the container was, in fact, created:
[root@gltrlx01 ~]# docker ps CONTAINER ID IMAGE COMMAND CREATED STATUS PORTS NAMES
cfd43f6d20ad rhel-db2-loaded:version1 "/bin/sh -c 'top -..." 3 secs ago Up 1 sec gltrlx01
Then, we accessed the container and checked that Db2 was operational.
Started the Db2 Docker container:
[root@gltrlx01 ~]# docker exec -i -t cfd43f6d20ad /bin/bash
bash-4.2#
bash-4.2# su – db2inst1
Updated the db2nodes.cfg file with the container hostname:
[db2inst1@cfd43f6d20ad ~]$ cd sqllib
[db2inst1@cfd43f6d20ad sqllb]$ echo "0 cfd43f6d20ad 0" > db2nodes.cfg
[db2inst1@cfd43f6d20ad sqllib]$ cat db2nodes.cfg
0 cfd43f6d20ad 0
Started Db2:
[db2inst1@cfd43f6d20ad sqllib]$ db2start
04/08/2018 03:48:15 0 0 SQL1063N DB2START processing was successful.
SQL1063N DB2START processing was successful.
Connected to the database and ran a query to ensure the database was operational: [db2inst1@cfd43f6d20ad sqllib]$ db2 connect to bdi
connect to bdi
Database Connection Information
Database server = DB2/LINUXZ64 11.1.0
SQL authorization ID = DB2INST1
Local database alias = BDI
[db2inst1@cfd43f6d20ad sqllib]$ db2 "call get_dbsize_info(?, ?, ?, -1)"

IBM Corporation May 10, 2018 29 | P a g e
call get_dbsize_info(?, ?, ?, -1)
Value of output parameters
--------------------------
Parameter Name : SNAPSHOTTIMESTAMP
Parameter Value : 2018-04-08-03.48.51.459417
Parameter Name : DATABASESIZE
Parameter Value : 36118528000
Parameter Name : DATABASECAPACITY
Parameter Value : 331504091136
Return Status = 0
Next, we gracefully shutdown the database and stop the container on gltrlx01 so that we can relocate the database to gltrlx02.
[db2inst1@cfd43f6d20ad sqllib]$ db2 force applications all
force applications all
DB20000I The FORCE APPLICATION command completed successfully.
DB21024I This command is asynchronous and may not be effective immediately.
[db2inst1@cfd43f6d20ad sqllib]$ db2 terminate
terminate
DB20000I The TERMINATE command completed successfully.
[db2inst1@cfd43f6d20ad sqllib]$ db2stop
04/08/2018 03:49:22 0 0 SQL1064N DB2STOP processing was successful.
SQL1064N DB2STOP processing was successful.
[db2inst1@cfd43f6d20ad sqllib]$ exit
Logout
bash-4.2# exit
exit
[root@gltrlx01 ~]# docker container stop cfd43f6d20ad
cfd43f6d20ad
[root@gltrlx01 ~]# docker ps CONTAINER ID IMAGE COMMAND CREATED STATUS PORTS NAMES
[root@gltrlx01 ~]#
SLES Relocation and Verification We deployed a Db2 Docker container, which we called rhel73_reloc.
gltrlx02:~ # docker run -it --privileged=true -d -v /glusterfs:/db2 --name
gltrlx02 rhel-db2-loaded:version1
76ff54e4caff8f2f4abc7a17dc85be1fe0927685315867777f07182129dab462
Next, we checked to see if the container was, in fact, created.

IBM Corporation May 10, 2018 30 | P a g e
gltrlx02:~ # docker ps CONTAINER ID IMAGE COMMAND CREATED STATUS PORTS NAMES
76ff54e4caff rhel-db2-loaded:version1 "/bin/sh -c 'top -..." 9 secs ago Up 8 secs gltrlx02
Then, we accessed the container and checked that Db2 was operational.
Started the Db2 Docker container:
gltrlx02:~ # docker exec -i -t 781d15b35503 /bin/bash
bash-4.2# su - db2inst1
Last login: Mon Nov 20 15:23:38 UTC 2017 on pts/4
Updated the db2nodes.cfg file with the container hostname:
[db2inst1@781d15b35503 ~]$ cd /home/db2inst1/sqllib/
[db2inst1@781d15b35503 sqllib]$ echo "0 781d15b35503 0" > db2nodes.cfg
[db2inst1@781d15b35503 sqllib]$ cat db2nodes.cfg
0 781d15b35503 0
Started Db2:
[db2inst1@781d15b35503 sqllib]$ db2start
01/23/2018 05:41:42 0 0 SQL1063N DB2START processing was
successful.
SQL1063N DB2START processing was successful.
Connected to the database and ran a query to ensure the database was operational: [db2inst1@781d15b35503 sqllib]$ db2 connect to bdi
connect to bdi
Database Connection Information
Database server = DB2/LINUXZ64 11.1.0
SQL authorization ID = DB2INST1
Local database alias = BDI
[db2inst1@781d15b35503 sqllib]$ db2 "call get_dbsize_info(?, ?, ?, -1)"
call get_dbsize_info(?, ?, ?, -1)
Value of output parameters
--------------------------
Parameter Name : SNAPSHOTTIMESTAMP
Parameter Value : 2018-02-26-17.55.25.494658
Parameter Name : DATABASESIZE
Parameter Value : 219257044992
Parameter Name : DATABASECAPACITY
Parameter Value : 1880903581696
Return Status = 0

IBM Corporation May 10, 2018 31 | P a g e
Next, we gracefully shutdown the database and stopped the container on gltrlx02 so that we can relocate the database to gltrlx03.
[db2inst1@76ff54e4caff sqllib]$ db2 force applications all
force applications all
DB20000I The FORCE APPLICATION command completed successfully.
DB21024I This command is asynchronous and may not be effective immediately.
[db2inst1@76ff54e4caff sqllib]$ db2 terminate
terminate
DB20000I The TERMINATE command completed successfully.
[db2inst1@76ff54e4caff sqllib]$ db2stop
04/08/2018 03:54:22 0 0 SQL1064N DB2STOP processing was successful.
SQL1064N DB2STOP processing was successful.
[db2inst1@76ff54e4caff sqllib]$ exit
Logout
bash-4.2# exit
exit
gltrlx02:~ # docker container stop 76ff54e4caff
76ff54e4caff
gltrlx02:~ # docker ps CONTAINER ID IMAGE COMMAND CREATED STATUS PORTS NAMES
gltrlx02:~ #
Ubuntu Relocation and Verification We deployed a Db2 Docker container, which we called rhel73_reloc.
root@gltrlx03:~# docker run -it --privileged=true -d -v /glusterfs:/db2 --
name gltrlx03 rhel-db2-loaded:version1
210d8edc4d6bca54357e4c5d1f3a144f8dc5e76fbaf594693dba8caaae2b7676
Next, we checked that the container was, in fact, created.
root@gltrlx03:~# docker ps CONTAINER ID IMAGE COMMAND CREATED STATUS PORTS NAMES
210d8edc4d6b rhel-db2-loaded:version1 "/bin/sh -c 'top -b'" 6 secs ago Up 6 secs gltrlx03
Then, we accessed the container and checked that Db2 was operational.
Started the Db2 Docker container:
root@gltrlx03:~# docker exec -i -t 210d8edc4d6b /bin/bash
bash-4.2# su - db2inst1
Updated the db2nodes.cfg file with the container hostname:

IBM Corporation May 10, 2018 32 | P a g e
[db2inst1@210d8edc4d6b ~]$ cd /home/db2inst1/sqllib/
[db2inst1@210d8edc4d6b sqllib]$ echo "0 210d8edc4d6b 0" > db2nodes.cfg
[db2inst1@210d8edc4d6b sqllib]$ cat db2nodes.cfg
0 210d8edc4d6b 0
Started Db2:
[db2inst1@210d8edc4d6b sqllib]$ db2start
04/08/2018 03:57:57 0 0 SQL1063N DB2START processing was successful.
SQL1063N DB2START processing was successful.
Connected to the database and ran a query to ensure the database was operational: [db2inst1@210d8edc4d6b sqllib]$ db2 connect to bdi
connect to bdi
Database Connection Information
Database server = DB2/LINUXZ64 11.1.0
SQL authorization ID = DB2INST1
Local database alias = BDI
[db2inst1@210d8edc4d6b sqllib]$ db2 "call get_dbsize_info(?, ?, ?, -1)"
call get_dbsize_info(?, ?, ?, -1)
Value of output parameters
--------------------------
Parameter Name : SNAPSHOTTIMESTAMP
Parameter Value : 2018-04-08-03.58.06.617954
Parameter Name : DATABASESIZE
Parameter Value : 36118528000
Parameter Name : DATABASECAPACITY
Parameter Value : 331504091136
Return Status = 0
At this point, to relocate the Db2 database running on Ubuntu (gltrlx03) back to RHEL (gltrlx01), you would gracefully shutdown the database, stop the container, and then follow the same deployment steps shown above for RHEL (gltrlx01).
MongoDB Relocation Test
MongoDB Test Procedure The test procedure is straightforward, easily reproducible, and require very little setup. Steps 1 through 5 are only for the initial MongoDB container instance and steps 6 through 10 are for each time the MongoDB container is relocated to a different Docker host. The steps are as follows:

IBM Corporation May 10, 2018 33 | P a g e
1. Start a MongoDB instance with a GlusterFS volume attached as the data directory 2. Load the Database with about 100GB of data (100,000,000 1K records) using YCSB 3. Run the YCSB read/update workload against the newly added data 4. Start the validation workload, which is adding 4 new timestamped records per second 5. Capture the state of the MongoDB instance and shutdown MongoDB 6. Bring up the MongoDB Docker container on a different Docker host, using the same GlusterFS
volume as the data directory 7. Validate the YCSB and validation workload records are on the relocated MongoDB instance, and
compare the data before relocation 8. Restart the YCSB workload 9. Restart the validation workload 10. Capture the state of the MongoDB instance and shutdown MongoDB 11. Repeat steps 6-10 for each relocation instance.
In this test scenario, there were three Docker hosts gltrlx01, gltrlx02 and gltrlx03. The workload was initialized on gltrlx01, relocated to gltrlx02, then from there relocated to gltrlx03. Finally, the Docker container was relocated back to gltrlx01. After each relocation, the data MongoDB state was captured, and the workloads were verified to be running.
MongoDB Results The process of verifying the results followed steps 6 – 10 of the procedure, above. The process involved capturing the state of the node twice for each MongoDB instance. First, the workloads were run, and the state of the cluster and the database was captured before shutdown. Then when the database was brought back up on a different Docker host, that data was verified to be the same as it was at shutdown time on the previous Docker host. This was repeated for MongoDB instances on Docker hosts 12, 23, and finally 31. MongoDB 1 to MongoDB 2 Verification
MongoDB Instance 1: Start the container.
‘docker run -it -d -v /glusterfs/mongo:/mongodb/data -v
/glusterfs/mongo/mongod.conf:/etc/mongod.conf -p 27017:27017 -p 28017:28107
--name mongodb sinenomine/mongodb-s390x’
Initial data load: This is the information about the data on the initial instance of MongoDB. This output format will be repeated for each instance to prove the validity of the data during transfer.
YCSB
ycsb.control: 108.8 GB (113.2 GB)
YCSB Record Count:
100000000
Verification Database: verification.jeopardy: 892.3 kB (392.0 kB)
Verification Record Count:
3027
Beginning server shutdown:

IBM Corporation May 10, 2018 34 | P a g e
Shutting down the MongoDB instance will automatically stop the running container.
# Stop the Mongo instance on the running container safely
## Access the mongo instance
docker exec -i -t <docker-id> /bin/bash
## Go into the mongo shell
mongo
## Inside the mongo shell
use admin
db.shutdownServer()
MongoDB instance 2: Start a new mongo container on the second Docker host, mounting the same volume to the Docker directory.
‘docker run -it -d -v /glusterfs/mongo:/mongodb/data -v
/glusterfs/mongo/mongod.conf:/etc/mongod.conf -p 27017:27017 -p 28017:28107
--name mongodb sinenomine/mongodb-s390x’
Verification: Verify that the same amount of data is in both DB instances on this MongoDB instance, as was in the MongoDB instance when it was turned off.
YCSB
ycsb.control: 108.8 GB (113.2 GB)
YCSB Record Count:
100000000
Verification Database verification.jeopardy: 892.3 kB (440.0 kB)
Verification Record Count:
3027
YCSB Data Run Test: Instance 2. Verifying the YCSB workload is still able to run using the data that was loaded on instance 1. Abridged YCSB workload run results.
[READ], Operations, 5007.0
[UPDATE], Operations, 4993.0
MongoDB 2 to MongoDB 3 Verification
Instance 2: Shutdown. The YCSB run process is stopped, the verification database is reloaded with new data and continues to run while the shutdown takes place.
# Check the state of the cluster before stopping
ycsb.control: 108.8 GB (113.2 GB)
YCSB Record Count:
100000000
Verification Database: verification.jeopardy: 1.6 MB (756.0 kB)
Verification Record Count:

IBM Corporation May 10, 2018 35 | P a g e
5539
Beginning server shutdown:
# Shutdown the Database
# Stop the Mongo instance on the running container safely
## Access the MongoDB instance
docker exec -i -t <docker-id> /bin/bash
## Go into the mongo shell
mongo
## Inside the mongo shell
use admin
db.shutdownServer()
MongoDB instance 3: After being powered back on, it must verify the data is in the same state as it was when instance 2 was shut down. This data verifies the state of the database is the same as when the first instance was turned off.
# Start the Mongo instance on Docker host 3
‘docker run -it -d -v /glusterfs/mongo:/mongodb/data -v
/glusterfs/mongo/mongod.conf:/etc/mongod.conf -p 27017:27017 -p 28017:28107
--name mongodb sinenomine/mongodb-s390x’
Verification Verify that the same amount of data is in both DB instances on this Mongo instance, as was in the MongoDB instance when it was turned off. YCSB ycsb.control: 108.8 GB (113.2 GB)
YCSB Record Count:
100000000
Verification Database: verification.jeopardy: 1.6 MB (780.0 kB)
Verification Record Count:
5540
SERVER 3: YCSB Run Results:
[READ], Operations, 5091.0
[UPDATE], Operations, 4909.0
MongoDB 3 to MongoDB 1 Verification
Instance 3: Shutdown. The YCSB run process is stopped, the verification database is reloaded with new data and continues to run while the shutdown takes place.
# Stop the MongoDB instance on the running container safely
## Access the mongo instance
docker exec -i -t <docker-id> /bin/bash
## Go into the MongoDB shell
mongo

IBM Corporation May 10, 2018 36 | P a g e
## Inside the MongoDB shell
use admin
db.shutdownServer()
YCSB
ycsb.control: 108.8 GB (113.2 GB)
YCSB Record Count:
100000000
Verification Database
verification.jeopardy: 898.4 kB (404.0 kB)
Verification Record Count:
3048
MongoDB Instance 1: After being powered back on, it must verify the data is in the same state as it was when instance 3 was shut down.
# Start the MongoDB instance on Docker host 3
‘docker run -it -d -v /glusterfs/mongo:/mongodb/data -v
/glusterfs/mongo/mongod.conf:/etc/mongod.conf -p 27017:27017 -p 28017:28107
--name mongodb sinenomine/mongodb-s390x’
Verification Verify that the same amount of data is in both DB instances on this Mongo instance, as was in the Mongo instance when it was turned off.
YCSB
ycsb.control: 108.8 GB (113.2 GB)
YCSB Record Count:
100000000
Verification Database
verification.jeopardy: 898.6 kB (428.0 kB)
Verification Record Count:
3048
SERVER 1: YCSB Run Results:
[READ], Operations, 4885.0
[UPDATE], Operations, 5115.0
PostgreSQL Relocation Test
PostgreSQL Test Procedure There are three Docker hosts gltrlx01, gltrlx02, and gltrlx03 in performing the relocation testing for PostgreSQL. The process of verifying the relocation results were divided into a set of three. The sequence included stopping/starting the PostgreSQL instance between Docker hosts 01->02, 02->03, and lastly 03->01. Details of the steps are as follows: 1) Started new Postgres Instance Docker container on gltrlx01.

IBM Corporation May 10, 2018 37 | P a g e
a) Ran Data Generator to load initial data into glusterdb database. 2) Gracefully stopped the Postgres instance from inside the Docker Container on gltrlx01. 3) Started new Postgres Instance Docker container on gltrlx02. a) Verified existing collection data in database glusterd. b) Ran Data Generator to create new collection data (phil) into existing database glusterdb. c) Verified new data in table (phil). d) Dropped new table (phil). 4) Gracefully stopped the Postgres instance from inside the Docker Container on gltrlx02. 5) Started new Postgres Instance Docker container on gltrlx03. a) Verified existing collection data in database glusterdb. b) Ran Data Generator to create new collection data (phil) into existing database glusterdb. c) Verified new data in table (phil). d) Dropped new table (phil). 6) Started new Postgres Instance Docker container on gltrlx01. a) Verified existing collection data in database gluserdb. b) Ran Data Generator to create new collection data (phil) into existing database glusterdb. c) Verified new data in table (phil). d) Dropped new table (phil). Before beginning any of the relocation test with PostgreSQL, we captured the size, order and record counts of the database as a point of comparison. As mentioned earlier, our database is glusterdb, with three tables named glustertable, glustertable2, and glustertable3. The queries were done through the PSQL terminal which can be started using the following command:
# docker run -it --rm --link glusterfs-postgres:postgres s390x/postgres psql
-h postgres -U postgres
Through the PSQL terminal, these were the queries we issued for verifying the existing data. a) Size of the table
glusterdb=# SELECT pg_size_pretty( pg_total_relation_size('<table_name>') );
b) Row count of the table
glusterdb=# SELECT COUNT(*) FROM public.<table_name>;
e) Total size of the database glusterdb.
glusterdb=# SELECT pg_size_pretty(pg_database_size('<database_name')) As
fulldbsize;
d) Sorting the columns in descending order limiting the output to 10
glusterdb=# SELECT * from <table_name> order by birthday DESC, first DESC,
last DESC limit 10;

IBM Corporation May 10, 2018 38 | P a g e
e) Sorting the columns in ascending order limiting the output to 10
glusterdb=# SELECT * from <table_name> order by birthday ASC, first ASC,
last ASC limit 10;
PostgreSQL 1 to PostgreSQL 2 Verification From the first host, we started the PostgreSQL container (PostgreSQL Instance 1).
# docker run --name glusterfs-postgres --volume-driver glusterfs -e
POSTGRES_PASSWORD=mysecretpassword -d -v
/glusterfs/postgres:/var/lib/postgresql/data -p 5432:5432 s390x/postgres
We checked that the PostgreSQL container is running.
# docker ps
CONTAINER ID IMAGE COMMAND CREATED
STATUS PORTS NAMES
b6d799219c5f s390x/postgres "docker-entrypoint..." 28 seconds
ago Up 26 seconds 0.0.0.0:5432->5432/tcp glusterfs-postgres
After running the initial data load from the BFG workload as mentioned in the PostgreSQL Workload Setup, we recorded the PSQL query results. We then gracefully stopped the PostgreSQL Instance 1 from inside the Docker container:
# docker exec -i -t b6d799219c5f /bin/bash
root@b6d799219c5f:/# su postgres
$ /usr/lib/postgresql/10/bin/pg_ctl -D /var/lib/postgresql/data status
pg_ctl: server is running (PID: 1)
/usr/lib/postgresql/10/bin/postgres
$ /usr/lib/postgresql/10/bin/pg_ctl -D /var/lib/postgresql/data stop
waiting for server to shut down.......
We verified that all containers are now stopped on the host.
# docker ps
CONTAINER ID IMAGE COMMAND CREATED
STATUS PORTS NAMES
We started a new PostgreSQL Instance 2 on our second host.
# docker run --name glusterfs-postgres --volume-driver glusterfs -e
POSTGRES_PASSWORD=mysecretpassword -d -v
/glusterfs/postgres:/var/lib/postgresql/data -p 5432:5432 s390x/postgres
We checked that the PostgreSQL container is running.

IBM Corporation May 10, 2018 39 | P a g e
# docker ps
CONTAINER ID IMAGE COMMAND CREATED
STATUS PORTS NAMES
f0ecb321a525 s390x/postgres "docker-entrypoint..." 25 seconds
ago Up 23 seconds 0.0.0.0:5432->5432/tcp glusterfs-postgres
We started the PQSL terminal and connected to the database glusterdb.
# docker run -it --rm --link glusterfs-postgres:postgres s390x/postgres psql
-h postgres -U postgres
Password for user postgres: <password>
psql (10.1)
Type "help" for help.
postgres=# \c glusterdb
You are now connected to database "glusterdb" as user "postgres".
We verified all the existing data matches the previous queries recorded earlier between PostgreSQL Instance 1 and PostgreSQL Instance 2. This included verifying the table sizes, row counts, size of database and sorting order of tables.
Furthermore, we wanted to verify write access by running the Big File Generator tool to create a new collection data into the existing database glusterdb under the second host. The new table was called phil. Then, we populated the new database phil with records. We verified the new table phil was added to the existing database from PQSL terminal.
glusterdb=# \dt
List of relations
Schema | Name | Type | Owner
--------+---------------+-------+----------
public | glustertable | table | postgres
public | glustertable2 | table | postgres
public | glustertable3 | table | postgres
public | mytable | table | postgres
public | phil | table | postgres
(5 rows)
Next, we verified that records had been added to the new table phil by issuing a simple query in descending order.
glusterdb=# select * from public.phil order by birthday DESC, first DESC,
last DESC limit 10;
Additionally, we verified that we can drop the new table phil from database glusterdb on the second host.
glusterdb=# drop table public.phil;
DROP TABLE

IBM Corporation May 10, 2018 40 | P a g e
glusterdb=# \dt
List of relations
Schema | Name | Type | Owner
--------+---------------+-------+----------
public | glustertable | table | postgres
public | glustertable2 | table | postgres
public | glustertable3 | table | postgres
public | mytable | table | postgres
(4 rows)
This concludes our verification of the PostgreSQL instance between Docker hosts 01->02. PostgreSQL 2 to PostgreSQL 3 Verification From the second host, we gracefully stopped the PostgreSQL Instance 2 from inside the Docker container.
# docker exec -i -t f0ecb321a525 /bin/bash
root@f0ecb321a525:/# su postgres
$ /usr/lib/postgresql/10/bin/pg_ctl -D /var/lib/postgresql/data status
pg_ctl: server is running (PID: 1)
/usr/lib/postgresql/10/bin/postgres
$ /usr/lib/postgresql/10/bin/pg_ctl -D /var/lib/postgresql/data stop
waiting for server to shut down....
We verified that all containers are now stopped on the host.
# docker ps
CONTAINER ID IMAGE COMMAND CREATED
STATUS PORTS NAMES
We started a new PostgreSQL Instance 3 on our third host.
# docker run --name glusterfs-postgres --volume-driver glusterfs -e
POSTGRES_PASSWORD=mysecretpassword -d -v
/glusterfs/postgres:/var/lib/postgresql/data -p 5432:5432 s390x/postgres
We checked that the PostgreSQL container is running.
# docker ps
CONTAINER ID IMAGE COMMAND CREATED
STATUS PORTS NAMES
1f42127fb149 s390x/postgres "docker-entrypoint..." 3 seconds
ago Up 2 seconds 0.0.0.0:5432->5432/tcp glusterfs-pos
We started the PQSL terminal, connect to the database glusterdb.

IBM Corporation May 10, 2018 41 | P a g e
# docker run -it --rm --link glusterfs-postgres:postgres s390x/postgres psql
-h postgres -U postgres
Password for user postgres: <password>
psql (10.1)
Type "help" for help.
postgres=# \c glusterdb
You are now connected to database "glusterdb" as user "postgres".
We verified all the existing data matches the previous queries recorded earlier between PostgreSQL Instance 2 and PostgreSQL Instance 3. This included verifying all the table sizes, row counts, size of database and sorting order of tables.
Furthermore, we wanted to verify write access by running the Big File Generator tool to create a new collection data into the existing database glusterdb under the second host. The new table was called phil. Then, we populated the new database phil with records. We verified the new table phil was added to the existing database from PSQL terminal.
glusterdb=# \dt
List of relations
Schema | Name | Type | Owner
--------+---------------+-------+----------
public | glustertable | table | postgres
public | glustertable2 | table | postgres
public | glustertable3 | table | postgres
public | mytable | table | postgres
public | phil | table | postgres
(5 rows)
Next, we verified that records had been added to the new table ‘phil’ by issuing a simple query in descending order.
glusterdb=# select * from public.phil order by birthday DESC, first DESC,
last DESC limit 10;
Additionally, we verified that we can drop the new table phil from database glusterdb on the second host.
glusterdb=# drop table public.phil;
DROP TABLE
glusterdb=# \dt
List of relations
Schema | Name | Type | Owner
--------+---------------+-------+----------
public | glustertable | table | postgres
public | glustertable2 | table | postgres
public | glustertable3 | table | postgres
public | mytable | table | postgres

IBM Corporation May 10, 2018 42 | P a g e
(4 rows)
This concludes our verification of the PostgreSQL instance between Docker hosts 02 -> 03.
PostgreSQL 3 to PostgreSQL 1 Verification
From the third host, we gracefully stopped the PostgreSQL Instance 3 from inside the Docker container.
# docker exec -i -t 1f42127fb149 /bin/bash
root@f0ecb321a525:/# su postgres
$ /usr/lib/postgresql/10/bin/pg_ctl -D /var/lib/postgresql/data status
pg_ctl: server is running (PID: 1)
/usr/lib/postgresql/10/bin/postgres
$ /usr/lib/postgresql/10/bin/pg_ctl -D /var/lib/postgresql/data stop
waiting for server to shut down....
We verified that all containers are now stopped on the host.
# docker ps
CONTAINER ID IMAGE COMMAND CREATED
STATUS PORTS NAMES
We started a new PostgreSQL Instance 1 back on our original first host.
# docker run --name glusterfs-postgres --volume-driver glusterfs -e
POSTGRES_PASSWORD=mysecretpassword -d -v
/glusterfs/postgres:/var/lib/postgresql/data -p 5432:5432 s390x/postgres
docker: Error response from daemon: Conflict. The container name "/glusterfs-
postgres" is already in use by container
"b6d799219c5fcf3c426d23b9869aec293a1880886e485b2249ccb99dd5f1fb60". You have
to remove (or rename) that container to be able to reuse that name.
See 'docker run --help'.
As noted by the above error, if you would like to use the same name – “some-postgres” for the container, the original container must first be removed. We removed the previous container that was automatically stopped when we shutdown the PostgreSQL instance on first host. For example:
# docker rm
"b6d799219c5fcf3c426d23b9869aec293a1880886e485b2249ccb99dd5f1fb60"
Then, we were able to start the new PostgreSQL instance – Instance 1 – on the first host.
# docker run --name glusterfs-postgres --volume-driver glusterfs -e
POSTGRES_PASSWORD=mysecretpassword -d -v
/glusterfs/postgres:/var/lib/postgresql/data -p 5432:5432 s390x/postgres
We checked that the PostgreSQL container is running.

IBM Corporation May 10, 2018 43 | P a g e
# docker ps
CONTAINER ID IMAGE COMMAND CREATED
STATUS PORTS NAMES
217a9e834fc3 s390x/postgres "docker-entrypoint..." 5 seconds
ago Up 4 seconds 0.0.0.0:5432->5432/tcp glusterfs-pos
We also started the PQSL terminal, connect to the database glusterdb.
# docker run -it --rm --link glusterfs-postgres:postgres s390x/postgres psql
-h postgres -U postgres
Password for user postgres: <password>
psql (10.1)
Type "help" for help.
postgres=# \c glusterdb
You are now connected to database "glusterdb" as user "postgres".
We verified all the existing data matches the previous queries recorded earlier between PostgreSQL Instance 3 and PostgreSQL Instance 1. This included verifying all the table sizes, row counts, size of database and sorting order of tables.
Furthermore, we wanted to verify write access by running the Big File Generator tool to create a new collection data into the existing database glusterdb under the second host. The new table was called phil. Then, we populated the new database phil with records. We verified the new table ‘phil’ was added to the existing database from PSQL terminal.
glusterdb=# \dt
List of relations
Schema | Name | Type | Owner
--------+---------------+-------+----------
public | glustertable | table | postgres
public | glustertable2 | table | postgres
public | glustertable3 | table | postgres
public | mytable | table | postgres
public | phil | table | postgres
(5 rows)
Next, we verified that records had been added to the new table phil by issuing a simple query in descending order.
glusterdb=# select * from public.phil order by birthday DESC, first DESC,
last DESC limit 10;
Additionally, we verified that we can drop the new table phil from database glusterdb on the second host.
glusterdb=# drop table public.phil;
DROP TABLE

IBM Corporation May 10, 2018 44 | P a g e
glusterdb=# \dt
List of relations
Schema | Name | Type | Owner
--------+---------------+-------+----------
public | glustertable | table | postgres
public | glustertable2 | table | postgres
public | glustertable3 | table | postgres
public | mytable | table | postgres
(4 rows)
This concludes our verification of the PostgreSQL instance between Docker hosts 03 -> 01.
9. Recovery Test
In this section, we perform recovery tests for each of our database environments. We felt we needed to add this section to validate GlusterFS replication feature and show if the data is compromised when replication takes place.
Db2 BLU Recovery Test
Db2 BLU Test Procedure
In this test, we deployed a Docker container with Db2 on gltrlx01 - RHEL. Then, we made sure that the database was operational. Then, we ran a tool to load data and, while the data was loading, we shutdown the z/VM guest abruptly. Next, we deployed a Docker container on gltrlx02 – SLES - and verified that the database was operational and that all committed records prior to shutting down the z/VM guest on gltrlx01 were accessible and correct. We called this our recovery test. Lastly, we deployed a Docker container on gltrlx03 – Ubuntu - and performed the same recovery procedure as on gltrlx02.
Db2 BLU Results
We ran our workload tool on gltrlx01 to create the database and tables. The workload tool loaded the data, however, we stopped the Linux guest abruptly as it was loading data into the tables. The output below shows what was loaded and committed at the time we stopped the load, it also shows an error message at the time the database was stopped (the STORE_SALES table was affected by the abrupt shutdown and not committed) , and it shows the tables not loaded:
[db2inst1@d8c82fecaccc db_scripts]$ db2 -tvf verify.sql
CONNECT TO BDI
Database Connection Information
Database server = DB2/LINUXZ64 11.1.0
SQL authorization ID = DB2INST1
Local database alias = BDI
SELECT COUNT(*) FROM CALL_CENTER 7

IBM Corporation May 10, 2018 45 | P a g e
SELECT COUNT(*) FROM CATALOG_PAGE 11719
SELECT COUNT_BIG(*) FROM CATALOG_RETURNS 144067
SELECT COUNT_BIG(*) FROM CATALOG_SALES 1441548
SELECT COUNT(*) FROM CUSTOMER 100001
SELECT COUNT(*) FROM CUSTOMER_ADDRESS 50001
SELECT COUNT(*) FROM CUSTOMER_DEMOGRAPHICS 1920801
SELECT COUNT(*) FROM DATE_DIM 73050
SELECT COUNT(*) FROM HOUSEHOLD_DEMOGRAPHICS 7201
SELECT COUNT(*) FROM INCOME_BAND 21
SELECT COUNT_BIG(*) FROM INVENTORY 0
SELECT COUNT(*) FROM ITEM 18001
SELECT COUNT(*) FROM PROMOTION 301
SELECT COUNT(*) FROM REASON 36
SELECT COUNT(*) FROM SHIP_MODE 21
SELECT COUNT(*) FROM STORE 13
SELECT COUNT_BIG(*) FROM STORE_RETURNS 287514
SELECT COUNT_BIG(*) FROM STORE_SALES
SQL0668N Operation not allowed for reason code "3" on table
"STORE_SALES". SQLSTATE=57016
SELECT COUNT(*) FROM TIME_DIM 0
SELECT COUNT(*) FROM WAREHOUSE 0
SELECT COUNT(*) FROM WEB_PAGE 0
SELECT COUNT_BIG(*) FROM WEB_RETURNS 0
SELECT COUNT_BIG(*) FROM WEB_SALES 0
SELECT COUNT(*) FROM WEB_SITE 0
CONNECT RESET
DB20000I The SQL command completed successfully.
[db2inst1@d8c82fecaccc db_scripts]$
Then, we started the Db2 database on gltrlx02 to view what was available there.
gpfslx02:~ # docker run -it --privileged=true -d -v /glusterfs:/db2 --name gltrlx02
rhel-db2-loaded:version1
d79512fd9e607a1b96639f78b3ba9a3634e82d0959fd331a90bf7588f3e60b78
gpfslx02:~ # docker ps CONTAINER ID IMAGE COMMAND CREATED STATUS PORTS NAMES
d79512fd9e60 rhel-db2-loaded:version1 "/bin/sh -c 'top -..." 4 secs ago Up 2 secs gltrlx02
gpfslx02:~ # docker exec -i -t d79512fd9e60 /bin/bash
bash-4.2# su - db2inst1
Last login: Mon Nov 20 15:23:38 UTC 2017 on pts/4
[db2inst1@d79512fd9e60 ~]$ cd /home/db2inst1/sqllib/
[db2inst1@d79512fd9e60 sqllib]$ echo "0 d79512fd9e60 0" > db2nodes.cfg
[db2inst1@d79512fd9e60 sqllib]$ cat db2nodes.cfg
0 d79512fd9e60 0
[db2inst1@d79512fd9e60 sqllib]$ db2start
04/27/2018 23:02:22 0 0 SQL1063N DB2START processing was successful.
SQL1063N DB2START processing was successful.
[db2inst1@d79512fd9e60 db_scripts]$ db2 -tvf verify.sql
CONNECT TO BDI
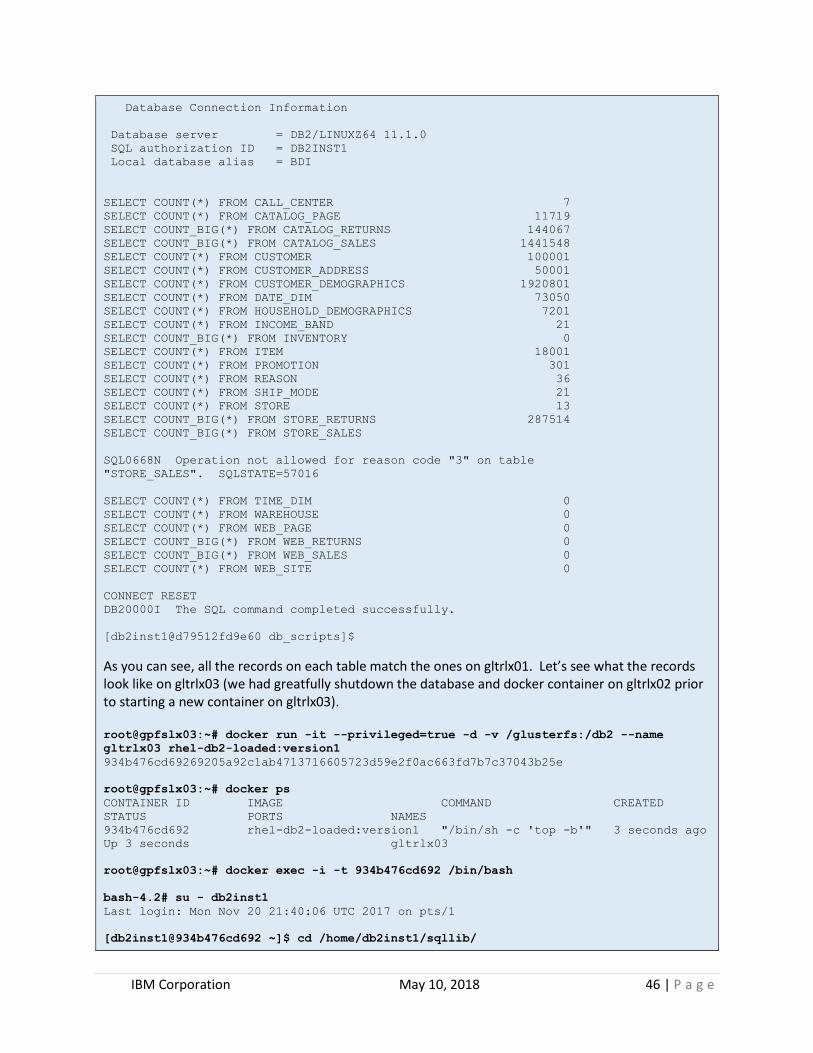
IBM Corporation May 10, 2018 46 | P a g e
Database Connection Information
Database server = DB2/LINUXZ64 11.1.0
SQL authorization ID = DB2INST1
Local database alias = BDI
SELECT COUNT(*) FROM CALL_CENTER 7
SELECT COUNT(*) FROM CATALOG_PAGE 11719
SELECT COUNT_BIG(*) FROM CATALOG_RETURNS 144067
SELECT COUNT_BIG(*) FROM CATALOG_SALES 1441548
SELECT COUNT(*) FROM CUSTOMER 100001
SELECT COUNT(*) FROM CUSTOMER_ADDRESS 50001
SELECT COUNT(*) FROM CUSTOMER_DEMOGRAPHICS 1920801
SELECT COUNT(*) FROM DATE_DIM 73050
SELECT COUNT(*) FROM HOUSEHOLD_DEMOGRAPHICS 7201
SELECT COUNT(*) FROM INCOME_BAND 21
SELECT COUNT_BIG(*) FROM INVENTORY 0
SELECT COUNT(*) FROM ITEM 18001
SELECT COUNT(*) FROM PROMOTION 301
SELECT COUNT(*) FROM REASON 36
SELECT COUNT(*) FROM SHIP_MODE 21
SELECT COUNT(*) FROM STORE 13
SELECT COUNT_BIG(*) FROM STORE_RETURNS 287514
SELECT COUNT_BIG(*) FROM STORE_SALES
SQL0668N Operation not allowed for reason code "3" on table
"STORE_SALES". SQLSTATE=57016
SELECT COUNT(*) FROM TIME_DIM 0
SELECT COUNT(*) FROM WAREHOUSE 0
SELECT COUNT(*) FROM WEB_PAGE 0
SELECT COUNT_BIG(*) FROM WEB_RETURNS 0
SELECT COUNT_BIG(*) FROM WEB_SALES 0
SELECT COUNT(*) FROM WEB_SITE 0
CONNECT RESET
DB20000I The SQL command completed successfully.
[db2inst1@d79512fd9e60 db_scripts]$
As you can see, all the records on each table match the ones on gltrlx01. Let’s see what the records look like on gltrlx03 (we had greatfully shutdown the database and docker container on gltrlx02 prior to starting a new container on gltrlx03). root@gpfslx03:~# docker run -it --privileged=true -d -v /glusterfs:/db2 --name
gltrlx03 rhel-db2-loaded:version1
934b476cd69269205a92c1ab4713716605723d59e2f0ac663fd7b7c37043b25e
root@gpfslx03:~# docker ps
CONTAINER ID IMAGE COMMAND CREATED
STATUS PORTS NAMES
934b476cd692 rhel-db2-loaded:version1 "/bin/sh -c 'top -b'" 3 seconds ago
Up 3 seconds gltrlx03
root@gpfslx03:~# docker exec -i -t 934b476cd692 /bin/bash
bash-4.2# su - db2inst1
Last login: Mon Nov 20 21:40:06 UTC 2017 on pts/1
[db2inst1@934b476cd692 ~]$ cd /home/db2inst1/sqllib/

IBM Corporation May 10, 2018 47 | P a g e
[db2inst1@934b476cd692 sqllib]$ echo "0 934b476cd692 0" > db2nodes.cfg
[db2inst1@934b476cd692 sqllib]$ cat db2nodes.cfg
0 934b476cd692 0
[db2inst1@934b476cd692 sqllib]$ db2start
04/27/2018 23:31:55 0 0 SQL1063N DB2START processing was successful.
SQL1063N DB2START processing was successful.
[db2inst1@934b476cd692 db_scripts]$ db2 -tvf verify.sql
CONNECT TO BDI
Database Connection Information
Database server = DB2/LINUXZ64 11.1.0
SQL authorization ID = DB2INST1
Local database alias = BDI
SELECT COUNT(*) FROM CALL_CENTER 7
SELECT COUNT(*) FROM CATALOG_PAGE 11719
SELECT COUNT_BIG(*) FROM CATALOG_RETURNS 144067
SELECT COUNT_BIG(*) FROM CATALOG_SALES 1441548
SELECT COUNT(*) FROM CUSTOMER 100001
SELECT COUNT(*) FROM CUSTOMER_ADDRESS 50001
SELECT COUNT(*) FROM CUSTOMER_DEMOGRAPHICS 1920801
SELECT COUNT(*) FROM DATE_DIM 73050
SELECT COUNT(*) FROM HOUSEHOLD_DEMOGRAPHICS 7201
SELECT COUNT(*) FROM INCOME_BAND 21
SELECT COUNT_BIG(*) FROM INVENTORY 0
SELECT COUNT(*) FROM ITEM 18001
SELECT COUNT(*) FROM PROMOTION 301
SELECT COUNT(*) FROM REASON 36
SELECT COUNT(*) FROM SHIP_MODE 21
SELECT COUNT(*) FROM STORE 13
SELECT COUNT_BIG(*) FROM STORE_RETURNS 287514
SELECT COUNT_BIG(*) FROM STORE_SALES
SQL0668N Operation not allowed for reason code "3" on table
"STORE_SALES". SQLSTATE=57016
SELECT COUNT(*) FROM TIME_DIM 0
SELECT COUNT(*) FROM WAREHOUSE 0
SELECT COUNT(*) FROM WEB_PAGE 0
SELECT COUNT_BIG(*) FROM WEB_RETURNS 0
SELECT COUNT_BIG(*) FROM WEB_SALES 0
SELECT COUNT(*) FROM WEB_SITE 0
CONNECT RESET
DB20000I The SQL command completed successfully.
[db2inst1@934b476cd692 db_scripts]$
As you can see, the output from all the three different servers is the same, and replication seem to work well. This concludes our recovery test.
MongoDB Recovery Test

IBM Corporation May 10, 2018 48 | P a g e
MongoDB Test Procedure The test procedure for the recovery test follows the same structure as the relocation tests with a few added components. The major difference in the recovery procedure is that the database shutdown is unclean when simulating a hard failure of the MongoDB instance. This hard-failure is done at the z/VM level to provide neither the MongoDB process nor the local GlusterFS volume a chance to flush info and go through their respective safe-shutdown procedures. The goal of this test is to make sure any new writes that are confirmed by the MongoDB driver are flushed to the GlusterFS volume. In order to get highly accurate results, the following changes were made:
1. The verification level of the PyMongo was set to write, and the journaling option set to True. This requires the MongoDB process to confirm that the transaction has been, at least, written to the journal before returning a true write response to the PyMongo driver.
2. The MongoDB driver script was modified to track the last valid transaction number, and print it on program exit. When the MongoDB process is unsafely shutdown, the PyMongo script will catch the write exception, print the last verified write and exit. This isolates any missing data to a fault in the GlusterFS, not the MongoDB/MongoDB Driver communication.
3. The verification workload wrote at an uncapped rate. Previously, the rate was 4 transactions per second. However, checking for data inconsistencies on an unsafe failure works best if there is a higher throughput of write transactions.
4. Extra data on the state of the GlusterFS volume was captured to try and catch any possible discrepancies in data before and after it is written.
5. Only the verification workload was run. The YCSB workload was not run because it does not deal with the writing of new data, so it doesn’t add anything that isn’t included as part of the relocation tests.
The rest of the test procedure is the same, and the modified procedure has been included below. The test procedure is straightforward, easily reproducible, and require very little setup. Each step should be run on each instance, to make sure the results are consistent across each Docker host/GlusterFS peer:
1. Start a MongoDB instance with a GlusterFS volume attached as the data directory 2. Start the validation workload, constantly writing few timestamped and numbered documents 3. Unsafely shutdown the host VM, killing Docker, MongoDB and GlusterFS 4. Bring up the MongoDB Docker container on a different Docker host, using the same GlusterFS
volume as the data directory 5. Validate the last verified written data is present on the new system. Once it is verified, the
MongoDB instance can be cleanly shutdown. 6. Restart the original system, and check the values of the gluster volumes 7. Restart the DB on the original system to make sure GlusterFS has recovered and synced up. 8. Repeat all steps for each cluster instance.
In this test scenario, there were 3 Docker hosts gltrlx01, gltrlx02 and gltrlx03. The workload was initialized on gltrlx01, relocated to gltrlx02, then from there relocated to gltrlx03. Finally, the Docker container was relocated back to gltrlx01. After each relocation, the data MongoDB state was captured, and the workloads were verified to be running.

IBM Corporation May 10, 2018 49 | P a g e
MongoDB Results The process of verifying the results primarily focused on data in the MongoDB instance with some additional GlusterFS file system data captured for verification. The testing procedure described above was repeated for each of the 3 nodes of the GlusterFS cluster. Each node was brought down unsafely, capturing the last verified write. Then the MongoDB instance was started on a different cluster member, making sure the last verified write was still present. After that, the original instance was brought back online, and reattached to GlusterFS cluster. The MongoDB instance was then restarted on the original node to make sure the data in the unsafely shutdown GlusterFS node was consistent and working. The process was repeated on each node for maximum test coverage, and to make sure there wasn’t a particular Linux distribution that caused an issue. For the sake of brevity, only the results of the first test cycle are included. The order of the tests completed was: MongoDB instances on Docker hosts 212 As you will see, the results of all 3 test iterations were consistent. This was repeated for MongoDB instances on Docker hosts 212 -, 313, and finally 131. Mongo DB 212 Verification
MongoDB Instance 2: Start the container.
‘docker run -it -d -v /glusterfs/mongo:/mongodb/data -v
/glusterfs/mongo/mongod.conf:/etc/mongod.conf -p 27017:27017 -p 28017:28107
--name mongodb sinenomine/mongodb-s390x’
Start Verification workload The verification workload is started. It will run for a few minutes to build up some data on the DB. When the database is killed in the next step, it will report the last confirmed write.
Kill the Host VM To simulate a unsafe shutdown, the instance was killed at the vm level. In this case, z/VM was used. In this z/VM console, the following command was issued to kill the guest: ‘#CP SYSTEM RESET’
Verification Database - Last Item: Last acknowledged write was insert_number: 50732
MongoDB instance 1: Start a new mongo container on any other Docker host, mounting the same volume to the Docker directory.
‘docker run -it -d -v /glusterfs/mongo:/mongodb/data -v
/glusterfs/mongo/mongod.conf:/etc/mongod.conf -p 27017:27017 -p 28017:28107
--name mongodb sinenomine/mongodb-s390x’
Verification: Verify that the last written instance reported during the shutdown is present on the MongoDB instance running on the other Docker host: Verification Database "insertNumber" : 50733, "insertNumber" : 50732, "insertNumber" : 50731, "insertNumber" : 50730

IBM Corporation May 10, 2018 50 | P a g e
The last verified insert, 50732, was included in the newly started MongoDB instance. You can actually see that one additional record, 50733 was also included. This means that it is possible to have unconfirmed data written to the DB. Safely shutdown MongoDB instance 1: Shutting down MongoDB 1, so the MongoDB instance can be brought back up on the original Docker host.
Beginning server shutdown: Shutting down the MongoDB instance will automatically stop the running container.
# Stop the MongoDB instance on the running container safely
## Access the MongoDB instance
docker exec -i -t <docker-id> /bin/bash
## Go into the mongo shell
mongo
## Inside the mongo shell
use admin
db.shutdownServer()
Start MongoDB 2 Host: Use z/VM to start the Linux guest Start the Docker host on the Linux guest Start the gluster process Mount the gluster volume MongoDB Instance 2: Start the container, again mounted to the same glusterFS volume
‘docker run -it -d -v /glusterfs/mongo:/mongodb/data -v
/glusterfs/mongo/mongod.conf:/etc/mongod.conf -p 27017:27017 -p 28017:28107
--name mongodb sinenomine/mongodb-s390x’
Verification: Verify that the last written instance reported during the shutdown is present on the MongoDB instance running on the other Docker host: Verification Database: "insertNumber" : 50733, "insertNumber" : 50732, "insertNumber" : 50731, "insertNumber" : 50730
This proves that the same GlusterFS stayed consistent when being restarted on the unsafely terminated Linux guest.
The results of this test go to prove that there was no data loss when GlusterFS failed unsafely, as long as certain settings were used by the MongoDB Driver. Having the drivers write concern set to fully replicated, and have the journal write set to true gives the highest level of data safety. One interesting note is the inclusion of “unverified” data being present in the database. There was a record added to the MongoDB database that was never verified back to the Mongo driver. This means that it is possible to have some data that happens to survive that is unverified.

IBM Corporation May 10, 2018 51 | P a g e
Another interesting observation that arose during testing was the ‘verification record count’ being incorrect. After an unsafe shutdown, and a database restoration, that record count for a collection was incorrect. According to the MongoDB documentation, this can happen as a result of an unclean shutdown. This happens because the insert count is not constantly calculated, but stored as metadata. This can be fixed, along with doing a validation of a collection with the following Mongo command, inside the Mongo Shell.
Run the validation on the verification collection:
# Stop the Mongo instance on the running container safely
## Access the mongo instance
docker exec -i -t <docker-id> /bin/bash
## Go into the mongo shell
mongo
## Inside the mongo shell
use verification
db.verificationCollection.validate(true)
After running that command, the collection will report the correct collection count, and the Mongo will confirm that there is no corruption in the collection.
PostgreSQL Recovery Test
PostgreSQL Test Procedure The recovery test will be similar to the relocation test, except for the following factors:
a) Instead of gracefully stopping the PostgreSQL instance, we will be issuing a #CP SYSTEM RESET from the z/VM guest. This will halt the system immediately and does not give the operating system a chance to finish what it is doing or perform cleanup tasks.
b) The Big File Generator tool will be running when the system reset is issued. This will simulate a disaster while data is being written to disk. We will see how the file contents is affected such as loss of data or permanently corrupt the file system.
We continued using the same three Docker hosts gltrlx01, gltrlx02, and gltrlx03 in performing the recovery testing with PostgreSQL. The process for verifying the recovery results were also divided into a set of three. The sequence for recovery testing include executing the z/VM guest system reset against the PostgreSQL instance on one Docker host while workload is running. Then start a new PostgreSQL instance on one of the other remaining Docker hosts to verify the data integrity of files system and database. Details of the steps are as follows: a. Start PostgreSQL Instance 1 on Docker host gltrlx01. b. Start Big File Generator workload to write data into database glusterdb under table phil. c. From the z/VM guest, issue the command ‘#cp system reset’ to terminate the guest immediately. d. Make note of the last record shown to be created by the Big File Generator tool.
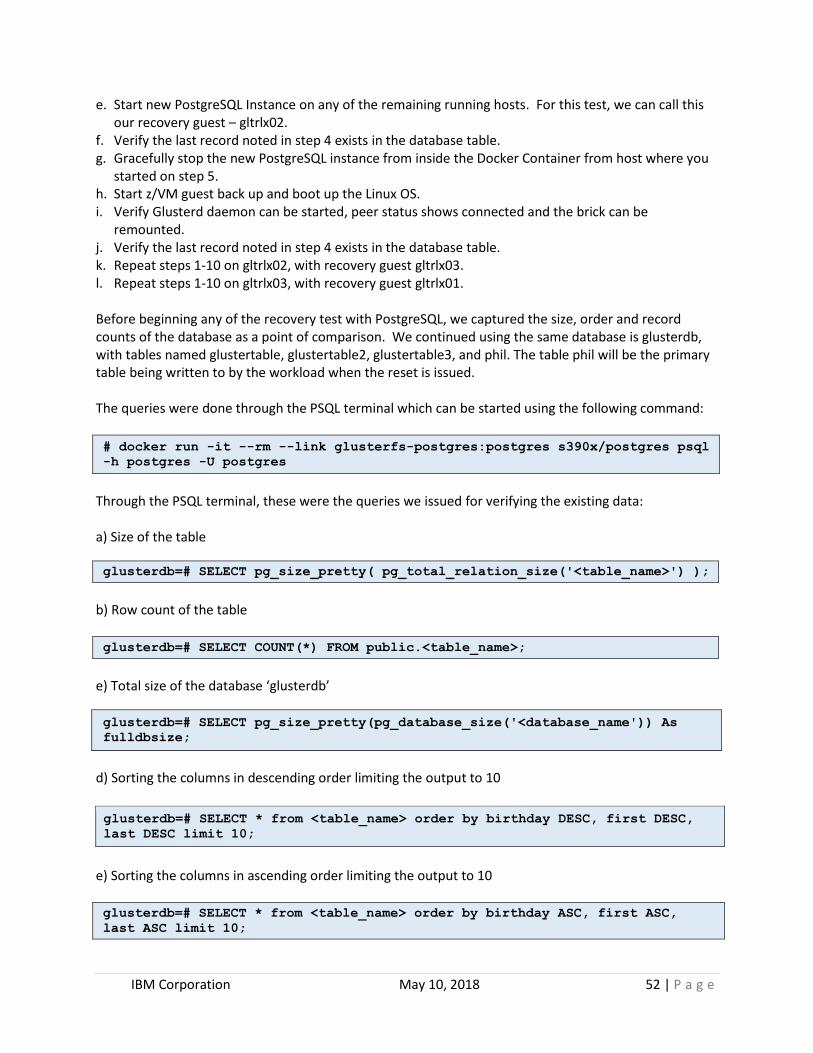
IBM Corporation May 10, 2018 52 | P a g e
e. Start new PostgreSQL Instance on any of the remaining running hosts. For this test, we can call this our recovery guest – gltrlx02.
f. Verify the last record noted in step 4 exists in the database table. g. Gracefully stop the new PostgreSQL instance from inside the Docker Container from host where you
started on step 5. h. Start z/VM guest back up and boot up the Linux OS. i. Verify Glusterd daemon can be started, peer status shows connected and the brick can be
remounted. j. Verify the last record noted in step 4 exists in the database table. k. Repeat steps 1-10 on gltrlx02, with recovery guest gltrlx03. l. Repeat steps 1-10 on gltrlx03, with recovery guest gltrlx01. Before beginning any of the recovery test with PostgreSQL, we captured the size, order and record counts of the database as a point of comparison. We continued using the same database is glusterdb, with tables named glustertable, glustertable2, glustertable3, and phil. The table phil will be the primary table being written to by the workload when the reset is issued. The queries were done through the PSQL terminal which can be started using the following command:
# docker run -it --rm --link glusterfs-postgres:postgres s390x/postgres psql
-h postgres -U postgres
Through the PSQL terminal, these were the queries we issued for verifying the existing data: a) Size of the table
glusterdb=# SELECT pg_size_pretty( pg_total_relation_size('<table_name>') );
b) Row count of the table
glusterdb=# SELECT COUNT(*) FROM public.<table_name>;
e) Total size of the database ‘glusterdb’
glusterdb=# SELECT pg_size_pretty(pg_database_size('<database_name')) As
fulldbsize;
d) Sorting the columns in descending order limiting the output to 10
glusterdb=# SELECT * from <table_name> order by birthday DESC, first DESC,
last DESC limit 10;
e) Sorting the columns in ascending order limiting the output to 10
glusterdb=# SELECT * from <table_name> order by birthday ASC, first ASC,
last ASC limit 10;

IBM Corporation May 10, 2018 53 | P a g e
PostgreSQL Recovery Verification From the host gltrlx01, we started the PostgreSQL container.
# docker run --name glusterfs-postgres --volume-driver glusterfs -e
POSTGRES_PASSWORD=mysecretpassword -d -v
/glusterfs/postgres:/var/lib/postgresql/data -p 5432:5432 s390x/postgres
We checked that the PostgreSQL container is running.
# docker ps
CONTAINER ID IMAGE COMMAND CREATED
STATUS PORTS NAMES
e2b264199959 s390x/postgres "docker-entrypoint..." 3 minutes
ago Up 3 minutes 0.0.0.0:5432->5432/tcp glusterfs-postgres
We started the BFG tool to continuously write records to the database table phil. Then, we logged on to the z/VM guest gltrlx01 and issued the command “#cp system reset” to immediately stop gltrlx01. We captured the last record shown to be created by the Big File Generator tool.
('5/9/1979', 'HENRY', 'NICKLOW')
We started a new PostgreSQL Instance on one of the remaining running Docker host – gltrlx02.
# docker run --name glusterfs-postgres --volume-driver glusterfs -e
POSTGRES_PASSWORD=mysecretpassword -d -v
/glusterfs/postgres:/var/lib/postgresql/data -p 5432:5432 s390x/postgres
We checked that the PostgreSQL container is running.
# docker ps
CONTAINER ID IMAGE COMMAND CREATED
STATUS PORTS NAMES
daef5dfb693e s390x/postgres "docker-entrypoint..." 2 hours ago
Up 2 hours 0.0.0.0:5432->5432/tcp glusterfs-postgres
Started the PQSL terminal and connected to the database glusterdb.
# docker run -it --rm --link glusterfs-postgres:postgres s390x/postgres psql
-h postgres -U postgres
Password for user postgres: <password>
psql (10.1)
Type "help" for help.
postgres=# \c glusterdb
You are now connected to database "glusterdb" as user "postgres".

IBM Corporation May 10, 2018 54 | P a g e
We verified all the existing data matches the previous queries recorded earlier. This included verifying the table sizes, row counts, size of database and sorting order of tables.
In addition, we wanted to verify if the last record that was shown to be created by the BFG tool exists in the current database table. To do so, we connected to the container running the current PostgreSQL instance.
# docker exec -it daef5dfb693e /bin/bash
From inside the container, we ran the command to dump the records from table phil into a file. root@daef5dfb693e:/# pg_dump --data-only --inserts -U postgres --table=phil
glusterdb > a.tmp
We searched the file a.tmp for the specific string that matches the last record shown from BFG.
root@daef5dfb693e:/# cat a.tmp |grep NICKLOW
...
INSERT INTO phil VALUES ('1910-07-05', 'GERALDINE', 'NICKLOW');
INSERT INTO phil VALUES ('1968-05-23', 'NAOMI', 'NICKLOW');
INSERT INTO phil VALUES ('1916-06-09', 'LEONARDO', 'NICKLOW');
INSERT INTO phil VALUES ('1966-11-21', 'WALLACE', 'NICKLOW');
INSERT INTO phil VALUES ('1979-05-09', 'HENRY', 'NICKLOW');
This verifies that we do not have data loss and that the integrity of the GlusterFS file system is intact. We were able to perform the same PostgresSQL Recovery Verification tests on Docker hosts gltrlx02 and gltrlx03. The last records written by the workload were always located under the recovered instance. The only minor problem we encountered during the recovery test was starting the PostgreSQL instance back up on another Docker host after a system reset. Occasionally, when starting the container, we saw the following in the Docker container logs:
2018-04-03 19:17:22.956 UTC [1] LOG: listening on IPv4 address "0.0.0.0", port 5432
2018-04-03 19:17:22.956 UTC [1] LOG: listening on IPv6 address "::", port 5432
2018-04-03 19:17:22.963 UTC [1] LOG: listening on Unix socket
"/var/run/postgresql/.s.PGSQL.5432"
2018-04-03 19:17:23.062 UTC [23] LOG: database system was interrupted; last known up
at 2018-04-03 19:11:28 UTC
2018-04-03 19:17:24.212 UTC [23] LOG: database system was not properly shut down;
automatic recovery in progress
2018-04-03 19:17:24.259 UTC [23] LOG: redo starts at 24/443400F8
2018-04-03 19:17:25.497 UTC [23] LOG: unexpected pageaddr 24/32A6E000 in log segment
00000001000000240000004D, offset 10936320
2018-04-03 19:17:25.497 UTC [23] LOG: redo done at 24/4DA6DEB0
2018-04-03 19:17:25.497 UTC [23] LOG: last completed transaction was at log time
2018-04-03 19:14:50.401645+00
2018-04-03 19:19:04.124 UTC [24] FATAL: the database system is starting up
2018-04-03 19:20:20.051 UTC [25] FATAL: the database system is starting up
2018-04-03 19:21:46.831 UTC [26] FATAL: the database system is starting up

IBM Corporation May 10, 2018 55 | P a g e
We observed that it remained in this starting up state for at least 15 minutes, with no sign of ending. Eventually, we would stop and remove the container. When we simply try starting it again, the instance would cleanly start and accept connections.
2018-04-03 19:30:56.373 UTC [1] LOG: listening on IPv4 address "0.0.0.0", port 5432
2018-04-03 19:30:56.373 UTC [1] LOG: listening on IPv6 address "::", port 5432
2018-04-03 19:30:56.382 UTC [1] LOG: listening on Unix socket
"/var/run/postgresql/.s.PGSQL.5432"
2018-04-03 19:30:56.474 UTC [22] LOG: database system shutdown was interrupted; last
known up at 2018-04-03 19:17:25 UTC
2018-04-03 19:30:57.781 UTC [22] LOG: database system was not properly shut down;
automatic recovery in progress
2018-04-03 19:30:57.833 UTC [22] LOG: redo starts at 24/443400F8
2018-04-03 19:30:59.096 UTC [22] LOG: unexpected pageaddr 24/32A6E000 in log segment
00000001000000240000004D, offset 10936320
2018-04-03 19:30:59.096 UTC [22] LOG: redo done at 24/4DA6DEB0
2018-04-03 19:30:59.096 UTC [22] LOG: last completed transaction was at log time 2018-
04-03 19:14:50.401645+00
2018-04-03 19:31:02.664 UTC [1] LOG: database system is ready to accept connections
This concludes our recovery testing with PostgreSQL.
10. Conclusion In this paper, we explored the capabilities of GlusterFS and validated our implementation not only by relocating the databases to test its portability, but by testing its replication feature to check for data integrity and recovery. Each use case consisted of a different database: Db2, PostgreSQL, and MongoDB. Furthermore, each database was launched as a Docker container and tested using a collection of workload tools. As we successfully conducted our two types of tests, relocation and recovery, they show the sheer diversity of application technologies that can be supported when the solution has a reliable base. The database applications represent a range of different technologies: a more traditional enterprise database in Db2, an industry standard open source SQL database in PostgreSQL, and a disruptive and highly popular No-SQL database in MongoDB. Each fulfills a different requirement for differing types of applications, yet each can run on the same platform as described here.

IBM Corporation May 10, 2018 56 | P a g e
Copyright IBM Corporation 2018 IBM Systems Route 100 Somers, New York 10589 U.S.A. Produced in the United States of America, 02/2018 All Rights Reserved IBM, IBM logo, Db2, ECKD, System z, Spectrum Scale and z/VM are trademarks or registered trademarks of the International Business Machines Corporation. Java and all Java based trademarks and logos are trademarks or registered trademarks of Oracle and/or its affiliates. Linux is a registered trademark of Linus Torvalds in the United States, other countries, or both. MongoDB is a trademark of MongoDB, Inc. GlusterFS is a trademark and brand of Gluster, Inc. All statements regarding IBM’s future direction and intent are subject to change or withdrawal without notice, and represent goals and objectives only.